Articles
How To Replace The Inside Of A Toilet
Modified: October 19, 2024
Learn how to replace the inside of a toilet with helpful articles and step-by-step instructions. Upgrade your bathroom plumbing easily and efficiently.
(Many of the links in this article redirect to a specific reviewed product. Your purchase of these products through affiliate links helps to generate commission for Storables.com, at no extra cost. Learn more)
Introduction
When it comes to home maintenance, one area that often requires occasional repairs is the bathroom. One common issue that homeowners face is a malfunctioning toilet. Whether it’s a constant running water or a weak flush, it can be quite frustrating. However, replacing the inside components of a toilet can help resolve these issues and restore its functionality.
In this article, we will guide you through the step-by-step process of replacing the inside of a toilet. By following these simple instructions, you can save money on professional plumber services and tackle this DIY project yourself. So, let’s get started!

Key Takeaways:
- Save money and restore your toilet’s functionality by following these DIY steps to replace the inside components. From turning off the water supply to installing new valves, you can tackle this project with confidence.
- Ensure a smooth and efficient replacement process by taking your time, using high-quality replacement parts, and testing the toilet’s functionality. Gain the satisfaction of tackling a home maintenance project on your own.
Read more: How To Clean Inside Toilet Tank
Step 1: Turn off the Water Supply
The first step in replacing the inside of a toilet is to turn off the water supply. This is an essential step to prevent any unwanted water leaks or sprays during the replacement process.
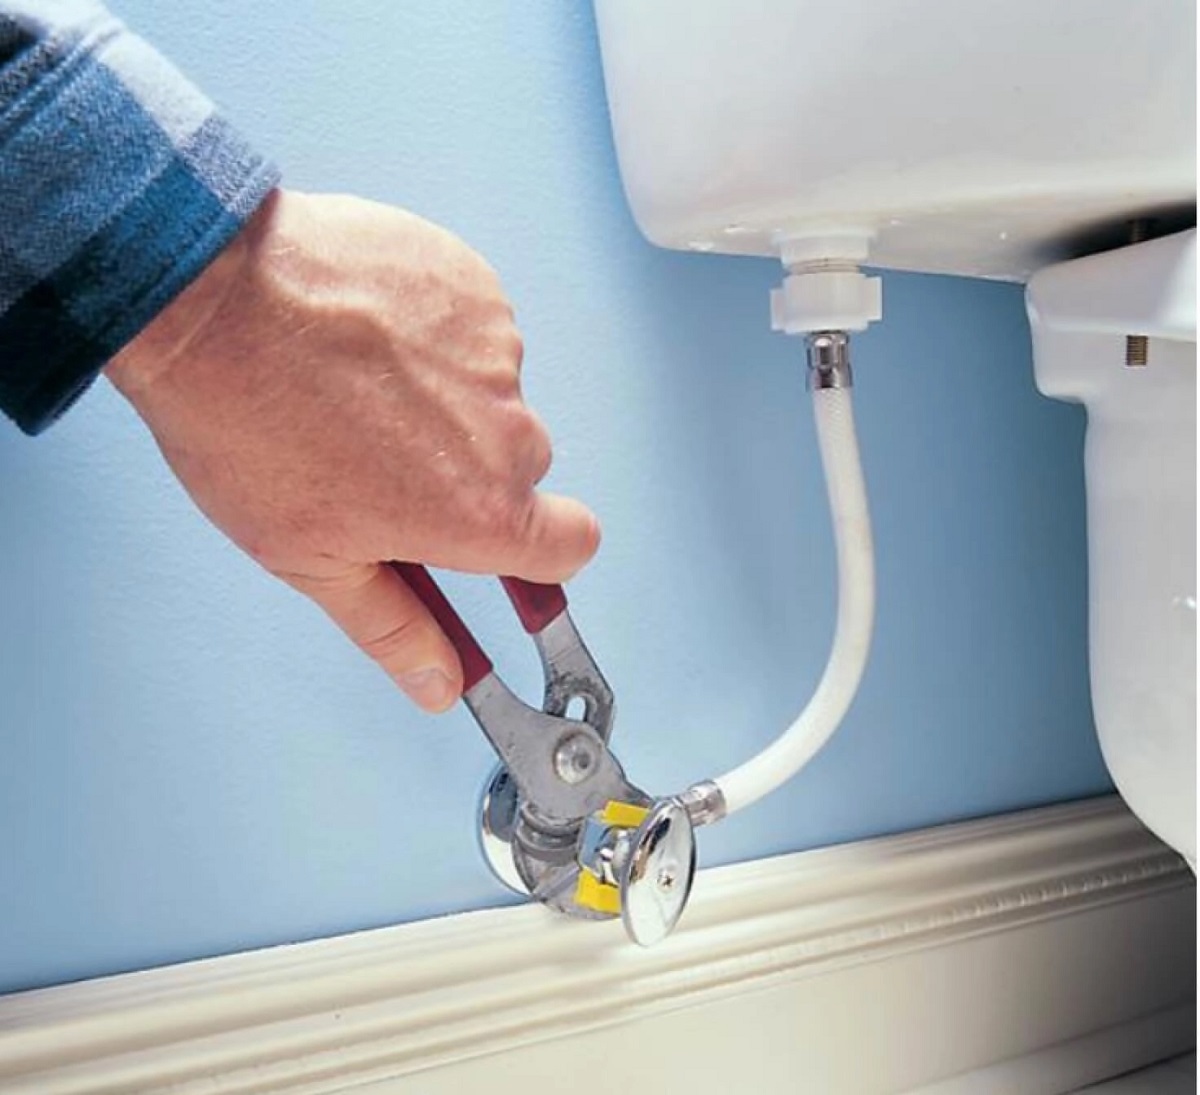
Locate the water shut-off valve, which is usually located on the wall behind the toilet or near the floor. Turn the valve clockwise until it is fully closed. This will stop the flow of water into the toilet.
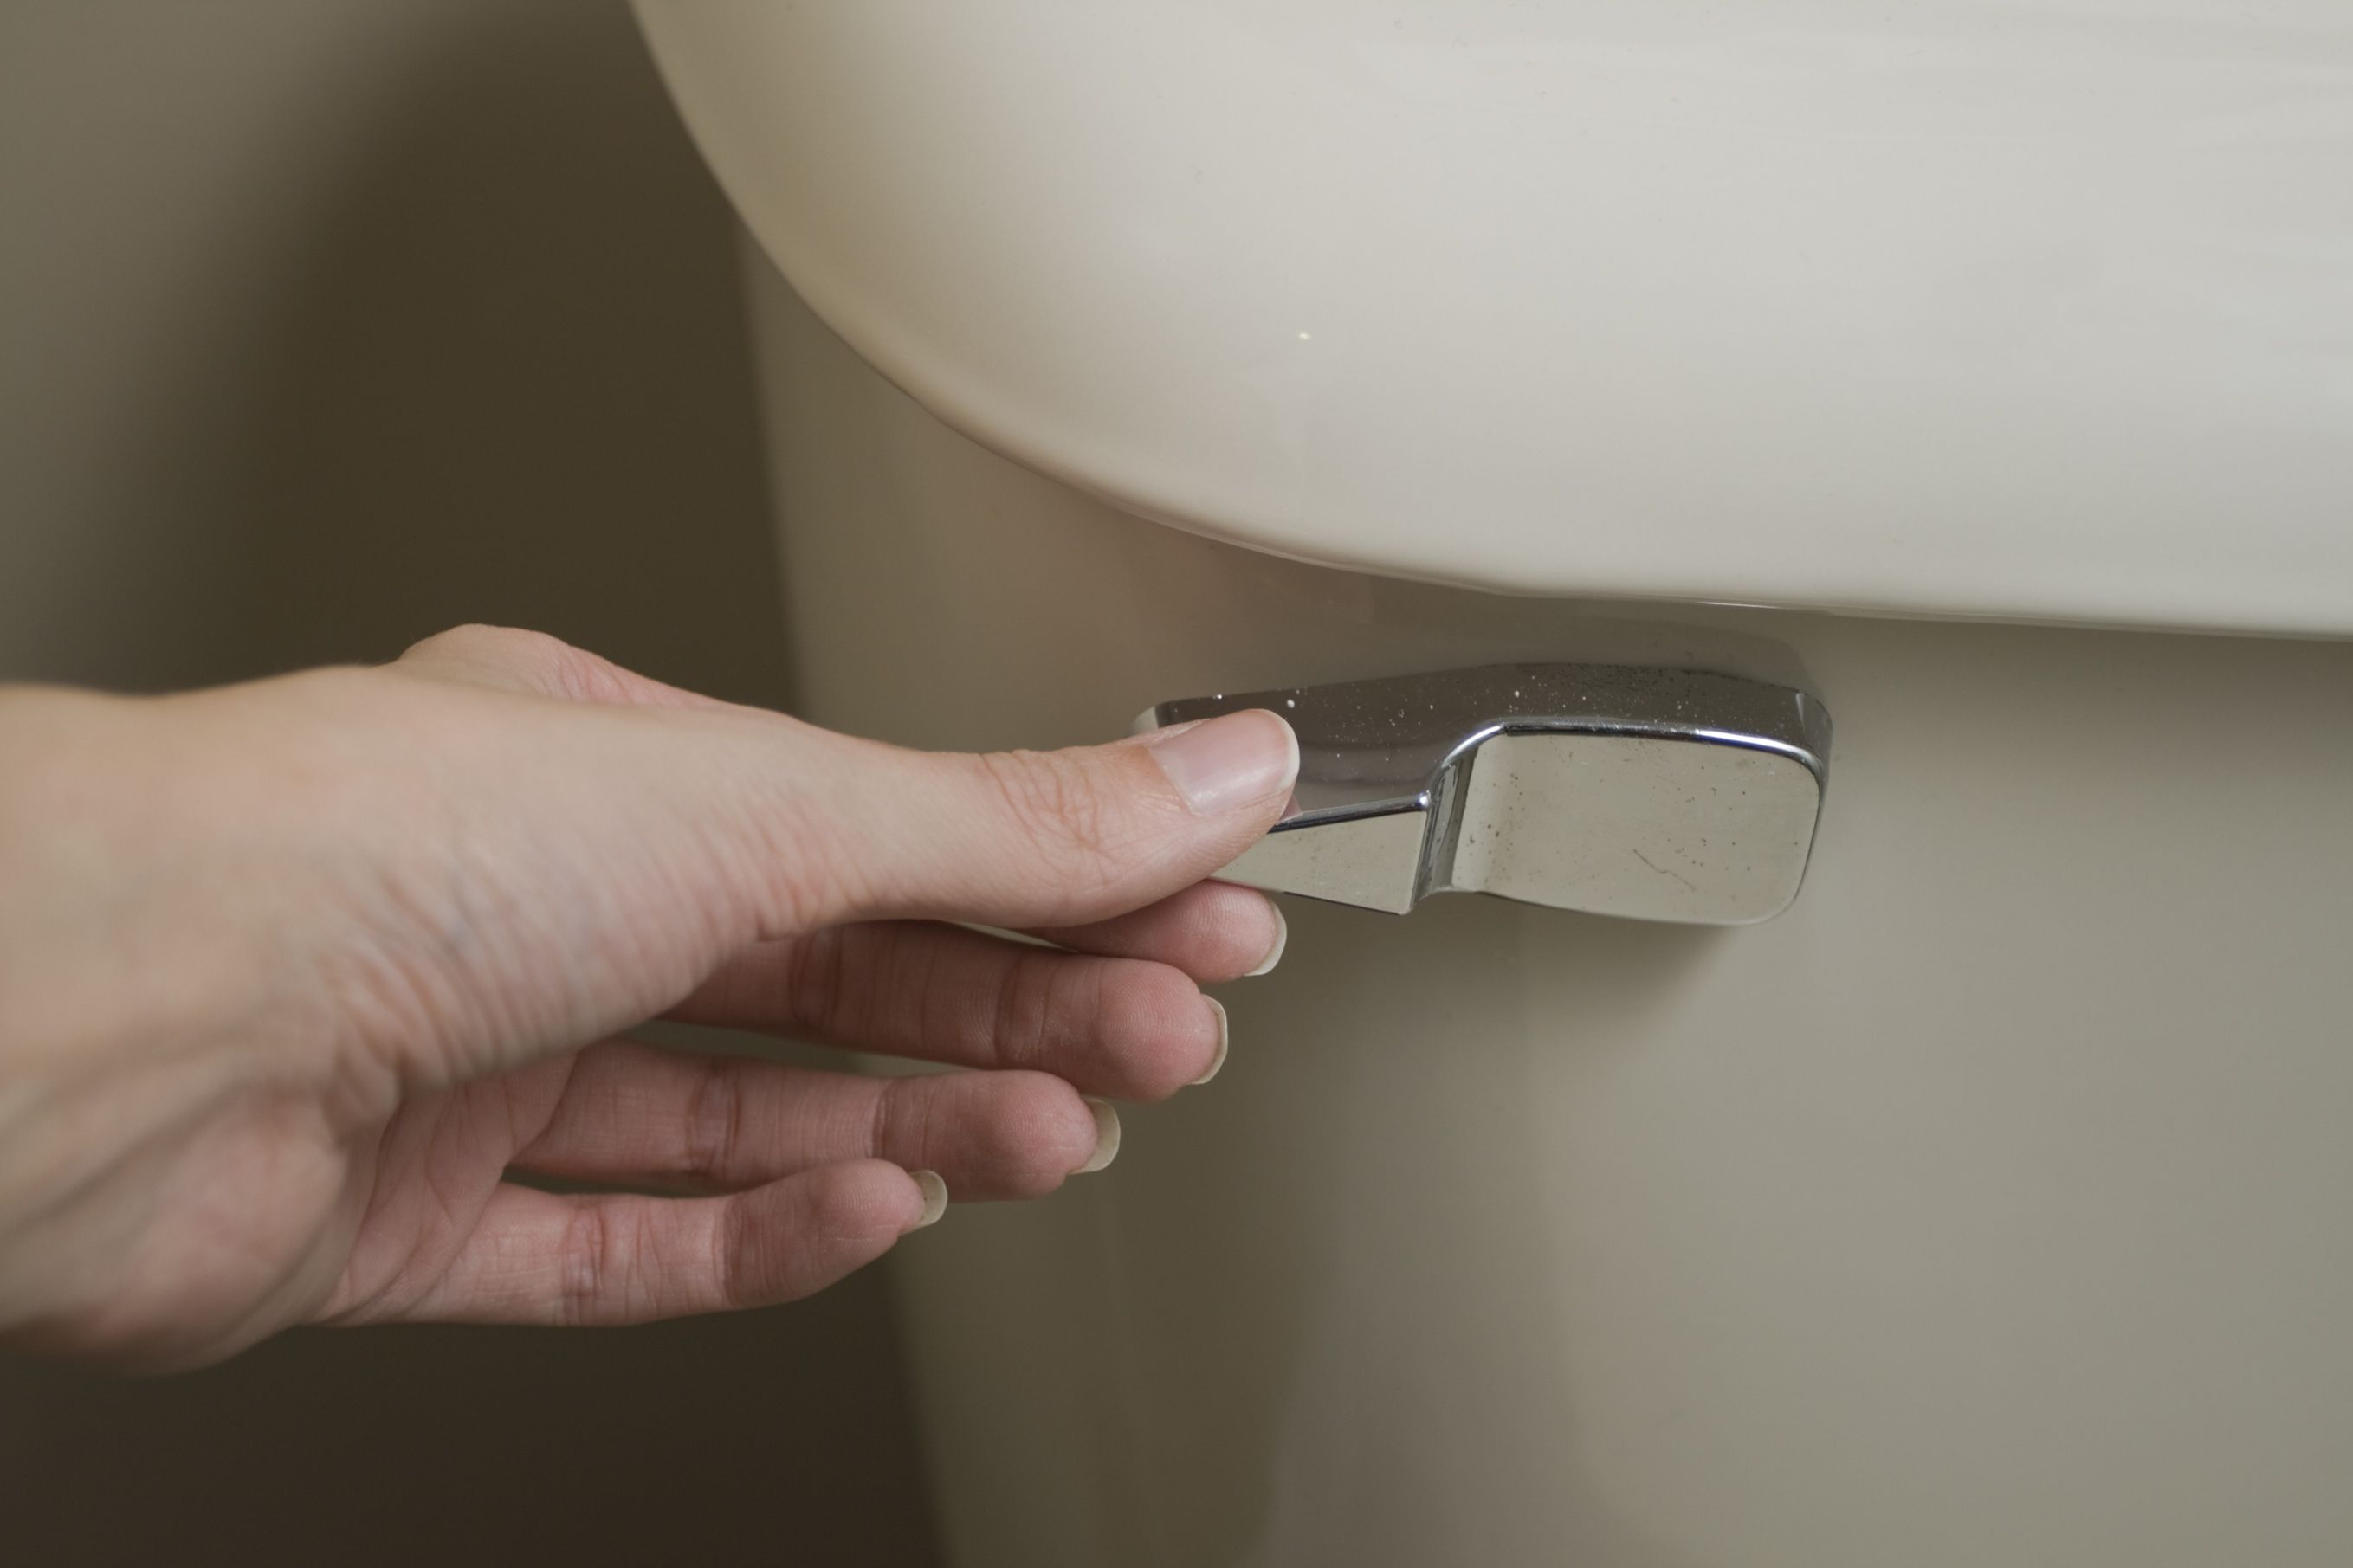
Once the water supply is turned off, flush the toilet to drain the remaining water from the tank and bowl. You may need to hold down the flush lever to ensure all the water is released.
After flushing, use a sponge or towel to soak up any remaining water that might be present in the tank and bowl. This will make the replacement process cleaner and more manageable.
By turning off the water supply and draining the toilet, you’re ensuring a safe and dry environment to work with during the rest of the replacement process.
Step 2: Empty the Tank
After turning off the water supply and draining the toilet, the next step is to empty the tank. This will allow you to remove the old components and install the new ones without any obstructions.
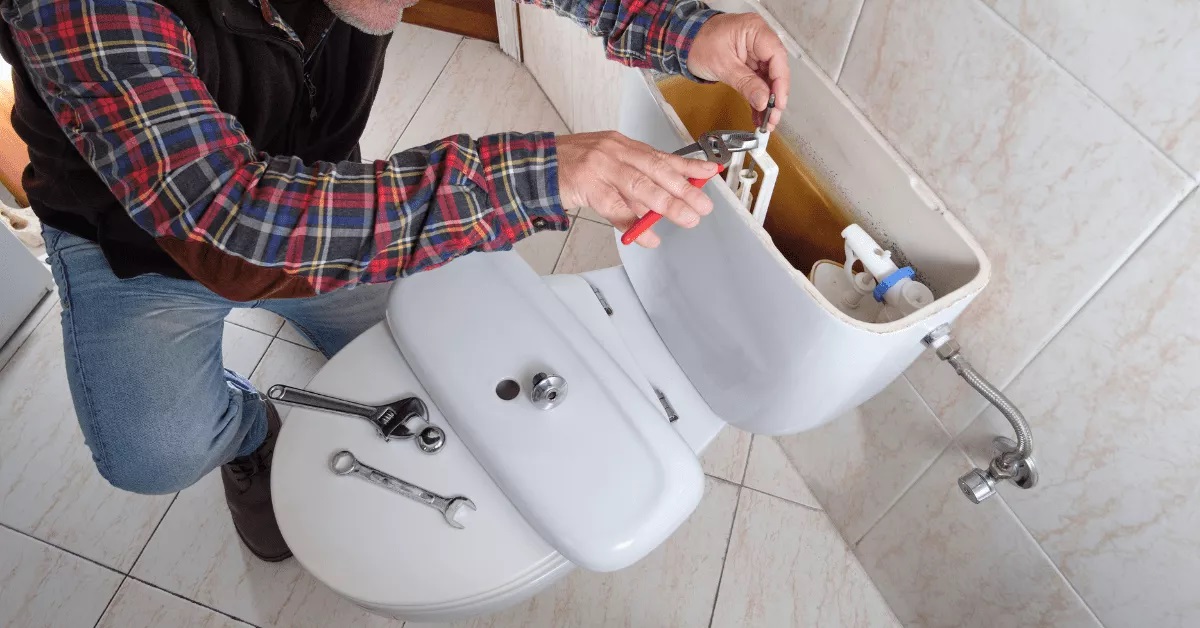
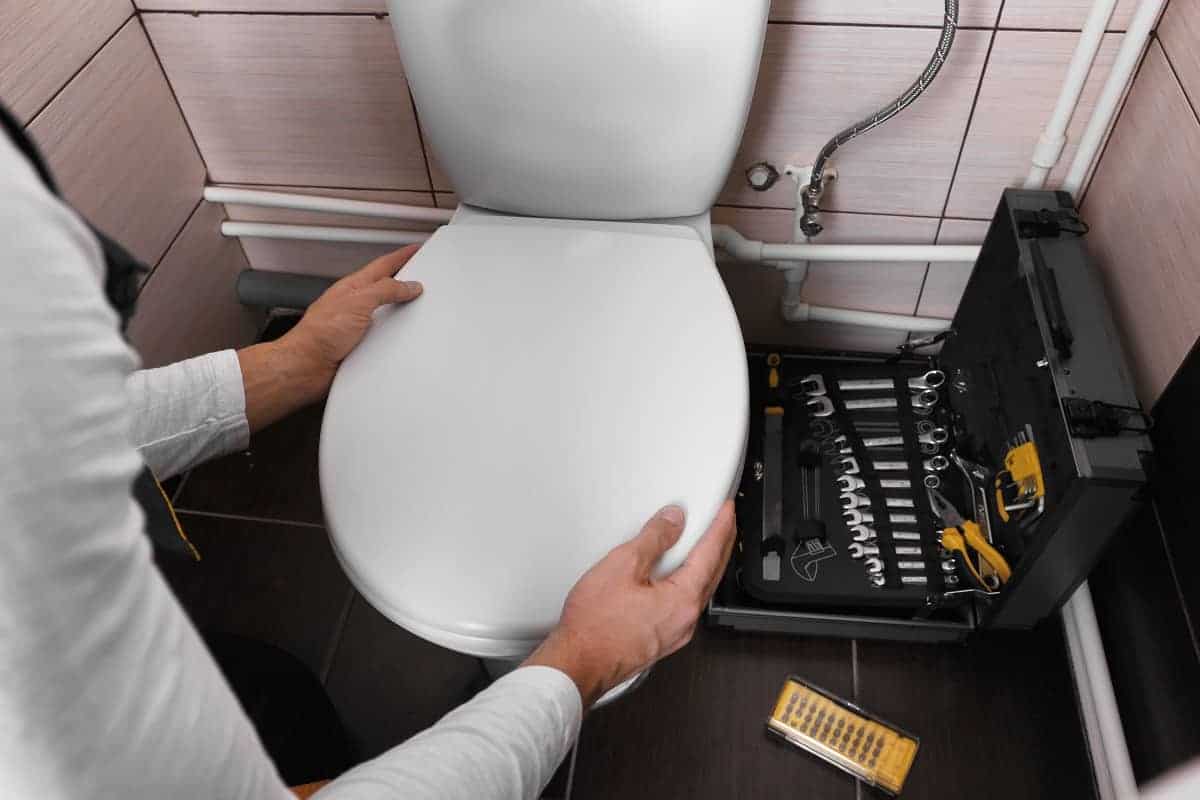
To empty the tank, start by locating the tank bolts on the bottom of the tank. These bolts connect the tank to the bowl. Using a wrench or pliers, loosen and remove the nuts from the bolts.
Once the nuts are removed, carefully lift the tank off the bowl and set it aside on a soft surface, such as a towel or blanket. Be cautious as the tank may be heavy, especially if it contains water.
With the tank removed, use a sponge or towel to remove any water that may remain in the tank or bowl. Wipe down the interior of the tank to ensure it is clean and free of any debris.
Emptying the tank allows you to have better access to the inner components and ensures that you can work with ease during the replacement process. Take your time and be careful when handling the tank to avoid any potential damage.
Step 3: Remove the Toilet Tank Lid
With the tank emptied, it’s time to remove the toilet tank lid. The lid not only provides a decorative cover for the tank but also protects the inner components.
To remove the toilet tank lid, simply lift it off the tank and set it aside in a safe place. Be sure to place it on a stable surface to avoid any accidental tipping or breaking.
It’s important to note that toilet tank lids can vary in size and shape depending on the toilet model. Some lids may have screws or tabs that need to be loosened or lifted, while others may simply lift off without any additional steps. Refer to the manufacturer’s instructions if you encounter any difficulties.
Once the lid is removed, take a moment to inspect it. If you notice any cracks or damage, it may be necessary to replace the lid as well. However, if the lid is in good condition, you can now proceed to the next step of the replacement process.
By removing the toilet tank lid, you create an open and accessible space to work with the inner components of the toilet. This step ensures that you have a clear view and easy access to the parts that need to be replaced.
Step 4: Disconnect the Water Supply Line
Before you can proceed with replacing the inside of the toilet, it’s important to disconnect the water supply line. This line connects the water source to the toilet tank and allows water to fill the tank for flushing.
Start by locating the water supply line, which is usually located at the bottom of the toilet tank on the left or right side. The line is typically connected to a valve or a fill valve assembly.
Once you find the water supply line, use an adjustable wrench to loosen the nut that secures the line to the valve or fill valve assembly. Turn the nut counterclockwise to loosen it and then disconnect the water supply line from the toilet.
After disconnecting the water supply line, it’s a good idea to place a small bucket or towel under the disconnected end of the line to catch any residual water that may still be in the line.
By disconnecting the water supply line, you ensure that no water will flow into the toilet tank and interrupt the replacement process. This step allows for a smoother and more efficient replacement of the inside components of the toilet.
Read more: How To Replace An Rv Toilet
Step 5: Remove the Old Fill Valve
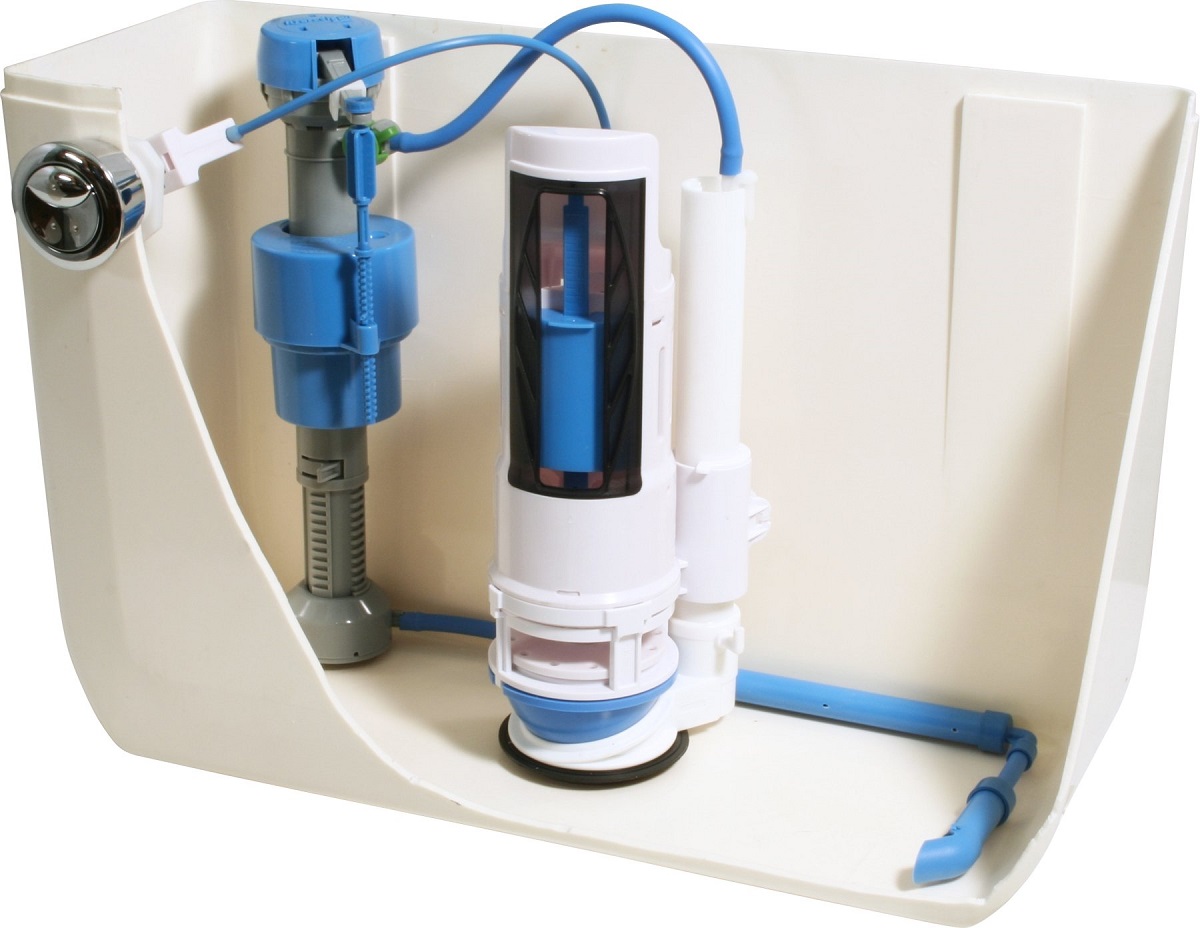
Now that the water supply line is disconnected, it’s time to remove the old fill valve from the toilet tank. The fill valve is responsible for regulating the water level in the tank and allows for proper flushing.
Start by locating the fill valve inside the toilet tank. It is typically situated in the center and has a small float attached to it. The float is responsible for detecting the water level and signaling the fill valve to shut off once the tank is adequately filled.
To remove the old fill valve, look for a large nut at the base of the valve that secures it to the bottom of the tank. Use an adjustable wrench to loosen and remove this nut by turning it counterclockwise.
Once the nut is removed, carefully lift the old fill valve out of the tank. You may need to wiggle it slightly to loosen it from any residue or tight fittings.
Inspect the old fill valve for any signs of damage or wear. Sometimes, a faulty fill valve can lead to irregular water flow or constant running water. If the valve appears to be in poor condition, it’s important to replace it with a new one.
By removing the old fill valve, you are clearing the way for the installation of a new and efficient component. This step is crucial in ensuring the proper functioning of the toilet’s water flow and ensuring an effective flush.
When replacing the inside of a toilet, always turn off the water supply and flush the toilet to empty the tank. Use a bucket and sponge to remove any remaining water before starting the replacement.
Step 6: Install the New Fill Valve
With the old fill valve removed, it’s time to install the new fill valve in the toilet tank. The fill valve is a crucial component that controls the water level and refills the tank after each flush.
Start by taking the new fill valve and ensuring that all the necessary parts and components are included. Refer to the manufacturer’s instructions to familiarize yourself with the specific installation process for your fill valve model.
Begin by inserting the threaded end of the new fill valve into the hole at the bottom of the toilet tank. Make sure it is positioned securely and centered in the opening.
Next, secure the fill valve by attaching the large nut to the threaded portion underneath the tank. Use an adjustable wrench to tighten the nut clockwise, ensuring that it is firmly in place.
Once the fill valve is secured, connect the water supply line to the fill valve assembly. Use an adjustable wrench to tighten the nut clockwise and ensure a snug connection. Avoid over-tightening, as it may cause damage to the fill valve or water supply line.
After connecting the water supply line, double-check that all connections are tight and secure. Ensure that the fill valve is properly aligned and straight within the toilet tank.
By installing the new fill valve, you are improving the efficiency and functionality of your toilet’s water flow. This new component will help regulate the water level and promote effective flushing.
Step 7: Reconnect the Water Supply Line
Now that the new fill valve is installed, it’s time to reconnect the water supply line. This line provides water to the toilet tank, allowing it to fill up for each flush.
Start by locating the water supply line that was previously disconnected from the toilet tank. Ensure that the line is clean and free from any debris or obstructions.
Next, take the open end of the water supply line and connect it to the fill valve assembly. Insert the threaded end of the water supply line onto the fill valve and hand-tighten it. Once it is securely attached, use an adjustable wrench to give it a final quarter-turn clockwise to ensure a tight connection.
After reconnecting the water supply line, turn on the water supply by turning the shut-off valve counterclockwise. This will allow water to flow into the toilet tank and fill it back up.
As the tank fills, visually inspect the water supply line and the fill valve connections for any signs of leaking. If you notice any leaks, turn off the water supply and tighten the connections as needed.
By reconnecting the water supply line, you are ensuring that the toilet tank has a steady source of water for proper flushing. This step is crucial to ensure the functionality and performance of your newly installed fill valve.
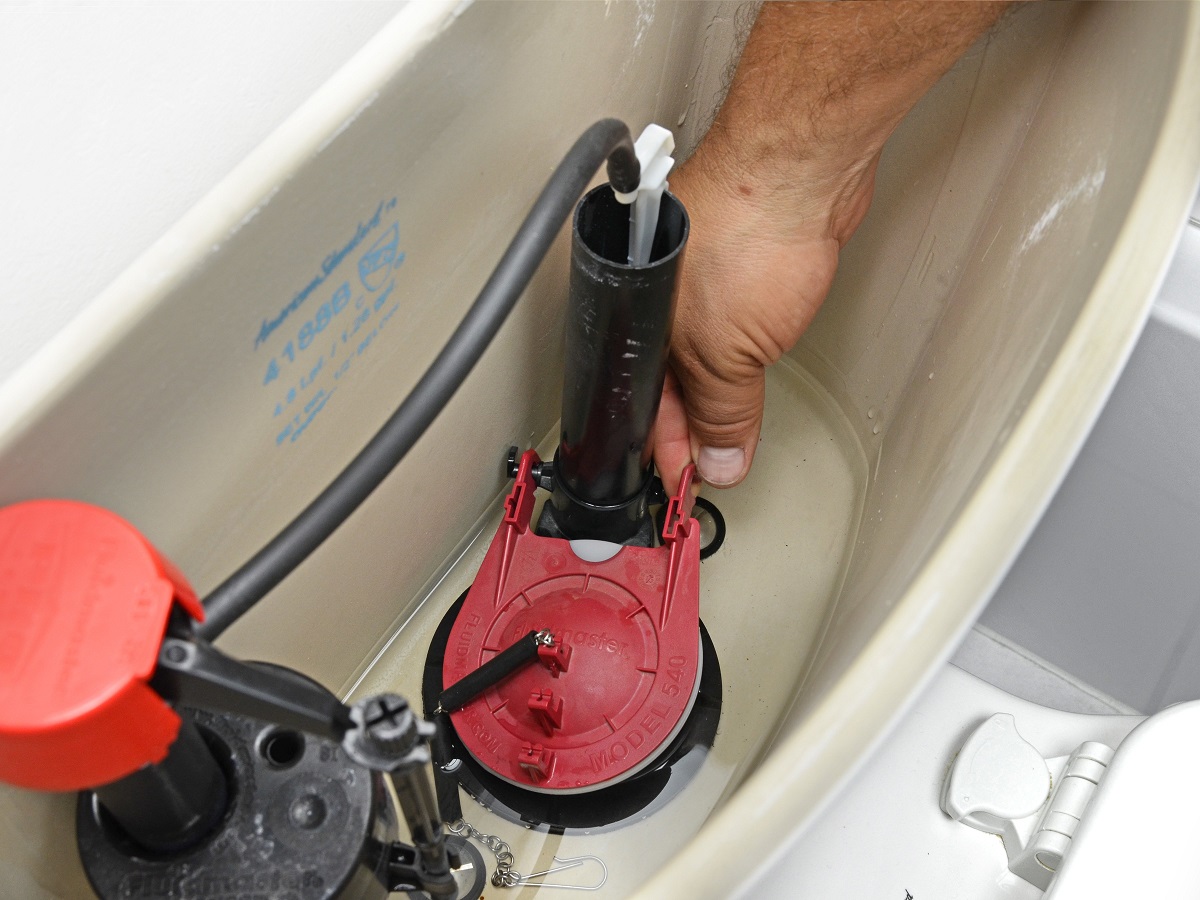
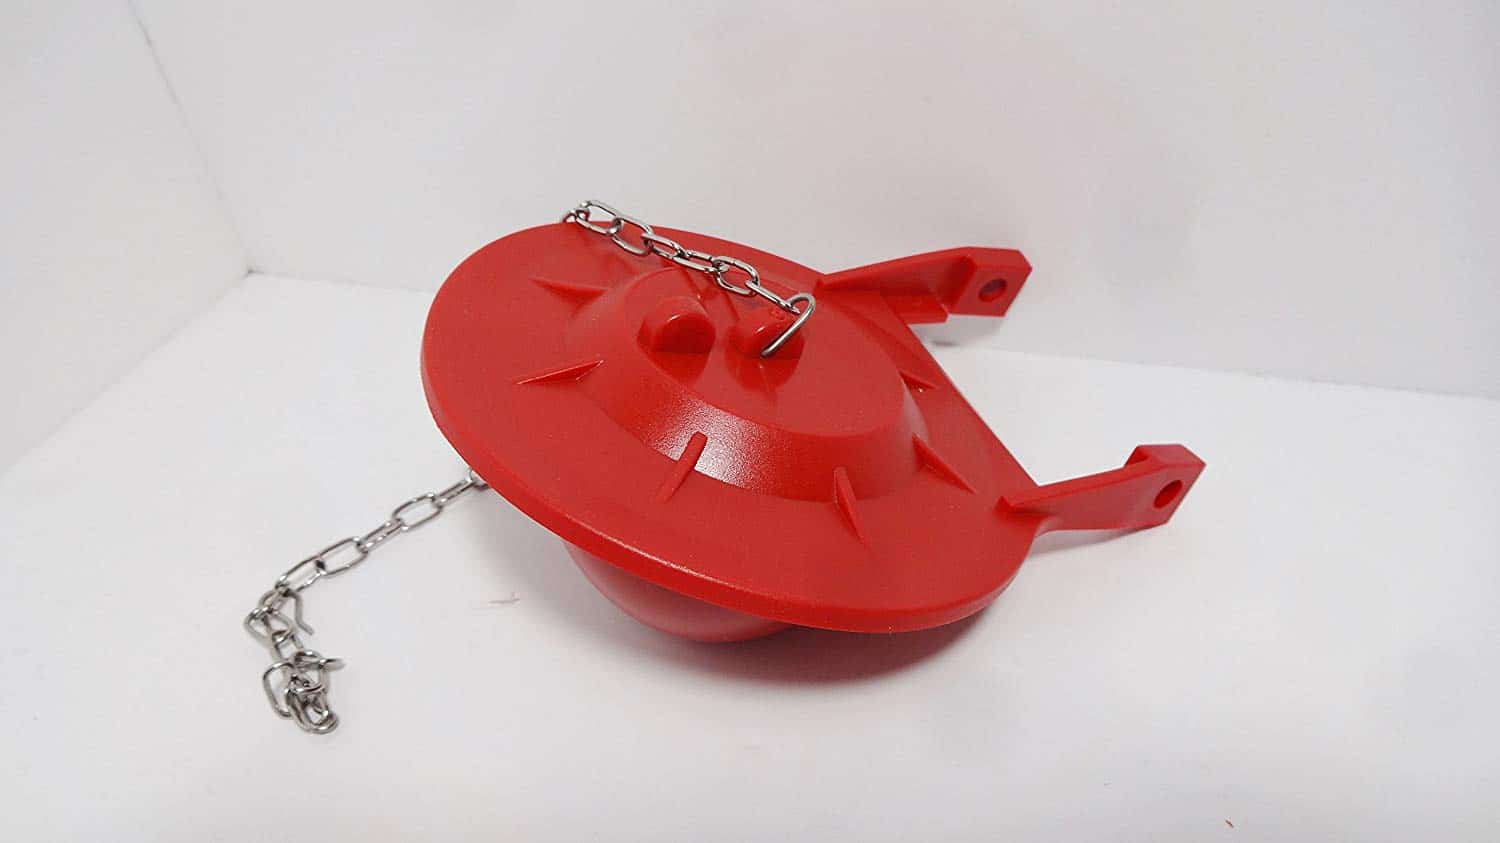
Step 8: Install the New Flush Valve and Flapper
With the water supply line reconnected, it’s time to install the new flush valve and flapper. These components play a vital role in the flushing mechanism of the toilet.
Start by locating the flush valve, which is typically a large plastic or rubber valve at the bottom of the toilet tank. Remove the old flush valve by unscrewing or unhooking it from the tank. Discard the old valve.
Take the new flush valve and carefully position it in the opening at the bottom of the tank. Ensure that it is aligned properly and fits securely without any gaps.
Next, install the flapper, which is responsible for sealing the flush valve and allowing water to enter the bowl during flushing. Connect the flapper to the flush valve using the attached chain or hinge mechanism.
Ensure that the flapper sits flat and seals tightly against the flush valve. Adjust the chain or hinge mechanism if needed to achieve the proper positioning and tension.
Test the flush valve and flapper by flushing the toilet. Observe the flapper to ensure it lifts fully and seals tightly after each flush. If necessary, adjust the chain or hinge to achieve the desired performance.
By installing the new flush valve and flapper, you are ensuring a proper and efficient flushing mechanism. These components work together to allow water to enter the bowl during flushing and seal the tank afterward, preventing water waste and promoting optimal toilet performance.
Read more: When To Replace Toilet
Step 9: Reattach the Toilet Tank Lid
With the new flush valve and flapper in place, it’s time to reattach the toilet tank lid. The lid not only adds a decorative touch to the toilet but also provides protection and coverage for the inner components.
Start by picking up the toilet tank lid and examining it for any signs of damage. Ensure that it is clean and free from any debris or water marks.
Next, position the lid on top of the toilet tank, aligning it with the corresponding openings and indentation. Gently lower the lid onto the tank, taking care not to force or apply excessive pressure.
Once the lid is properly aligned, press it down firmly to secure it in place. You may need to apply slight pressure to ensure all sides of the lid are properly seated and flush with the tank.
Give the lid a gentle shake or tap to ensure it is secure and does not wobble. This ensures that the lid is fitted correctly and will not move or fall off during regular use.
By reattaching the toilet tank lid, you not only restore the aesthetic appeal of the toilet but also provide protection for the inner components. This final touch completes the replacement process and prepares the toilet for its regular functioning.
Step 10: Turn on the Water Supply
Now that all the necessary components have been replaced and the toilet is reassembled, it’s time to turn on the water supply and test the functionality of the toilet.
Start by locating the water shut-off valve for the toilet. Turn the valve counterclockwise to gradually open it and allow water to flow into the toilet tank.
As the water supply is turned on, closely observe the tank and the surrounding connections for any signs of leaks or drips. If you notice any leaks, immediately turn off the water supply and check the connections to ensure they are tight and secure.
Once the water supply is flowing smoothly, flush the toilet to test its functionality. Observe the flushing action and listen for any abnormal sounds or issues.
If the toilet flushes properly and refills without any problems, congratulations! Your replacement process was successful. However, if you encounter any issues such as weak flushing or running water, it may be necessary to go back and double-check the installation of the components.
Take the time to ensure that the water level in the tank is appropriate and that the flush valve and flapper are operating correctly. Make any necessary adjustments to achieve optimal performance.
By turning on the water supply, you are completing the replacement process and putting your newly installed components to the test. This step allows you to ensure that the toilet is functioning properly and ready to use once again.
Conclusion
Replacing the inside of a toilet may seem like a daunting task, but with the right knowledge and guidance, it can be a manageable and rewarding DIY project. By following the step-by-step process outlined in this article, you can successfully replace the components inside your toilet and restore its functionality.
From turning off the water supply and emptying the tank to installing the new fill valve, flush valve, and flapper, each step is crucial in ensuring a smooth and efficient replacement process. By taking your time, following the instructions, and paying attention to detail, you can tackle this project with confidence.
Remember to check for any signs of damage or wear on the old components and replace them if necessary. It’s important to use high-quality replacement parts to ensure the longevity and proper functionality of your toilet.
After completing the replacement process, remember to turn on the water supply and test the toilet’s functionality. Look out for any leaks, weak flushes, or running water. If you encounter any issues, go back and double-check your installation and make any necessary adjustments.
By successfully replacing the inside of your toilet, you not only save money on plumber services but also gain the satisfaction of tackling a home maintenance project on your own. Remember to always prioritize safety, follow manufacturer’s instructions, and seek professional help if needed.
With a properly functioning toilet, you can enjoy a comfortable and convenient bathroom experience. Don’t let a malfunctioning toilet cause unnecessary frustration – take matters into your own hands and replace the inside of your toilet with confidence!
Now that you've mastered replacing the inside of your toilet, why stop there? Enhance your handy skills with our guide on DIY home improvement. For those pesky problems that pop up, our detailed walkthrough on toilet repair offers practical solutions. And if you ever face a bathroom emergency, our tips on fixing toilets when they overflow will surely come in handy. Keep your home maintenance savvy sharp and ready for anything!
Frequently Asked Questions about How To Replace The Inside Of A Toilet
Was this page helpful?
At Storables.com, we guarantee accurate and reliable information. Our content, validated by Expert Board Contributors, is crafted following stringent Editorial Policies. We're committed to providing you with well-researched, expert-backed insights for all your informational needs.
0 thoughts on “How To Replace The Inside Of A Toilet”