
Articles
How To Clean LG Ice Maker
Modified: October 19, 2024
Learn effective techniques and methods for cleaning your LG ice maker with these helpful articles. Keep your ice maker in pristine condition for delicious ice every time.
(Many of the links in this article redirect to a specific reviewed product. Your purchase of these products through affiliate links helps to generate commission for Storables.com, at no extra cost. Learn more)
Introduction
Welcome to our guide on how to clean an LG ice maker. Regular cleaning of your ice maker is essential to maintain its efficiency and ensure the production of clean and fresh ice cubes. Over time, mineral deposits, mold, and bacteria can accumulate in the ice maker, affecting the taste and quality of the ice.
By following these simple steps, you can keep your LG ice maker in optimal condition and enjoy crystal-clear ice cubes for your drinks.
Before you start cleaning the ice maker, it is essential to take some safety precautions to protect yourself and prevent any damage to the unit.
Please keep in mind that these instructions are specifically for LG ice makers. If you have a different brand of ice maker, you may need to refer to the manufacturer’s guidelines for proper cleaning instructions.
Key Takeaways:
- Regularly cleaning your LG ice maker is crucial to ensure the production of clean and fresh ice cubes, as well as maintaining the efficiency and longevity of the appliance.
- Taking safety precautions, using the right tools and materials, and following a thorough cleaning process will help you achieve optimal results and enjoy crystal-clear ice for your beverages.
Read more: How To Clean A Igloo Ice Maker
Safety Precautions
Before you begin cleaning your LG ice maker, it is important to take some safety precautions to ensure your well-being and prevent any damage to the appliance. Follow these safety guidelines:
- Turn off and unplug the ice maker: Before starting the cleaning process, make sure to turn off the ice maker and unplug it from the power source. This will prevent any accidental activation or electrocution during the cleaning process.
- Protect your hands: Wear protective gloves to shield your hands from any sharp edges or potential contaminants during the cleaning process.
- Work in a well-ventilated area: Cleaning agents and disinfectants may produce fumes, so it is important to work in a well-ventilated area to avoid inhaling any harmful vapors.
- Use non-abrasive cleaning agents: When selecting cleaning agents, make sure to choose non-abrasive products to avoid damaging the surface of the ice maker.
- Follow manufacturer’s instructions: Always refer to the user manual or manufacturer’s guidelines for specific cleaning instructions and any precautions unique to your LG ice maker model.
By following these safety precautions, you can ensure a safe and effective cleaning process for your LG ice maker.
Tools and Materials Needed
Before you begin cleaning your LG ice maker, gather the following tools and materials:
- Mild dish soap or ice maker cleaner: Choose a mild dish soap or specifically formulated ice maker cleaner to effectively remove any build-up or residue.
- Warm water: You will need warm water to mix with the cleaning agent and for rinsing the ice maker components.
- Soft cloth or sponge: Use a soft cloth or sponge to clean the interior and exterior surfaces of the ice maker.
- Toothbrush or small brush: A toothbrush or small brush will help you clean hard-to-reach areas, such as crevices and corners.
- Microfiber cloth: A microfiber cloth is perfect for drying and polishing the ice maker components to prevent water spots.
- Gloves: It is recommended to wear protective gloves to safeguard your hands during the cleaning process.
Having these tools and materials readily available will make the cleaning process more efficient and ensure that you have everything you need to clean your LG ice maker effectively.
Step 1: Turn off and unplug the LG ice maker
The first step in cleaning your LG ice maker is to turn it off and unplug it from the power source. This is a crucial safety precaution to prevent any accidental activation or electric shock.
Locate the power switch on your LG ice maker and switch it to the “Off” position. If your ice maker doesn’t have a dedicated power switch, you can unplug it from the electrical outlet.
By turning off and unplugging the ice maker, you ensure that it is completely powered down and not connected to any electricity while you clean it, minimizing the risk of injury.
Once you have turned off and unplugged the LG ice maker, you can proceed to the next step of cleaning the ice bin.
Step 2: Remove the ice bin
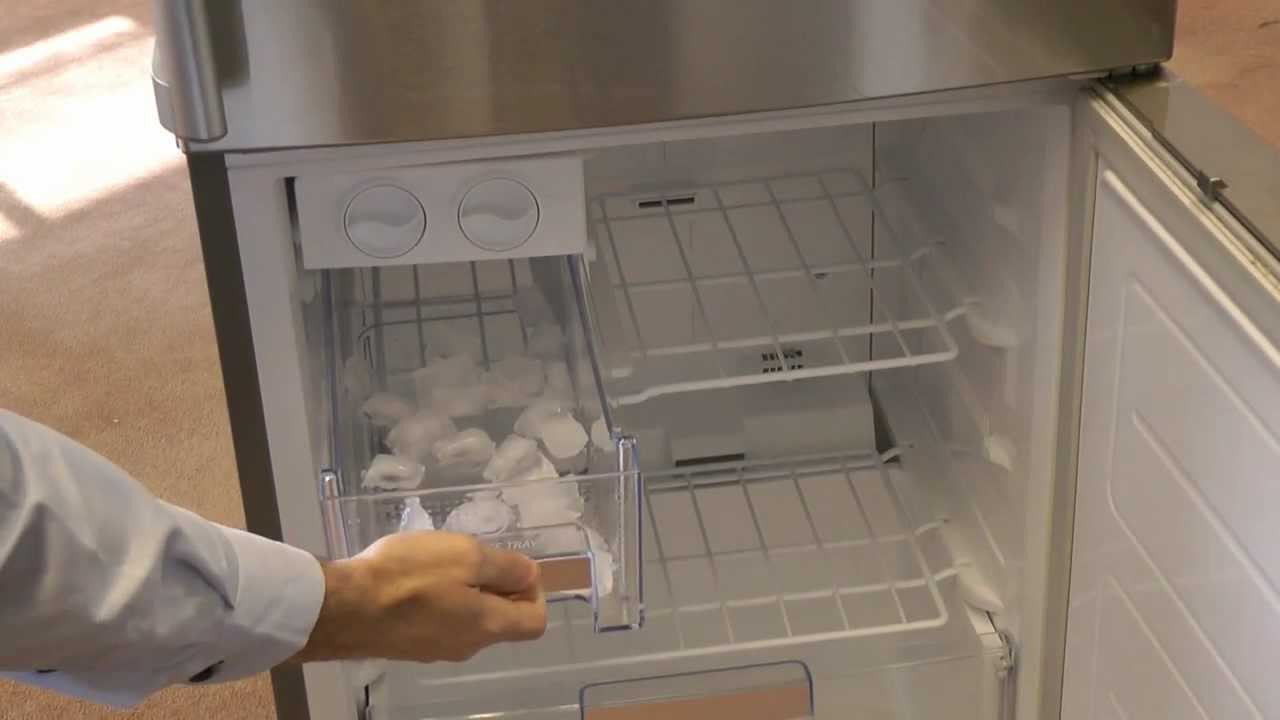
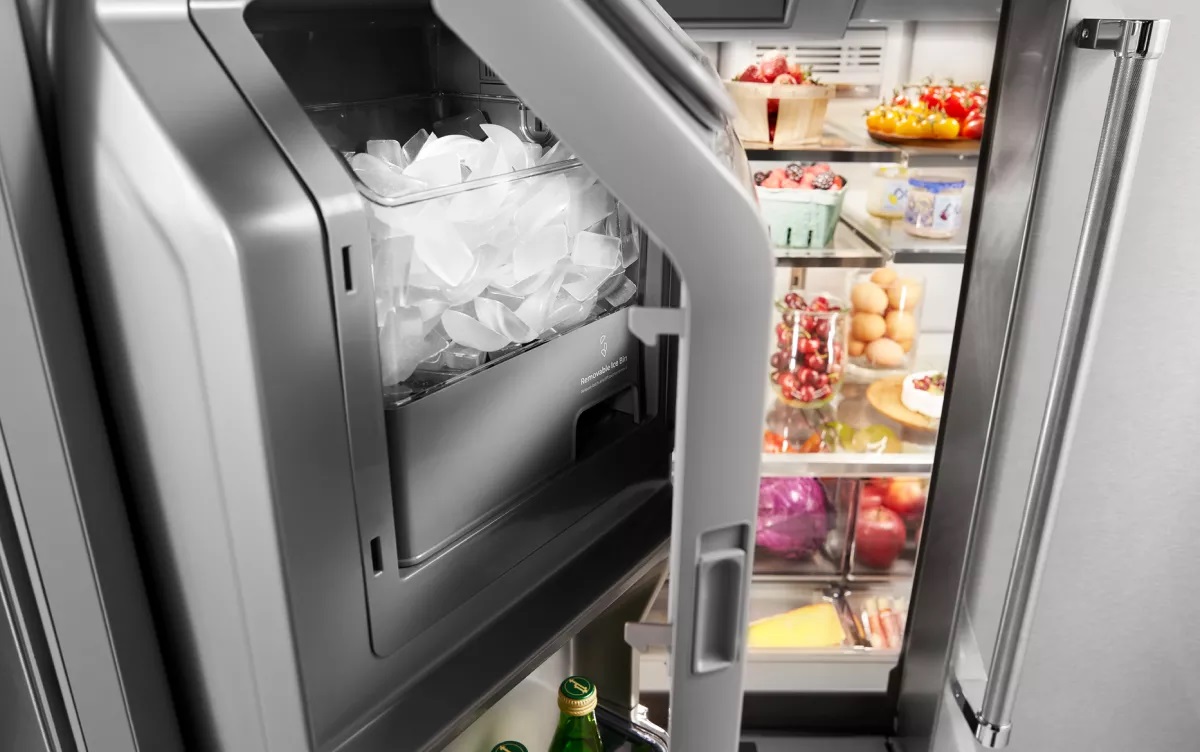
After turning off and unplugging the LG ice maker, the next step is to remove the ice bin. The ice bin is the container that holds the ice cubes. Removing the bin allows you to clean it thoroughly and access the ice maker assembly for cleaning.
Open the freezer door and locate the ice bin. Depending on the model of your LG ice maker, the ice bin may be located on the door or inside the freezer compartment. Consult the user manual for specific instructions if you are unsure.
To remove the ice bin, gently lift it up and out of the ice maker. Be careful not to spill any ice cubes that may be inside. If necessary, empty the ice bin into a separate container or sink.
Set the ice bin aside and proceed to the next step, which involves cleaning the ice bin and ice scoop.
Removing the ice bin is an important step as it allows you to clean both the ice bin and the ice maker assembly more effectively. It also gives you a clear view of any dirt or debris that may have accumulated.
Read more: How To Clean Out An Ice Maker
Step 3: Clean the ice bin and ice scoop
Now that you have removed the ice bin from your LG ice maker, it’s time to clean both the ice bin and the ice scoop.
Start by emptying any remaining ice cubes from the bin into a separate container or sink, and discard any melted or discolored ice.
Next, prepare a mixture of warm water and a mild dish soap or ice maker cleaner. Dip a soft cloth or sponge into the soapy water, and use it to clean the interior and exterior surfaces of the ice bin.
Pay special attention to any areas with visible dirt or residue, using a toothbrush or small brush to scrub away stubborn stains or build-up. Be gentle when scrubbing to avoid scratching the surfaces.
Rinse the ice bin thoroughly with clean water to remove any traces of soap or cleaner. Ensure that all the soap or cleaner is fully rinsed off to prevent any unwanted taste or odor in the ice cubes.
For the ice scoop, clean it separately using the same warm water and soap mixture. Scrub all surfaces of the scoop, including the handle and the area where the ice contacts the scoop.
Rinse the ice scoop thoroughly with clean water to remove any soap residue, and make sure it is completely dry before returning it to the ice bin.
Once the ice bin and ice scoop are clean and dry, you can move on to the next step, which involves cleaning the ice maker assembly.
Properly cleaning the ice bin and ice scoop is crucial to maintain the hygiene and quality of the ice cubes produced by your LG ice maker. Regular cleaning helps prevent the build-up of contaminants and ensures the production of clean and fresh ice for your beverages.
To clean an LG ice maker, start by turning off the ice maker and removing any ice. Then, use a mild soap and warm water to clean the ice maker and its components. Be sure to dry thoroughly before turning it back on.
Step 4: Clean the ice maker assembly
Now that you have cleaned the ice bin and ice scoop, it’s time to focus on cleaning the ice maker assembly itself. This step will remove any accumulated dirt, mineral deposits, or bacteria that may affect the performance and quality of your LG ice maker.
Start by examining the ice maker assembly for any visible debris or residue. Use a soft cloth or sponge dampened with warm water and a mild dish soap or ice maker cleaner to clean the exterior surfaces of the ice maker.
For hard-to-reach areas, such as the corners or crevices, use a toothbrush or small brush to gently scrub away any dirt or build-up. Be careful not to apply excessive pressure that could damage the components.
Pay close attention to the ice maker’s evaporator plate, which is responsible for freezing the water into ice cubes. If you notice any mineral deposits or scale on the evaporator plate, mix a solution of white vinegar and water in a 1:1 ratio.
Apply the vinegar solution to the evaporator plate using a soft cloth or sponge, and let it sit for a few minutes to dissolve the deposits. Then, gently scrub the evaporator plate to remove any remaining residue.
Rinse the ice maker assembly thoroughly with clean water, ensuring that all traces of soap, cleaner, or vinegar are completely removed. Dry the surfaces with a microfiber cloth to prevent water spots and streaks.
Once the ice maker assembly is clean and dry, you can proceed to the next step, which involves cleaning the water tray of the LG ice maker.
Cleaning the ice maker assembly removes any impurities that can affect the quality of the ice cubes and helps maintain the efficiency and longevity of your LG ice maker.
Step 5: Clean the water tray
Now that you have cleaned the ice maker assembly, it’s time to focus on the water tray. The water tray is the area where the water is stored before it is frozen into ice cubes.
Start by locating the water tray in your LG ice maker. It is usually located beneath the ice bin or at the back of the ice maker assembly. Refer to the user manual if you are unsure of the exact location.
Once you have located the water tray, remove it from the ice maker. Be cautious while handling the tray to avoid spillage. Empty any remaining water from the tray into a sink or container.
Next, prepare a solution of warm water and a mild dish soap or ice maker cleaner. Using a soft cloth or sponge, thoroughly clean the water tray, paying close attention to any stains or residue. You can also use a toothbrush or small brush to scrub the tray’s corners and hard-to-reach areas.
Rinse the water tray with clean water to remove any soapy residue. Ensure that all traces of soap or cleaner are completely rinsed off.
Before reinserting the water tray back into the LG ice maker, ensure that it is completely dry. Use a microfiber cloth to dry the tray and remove any moisture.
Once the water tray is clean and dry, carefully place it back into the ice maker according to the manufacturer’s instructions.
With the water tray clean and back in place, you can move on to the next step, which involves cleaning the water filter (if applicable) in your LG ice maker.
Regularly cleaning the water tray helps maintain the cleanliness and freshness of the water used to make ice cubes in your LG ice maker.
Step 6: Clean the water filter (if applicable)
In this step, we will focus on the cleaning process for the water filter of your LG ice maker. Not all LG ice makers have a water filter, so skip this step if your model doesn’t have one. However, if your ice maker does have a water filter, it’s important to clean it regularly to maintain optimal water quality and ice production.
First, consult your LG ice maker’s user manual to locate the water filter and understand the recommended cleaning procedure.
Follow the instructions provided in the manual to remove the water filter from your LG ice maker.
Next, rinse the water filter under running water to remove any loose debris or particles. This step will help to clear out any build-up that may have accumulated in the filter.
If your water filter is washable, prepare a solution of warm water and a mild dish soap. Gently scrub the filter using a soft brush or sponge to remove any stubborn dirt or residue. Be sure to follow the manual’s instructions on how to clean the filter properly.
Once you have finished cleaning the water filter, rinse it thoroughly with clean water to remove any traces of soap or cleaner. Make sure that the filter is completely free from any residual cleaning agents.
Allow the water filter to air dry completely before reinserting it into your LG ice maker. Ensure that the filter is properly aligned and securely reattached according to the instructions provided in the manual.
Keep in mind that some LG ice maker water filters are not washable and need to be replaced. If this is the case for your ice maker, refer to the manufacturer’s instructions on how often the filter should be replaced.
With the water filter cleaned or replaced (if applicable), you can proceed to the next step, which involves reassembling your LG ice maker.
Regular cleaning and maintenance of the water filter will ensure that your LG ice maker produces clean and fresh tasting ice cubes.
Read more: How To Clean A Silonn Ice Maker
Step 7: Reassemble the ice maker
After completing the cleaning process for the various components of your LG ice maker, it’s time to reassemble the unit. Follow these steps to ensure proper reassembly:
- Start by inserting the cleaned or replaced water filter back into its designated slot, following the manufacturer’s instructions. Make sure it is securely connected or properly aligned, depending on the design of your ice maker.
- Next, carefully place the water tray back into the ice maker. Ensure that it is properly positioned and fully inserted.
- If you removed any removable parts from the ice bin, such as dividers or shelves, reinsert them back into their respective slots.
- Align the ice bin with the ice maker assembly and gently slide it back into place. Make sure it is securely attached and properly aligned.
- Double-check that all components are correctly reassembled and seated in their designated positions.
Once you have reassembled the LG ice maker, take a moment to visually inspect the unit to ensure that everything is in place and securely connected. Verify that there are no loose or dangling parts.
With the ice maker properly reassembled, you are now ready to move on to the final step: turning on the LG ice maker.
Properly reassembling your LG ice maker is crucial to ensure its optimal operation and functionality. By following these steps, you can ensure that all components are in the correct position and securely attached.
Step 8: Turn on the LG ice maker
Now that you have completed the cleaning and reassembly process for your LG ice maker, it’s time to turn it back on and resume ice production. Follow these steps to safely turn on the ice maker:
- Locate the power switch or control panel on your LG ice maker. It is usually located on the front or side of the unit.
- Switch the power button or control panel to the “On” position. This will restore power to the ice maker.
- Wait for a few minutes to allow the ice maker to initialize and start the ice-making process.
- Listen for any unusual sounds or observe any error messages on the display, if applicable. If you notice anything unusual, consult the user manual or contact LG customer support for assistance.
- Keep an eye on the ice maker over the next few hours to ensure that it is operating smoothly and producing ice cubes.
Once the ice maker is turned on and operational, it will start producing ice cubes within the specified time frame determined by the appliance. Be patient, as it may take some time for the ice maker to produce a full batch of ice cubes.
Remember that regular maintenance and cleaning, as well as ensuring proper air circulation around the ice maker, will help maintain its efficiency and prolong its lifespan.
With your LG ice maker now turned on, you can enjoy the convenience of fresh, clean ice cubes for your beverages once again.
Conclusion
Cleaning your LG ice maker is a vital step in ensuring the production of clean and fresh ice cubes, as well as maintaining the efficiency and longevity of the appliance. By following the steps outlined in this guide, you can effectively clean your LG ice maker and enjoy crystal-clear ice for your beverages.
It is important to remember to take safety precautions, such as turning off and unplugging the ice maker, wearing protective gloves, and working in a well-ventilated area. Additionally, using the right tools and materials, such as mild dish soap or ice maker cleaner, warm water, soft cloth or sponge, and a toothbrush or small brush, will help you achieve optimal cleaning results.
The cleaning process involves removing and cleaning the ice bin, ice scoop, ice maker assembly, water tray, and, if applicable, the water filter. Taking the time to thoroughly clean each component will remove any dirt, residue, mineral deposits, and bacteria that may have accumulated over time.
Once the cleaning is complete, carefully reassemble the ice maker, ensuring that all components are properly aligned and securely attached. Finally, turn on the LG ice maker and observe its operation to ensure it is producing ice cubes efficiently.
Regularly cleaning your LG ice maker and following proper maintenance guidelines will help maintain its performance and extend its lifespan. It is recommended to clean the ice maker at least every 3-6 months, or more frequently if you notice any build-up or changes in ice quality.
Remember to consult your LG ice maker’s user manual for specific instructions and recommendations tailored to your appliance model. By following these guidelines, you can enjoy consistently clean and refreshing ice cubes for all your beverage needs.
Now that you've mastered cleaning your LG ice maker, why stop there? Dive into our comprehensive guide on general ice maker cleaning, ensuring every cube is fresh and clear. For those with a full fridge setup, our detailed steps on maintaining refrigerator ice makers are essential. These guides not only keep your ice tasting great but also extend the life of your machines. Get ready to enjoy crystal clear ice with minimal effort!
Frequently Asked Questions about How To Clean LG Ice Maker
Was this page helpful?
At Storables.com, we guarantee accurate and reliable information. Our content, validated by Expert Board Contributors, is crafted following stringent Editorial Policies. We're committed to providing you with well-researched, expert-backed insights for all your informational needs.

0 thoughts on “How To Clean LG Ice Maker”