Home>Furniture>Outdoor Furniture>How To Fill Gaps Between Patio Stones
Outdoor Furniture
How To Fill Gaps Between Patio Stones
Modified: March 7, 2024
Learn how to fill gaps between your patio stones with our outdoor-furniture solutions. Achieve a seamless and stylish look for your outdoor space.
(Many of the links in this article redirect to a specific reviewed product. Your purchase of these products through affiliate links helps to generate commission for Storables.com, at no extra cost. Learn more)
Introduction
Welcome to our comprehensive guide on how to fill gaps between patio stones. If you have a beautiful patio or walkway made of stone, you may have noticed that over time, small gaps start to appear between the stones. These gaps not only detract from the aesthetic appeal of your outdoor space, but they can also be a tripping hazard and cause weed growth. That’s why it’s essential to fill these gaps to maintain the integrity and beauty of your patio.
In this article, we will walk you through the step-by-step process of filling the gaps between patio stones. Whether you’re a seasoned DIYer or a beginner, you’ll find all the information you need to complete this project successfully.
Before we dive into the process, let’s discuss why it’s important to fill these gaps in the first place.
Key Takeaways:
- Fill gaps between patio stones to prevent tripping hazards, weed growth, erosion, and pest infestation. Choose the right filler material and follow the step-by-step process for a safe and visually appealing outdoor space.
- Prepare, clean, and apply the filler material carefully to achieve a polished look. Consider sealing the gaps for added protection and longevity. Enjoy a transformed and functional patio with regular maintenance.
Read more: How To Fill Gap Between Baseboard And Floor
Importance of Filling Gaps Between Patio Stones
While it may seem like a minor issue, leaving gaps between patio stones can lead to various problems that can affect the overall functionality and appearance of your outdoor space. Here are some key reasons why it’s important to fill these gaps:
- Safety: Uneven gaps between patio stones can create tripping hazards, especially for children and the elderly. Filling the gaps ensures a smooth and level surface, minimizing the risk of accidents.
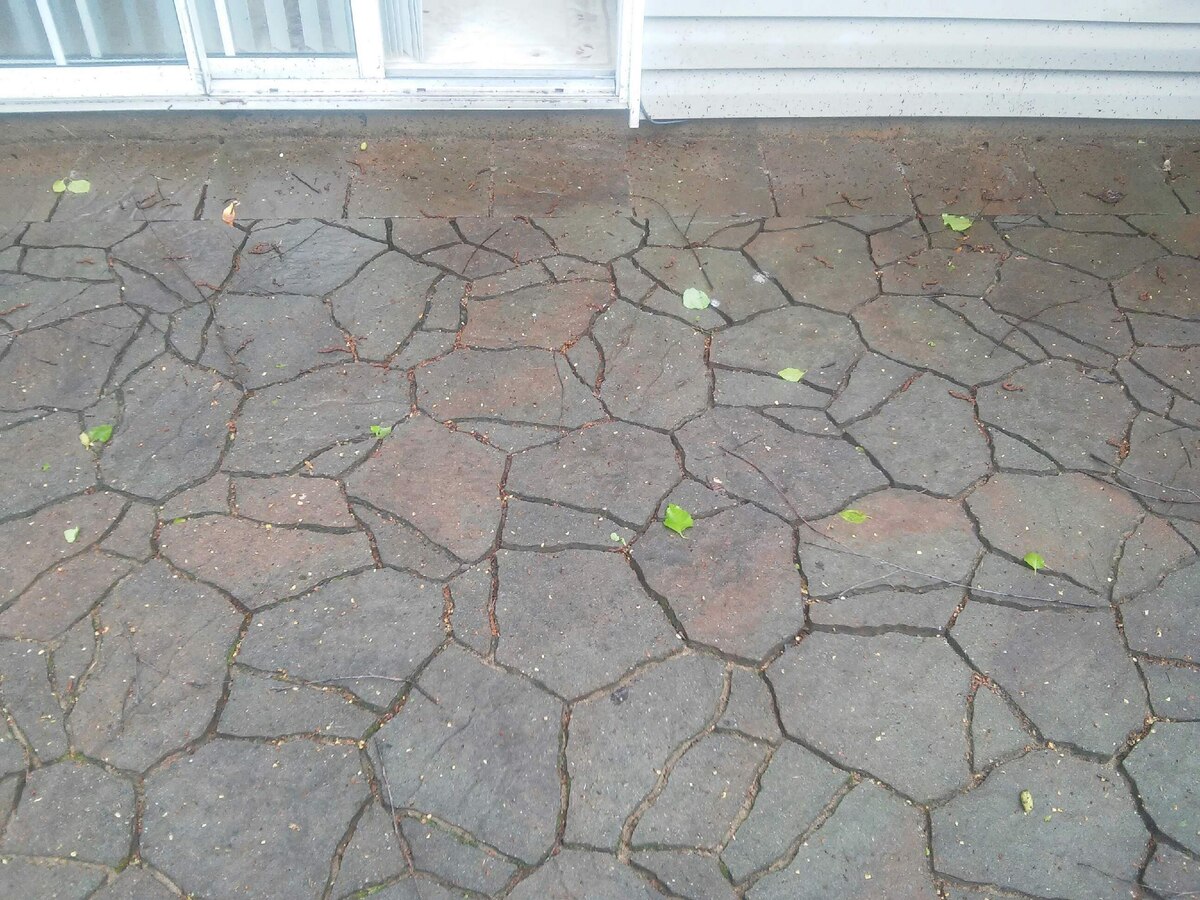
- Preventing weed growth: Unfilled gaps provide a perfect environment for weeds to take root and grow. Over time, these weeds can sprout through the cracks, making your patio appear unkempt. By filling the gaps, you create a barrier that discourages weed growth and reduces the maintenance required to keep your patio weed-free.
- Preventing erosion: Gaps between stones allow water to seep through, potentially causing erosion beneath the surface. Over time, this erosion can lead to shifting and sinking of the stones, resulting in an uneven and unstable patio. By filling the gaps, you help maintain the structural integrity of your patio and prevent long-term damage.
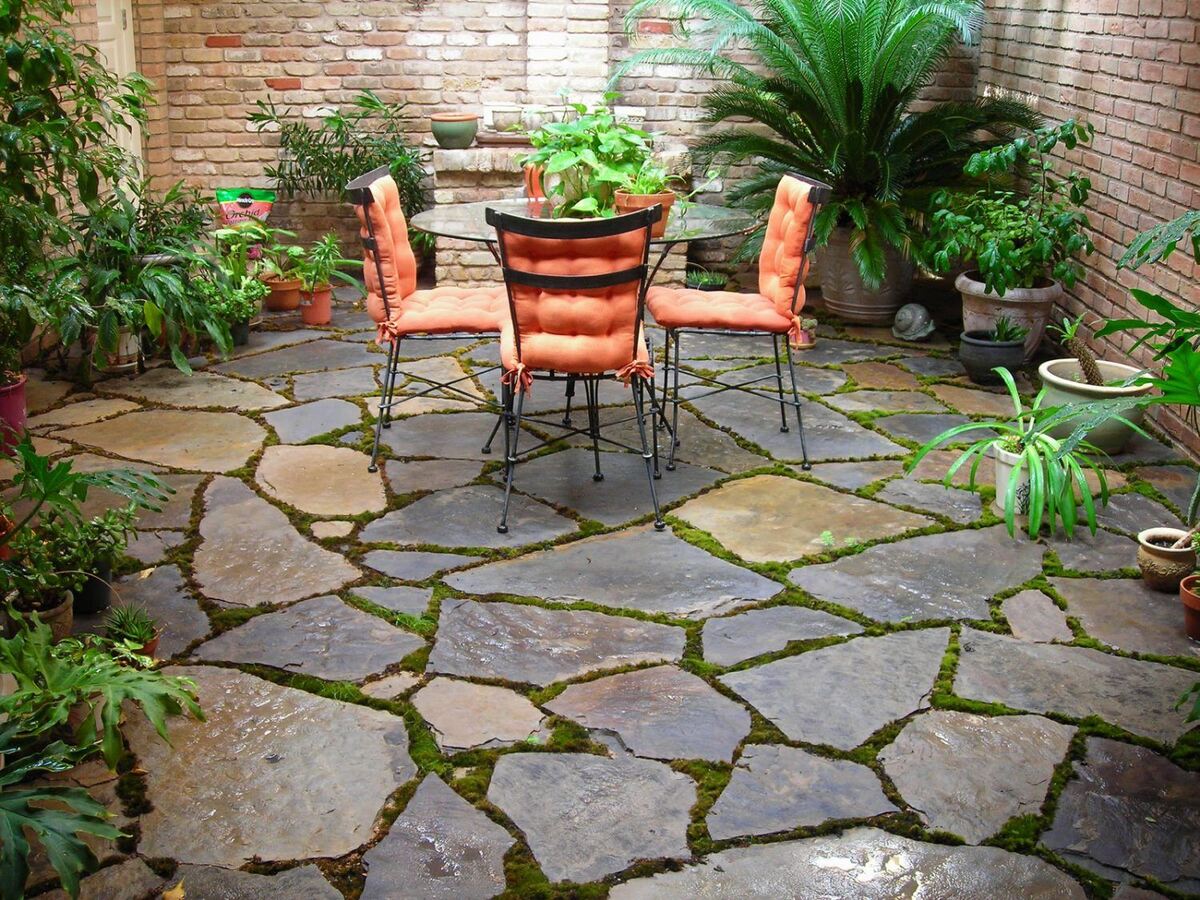
- Enhancing aesthetics: A well-maintained patio with filled gaps looks significantly more visually appealing than one with unsightly gaps. By filling the gaps with a suitable filler material, you can create a cohesive and seamless look, enhancing the overall beauty of your outdoor space.
- Minimizing pest infestation: Unfilled gaps between patio stones can attract pests such as ants, spiders, and other insects. These pests can create nests or burrows in the gaps, leading to unwanted infestations. By filling the gaps, you create a barrier that deters pests from nesting in your patio.
As you can see, filling the gaps between patio stones is not just a cosmetic issue; it is crucial for safety, maintenance, and the longevity of your patio. Now that you understand the importance, let’s move on to the tools and materials you’ll need for this project.
Tools and Materials Required
Before you start filling the gaps between your patio stones, gather the necessary tools and materials to ensure a smooth and efficient process. Here’s a list of what you’ll need:
Tools:
- Trowel: Used for applying the filler material into the gaps.
- Broom: Used to sweep away any debris or loose material from the gaps.
- Brush: A small brush can be handy for cleaning the gaps and removing any stubborn dirt or weeds.
- Bucket: To mix the filler material if necessary.
- Gloves: Protect your hands while working with the filler material.
- Watering Can or Spray Bottle: Used to moisten the filler material if required.
Materials:
- Filler Material: There are several options available for filling the gaps between patio stones, including sand, polymeric sand, gravel, or mortar mix. The choice of filler material will depend on factors such as the size of the gaps, the desired level of stability, and the overall look you want to achieve.
- Joint Stabilizing Sealer (optional): If you want to further enhance the durability and stability of the filled gaps, you can consider applying a joint stabilizing sealer. This sealer helps to prevent weed growth and protects the filler material from erosion.
Make sure you have all the necessary tools and materials on hand before you begin filling the gaps. With everything prepared, you’re ready to move on to the step-by-step process of filling the gaps between your patio stones. Let’s get started!
Read more: How To Fill Gap Between Wall And Ceiling
Step 1: Preparing the Patio Stones
Before you start filling the gaps between your patio stones, it’s essential to prepare the surface properly. Follow these steps to ensure an optimal result:
- Clean the surface: Begin by sweeping or using a leaf blower to remove any loose debris, leaves, or dirt from the patio surface. This will make it easier to access the gaps between the stones and provide a clean working area.
- Moss or weed removal: If you notice any moss or weeds growing between the stones, take the time to remove them. Use a brush or scraper to gently scrape away the moss, and if necessary, apply a weed killer to eliminate any weeds. It’s important to start with a clean and weed-free surface to ensure long-lasting results.
- Inspect for damage: Take a close look at the patio stones to check for any cracks, chips, or loose pieces. Repair any damaged stones before proceeding with the gap filling process. This will help maintain the structural integrity of your patio and ensure that the filler material adheres properly.
- Moisten the stones (if required): Some filler materials, such as mortar mix, may require the surface of the stones to be dampened before application. Check the instructions provided with the filler material and moisten the stones accordingly. Be careful not to oversaturate the surface, as it can affect the adhesion of the filler material.
By properly preparing the patio stones, you create a clean and stable surface for the gap filling process. With step 1 complete, let’s move on to step 2, which involves cleaning the gaps between the stones.
Step 2: Cleaning the Gaps
Once you have prepared the patio stones, it’s time to focus on cleaning the gaps between them. Follow these steps to ensure the gaps are free of debris and ready for filler material:
- Remove loose material: Start by using a broom, brush, or even a vacuum cleaner with a narrow attachment to remove any loose debris, dirt, or sand from the gaps. This will help create a clean surface for the filler material to adhere to.
- Clear out stubborn dirt or weeds: For any stubborn dirt or weeds that remain in the gaps, use a small brush or scraper to gently remove them. Take extra care not to damage the surrounding stones while doing so.
- Power washing (optional): If the gaps are heavily soiled or if you want a deep clean, you can consider using a power washer to blast away dirt and debris. Be cautious when using a power washer, as too much pressure can damage the stones or dislodge them. Adjust the pressure setting accordingly and keep a safe distance from the stones.
- Dry the gaps: After cleaning, allow the gaps to dry completely before applying the filler material. This will ensure better adhesion and prevent the filler material from clumping or caking.
Taking the time to properly clean the gaps between the patio stones is crucial for achieving a professional and long-lasting result. Once the gaps are clean and dry, you are ready to move on to the next step: choosing the right filler material. Let’s explore your options in step 3.
Step 3: Choosing the Right Filler Material
Choosing the right filler material for your patio stone gaps is essential to ensure proper stability, durability, and aesthetic appeal. Here are some commonly used filler materials and their characteristics:
1. Sand:
Sand is a popular choice for filling gaps between patio stones. It is readily available, affordable, and easy to work with. Concrete sand or polymeric sand can be used. Concrete sand is a traditional option, while polymeric sand contains binders that help it harden and prevent weed growth. Sand provides good drainage and allows for some flexibility, making it suitable for areas with freeze-thaw cycles.
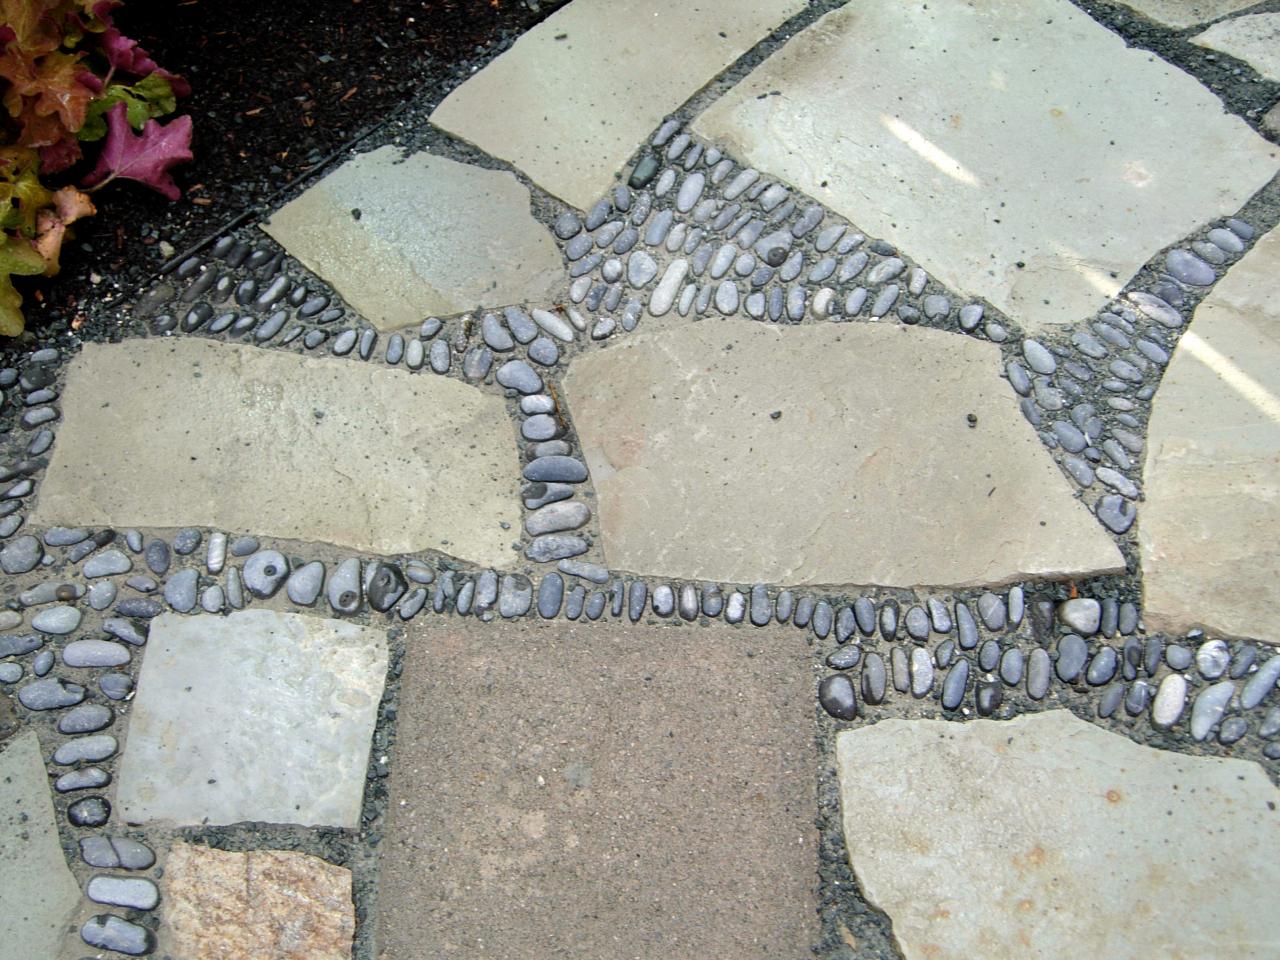
2. Gravel or Crushed Stone:
Gravel or crushed stone can be used for larger gaps or for a more rustic look. It provides excellent drainage and stability. However, keep in mind that gravel or crushed stone may not prevent weed growth as effectively as other options.
3. Polymeric Sand:
Polymeric sand is a mixture of sand and polymers that, when activated with water, creates a strong bond between the stones. It hardens to a semi-flexible state, preventing weed growth, and minimizing water penetration. Polymeric sand is an excellent choice for areas with heavy foot traffic or where weed control is a top priority.
4. Mortar Mix:
Mortar mix is a cement-based material that provides a strong and durable bond between the stones. It is ideal for gaps that require more stability, such as irregular or uneven stones. However, keep in mind that mortar mix can be more challenging to work with and may require more specialized tools.
Consider the size of the gaps, the desired level of stability, and the overall look you want to achieve when choosing the filler material. Additionally, check manufacturer guidelines for any specific instructions or recommendations for your chosen filler material.
Now that you have an understanding of the different filler materials available, it’s time to move on to step 4: applying the filler material to the gaps between the patio stones.
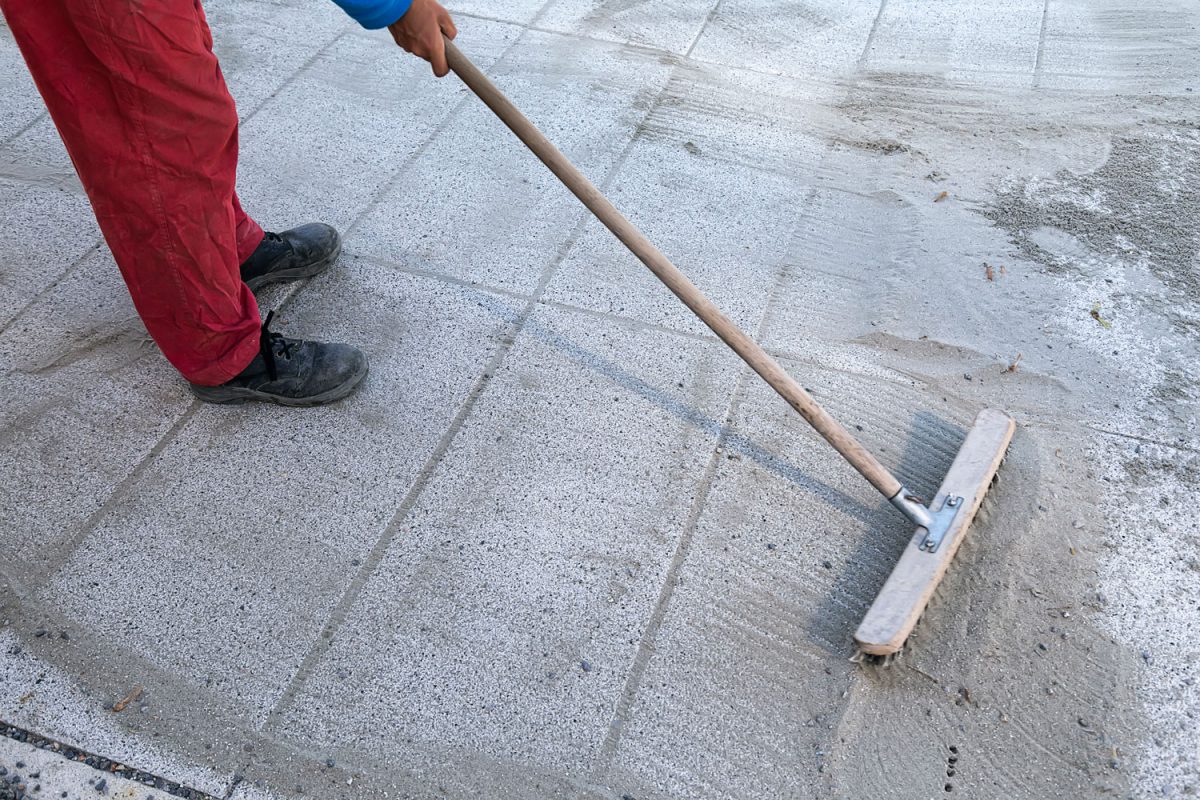
Step 4: Applying the Filler Material
With the right filler material selected, you’re ready to start filling the gaps between your patio stones. Follow these steps to ensure a smooth and effective application:
- Start with a dry surface: Make sure the patio stones and the gaps are completely dry before applying the filler material. Any moisture can affect the adhesion and performance of the filler.
- Pour or spread the filler material: Depending on the filler material you’ve chosen, pour it directly into the gaps or spread it evenly using a trowel. Fill each gap until it is level with the surface of the stones.
- Press down the filler: Use a trowel or your fingers to press down the filler material firmly. This will help compact it and ensure a tight fit within the gaps.
- Continue filling all the gaps: Work systematically, moving from one gap to the next, until all the gaps between the patio stones are filled. Take your time to ensure even and consistent coverage.
- Remove excess filler: Once all the gaps are filled, use a broom or brush to sweep away any excess filler material from the surface of the patio stones. This will help create a clean and polished look.
It is important to note that each filler material may have specific instructions for application. Follow the manufacturer’s guidelines for the best results. Additionally, take care not to overfill the gaps, as this can lead to a messy appearance and difficulty in leveling the surface.
With step 4 complete, you’re one step closer to having neatly filled gaps between your patio stones. In the next step, we’ll focus on leveling and smoothing the surface.
Read more: How To Fill A Gap Between Vanity And Wall
Step 5: Leveling and Smoothing the Surface
After applying the filler material to the gaps between your patio stones, it’s time to level and smooth the surface. Follow these steps to achieve a professional and uniform look:
- Use a trowel or scraper: Start by using a trowel or scraper to level the filler material with the surface of the stones. Gently press down and smooth out any uneven areas, ensuring that the filler is flush with the stones.
- Work in small sections: Divide the area into manageable sections and focus on one section at a time. This will give you better control and allow you to achieve a consistent finish across the entire patio.
- Check for gaps or low spots: After leveling, inspect the surface for any remaining gaps or low spots. If needed, add more filler material and repeat the leveling process until the gaps are completely filled and the surface is even.
- Smooth the surface: Once the gaps are filled and leveled, use a trowel or a brush to gently smooth the surface of the filler material. This will help create a seamless and polished look.
- Clean any excess material: Use a broom or brush to sweep away any excess filler material on the surface of the patio stones. Take the time to ensure a clean and tidy finish.
Keep in mind that some filler materials, such as polymeric sand or mortar mix, may require additional steps or curing time. Follow the manufacturer’s instructions for any specific guidelines on leveling and smoothing the surface.
With step 5 complete, your patio is almost complete. In the next step, we’ll explore an optional but recommended step: sealing the gaps between the patio stones.
Use polymeric sand to fill the gaps between patio stones. This special sand hardens when water is added, creating a solid, weed-resistant joint.
Step 6: Sealing the Gaps (Optional)
While not necessary, sealing the gaps between your patio stones can provide additional protection and longevity to your filled gaps. Sealing helps prevent weed growth, protects the filler material from erosion, and enhances the overall durability of your patio. Follow these steps to seal the gaps:
- Choose a joint stabilizing sealer: Select a joint stabilizing sealer suitable for your filler material. There are various sealers available, such as water-based or solvent-based options. Read the manufacturer’s instructions and make sure the sealer is compatible with your filler material.
- Clean the surface: Before applying the sealer, ensure that the surface and the gaps are clean and free from any loose debris or excess filler material. Use a broom or brush to remove any residue.
- Apply the sealer: Follow the instructions provided with the sealer for the best application method. It may involve using a brush, roller, or sprayer. Apply the sealer evenly, making sure to cover all the gaps and surrounding areas.
- Allow drying and curing time: Leave the sealer to dry and cure according to the manufacturer’s instructions. This can vary depending on the type of sealer used. Avoid walking or placing any objects on the sealed areas until the sealer is completely dry.
- Inspect and reapply if necessary: Once the sealer has dried, inspect the sealed gaps. If you notice any areas that were missed or require additional coverage, reapply the sealer as needed. This will ensure thorough protection of the gaps.
Sealing the gaps between your patio stones is an optional step, but it can significantly enhance the overall performance and longevity of your filled gaps. It’s especially beneficial in areas with high foot traffic or prone to harsh weather conditions.
With step 6 complete, you have successfully filled the gaps and sealed your patio stones! Your outdoor space is now transformed with a refreshed and visually appealing look. Remember to follow any specific maintenance and reapplication guidelines provided by the sealer manufacturer to maintain the durability and appearance of your patio.
Congratulations on completing this comprehensive guide on filling gaps between patio stones. Enjoy your transformed outdoor space and the many years of beauty and functionality it will provide!
Conclusion
Filling gaps between patio stones is a vital step in maintaining the beauty, safety, and longevity of your outdoor space. By following the step-by-step process outlined in this guide, you can achieve a professional result and enjoy a seamless and visually pleasing patio.
We discussed the importance of filling these gaps, which include safety concerns, preventing weed growth, minimizing erosion, enhancing aesthetics, and deterring pest infestation. By addressing these issues, you create a more enjoyable and functional outdoor environment.
It is crucial to choose the right tools and materials for this project. Consider your specific needs and the size of the gaps when selecting filler materials such as sand, gravel, polymeric sand, or mortar mix. Each option offers different benefits in terms of stability, durability, and weed prevention.
Throughout the process, preparing the patio stones, cleaning the gaps, and applying the filler material require attention to detail. Leveling and smoothing the surface ensure a polished appearance, while sealing the gaps provides an optional layer of protection and longevity.
Remember to follow the instructions provided by the manufacturer of your chosen filler material and sealer for the best results. Regular maintenance, such as sweeping away debris and resealing if necessary, will help maintain the integrity and appearance of your filled gaps over time.
With your newly filled and refreshed patio, you can enjoy countless hours of relaxation and entertaining in an outdoor space that is not only aesthetically pleasing but also safe and functional.
Thank you for using our comprehensive guide on how to fill gaps between patio stones. We hope this information has been valuable and that you are now equipped with the knowledge to complete this project successfully.
Frequently Asked Questions about How To Fill Gaps Between Patio Stones
Was this page helpful?
At Storables.com, we guarantee accurate and reliable information. Our content, validated by Expert Board Contributors, is crafted following stringent Editorial Policies. We're committed to providing you with well-researched, expert-backed insights for all your informational needs.


0 thoughts on “How To Fill Gaps Between Patio Stones”