Home>Renovation & DIY>Home Renovation Guides>How To Fill Gap Between Backsplash And Countertop
Home Renovation Guides
How To Fill Gap Between Backsplash And Countertop
Published: February 8, 2024
Learn how to fill the gap between your backsplash and countertop with our comprehensive home renovation guide. Get expert tips and advice for a seamless finish.
(Many of the links in this article redirect to a specific reviewed product. Your purchase of these products through affiliate links helps to generate commission for Storables.com, at no extra cost. Learn more)
Introduction
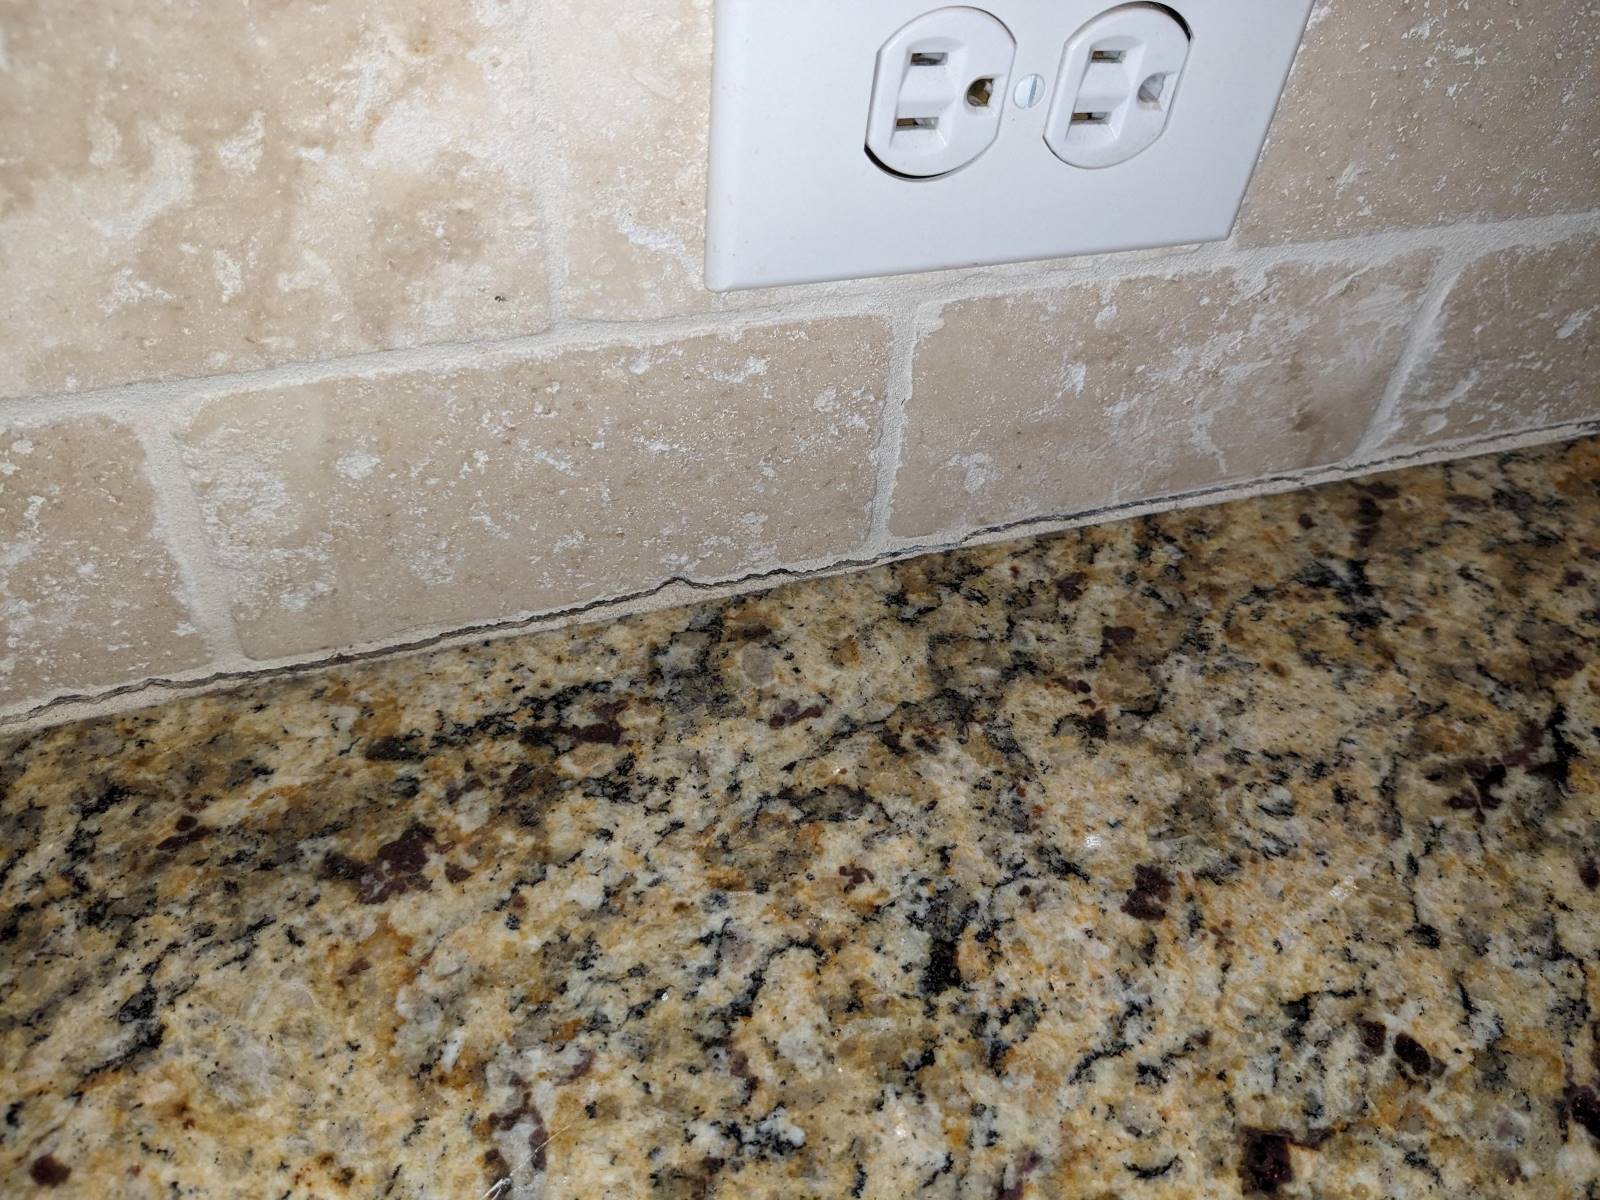
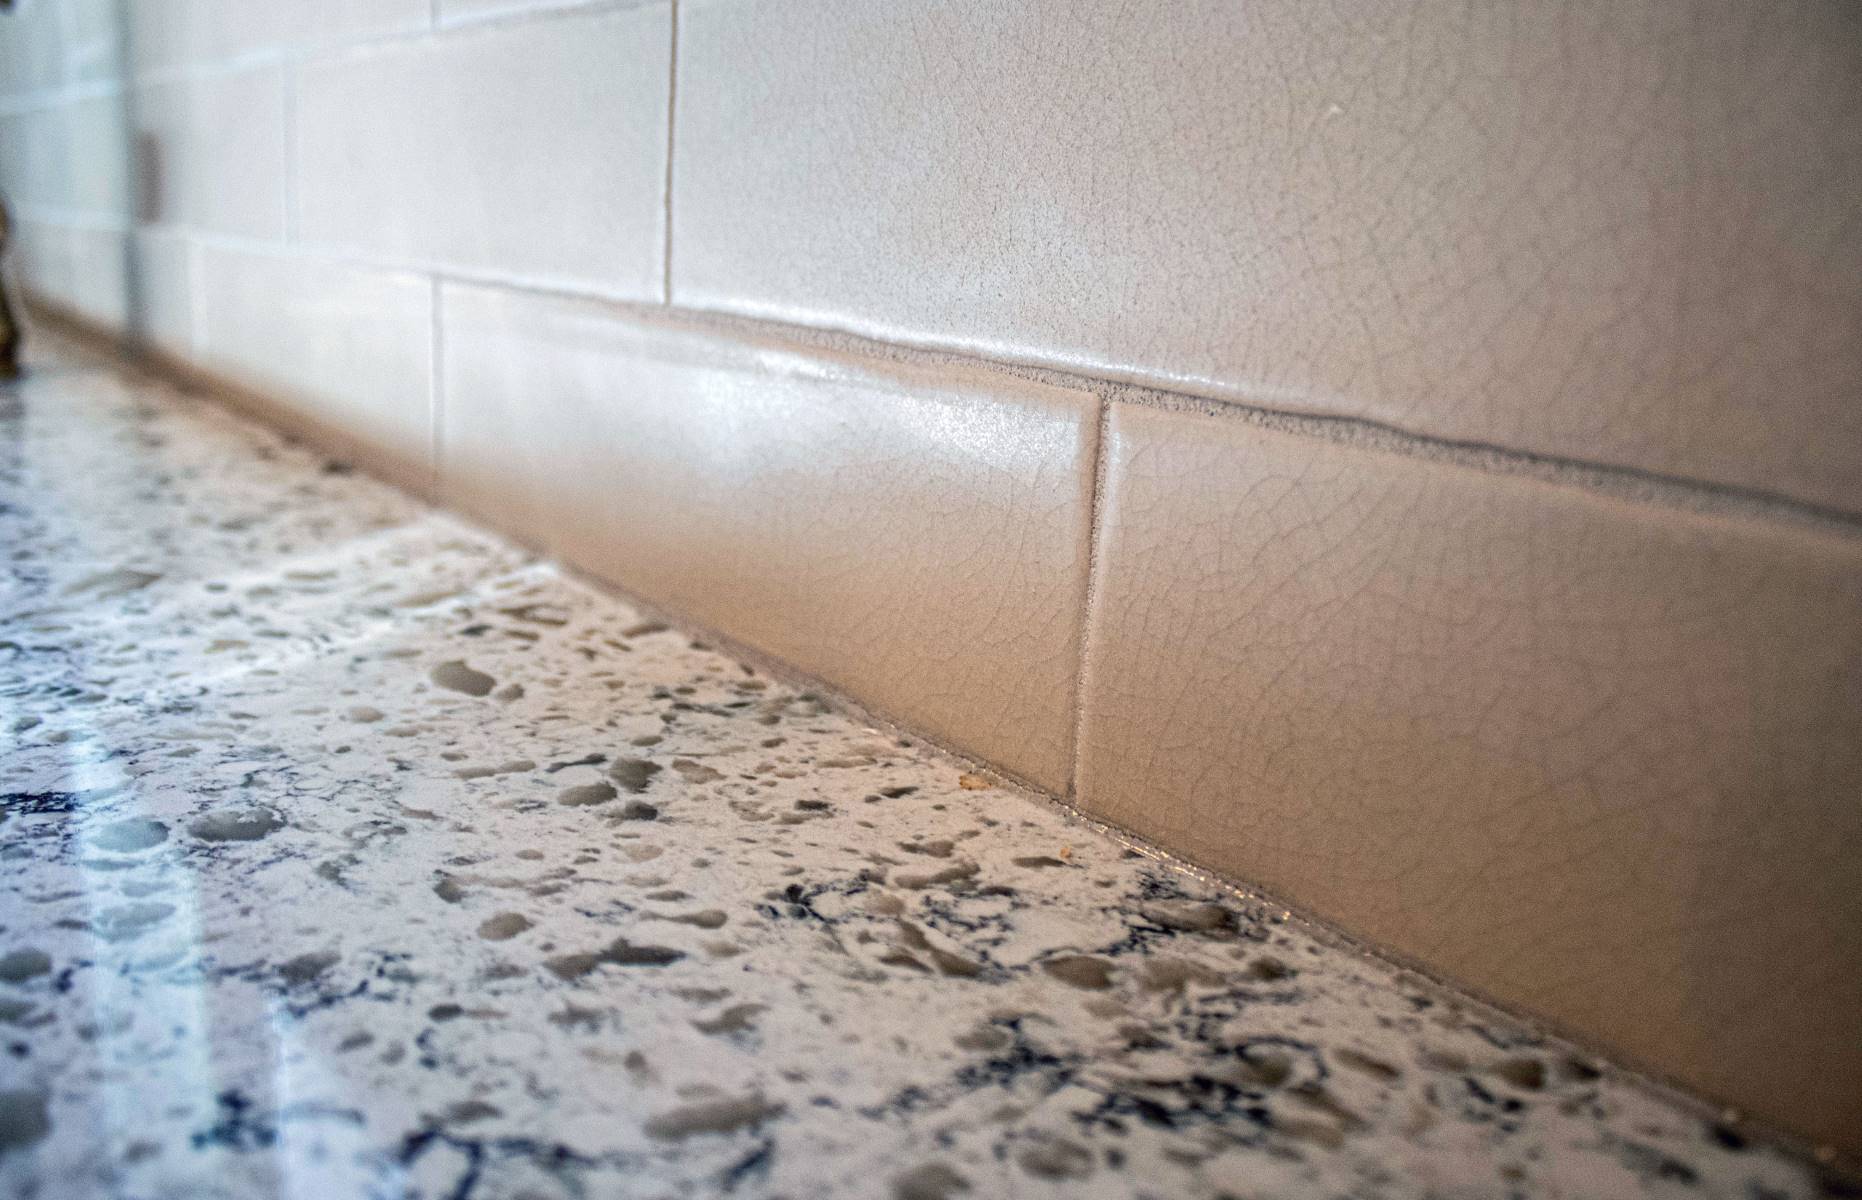
The gap between the backsplash and countertop is a common issue in many kitchens and bathrooms. This space not only detracts from the aesthetic appeal of the room but also creates a haven for dirt, grime, and moisture. Filling this gap is essential not only for a polished look but also for maintaining the cleanliness and integrity of the area.
In this comprehensive guide, we will delve into the process of filling the gap between the backsplash and countertop, providing you with the knowledge and confidence to tackle this task effectively. Whether you are a seasoned DIY enthusiast or a novice homeowner, this step-by-step guide will equip you with the necessary skills to achieve a seamless and professional finish.
By understanding the underlying causes of the gap and learning the techniques to address it, you can transform this potential eyesore into a seamless and visually appealing transition. With the right tools, materials, and know-how, you can elevate the overall look of your kitchen or bathroom while preventing future issues associated with an exposed gap.
So, let's roll up our sleeves and embark on this home improvement journey together. With a bit of patience and attention to detail, you'll soon be admiring a flawlessly integrated backsplash and countertop, enhancing the beauty and functionality of your living space.
Key Takeaways:
- Fill the gap between backsplash and countertop using the right tools and materials, and meticulous application to achieve a seamless and visually appealing integration, enhancing the overall look of your kitchen or bathroom.
- By understanding the causes of the gap, selecting the appropriate filler material, and smoothing and cleaning the surface, you can transform the unsightly gap into a polished and enduring transition, elevating the beauty and functionality of your living space.
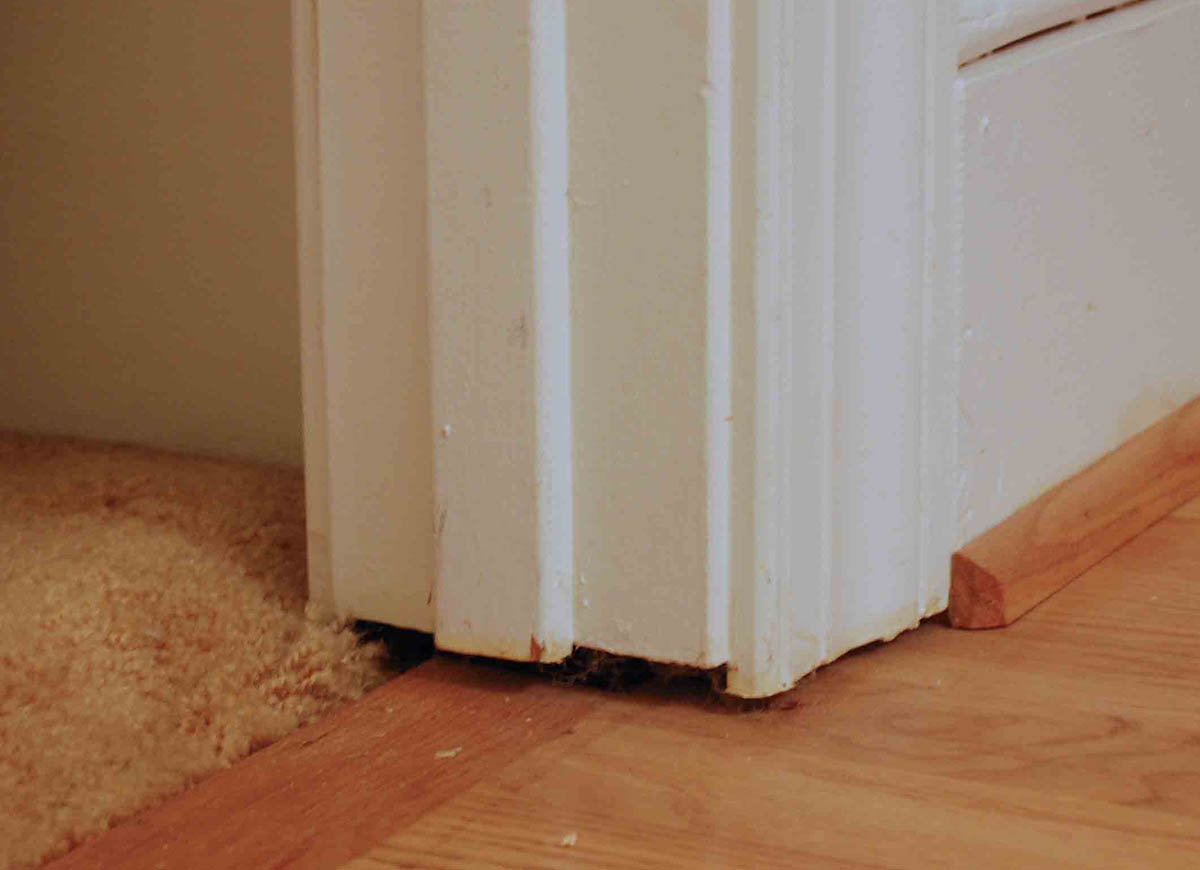
Read more: How To Fill Gap Between Baseboard And Floor
Understanding the Gap Between Backsplash and Countertop
The gap between the backsplash and countertop is a common occurrence in many homes, often resulting from the natural settling of the building or the movement of the countertop and backsplash materials. This space, typically ranging from a few millimeters to half an inch, can be a source of frustration for homeowners, as it not only disrupts the visual continuity of the kitchen or bathroom but also poses practical challenges.
From a visual standpoint, the presence of a gap can create an unfinished and unrefined look, detracting from the overall aesthetic appeal of the space. Additionally, the crevice between the two surfaces can accumulate dirt, grime, and moisture, leading to hygiene concerns and potential damage to the underlying structure. Furthermore, the exposed gap may allow water or food particles to seep behind the countertop, potentially causing damage to the wall or cabinet materials over time.
Understanding the underlying causes of this gap is crucial for effectively addressing the issue. In many cases, the gap is a result of the natural settling of the building, which can cause the countertop and backsplash to move slightly away from each other. Additionally, variations in temperature and humidity can lead to the expansion and contraction of the materials, further exacerbating the gap over time.
By comprehending the factors contributing to the gap, homeowners can approach the task of filling it with a deeper understanding of the underlying issues. This knowledge empowers individuals to not only address the immediate visual concern but also to implement measures that mitigate the potential for future gapping, ensuring a long-lasting and visually pleasing solution.
In the following sections, we will explore the tools and materials needed for this project, as well as the step-by-step process for filling the gap between the backsplash and countertop. With a clear understanding of the gap's origins and implications, you will be well-equipped to tackle this home improvement endeavor with confidence and precision.
Tools and Materials Needed
Filling the gap between the backsplash and countertop requires a set of essential tools and materials to ensure a successful and professional-looking outcome. Before embarking on this project, it's crucial to gather the following items:
Tools:
- Measuring Tape: Accurately measuring the width and depth of the gap is essential for determining the amount of filler material needed.
- Putty Knife: This versatile tool is instrumental for applying and smoothing the filler material along the gap.
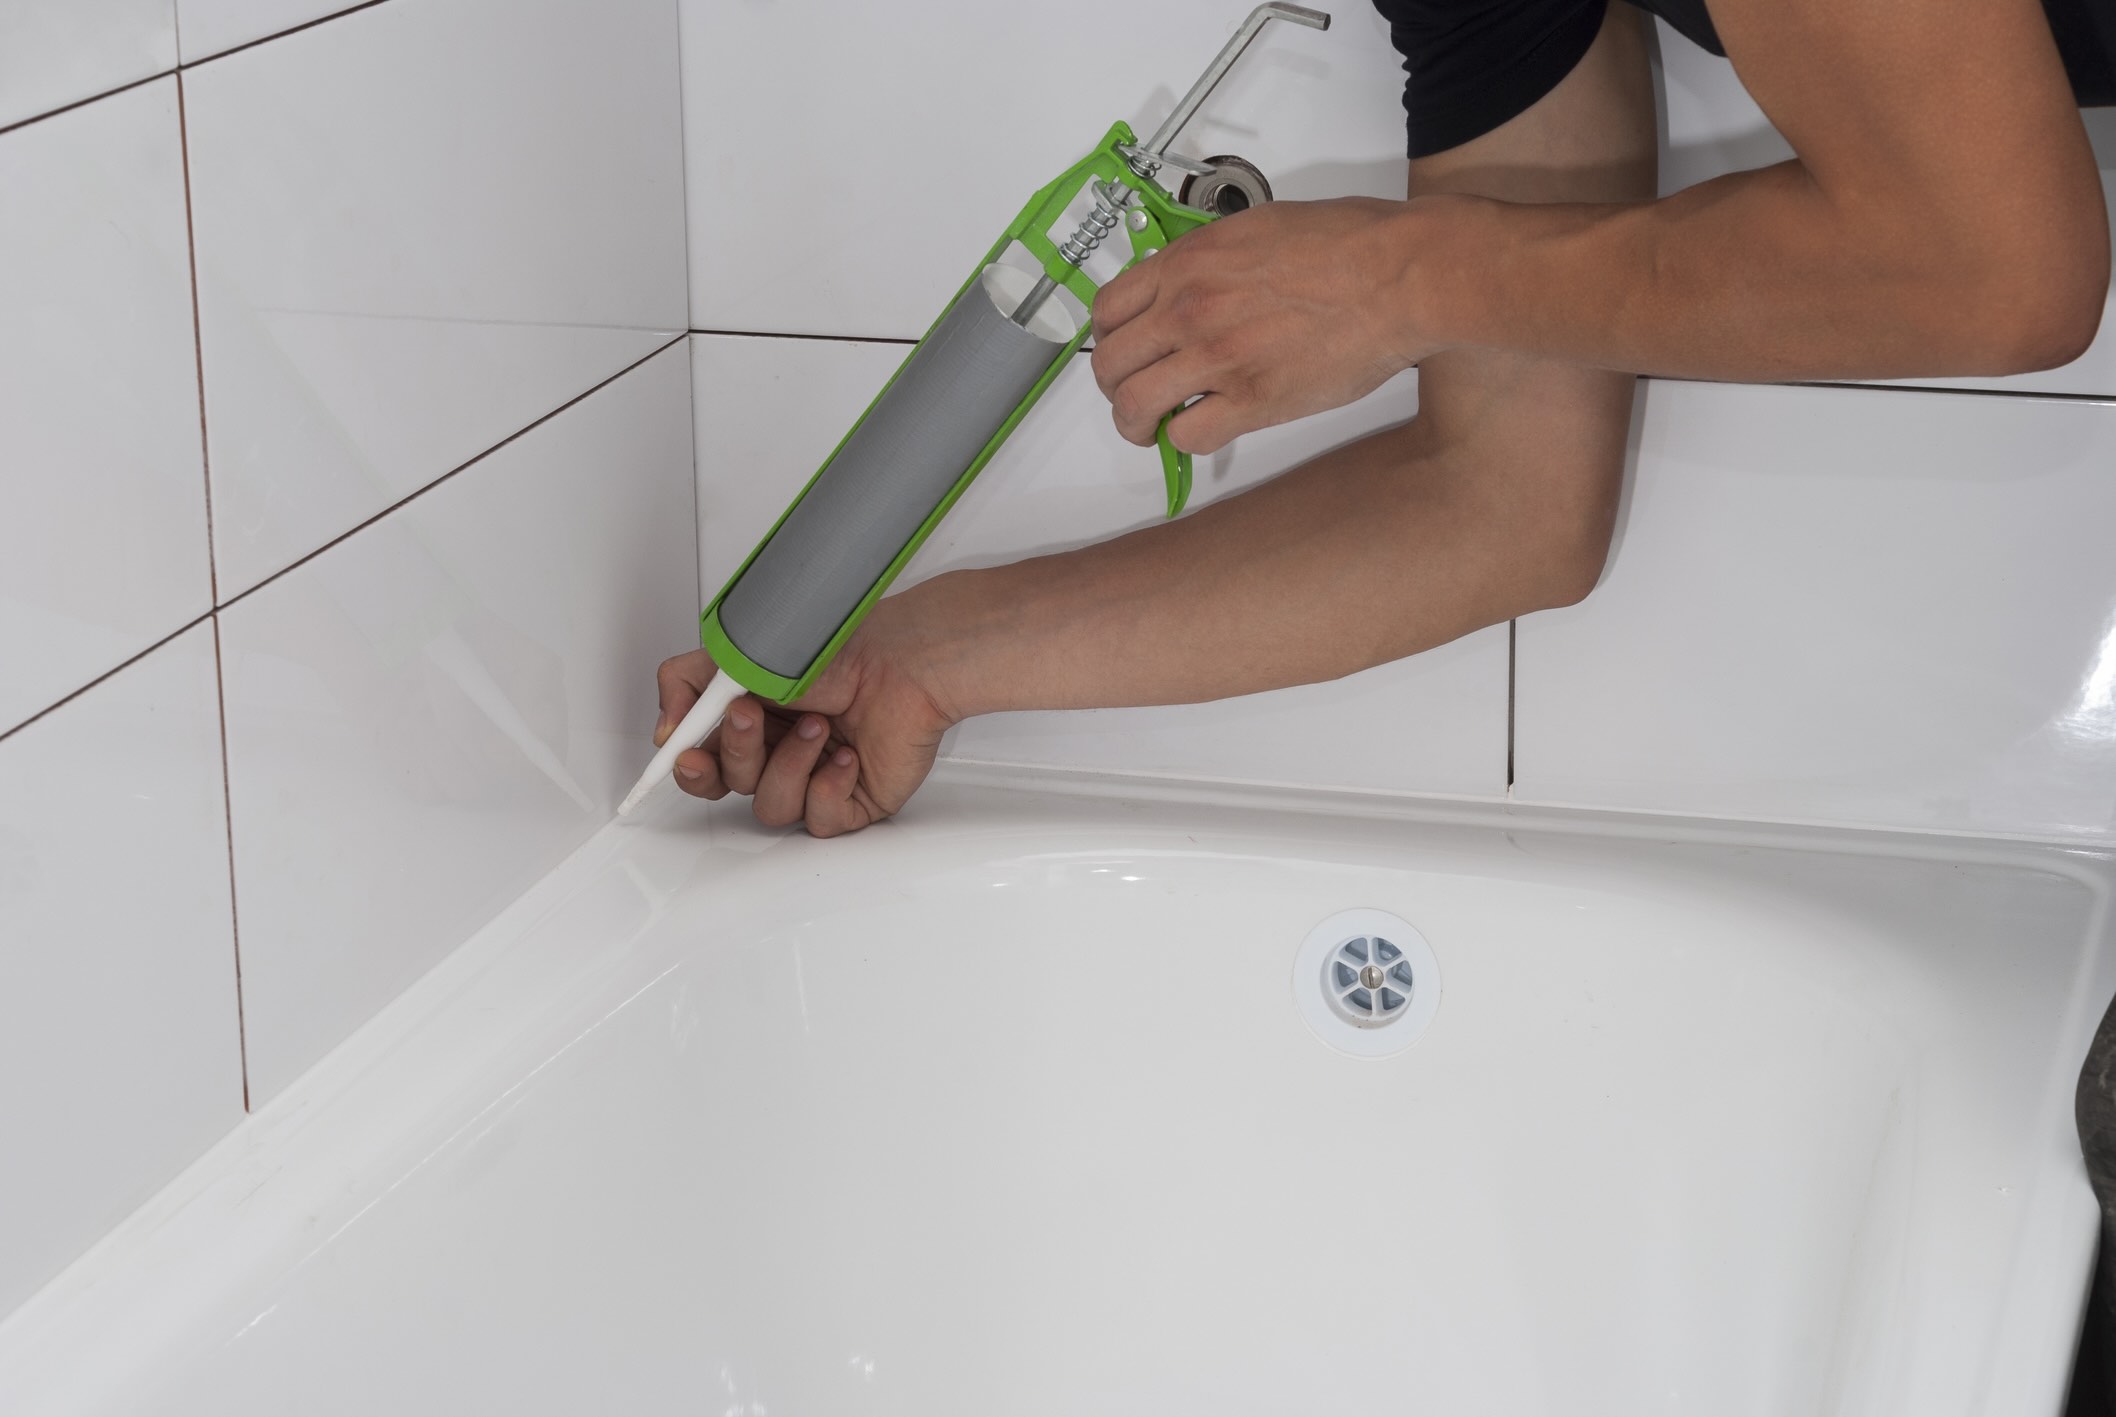
- Caulk Gun: If using a caulking compound, a caulking gun is necessary for precise and controlled application.
- Utility Knife: Useful for cutting and shaping certain filler materials to fit the gap seamlessly.
- Sandpaper: To ensure a smooth and even finish, sandpaper of varying grits will be required for smoothing the applied filler material.
Materials:
- Caulk or Sealant: Depending on the size and nature of the gap, a suitable caulk or sealant should be chosen. Silicone or acrylic-based caulking compounds are commonly used for this purpose.
- Backer Rod (Optional): For larger gaps, a backer rod can be inserted before applying the filler material to provide additional support and prevent excessive use of caulking.
- Wood Filler: If the gap is located in a wooden countertop or backsplash, a wood filler matching the color and texture of the wood is essential for a seamless blend.
- Epoxy Filler: For more substantial gaps or areas prone to moisture exposure, an epoxy-based filler provides durability and resistance to water and heat.
- Painter's Tape: To protect the surrounding surfaces from accidental smudges or spills during the filling process.
By ensuring the availability of these tools and materials, you can approach the task of filling the gap between the backsplash and countertop with confidence and efficiency. Each item plays a crucial role in achieving a professional and visually appealing result, while also contributing to the long-term durability and integrity of the filled area. With these essentials at hand, you are ready to proceed to the next steps of this home improvement endeavor.
Read more: How To Fill Gap Between Wall And Ceiling
Step 1: Measure the Gap
Before embarking on the process of filling the gap between the backsplash and countertop, it is crucial to accurately measure the dimensions of the space. This initial step lays the foundation for a precise and effective filling process, ensuring that the chosen filler material adequately addresses the gap while seamlessly blending with the surrounding surfaces.
To begin, gather a measuring tape and carefully assess the width and depth of the gap. Start by placing one end of the measuring tape at the lowest point of the backsplash where it meets the countertop, and extend it to the corresponding point on the countertop. Record the width measurement, taking note of any variations along the length of the gap.
Next, determine the depth of the gap by measuring from the front edge of the countertop to the point where the backsplash begins. This measurement is crucial for selecting a filler material that can adequately fill the space without protruding or sinking below the surface level.
In cases where the gap exhibits irregularities or variations in width and depth along its length, it is advisable to take multiple measurements at different points and record the maximum width and depth encountered. This comprehensive approach ensures that the chosen filler material can accommodate the most significant dimensions of the gap, resulting in a uniform and seamless fill.
Additionally, it is essential to consider any obstructions or protrusions within the gap, such as electrical outlets or fixtures, which may require special attention during the filling process. By noting these details during the measurement phase, you can anticipate potential challenges and plan for precise application of the filler material around such obstacles.
By meticulously measuring the gap and documenting its dimensions, you establish a solid groundwork for the subsequent steps of selecting and applying the filler material. This attention to detail ensures that the filling process addresses the specific characteristics of the gap, resulting in a visually cohesive and structurally sound integration between the backsplash and countertop. With the measurements in hand, you are now prepared to proceed to the next crucial step of choosing the right filler material to suit the dimensions and characteristics of the gap.
Step 2: Choose the Right Filler Material
Selecting the appropriate filler material is a pivotal decision that significantly influences the visual appeal, durability, and long-term integrity of the filled gap between the backsplash and countertop. The choice of filler material should align with the specific characteristics of the gap, including its dimensions, surrounding materials, and exposure to moisture or heat. By considering these factors, homeowners can make an informed decision that ensures a seamless and enduring solution.
Factors to Consider
1. Size and Depth of the Gap:
The dimensions of the gap play a crucial role in determining the suitable filler material. For smaller, shallow gaps, a flexible caulking compound, such as silicone or acrylic-based sealant, is often the preferred choice. These materials can easily conform to the contours of the gap and provide a visually cohesive transition between the backsplash and countertop. In contrast, larger or deeper gaps may require a more substantial filler material, such as epoxy-based compounds or wood fillers, to effectively bridge the space and provide structural support.
2. Material Compatibility:
The type of material used for the countertop and backsplash influences the selection of the filler material. For instance, in areas with wooden surfaces, a wood filler that matches the color and texture of the wood is essential for achieving a seamless blend. Similarly, in spaces with tile or stone surfaces, a color-matched caulking compound or epoxy filler can ensure a harmonious integration with the surrounding materials.
3. Exposure to Moisture and Heat:
Areas prone to moisture exposure, such as kitchen backsplashes, require filler materials with water-resistant properties to prevent deterioration and mold growth. Silicone-based caulking compounds and epoxy fillers are well-suited for such environments, offering resilience against moisture and heat. Additionally, in proximity to stovetops or ovens, heat-resistant fillers are essential to maintain the integrity of the filled gap under elevated temperatures.
Options for Filler Materials
– Caulking Compounds:
Silicone and acrylic-based caulking compounds are versatile options suitable for filling narrow to moderately sized gaps. These compounds are available in a variety of colors, allowing homeowners to select a shade that seamlessly blends with the surrounding surfaces. Furthermore, their flexibility and water-resistant properties make them ideal for areas exposed to moisture and temperature variations.
– Wood Fillers:
In spaces featuring wooden countertops or backsplashes, wood fillers provide an effective solution for addressing gaps while maintaining the natural aesthetic of the wood. These fillers are available in a range of wood tones, enabling a seamless integration that complements the existing wood surfaces.
– Epoxy Fillers:
For larger or more substantial gaps, epoxy-based fillers offer exceptional durability and resistance to moisture and heat. These fillers provide a robust solution for areas where long-term structural support and resilience to environmental factors are paramount.
By carefully evaluating the size, material compatibility, and environmental conditions of the gap, homeowners can make an informed choice regarding the most suitable filler material. This thoughtful selection sets the stage for a successful filling process, ensuring a visually pleasing and enduring integration between the backsplash and countertop.
Read more: How To Fill A Gap Between Vanity And Wall
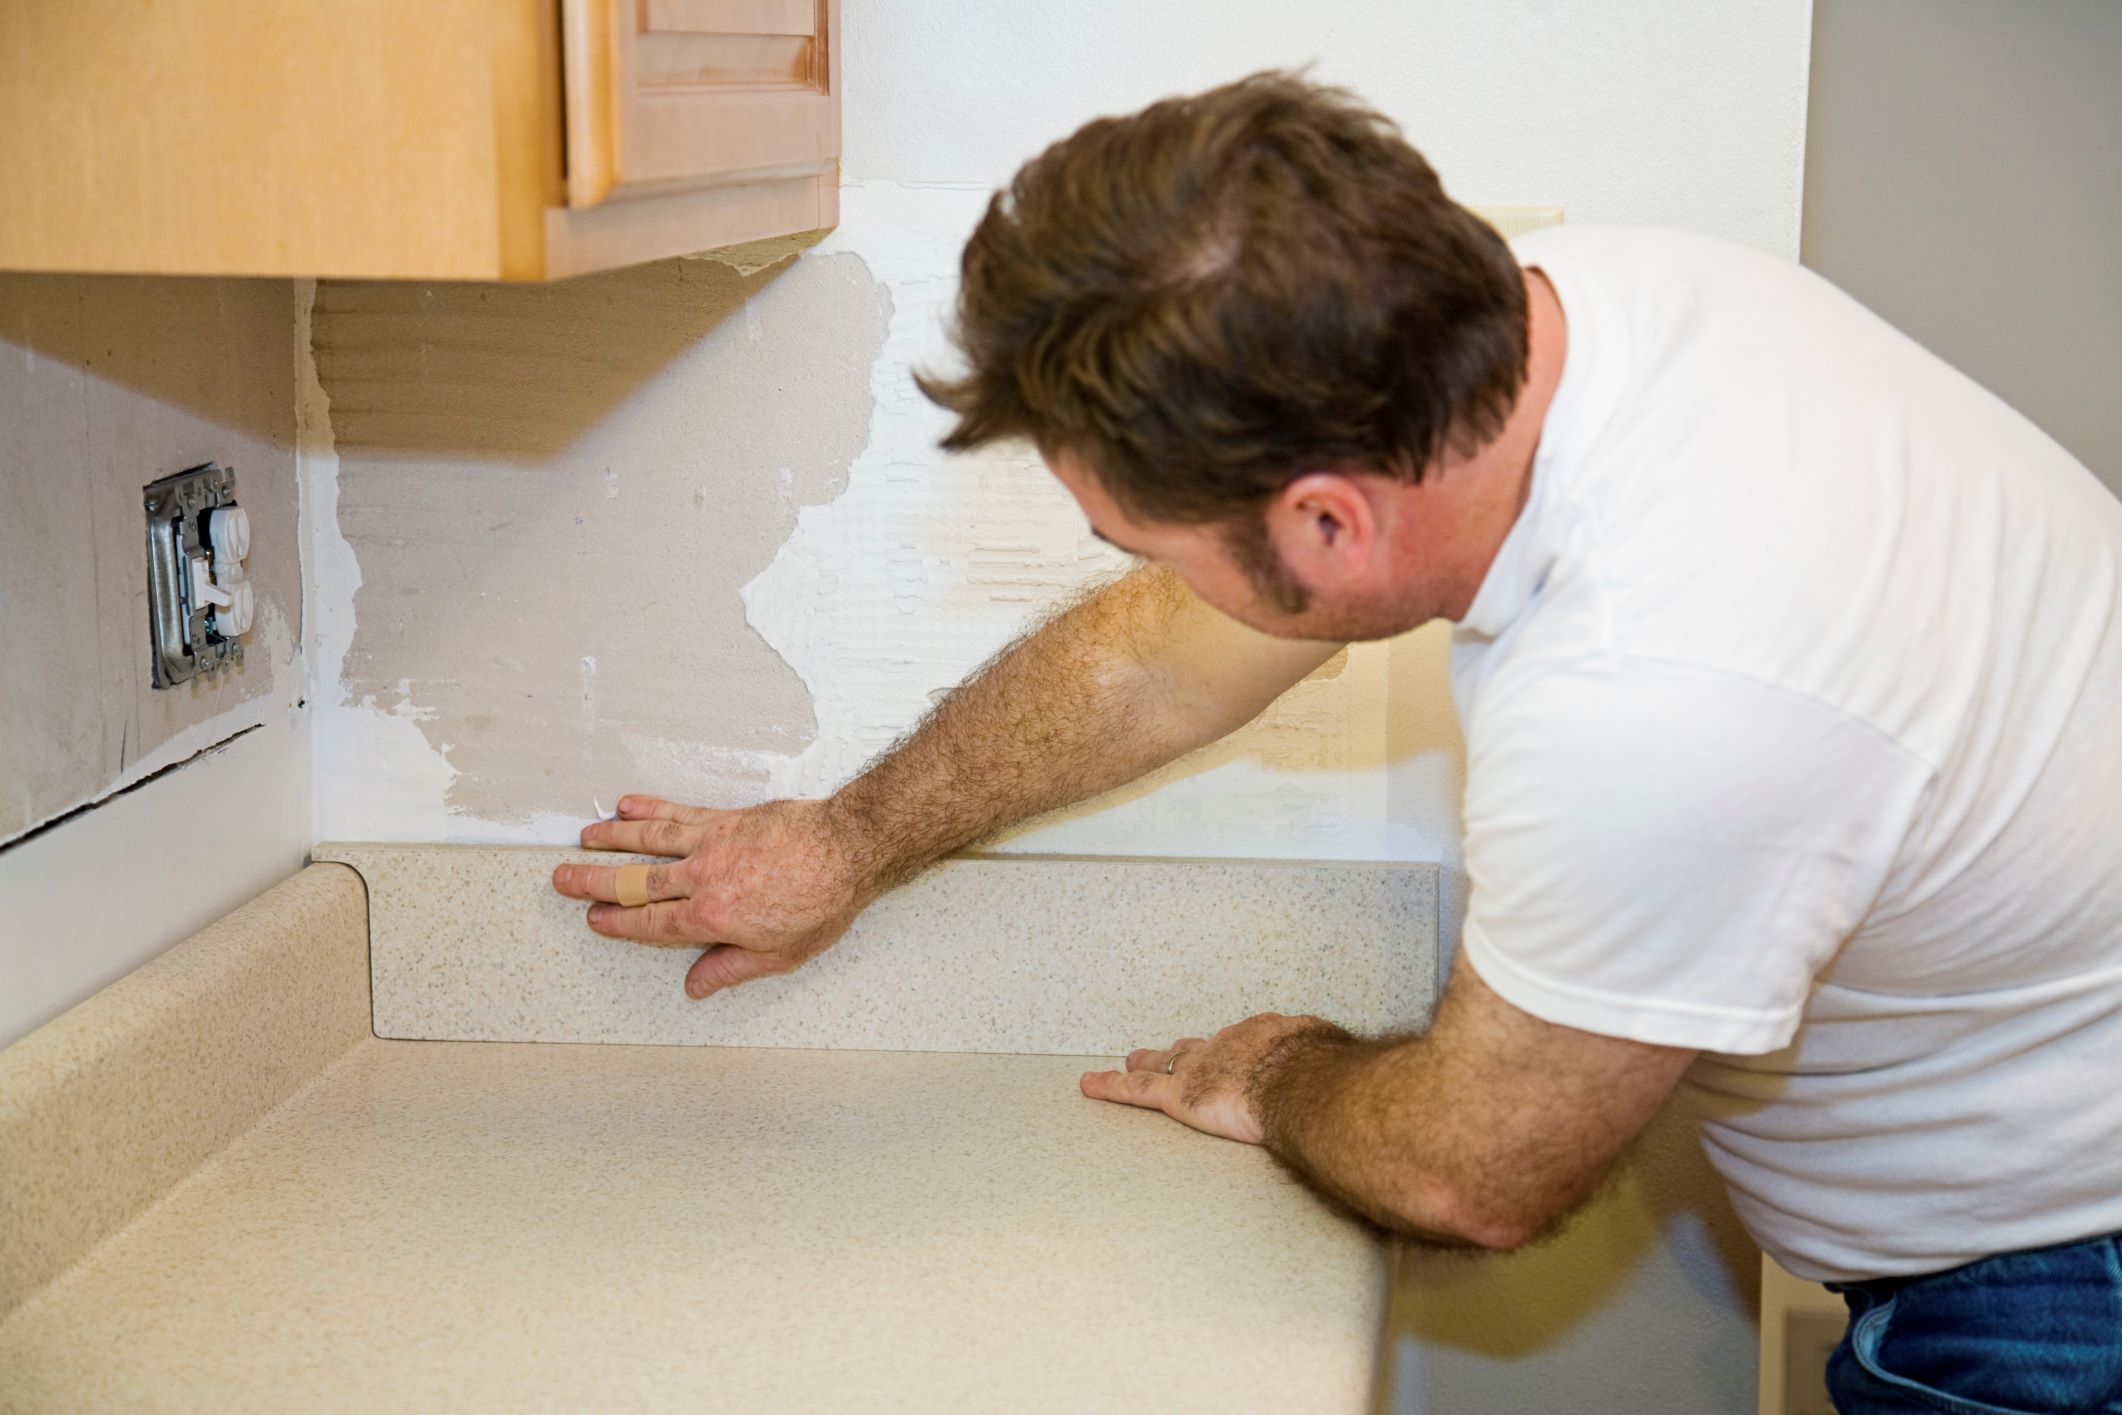
Step 3: Apply the Filler Material
With the precise measurements taken and the appropriate filler material selected, the next step involves the meticulous application of the chosen filler to seamlessly bridge the gap between the backsplash and countertop. The application process demands attention to detail and a methodical approach to ensure a professional and visually cohesive result.
Preparing the Gap:
Before applying the filler material, it is essential to prepare the gap to promote optimal adhesion and a seamless finish. Begin by thoroughly cleaning the gap to remove any dust, debris, or residues that may hinder the bonding of the filler. A clean, dry surface provides the ideal foundation for the filler material to adhere effectively and maintain its integrity over time.
Applying the Filler:
The method of applying the filler material varies depending on the chosen product and the characteristics of the gap. For flexible caulking compounds, such as silicone or acrylic-based sealants, a caulking gun is used to dispense the material evenly along the gap. Careful and steady application is crucial to achieve a uniform fill without air gaps or excess buildup.
In the case of wood fillers, the material is carefully pressed into the gap using a putty knife, ensuring that it conforms to the contours of the space while maintaining a flush surface with the surrounding wood. Epoxy-based fillers, designed for larger or deeper gaps, are typically mixed according to the manufacturer's instructions and meticulously applied to the prepared gap using a putty knife or trowel.
Smoothing and Shaping:
Once the filler material is applied, the next step involves smoothing and shaping the filled gap to achieve a seamless integration with the surrounding surfaces. A putty knife or a specialized tool provided with the filler product is used to level the material and create a uniform surface that aligns with the contours of the backsplash and countertop. Careful attention is given to achieving a smooth and even finish that blends seamlessly with the adjacent materials.
Read more: How To Fill Gaps Between Patio Stones
Removing Excess Filler:
After the filler material is smoothed and shaped, any excess material is carefully removed to ensure a clean and polished appearance. A utility knife or a specialized tool, depending on the filler type, is employed to trim any protruding or uneven sections, resulting in a refined and visually appealing transition between the backsplash and countertop.
By meticulously following the steps for applying the filler material, homeowners can achieve a flawlessly integrated and visually cohesive result that enhances the overall aesthetic appeal of the kitchen or bathroom. This meticulous application process sets the stage for the final step of smoothing and cleaning the surface, bringing the project to its completion with a polished and professional finish.
Step 4: Smooth and Clean the Surface
After the filler material has been meticulously applied to bridge the gap between the backsplash and countertop, the final step involves the critical tasks of smoothing and cleaning the surface. This pivotal phase is essential for achieving a seamless and visually appealing integration while ensuring the longevity and durability of the filled area.
Smoothing the Filled Gap
To achieve a polished and uniform finish, the filled gap is carefully smoothed to align with the contours of the surrounding surfaces. Depending on the type of filler material used, a putty knife, trowel, or specialized smoothing tool provided with the product is employed to level the material and create a seamless transition. The goal is to achieve a flush and even surface that seamlessly blends with the backsplash and countertop, eliminating any visible irregularities or excess material.
Careful attention is given to the edges and corners of the filled area, ensuring that the transition between the filler and the adjacent surfaces is imperceptible to the eye and touch. By employing precise and methodical smoothing techniques, homeowners can achieve a professional and visually cohesive result that enhances the overall aesthetic appeal of the space.
Cleaning and Final Inspection
Once the filled gap has been smoothed to perfection, the next step involves thorough cleaning to remove any residual debris, dust, or smudges resulting from the filling process. A damp cloth or sponge is used to gently wipe the filled area, ensuring that it is free from any lingering particles or marks. This meticulous cleaning not only enhances the visual appeal of the filled gap but also contributes to the overall cleanliness and hygiene of the kitchen or bathroom.
After the cleaning process, a final inspection is conducted to assess the quality and integrity of the filled area. Any remaining imperfections or inconsistencies are addressed, ensuring that the surface is flawless and seamlessly integrated with the surrounding backsplash and countertop. This meticulous attention to detail guarantees a professional and visually pleasing result that elevates the overall aesthetic of the space.
By completing the final steps of smoothing and cleaning the surface with precision and care, homeowners can admire a flawlessly integrated backsplash and countertop, free from the unsightly gap that once marred the visual continuity of the space. This transformative process not only enhances the aesthetic appeal of the kitchen or bathroom but also contributes to the cleanliness, durability, and long-term integrity of the filled area.
Conclusion
Filling the gap between the backsplash and countertop is a transformative endeavor that goes beyond mere visual enhancement. By embarking on this home improvement journey, homeowners not only achieve a seamless and polished integration but also address practical concerns related to cleanliness, hygiene, and structural integrity. This comprehensive guide has equipped you with the knowledge and skills to tackle this task with confidence and precision, ensuring a professional and enduring result.
Through meticulous measurement, thoughtful material selection, and methodical application, the once-unsightly gap has been transformed into a seamless transition that harmoniously blends the backsplash and countertop. The careful consideration of factors such as gap dimensions, material compatibility, and environmental exposure has led to the selection of the most suitable filler material, ensuring a visually cohesive and durable integration.
The meticulous application process, from preparing the gap to smoothing and cleaning the surface, has resulted in a flawlessly integrated area that enhances the overall aesthetic appeal of the kitchen or bathroom. The attention to detail and the commitment to achieving a polished finish have not only addressed the immediate visual concern but also contributed to the cleanliness, durability, and long-term resilience of the filled gap.
As you stand back and admire the seamless transition between the backsplash and countertop, take pride in the transformation you have accomplished. The once-noticeable gap has given way to a visually cohesive and structurally sound integration, elevating the overall look and feel of the space. Moreover, the measures taken to address the underlying causes of the gap have contributed to the long-term maintenance and integrity of the filled area.
In closing, this home improvement endeavor serves as a testament to the transformative power of attention to detail and thoughtful execution. By applying the knowledge and techniques outlined in this guide, you have not only filled a physical gap but have also bridged the divide between visual refinement and practical functionality. As you revel in the seamless integration between the backsplash and countertop, may this accomplishment inspire further pursuits of home enhancement and serve as a reminder of the remarkable impact of meticulous attention to detail.
Frequently Asked Questions about How To Fill Gap Between Backsplash And Countertop
Was this page helpful?
At Storables.com, we guarantee accurate and reliable information. Our content, validated by Expert Board Contributors, is crafted following stringent Editorial Policies. We're committed to providing you with well-researched, expert-backed insights for all your informational needs.


0 thoughts on “How To Fill Gap Between Backsplash And Countertop”