Articles
How To Fix A Chimney
Modified: October 20, 2024
Learn how to fix a chimney with our informative articles. From troubleshooting common issues to step-by-step repair guides, we've got you covered.
(Many of the links in this article redirect to a specific reviewed product. Your purchase of these products through affiliate links helps to generate commission for Storables.com, at no extra cost. Learn more)
Introduction
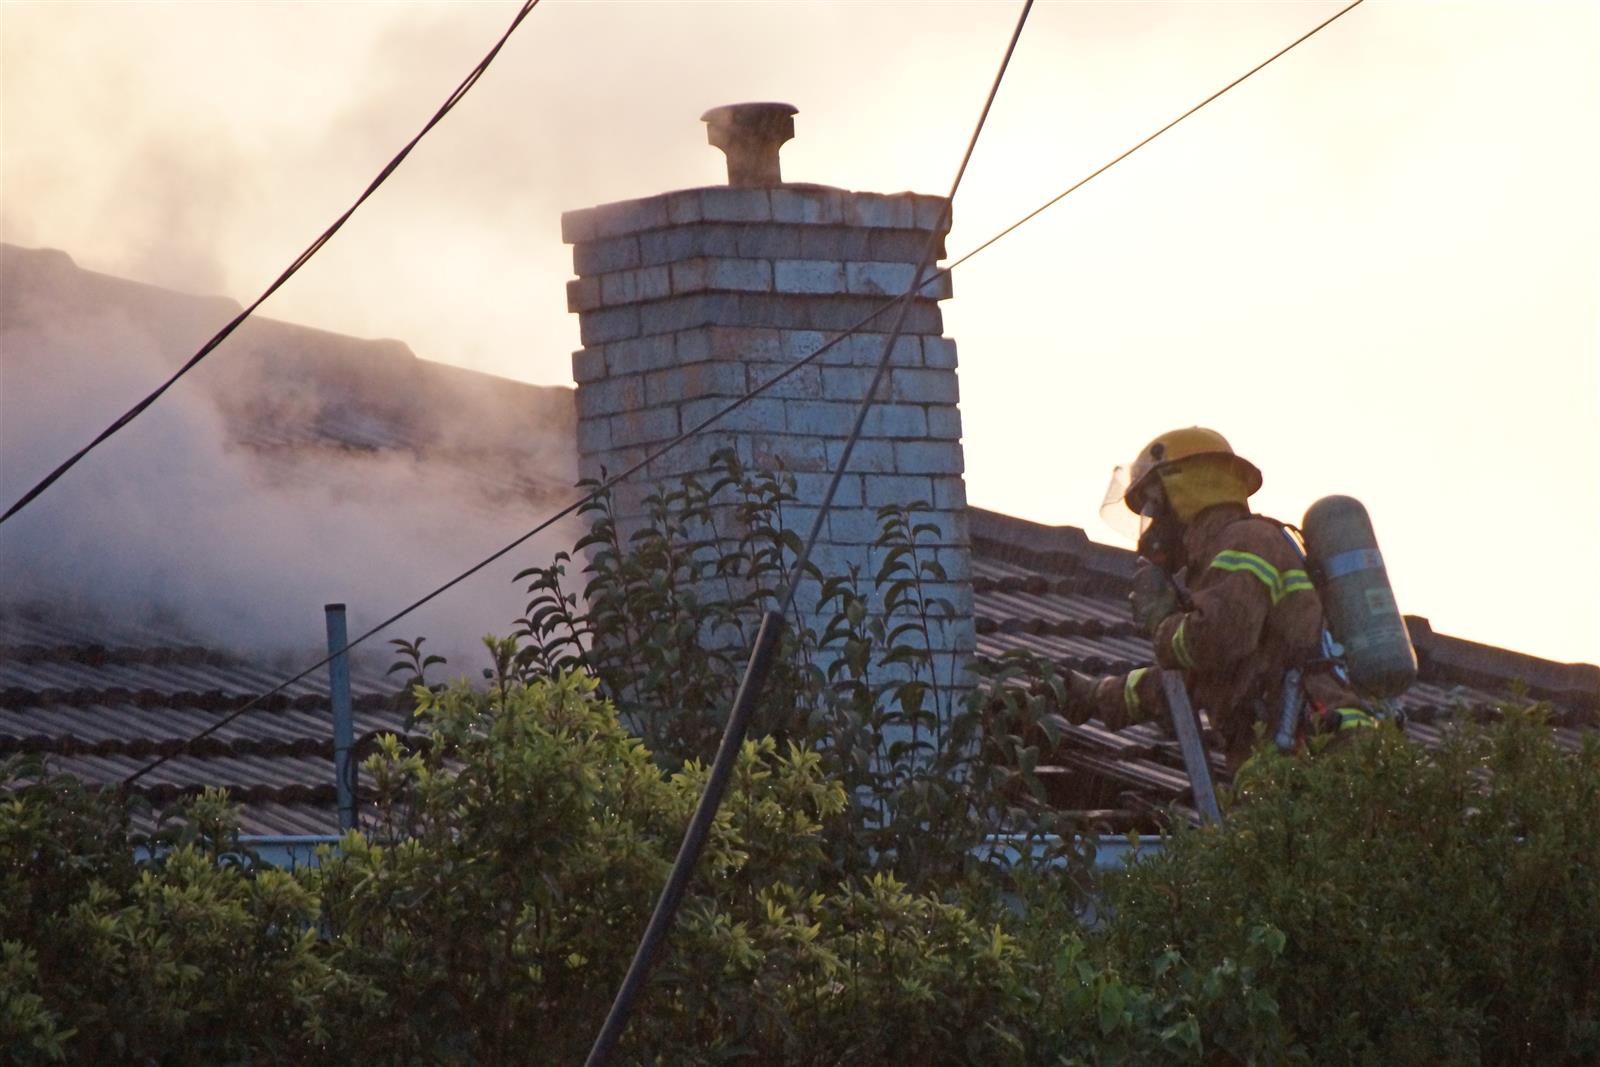
A chimney is an essential component of any home that has a fireplace or a wood-burning stove. It plays a crucial role in venting out smoke, gases, and other combustion byproducts safely. However, over time, chimneys can develop issues that require attention and repair. Ignoring these issues can lead to serious problems, including chimney fires, carbon monoxide leaks, and structural damage to your home.
In this article, we will discuss common chimney issues and provide you with a step-by-step guide on how to fix them. Whether you’re dealing with cracked bricks, leaking flashing, or chimney drafts, we’ll equip you with the knowledge and tools necessary to tackle these problems and restore your chimney’s functionality and safety.
Key Takeaways:
- Proper chimney maintenance is essential for safety and efficiency. From inspecting for cracks to cleaning and repairing, taking proactive steps can prevent hazards like chimney fires and carbon monoxide leaks.
- Addressing common chimney issues, such as drafts and leaking flashing, requires thorough inspection and careful repairs. Safety should always be a priority, and consulting a professional for complex issues is highly recommended.
Read more: How To Fix Chimney Pulling Away From House
Common Chimney Issues
Before we dive into the solutions, it’s important to familiarize yourself with common chimney issues that homeowners often encounter. By understanding these issues, you’ll be better equipped to diagnose problems and implement appropriate fixes.
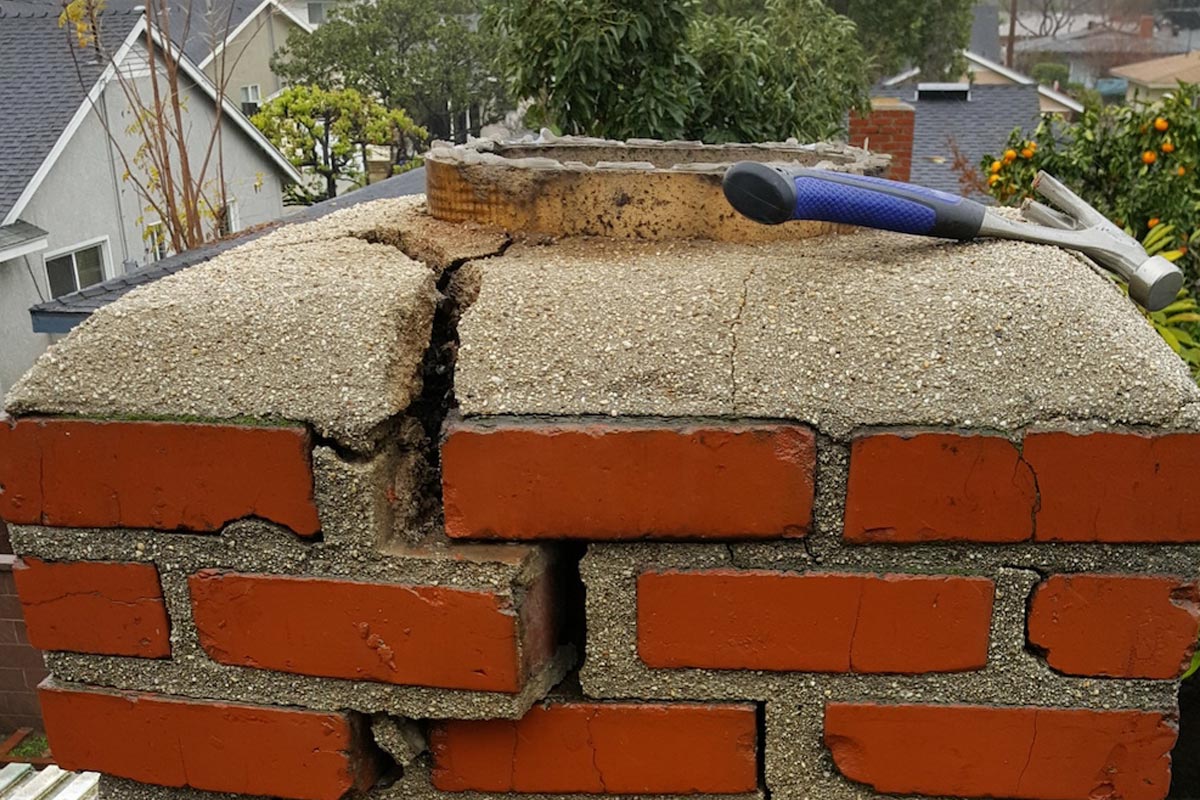
- Cracked Bricks or Mortar: Over time, bricks and mortar joints can deteriorate due to exposure to heat, moisture, and freeze-thaw cycles. Cracked bricks or mortar joints can lead to water penetration, which can cause further damage and compromise the structural integrity of the chimney.
- Damaged Chimney Caps or Crown: The chimney cap and crown serve as a protective barrier against water intrusion, debris, and animals. A damaged or missing chimney cap or crown can allow water to enter the chimney, leading to leaks and deterioration.
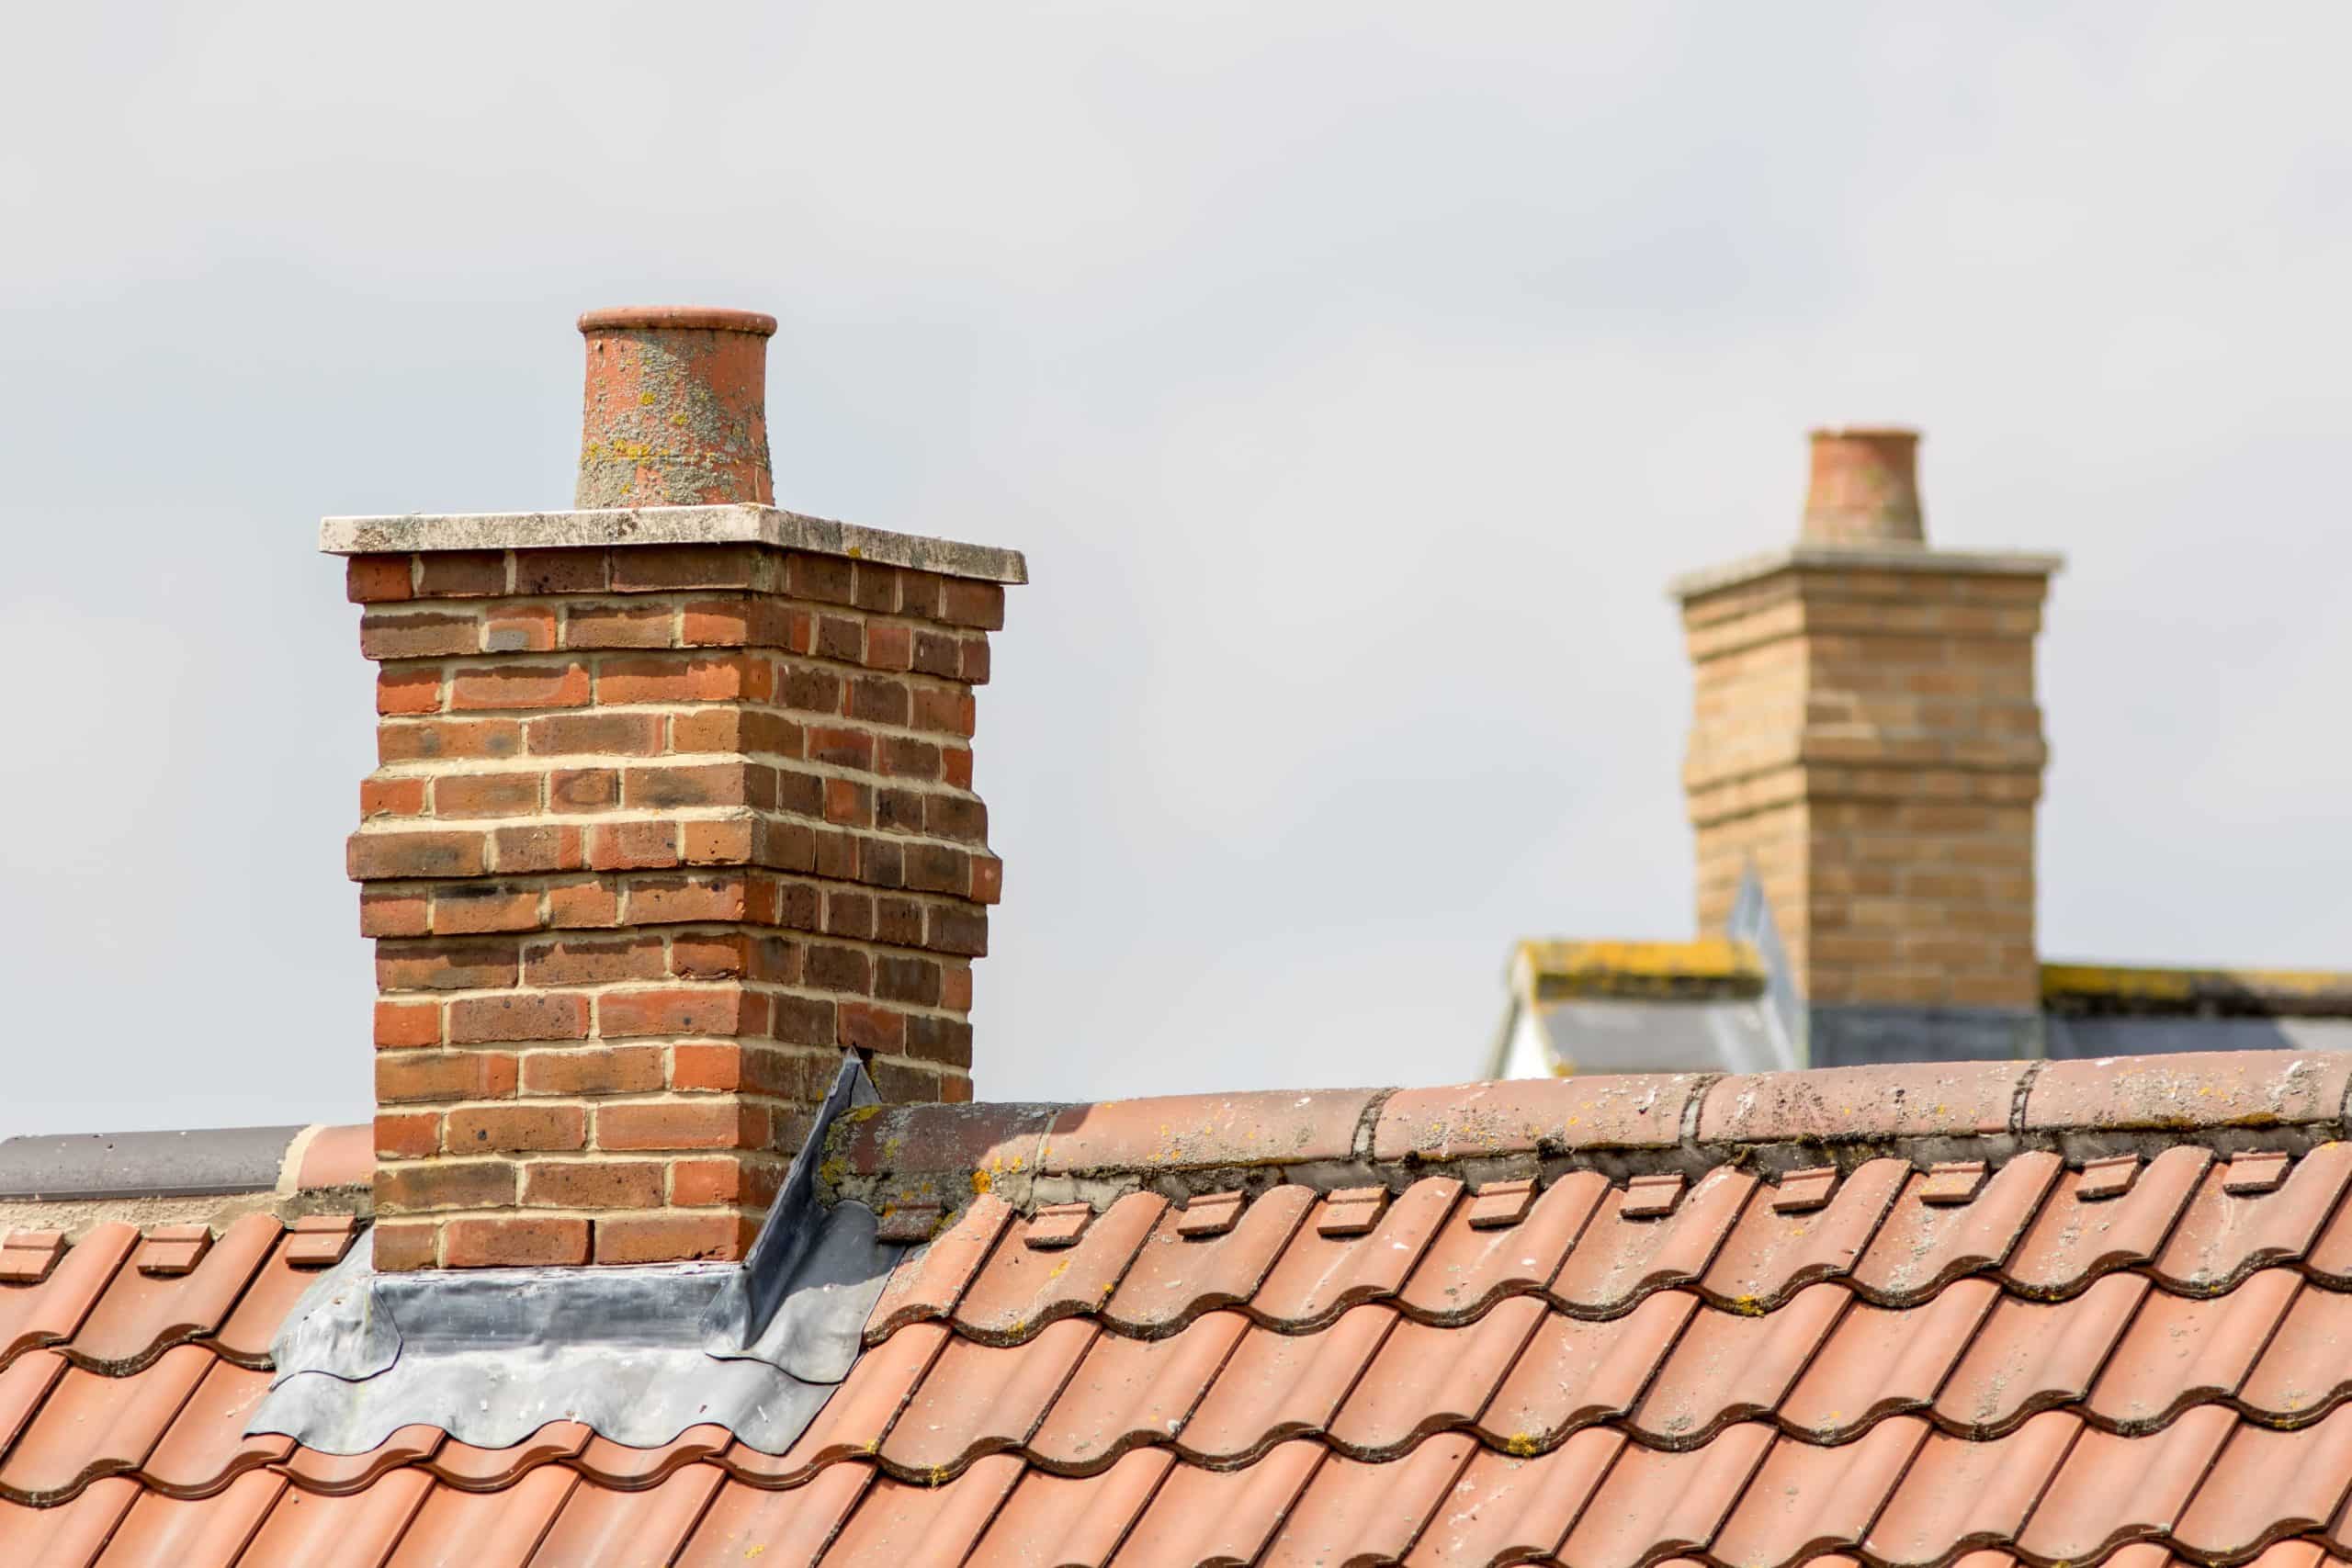
- Leaking Chimney Flashing: Flashing is the metal barrier that prevents water from seeping into the intersection between the chimney and the roof. If the flashing is damaged or improperly installed, it can allow water to penetrate, causing leaks and water damage.
- Chimney Drafts: Chimney drafts occur when there is an imbalance between the air inside and outside the chimney. This can cause smoke to enter the home or hinder proper ventilation. Draft issues can stem from a variety of factors, including chimney height, flue size, and air pressure differentials.
- Chimney Rain Cap: A rain cap is a chimney component designed to prevent rain, debris, and animals from entering the chimney. If the rain cap is damaged or missing, it can lead to water penetration and potential blockages.
- Chimney Gaps and Cracks: Gaps and cracks can develop in the chimney masonry or between the chimney and the roofline. These openings can allow water and pests to enter the chimney and cause further damage.
- Lack of Regular Maintenance: Many chimney issues can be prevented with regular maintenance. Failure to schedule regular chimney inspections and cleanings can result in a buildup of creosote, soot, and debris, increasing the risk of chimney fires and reducing the chimney’s efficiency.
Now that you’re informed about the common chimney issues, let’s move on to the step-by-step process of fixing them.
Tools and Materials Needed
Before you begin fixing your chimney, it’s important to gather the necessary tools and materials. Having these items on hand will save you time and ensure that you can complete the repairs efficiently.
Tools:
- Safety goggles and gloves
- Ladder or scaffolding
- Trowel or chisel
- Masonry brush or wire brush
- Hammer
- Level
- Caulking gun
- Chimney repair mix
- Flashing repair tape
- Chimney rain cap
- Weatherproof sealant
Materials:
- Masonry repair mortar or caulk
- Chimney flashing
- Chimney cap or crown replacement
- Flue liner
- Firebrick replacement
- Creosote cleaner
Ensure that you have all the necessary tools and materials before beginning any chimney repair project. This will ensure you complete the repairs without interruption, helping you fix your chimney effectively.
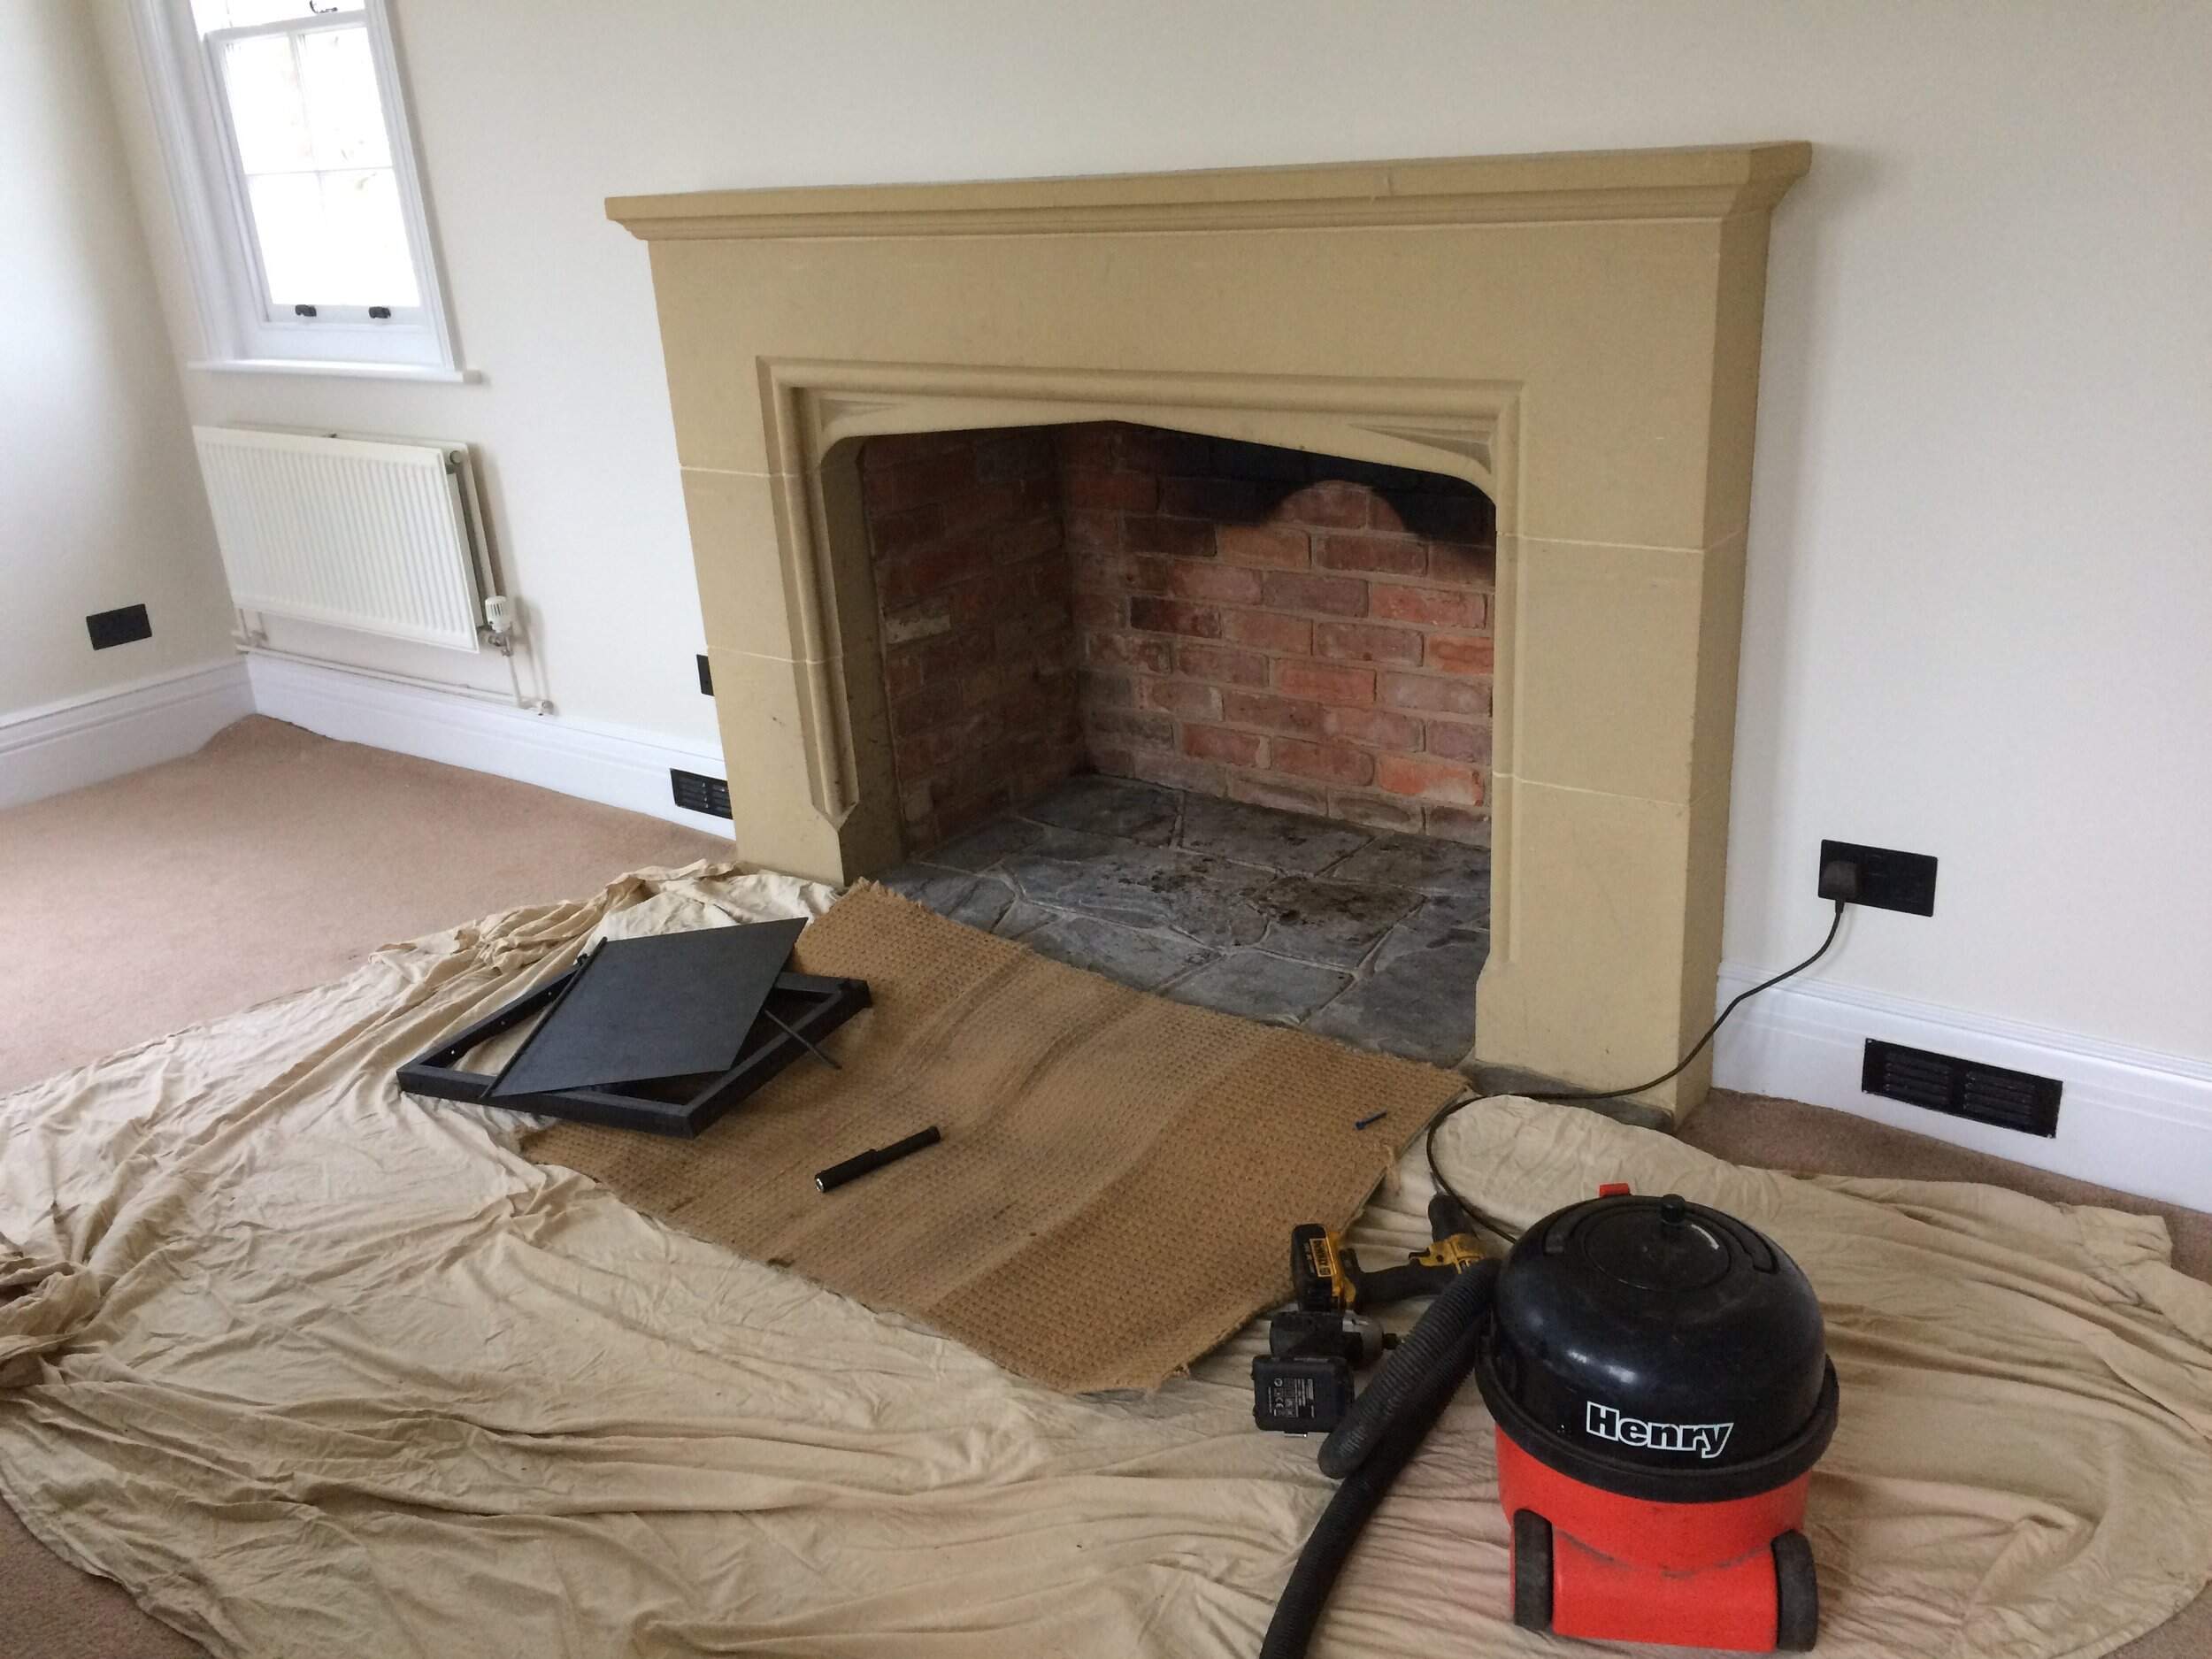
Step 1: Inspect the Chimney
The first step in fixing your chimney is to conduct a thorough inspection. This will help you identify any visible issues and determine the extent of the repairs needed. Here’s how you can inspect your chimney:
- First, ensure your safety by wearing protective goggles and gloves. If your chimney requires accessing the roof, make sure to use a stable ladder or scaffolding.
- Examine the exterior of the chimney for any visible cracks, damaged bricks or mortar, and signs of water damage. Pay attention to the chimney cap, flashing, and crown as well.
- Check the interior of the chimney for signs of creosote buildup. Creosote is a highly flammable substance that can accumulate over time and increase the risk of chimney fires. If you notice a thick layer of creosote, it’s important to schedule a professional chimney cleaning.
- Inspect the chimney damper to ensure it’s functioning correctly. The damper helps control airflow and prevents drafts when the fireplace is not in use.
- Check for any signs of pests or animal nests inside the chimney. Blockages caused by animals can hinder proper ventilation and increase the risk of carbon monoxide buildup.
By thoroughly inspecting your chimney, you’ll have a clear understanding of the repairs required and can proceed with confidence. If you’re unsure about any issues you encounter during the inspection, it’s always recommended to consult a professional chimney contractor for further evaluation.
Step 2: Clean the Chimney
Proper chimney cleaning is vital to maintain its efficiency and prevent potential hazards. Before you proceed with any repairs, it’s essential to thoroughly clean the chimney. Here’s a step-by-step guide on how to clean your chimney:
- Start by placing a drop cloth or tarp around the fireplace or wood-burning stove to protect your flooring from any debris or soot that may fall during the cleaning process.
- Wear protective goggles and gloves to prevent any contact with soot or harmful chemicals.
- Use a chimney brush or wire brush to sweep the chimney flue. Start from the bottom and work your way up, ensuring that the brush reaches all areas of the flue. Be gentle to avoid damaging the chimney liner or flue.
- If necessary, use a creosote cleaner or chimney sweeping log to remove stubborn creosote buildup. Follow the instructions provided by the manufacturer carefully.
- After sweeping, use a vacuum cleaner with a HEPA filter to clean up any loose soot or debris that may have fallen into the fireplace or stove.
- Inspect the chimney cap and clean it if necessary. Remove any debris, leaves, or animal nests that may be blocking the cap’s functionality.
- Clean the fireplace or stove, removing ashes and soot buildup. Dispose of the ashes properly.
Regular chimney cleaning is recommended at least once a year, depending on your usage and the type of fuel you burn. It’s also important to hire a professional chimney sweep periodically for a more thorough cleaning and inspection.
Once you have completed the cleaning process, you can proceed with any necessary repairs to ensure your chimney operates safely and efficiently.
Step 3: Repair Cracked Bricks or Mortar
If you notice cracked bricks or deteriorating mortar joints during your chimney inspection, it’s crucial to repair them promptly. Here’s a step-by-step guide on how to fix cracked bricks or mortar:
- Start by removing any loose bricks or mortar using a hammer and chisel. Be careful not to damage surrounding bricks or mortar.
- Use a wire brush to clean the area thoroughly, removing any debris, dust, or loose particles.
- Mix a batch of mortar according to the manufacturer’s instructions. If you’re unsure about the mortar mix, consult with a professional or a local home improvement store.
- Dampen the area to be repaired with water. This will help the new mortar adhere better.
- Apply the mortar mixture using a trowel, filling in the cracks or gaps between the bricks or mortar joints. Use the trowel to smooth and level the mortar surface.
- Allow the mortar to dry completely. This can take a few hours or even days, depending on the weather conditions and type of mortar used. Follow the drying time recommendations provided by the manufacturer.
- Once the mortar has dried, inspect the repaired area for any remaining imperfections. If needed, use a wire brush or sandpaper to smooth out any rough edges.
Remember, if you’re dealing with extensive brick or mortar damage or if you’re unsure about the repair process, it’s best to consult a professional chimney contractor. They have the expertise and proper tools to handle more complex repairs.
By addressing cracked bricks or mortar, you’ll prevent further water penetration and structural damage, ensuring the integrity and longevity of your chimney.
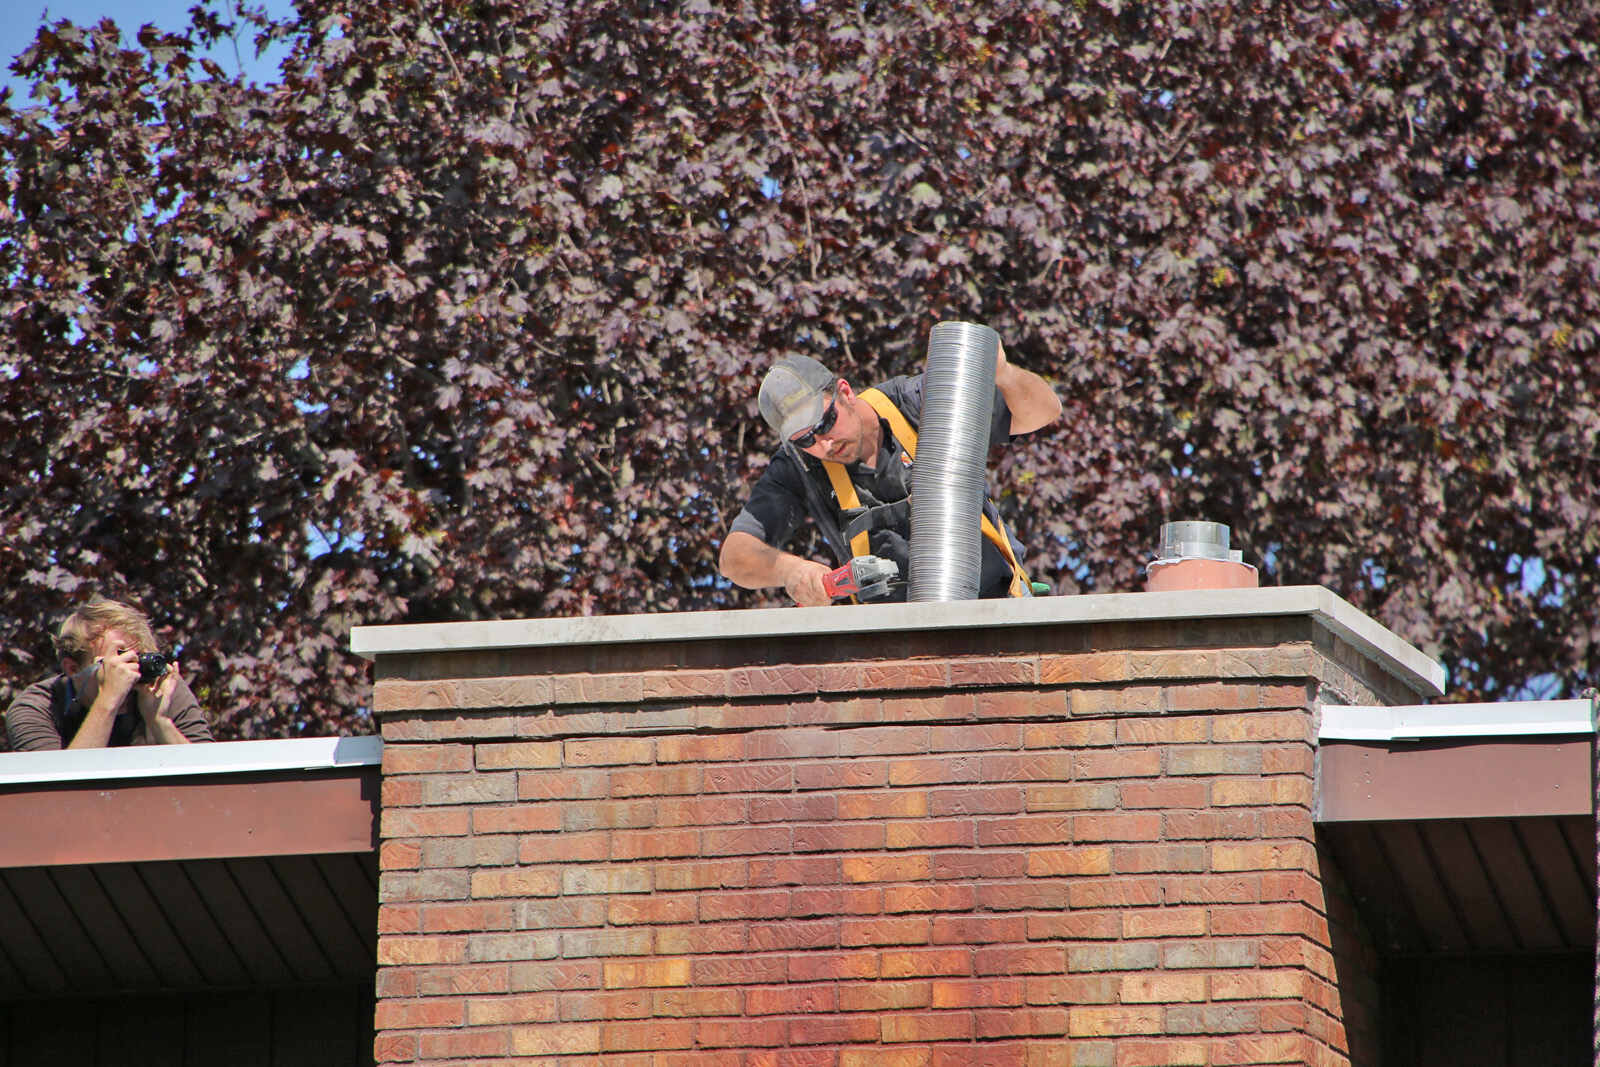
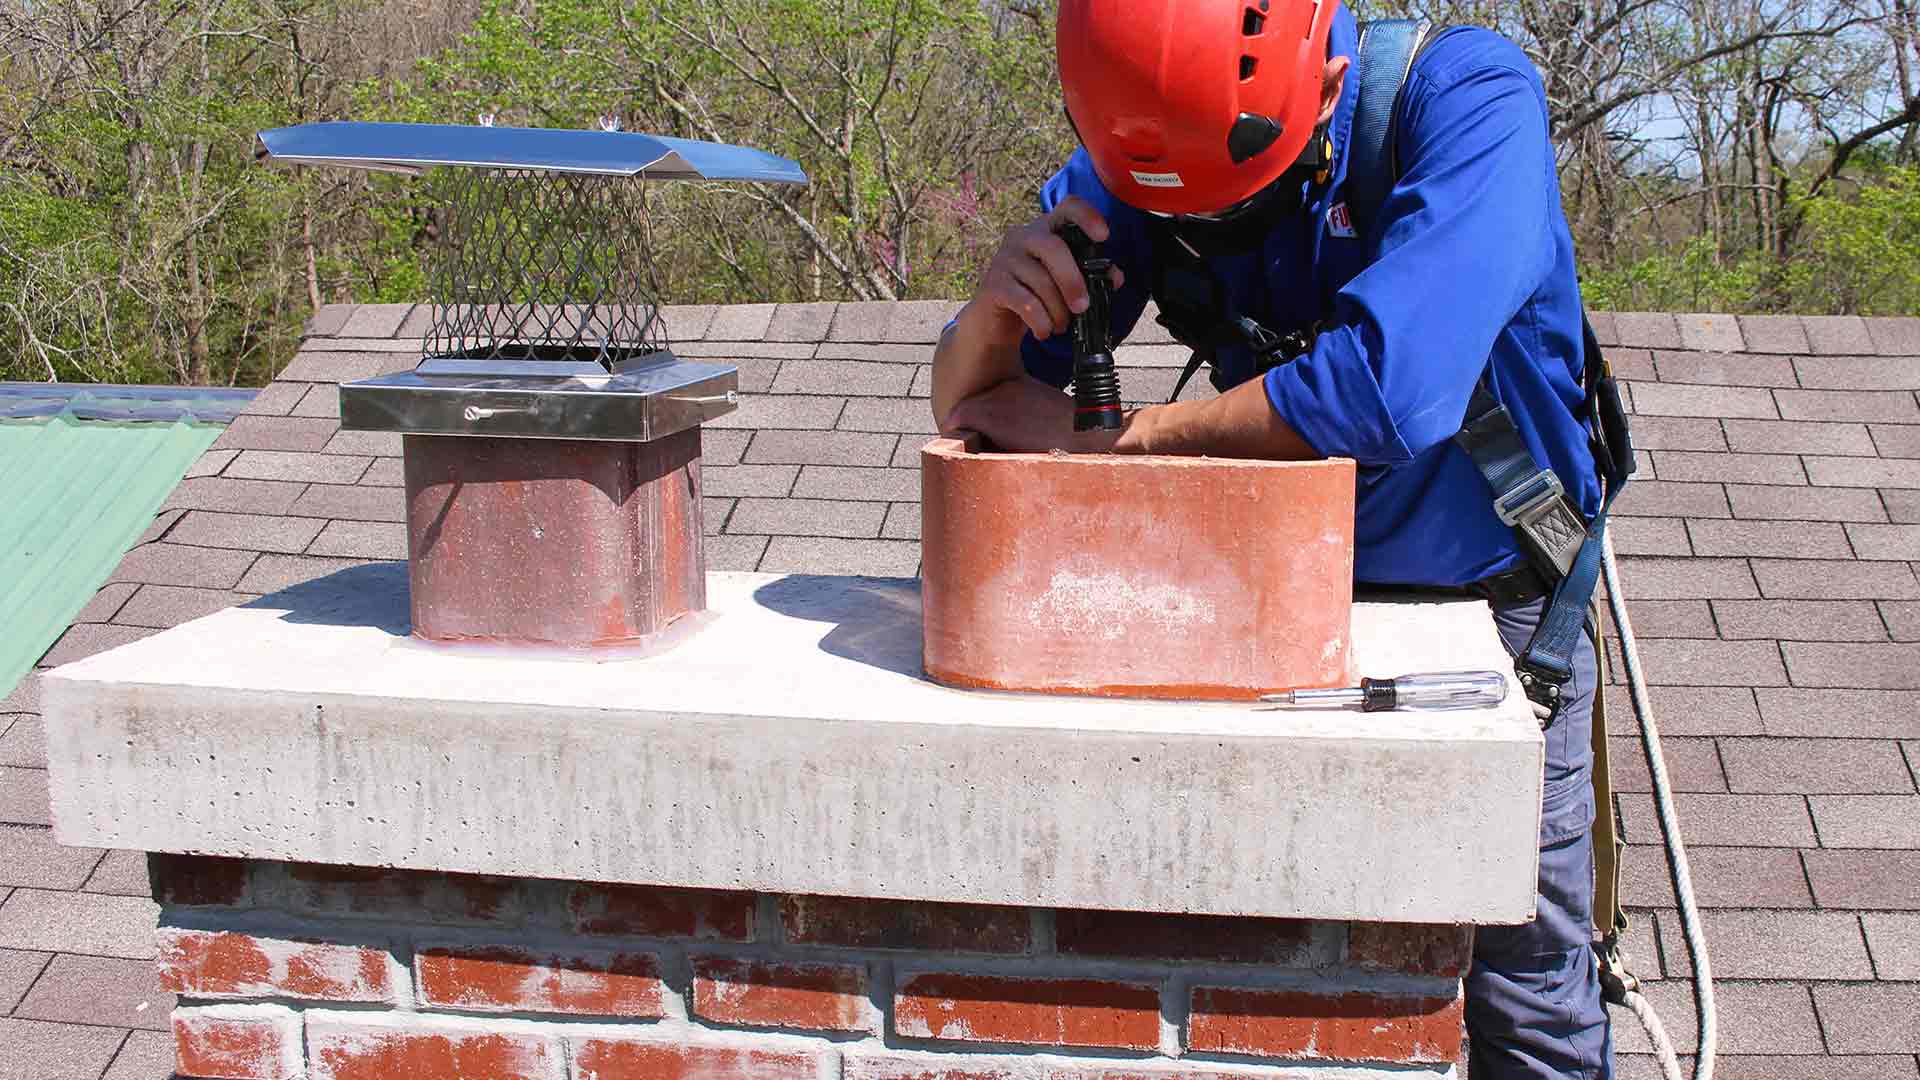
Step 4: Replace Damaged Chimney Caps or Crown
The chimney cap and crown serve as protective barriers against water, debris, and animals. If you notice damaged or missing chimney caps or a deteriorating crown, it’s important to replace them to prevent further damage. Here’s how you can replace damaged chimney caps or crown:
- Start by accessing the roof safely using a ladder or scaffolding, ensuring you have proper safety equipment such as goggles and gloves.
- Inspect the existing chimney cap or crown for any signs of damage or wear. Look for cracks, gaps, or missing pieces.
- If you have a metal chimney cap, remove it by unscrewing the bolts or clips that secure it in place. For a masonry crown, you may need to chip away the damaged portion using a chisel and hammer.
- Clean the area thoroughly, removing any debris, dust, or old mortar. Use a wire brush or scraper to ensure a clean surface.
- Measure the dimensions of your chimney to determine the appropriate size for the replacement chimney cap or crown. You can find these measurements in the original installation documentation or by consulting a professional.
- If you’re replacing a chimney cap, purchase a new one that matches the dimensions and style of your existing cap. Install the new cap by following the manufacturer’s instructions and using the provided hardware.
- If you’re replacing a masonry crown, mix a batch of crown repair mortar according to the manufacturer’s instructions. Apply the mortar to the damaged area using a trowel, ensuring a smooth and level surface. Allow the mortar to dry completely.
- Once the replacement chimney cap or crown is installed and dried, inspect it for any remaining imperfections. Make sure it is securely in place and provides proper protection.
Replacing damaged chimney caps or crowns will help prevent water intrusion, protect the chimney structure, and prolong its lifespan. If you’re unsure about the replacement process or if you’re dealing with a complex chimney structure, it’s advisable to seek professional assistance for a seamless and secure replacement.
Read more: How To Decorate Chimney
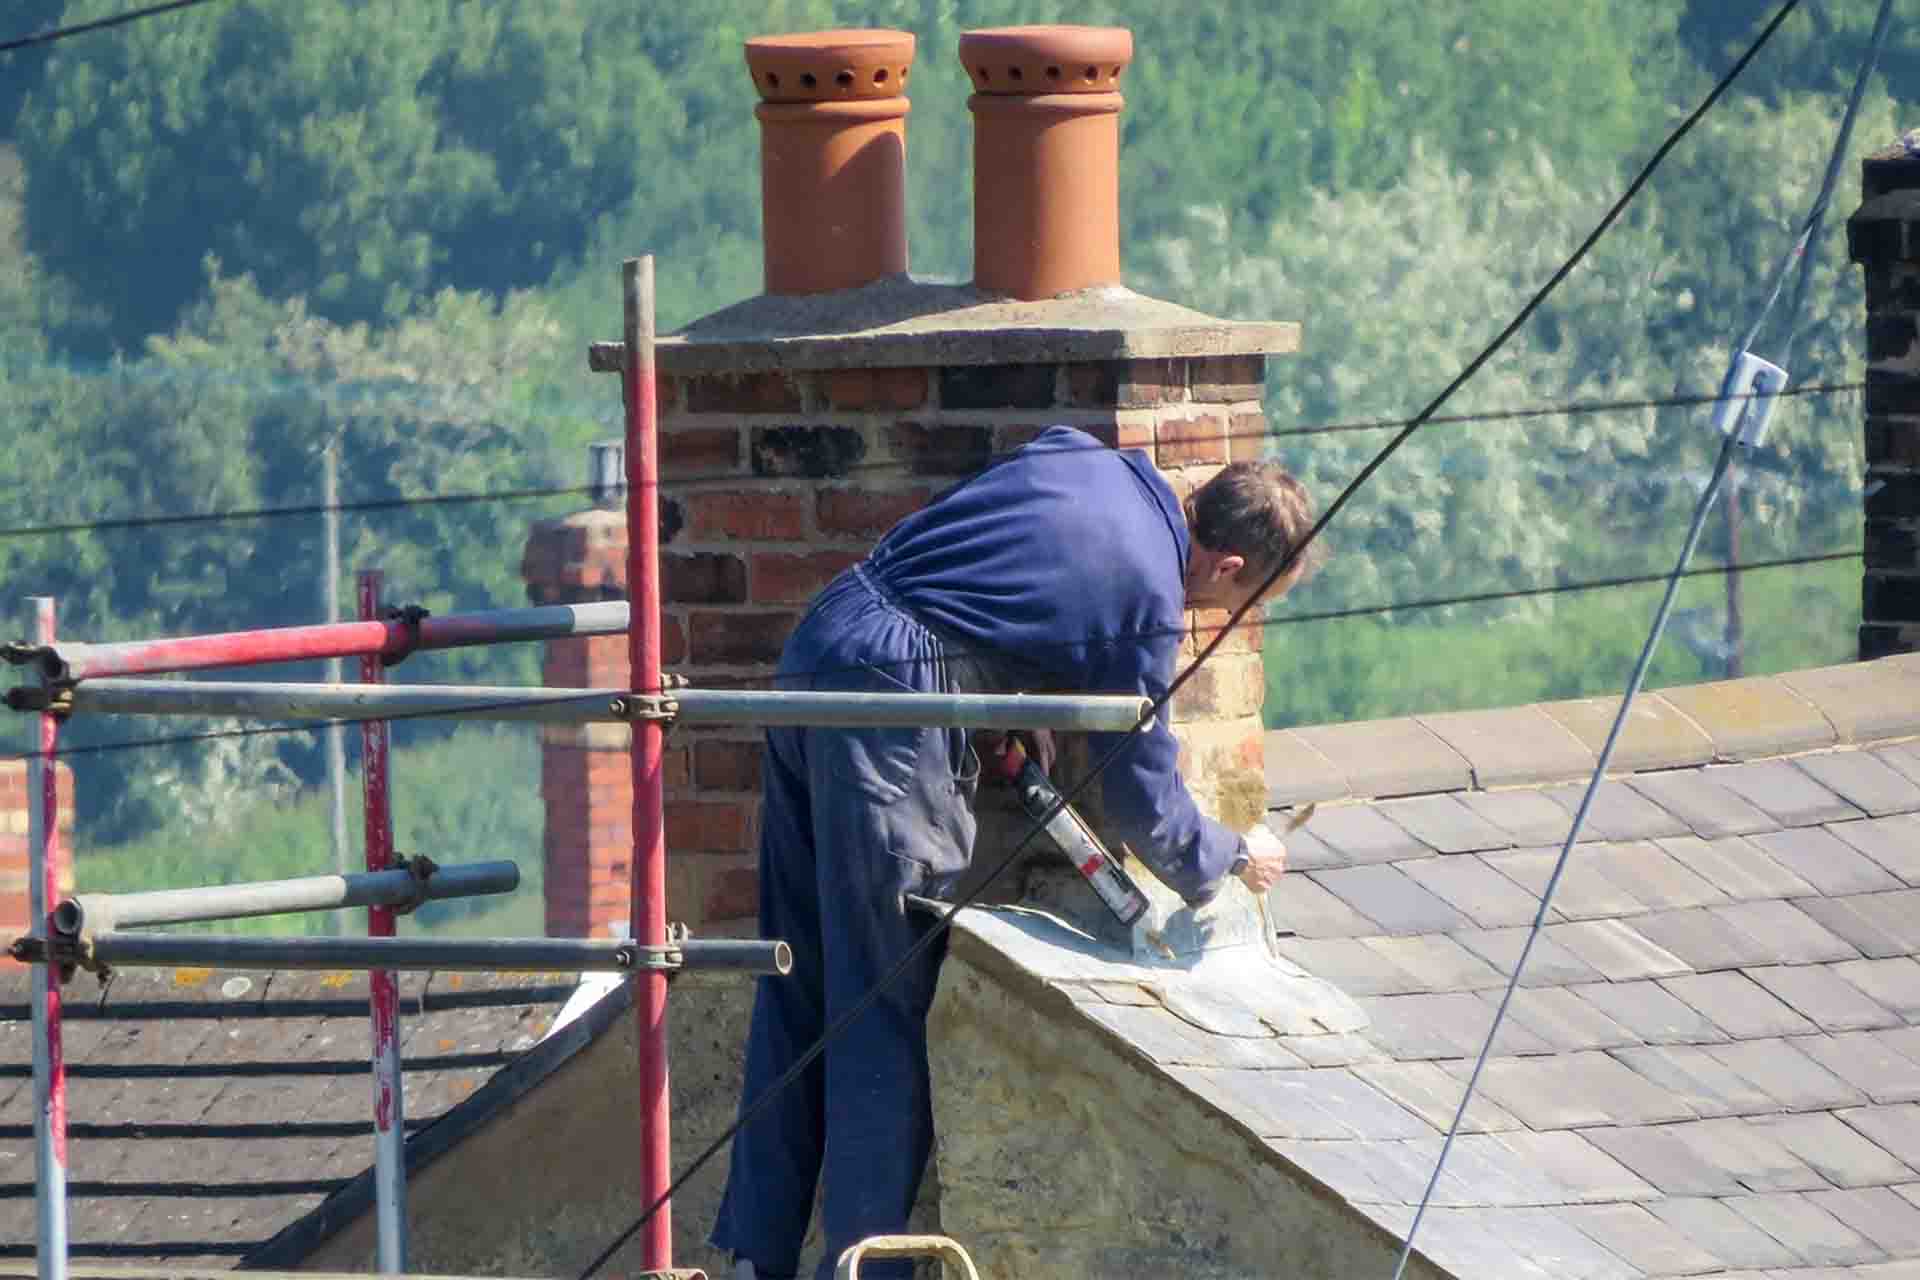
Step 5: Fix Leaking Chimney Flashing
Leaking chimney flashing can lead to water penetration and damage to your chimney and home. It’s important to fix any issues with the flashing promptly. Here’s a step-by-step guide on how to fix leaking chimney flashing:
- Start by accessing the roof safely using a ladder or scaffolding, ensuring you have proper safety equipment such as goggles and gloves.
- Inspect the chimney flashing for any signs of damage, such as cracks, gaps, or loose sections. Pay attention to the joints between the flashing and the chimney as well as the adjacent roof shingles.
- If you notice any damaged flashing, remove the old flashing carefully using a pry bar or a flathead screwdriver. Be cautious not to damage the surrounding roof shingles or the chimney structure.
- Clean the area thoroughly, removing any debris, dust, or old caulk. Use a wire brush or scraper to ensure a clean and smooth surface.
- Measure and cut a new piece of flashing that matches the dimensions of the area to be repaired. It’s recommended to use a durable material such as galvanized steel or aluminum for longevity.
- Apply a generous amount of roofing caulk or flashing repair adhesive to the backside of the new flashing piece. Press it firmly into place, ensuring it covers the damaged area of the chimney and overlaps the adjacent roof shingles.
- Secure the new flashing in place using roofing nails or screws, making sure they are positioned in the designated holes or slots of the flashing.
- Apply a layer of roofing caulk along the edges of the flashing, sealing any gaps or joints. This will provide additional protection against water infiltration.
Fixing leaking chimney flashing is crucial to prevent further water damage to your chimney, roof, and home. If you’re unfamiliar with roofing repairs or if the flashing damage is extensive, it’s recommended to consult a professional roofer or chimney contractor for assistance.
By addressing chimney flashing issues promptly, you’ll ensure your chimney remains water-tight and protected from potential leaks and structural damage.
Regularly inspect and clean your chimney to prevent buildup of creosote, which can lead to chimney fires. Hire a professional for thorough cleaning and maintenance at least once a year.
Step 6: Eliminate Chimney Drafts
Chimney drafts can result in poor ventilation, smoke backflow, and energy inefficiency. It’s important to address chimney draft issues to improve the functionality and safety of your chimney. Here’s a step-by-step guide on how to eliminate chimney drafts:
- Identify the source of the chimney draft. Draft issues can stem from various factors, such as chimney height, flue size, air pressure differentials, or a blocked chimney cap or damper.
- Inspect the chimney cap and damper to ensure they are functioning correctly. Clean any debris, leaves, or nests that may be obstructing proper airflow.
- If the damper is not sealing tightly or is damaged, consider replacing it with a new damper that provides a better seal and control over airflow.
- Consider installing a chimney draft stopper or draft excluder. These devices are designed to seal the flue when it’s not in use, preventing drafts from entering the chimney.
- If the chimney height is inadequate and causing draft issues, consult a professional to determine if extending the chimney stack is necessary.
- Check the flue size to ensure it matches the size of your fireplace or wood-burning stove. An improperly sized flue can result in poor draft and ventilation. Consult with a professional to make sure your flue is the correct size.
- Seal any gaps or cracks around the chimney structure, especially near the roofline. Use weatherproof sealant or caulk to prevent air leaks that may be contributing to the draft issue.
- Consider installing a chimney draft inducer or exhaust fan. These devices can improve draft by boosting airflow through the chimney, especially in cases where the draft issue persists despite other remedies.
If you’re unsure about the underlying cause of chimney drafts or if the draft issue persists despite your efforts, it’s advisable to consult a professional chimney contractor who can assess the situation and recommend the most appropriate solution.
By eliminating chimney drafts, you’ll improve the performance of your chimney, reduce the risk of smoke and carbon monoxide infiltration, and enhance the energy efficiency of your home.
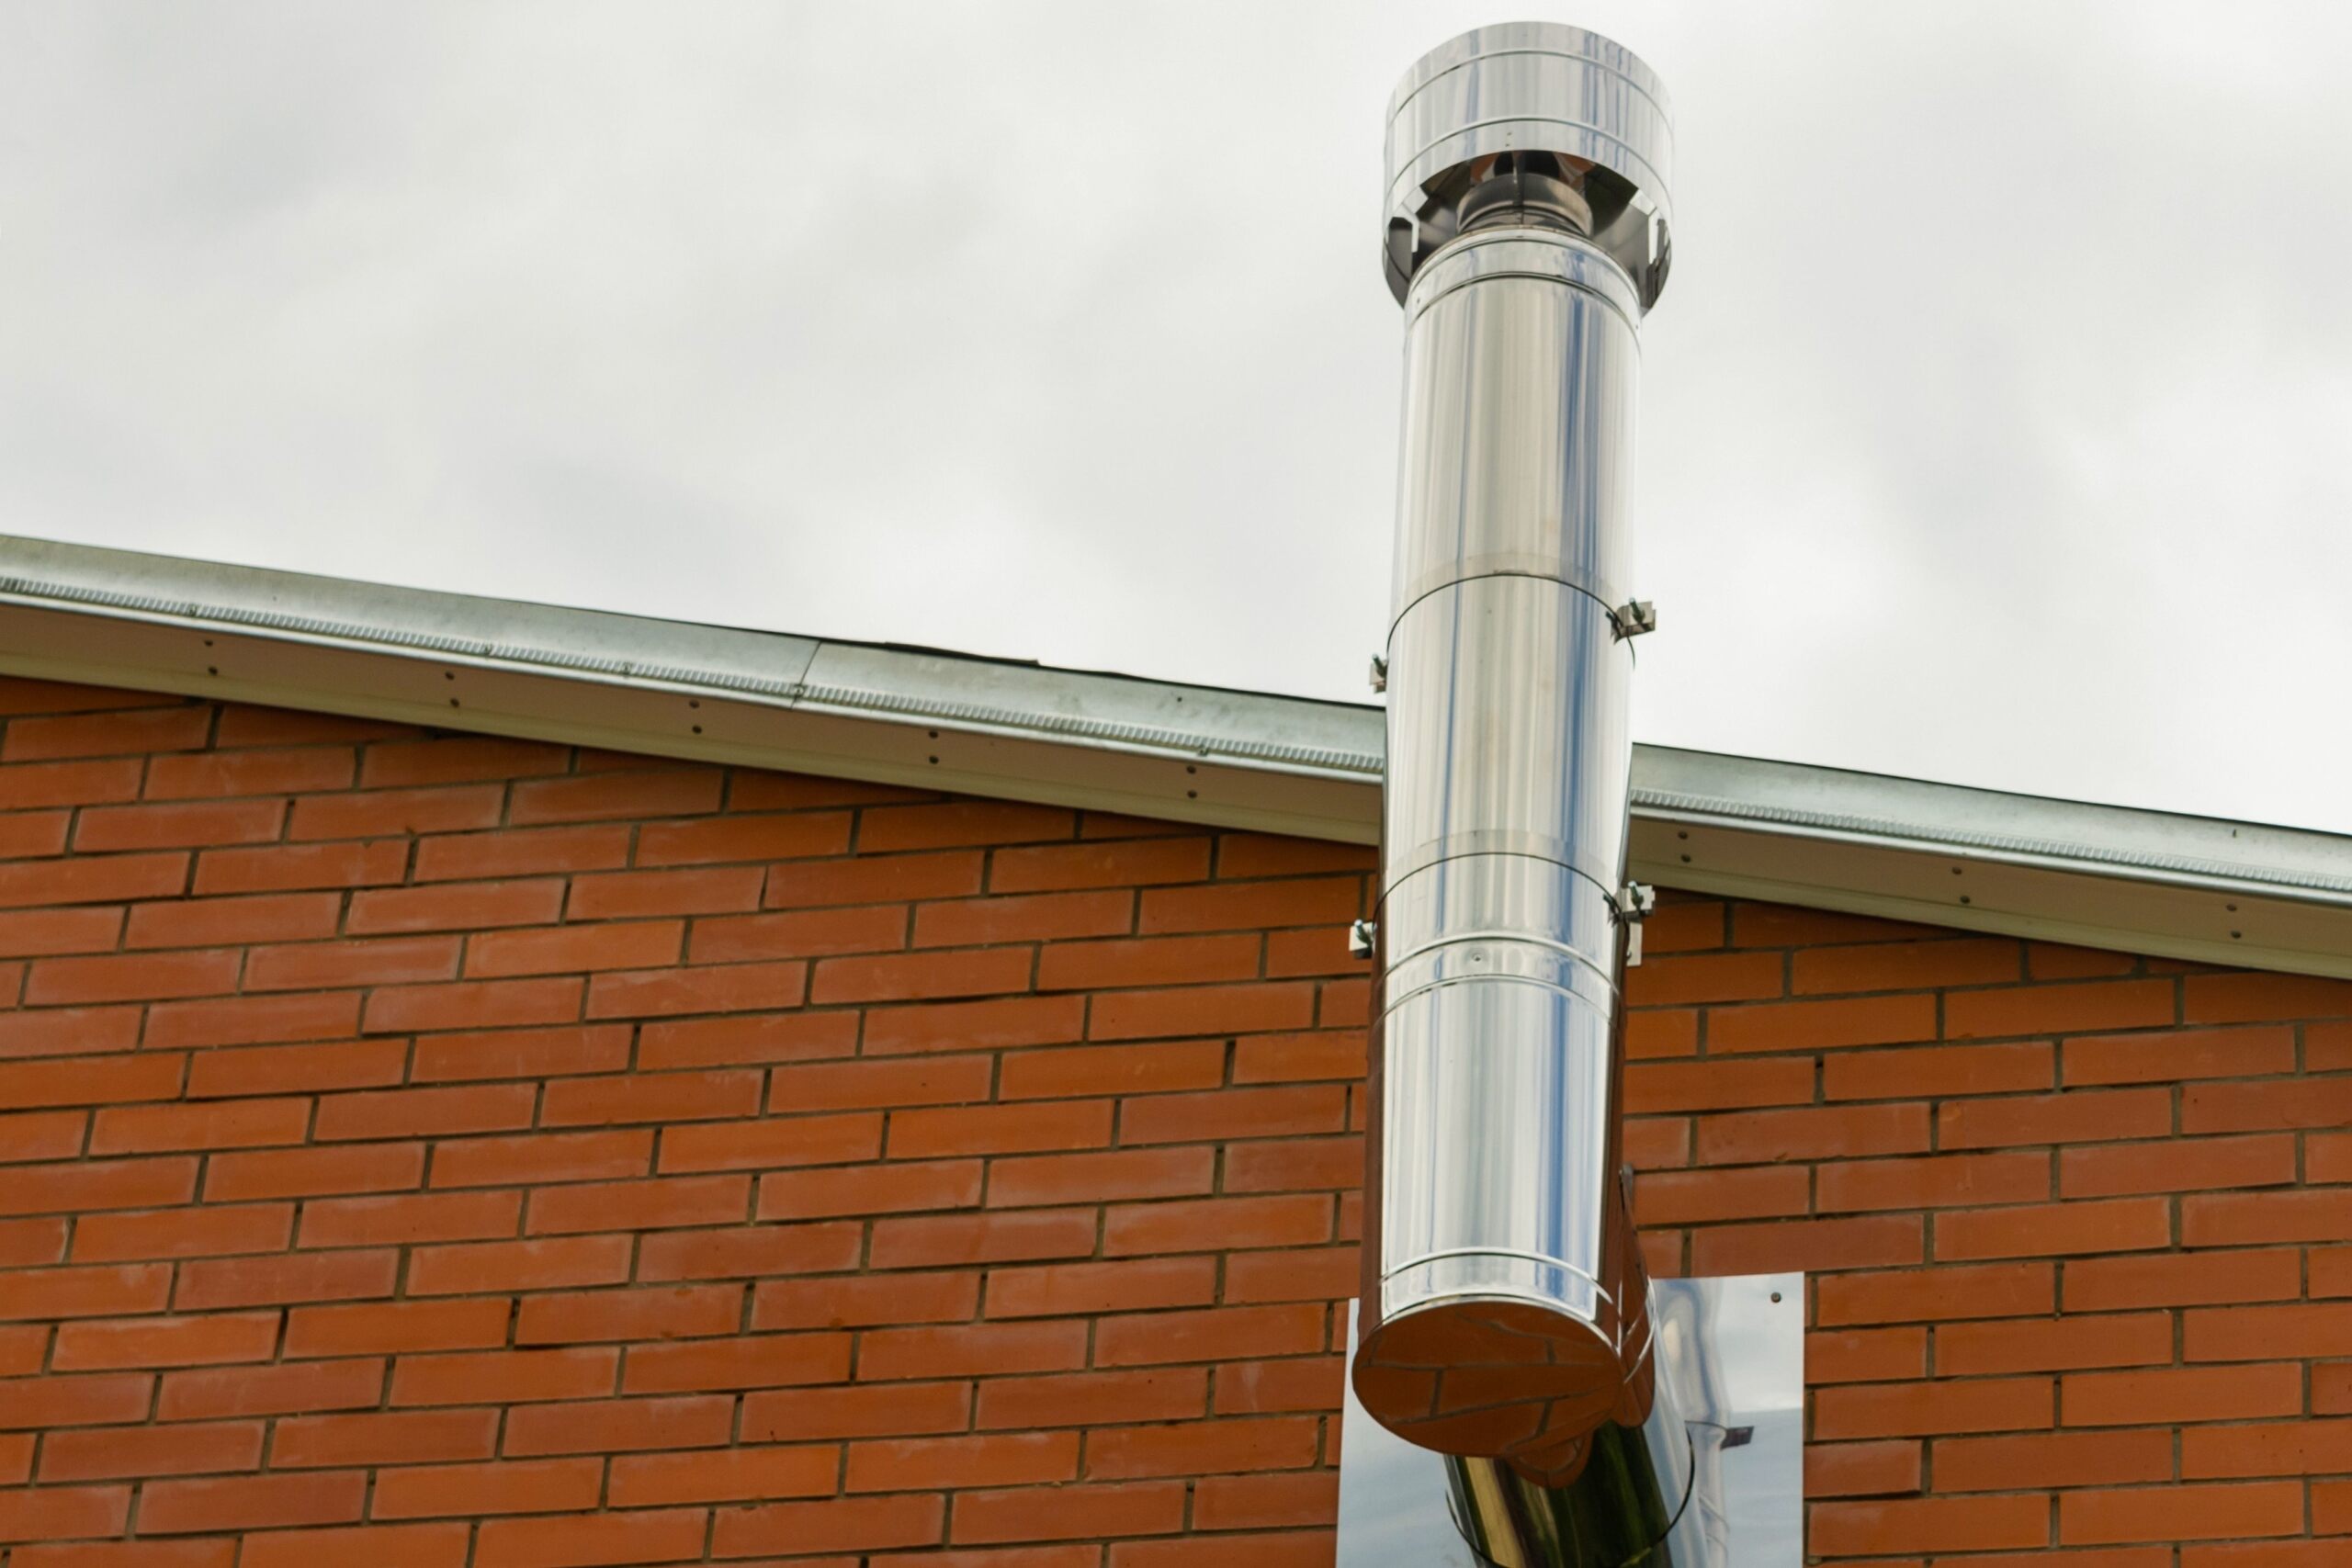
Step 7: Install Chimney Rain Cap
A chimney rain cap is a vital component that helps protect your chimney from water infiltration and prevent potential damage. Installing a chimney rain cap is a simple yet effective way to safeguard your chimney. Here’s a step-by-step guide on how to install a chimney rain cap:
- Start by accessing the roof safely using a ladder or scaffolding. Ensure that you have proper safety equipment such as goggles and gloves.
- Measure the dimensions of your chimney flue to determine the appropriate size for the rain cap. Consider the shape and style of the rain cap that will complement your chimney and provide optimal protection.
- Position the rain cap over the chimney flue, ensuring that it aligns properly and covers the opening completely. It should rest securely on top of the chimney.
- Use the provided hardware, typically screws or clamps, to attach the rain cap securely. Follow the manufacturer’s instructions for proper installation.
- Ensure that the rain cap is level and securely fastened, double-checking that it is not wobbly or loose.
- Inspect the rain cap to ensure that it has proper clearance from any nearby objects such as roof vents, trees, or other structures.
- Clean the rain cap regularly to remove any debris or buildup that may obstruct proper airflow.
Installing a chimney rain cap will protect your chimney from rain, snow, debris, and animals. It will also prevent potential water damage and extend the lifespan of your chimney. If you’re unsure about the installation process or the appropriate rain cap for your chimney, consult a professional chimney contractor who can guide you in selecting and installing the right rain cap.
By installing a chimney rain cap, you’ll ensure the longevity and functionality of your chimney while minimizing the risk of water-related issues.
Step 8: Seal Chimney Gaps and Cracks
Gaps and cracks in your chimney can lead to water intrusion, energy loss, and structural damage if left unaddressed. Sealing these gaps and cracks is an important step in maintaining the integrity and efficiency of your chimney. Here’s a step-by-step guide on how to seal chimney gaps and cracks:
- Start by inspecting the chimney for any visible gaps or cracks in the masonry or between the chimney and the roofline. Pay close attention to areas where the chimney meets the flashing, crown, or adjacent structures.
- Clean the areas around the gaps or cracks using a wire brush or scraper to remove any loose debris, dust, or old sealant.
- Choose an appropriate sealant or caulk for chimney repairs. Look for a high-quality, weather-resistant sealant specifically designed for masonry applications.
- If the gaps or cracks are small, apply the sealant directly into the gaps using a caulk gun. Make sure to fill the gaps completely and smooth the surface with a putty knife or your finger.
- For larger cracks or gaps, you may need to use a foam backer rod as a filler before applying the sealant. Insert the backer rod into the crack or gap, ensuring it fits snugly.
- Apply the sealant over the backer rod, filling the remaining space and creating a smooth surface. Use a putty knife or a caulk smoothing tool to ensure the sealant is evenly spread and properly adhered.
- Allow the sealant to dry and cure completely. Follow the manufacturer’s instructions for drying time, as it may vary depending on the type of sealant used.
- Inspect the sealed areas once the sealant is dry to ensure a proper seal. Make any necessary touch-ups or adjustments if needed.
Sealing the gaps and cracks in your chimney will help prevent water infiltration, improve energy efficiency, and maintain the structural integrity of your chimney. If you’re unsure about the sealing process or if you’re dealing with extensive damage, it’s recommended to consult a professional chimney contractor who can provide expert guidance and ensure a proper sealing job.
By sealing chimney gaps and cracks, you’ll protect your home from potential water damage and maintain a safe and efficient chimney system.
Read more: How To Rebuild A Chimney
Step 9: Maintain Regular Chimney Maintenance
Regular chimney maintenance is essential for ensuring the longevity, safety, and efficiency of your chimney system. By implementing a regular maintenance routine, you can prevent potential issues and address small problems before they escalate into costly repairs. Here’s a step-by-step guide on maintaining regular chimney maintenance:
- Schedule a professional chimney inspection at least once a year. A certified chimney sweep will thoroughly assess your chimney for any issues, including creosote buildup, structural damage, or ventilation problems.
- During the inspection, have the chimney sweep clean the chimney to remove any creosote, soot, or debris that may have accumulated. This cleaning process will improve the chimney’s efficiency and reduce the risk of chimney fires.
- Ensure proper airflow by regularly checking and cleaning the chimney damper. A clean and functioning damper helps regulate the airflow and prevents drafts when the fireplace is not in use.
- Inspect and clean the chimney cap regularly. Remove any leaves, debris, or animal nests that may obstruct proper airflow or cause damage to the cap.
- Keep an eye out for signs of water damage, such as water stains or mold growth on the walls near the chimney. If you notice any signs of water intrusion, promptly address the issue to prevent further damage.
- Monitor the condition of the chimney crown and flashing. Look for cracks, gaps, or deterioration and address any necessary repairs promptly to maintain the chimney’s structural integrity.
- Keep the area around the chimney clear of tree branches, leaves, and other debris. This will help prevent potential blockages and improve the chimney’s airflow.
- If you notice any changes in the performance of your chimney, such as excessive smoke, odors, or difficulty starting a fire, consult a professional chimney contractor for a thorough inspection and necessary repairs.
Maintaining regular chimney maintenance is not only crucial for proper chimney function but also for the overall safety of your home. By staying proactive and addressing any potential issues early on, you can save yourself from costly repairs and ensure the long-term reliability of your chimney system.
Remember, if you’re unsure about any aspect of chimney maintenance or if you encounter complex issues, it’s always best to consult a professional chimney contractor who can provide expertise and guidance specific to your chimney’s needs.
Conclusion
Properly maintaining and fixing common chimney issues is crucial for the functionality, safety, and longevity of your chimney system. By taking the time to inspect and address any problems promptly, you can ensure that your chimney operates efficiently and reduces the risk of potential hazards such as chimney fires, carbon monoxide leaks, and structural damage to your home.
In this article, we discussed common chimney issues, including cracked bricks or mortar, damaged chimney caps or crown, leaking chimney flashing, chimney drafts, chimney rain caps, and gaps/cracks. We provided you with a comprehensive step-by-step guide on how to fix these issues, from inspecting and cleaning the chimney to performing necessary repairs and installations.
Remember, safety should always be a top priority. Before you embark on any chimney repairs, make sure to take appropriate safety measures, such as wearing protective gear and using stable ladders or scaffolding.
Additionally, if you’re unsure about any aspect of chimney repair or if you’re dealing with complex issues, it’s highly recommended to consult a professional chimney contractor. They have the expertise, tools, and knowledge to handle more intricate repairs and ensure the job is done safely and effectively.
By following the steps outlined in this article and maintaining regular chimney maintenance, you can enjoy a functional, safe, and efficient chimney system for years to come. A well-maintained chimney not only enhances the ambiance of your home but also provides peace of mind knowing that your chimney and fireplace or wood-burning stove are working optimally.
Take the necessary steps to maintain and fix your chimney, and enjoy the warmth, comfort, and beauty it brings to your home for many seasons ahead.
Frequently Asked Questions about How To Fix A Chimney
Was this page helpful?
At Storables.com, we guarantee accurate and reliable information. Our content, validated by Expert Board Contributors, is crafted following stringent Editorial Policies. We're committed to providing you with well-researched, expert-backed insights for all your informational needs.
0 thoughts on “How To Fix A Chimney”