Articles
How To Inspect A Chimney
Modified: August 22, 2024
Learn how to inspect a chimney with our informative articles. Find tips and guidelines for ensuring your chimney is safe and well-maintained.
(Many of the links in this article redirect to a specific reviewed product. Your purchase of these products through affiliate links helps to generate commission for Storables.com, at no extra cost. Learn more)
Introduction
Inspecting a chimney is an essential part of regular home maintenance. Whether you use your fireplace frequently or just occasionally, it’s crucial to ensure that your chimney is in good condition and free from any potential hazards. Regular inspections help identify and address any issues before they escalate, ensuring the safety and efficiency of your chimney.
While it is recommended to hire a professional chimney sweep for a thorough inspection, you can also perform a basic visual inspection yourself. This article will guide you through the steps involved in inspecting a chimney, from gathering the necessary tools to evaluating the chimney’s structural integrity.
Before beginning the inspection, it’s important to note that this article covers the visual inspection of chimneys in residential homes. If you suspect any significant problems or have any safety concerns, it’s best to consult a professional chimney sweep for a comprehensive assessment.
Now, let’s dive into the process of inspecting your chimney, step by step.
Key Takeaways:
- Regular chimney inspections and maintenance are crucial for ensuring safety, efficiency, and longevity. DIY inspections are possible, but professional assistance is recommended for significant issues or complex problems.
- Gathering the right tools, inspecting both the exterior and interior, and addressing creosote buildup and structural issues are key steps in maintaining a safe and well-functioning chimney. Regular cleaning and maintenance practices further contribute to optimal chimney performance and safety.
Read more: How To Decorate Chimney
Step 1: Gathering Necessary Tools and Equipment
Before you begin inspecting your chimney, it’s important to have the right tools and equipment on hand. This will ensure that you can perform a thorough and accurate assessment. Here are the essential tools you will need:
- Flashlight: A reliable flashlight is crucial for illuminating dark areas inside the chimney and providing a clear view of any potential issues.
- Ladder: Depending on the height of your chimney, you may need a ladder to access the rooftop and inspect the chimney from the exterior.
- Binoculars: Binoculars can be useful for examining the chimney from a distance, especially if you are unable to access certain areas.
- Gloves and Protective Gear: It’s important to protect yourself during the inspection process, so wear gloves and any other necessary protective gear, such as a dust mask or safety glasses.
- Notebook and Pen: Keep a notebook and pen handy to jot down any observations or notes during the inspection.
With these tools ready, you can ensure a smooth inspection process and be prepared to document any findings along the way.
Now that you’ve gathered your tools, let’s move on to the next step: the exterior inspection of the chimney.
Step 2: Exterior Inspection
The exterior of your chimney plays a crucial role in its overall safety and functionality. Conducting a thorough inspection of the exterior will help you identify any signs of damage or deterioration. Here’s how to perform an exterior inspection:
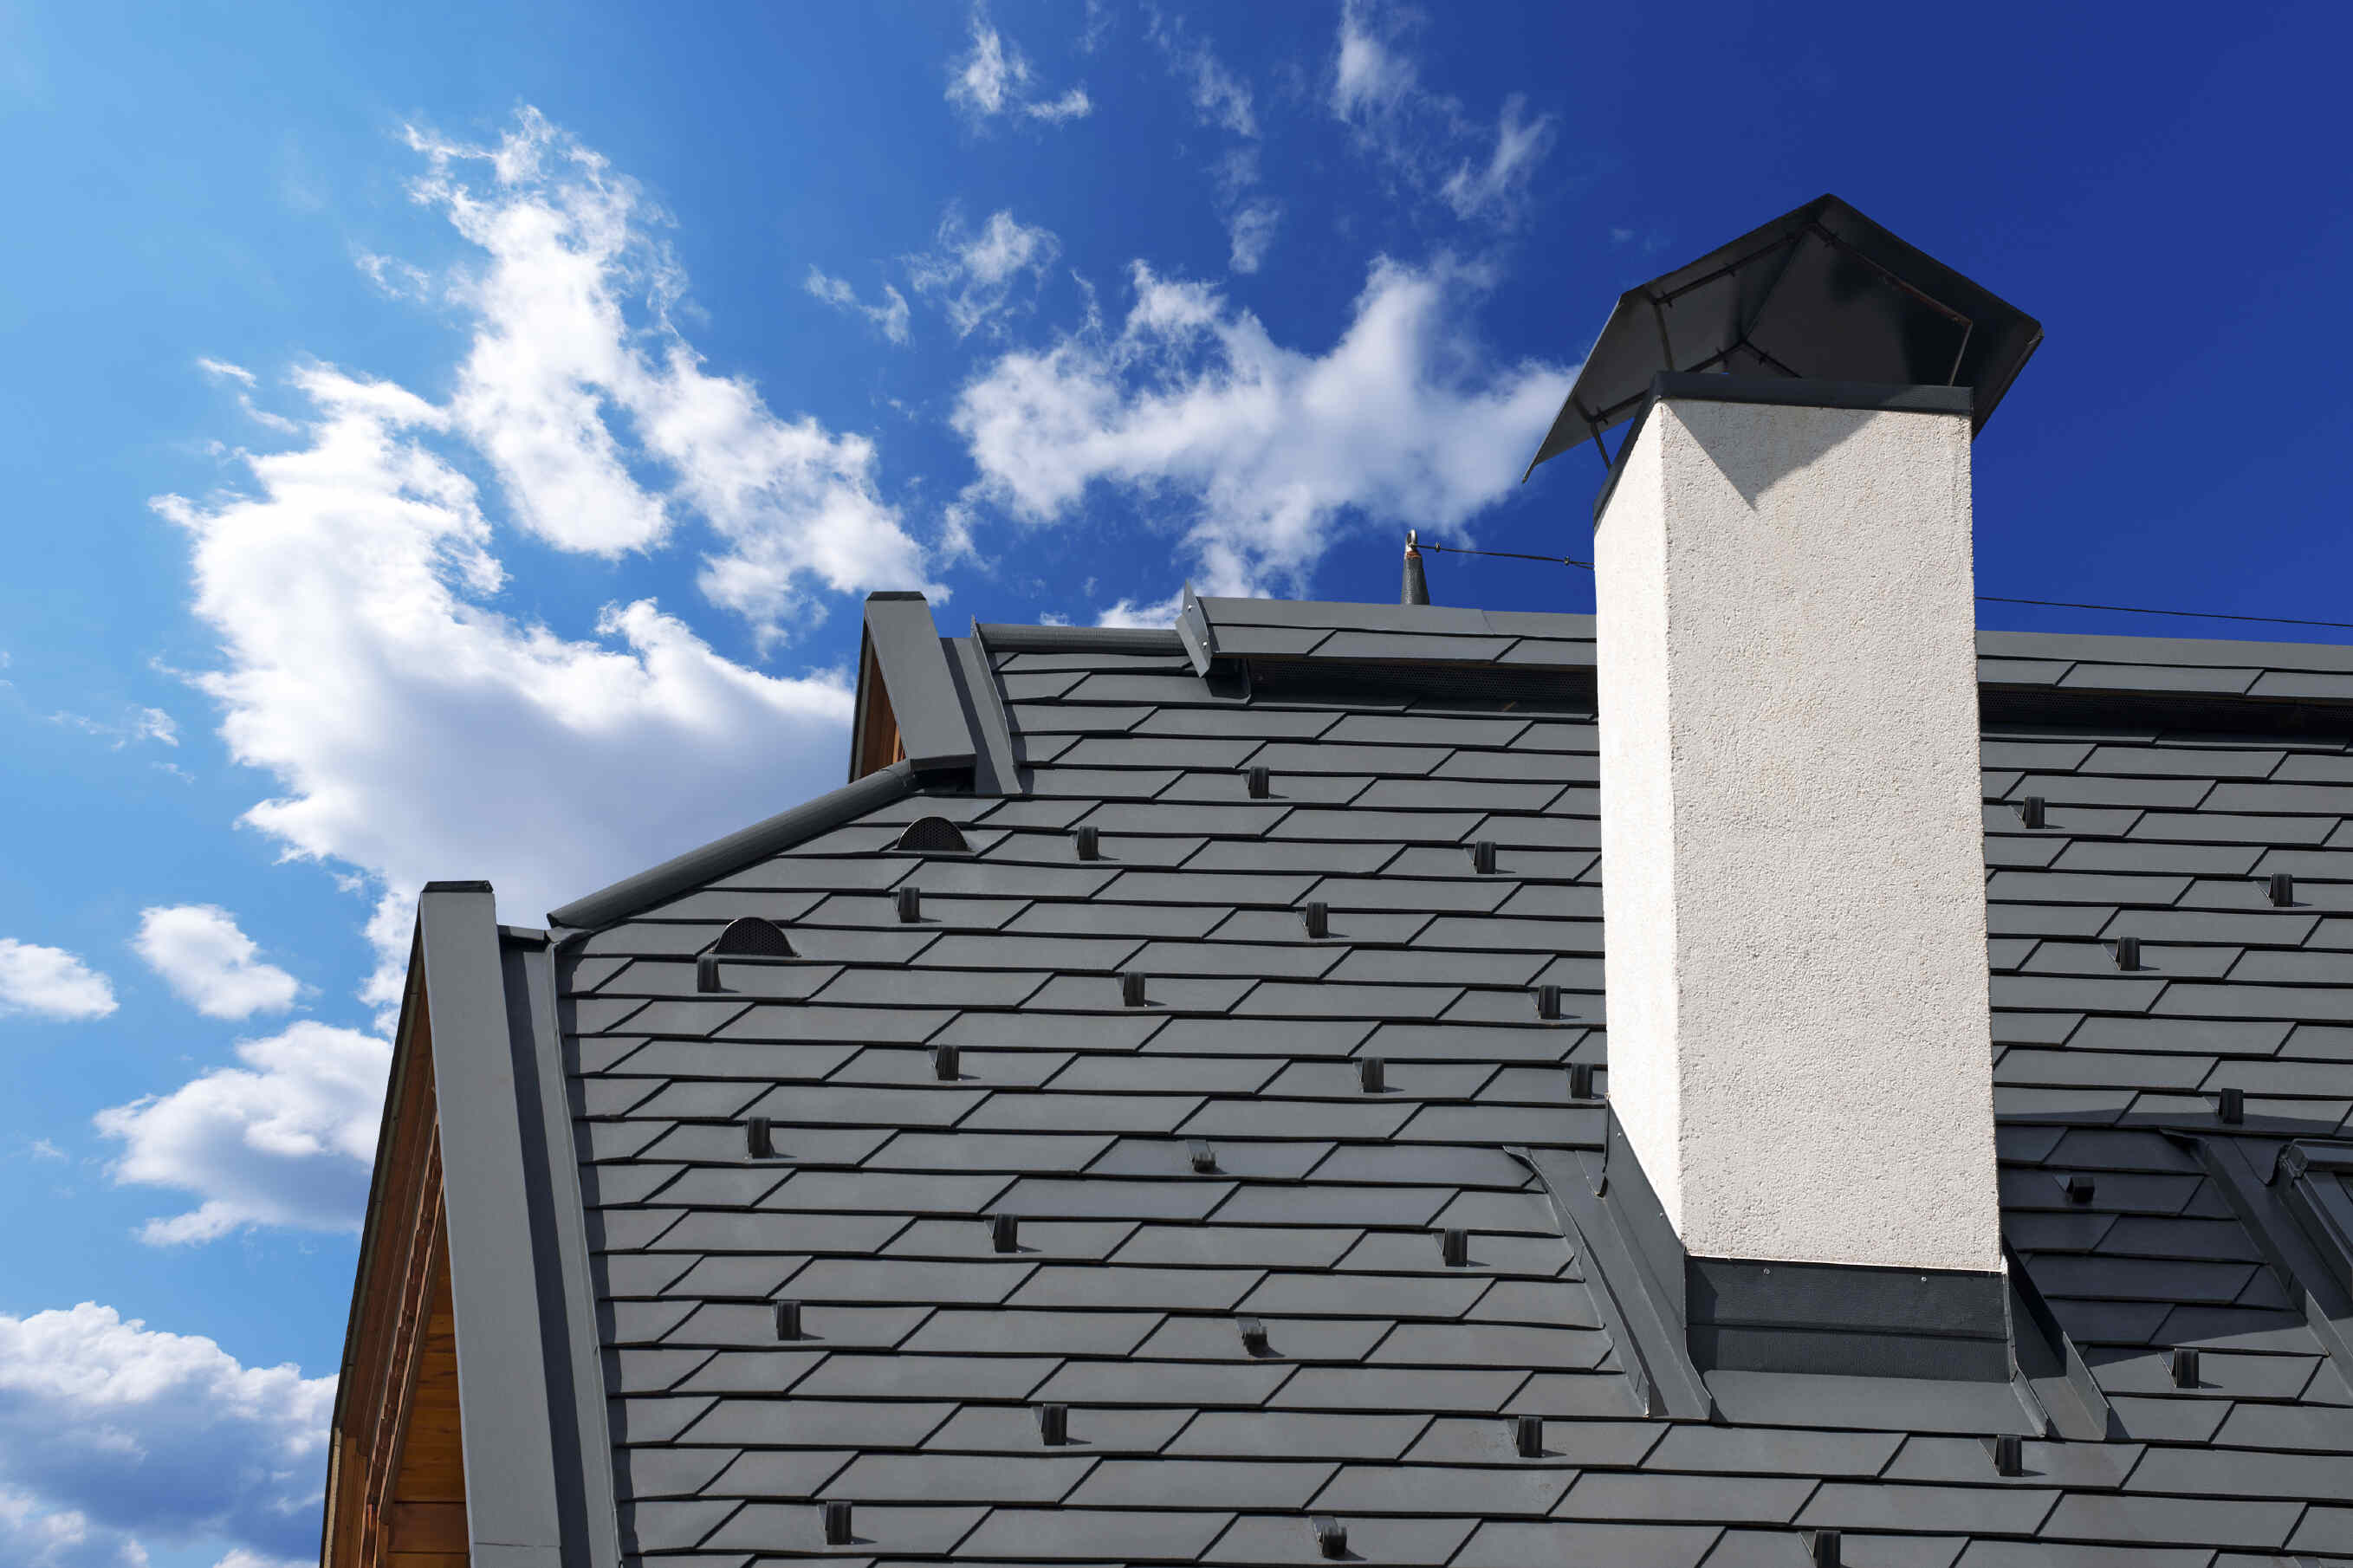
- Look for Cracks and Damage: Start by visually inspecting the chimney from the ground. Look for any visible cracks, crumbling masonry, or signs of damage. Pay attention to the chimney crown, which is the top part of the chimney, and check for any cracking or missing pieces.
- Check the Mortar Joints: Examine the mortar joints between the bricks or stones. Look for any gaps, erosion, or deteriorating mortar. Damaged mortar can lead to water infiltration and weaken the structure of the chimney.
- Inspect the Chimney Cap: The chimney cap is the metal or concrete covering that sits on top of the chimney. Make sure it is securely in place and not damaged or missing. The chimney cap prevents debris, animals, and excess moisture from entering the chimney.
- Check the Flashing: The flashing is the metal strip that seals the connection between the chimney and the roof. Check for any loose or damaged flashing. Proper flashing prevents water from seeping into the roof or chimney and causing leaks.
- Inspect the Chimney Flue: Take a look at the chimney flue, which is the interior lining of the chimney. Look for any visible cracks, gaps, or deterioration. A damaged chimney flue can affect the efficiency and safety of your chimney.
During the exterior inspection, use your binoculars and flashlight to get a closer look at hard-to-reach areas. If you spot any major issues or areas of concern, it’s advisable to contact a professional chimney sweep for further evaluation and repairs.
Now that we’ve completed the exterior inspection, let’s move on to the next step: the interior inspection of the chimney.
Step 3: Interior Inspection
The interior of your chimney is just as important to inspect as the exterior. Conducting a thorough interior inspection will help you identify any potential issues or obstructions that could affect the performance and safety of your chimney. Here’s how to perform an interior inspection:
- Open the Damper: Before starting the inspection, open the damper to allow access to the chimney’s interior. The damper is a metal plate or valve that regulates airflow in the chimney. Make sure it opens and closes smoothly.
- Shine Your Flashlight Inside: Use the flashlight to illuminate the chimney from the bottom. Look for any signs of debris, nesting materials, or other obstructions that could block the flue and hinder proper airflow. Remove any visible obstructions using a chimney brush or vacuum.
- Check for Stains or Water Damage: Look for any discoloration, stains, or water damage on the interior walls of the chimney. These signs could indicate a leak or moisture problem, which should be addressed to prevent further damage.
- Inspect the Firebox: Examine the firebox, which is the area where the fire is ignited and burns. Look for any cracks, loose bricks, or signs of heavy soot buildup. These issues can impact the safety and efficiency of your fireplace.
- Examine the Chimney Damper: Take a closer look at the chimney damper to ensure it is functioning properly. Look for any signs of rust, damage, or misalignment. A faulty damper can negatively affect draft and increase heat loss.
During the interior inspection, take note of any potential problems or areas that require attention. If you are unsure about anything you observe, it’s recommended to seek professional assistance from a chimney sweep.
Now that we’ve completed the interior inspection, let’s move on to the next step: checking for creosote buildup.
Step 4: Checking for Creosote Buildup
Creosote is a highly flammable substance that can accumulate inside your chimney over time. It is formed when smoke and gases from burning wood condense and cool down inside the flue. Checking for creosote buildup is a crucial step in chimney inspection to ensure the safety of your fireplace. Here’s how to do it:
- Put on Protective Gear: Before inspecting for creosote, make sure you are wearing gloves and a dust mask to protect yourself from any potentially harmful particles.
- Use a Chimney Brush: Attach a chimney brush to a long pole or rod, and carefully insert it into the chimney. Move the brush up and down to scrape the chimney’s interior walls, dislodging any creosote buildup.
- Inspect the Brush: After brushing, examine the bristles of the chimney brush. If they appear coated with a thick, black, tar-like substance, it is an indication of creosote buildup.
- Measure the Thickness: If you have a creosote buildup, use a creosote depth gauge to measure the thickness. This will help determine the severity of the buildup and whether it requires professional cleaning.
- Note the Stage of Creosote: Creosote buildup is categorized into three stages: stage 1 is light, fluffy, and easily removable; stage 2 is more dense and tar-like; stage 3 is a hard, glazed layer. Take note of the stage of creosote you find during the inspection.
Creosote buildup is a serious fire hazard, as it can ignite and cause a chimney fire. If you observe a significant amount of creosote or find it in the later stages of buildup, it is recommended to contact a professional chimney sweep to thoroughly clean and remove the creosote.
Now that we’ve checked for creosote buildup, let’s move on to examining the chimney cap and spark arrestor.
Read more: How To Rebuild A Chimney
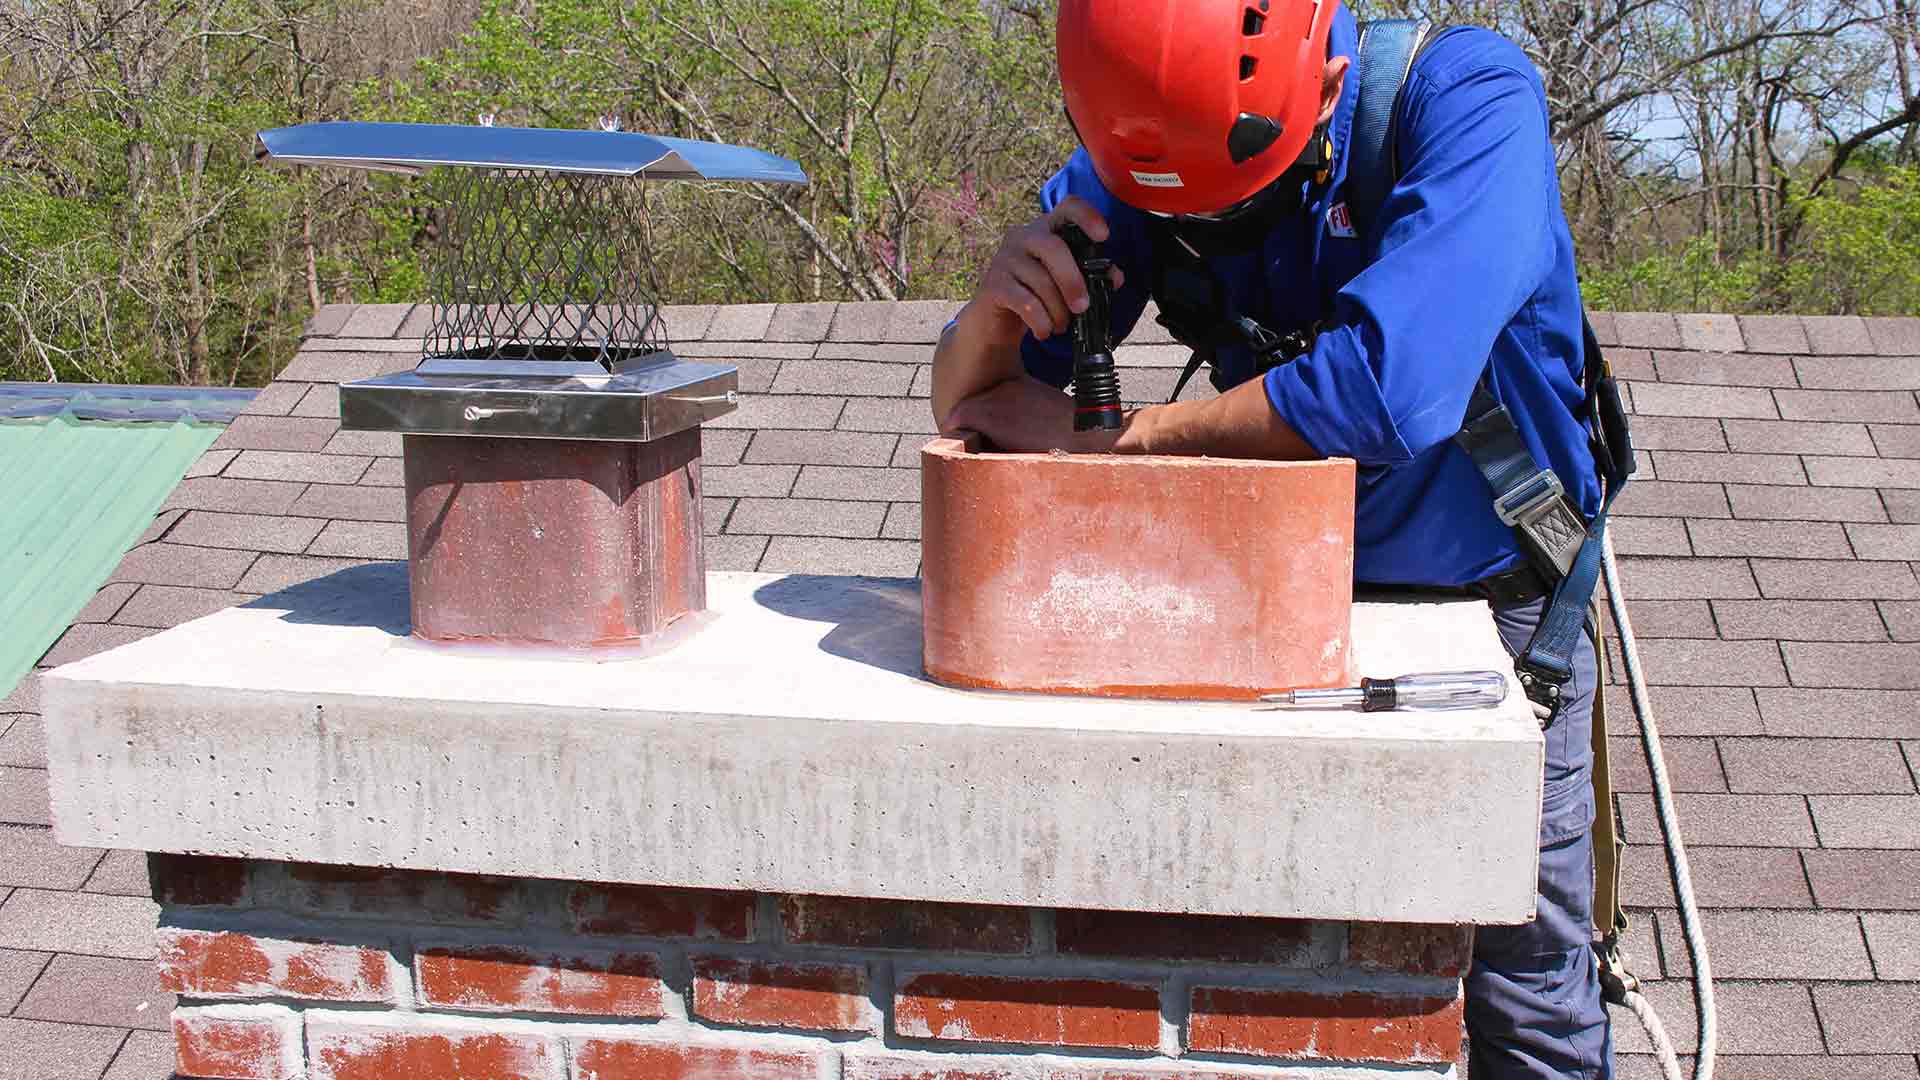
Step 5: Examining the Chimney Cap and Spark Arrestor
The chimney cap and spark arrestor are essential components of your chimney system. They help prevent debris, animals, and sparks from entering the chimney, ensuring its safety and functionality. It’s important to inspect these elements regularly to ensure they are in good condition. Here’s how to examine the chimney cap and spark arrestor:
- Check for Damage: Inspect the chimney cap for any signs of damage, such as cracks, dents, or corrosion. Ensure that it is securely attached to the chimney and that all screws or fasteners are in place.
- Clean the Chimney Cap: Remove any debris or leaves that may have accumulated on top of the chimney cap. This will prevent clogs and blockages that could affect the chimney’s airflow.
- Examine the Spark Arrestor: The spark arrestor is a mesh screen that prevents sparks and embers from escaping the chimney and potentially starting a fire. Check for any tears, holes, or clogging in the screen. Clean or replace it if necessary.
- Inspect for Animal Nests: Look for any signs of animal nests or activity on top of the chimney cap. Animals, such as birds or squirrels, may seek refuge in the chimney. If you notice any nests, contact a professional to safely remove them.
Regularly inspecting and maintaining the chimney cap and spark arrestor will help keep your chimney safe from potential hazards and ensure its proper functioning.
Now that we’ve examined the chimney cap and spark arrestor, let’s move on to assessing the chimney liner.
When inspecting a chimney, be sure to check for any signs of damage or deterioration, such as cracks, loose bricks, or missing mortar. This can help prevent potential hazards and ensure the chimney is safe for use.
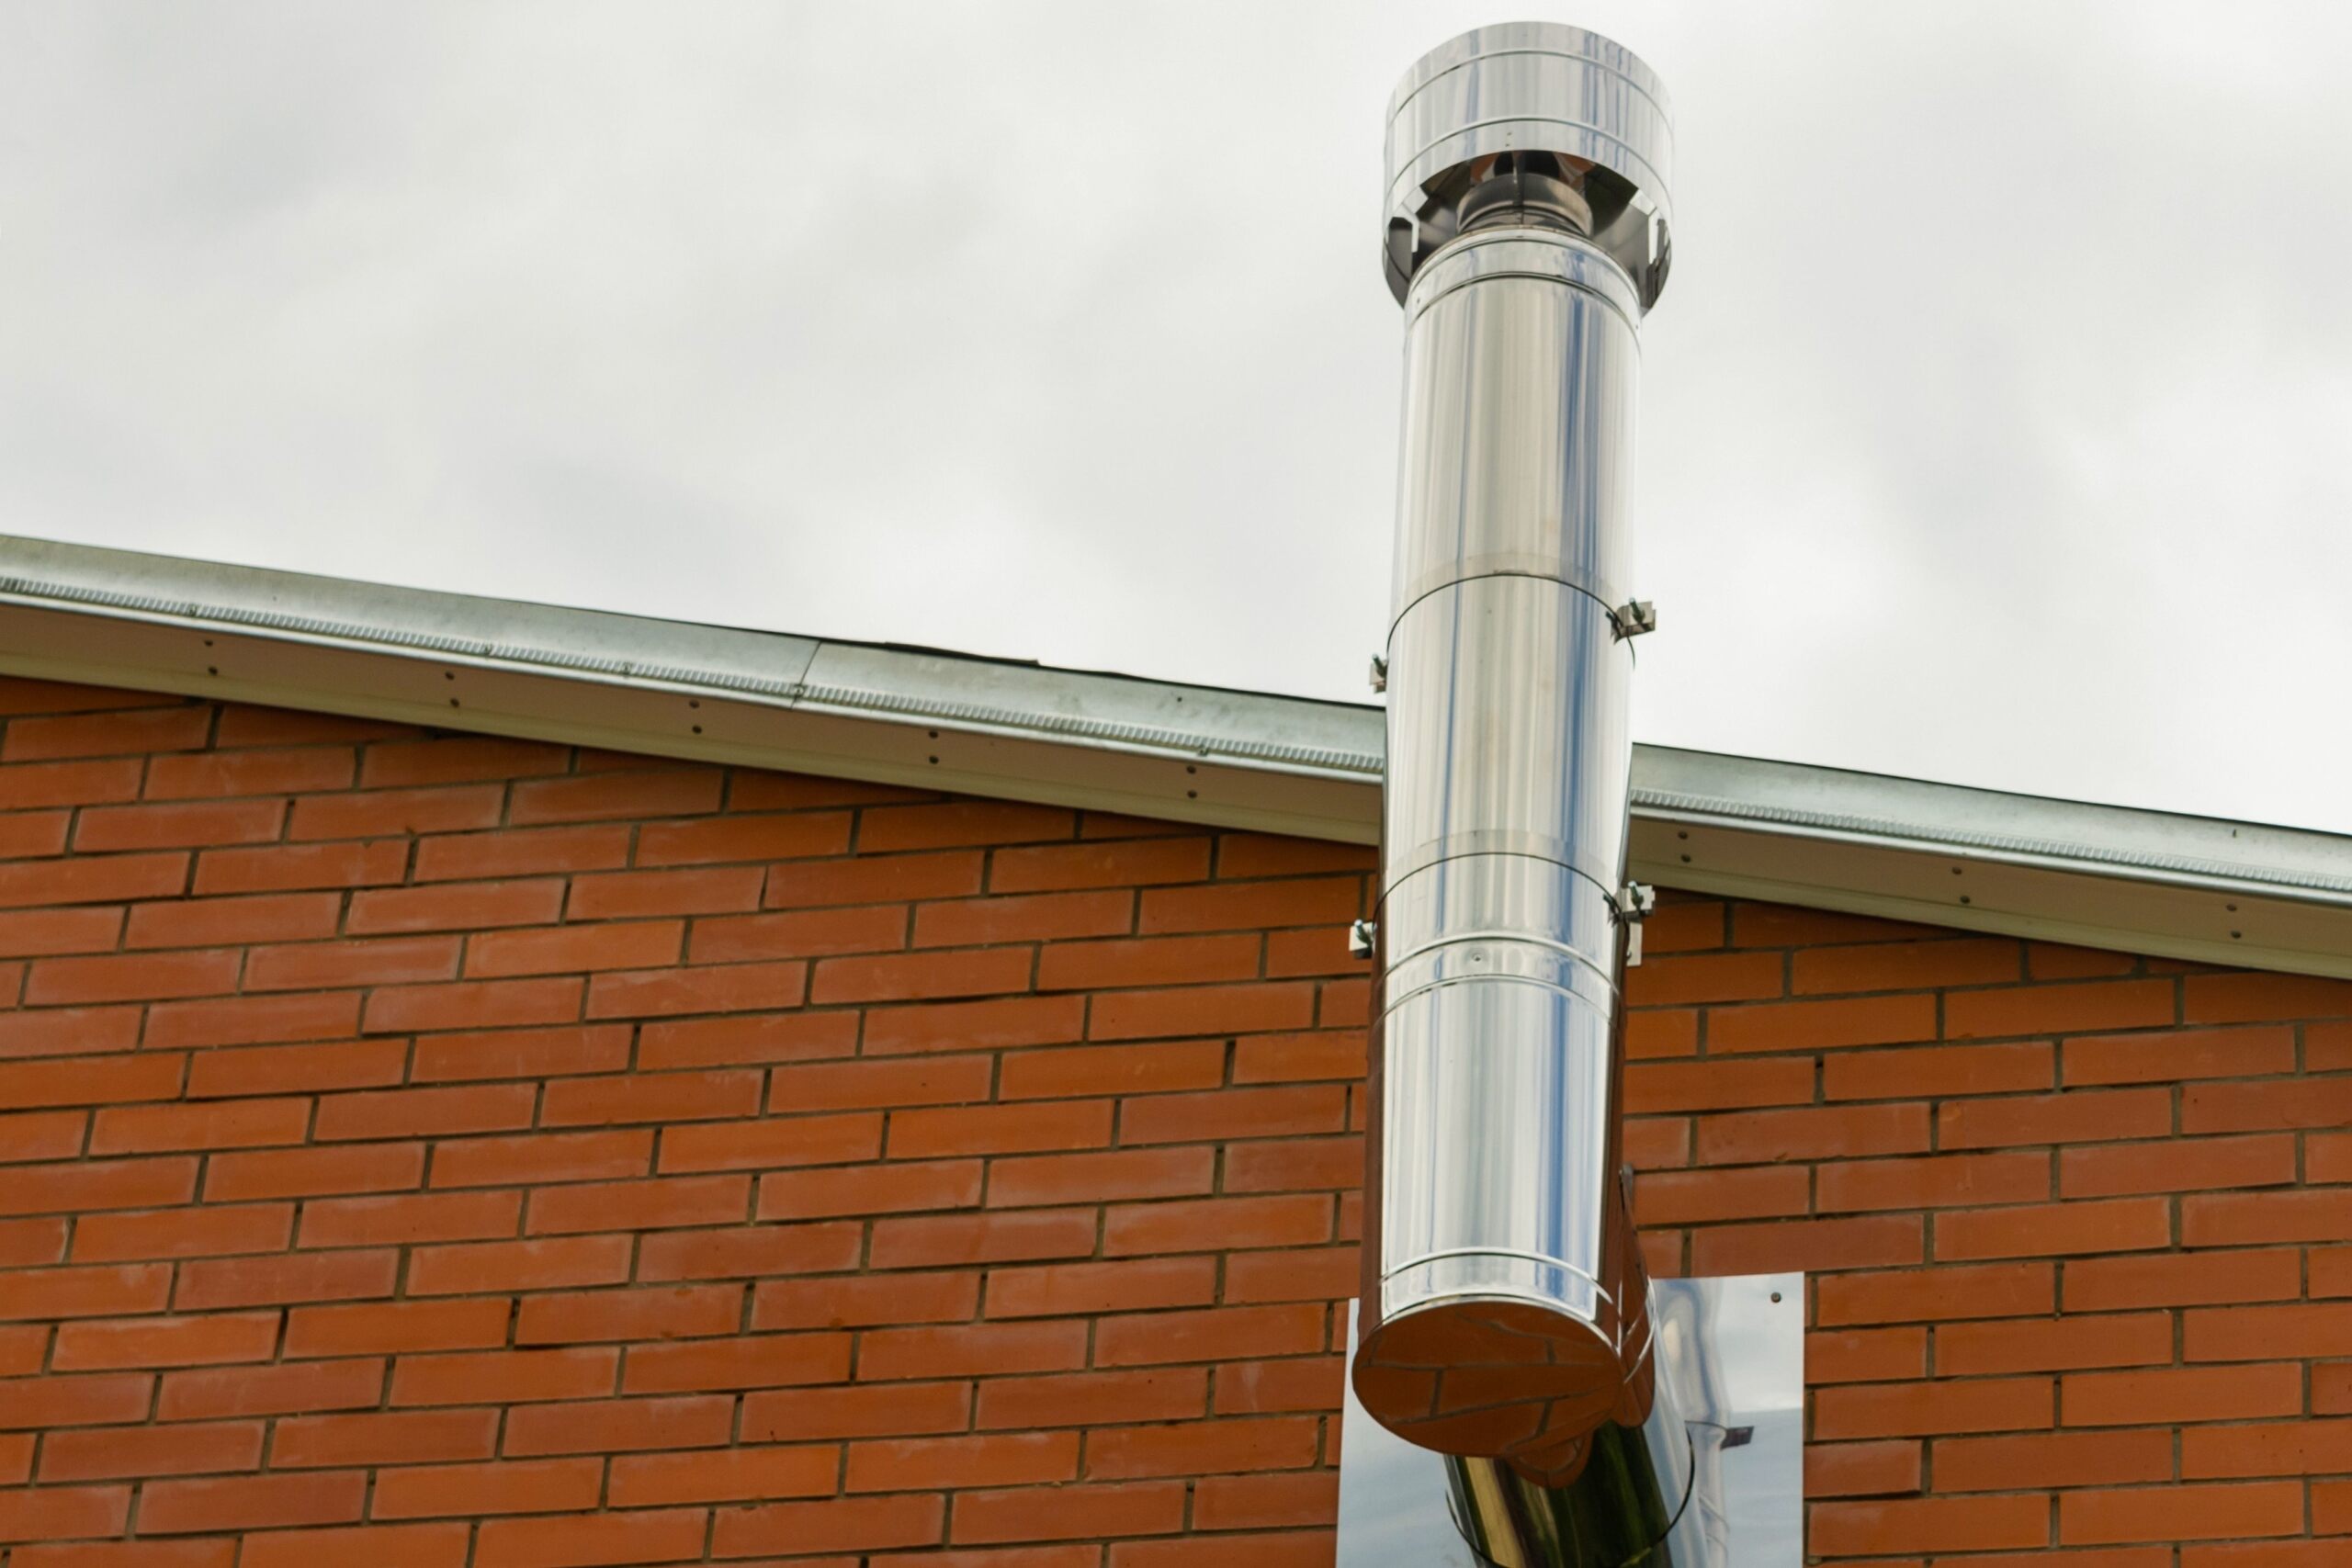
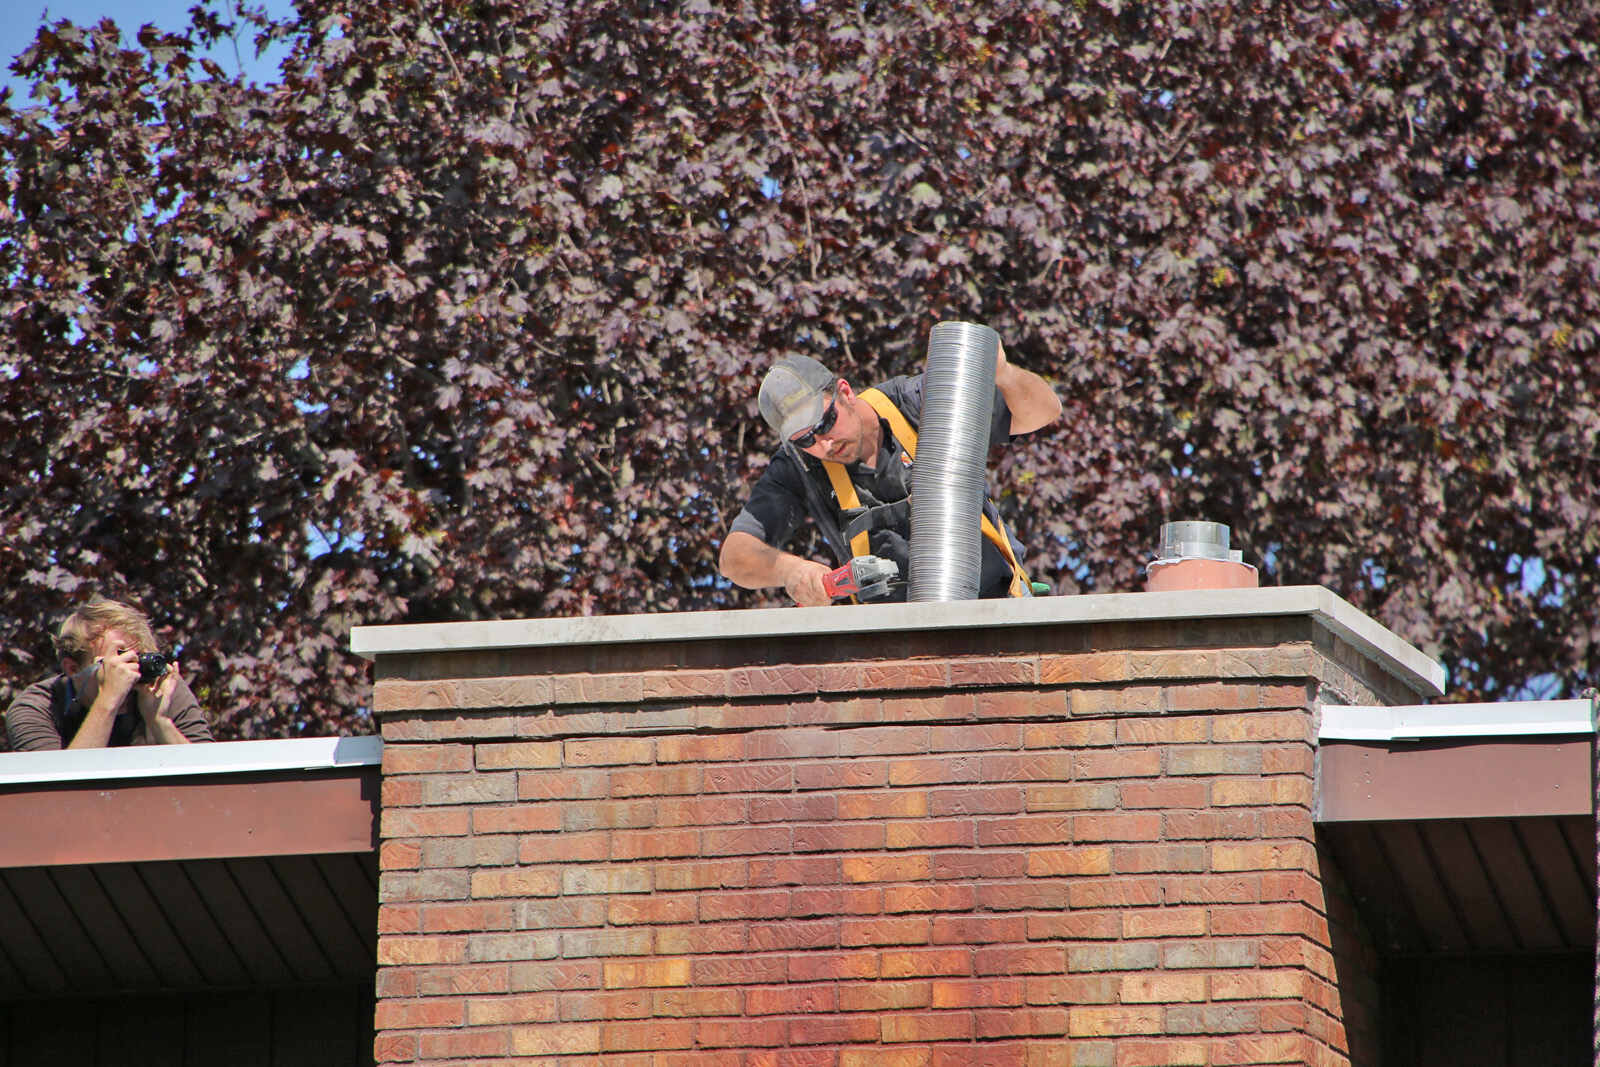
Step 6: Assessing the Chimney Liner
The chimney liner is a protective barrier that lines the inside of the chimney flue. It serves several important functions, including improving draft efficiency, preventing heat transfer to combustible materials, and reducing the risk of chimney fires. Assessing the condition of the chimney liner is crucial for maintaining a safe and efficient chimney system. Here’s how to assess the chimney liner:
- Inspect the Visible Portion: Using a flashlight, examine the visible portion of the chimney liner from inside the fireplace or stove. Look for any cracks, damage, or deterioration. Pay close attention to the joints and seams, as these are common areas for wear and tear.
- Check for Discoloration: Look for any discoloration on the chimney liner. Dark patches or stains could indicate a buildup of creosote or a potential problem with the liner’s integrity.
- Monitor for Flaking or Peeling: Keep an eye out for any signs of flaking or peeling on the chimney liner. This could be a sign of thermal stress or corrosion, which may require further inspection and repair.
- Consider the Age of the Liner: If you know the age of your chimney liner, take that into consideration when assessing its condition. Liners typically have a lifespan of around 20-30 years, depending on the material and usage. If your liner is approaching or surpassing this timeframe, it may be time to consider a replacement.
If you notice any significant issues or concerns during the assessment of the chimney liner, it’s advisable to consult a professional chimney sweep. They can provide a more detailed inspection and recommend the appropriate course of action.
Now that we’ve assessed the chimney liner, let’s move on to inspecting the chimney flue.
Step 7: Inspecting the Chimney Flue
The chimney flue is the passageway that carries smoke and gases from the fireplace or stove to the outside. It’s crucial to inspect the flue to ensure its proper functionality and safety. Here’s how to conduct a thorough inspection of the chimney flue:
- Check for Obstructions: Use a flashlight to inspect the chimney flue for any obstructions, such as bird nests, leaves, or debris. Obstructions can restrict airflow and increase the risk of carbon monoxide buildup or chimney fires. If you detect any blockages, consult a professional to remove them safely.
- Look for Cracks or Gaps: Examine the walls of the flue for any visible cracks, gaps, or signs of deterioration. These issues can compromise the structural integrity of the chimney and allow harmful gases to escape into your home. If you notice any significant damage, it’s important to seek professional assistance for repair or relining.
- Monitor for Stains or Smoke Leakage: Check for any stains or discoloration on the walls of the flue, as well as around the chimney opening. These stains may indicate smoke leakage and could be a sign of a damaged or improperly sealed flue. Properly sealing the flue will help improve the efficiency and safety of your chimney.
- Inspect the Flue Liner: If your chimney has a separate flue liner, visually inspect it for any signs of wear, cracking, or degradation. The flue liner provides an additional layer of protection and insulation for the chimney. Damaged or deteriorated liners should be repaired or replaced by a professional.
Regularly inspecting the chimney flue will help ensure proper ventilation, prevent issues such as smoke backups or carbon monoxide leaks, and maintain the overall safety of your chimney system. If you are unsure about any findings or have concerns, it is always recommended to consult a certified chimney sweep.
Now that we’ve inspected the chimney flue, let’s move on to checking for structural issues in the chimney.
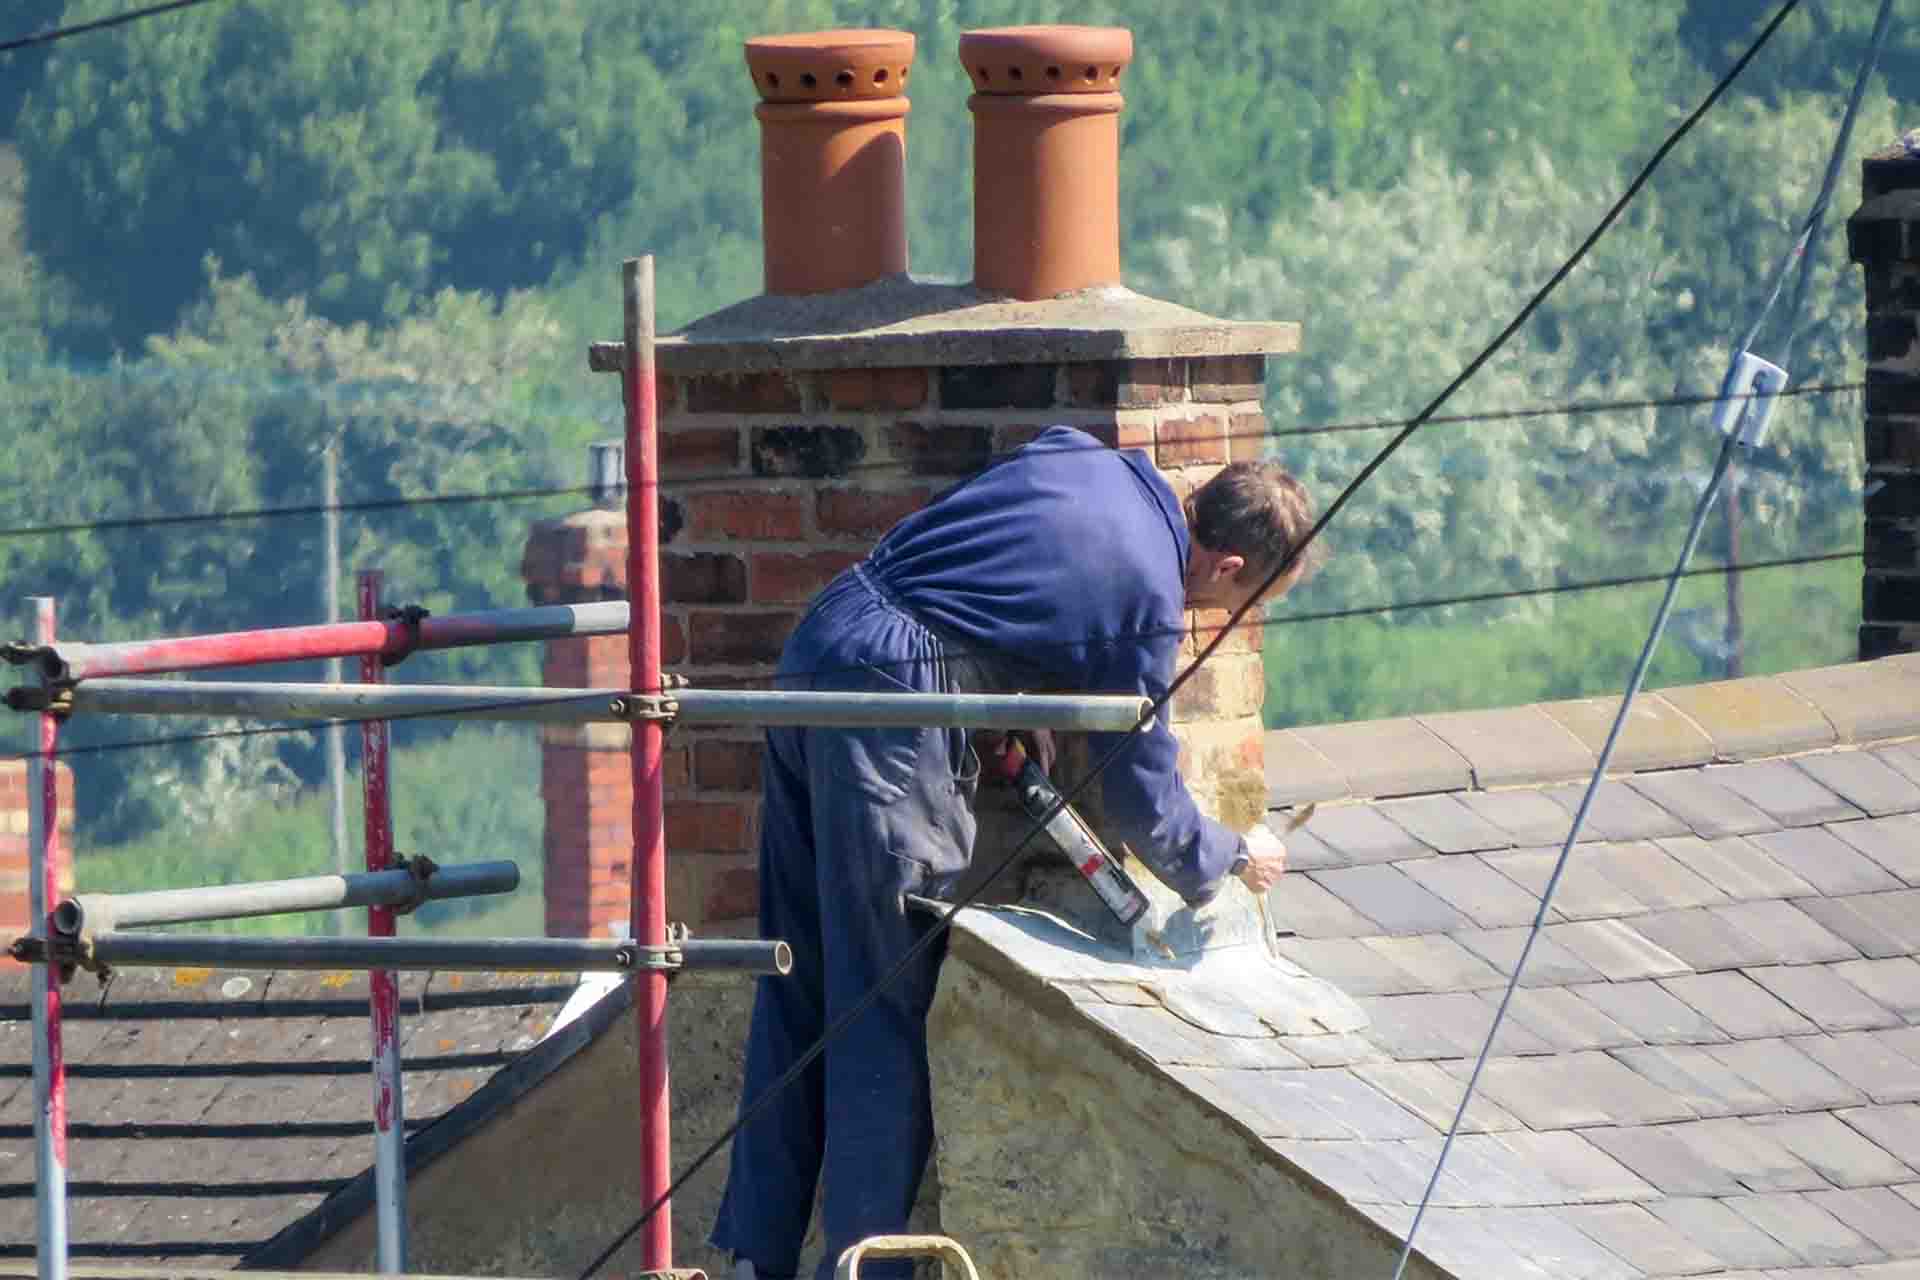
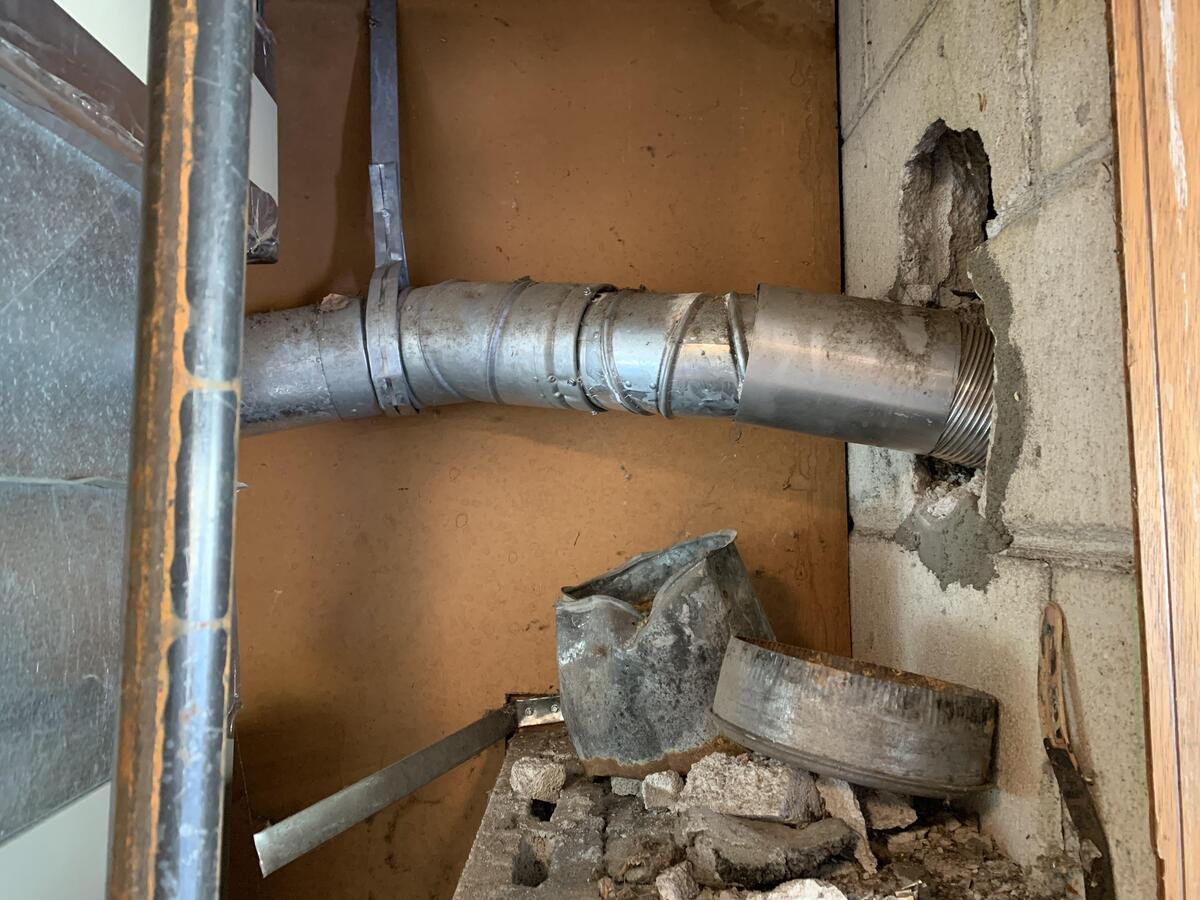
Step 8: Checking for Structural Issues
Checking for structural issues is a crucial step in chimney inspection as it ensures the stability and integrity of the chimney. Identifying and addressing any structural problems early on can prevent further damage and ensure the safety of your home. Here’s how to check for structural issues in your chimney:
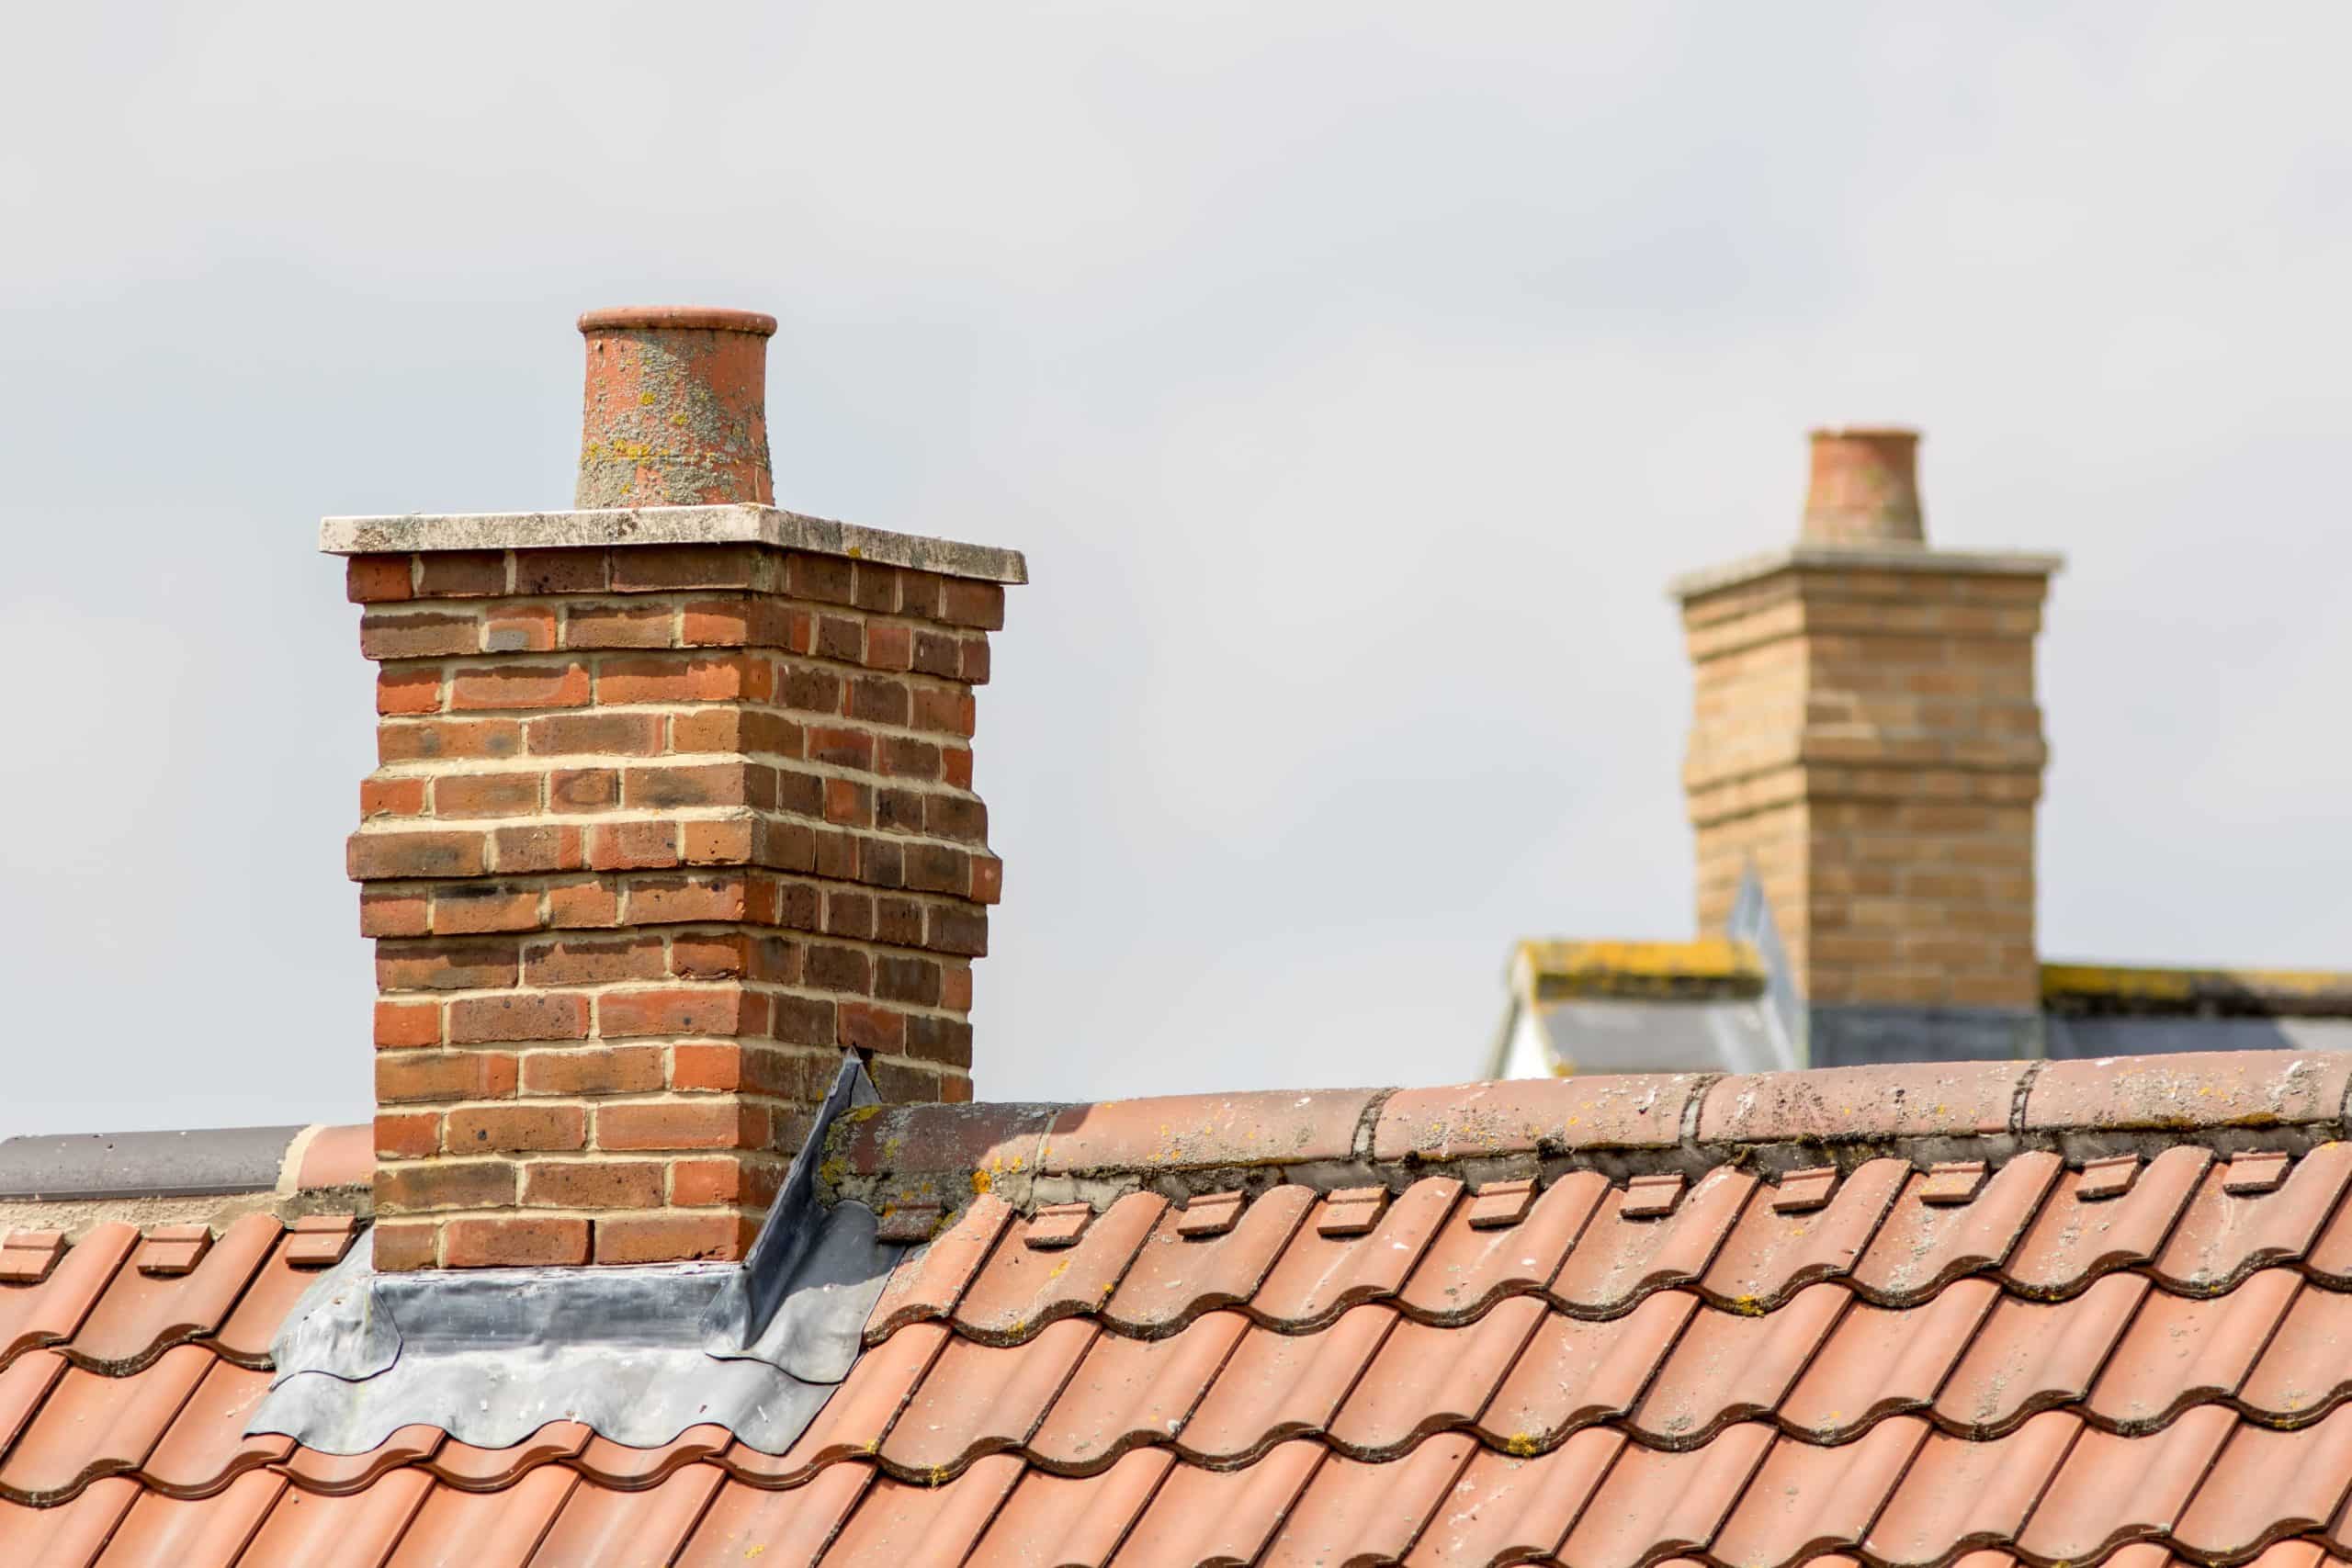
- Examine the Chimney Bricks or Masonry: Inspect the bricks or masonry of the chimney for any visible signs of damage, such as cracks, spalling, or loose bricks. These issues can indicate deteriorating mortar, shifting foundations, or water damage. Pay attention to areas near the base of the chimney, where moisture tends to accumulate.
- Check for Leaning or Tilting: Step back and visually assess the chimney from different angles. Look for any signs of leaning or tilting. A chimney that is not standing upright could indicate a structural problem or a weak foundation. Report any significant leaning to a professional for further evaluation.
- Inspect the Chimney Crown: Examine the chimney crown, which is the topmost concrete or masonry surface of the chimney. Look for any cracks, deterioration, or signs of water damage. A damaged chimney crown can lead to water infiltration and worsen the condition of the chimney structure.
- Assess the Chimney Flashing: Check the flashing, which is the metal strip that seals the connection between the chimney and the roof. Look for any loose or damaged flashing as it can allow water to seep into the chimney structure, causing significant damage over time.
If you notice any structural issues during the inspection, it’s crucial to consult a professional chimney inspector or structural engineer for a detailed assessment and appropriate repair recommendations. They will be able to provide expert insight and guidance to ensure the stability and safety of your chimney.
Now that we’ve checked for structural issues, let’s move on to evaluating the chimney’s masonry.
Read more: How To Make A Cardboard Chimney
Step 9: Evaluating the Chimney’s Masonry
The masonry of the chimney plays a vital role in its overall stability and durability. Evaluating the condition of the chimney’s masonry will help identify any signs of deterioration or damage, allowing for timely repairs. Here’s how to evaluate the chimney’s masonry:
- Inspect the Mortar Joints: Examine the mortar joints between the bricks or stones. Look for any signs of deterioration, such as crumbling or missing mortar. Damaged mortar can weaken the structure of the chimney and may require re-pointing or re-mortaring.
- Check for Efflorescence: Look for white, powdery deposits on the surface of the masonry. This substance, known as efflorescence, is a sign of water intrusion. It can indicate underlying moisture problems that should be addressed to prevent further damage.
- Examine the Brick or Stone: Inspect the bricks or stones for any cracks, chips, or spalling. These issues can compromise the strength of the chimney’s masonry. Pay close attention to areas near the base of the chimney, where water can accumulate and cause more significant damage.
- Assess the Chimney Crown: Evaluate the condition of the chimney crown, which is the topmost protective layer of the chimney. Look for any cracks, deterioration, or signs of water damage. A damaged chimney crown can lead to water infiltration and further degradation of the masonry.
If you notice any significant masonry issues, it’s important to consult a professional chimney repair specialist. They will have the expertise to assess the severity of the damage and recommend the appropriate repairs or restoration techniques.
Regular maintenance and timely repair of the chimney’s masonry will help preserve its structural integrity and ensure the safety and longevity of your chimney system.
Now that we’re done evaluating the chimney’s masonry, let’s move on to the final step: cleaning and maintaining the chimney.
Step 10: Cleaning and Maintaining the Chimney
Regular cleaning and maintenance of your chimney are essential for its safe and efficient operation. Over time, creosote buildup, debris, and other contaminants can accumulate, increasing the risk of chimney fires and impairing its performance. Here’s how to clean and maintain your chimney:
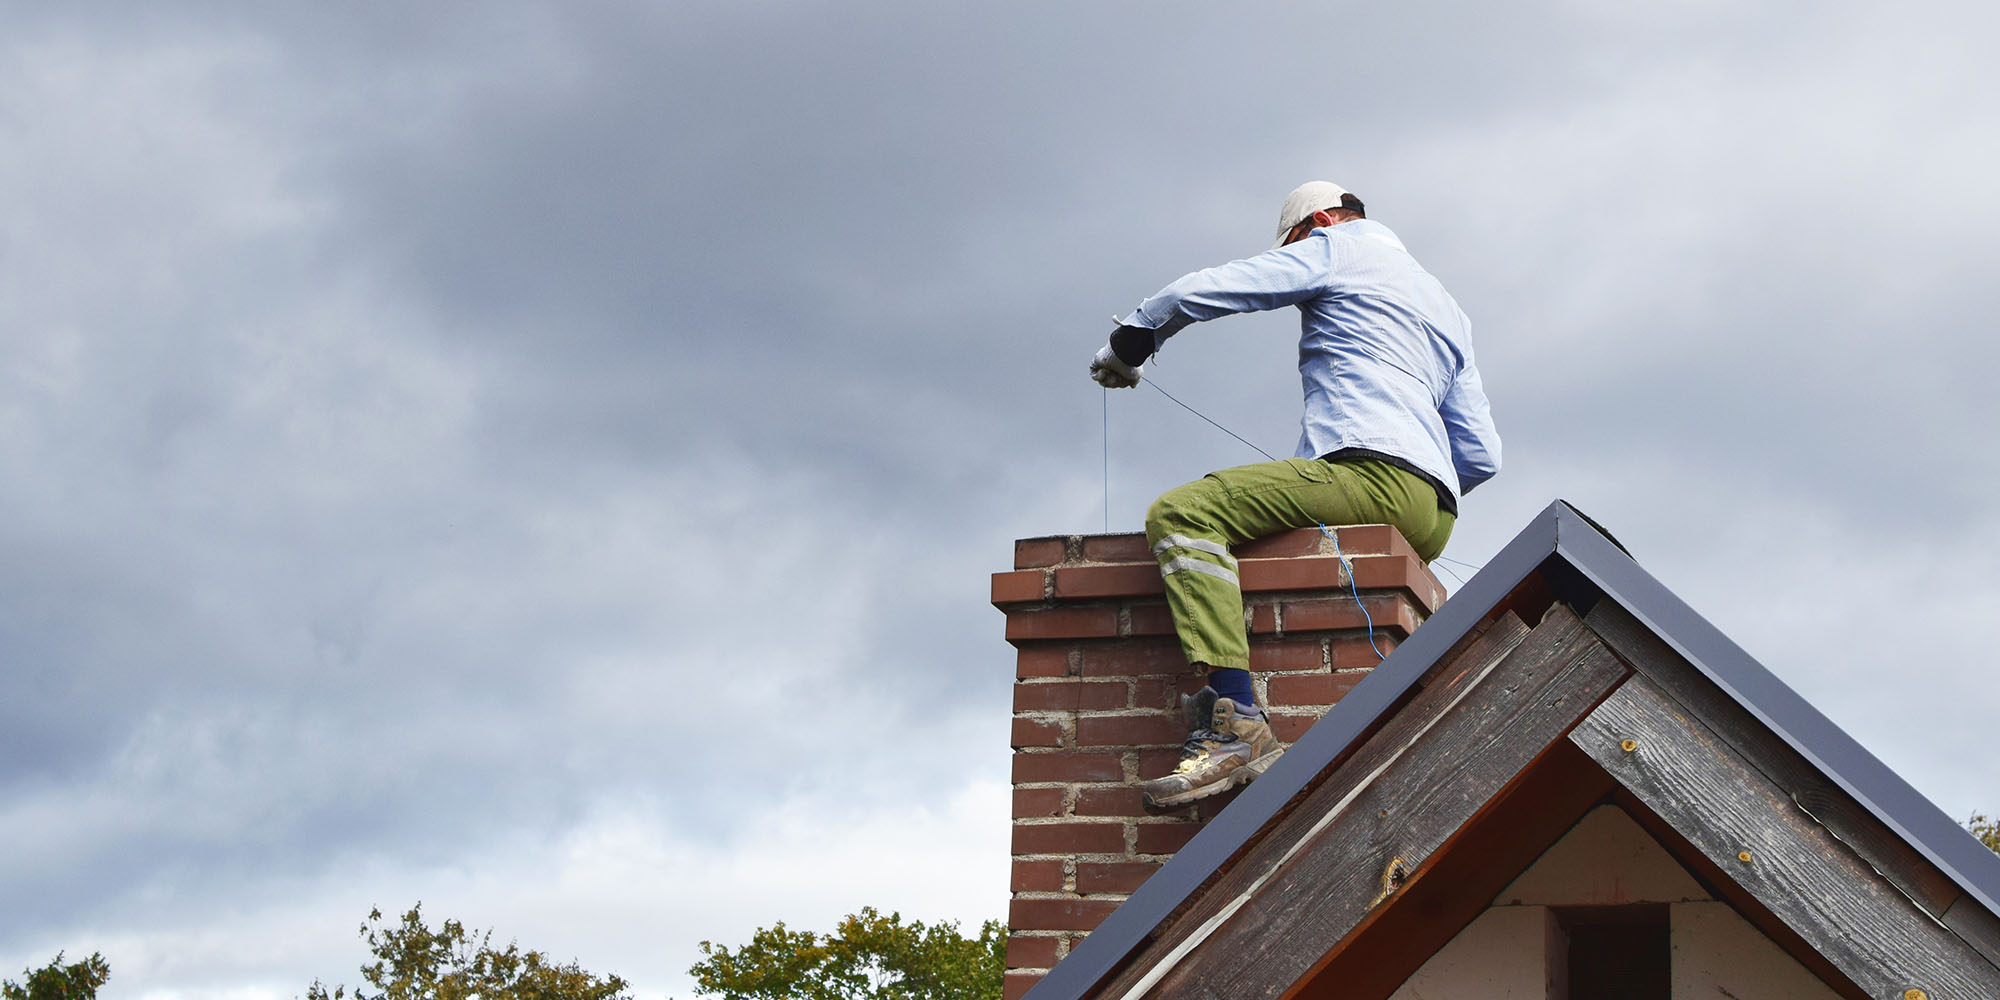
- Hire a Professional Chimney Sweep: It’s recommended to hire a professional chimney sweep for an annual cleaning and inspection. They have the knowledge, skills, and specialized tools to thoroughly clean the chimney and remove any built-up creosote or obstructions.
- Use Proper Burning Techniques: Burn seasoned firewood that has been properly dried. Avoid burning wet or green wood, as it can lead to excessive creosote buildup and other issues. Also, avoid burning materials like cardboard, plastics, or treated wood, as they can release harmful chemicals and increase the risk of chimney fires.
- Keep the Firebox Clean: Regularly remove ash and other debris from the firebox using a fireplace shovel or vacuum. This helps maintain proper airflow and prevents excess buildup that can restrict the fire’s efficiency and increase the risk of chimney fires.
- Check and Replace Chimney Cap: Inspect the chimney cap regularly and replace it if damaged or missing. The chimney cap helps keep debris, animals, and excess moisture out of the chimney, preventing potential blockages and damage.
- Maintain Proper Ventilation: Ensure that your home is properly ventilated, as poor ventilation can contribute to condensation and moisture-related chimney problems. Make sure windows and doors are well-sealed to prevent drafts that can impact airflow.
- Monitor Carbon Monoxide Detectors: Install carbon monoxide detectors near your fireplace or in proximity to the chimney. Regularly check the detectors to ensure they are functioning correctly, as carbon monoxide is a silent, odorless, and potentially dangerous gas that can be produced by a faulty chimney.
- Address Repairs Promptly: If you notice any signs of chimney damage or issues during your inspections, such as cracks, leaks, or deterioration, address them promptly. Ignoring repairs can lead to more extensive damage and increase the risk of hazards.
By following these cleaning and maintenance practices, you can ensure the optimal performance, safety, and longevity of your chimney. Remember, if you are unsure or uncomfortable performing any of these tasks yourself, it’s recommended to seek the assistance of a professional chimney sweep.
With these steps, you now have the knowledge and guidance to inspect and maintain your chimney effectively. Regular inspections and maintenance will not only keep your chimney functioning well, but also provide peace of mind knowing that your home and loved ones are safe.
Now, go ahead and schedule your chimney inspection to ensure a cozy and worry-free winter season!
Conclusion
Inspecting and maintaining your chimney is an essential part of responsible homeownership. Regular inspections help ensure the safety, efficiency, and longevity of your chimney system. By following the steps outlined in this guide, you can effectively assess your chimney for any potential issues and take appropriate action to address them.
Remember, safety should always be a priority when dealing with your chimney. While this article provides a comprehensive overview of chimney inspection, it is essential to recognize the limits of a DIY inspection. If you come across any significant structural damage, excessive creosote buildup, or complex issues beyond your expertise, it is strongly advised to seek the assistance of a professional chimney sweep.
By gathering the necessary tools, inspecting the exterior and interior, checking for creosote buildup, examining the chimney cap and spark arrestor, assessing the chimney liner and flue, and addressing any structural and masonry issues, you will be well-equipped to maintain a safe and well-functioning chimney.
Additionally, don’t forget about regular cleaning and maintenance, such as hiring a professional chimney sweep, practicing proper burning techniques, keeping the firebox clean, monitoring the chimney cap, maintaining proper ventilation, and addressing repairs promptly. These steps will contribute to the overall performance and safety of your chimney.
Now that you possess the knowledge and tools necessary for chimney inspection and maintenance, take the initiative to schedule regular check-ups and cleaning to ensure a warm and secure environment in your home.
By giving your chimney the attention it deserves, you can enjoy a cozy fireplace experience, protect your home, and provide peace of mind for you and your family.
Frequently Asked Questions about How To Inspect A Chimney
Was this page helpful?
At Storables.com, we guarantee accurate and reliable information. Our content, validated by Expert Board Contributors, is crafted following stringent Editorial Policies. We're committed to providing you with well-researched, expert-backed insights for all your informational needs.
0 thoughts on “How To Inspect A Chimney”