Articles
How To Fix A Leak Around A Chimney
Modified: March 19, 2024
Learn how to fix a leak around a chimney with our informative articles. Discover step-by-step guides and expert tips for a waterproof solution.
(Many of the links in this article redirect to a specific reviewed product. Your purchase of these products through affiliate links helps to generate commission for Storables.com, at no extra cost. Learn more)
Introduction
Welcome to our comprehensive guide on how to fix a leak around a chimney. If you have noticed water seeping into your home near the chimney area or have observed visible signs of damage, it’s essential to address the issue promptly to prevent further damage and costly repairs.
A leak around the chimney can cause a range of problems, from water damage to the interior of your home to structural damage to the chimney itself. Understanding the signs and causes of chimney leaks and knowing how to fix them can help you tackle the issue effectively.
In this article, we will walk you through the step-by-step process of identifying and repairing a leak around your chimney. We will also provide you with valuable tips to prevent future leaks and maintenance considerations to keep your chimney in optimal condition.
Before we dive into the repair process, it’s crucial to have a basic understanding of the signs that indicate a leak and the potential causes behind it.
Key Takeaways:
- Identifying the signs and causes of chimney leaks, and taking proper safety precautions and repair steps can help you effectively fix a leak around your chimney and prevent further damage to your home.
- Regular maintenance, including inspections, cleaning, and seeking professional help when needed, is crucial for preventing and addressing chimney leaks, ensuring a safe and cozy environment in your home.
Understanding the Problem
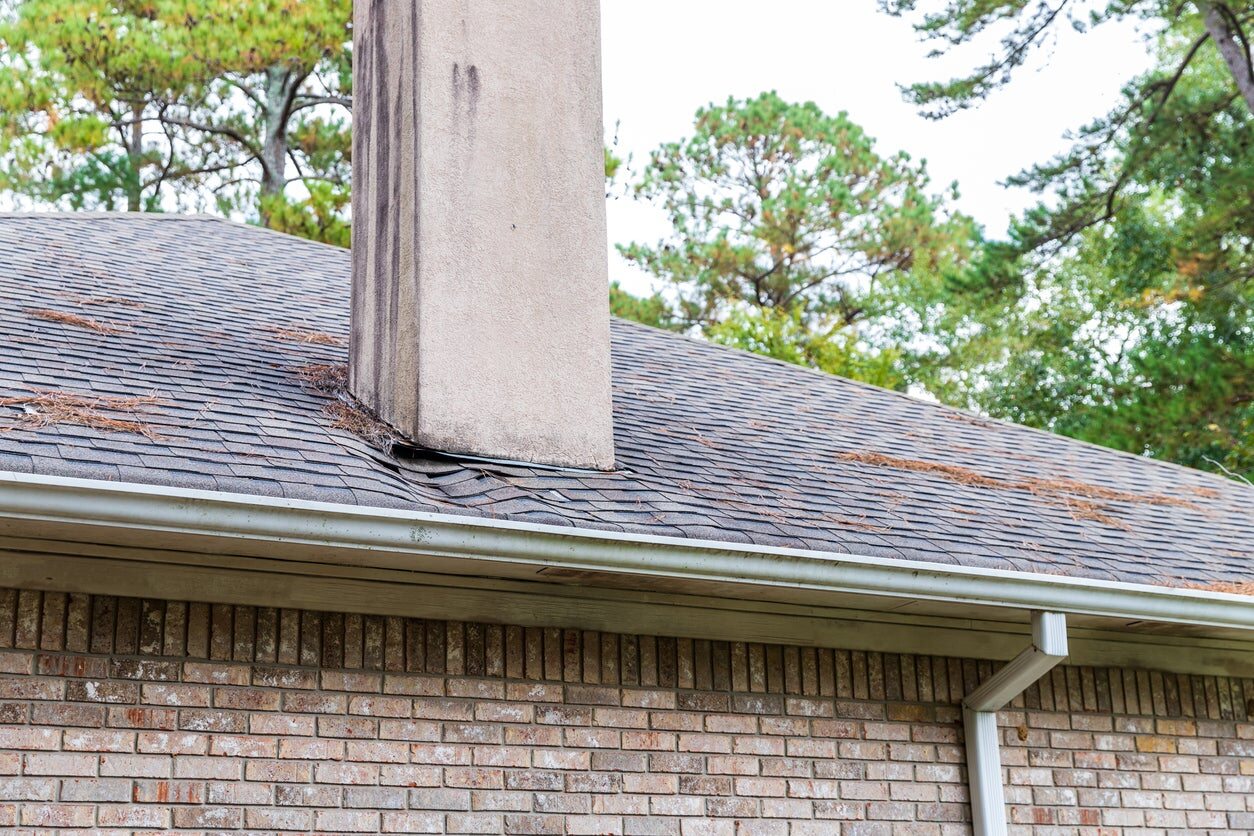
Before attempting to fix a leak around a chimney, it’s important to recognize the signs that indicate a problem. Here are some common signs of a leak:
- Water stains or discoloration on the walls or ceilings near the chimney.
- Musty odors or mold growth in the attic or around the chimney area.
- Deterioration or rotting of woodwork or drywall near the chimney.
- Cracks or gaps in the chimney masonry or flashing.
- Water pooling on the roof or gathering around the chimney base.
Now, let’s explore some of the common causes of chimney leaks:
- Damaged flashing: Flashing is a thin metal strip installed to create a seal between the chimney and the roof. Over time, flashing can become corroded, cracked, or improperly installed, leading to water infiltration.
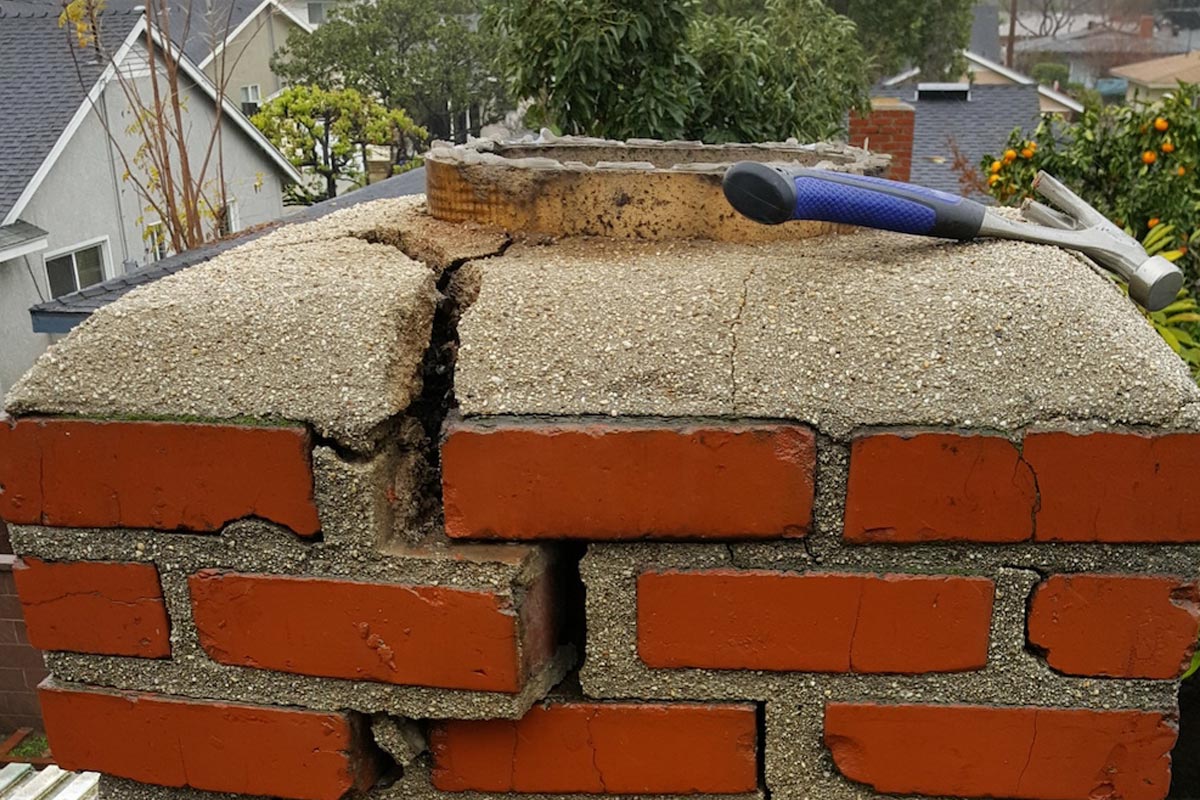
- Cracked chimney crown: The crown is the top part of the chimney that protects it from water damage. When the crown develops cracks or deteriorates, water can seep into the chimney structure and cause leaks.
- Failed chimney cap: A chimney cap is designed to prevent rainwater and debris from entering the chimney. If the cap is damaged or missing, water can freely enter and cause leaks.
- Chimney condensation: In some cases, leaks may be caused by condensation build-up inside the chimney flue. This can occur when warm air from the house mixes with colder air in the chimney, leading to moisture accumulation.
- Cracked masonry: Over time, the masonry of the chimney can develop cracks due to weather exposure and age. These cracks can allow water to penetrate the chimney system, leading to leaks.
Identifying the specific cause of the leak is crucial before proceeding with the repair process. Inspecting both the exterior and interior of the chimney can help pinpoint the source of the problem, which we will explore in the next section.
Preparing for the Repair
Before you begin fixing a leak around a chimney, it’s important to take proper safety precautions to ensure your well-being during the repair process. Here are some safety tips to keep in mind:
- Ensure you have a sturdy ladder to safely access the roof and chimney area.
- Wear appropriate protective gear, such as gloves and safety goggles, to protect yourself from debris and potential hazards.
- Work with a partner or have someone nearby to assist you if needed.
- Check the weather forecast and avoid working on the roof during inclement weather or strong winds.
- Turn off any utilities connected to the chimney, such as gas or electricity.
Once you have taken the necessary safety precautions, gather the tools and materials you will need for the repair. Here is a list of commonly used items:
- Safety gear (gloves, safety goggles, dust mask)
- Ladder
- Hammer
- Screwdriver
- Pry bar
- Tin snips
- Flashlight
- Wire brush
- Chisel
- Masonry caulk or sealant
- Waterproofing agent
- Roofing cement
- Replacement flashing
- Gloves
- Paintbrush
- Caulking gun
- Chimney cap (if needed)
Having these tools and materials readily available will help you complete the repair efficiently and effectively. If you don’t have the necessary tools, consider borrowing or renting them to ensure a smooth repair process.
Now that you are prepared with the required safety precautions and tools, it’s time to move on to the next crucial step: identifying the source of the leak. This will allow you to tackle the problem at its root and ensure a successful repair.
Identifying the Source of the Leak
Before proceeding with the repair, it’s important to identify the source of the leak around your chimney. This will help you target the specific area that needs to be addressed. To identify the source of the leak, you will need to conduct both an exterior and interior inspection.
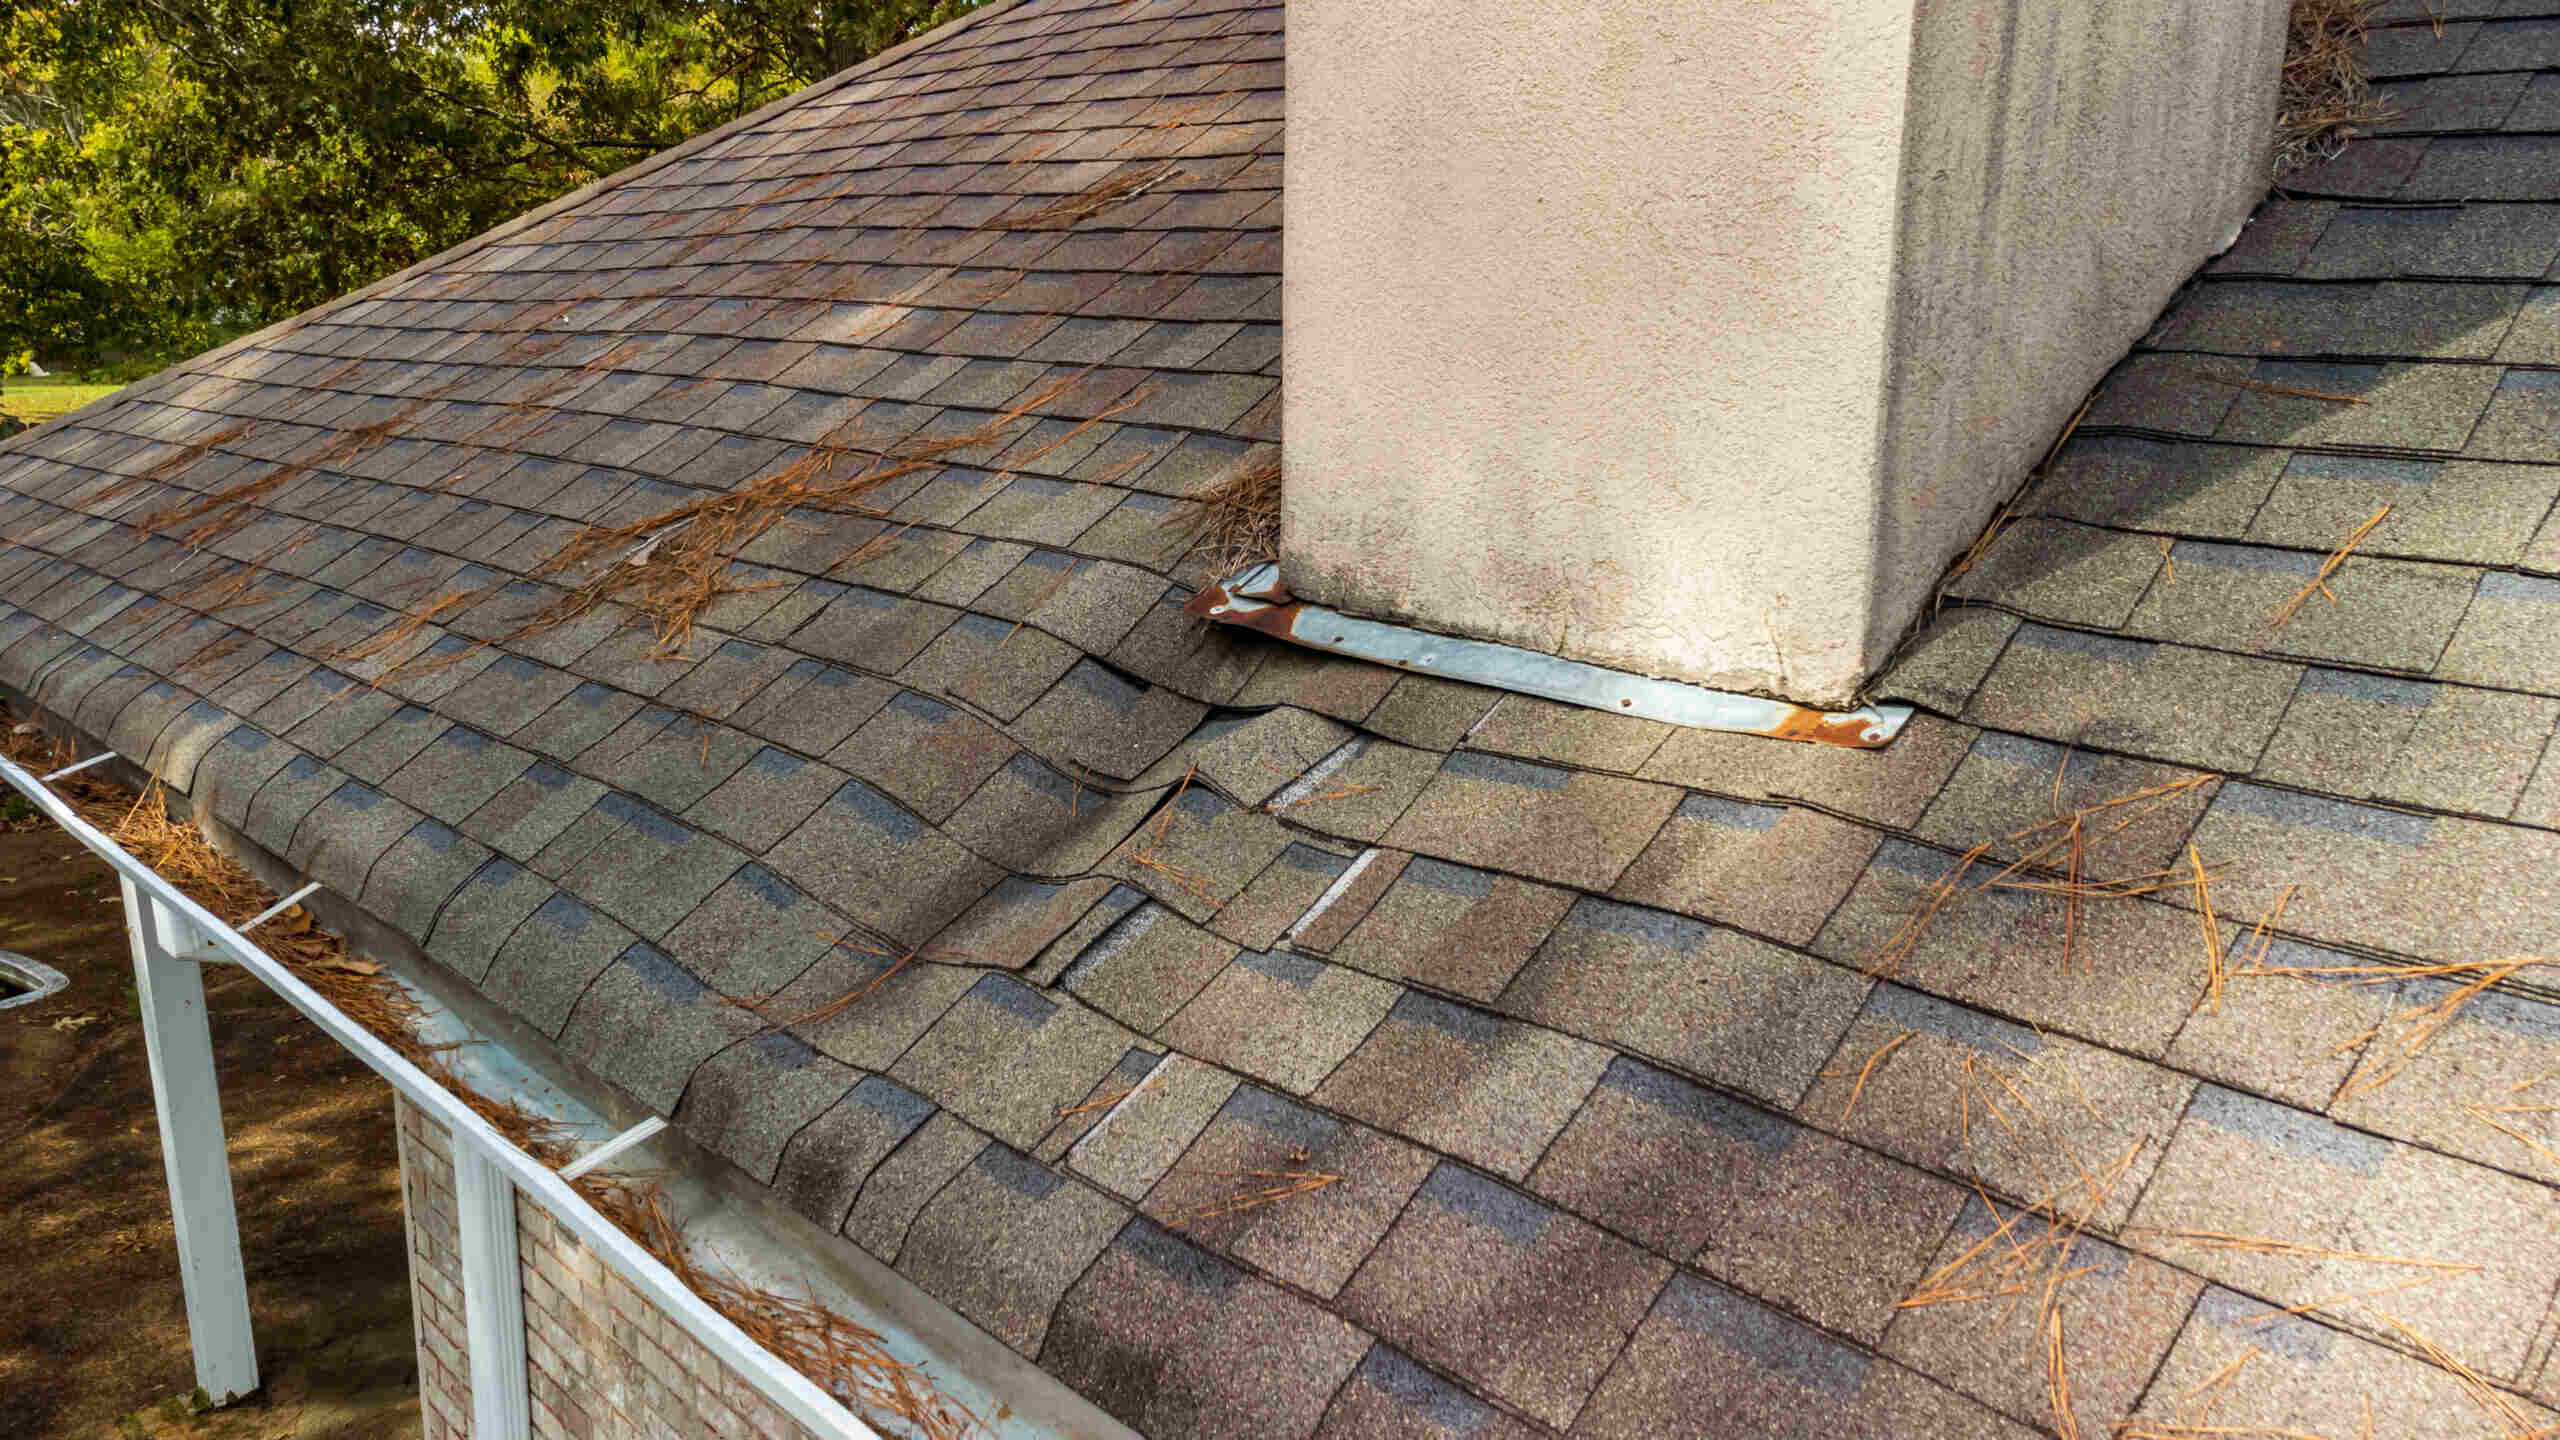
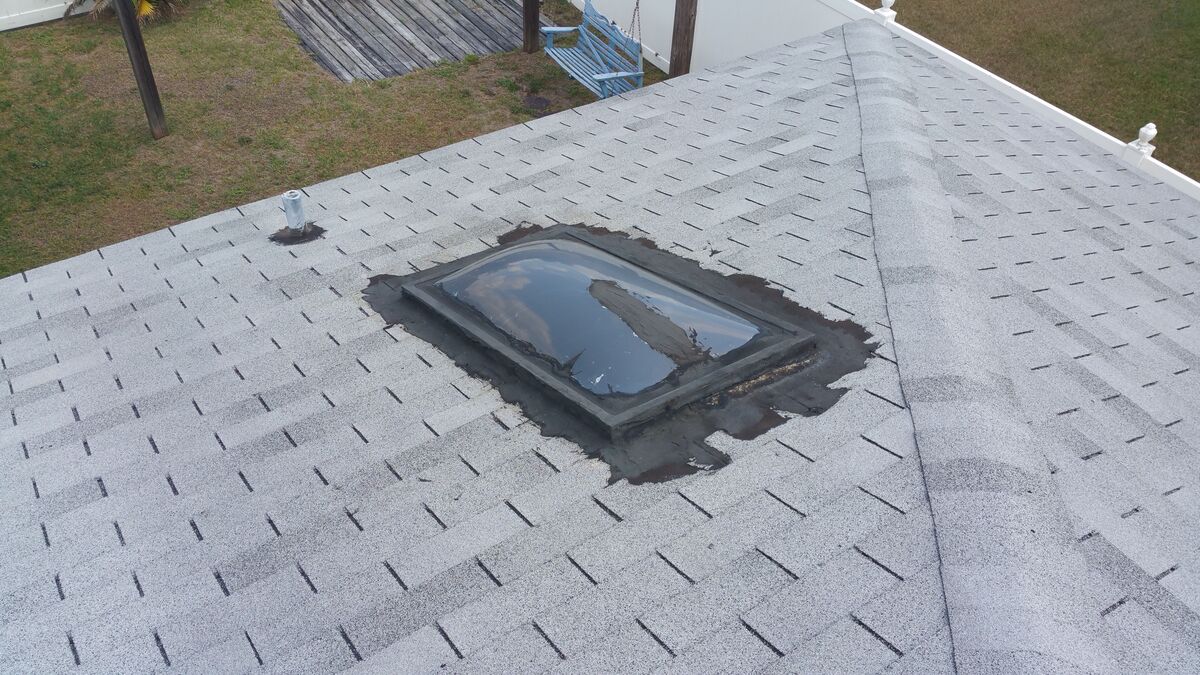
Exterior Inspection:
Start by carefully inspecting the exterior of your chimney. Look for any signs of damage or areas where water may be entering. Here are some areas to pay attention to:
- Check the flashing: Examine the metal flashing that connects the chimney to the roof. Look for any signs of corrosion, cracks, or gaps. Pay close attention to the corners and edges, as these areas are prone to leaks.
- Inspect the chimney crown: Examine the top of the chimney, also known as the crown. Look for any cracks or deterioration in the masonry. Damaged chimney crowns can allow water to seep into the chimney structure.
- Examine the chimney cap: Inspect the chimney cap to ensure it is intact and properly installed. A damaged or missing chimney cap can lead to water infiltration into the chimney.
- Check the brick and mortar: Look for any cracks or gaps in the chimney’s brickwork. Water can easily penetrate these openings and cause leaks.
- Inspect the chimney’s base: Examine the area where the chimney meets the roof. Check for any signs of water pooling or damage around the base.
Read more: How To Fix A Leak Around A Dormer
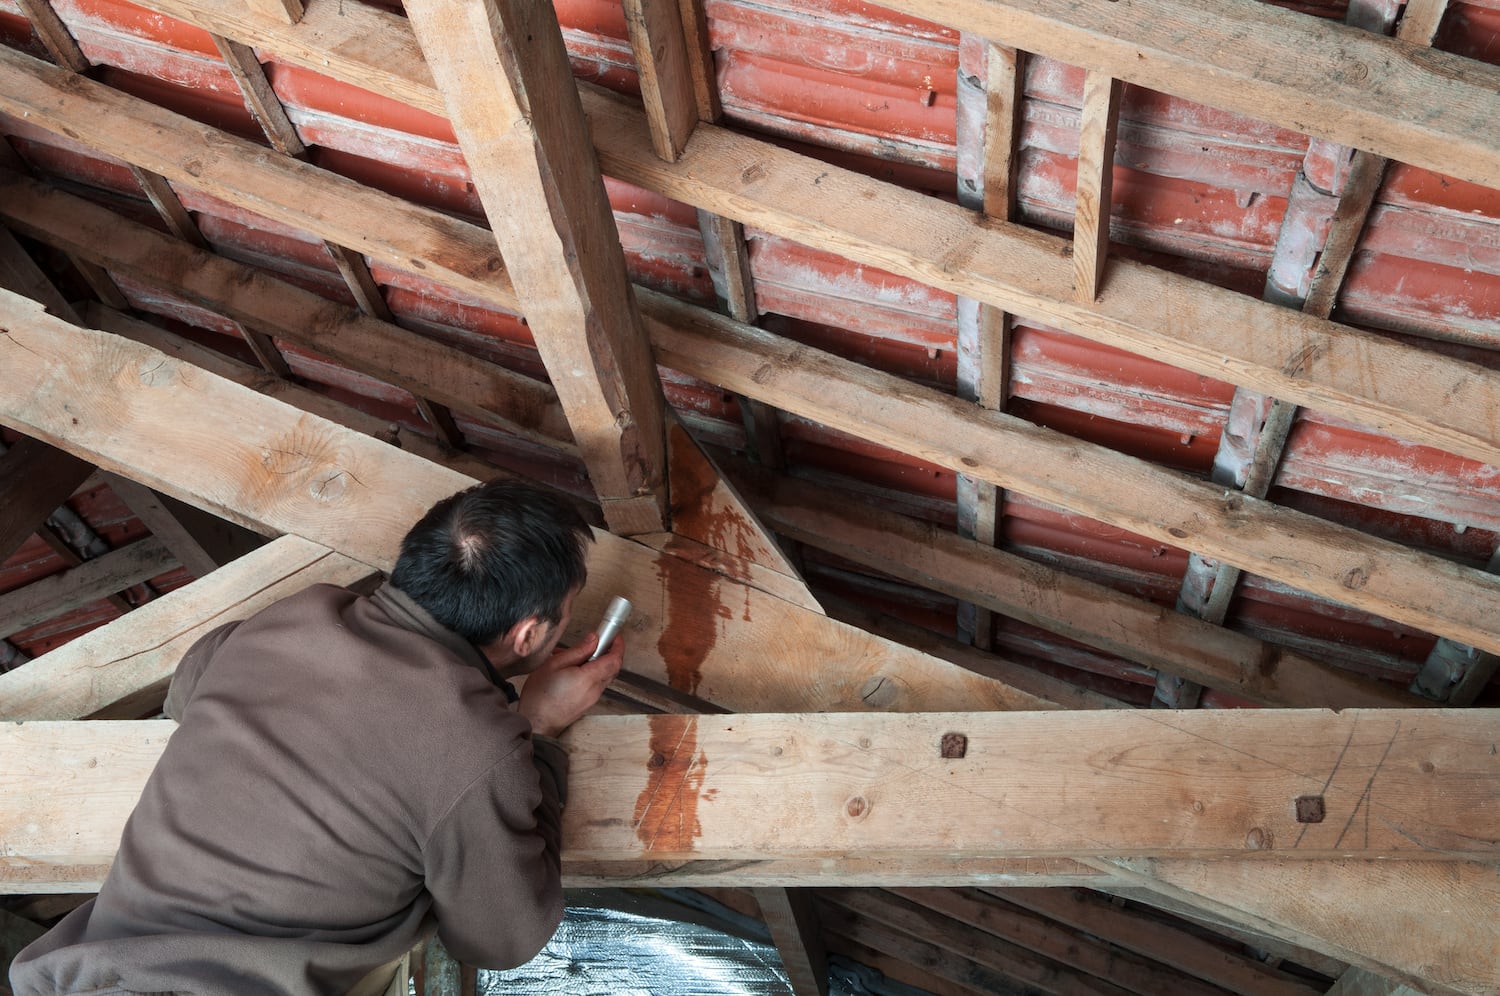
Interior Inspection:
Once you have completed the exterior inspection, it’s time to move indoors and inspect the interior of your chimney. Here’s what you should do:
- Check the attic or crawl space: Look for any signs of water stains, damp spots, or mold growth near the chimney area.
- Inspect the walls and ceilings: Examine the walls and ceilings near the chimney for any water stains or discoloration.
- Feel for moisture: Run your hands along the interior surface of the chimney to check for any dampness or moisture accumulation.
By thoroughly inspecting both the exterior and interior of your chimney, you can narrow down the source of the leak and focus your repair efforts accordingly. Now that you have identified the problem area, it’s time to move on to the repair process.
Repairing the Leak
Now that you have identified the source of the leak, it’s time to start the repair process. Follow these steps to fix the leak around your chimney:
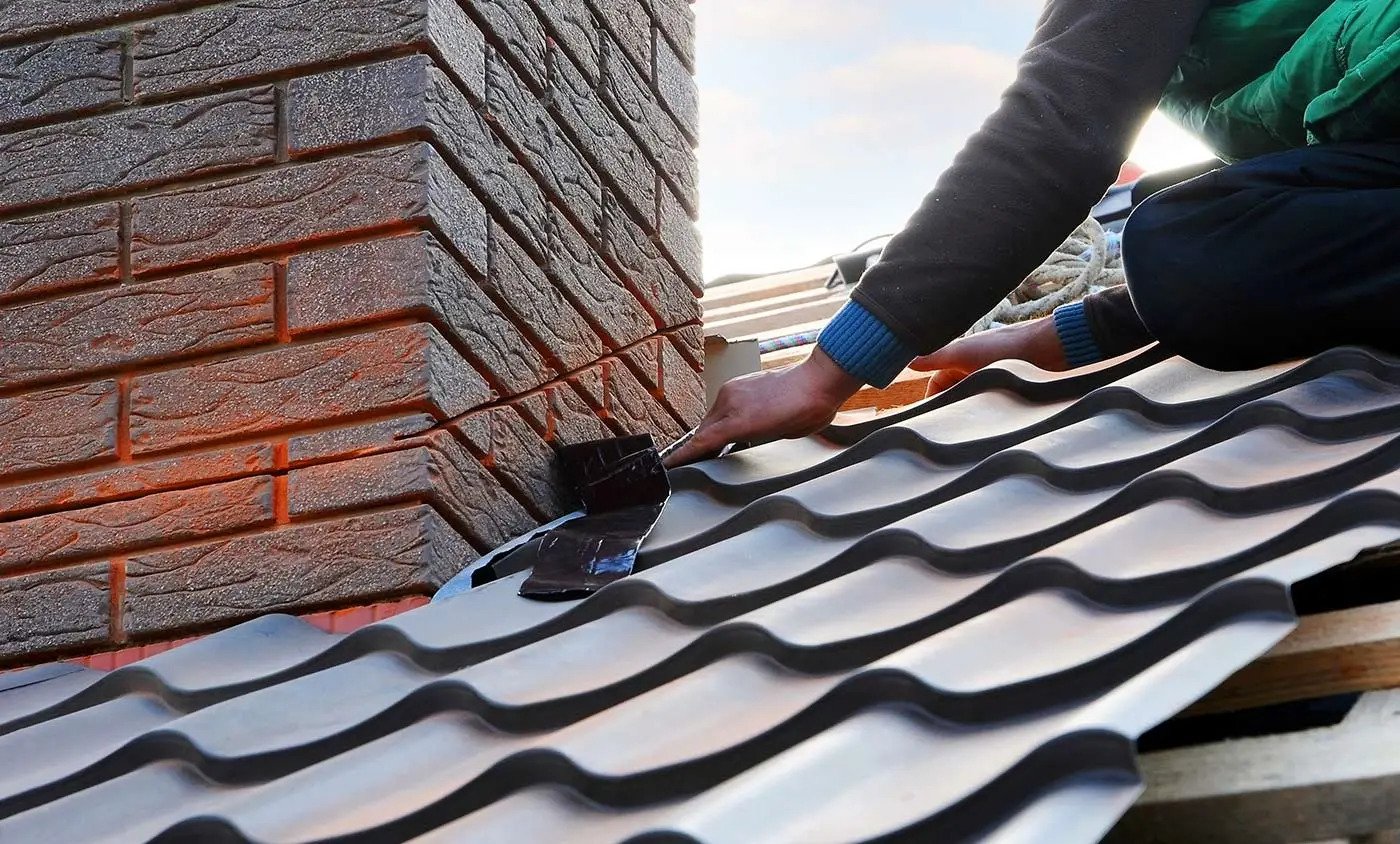
Step 1: Removing Damaged Flashing
The first step is to remove the damaged flashing. Use a pry bar or screwdriver to gently lift the edges of the flashing and remove any nails or screws holding it in place. Be careful not to damage the surrounding roofing materials during this process. Once the flashing is loosened, carefully pull it away from the chimney.
Step 2: Installing New Flashing
Next, measure and cut a new piece of flashing to match the size of the original. Use tin snips or a similar cutting tool to ensure a clean and accurate cut. Position the new flashing over the chimney and slide it under the surrounding roofing materials. Be sure to overlap the flashing with the roof shingles to create a watertight seal.
Read more: How To Flash Around A Chimney
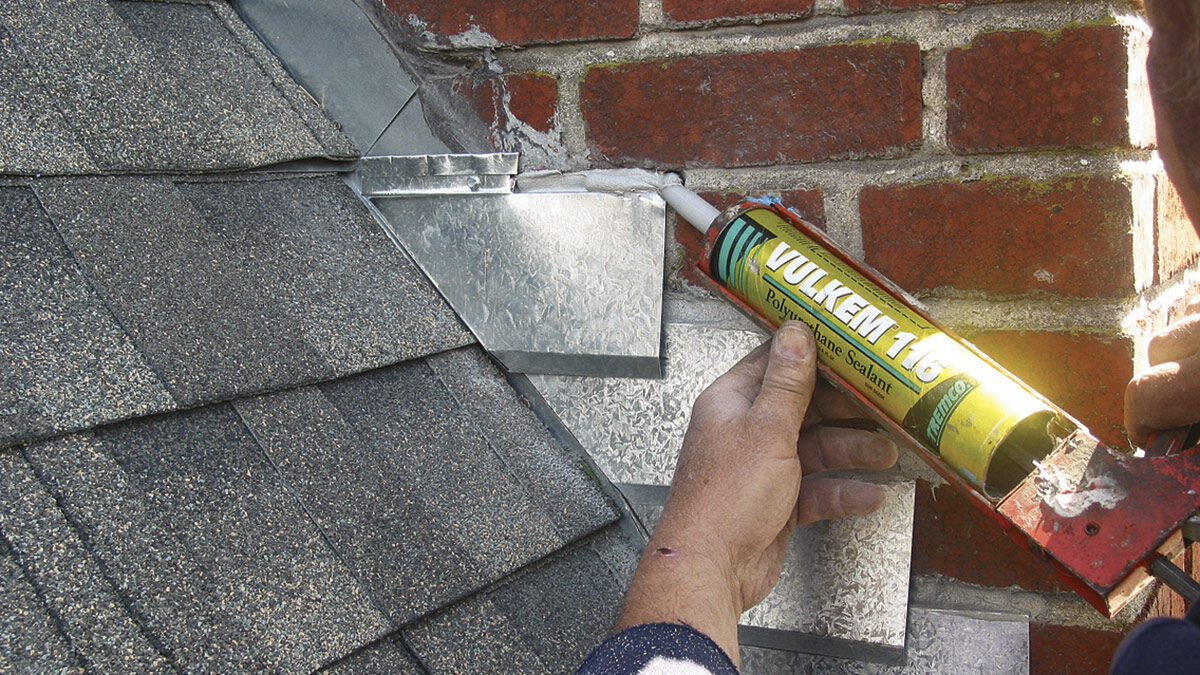
Step 3: Sealing the Flashing
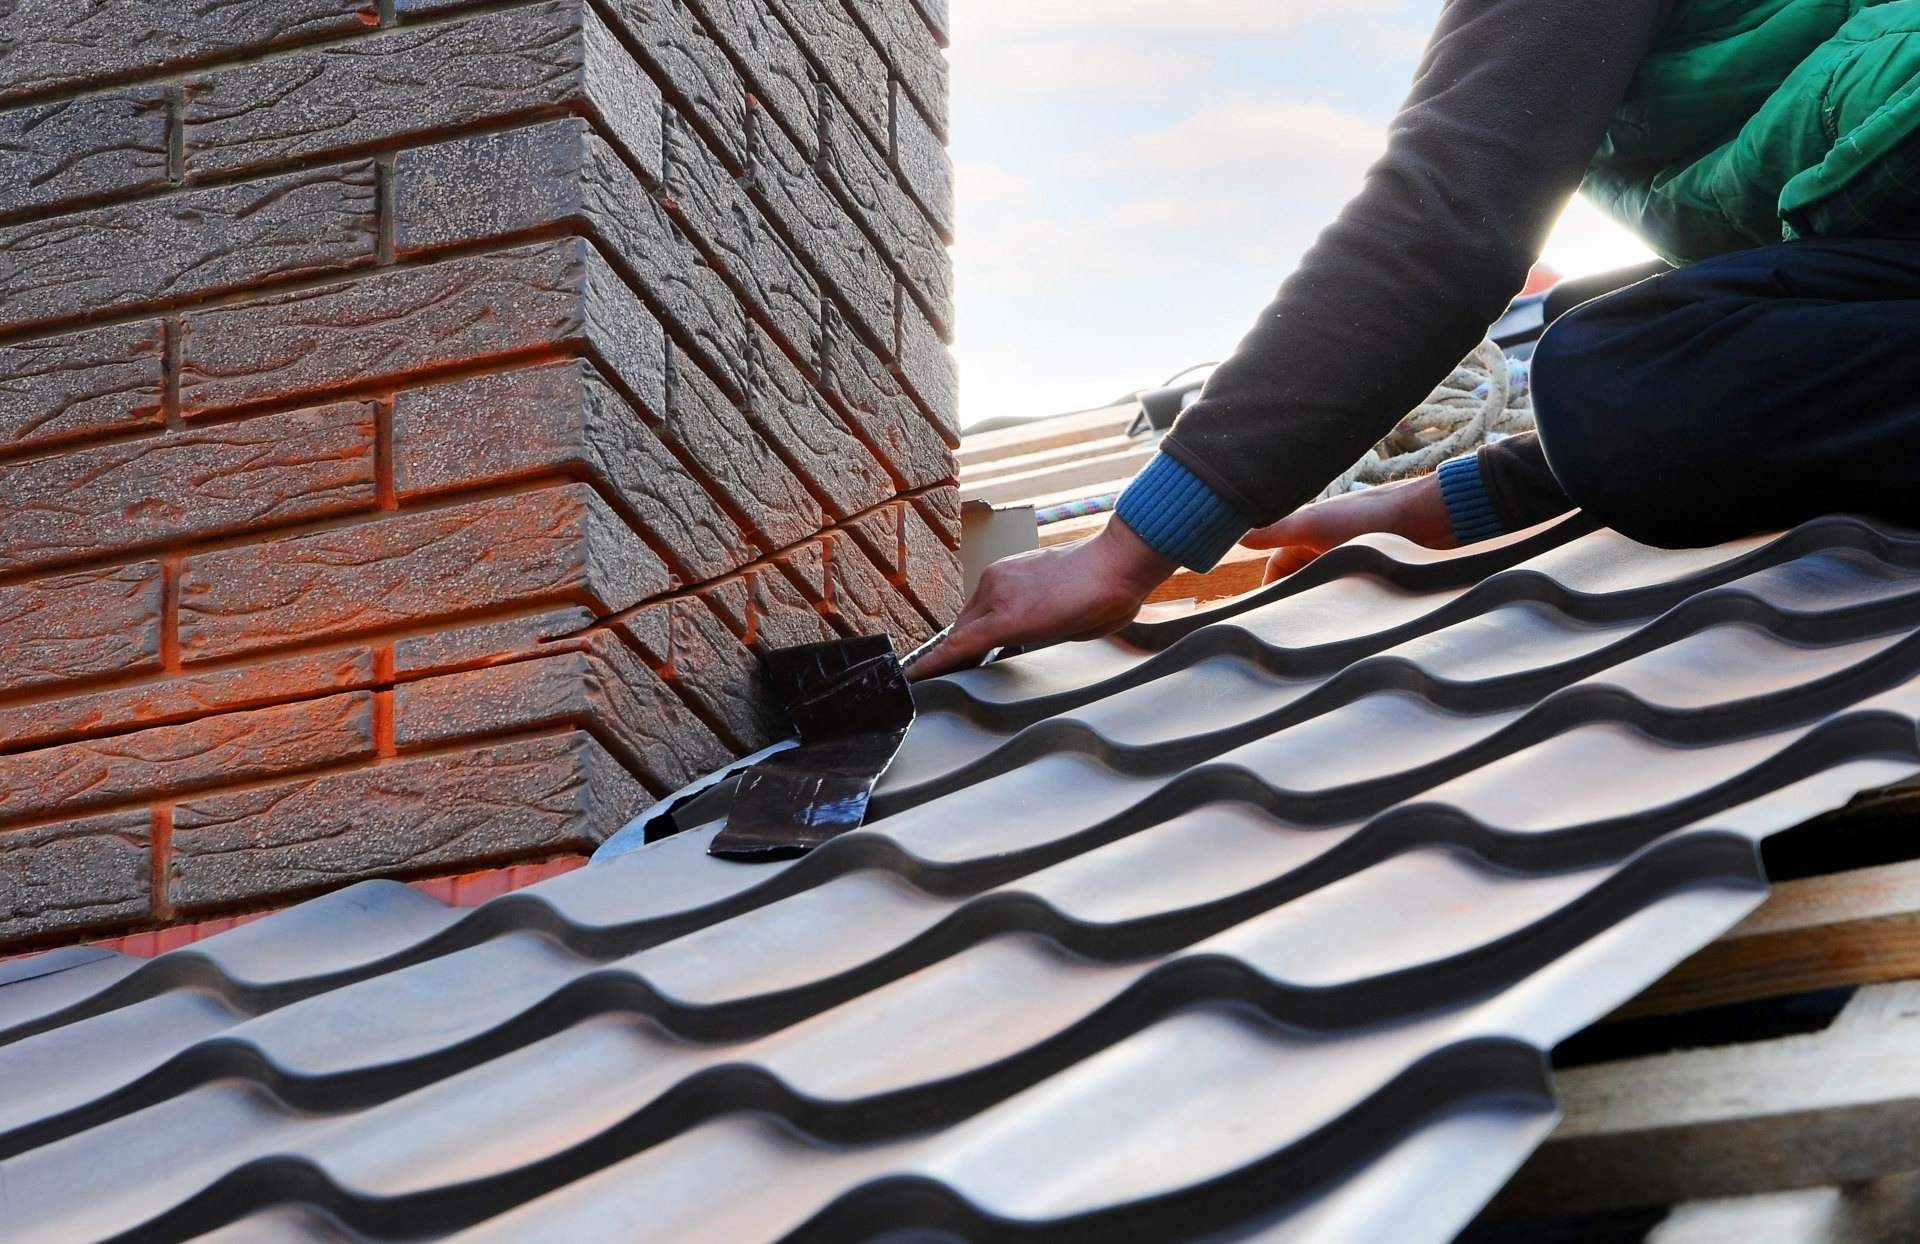
Once the new flashing is in place, it’s crucial to seal it properly to prevent any future leaks. Apply a generous amount of roofing cement or masonry caulk to seal the edges of the flashing. Use a putty knife or a similar tool to ensure a smooth and even application. Pay close attention to the corners and edges, as these areas are prone to leaks.
Step 4: Waterproofing the Chimney
In addition to repairing the flashing, it’s important to waterproof the chimney to further prevent leaks. Use a waterproofing agent specifically designed for masonry surfaces. Apply the waterproofing agent to the exterior of the chimney using a paintbrush or sprayer, following the manufacturer’s instructions. Ensure that all exposed masonry surfaces are thoroughly covered, including the crown and brickwork.
Allow the waterproofing agent to dry completely before testing the repairs. Once dry, inspect the repaired area for any signs of potential leaks. It is recommended to perform a water test by gently spraying water onto the repaired area and checking for any water seepage.
By following these steps and ensuring a proper repair, you can effectively fix the leak around your chimney and prevent further damage to your home. However, it’s worth noting that if you are not comfortable with or experienced in handling chimney repairs, it’s advisable to seek professional help to ensure the job is done correctly.
Additional Tips and Considerations
After successfully repairing the leak around your chimney, it’s important to keep up with regular maintenance to ensure the longevity and performance of your chimney. Here are some additional tips and considerations to keep in mind:
Regular Maintenance:
- Inspect your chimney at least once a year to check for any signs of damage or potential leaks. Look for cracks, gaps, or deteriorating flashing.
- Keep the chimney clean by regularly removing any debris, such as leaves or branches, that may collect on the roof or inside the chimney.
- Ensure proper ventilation to prevent condensation build-up inside the chimney. This can be achieved by opening dampers or installing venting systems.
- Trim any overhanging tree branches near the chimney to prevent damage from falling limbs or leaves.
- Check the chimney cap regularly to ensure it is in good condition and securely in place. Replace any damaged or missing caps promptly.
Read more: How To Seal Flashing Around Chimney
Seeking Professional Help:
While you can perform basic maintenance and minor repairs on your chimney, it’s important to know your limitations. Some situations may require the expertise and knowledge of a professional chimney repair specialist. Here are a few scenarios when it’s advisable to seek professional help:
- If the leak is severe or persistent, despite your repair attempts, it’s best to consult a professional who can assess the situation and provide a more thorough solution.
- If you are uncomfortable or inexperienced with working at heights or handling roofing materials, it’s safer to leave the repair to professionals who have the necessary tools and expertise.
- If you notice significant damage to the chimney structure, such as crumbling or extensive masonry cracks, it’s best to have a professional evaluate the chimney’s overall condition.
Remember, your safety and the integrity of your home should always be the top priority. If you are unsure or hesitant about handling chimney repairs on your own, it’s always best to consult with a professional who can provide knowledgeable guidance and ensure the job is done correctly.
By implementing regular maintenance and seeking professional assistance when needed, you can effectively prevent and address chimney leaks, keeping your home safe, dry, and comfortable.
Conclusion
Dealing with a leak around your chimney can be a daunting task, but with the right knowledge and steps, you can successfully repair the problem and prevent further damage to your home. By understanding the signs and causes of chimney leaks, you can quickly identify the source of the issue and take appropriate action.
Throughout this guide, we’ve provided you with a comprehensive overview of how to fix a leak around a chimney. From the initial inspection to the repair process, we’ve covered the necessary steps to address the problem effectively. Remember to prioritize safety by taking the necessary precautions and using the right tools and materials for the job.
Regular maintenance is key to keeping your chimney in optimal condition. By conducting routine inspections and addressing any issues promptly, you can prevent leaks and extend the lifespan of your chimney. Additionally, seeking professional help when needed will ensure that complex repairs or situations are handled by experts, guaranteeing a thorough and proper solution.
By following the tips and techniques outlined in this guide and being proactive in maintaining your chimney, you can enjoy a leak-free and well-maintained chimney for years to come. Remember, a well-maintained chimney not only adds to the beauty of your home but also provides a safe and cozy environment during colder months.
Take the time to address any chimney leaks you may have, and don’t hesitate to seek professional assistance if necessary. With proper care and maintenance, your chimney will continue to keep your home warm and inviting for many seasons to come.
Frequently Asked Questions about How To Fix A Leak Around A Chimney
Was this page helpful?
At Storables.com, we guarantee accurate and reliable information. Our content, validated by Expert Board Contributors, is crafted following stringent Editorial Policies. We're committed to providing you with well-researched, expert-backed insights for all your informational needs.


0 thoughts on “How To Fix A Leak Around A Chimney”