Articles
How To Fix A Cracked Stove Top
Modified: January 8, 2024
Discover effective methods and step-by-step instructions for repairing a cracked stove top through our informative and helpful articles.
(Many of the links in this article redirect to a specific reviewed product. Your purchase of these products through affiliate links helps to generate commission for Storables.com, at no extra cost. Learn more)
Introduction
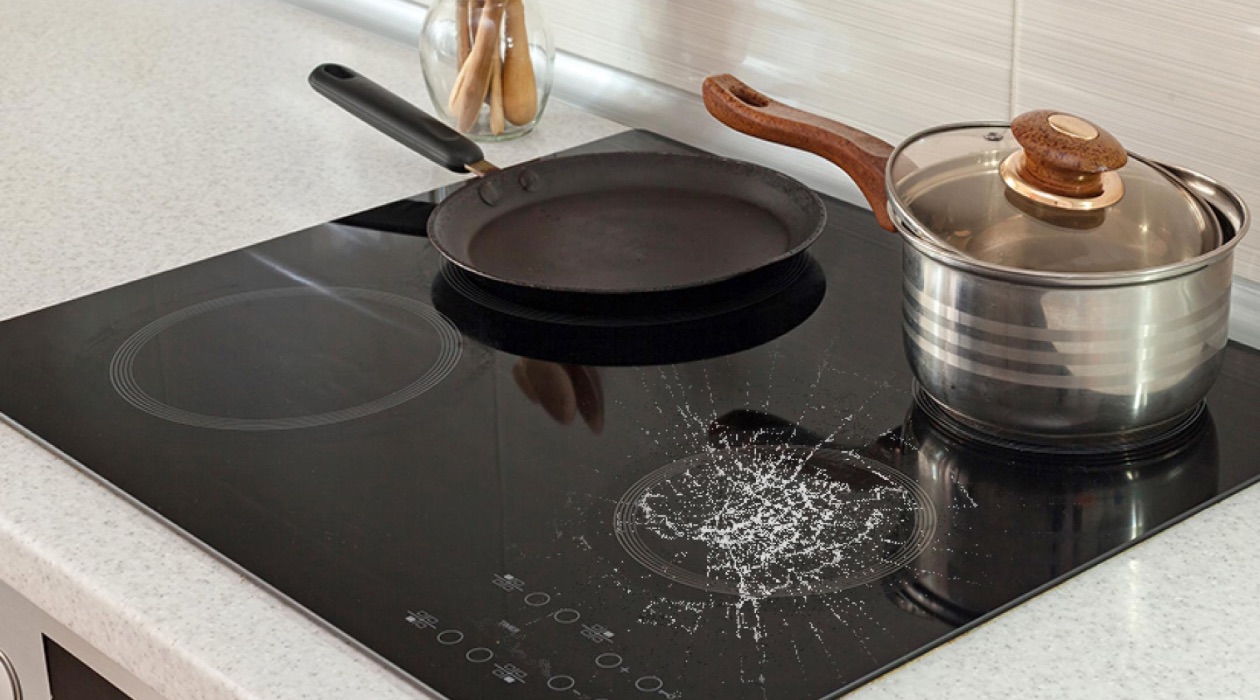
Welcome to our comprehensive guide on how to fix a cracked stove top. Few things can be as frustrating as discovering a crack on your stove top. Not only does it affect the aesthetics of your kitchen, but it can also pose a safety hazard. Thankfully, you don’t always have to replace the entire stove top when it cracks. In many cases, you can repair the crack and restore the functionality of your stove. In this article, we will walk you through the process of assessing the damage, exploring repair options, and providing step-by-step instructions to fix the crack. Let’s dive in!
Key Takeaways:
- Repairing a cracked stove top is feasible with the right tools and methods, such as using a repair kit or high-temperature epoxy. Assess the damage and follow safety precautions for a successful DIY repair.
- Prevent future cracks by practicing maintenance tips, like avoiding sudden temperature changes and using appropriate cookware. Regular inspections and following manufacturer recommendations can extend the lifespan of your stove top.
Read more: How To Fix A Cracked Vanity Top
Tools and Materials Needed
Before you start repairing the cracked stove top, it’s important to gather the necessary tools and materials to ensure a successful repair. Here are the items you will need:
- Protective gloves
- Safety goggles
- Stove top repair kit or high-temperature epoxy
- Scraper or putty knife
- Fine-grit sandpaper
- Isopropyl alcohol or degreaser
- Clean cloth or paper towels
- Masking tape
- Hairdryer or heat gun (if using epoxy)
- Replacement stove top (if opting for replacement)
While some methods may require additional tools or materials, these are the essentials you will need for most stove top crack repairs. Ensure that you have them on hand before proceeding with the repair process.
Assessing the Damage
Before you can decide on the best repair method for your cracked stove top, it’s important to assess the extent of the damage. This will help determine whether the crack can be repaired or if a replacement is necessary. Here are a few things to consider when assessing the damage:
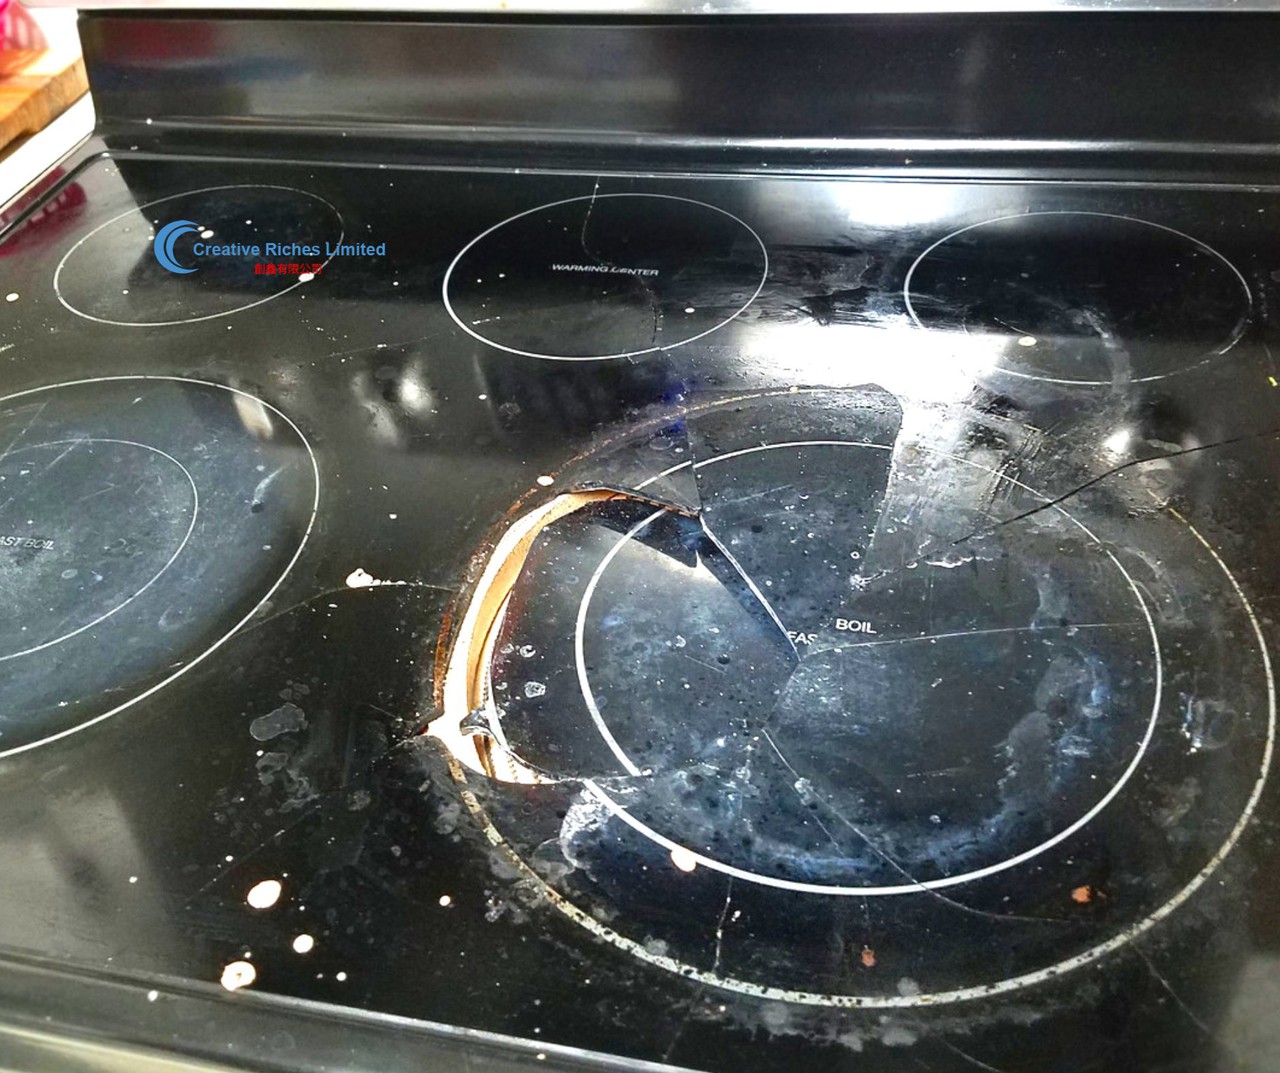
- Size and location of the crack: Take note of the length, width, and depth of the crack. If it’s a small, superficial crack, it may be easier to repair. However, larger or deeper cracks may require more extensive repairs or a replacement.
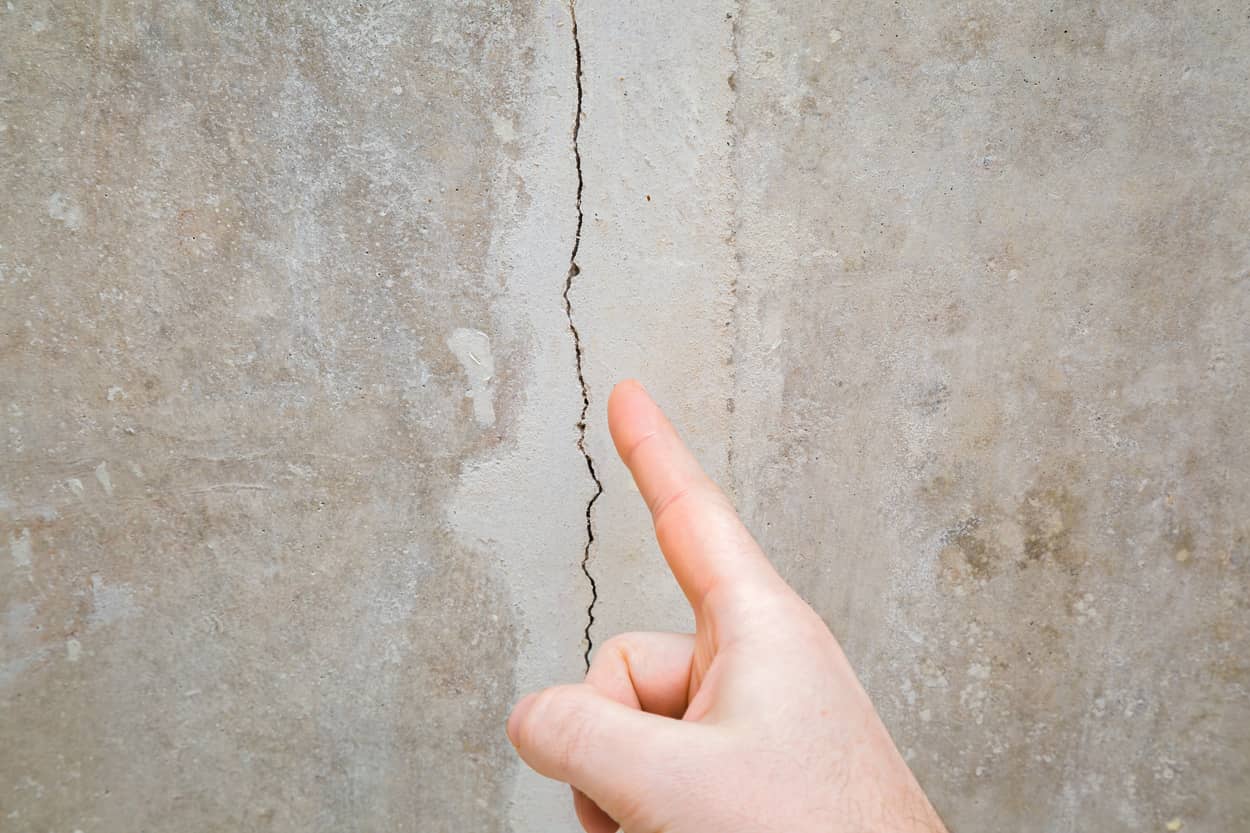
- Stability of the crack: Gently press on the cracked area to check if it flexes or moves. If the crack is unstable or widening, it may indicate structural damage that can’t be easily repaired.
- Heat resistance: Consider the temperature resistance of the repair method you plan to use. Some repair kits or epoxies may not withstand the high temperatures that a stove top can reach, leading to further damage or safety concerns.
- Budget and time constraints: Assess your budget and the amount of time you’re willing to invest in the repair. Some methods may be more cost-effective but require more time and effort, while others may be quicker but more expensive.
By carefully assessing these factors, you can make an informed decision on the best course of action for repairing your cracked stove top. Remember, if you’re unsure or uncomfortable with tackling the repair yourself, it’s always best to consult a professional for assistance.
Repair Options
When it comes to repairing a cracked stove top, you have several options to choose from. The right method for you will depend on the severity of the crack, the materials you have available, and your own comfort level with DIY repairs. Here are three common repair options to consider:
- Method 1: Using a stove top repair kit: Stove top repair kits are specifically designed to fix minor cracks and chips in glass or ceramic stove tops. These kits usually come with a filler compound and instructions on how to apply it. They provide a cost-effective solution and can restore the appearance and functionality of your stove top. However, they may not be suitable for large or deep cracks.
- Method 2: Sealing the crack with high-temperature epoxy: High-temperature epoxy is another option for repairing a cracked stove top. This method involves applying the epoxy to the crack, allowing it to cure, and then sanding it down for a smooth finish. The epoxy is heat resistant and can withstand the high temperatures generated by the stove. However, it requires precision and careful handling to ensure proper adhesion and durability.
- Method 3: Replacing the stove top: In cases where the crack is extensive, deep, or spreading, it may be necessary to replace the entire stove top. While this option is more expensive and time-consuming, it guarantees a complete restoration of the stove top’s integrity. If you choose this route, make sure to find a compatible replacement and follow manufacturer instructions for installation.
Take the time to consider your specific circumstances and the pros and cons of each repair option. This will help you make an informed decision and choose the method that suits your needs best. In the following sections, we will provide step-by-step instructions for the first two repair methods: using a stove top repair kit and sealing the crack with high-temperature epoxy.
Method 1: Using a Stove Top Repair Kit
If you have a small crack or chip in your stove top, using a stove top repair kit can be an effective and affordable solution. These kits typically include a filler compound specifically designed for glass or ceramic surfaces. Here’s how you can use a stove top repair kit to fix the crack:
- Begin by thoroughly cleaning the cracked area with a degreaser or isopropyl alcohol. This will remove any grease, dirt, or debris that could affect the adhesion of the filler compound.
- Once the area is clean and dry, apply a small amount of the filler compound to the crack. Use a putty knife or scraper to evenly spread the compound over the entire length of the crack.
- Allow the filler compound to dry as per the manufacturer’s instructions. This usually takes a few hours, but it may vary depending on the product. Avoid using the stove during this time.
- After the filler has dried, use fine-grit sandpaper to carefully sand down the repaired area. This will help achieve a smooth and seamless finish.
- Once the repair is complete, clean the stove top again to remove any residue from the repair process.
It’s important to note that stove top repair kits are generally suitable for minor cracks or chips. If the crack is large or deep, or if it compromises the integrity of the stove top, it may be best to explore other repair options or consider replacing the stove top.
Remember to carefully read and follow the instructions provided with the repair kit. Each product may have specific application and curing requirements. If you’re unsure about any step of the process, consult the manufacturer or seek assistance from a professional.
Read more: How To Fix Samsung Glass Top Stove Burners
Method 2: Sealing the Crack with High-Temperature Epoxy
If you have a crack in your stove top that requires a more durable and heat-resistant solution, sealing the crack with high-temperature epoxy is a suitable method. High-temperature epoxy is specifically designed to withstand the extreme temperatures generated by a stove. Here’s a step-by-step guide on how to seal the crack:
- Start by thoroughly cleaning the cracked area with a degreaser or isopropyl alcohol. This will ensure proper adhesion of the epoxy to the surface.
- If the crack is wide or deep, use masking tape to create a barrier around the crack. This will prevent the epoxy from spreading onto the surrounding area.
- Prepare the high-temperature epoxy according to the manufacturer’s instructions. This typically involves mixing two components together until they are well blended.
- Apply the epoxy to the crack using a putty knife or scraper. Ensure that the crack is completely filled with the epoxy, and use the tool to smooth out the surface.
- Remove any excess epoxy or smudges with a clean cloth or paper towel before it fully cures. It’s important to work quickly since epoxy can harden rapidly.
- Allow the epoxy to cure as per the manufacturer’s instructions. This may involve using a hairdryer or heat gun to aid the curing process. Be sure to follow the recommended curing time to ensure a strong and durable repair.
- Once the epoxy is fully cured, carefully remove the masking tape. Use fine-grit sandpaper to smooth down any rough edges or bumps.
Sealing the crack with high-temperature epoxy provides a strong and heat-resistant repair solution. However, it requires meticulous application and adherence to the manufacturer’s instructions for the best results. If you have any doubts or concerns, seek professional assistance to ensure a safe and effective repair.
It’s worth noting that using high-temperature epoxy is generally more suitable for smaller cracks. If the crack is significant or compromises the integrity of the stove top, it may be necessary to consider other repair options or replacing the stove top altogether.
Use a high-temperature epoxy or adhesive specifically designed for repairing stove tops. Clean the area thoroughly before applying the adhesive and follow the manufacturer’s instructions carefully for the best results.
Method 3: Replacing the Stove Top
In some cases, repairing a cracked stove top may not be feasible or practical due to the extent of the damage. If the crack is large, deep, or spreading, or if the stove top is significantly compromised, replacing it may be the best option. Here’s a step-by-step guide on how to replace a stove top:
- Start by turning off the power supply to the stove. This may involve unplugging it from the electrical outlet or switching off the circuit breaker dedicated to the stove.
- Remove any accessories, such as burners, knobs, or grates, from the stove top.
- Locate the fasteners that secure the stove top to the rest of the appliance. These are typically screws or clips located on the underside of the stove top.
- Using the appropriate tools, carefully remove the fasteners while ensuring you have a secure grip on the stove top.
- Lift the old stove top off the appliance, taking care not to damage any surrounding components or electrical connections.
- Place the new stove top onto the appliance, aligning it with the burner openings, control panel, and other relevant features.
- Secure the new stove top in place by reattaching the fasteners that were removed earlier. Make sure they are tightened properly, but be careful not to overtighten them to avoid damaging the new stove top.
- Reinstall any accessories, such as burners, knobs, or grates, onto the new stove top.
- Turn on the power supply to the stove and test the new stove top to ensure it is functioning correctly.
Replacing a stove top can be a more involved process compared to repair methods, but it guarantees a complete restoration of the stove’s functionality and aesthetics. If you’re unsure about any step of the process or if you’re uncomfortable performing the replacement yourself, it’s best to consult a professional to ensure a proper installation.
Remember to follow the manufacturer’s instructions and guidelines specific to your stove model when replacing the stove top. Additionally, ensure your safety by handling electrical components and tools with caution and by wearing appropriate protective gear.
Step-by-Step Instructions
Now that you’re familiar with the different repair methods for a cracked stove top, let’s provide step-by-step instructions that can be followed for each method:
Method 1: Using a Stove Top Repair Kit:
- Clean the cracked area of the stove top using a degreaser or isopropyl alcohol.
- Apply the filler compound from the stove top repair kit to the crack, ensuring even coverage.
- Allow the filler compound to dry as per the manufacturer’s instructions.
- Use fine-grit sandpaper to carefully sand down the repaired area for a smooth finish.
- Clean the stove top again to remove any residue from the repair process.
Method 2: Sealing the Crack with High-Temperature Epoxy:
- Clean the cracked area of the stove top using a degreaser or isopropyl alcohol.
- If necessary, use masking tape to create a barrier around the crack to prevent epoxy from spreading.
- Prepare the high-temperature epoxy by mixing the components according to the manufacturer’s instructions.
- Apply the epoxy to the crack, ensuring it completely fills the crack.
- Remove any excess epoxy or smudges before it fully cures.
- Allow the epoxy to cure as per the manufacturer’s instructions.
- Once cured, remove the masking tape and use fine-grit sandpaper to smooth down any rough edges.
Method 3: Replacing the Stove Top:
- Disconnect the power supply to the stove by unplugging it or switching off the circuit breaker dedicated to the stove.
- Remove any accessories, such as burners, knobs, or grates, from the stove top.
- Locate and remove the fasteners securing the stove top to the rest of the appliance.
- Lift the old stove top off the appliance carefully.
- Place the new stove top onto the appliance, aligning it with the burner openings and control panel.
- Secure the new stove top in place by reattaching the fasteners.
- Reinstall the accessories onto the new stove top.
- Restore power to the stove and test the new stove top for proper functionality.
Always refer to the specific instructions and guidelines provided by the manufacturer for your stove model when performing repairs or replacements. Ensuring your safety by wearing protective gear, following proper electrical safety protocols, and seeking professional assistance when needed is essential.
Safety Precautions to Consider
While repairing a cracked stove top can be a DIY project, it is important to prioritize safety throughout the process. Here are some safety precautions to consider:
- Turn off the power: Before starting any repair or replacement, make sure to disconnect the power supply to the stove. Unplug the appliance or switch off the circuit breaker dedicated to the stove to avoid the risk of electric shock.
- Wear protective gear: When working with potentially hazardous materials, such as epoxy or cleaner, it is essential to wear protective gloves and safety goggles to protect your skin and eyes from potential harm.
- Work in a well-ventilated area: Ensure that you are working in a space with proper ventilation to avoid inhaling fumes or chemicals. Open windows or use fans to improve air circulation.
- Handle tools with care: Be cautious when using tools such as putty knives or scrapers to avoid any accidental cuts or injuries. Keep the tools clean and in good condition to prevent accidents.
- Follow product instructions: Read and follow the manufacturer’s instructions and guidelines for any repair kits, epoxy, or cleaning products you are using. Adhere to recommended curing times, application methods, and safety precautions specified by the manufacturer.
- Take breaks: If the repair process is lengthy, take periodic breaks to avoid fatigue and maintain focus. This can help prevent accidents caused by a lack of concentration.
- Seek professional assistance when needed: If you’re unsure about any aspect of the repair process or if the crack is significant and compromises the safety of the stove, it is best to consult a professional. They have the expertise and experience to handle complex repairs and ensure safety.
Remember, safety should always be your top priority. If at any point you feel uncomfortable or unsure about a particular step, don’t hesitate to seek professional assistance. By following these safety precautions, you can minimize the risk of accidents and successfully repair your cracked stove top.
Read more: How To Fix Cracked Sink
Maintenance Tips to Prevent Future Cracks
Preventing future cracks on your stove top is essential to keep it looking and functioning at its best. Here are some maintenance tips to help you avoid future cracks:
- Avoid sudden temperature changes: Rapid temperature changes can cause stress on the stove top, leading to cracks. Avoid placing cold or frozen items directly on a hot stove top, and never pour cold water on a hot surface.
- Use appropriate cookware: Choose cookware that is compatible with your stove top. Avoid using pots and pans with rough or uneven bottoms that can scratch or damage the surface. Also, avoid dragging or sliding heavy cookware across the stove top.
- Clean spills promptly: Clean up spills and splatters on the stove top as soon as possible to prevent them from hardening and potentially causing damage. Use a mild cleaning solution and a non-abrasive cloth or sponge.
- Avoid using abrasive cleaners: Harsh chemical cleaners and abrasive scrubbers can scratch or weaken the surface of the stove top. Stick to gentle and non-abrasive cleaners recommended by the manufacturer.
- Regularly inspect the stove top: Take the time to inspect the stove top regularly for any signs of damage or wear. Check for cracks, chips, or rough spots. Catching these issues early can help prevent them from worsening.
- Use burner protectors: Consider using burner protectors or liners to provide an extra layer of protection for your stove top. These can help prevent scratches and stains from spills or food particles.
- Be mindful when using heavy appliances: If you have large or heavy appliances, such as pressure cookers or canners, be cautious when placing them on the stove top. Avoid dropping or sliding them onto the surface, as this can cause cracks or damage.
- Follow manufacturer recommendations: Lastly, make sure to follow the manufacturer’s guidelines and recommendations for maintenance and care of your specific stove top model. This will ensure that you are taking the necessary precautions to keep it in optimal condition.
By incorporating these maintenance tips into your routine, you can prolong the lifespan of your stove top and minimize the risk of future cracks. Remember, prevention is key when it comes to maintaining the beauty and functionality of your stove top.
Conclusion
Dealing with a cracked stove top can be frustrating, but with the right knowledge and techniques, you can repair the damage and restore the functionality of your appliance. Whether you choose to use a stove top repair kit, seal the crack with high-temperature epoxy, or opt for a complete replacement, each method offers a viable solution depending on the severity of the crack.
It’s important to assess the damage before deciding on a repair method, considering factors like the size and stability of the crack, heat resistance of the repair options, and your budget and time constraints. Following the step-by-step instructions and safety precautions provided for each method will help ensure a successful and safe repair.
To prevent future cracks, practicing regular maintenance habits such as avoiding sudden temperature changes, cleaning spills promptly, and using appropriate cookware can go a long way. By being mindful of how you handle and care for your stove top, you can minimize the risk of future damage and extend its lifespan.
Remember, if you are ever unsure or uncomfortable with performing a repair yourself, it’s always best to consult a professional. They have the expertise to handle complex repairs and ensure the safety of your appliance.
We hope this comprehensive guide has provided you with valuable insights on how to fix a cracked stove top. By following the tips and instructions outlined in this article, you can effectively repair the crack and continue to enjoy the convenience of your stove for years to come.
Frequently Asked Questions about How To Fix A Cracked Stove Top
Was this page helpful?
At Storables.com, we guarantee accurate and reliable information. Our content, validated by Expert Board Contributors, is crafted following stringent Editorial Policies. We're committed to providing you with well-researched, expert-backed insights for all your informational needs.


0 thoughts on “How To Fix A Cracked Stove Top”