Articles
How To Fix Doorbell
Modified: October 20, 2024
Learn how to fix your doorbell with these informative and easy-to-follow articles. Discover troubleshooting tips and step-by-step guides to get your doorbell working again.
(Many of the links in this article redirect to a specific reviewed product. Your purchase of these products through affiliate links helps to generate commission for Storables.com, at no extra cost. Learn more)
Introduction
A doorbell is a crucial component of every home, welcoming guests and alerting homeowners to visitors. However, like any electrical device, doorbells can sometimes encounter issues that require troubleshooting and fixing. If your doorbell stops working or starts acting up, don’t worry – this article will guide you through the process of fixing your doorbell.
Before diving into the troubleshooting steps, it’s important to gather the necessary tools and materials. Having them ready will expedite the repair process and ensure a smooth experience. Let’s take a look at the tools and materials you’ll need:
- Screwdriver
- Multimeter
- Wire strippers
- Replacement doorbell button
- Replacement doorbell chime
- Electrical tape
- Wire nuts
Now that you have all the necessary tools at your disposal, let’s get started with the troubleshooting.
Key Takeaways:
- Troubleshoot and fix your doorbell by checking the power source, inspecting wiring, and testing components. Prioritize safety and enjoy the convenience of a working doorbell at home.
- Save time and money by following step-by-step troubleshooting to fix your doorbell. From testing the button to replacing the chime, restore functionality and create a welcoming atmosphere for visitors.
Read more: How To Fix Hammer Holster On Tool Belt
Tools and Materials Needed
Before you begin fixing your doorbell, it’s important to gather the necessary tools and materials. Having them ready will save you time and ensure a smooth repair process. Here’s a list of the tools and materials you’ll need:
- Screwdriver: You’ll need a screwdriver to remove the screws that hold the doorbell button and chime in place.
- Multimeter: A multimeter is a crucial tool for testing electrical connections and troubleshooting issues with your doorbell.
- Wire strippers: If you need to replace or reconnect wiring, wire strippers will be necessary to remove the insulation from the wires.
- Replacement doorbell button: If the button is faulty or worn out, you may need to replace it. Make sure to purchase a compatible replacement.
- Replacement doorbell chime: If the chime fails to produce any sound, it may need to be replaced. Consider selecting a chime that matches your home’s aesthetic.
- Electrical tape: Electrical tape will be useful for insulating and securing any exposed or damaged wires.
- Wire nuts: If you need to reconnect or replace wiring, wire nuts are essential for securing the connections.
Having these tools and materials ready will allow you to efficiently troubleshoot and fix your doorbell. Now that you’re equipped, let’s move on to the step-by-step troubleshooting process.
Step 1: Check Power Source
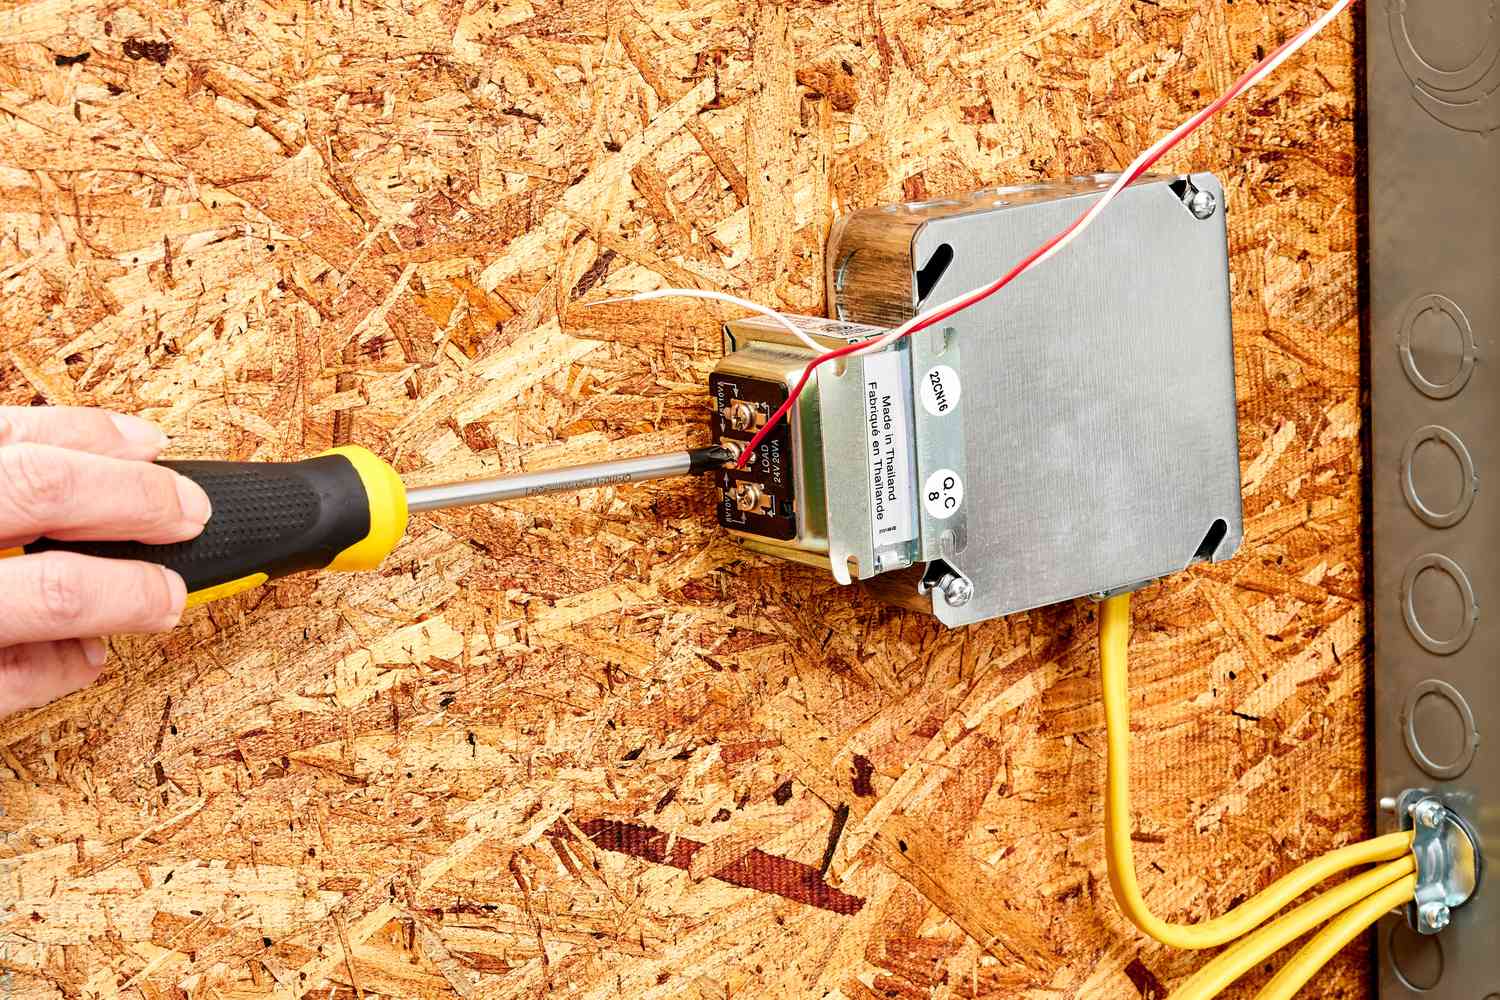
The first step in fixing your doorbell is to check the power source. A doorbell typically operates on low voltage power supplied by a transformer. Follow these steps to check the power source:
- Locate the doorbell transformer: The transformer is usually located near your electrical panel or in the basement. It may be mounted on a wall or ceiling.
- Turn off the power: Before handling any electrical components, ensure that the power to the doorbell system is turned off. Locate the circuit breaker for the doorbell and switch it off.
- Test the transformer output: Use a multimeter set to AC voltage mode to test the output of the transformer. Place the multimeter probes on the transformer output terminals. You should get a reading of around 16-24 volts. If the reading is significantly lower or zero, the transformer may be faulty and needs to be replaced.
- Check for tripped breakers: If the transformer output is normal, check for any tripped breakers in the circuit. Reset any tripped breakers and check if the doorbell starts working.
- Inspect the wiring: Examine the wiring from the transformer to the doorbell chime and button. Look for any loose connections or exposed wires. Secure any loose connections and insulate any exposed wires using electrical tape.
- Turn on the power: After completing these checks, turn the power back on at the circuit breaker. Test the doorbell again to see if it is functioning properly.
By checking the power source and ensuring that it is supplying the correct voltage to the doorbell system, you can eliminate power-related issues as the cause of the problem. If the doorbell still doesn’t work after checking the power source, proceed to the next troubleshooting step.
Step 2: Inspect Wiring
If your doorbell still doesn’t work after checking the power source, the next step is to inspect the wiring. Follow these steps to inspect the wiring:
- Locate the doorbell chime and button: The doorbell chime is typically located inside your home, usually near the front door or in a hallway. The doorbell button is located outside, near the entrance door.
- Check for loose connections: Inspect the wiring connections at both the doorbell chime and the button. Look for any loose or disconnected wires. If you find any, secure the connections by tightening them.
- Test the wiring continuity: Use a multimeter set to continuity mode to check the wiring for any breaks or open circuits. Disconnect the wires at both the chime and the button, then place one probe of the multimeter on one wire and the other probe on the corresponding wire at the other end. If there is continuity, you will hear a beep or see a reading on the multimeter screen. If there is no continuity, there is a break in the wiring that needs to be repaired or replaced.
- Inspect the wiring for damage: Carefully examine the wiring for any visible damage, such as frayed or chewed wires. If you find any damaged wires, they will need to be repaired or replaced.
- Reconnect or replace wiring: If you find loose or damaged wiring, you will need to reconnect or replace the affected wires. To reconnect wires, strip the ends of the wires using wire strippers, twist the exposed ends together, and secure them with wire nuts. If the wiring is severely damaged, it is best to replace the entire length of wire.
By inspecting and repairing any issues with the wiring, you can restore proper connectivity to your doorbell system. However, if the doorbell still doesn’t work after inspecting the wiring, proceed to the next troubleshooting step.
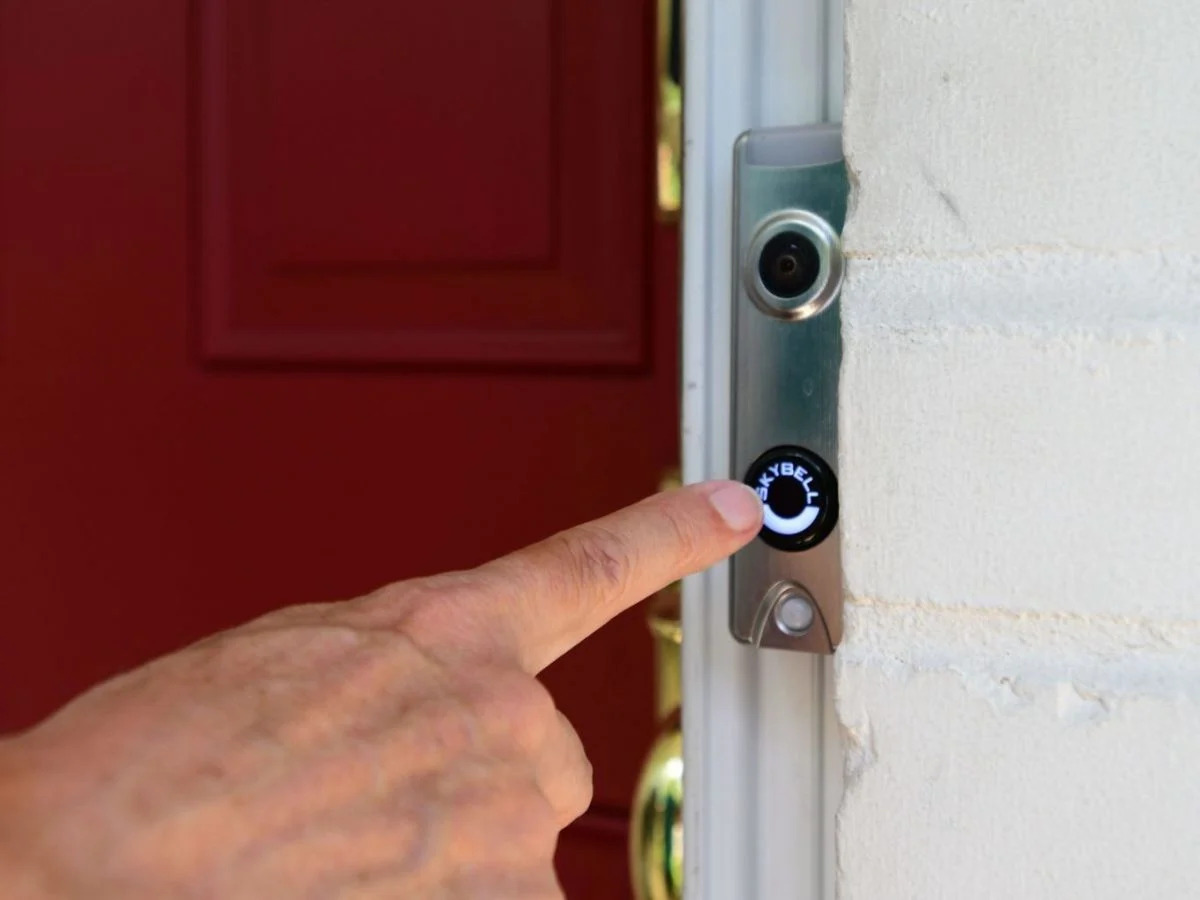
Step 3: Test Doorbell Button
If your doorbell is still not functioning after checking the power source and inspecting the wiring, it’s time to test the doorbell button. Follow these steps to test the doorbell button:
- Ensure power is turned on: Before testing the doorbell button, make sure that the power to the doorbell system is turned on at the circuit breaker.
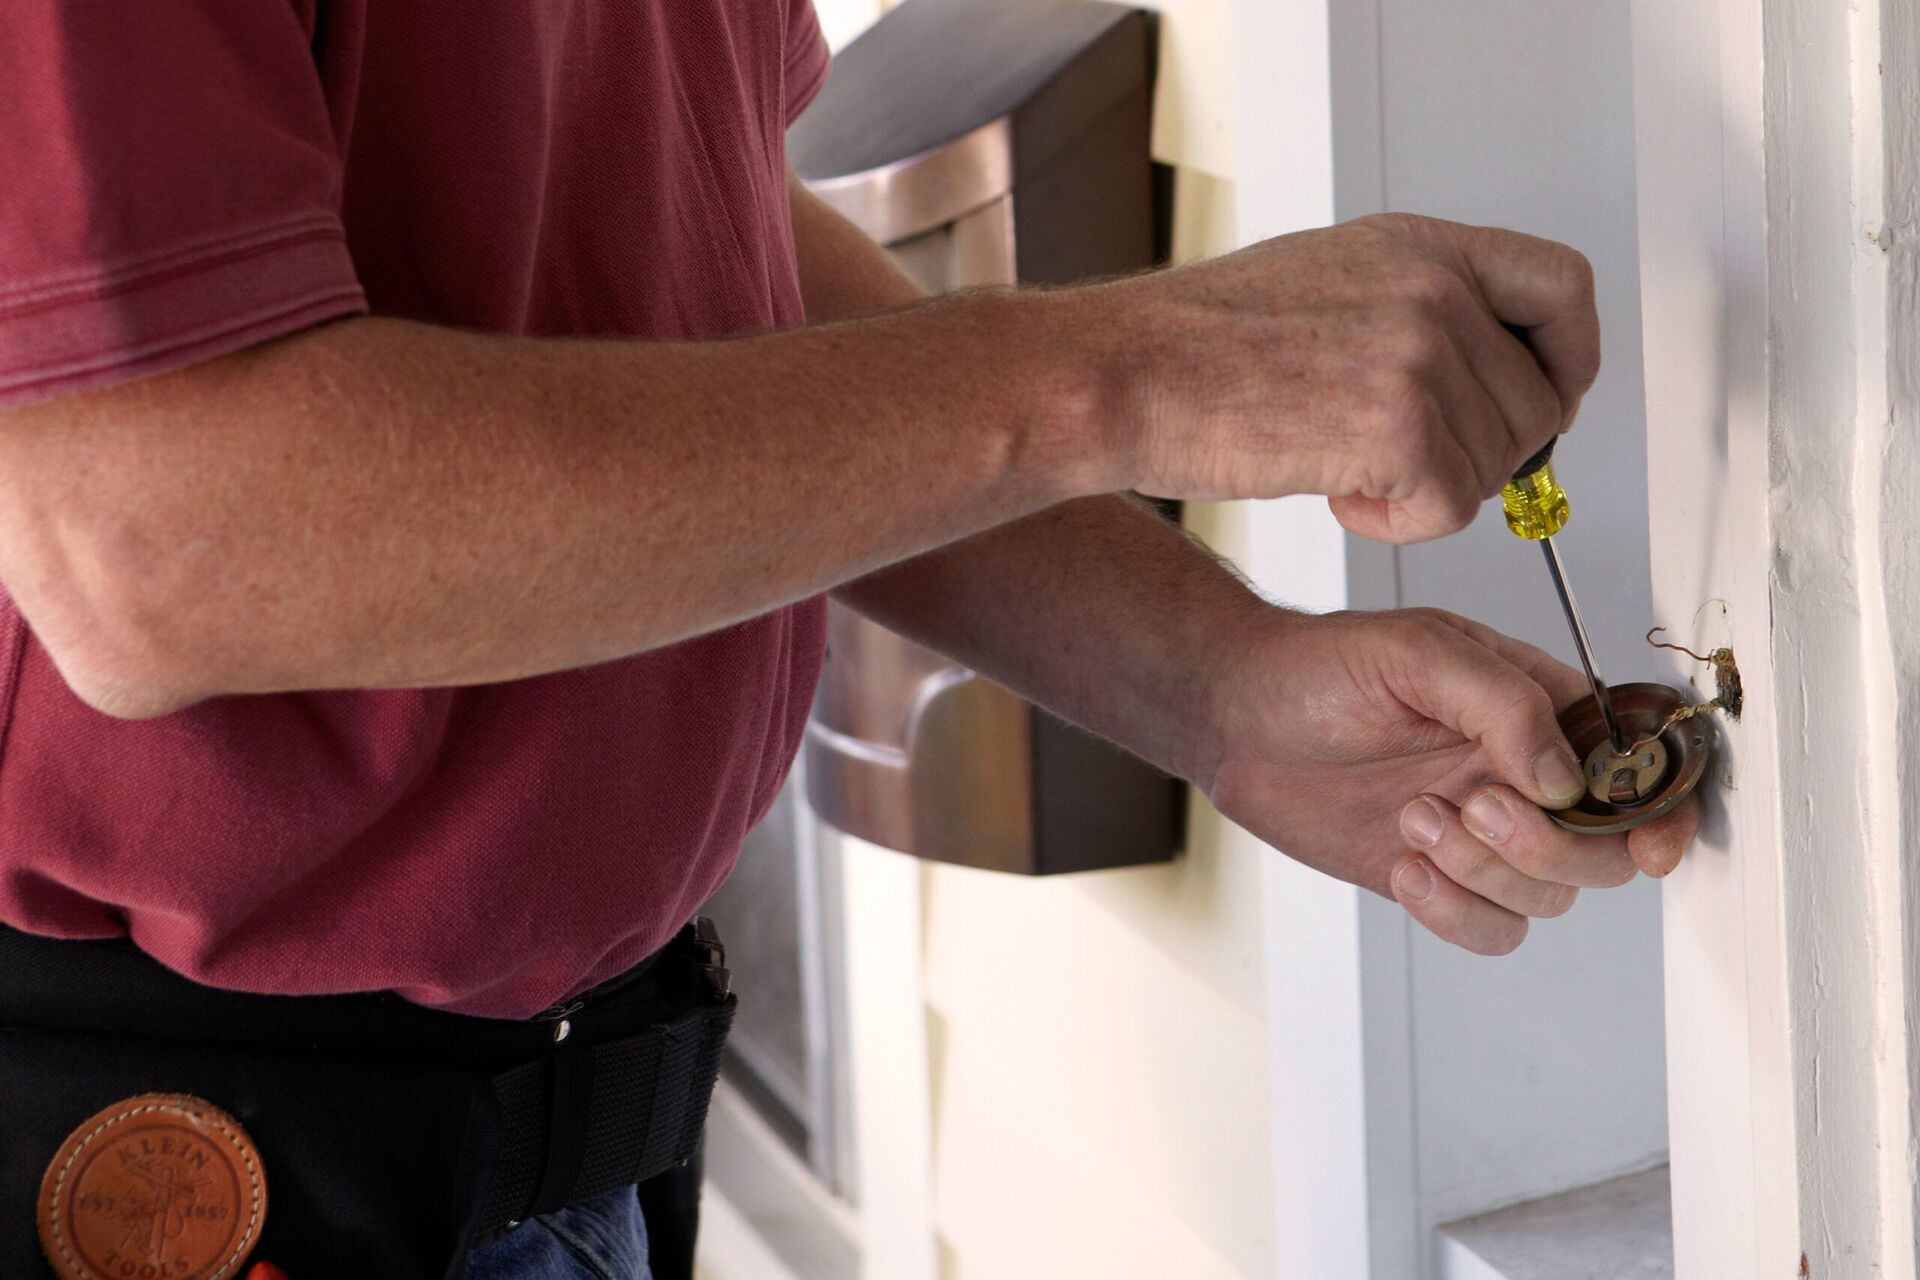
- Remove the doorbell button: Gently remove the doorbell button from its mounting location using a screwdriver. Be careful not to damage the wires or the mounting plate.
- Inspect the doorbell button: Examine the doorbell button for any visible damage or deterioration. Look for signs of corrosion, loose connections, or worn-out buttons. If you notice any issues, it may be necessary to replace the doorbell button.
- Test the doorbell button with a multimeter: Set your multimeter to continuity mode and touch the probes to the terminals of the doorbell button. Press the button and check for continuity. If there is no continuity, it indicates a faulty button that needs to be replaced.
- Replace the doorbell button: If the doorbell button is indeed faulty, disconnect the wires from the old button and connect them to the new button. Mount the new button in place using the screws provided.
Testing and replacing the doorbell button is an essential step in troubleshooting doorbell issues. If the button is functioning properly and the doorbell still doesn’t work, move on to the next troubleshooting step.
Read more: How To Test Doorbell
Step 4: Check Transformer
If your doorbell is not working even after testing the button, the next step is to check the transformer. The transformer is responsible for providing power to the doorbell system. Follow these steps to check the transformer:
- Locate the transformer: The transformer is usually located near your electrical panel or in the basement. It may be mounted on a wall or ceiling.
- Turn off the power: Before handling any electrical components, ensure that the power to the doorbell system is turned off. Locate the circuit breaker for the doorbell and switch it off.
- Inspect the transformer: Examine the transformer for any visible damage or signs of overheating, such as melted plastic or burnt marks. If the transformer appears to be damaged, it will need to be replaced.
- Test the transformer output: Use a multimeter set to AC voltage mode to test the output of the transformer. Place the multimeter probes on the transformer output terminals. You should get a reading of around 16-24 volts. If the reading is significantly lower or zero, the transformer may be faulty and needs to be replaced.
- Replace the transformer: If the transformer is not providing the correct voltage output or shows other signs of malfunction, it needs to be replaced. Consult a professional electrician to ensure a safe and proper replacement.
Checking the transformer will help determine whether it is the cause of the doorbell malfunction. If the transformer is working correctly and the doorbell still doesn’t work, proceed to the next troubleshooting step.
Check the power source and wiring connections. Replace the batteries or check the circuit breaker if it’s a wired doorbell. If the issue persists, consider replacing the doorbell unit.
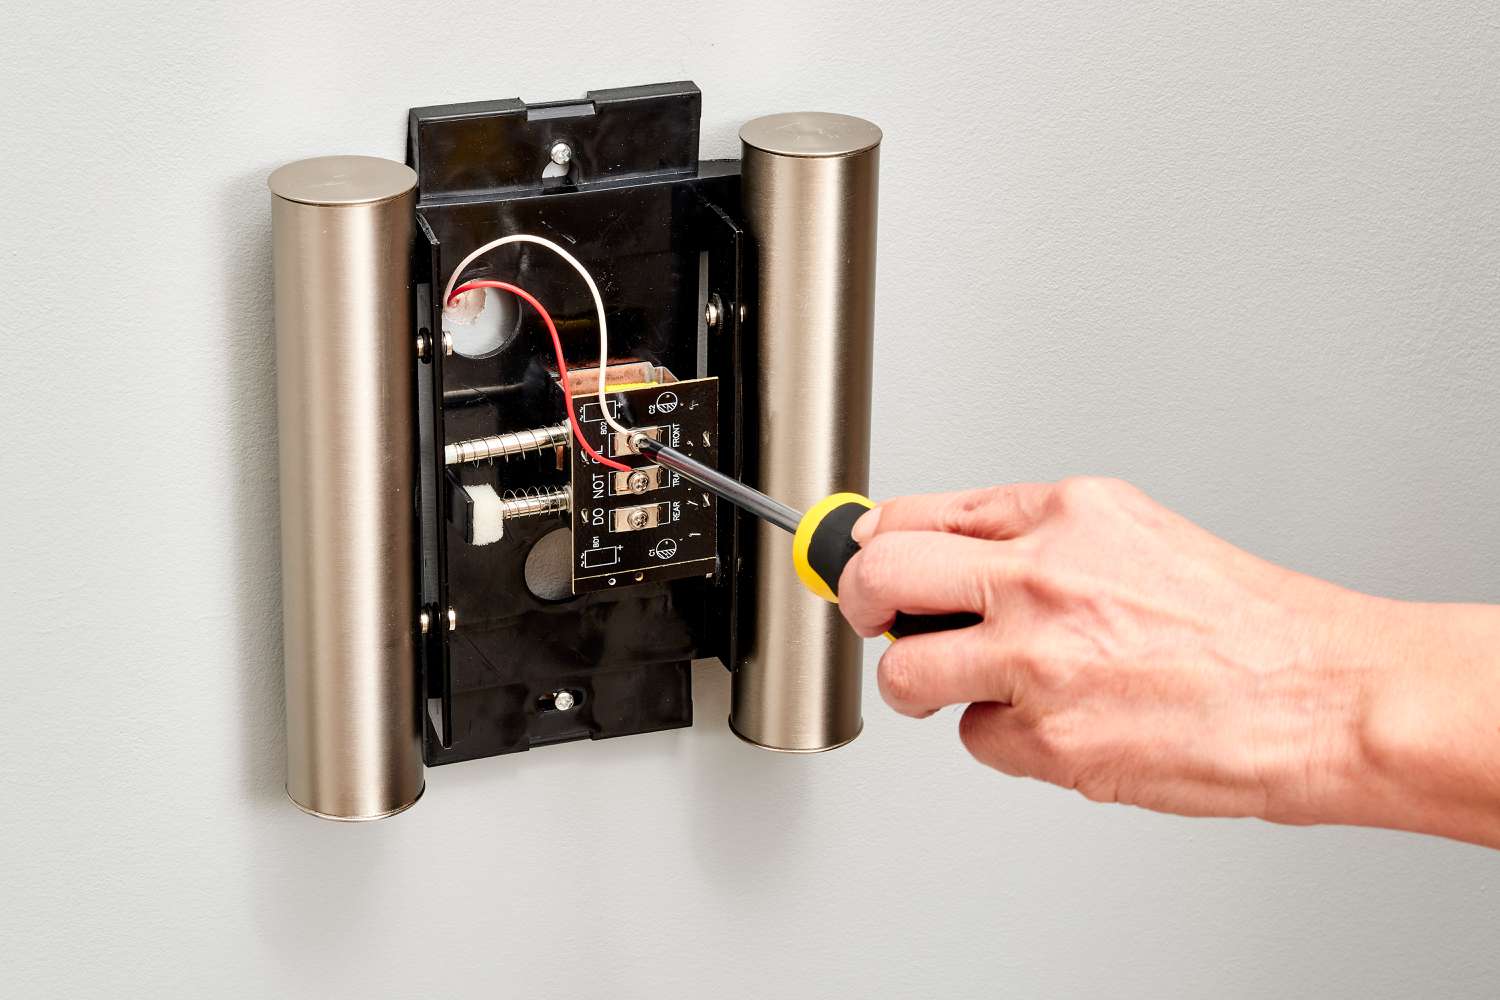
Step 5: Replace Doorbell Chime
If your doorbell is still not functioning after checking the transformer, it’s time to move on to the doorbell chime. The chime is responsible for producing the sound when the doorbell button is pressed. Follow these steps to replace the doorbell chime:
- Turn off the power: Before replacing the doorbell chime, ensure that the power to the doorbell system is turned off. Locate the circuit breaker for the doorbell and switch it off.
- Remove the existing chime: Remove the screws that hold the existing chime in place using a screwdriver. Carefully disconnect the wires from the terminals, noting their positions for easy reconnection later.
- Choose a replacement chime: Select a new doorbell chime that matches your preferences and is compatible with your doorbell system. Consider factors such as the type of chime (mechanical or electronic) and the sound it produces.
- Connect the new chime: Follow the manufacturer’s instructions to connect the wires from the new chime to the corresponding terminals. Use wire nuts to secure the connections.
- Mount the new chime: Attach the new chime to the wall or mounting bracket using the screws provided. Make sure it is securely fastened.
- Restore power and test: Turn the power back on at the circuit breaker and test the doorbell. If the new chime is properly connected, you should hear the sound when the doorbell button is pressed.
Replacing the doorbell chime can resolve issues related to sound production. If the doorbell is still not working after replacing the chime, continue to the next troubleshooting step.
Step 6: Reconnect or Replace Wiring
If your doorbell is still not functioning after replacing the chime, it’s time to focus on the wiring of the doorbell system. Faulty or damaged wiring can prevent the doorbell from working properly. Follow these steps to reconnect or replace the wiring:
- Turn off the power: Before working on the wiring, ensure that the power to the doorbell system is turned off. Locate the circuit breaker for the doorbell and switch it off.
- Inspect the wiring: Carefully examine the wiring from the transformer to the chime and the button. Look for any loose connections, exposed wires, or signs of damage. If you find any issues, take note of them for either reconnecting or replacing the wiring.
- Reconnect loose connections: If you find any loose connections, use wire strippers to remove a small portion of the insulation from the wire ends. Twist the exposed ends together securely and use wire nuts to reconnect them. Ensure the connection is tight and insulated with electrical tape for added protection.
- Replace damaged wiring: If you find any damaged or frayed wiring, it is best to replace the entire length of wire. Cut out the damaged section using wire cutters/strippers and strip the ends of the new wire. Connect the new wire using wire nuts and insulate with electrical tape.
- Secure the wiring: Once all the connections are made, use cable clips or straps to secure the wiring to walls, ceilings, or other surfaces. This will prevent it from getting tangled or coming loose in the future.
- Turn on the power and test: Restore power at the circuit breaker and test the doorbell. If the wiring was the issue, the doorbell should now function properly.
Reconnecting or replacing the wiring can solve issues related to poor connectivity and electrical continuity. If the doorbell still doesn’t work after addressing the wiring, proceed to the next troubleshooting step.
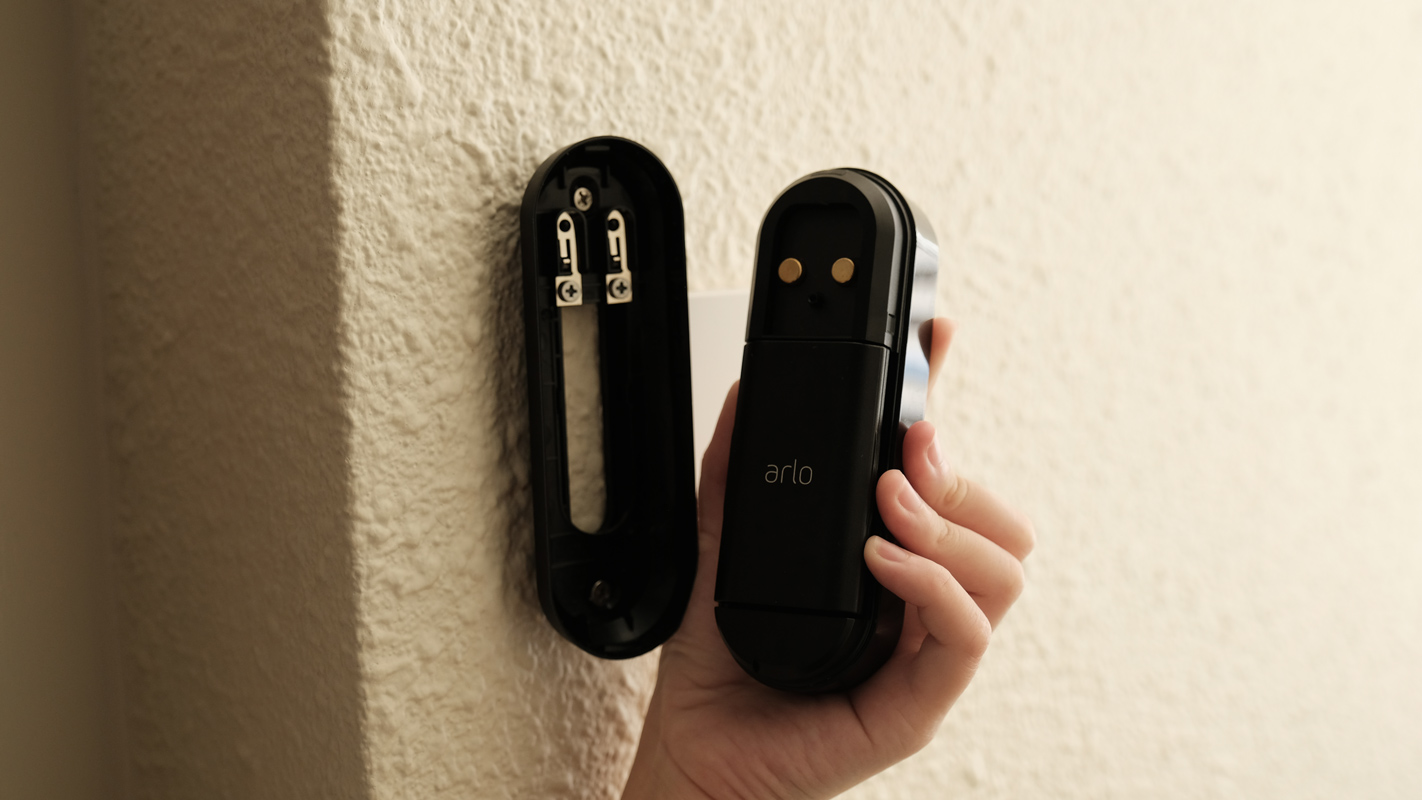
Step 7: Install New Doorbell Button
If your doorbell is still not working after addressing the wiring, it’s time to install a new doorbell button. Over time, doorbell buttons can become worn out or damaged, leading to malfunction. Follow these steps to install a new doorbell button:
- Turn off the power: Before installing the new doorbell button, ensure that the power to the doorbell system is turned off. Locate the circuit breaker for the doorbell and switch it off.
- Remove the old button: Use a screwdriver to remove the screws that hold the old doorbell button in place. Carefully disconnect the wires from the terminals, noting their positions for easy reconnection later.
- Prepare the new button: Examine the new doorbell button and ensure it is compatible with your doorbell system. Follow the manufacturer’s instructions for any specific preparation steps, such as attaching the wires or connecting batteries.
- Connect the new button: Match the wires from the doorbell system to the corresponding terminals on the new button. Typically, this involves connecting the wires according to their color-coded designations (e.g., red to red, white to white). Use wire nuts or other suitable connectors to secure the connections.
- Mount the new button: Position the new button over the existing mounting hole and use the screws provided to secure it in place. Ensure it is firmly attached to the wall or surface.
- Restore power and test: Turn the power back on at the circuit breaker and test the doorbell. Press the new button to see if the doorbell rings and functions correctly. If it does, your new doorbell button is successfully installed.
Installing a new doorbell button can resolve issues related to button wear or damage. If the doorbell still doesn’t work after installing the new button, proceed to the final troubleshooting step.
Read more: How Long To Charge Arlo Doorbell Battery
Step 8: Test the Doorbell
After going through all the troubleshooting steps and making the necessary repairs or replacements, it’s time to test the doorbell to ensure everything is in working order. Follow these steps to test the doorbell:
- Ensure power is turned on: Make sure the power to the doorbell system is turned on at the circuit breaker.
- Stand near the doorbell button: Position yourself near the doorbell button to easily hear the sound when the button is pressed.
- Press the doorbell button: Firmly press the doorbell button and listen for the sound of the doorbell chime. If you hear the chime or the doorbell system activates, it indicates that the repairs and replacements have been successful.
- Check for proper operation: Test the doorbell from different locations within your home to ensure it can be heard throughout. Verify that the sound is clear and audible without any distortions.
- Inspect for any issues: While the doorbell is ringing, observe for any abnormal behavior, such as flickering lights or sparks. If you notice any unusual signs, immediately turn off the power and consult a professional electrician.
If the doorbell works properly during testing and there are no signs of malfunction, congratulations! You have successfully fixed your doorbell. However, if the doorbell is still not working or you encounter any issues during testing, it is recommended to seek the assistance of a professional electrician for further inspection and repairs.
Remember that doorbells are electrical devices, and it’s important to prioritize safety throughout the troubleshooting and repair process. If you are unsure or uncomfortable working with electrical components, it’s best to leave it to the experts.
Conclusion
Fixing a doorbell may seem daunting at first, but by following the troubleshooting steps outlined in this guide, you can resolve common issues and get your doorbell back in working order. From checking the power source to inspecting the wiring and replacing components, each step is designed to help you identify and resolve the problem.
Remember to prioritize safety throughout the process by turning off the power at the circuit breaker before working on any electrical components. Use the necessary tools and materials to ensure a proper repair and replacement. If you ever feel unsure or uncomfortable, it’s best to seek the assistance of a professional electrician.
Troubleshooting and fixing your doorbell can save you time and money compared to calling a professional, but it may not always be possible to repair the doorbell on your own. In such cases, don’t hesitate to seek professional help to ensure a safe and effective resolution.
By following the steps outlined in this guide, you can restore the functionality of your doorbell and enjoy the convenience it provides. A working doorbell not only enhances the security of your home but also creates a welcoming atmosphere for visitors.
Now that you have the knowledge and confidence to troubleshoot and fix your doorbell, go ahead and apply these steps to get your doorbell ringing again. Good luck!
Frequently Asked Questions about How To Fix Doorbell
Was this page helpful?
At Storables.com, we guarantee accurate and reliable information. Our content, validated by Expert Board Contributors, is crafted following stringent Editorial Policies. We're committed to providing you with well-researched, expert-backed insights for all your informational needs.


0 thoughts on “How To Fix Doorbell”