Articles
How To Remove Arlo Doorbell
Modified: August 21, 2024
Learn how to remove the Arlo Doorbell with our comprehensive articles. Discover step-by-step instructions and expert tips for a hassle-free removal process.
(Many of the links in this article redirect to a specific reviewed product. Your purchase of these products through affiliate links helps to generate commission for Storables.com, at no extra cost. Learn more)
Introduction
Welcome to the world of smart home technology where every aspect of our homes can be automated and controlled with just a few taps on our smartphones. One such advancement in this realm is the Arlo Doorbell – a wireless doorbell system that not only alerts you to visitors at your door but also allows for two-way communication.
While the Arlo Doorbell offers a range of convenient features, there may come a time when you need to remove it. Whether you are upgrading to a different smart doorbell system or no longer require its services, removing the Arlo Doorbell is a relatively simple process that can be done with the right tools and a little know-how.
In this guide, we will walk you through the step-by-step process of removing the Arlo Doorbell from your home. We will also provide you with some essential safety precautions to ensure that the removal process goes smoothly without any mishaps.
Before we dive into the details, it’s important to note that if you are uncomfortable working with electrical components, it is best to hire a professional electrician to remove the Arlo Doorbell for you. Safety should always be the top priority when dealing with any electrical device.
Now, let’s get started with the necessary safety precautions you need to keep in mind before removing the Arlo Doorbell.
Key Takeaways:
- Safety First
When removing your Arlo Doorbell, prioritize safety by turning off the power supply, using protective gear, and consulting the instruction manual. If unsure, seek professional help to avoid electrical hazards. - Step-by-Step Removal Process
Follow the step-by-step guide to safely remove your Arlo Doorbell, from powering off the existing system to testing the newly installed device. Prioritize safety and consult the manual for a smooth removal process.
Read more: How Long To Charge Arlo Doorbell Battery
Why Remove Arlo Doorbell?
There can be several reasons why you might want to remove your Arlo Doorbell. Here are a few common scenarios:
- Upgrading to a new doorbell system: As technology advances, newer and more feature-rich smart doorbell systems become available. If you are looking to upgrade to a different doorbell system that offers additional functionalities or better compatibility with your smart home ecosystem, you might need to remove your Arlo Doorbell.
- Moving to a new home: If you are moving to a new house, you may want to take your Arlo Doorbell with you to your new residence. In this case, removing the device from your current home is necessary.
- Replacing a faulty doorbell: If your Arlo Doorbell is malfunctioning or experiencing technical issues that cannot be resolved through troubleshooting, removing it and replacing it with a new unit may be required.
- No longer requiring a doorbell system: In some cases, you might decide that a doorbell system is no longer necessary for your home. This could be due to lifestyle changes, security concerns, or other factors that make a doorbell system redundant. Removing the Arlo Doorbell in such instances is a logical step.
Regardless of the reason, it is essential to follow the proper steps to remove the Arlo Doorbell safely and effectively. Neglecting to do so can result in damage to your existing wiring, leaving you with a more complicated problem to address.
Now that we understand why you might need to remove the Arlo Doorbell, let’s move on to the safety precautions you should take before starting the removal process.
Safety Precautions
Before you begin the process of removing the Arlo Doorbell, it’s crucial to prioritize safety. Here are some essential safety precautions to keep in mind:
- Turn off the power: Prior to starting any electrical work, make sure to turn off the power supply to the existing doorbell system. This will help prevent any potential electrical shocks or accidents.
- Disconnect the power source: Identify the circuit breaker that controls the power to the doorbell system and switch it off. Additionally, check if there are any secondary power sources, such as backup batteries, and disconnect them as well.
- Use appropriate safety gear: Wear protective gear, such as gloves and safety glasses, to minimize the risk of injuries while working with electrical components.
- Handle wires carefully: Always assume that the doorbell wires are live and handle them with caution. Avoid touching exposed wires with bare hands and use insulated tools for disconnecting the wiring.
- Consult the instruction manual: Refer to the Arlo Doorbell’s instruction manual for specific safety instructions and guidelines provided by the manufacturer. This will ensure that you follow the correct procedures while removing the doorbell.
- Seek professional help if needed: If you are uncomfortable working with electrical components or unsure about any step of the process, it’s best to consult a professional electrician. They have the experience and knowledge to handle the removal safely and efficiently.
Adhering to these safety precautions will help minimize the risk of accidents and ensure a smooth and safe removal process for your Arlo Doorbell. Now that you are aware of the necessary safety measures, let’s move on to the tools and materials you will need for the removal process.
Tools and Materials Needed
Before you begin removing the Arlo Doorbell, make sure you have the following tools and materials ready:
- Screwdriver: A screwdriver will be required to remove the screws that hold the existing doorbell in place and potentially to release any wiring connections.
- Wire strippers: Wire strippers are essential for safely removing the insulation from the doorbell’s wires.
- Insulated gloves: Insulated gloves will protect your hands from potential electrical shocks while working with the doorbell’s wiring.
- Electrical tape: Electrical tape is useful for securely resealing any wire connections and providing insulation.
- Masking tape: Masking tape can be used to label the wires during the removal process, making it easier to reconnect them later if needed.
- Optional: Voltage tester: A voltage tester can help you ensure that the power to the doorbell system has been successfully turned off before you start working on it.
Additionally, it’s a good idea to familiarize yourself with the specific instructions and requirements outlined in the Arlo Doorbell’s user manual. The manual may provide additional details on any specialized tools or materials that are recommended for the removal process.
Now that you have gathered the necessary tools and materials, we can move on to the step-by-step process of removing the Arlo Doorbell from your home.
Step 1: Power Off the Existing Doorbell System
The first step in removing the Arlo Doorbell is to turn off the power supply to the existing doorbell system. This ensures your safety by preventing any electrical shocks or accidents during the removal process.
Follow these steps to power off the existing doorbell system:
- Identify the correct circuit breaker: Locate the circuit breaker in your electrical panel that controls the power supply to the doorbell system. It is usually labeled as “Doorbell” or “Bell.” If there is no specific label, you may need to go through trial and error by turning off each breaker one at a time until the doorbell stops working.
- Switch off the circuit breaker: Once you have identified the correct circuit breaker, switch it off by flipping the corresponding switch to the “OFF” position. Double-check that the power to the doorbell system has been successfully shut off by pressing the doorbell button and confirming that it does not ring or light up.
- Verify power interruption: For an added layer of safety, you can use a voltage tester to check if the doorbell system is receiving any electrical current. Simply follow the instructions provided with the voltage tester to confirm that there is no power flowing to the doorbell system.
By ensuring that the power supply to the existing doorbell system is turned off, you minimize the risk of potential electrical hazards while working with the Arlo Doorbell. With the power safely turned off, you can proceed to the next step: removing the existing doorbell itself.
Read more: How To Reset Arlo Doorbell
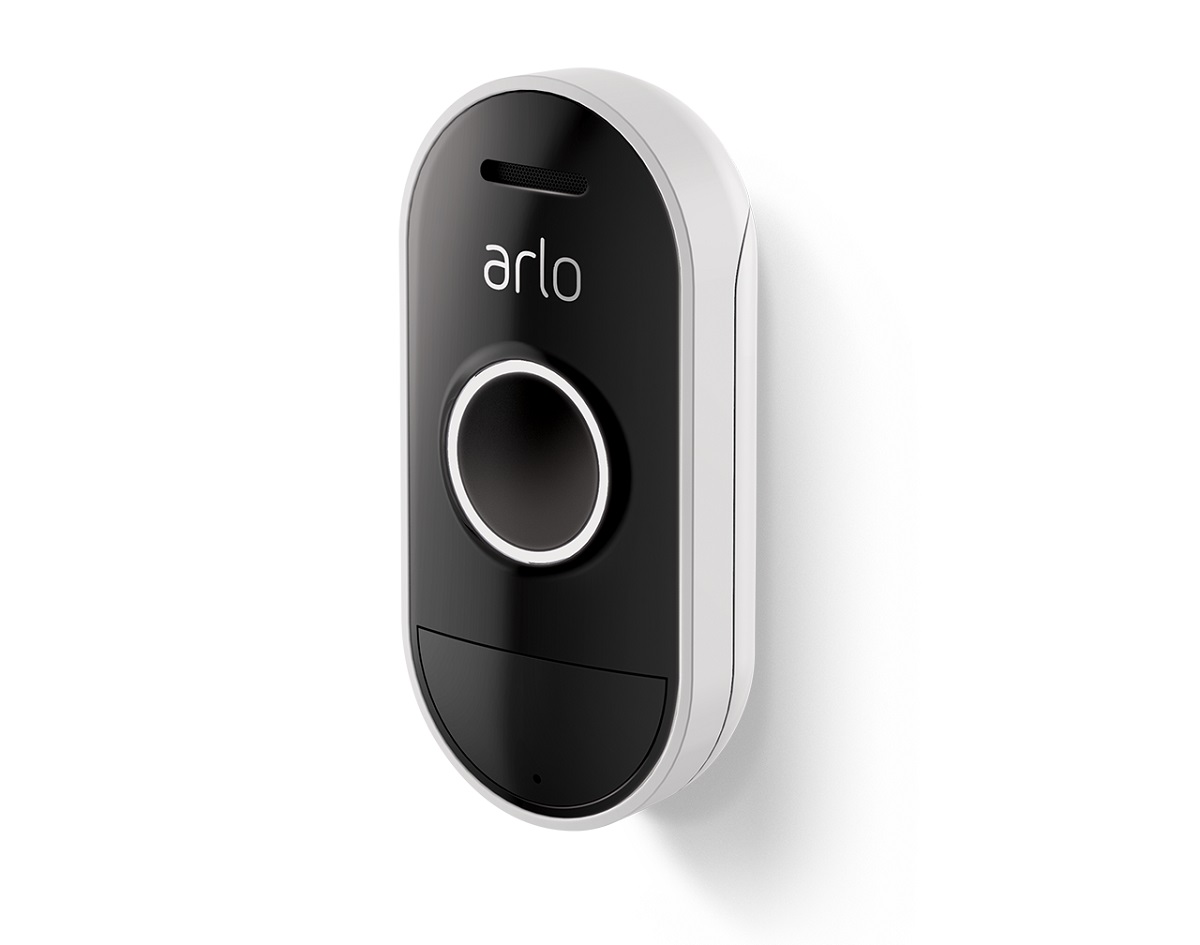
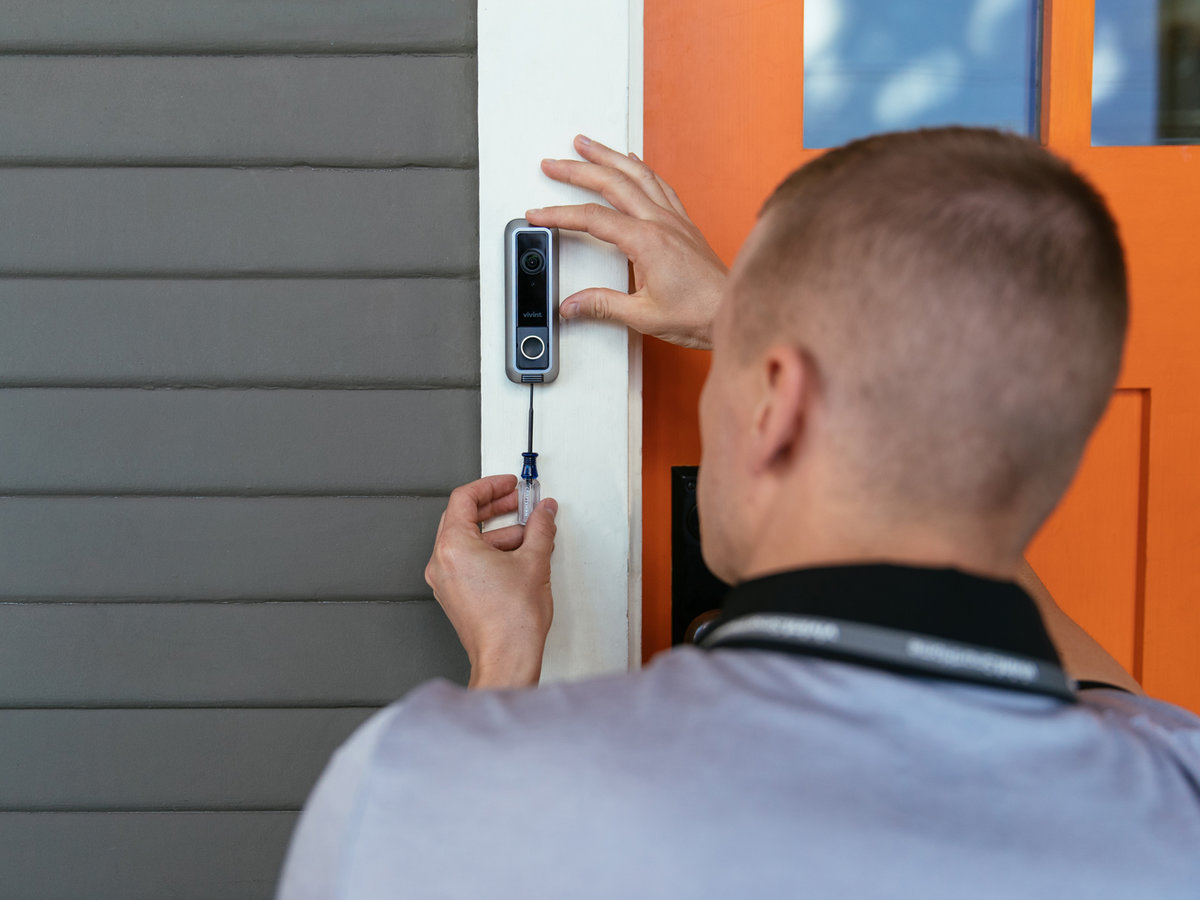
Step 2: Remove the Existing Doorbell
Once you have safely turned off the power to the existing doorbell system, it’s time to remove the old doorbell itself. Follow these steps to remove the existing doorbell:
- Locate the mounting screws: Look for the screws that hold the existing doorbell onto the wall or door frame. These screws are typically located at the top and bottom of the doorbell.
- Use a screwdriver to remove the screws: Take a screwdriver that fits the size of the screws and carefully remove them. Keep a secure grip on the doorbell as you remove the screws to prevent it from falling or getting damaged.
- Take note of the wiring: As you remove the screws, pay attention to the wiring connected to the existing doorbell. Make a mental note of which wires are connected to which terminals, or use masking tape to label them if necessary.
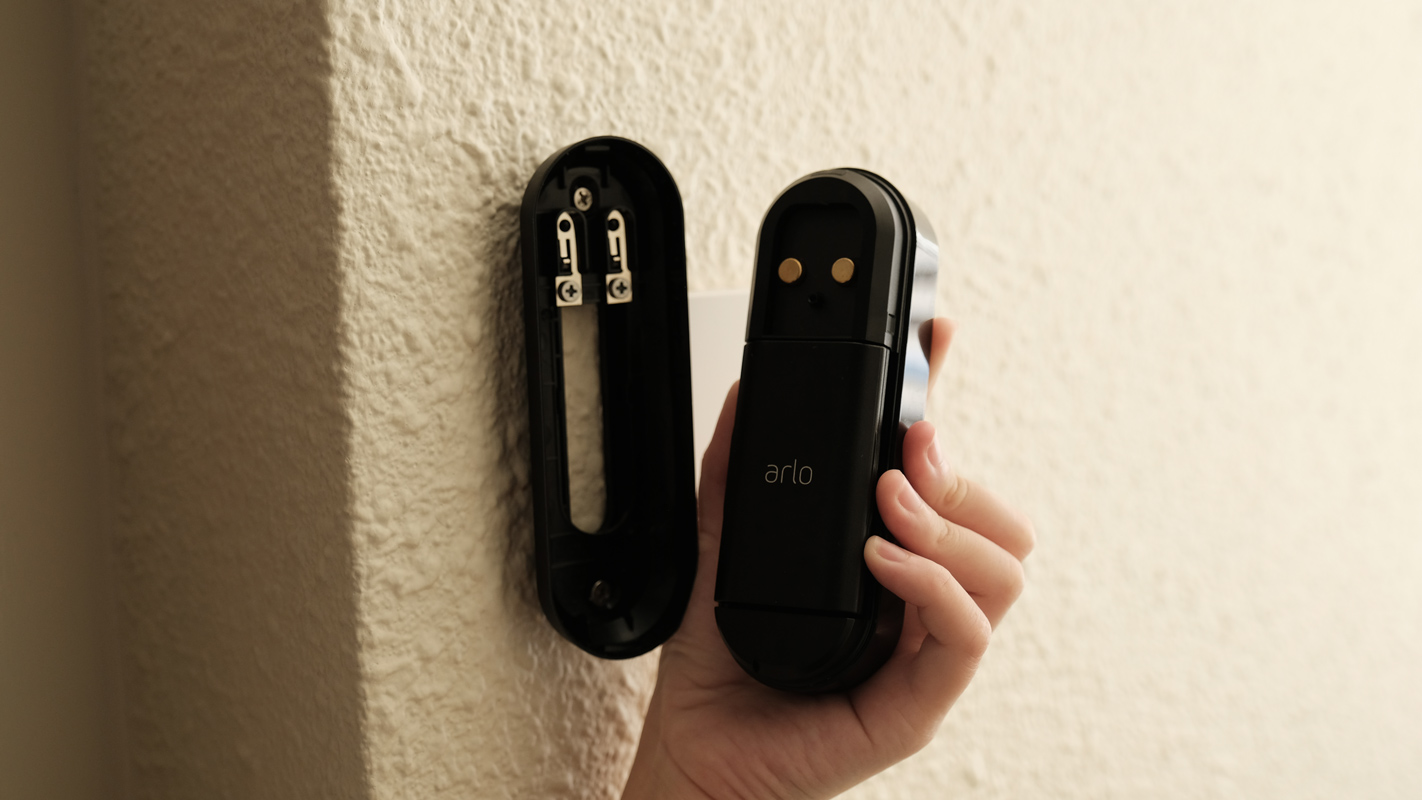
- Remove the existing doorbell: With the screws removed, gently pull the existing doorbell away from the mounting surface. It should come off easily, exposing the wiring behind it.
At this stage, you have successfully removed the existing doorbell from the wall or door frame. However, the process is not complete yet, as you still need to disconnect the existing doorbell wiring. We will cover this step in the next section.
Before moving on, take a moment to inspect the wiring and ensure there are no signs of damage or exposed wires. If you notice any issues, it’s best to consult a professional electrician for assistance. Otherwise, continue to the next step of the removal process.
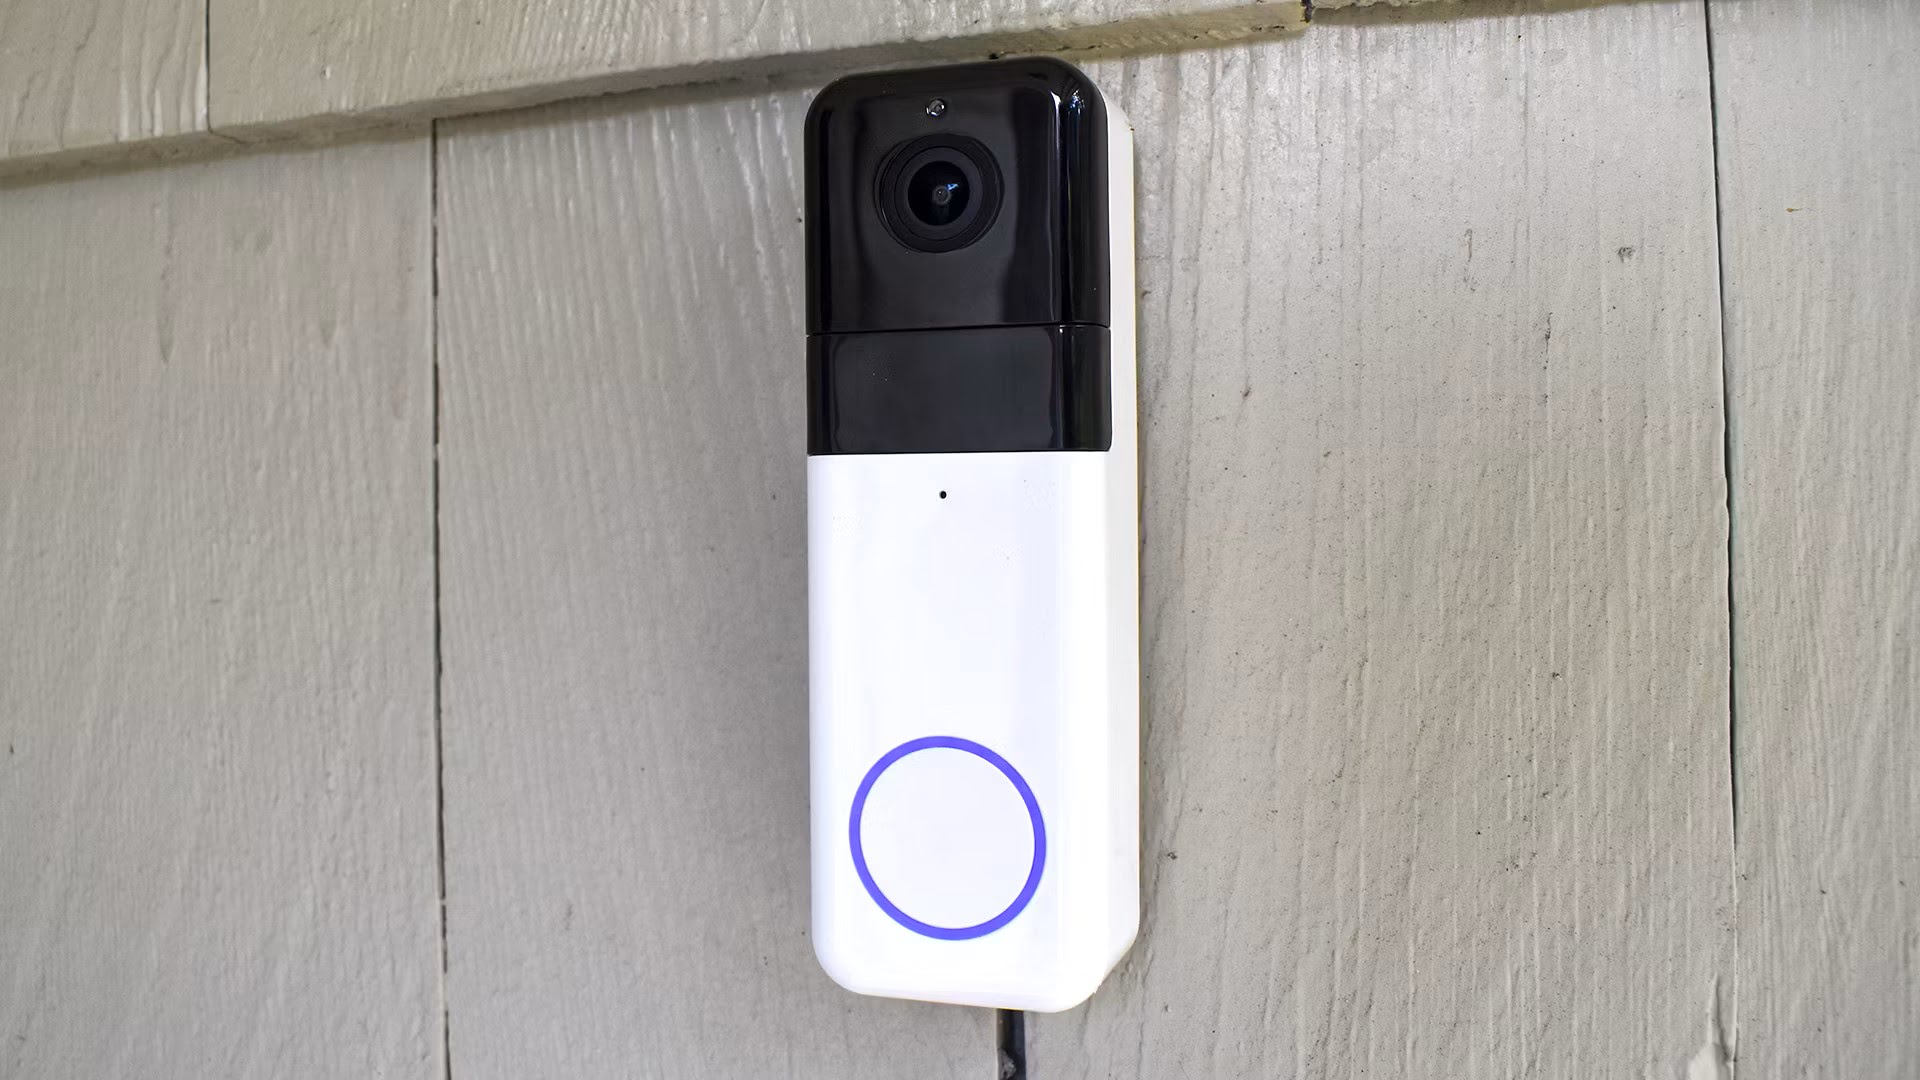
To remove an Arlo Doorbell, first, power off the device. Then, use a screwdriver to remove the mounting plate and disconnect the wires. Finally, gently pull the doorbell off the mounting plate.
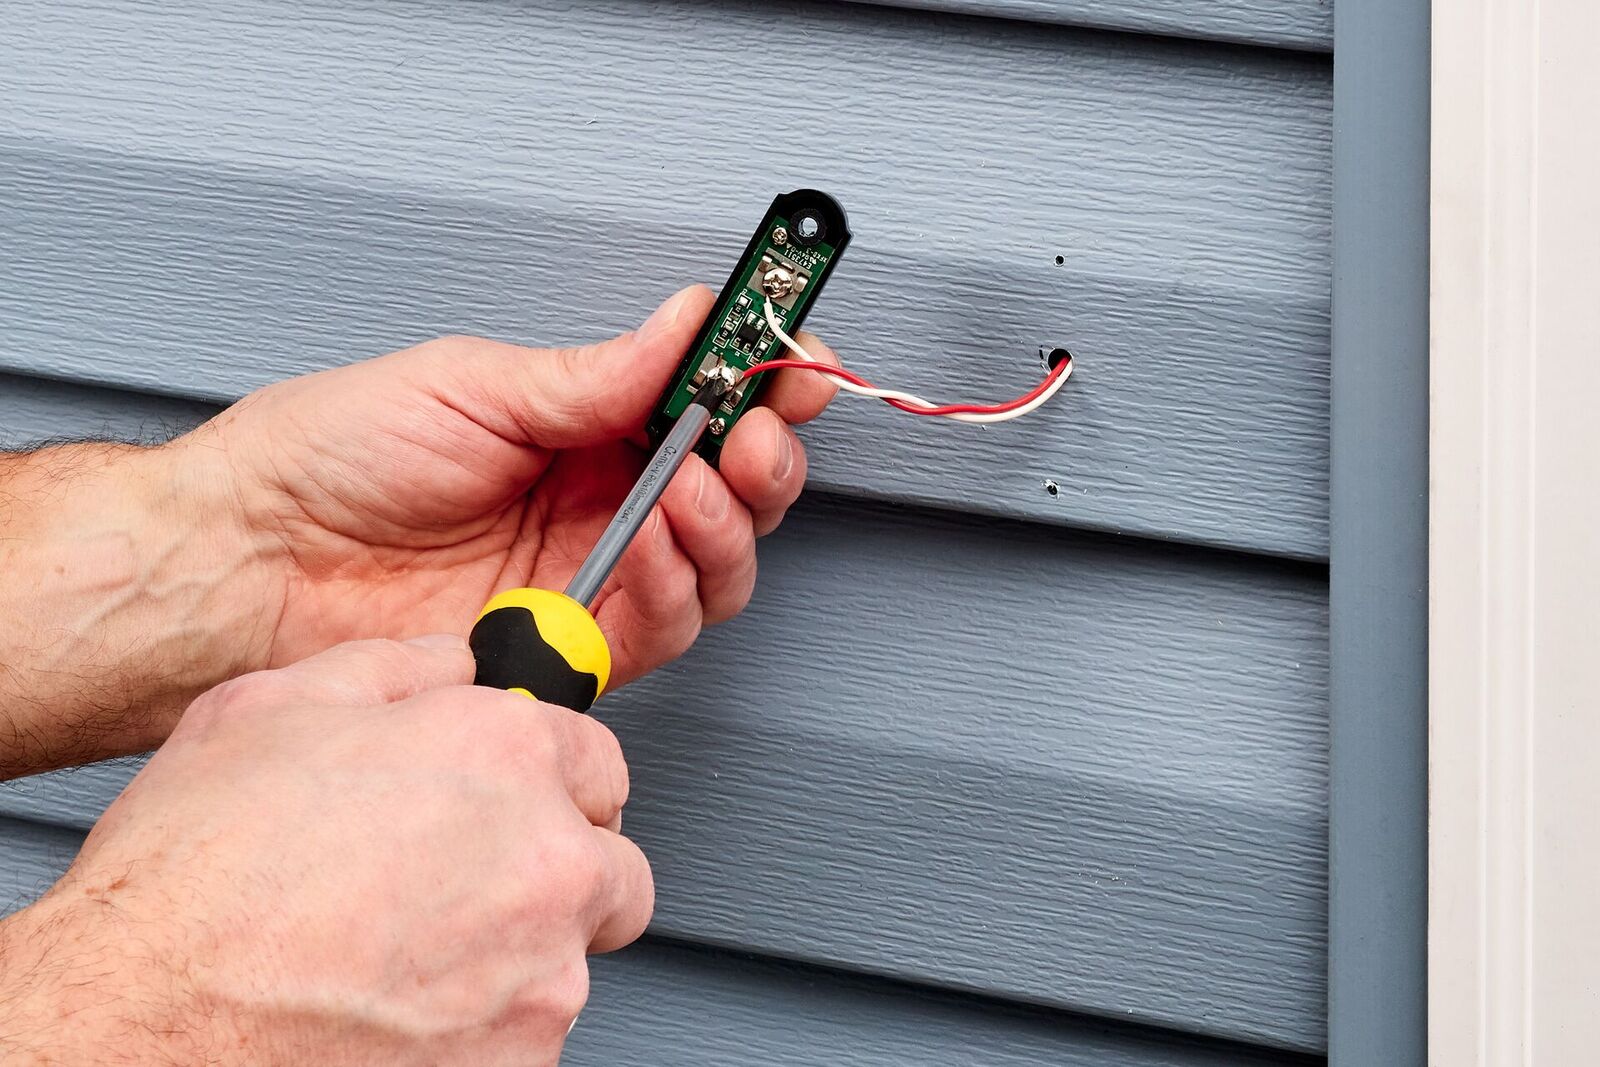
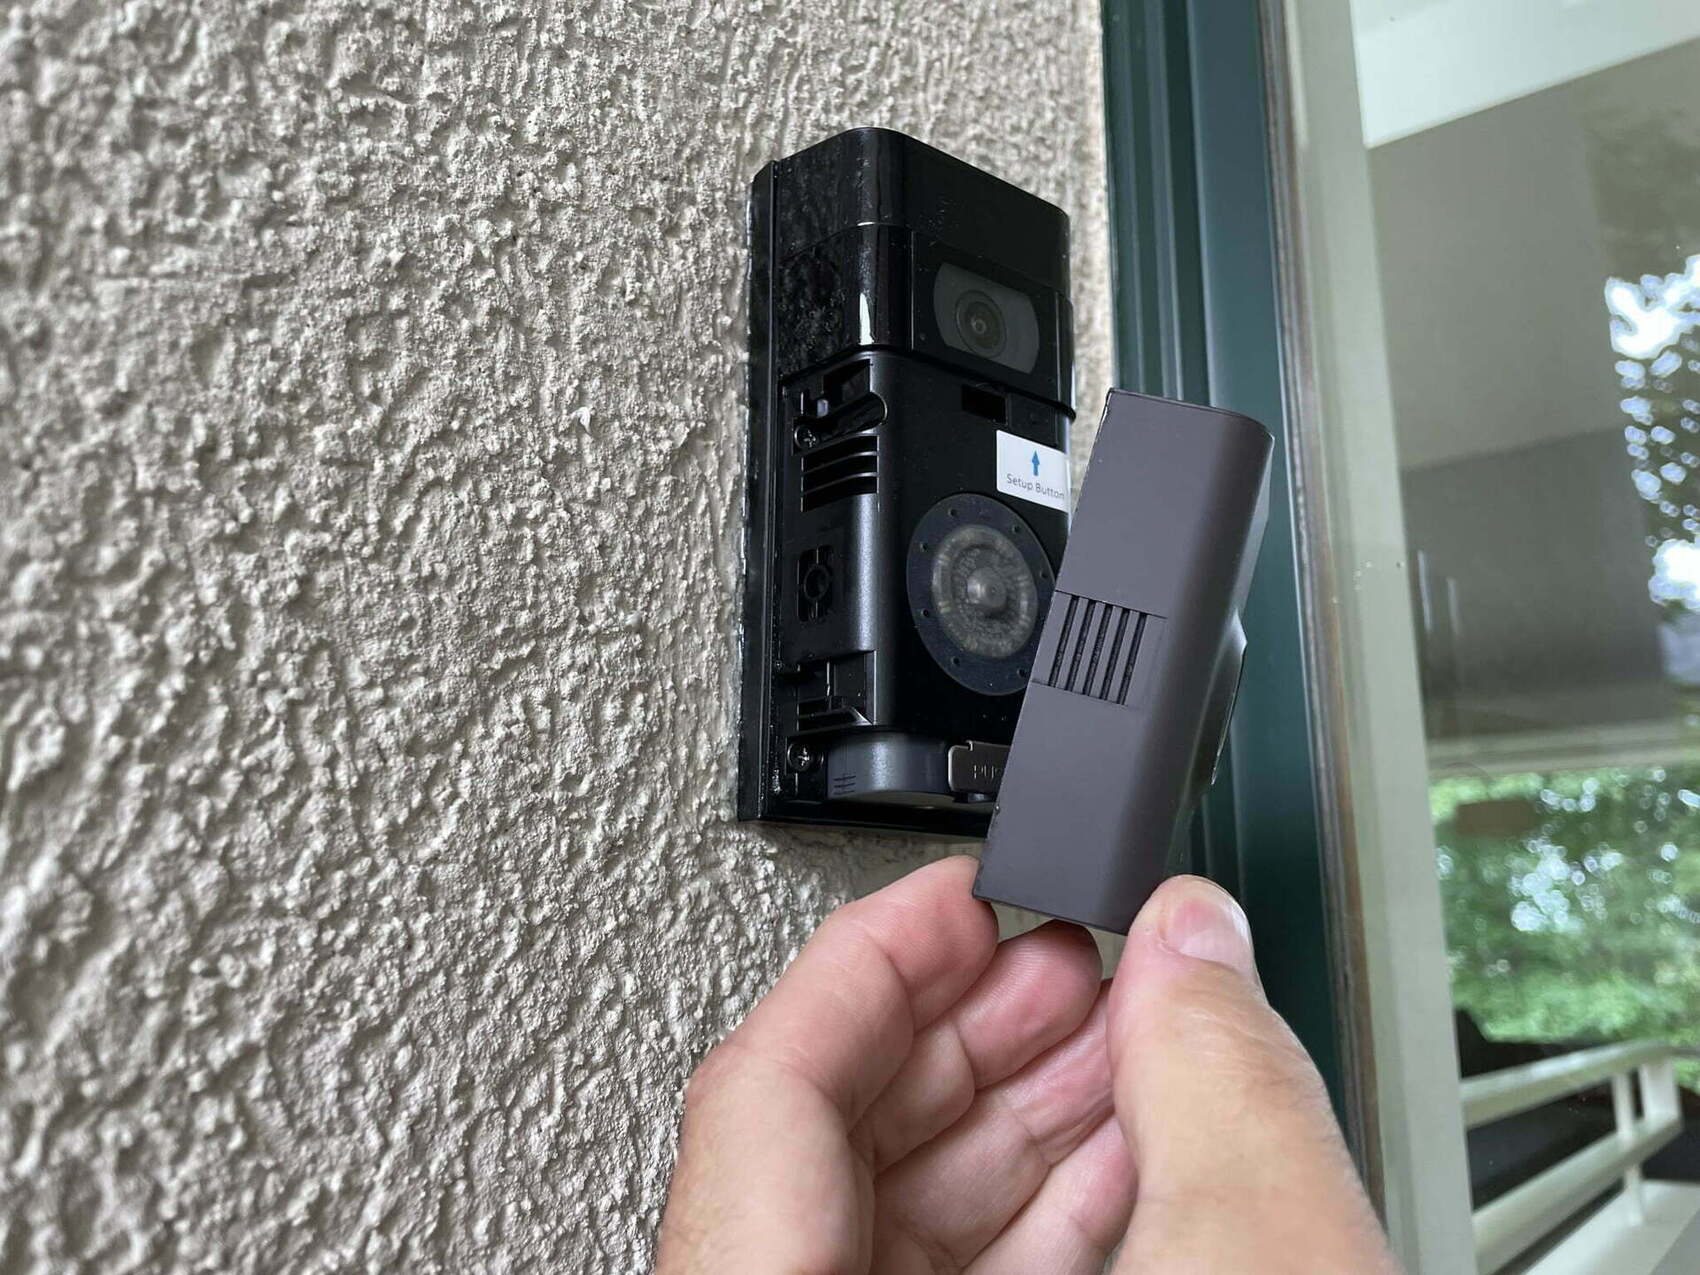
Step 3: Disconnect the Existing Doorbell Wiring
Now that you have removed the existing doorbell from its mounting location, the next step is to disconnect the wiring. Follow these steps to disconnect the existing doorbell wiring:
- Identify the wiring terminals: Take a closer look at the wiring connected to the existing doorbell. You should see two or more wires attached to specific terminals. These terminals are usually labeled “Front” or “Trans” (for the front door) and “Transformer” or “Transf” (for the power source).
- Loosen the terminal screws: Use a screwdriver to loosen the terminal screws that secure the wires in place. Turn the screws counterclockwise to release the wires. Be careful not to strip or damage the screws or the wiring.
- Disconnect the wires: Once the screws are loose, gently pull the wires away from the terminals. Take note of the wire colors and their corresponding terminals. You can also use masking tape to label the wires for easier reconnection later on.
- Secure the wiring: To prevent any accidental contact between the exposed wiring and other electrical components, it’s a good idea to secure them using electrical tape. Wrap a small piece of electrical tape around each wire’s exposed end to provide insulation and protect against any potential short circuits.
By following these steps, you have successfully disconnected the existing doorbell wiring from its terminals. This paves the way for the installation of your new Arlo Doorbell or any other doorbell system you choose. In the next section, we will guide you through the preparation of the Arlo Doorbell before installation.
Take a moment to double-check your work and ensure that all wiring connections are disconnected properly. If you are unsure about any step or encounter any difficulties, consider seeking assistance from a professional electrician.
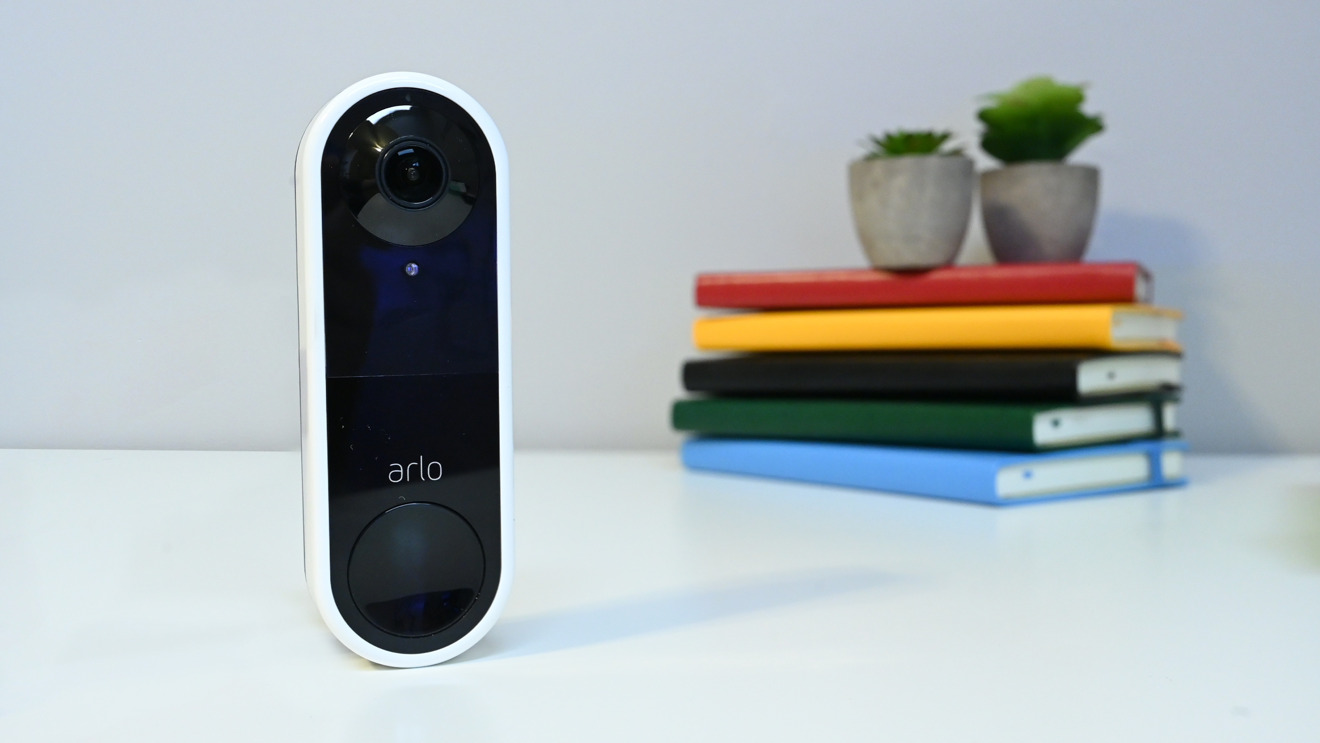
Step 4: Prepare the Arlo Doorbell for Installation
With the existing doorbell and wiring disconnected, it’s time to prepare the Arlo Doorbell for installation. Follow these steps to get the Arlo Doorbell ready:
- Read the Arlo Doorbell’s manual: Before proceeding, refer to the instruction manual provided with the Arlo Doorbell. Familiarize yourself with the specific guidelines and requirements for installing the device.
- Inspect the Arlo Doorbell: Carefully examine the Arlo Doorbell for any visible damage or defects. Ensure that all necessary components, such as the mounting bracket and screws, are included and in good condition.
- Choose the installation location: Decide where you want to install the Arlo Doorbell. Consider factors such as visibility, accessibility, and the angle you want the camera to capture.
- Prepare the mounting surface: Clean the mounting surface thoroughly to ensure a secure and stable installation. Remove any dirt, dust, or debris that may prevent proper adhesion of the mounting bracket.
- Attach the mounting bracket: Use the provided screws and a screwdriver to attach the mounting bracket to the prepared surface. Ensure that the bracket is level and securely fastened.
By following these steps, you have successfully prepared the Arlo Doorbell for installation. The mounting bracket is securely in place, and you are ready to move on to the next step of connecting the Arlo Doorbell’s wiring. Let’s explore this step in the following section.
If you encounter any difficulties or have any questions during the preparation process, refer to the Arlo Doorbell’s manual or consider consulting a professional for guidance.
Step 5: Connect the Arlo Doorbell Wiring
Now that you have prepared the Arlo Doorbell and its mounting bracket, it’s time to connect the wiring. Follow these steps to properly connect the Arlo Doorbell’s wiring:
- Refer to the Arlo Doorbell’s manual: Consult the instruction manual that came with the Arlo Doorbell for specific wiring instructions and diagrams. The manual will provide guidance on which wires should be connected to which terminals.
- Identify the doorbell wiring: Take a look at the wiring that you previously disconnected from the old doorbell. Identify the wires that correspond to the front door and the power source (usually the transformer).
- Strip the wire ends: Use wire strippers to carefully strip the ends of the wires that will be connected to the Arlo Doorbell. Follow the instructions provided with the wire strippers to strip the appropriate length of insulation from each wire.
- Connect the wires to the Arlo Doorbell: Insert the stripped ends of the wires into the respective terminals on the back of the Arlo Doorbell. Ensure a secure connection by tightening the terminal screws with a screwdriver. Double-check that the wires are properly seated and secured.
- Secure the wiring: Once the wires are connected, use electrical tape to wrap around the exposed ends of the wires. This helps provide insulation and protection against any accidental contact or short circuits.
By following these steps, you have successfully connected the wiring to the Arlo Doorbell. It’s important to ensure that the connections are secure and the wires are properly insulated to prevent any electrical issues. With the wiring in place, you can now move on to the next step of mounting the Arlo Doorbell.
If you need clarification or encounter any difficulties during the wiring process, refer to the Arlo Doorbell’s manual or consider seeking assistance from a professional electrician.
Read more: How To Install An Arlo Doorbell
Step 6: Mount the Arlo Doorbell
With the wiring of the Arlo Doorbell properly connected, it’s time to mount the device onto the prepared mounting surface. Follow these steps to securely mount the Arlo Doorbell:
- Position the Arlo Doorbell: Align the Arlo Doorbell with the mounting bracket, making sure that it sits flush and level. Take a moment to adjust the position if needed.
- Secure the Arlo Doorbell: Once the Arlo Doorbell is properly positioned, use the provided screws and a screwdriver to fasten it onto the mounting bracket. Ensure that the screws are tightened securely, but be careful not to overtighten and risk damaging the device.
- Double-check the stability: Give the Arlo Doorbell a gentle tug to ensure that it is securely mounted and does not wobble or move. This ensures that the device will function properly and remain in place over time.
By following these steps, you have successfully mounted the Arlo Doorbell onto the prepared mounting surface. The device should now be securely in place, ready for the next step: powering on and testing the Arlo Doorbell.
If you encounter any difficulties during the mounting process or have any questions, refer to the Arlo Doorbell’s manual or consider seeking assistance from a professional installer.
Step 7: Power On and Test the Arlo Doorbell
Now that the Arlo Doorbell is securely mounted, it’s time to power on the device and test its functionality. Follow these steps to power on and test the Arlo Doorbell:
- Turn on the power supply: Go to your electrical panel and switch on the circuit breaker that controls the power supply to the doorbell system. This will provide power to the Arlo Doorbell.
- Wait for the Arlo Doorbell to initialize: Give the Arlo Doorbell a few moments to initialize once power is restored. This may involve the device going through a startup process and connecting to your home’s Wi-Fi network.
- Check the doorbell’s LED status light: Look for the LED on the Arlo Doorbell to see if it lights up. This indicates that the device has power and is functioning correctly.
- Test the doorbell’s button: Press the doorbell button to trigger a test chime or notification. This allows you to verify that the Arlo Doorbell is working and properly connected to your smartphone or other connected devices.
- Test the two-way audio: If your Arlo Doorbell supports two-way audio, test this feature by speaking into your smartphone or connected device, and listen for sound coming from the Arlo Doorbell’s speaker.
- Adjust settings if necessary: Use the Arlo app or other provided methods to adjust settings such as volume levels, motion detection sensitivity, or other preferences, as needed.
By following these steps, you have successfully powered on and tested the Arlo Doorbell. You can now enjoy the features and convenience of a smart doorbell system. Make any necessary adjustments to the settings to ensure optimal performance.
If you encounter any issues during the testing phase or require further assistance, refer to the Arlo Doorbell’s manual or reach out to the manufacturer’s support team for guidance.
Conclusion
Congratulations! You have successfully removed your Arlo Doorbell or any other smart doorbell system from your home. Whether you are upgrading to a new system, moving to a new residence, or no longer need a doorbell system, the step-by-step process provided in this guide has helped you safely and effectively remove the Arlo Doorbell.
Throughout the process, it’s crucial to prioritize your safety by following the recommended safety precautions, such as turning off the power supply and using appropriate safety gear. Remember, if you are unsure or uncomfortable working with electrical components, it’s always a good idea to seek assistance from a professional electrician.
By properly disconnecting the existing wiring, preparing the Arlo Doorbell, connecting the wiring, and mounting the device, you have successfully completed the removal process. Finally, powering on and testing the Arlo Doorbell ensures that the device is functioning correctly and ready to serve its intended purpose.
Remember to consult the Arlo Doorbell’s manual for specific instructions and guidelines tailored to your device and follow any manufacturer recommendations. Additionally, take advantage of the available support resources provided by the manufacturer if you encounter any issues or have questions during the removal process.
Whether you choose to replace the Arlo Doorbell with another smart doorbell system or opt for a different solution altogether, the process of removing the Arlo Doorbell has provided you with an opportunity to explore and customize the technology in your home to fit your needs.
We hope this guide has been helpful in assisting you with the removal of your Arlo Doorbell. Enjoy your smart home journey and the convenience that comes with it!
Now that you've mastered removing your Arlo Doorbell, why not step up your entire home's tech game? Our latest article on home automation systems for the upcoming year is packed with insights. Whether you're looking to streamline daily routines or secure your space with cutting-edge technology, you'll find plenty of options to suit your needs. Don't miss out on transforming your residence into a smart home haven!
Frequently Asked Questions about How To Remove Arlo Doorbell
Was this page helpful?
At Storables.com, we guarantee accurate and reliable information. Our content, validated by Expert Board Contributors, is crafted following stringent Editorial Policies. We're committed to providing you with well-researched, expert-backed insights for all your informational needs.


0 thoughts on “How To Remove Arlo Doorbell”