Home>Articles>How To Test A Doorbell Transformer With A Multimeter
Articles
How To Test A Doorbell Transformer With A Multimeter
Modified: February 22, 2024
Learn how to test a doorbell transformer with a multimeter in this informative article. Discover the step-by-step process to ensure your doorbell transformer is functioning properly.
(Many of the links in this article redirect to a specific reviewed product. Your purchase of these products through affiliate links helps to generate commission for Storables.com, at no extra cost. Learn more)
Introduction
Welcome to this comprehensive guide on how to test a doorbell transformer with a multimeter. A doorbell transformer is a crucial component that powers your doorbell system, and over time, it may start to malfunction. Perhaps your doorbell has stopped working altogether, or it’s producing a weak sound. In such cases, testing the doorbell transformer becomes essential to identify the root cause of the issue.
Using a multimeter to test the doorbell transformer is a straightforward process that can be done by anyone with basic knowledge of electrical circuits. In this article, we will take you through the step-by-step process of testing a doorbell transformer using a multimeter.
Before we get started, it’s important to note that safety should always be a top priority when dealing with electrical components. Make sure to follow all safety precautions and turn off the power before working on the doorbell transformer.
In this guide, we will cover the materials needed for the test, the step-by-step process on how to do it, and also provide some additional tips and warnings to ensure a successful and safe testing experience.
So, if you’re ready, let’s dive deeper into the world of doorbell transformers and multimeters and learn how to test them effectively!
Key Takeaways:
- Testing a doorbell transformer with a multimeter involves prioritizing safety, identifying the transformer, setting up the multimeter, and interpreting the results. Proper testing can diagnose issues and ensure a functional doorbell system.
- Safety precautions, voltage measurement, continuity checks, and result interpretation are essential for effective doorbell transformer testing. Following additional tips and consulting a professional when unsure can enhance the testing process’s efficiency and safety.
Read more: How To Test An LED Bulb With A Multimeter
Materials Needed
Before you begin testing your doorbell transformer with a multimeter, make sure you have the following materials on hand:
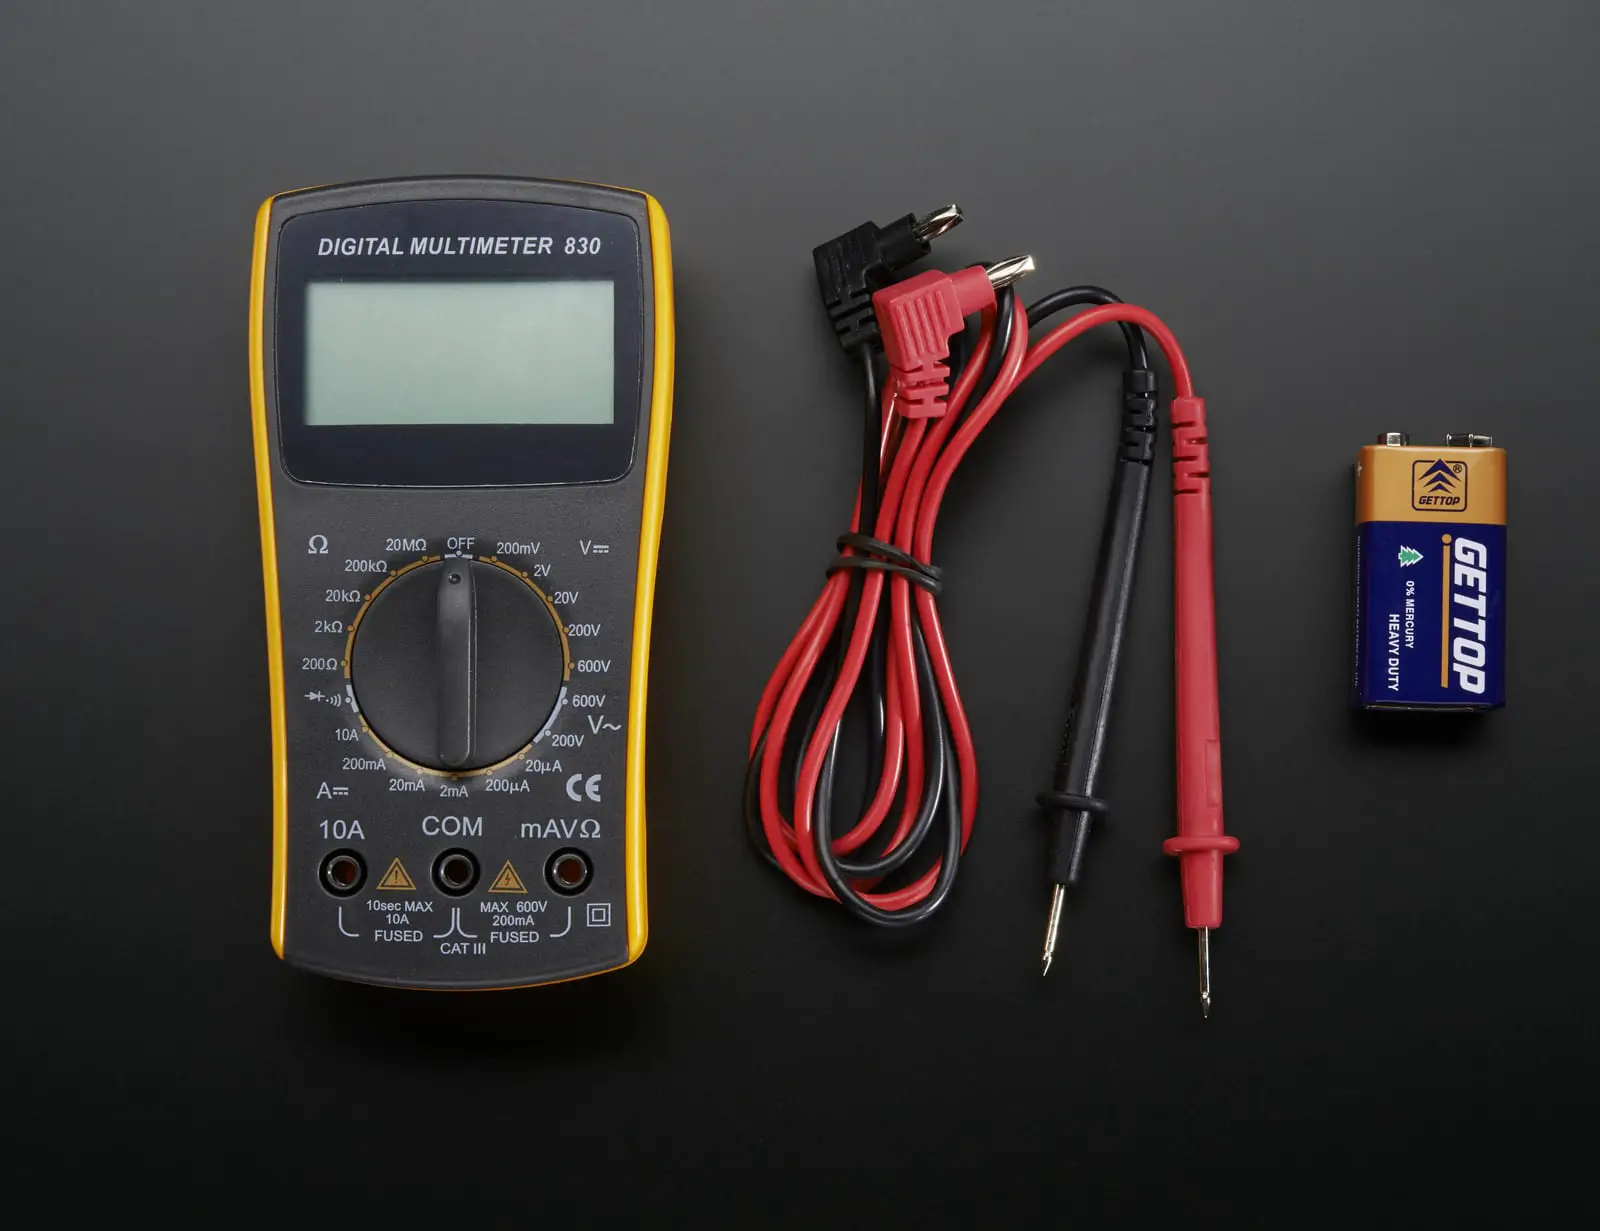
- Multimeter: A multimeter is a versatile tool used for measuring voltage, current, and resistance. It is essential for testing electrical components like the doorbell transformer. Make sure you have a reliable multimeter with voltage measuring capabilities.
- Safety Gear: Whenever working with electrical components, it’s crucial to prioritize safety. Wear safety goggles to protect your eyes and insulated gloves to prevent electric shock.
- Screwdriver: You may need a screwdriver to access the doorbell transformer. The type of screwdriver you need will depend on the screw head type used in your particular doorbell system. It’s best to have a set of different screwdrivers available.
- Wire Strippers (optional): Wire strippers are handy tools for removing insulation from electrical wires. While not always necessary for testing a doorbell transformer, they can be useful if you need to expose the wire ends for further testing.
- Electrical Tape: Electrical tape is used to insulate and secure electrical connections. It can come in handy if you need to cover exposed wires or secure any loose connections.
- Replacement Parts (if necessary): Depending on the results of the test, you may need replacement parts for your doorbell system. This could include a new doorbell transformer or other components. It’s a good idea to have these on hand in case they are needed.
Having these materials ready before you start testing will ensure a smooth and efficient process. With everything in place, you can now move on to the next step: safety precautions.
Step 1: Safety Precautions
Before you begin testing the doorbell transformer, it’s crucial to prioritize safety. Dealing with electrical components can be hazardous if proper precautions are not taken. Follow these safety measures to ensure a safe testing process:
- Turn Off the Power: Before starting any work on the doorbell system, locate the circuit breaker that controls the power supply to the doorbell transformer. Switch off the power to prevent any risk of electrical shock.
- Use Personal Protective Equipment (PPE): Wear safety goggles to protect your eyes from any potential sparks or debris. Additionally, insulated gloves can prevent electric shock when handling live wires or electrical components.
- Work in a Well-Lit Area: Ensure that your work area is well-lit to allow for better visibility. Poor lighting can lead to mistakes or accidents while handling the doorbell system.
- Keep the Area Clear: Clear the immediate area around the doorbell transformer of any flammable materials or clutter. This will minimize the risk of accidents and allow for easier access during testing.
- Check for Damaged Wires: Inspect the wires connected to the doorbell transformer for any signs of damage, such as fraying or exposed conductors. If you notice any, it’s essential to proceed with caution or consult a professional electrician.
- Avoid Touching Exposed Wires: Never touch exposed wires or live electrical connections with your bare hands. Use insulated tools like screwdrivers to make any necessary adjustments or connections during the testing process.
By following these safety precautions, you can minimize the risk of accidents and ensure a safe environment while testing the doorbell transformer. Once you’re confident that you have taken all necessary safety measures, you can proceed to the next step: identifying the doorbell transformer.
Step 2: Identify the Transformer
Before you can test the doorbell transformer, you need to locate it within your doorbell system. The transformer is responsible for stepping down the voltage from the electrical circuit to a lower voltage suitable for the doorbell. Here’s how you can identify the transformer:
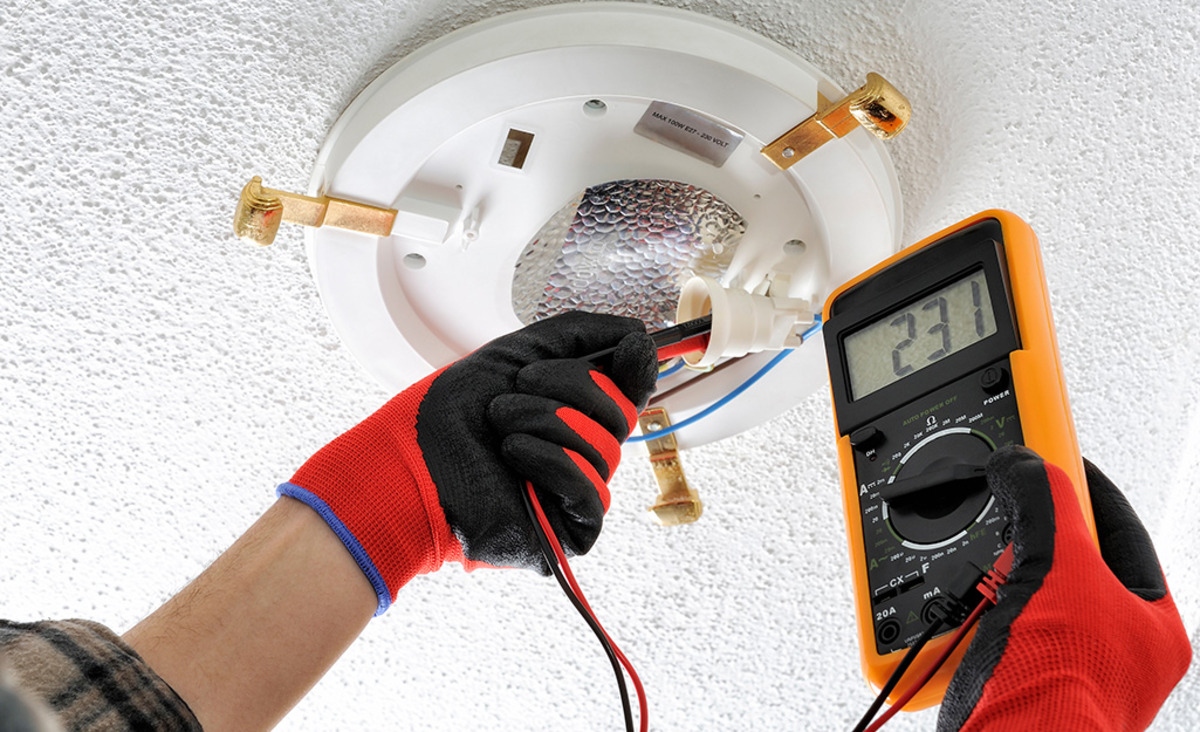
- Locate the Chime Box: Start by locating the chime box, which is usually installed on a wall near the front entrance. The chime box produces the sound when someone presses the doorbell button.
- Inspect the Chime Box: Open the chime box cover by unscrewing the screws or gently prying it open. Inside, you should find the chime unit that produces the doorbell sound.
- Look for the Transformer: The transformer is typically located near the chime unit. It is a small, rectangular device that is often mounted on or near the wall, hidden behind the chime box or within the electrical wiring.
- Check for Labeling: Some transformers may have labeling or markings indicating their voltage rating and other specifications. This information can be useful when testing or replacing the transformer.
- Take Note of the Wiring: Observe the wiring connected to the transformer. Note the color codes and connections so you can reconnect them correctly after testing.
- Power Off if Necessary: If the transformer is not easily accessible and requires further disconnection, make sure to turn off the power from the circuit breaker to ensure your safety.
By identifying the doorbell transformer, you can move on to the next step of setting up the multimeter for testing. Ensure that you have a clear understanding of the transformer’s location and wiring connections before proceeding with the test.
Step 3: Set Up the Multimeter
Now that you have identified the doorbell transformer, it’s time to set up your multimeter for testing. The multimeter will allow you to measure the voltage and check for continuity in the transformer. Follow these steps to set up your multimeter:
- Select the Voltage Setting: Turn on the multimeter and set it to the “AC Voltage” mode. Make sure to choose a voltage range that is higher than the expected output of your doorbell transformer. For example, if your transformer is rated for 16 volts, select a voltage range of at least 20 volts.
- Attach the Test Leads: Connect the red test lead to the “VΩ” or “Voltage” socket on the multimeter. Connect the black test lead to the “Common” or “COM” socket. Ensure a secure connection for accurate readings.
- Set the Multimeter to the Proper Range: Adjust the multimeter’s range setting to the desired voltage range. Some multimeters may have an auto-ranging feature, while others require manual adjustment. Refer to the user manual of your specific multimeter model for instructions.
- Verify the Calibration: Before proceeding with the test, it’s a good practice to verify the calibration of your multimeter by testing a known voltage source. This can help ensure accurate measurements during the doorbell transformer test.
- Double-Check the Safety: Once your multimeter is set up properly, take a moment to double-check that you have followed all safety precautions and that the power to the doorbell transformer is still turned off.
With your multimeter set up correctly, you are now ready to move on to the next step: measuring the voltage of the doorbell transformer. Proper multimeter setup is essential to obtain accurate readings and ensure a successful test. Take your time during this step to ensure all settings are correct before proceeding.
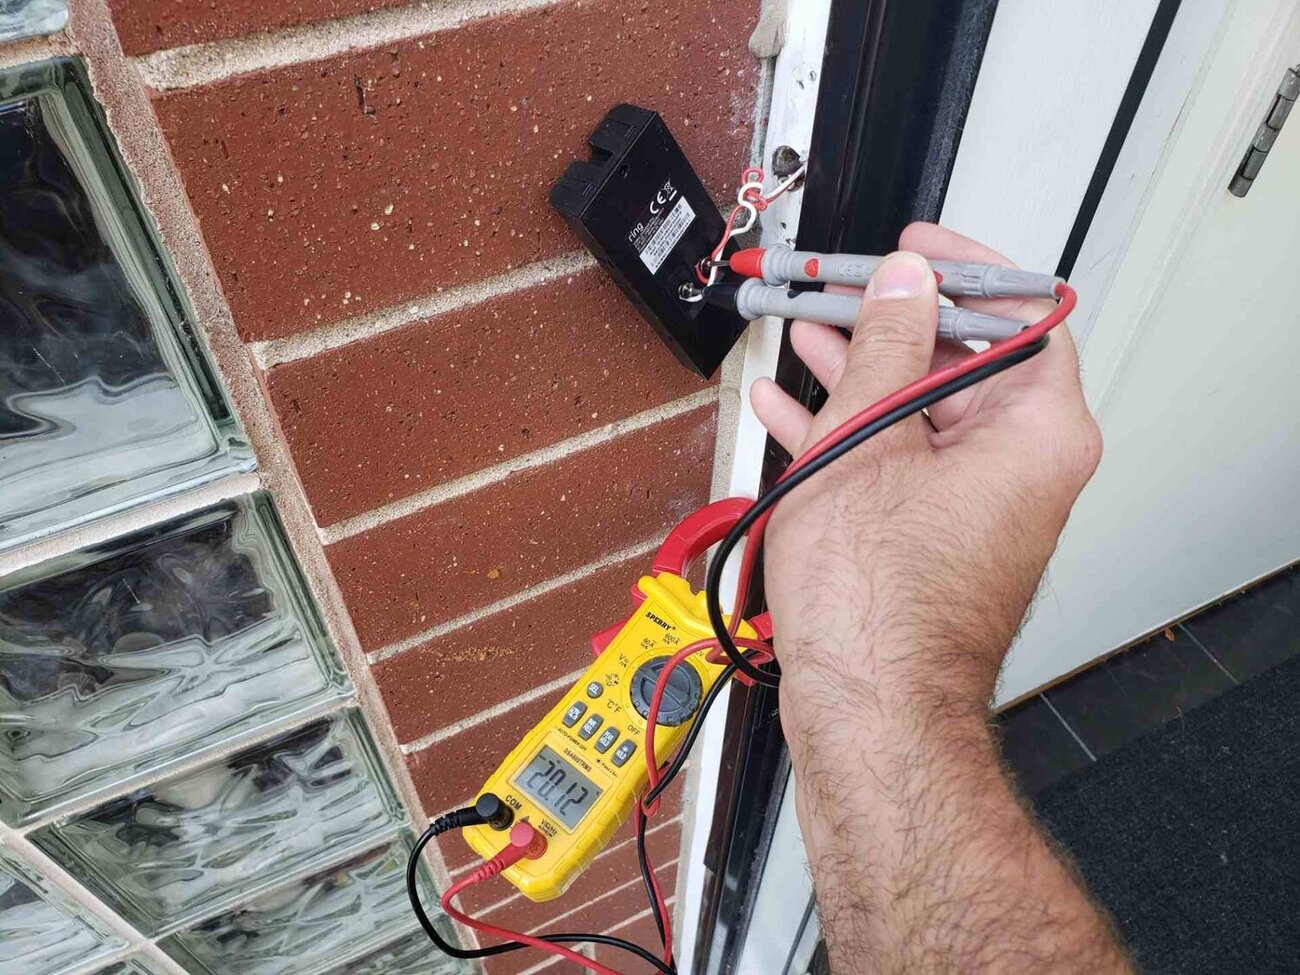
When testing a doorbell transformer with a multimeter, set the multimeter to the AC voltage setting. Then, place the multimeter probes on the transformer’s output terminals to measure the voltage. If the voltage is within the specified range, the transformer is functioning properly.
Read more: How To Test An Ac Adapter With A Multimeter
Step 4: Measure the Voltage
Now that your multimeter is set up, it’s time to measure the voltage of the doorbell transformer. This step will help determine if the transformer is functioning properly. Follow these instructions to measure the voltage:
- Turn on the Power: Make sure the power to the doorbell system is turned on. This will allow the transformer to supply voltage.
- Access the Transformer Wires: Depending on the location of the transformer, you may need to remove the chime box cover or access panel to expose the transformer’s wiring.
- Identify the Transformer Wires: Locate the wires coming from the transformer. There will typically be two wires – one connected to the low-voltage side and another to the high-voltage side.
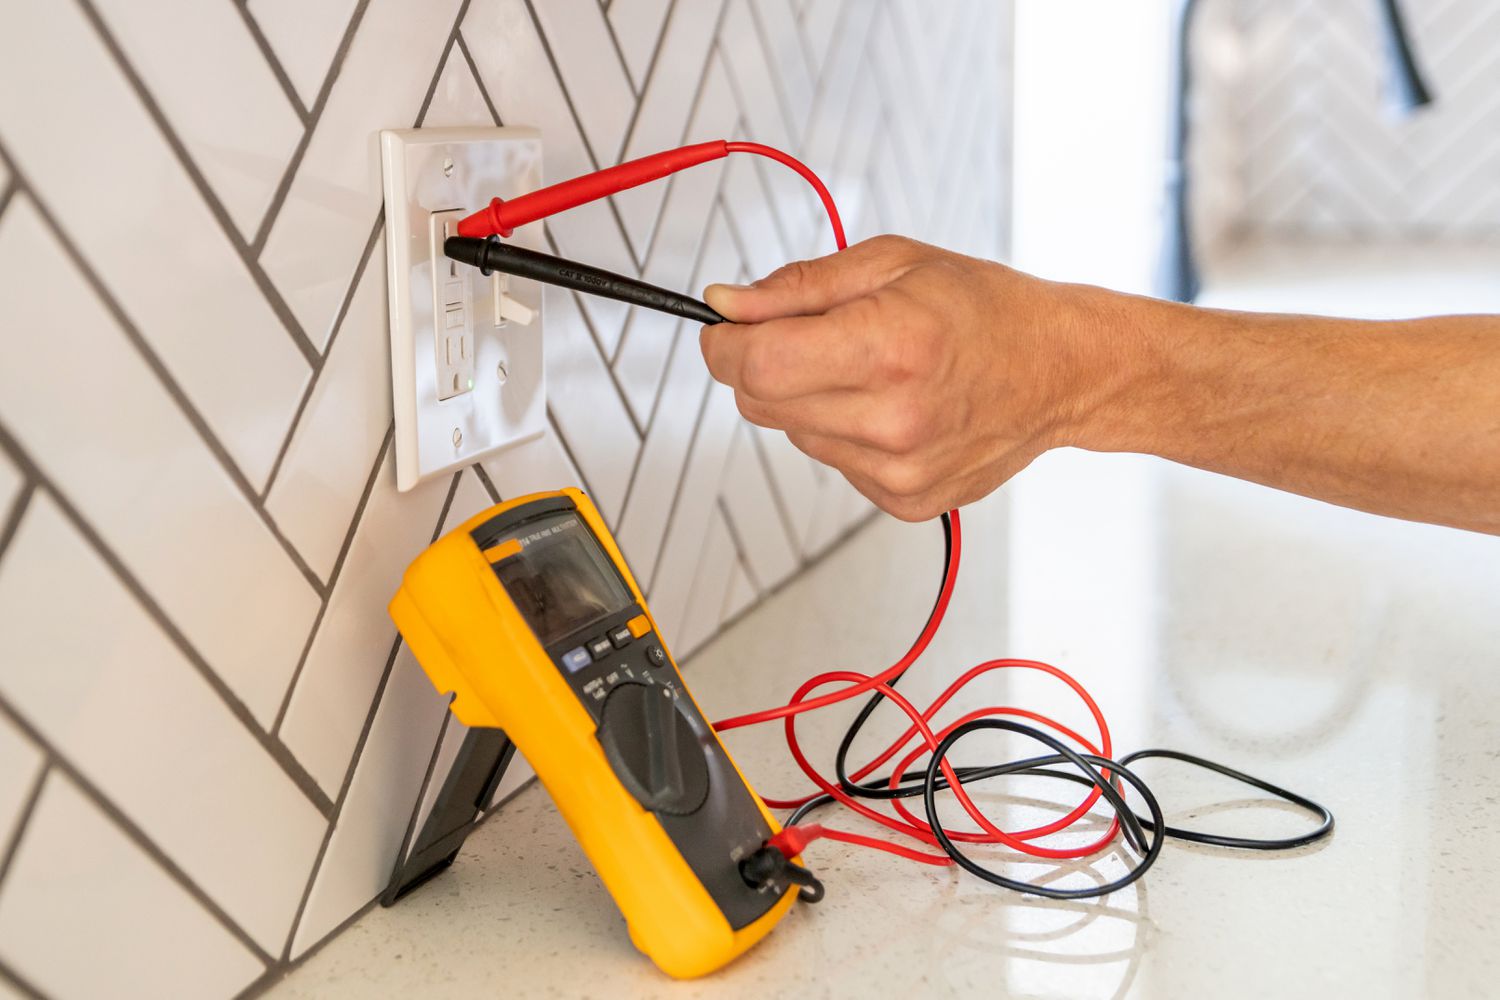
- Connect the Test Leads: Take the red test lead of the multimeter and touch it to the wire connected to the low-voltage side of the transformer. Similarly, touch the black test lead to the wire connected to the high-voltage side.
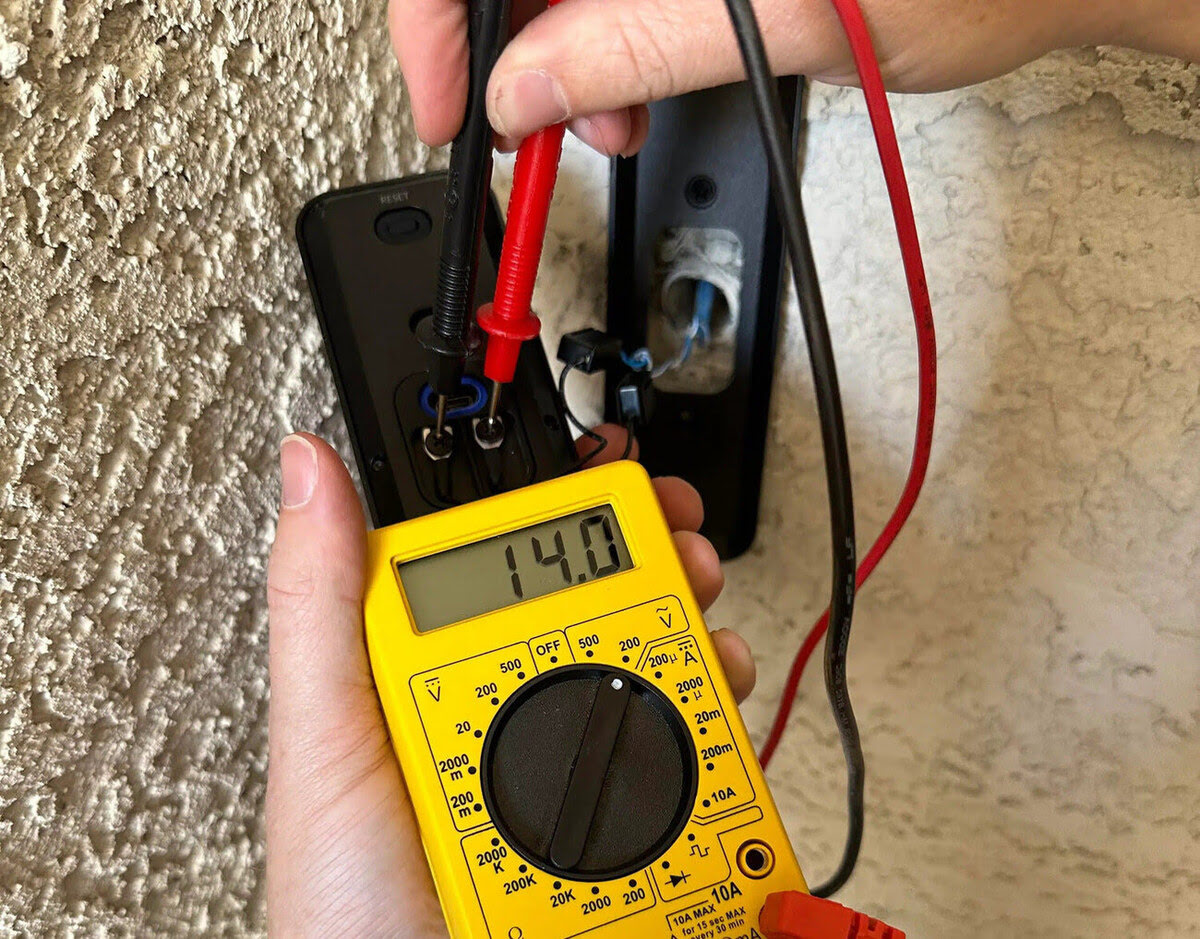
- Read the Voltage: With the test leads securely connected, check the multimeter display for the voltage reading. Ensure the multimeter is set to the appropriate voltage range for accurate readings.
- Record the Reading: Note down the voltage reading. In a properly functioning doorbell transformer, the voltage reading should match or be close to its rated output voltage (e.g., 16 volts).
- Repeat the Measurements: If you have multiple low-voltage wires coming from the transformer, repeat the previous steps for each wire to ensure consistent readings across all connections.
By measuring the voltage, you can assess the health of your doorbell transformer. If the measured voltage is significantly lower than the rated output voltage or if there is no voltage at all, it may indicate a problem with the transformer. In such cases, further testing or replacement may be necessary.
With the voltage measurement complete, you can now move on to the next step: checking for continuity in the transformer wiring.
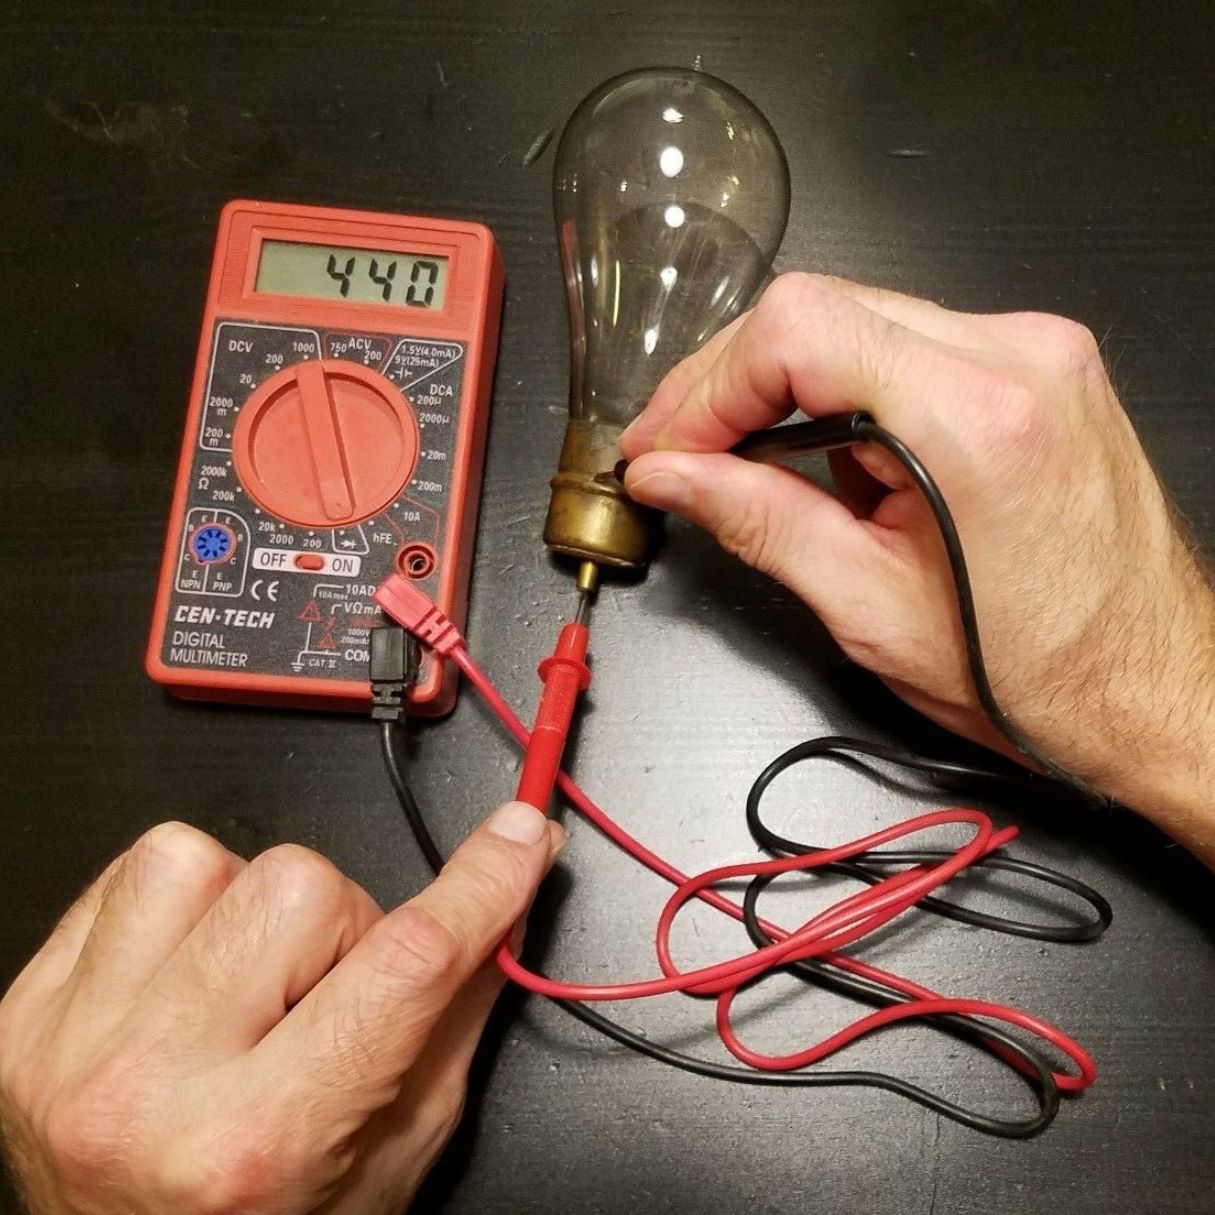
Step 5: Check for Continuity
In addition to measuring the voltage, checking for continuity in the doorbell transformer wiring is an important step in the testing process. Continuity refers to the uninterrupted flow of electrical current through a conductor. By checking for continuity, you can ensure that the wiring is intact and properly connected. Follow these steps to check for continuity:
- Ensure the Power is Off: Before proceeding, make sure that the power to the doorbell system is turned off. This will prevent any accidental electric shock during the continuity check.
- Disconnect the Transformer: Unplug or disconnect the wires connected to the doorbell transformer. This will isolate the transformer from the rest of the circuit, allowing for an accurate continuity test.
- Set the Multimeter: Switch your multimeter to the continuity testing mode. On most multimeters, this is indicated by a diode symbol or an audible continuity sound setting.
- Touch the Test Probes: Take the test probes of the multimeter and touch them to the ends of the wires that were previously connected to the transformer. The red probe should touch one wire, while the black probe should touch the other.
- Check for Continuity: When the test probes are touching the wires, the multimeter will emit a beep or display a continuity symbol if there is a complete circuit. This indicates that there is continuity in the wiring.
- Repeat for all Wires: If you have multiple wires connected to the transformer, repeat the continuity check for each wire to ensure all connections are intact.
- Replace Faulty Wires: If the multimeter does not register continuity, it means there is a break in the wiring. In this case, you may need to replace the faulty wires to restore the circuit.
Checking for continuity is essential to ensure that the wiring is in good condition and capable of transmitting the electrical signal. A lack of continuity may indicate a wire break or loose connection that needs to be addressed. Once you have completed the continuity check, you can move on to interpreting the results in the next step.
Step 6: Interpret the Results
Now that you have completed the voltage measurement and continuity check, it’s time to interpret the results to determine the condition of your doorbell transformer. By analyzing the readings and observations, you can assess whether the transformer is functioning properly or if further actions are required. Here’s how to interpret the results:
Voltage Measurement:
- If the voltage reading matches or closely aligns with the rated output voltage of the transformer (e.g., 16 volts), it indicates that the transformer is likely functioning correctly.
- If the voltage reading is significantly lower than the rated output voltage or shows no voltage at all, it suggests a problem with the transformer. In such cases, you may need to replace the transformer.
- If the voltage reading is higher than the rated output voltage, it could indicate an issue with the transformer or an overload in the circuit. A professional electrician should be consulted to determine the cause and provide guidance.
Continuity Check:
- If the continuity test shows a complete circuit and the multimeter emits a beep or displays a continuity symbol, it indicates that the wiring and connections are intact.
- If the continuity test does not register continuity, it suggests a break or loose connection in the wiring. In such cases, you may need to repair or replace the faulty wires to ensure proper functioning of the doorbell system.
Based on the results of these tests, you can make an informed decision on the next steps. If your doorbell transformer is functioning properly and the wiring has continuity, you can reassemble the components and restore power to the doorbell system. However, if there are issues with the transformer or wiring, it is advisable to seek professional help or replace the faulty components.
Remember that proper testing and interpretation are crucial for accurate troubleshooting and effective resolution of the doorbell issues. If you’re unsure about the results or encounter difficulties during the testing process, consult a qualified electrician to ensure your safety and the proper functioning of your doorbell system.
Conclusion
Congratulations! You have successfully learned how to test a doorbell transformer with a multimeter. By following the step-by-step process outlined in this guide, you can diagnose potential issues with your doorbell system and determine if the transformer is functioning properly.
Remember, safety should always be your top priority when working with electrical components. Take the necessary precautions, such as turning off the power and wearing appropriate safety gear, to avoid any accidents or electric shock.
Testing the voltage and checking for continuity are essential steps in assessing the condition of the doorbell transformer. If the voltage measurement matches the rated output voltage and the continuity test reveals a complete circuit, it indicates that the transformer and wiring are in good condition.
However, if you discover issues such as low voltage readings, no voltage, or a lack of continuity, it may suggest problems with the transformer or wiring. In such cases, it’s recommended to consult a professional electrician for further assistance, repairs, or possible replacement.
By understanding how to test your doorbell transformer, you can troubleshoot common problems and ensure the efficient functioning of your doorbell system. Remember to refer back to this guide whenever you need to test a doorbell transformer or encounter issues with your doorbell system in the future.
We hope this guide has been helpful in empowering you with the knowledge and skills necessary to test a doorbell transformer effectively. Good luck, and may your doorbell system always ring loud and clear!
Additional Tips and Warnings
Testing a doorbell transformer with a multimeter requires precision and caution. To ensure a successful testing process and maintain safety, consider the following additional tips and warnings:
- Double-check the power: Before starting any testing, always confirm that the power to the doorbell system is turned off. This will prevent any potential electrical shock or damage to the components.
- Refer to the manufacturer’s instructions: If available, consult the manufacturer’s instructions or documentation for your specific doorbell system. This will provide valuable insights and guidance regarding the testing process.
- Document the wiring connections: Take pictures or make notes of the wiring connections before you start testing. This will help you reconnect the wires correctly afterward, ensuring the doorbell system functions properly.
- Perform regular maintenance: Even if you don’t encounter any issues with your doorbell system, it’s a good practice to perform routine maintenance. Clean the contacts and connections periodically to prevent dirt or corrosion from affecting the performance.
- Consult a professional if unsure: If you’re uncertain about any aspect of the testing process or if you’re uncomfortable working with electrical components, it’s best to seek assistance from a qualified electrician. They have the expertise and tools to safely diagnose and resolve any doorbell system issues.
- Use proper insulation: When making wire connections, ensure that you use electrical tape or wire nuts to insulate and secure the exposed wires. This helps prevent any short circuits or accidental contact that can lead to electrical hazards.
- Keep children and pets away: During the testing process, ensure that children and pets are kept away from the work area. This minimizes the risk of accidents or interference with the testing process.
- Don’t overload the doorbell transformer: Doorbell transformers are designed to handle a specific range of voltage. Avoid connecting additional devices or systems to the transformer that exceeds its capacity, as it can lead to overheating or damage.
- Be mindful of the multimeter settings: Ensure that you have set up the multimeter correctly in the appropriate voltage range and mode for accurate measurements. Incorrect settings can lead to inaccurate readings or even damage to the multimeter.
By following these additional tips and heeding the warnings, you can enhance the testing process’s efficiency and safety. Remember, if you encounter any difficulties, it’s always best to consult a professional to avoid any potential risks or complications.
Good luck with testing your doorbell transformer, and may you successfully diagnose and resolve any issues with your doorbell system!
Frequently Asked Questions about How To Test A Doorbell Transformer With A Multimeter
Was this page helpful?
At Storables.com, we guarantee accurate and reliable information. Our content, validated by Expert Board Contributors, is crafted following stringent Editorial Policies. We're committed to providing you with well-researched, expert-backed insights for all your informational needs.

0 thoughts on “How To Test A Doorbell Transformer With A Multimeter”