
Articles
How To Fix Squeaky Faucet Handle
Modified: August 16, 2024
Learn how to fix a squeaky faucet handle with our articles and stop the annoying noises in no time.
(Many of the links in this article redirect to a specific reviewed product. Your purchase of these products through affiliate links helps to generate commission for Storables.com, at no extra cost. Learn more)
Introduction
Squeaky faucet handles can be annoying and disruptive in our daily lives. The constant creaking and grinding sounds can make even the simplest tasks, like washing your hands or doing the dishes, feel like a chore. However, fixing a squeaky faucet handle is not an impossible task, and with a little bit of knowledge and some basic tools, you can easily remedy the situation.
The source of a squeaky faucet handle can vary, but it is often caused by a lack of lubrication or wear and tear on the handle mechanism. Over time, the constant twisting and turning of the handle can cause friction between the components, leading to the unpleasant sounds. Thankfully, resolving this issue doesn’t require calling a professional plumber. With a few simple steps, you can silence that squeaky faucet handle and restore peace to your kitchen or bathroom.
In this article, we will walk you through the process of identifying the source of the squeak, gathering the necessary tools and materials, and providing step-by-step instructions on how to fix the squeaky faucet handle. By following these instructions, you’ll be able to enjoy the smooth and silent operation of your faucet once again.
Before we dive into the details, it’s important to note that while fixing a squeaky faucet handle is generally a straightforward task, if you feel uncomfortable or uncertain about performing any of the steps, it’s always best to consult a professional plumber. Safety should always be a priority, and if you’re not confident in your abilities, it’s better to seek professional assistance.
Now, let’s begin by identifying the source of the squeaky faucet handle so we can determine the appropriate course of action.
Key Takeaways:
- Say goodbye to annoying squeaky faucet handles by identifying the source of the problem, applying lubricant, and reassembling the handle for smooth, silent operation.
- With the right tools and know-how, fixing a squeaky faucet handle is a manageable DIY task that can save you time and money while ensuring a peaceful kitchen or bathroom experience.
Read more: How To Fix A Stripped Faucet Handle
Identifying the Source of the Squeaky Faucet Handle
Before attempting to fix a squeaky faucet handle, it’s important to identify the source of the problem. This will help determine the appropriate solution and ensure that you’re addressing the root cause of the squeaking noise. Here are a few common areas to check:
- Handle Mechanism: The most common cause of a squeaky faucet handle is wear and tear on the handle mechanism itself. Over time, the components inside the handle can become worn or damaged, resulting in friction and noise when the handle is turned.
- Valve Stem: Another potential source of squeaking is the valve stem. The valve stem is responsible for controlling the flow of water and can sometimes become misaligned or corroded, causing friction and noise when the handle is moved.
- Lack of Lubrication: If the handle or valve components are not properly lubricated, they can rub against each other, creating squeaking sounds. This is often a quick and simple fix, requiring the application of lubricant to reduce friction.
- Loose or Damaged Parts: Loose or damaged parts, such as screws or washers, can also contribute to a squeaky faucet handle. Inspecting the handle and other components for any obvious signs of damage or looseness can help identify the problem.
To begin the troubleshooting process, start by turning the faucet handle on and off while listening carefully for the source of the squeaking noise. Pay attention to the location of the sound and any other accompanying factors, such as difficulty in turning the handle or water leakage. By pinpointing the source, you can focus your efforts on that specific area when attempting to fix the problem.
If the squeaking noise persists even after the handle has been removed, it’s possible that the issue lies within the valve cavity or other internal components of the faucet. In such cases, it may be necessary to disassemble the faucet further to access and address the underlying problem.
Now that we have identified the potential sources of the squeaky faucet handle, it’s time to gather the necessary tools and materials for the repair process.
Tools and Materials Needed
Before you begin fixing your squeaky faucet handle, you’ll need to gather a few tools and materials. Having these items on hand will ensure that you have everything you need to complete the repair successfully. Here’s a list of what you’ll need:
- Adjustable wrench: An adjustable wrench will be necessary for loosening and tightening the nuts and bolts that hold the faucet handle in place.
- Screwdriver: Depending on the type of faucet handle you have, you may need a flathead or Phillips screwdriver to remove the screws or fasteners.
- Plumber’s grease or silicone-based lubricant: Lubricating the handle mechanism and valve stem is important for reducing friction and eliminating the squeaking noise. Plumber’s grease or a silicone-based lubricant will work well for this purpose.
- Replacement parts (if necessary): If you discover any damaged or worn-out components during the troubleshooting process, you may need to purchase replacement parts. This could include new washers, O-rings, or even a complete faucet handle assembly.
- Cloth or towel: Having a cloth or towel nearby will come in handy for cleaning and drying the handle and valve components as you work on them.
- Bucket or bowl: It’s always a good idea to have a bucket or bowl nearby to catch any water that may spill out when you’re working on the faucet handle.
- Safety gloves and goggles: While not mandatory, wearing safety gloves and goggles can protect your hands and eyes from any potential injuries or splashes of water or cleaning products.
By having these tools and materials ready before you start the repair process, you’ll save time and ensure a smoother experience. Now that you’re equipped with the necessary supplies, it’s time to move on to the step-by-step instructions to fix your squeaky faucet handle.
Step 1: Shutting Off the Water Supply
Before you begin working on your squeaky faucet handle, it’s essential to shut off the water supply to prevent any potential flooding or accidents. Here’s how you can safely turn off the water:
- Locate the water shut-off valve: The water shut-off valve is typically located under the sink or near the main water supply line. It’s a small valve that you can turn clockwise to shut off the flow of water.
- Turn off the water: Using a wrench or your hand, turn the water shut-off valve clockwise until it’s completely closed. This will stop the water from flowing to the faucet and minimize the risk of any water leaks or spills during the repair process.
- Check for water flow: Once you’ve closed the water shut-off valve, turn on the faucet to confirm that the water supply has been successfully turned off. If no water comes out, you can proceed to the next step. If there’s still a slight trickle, double-check that the valve is completely closed, or consider shutting off the main water supply to your home.
By taking the time to shut off the water supply, you can work on your squeaky faucet handle without the risk of water damage or unexpected water flow. Now that the water is off, you’re ready to move on to the next step of the repair process: removing the faucet handle.
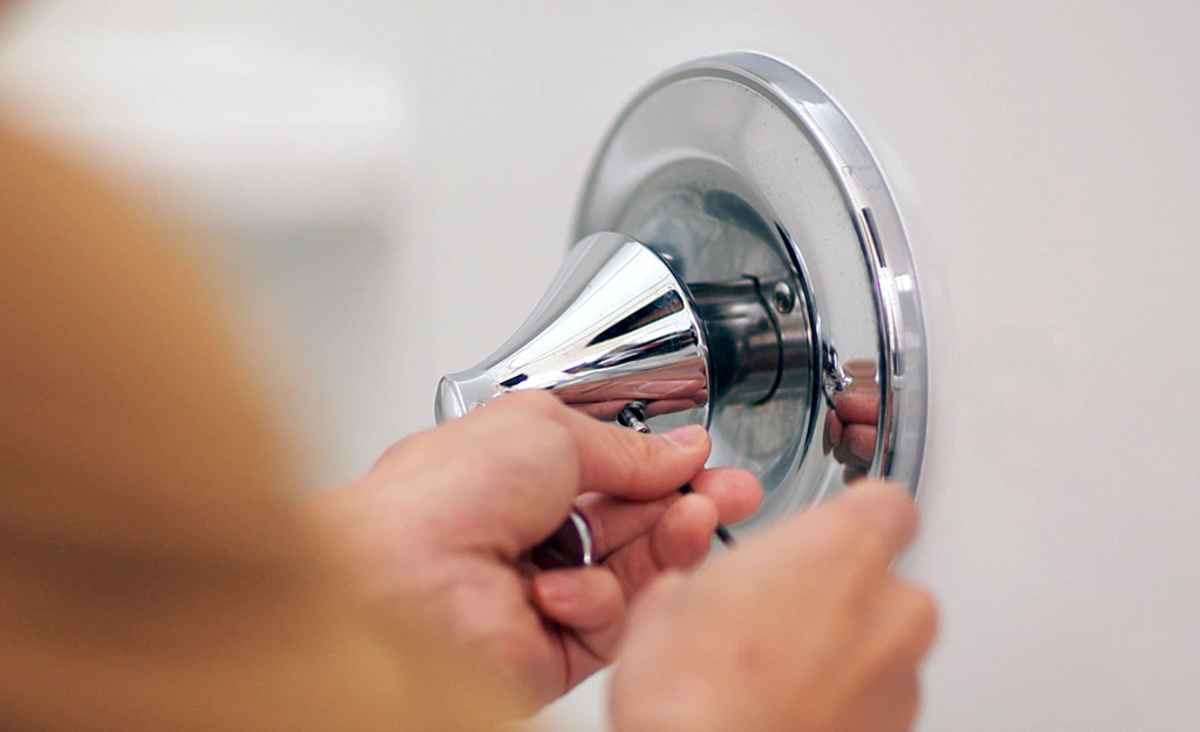
Step 2: Removing the Faucet Handle
Now that you’ve turned off the water supply, it’s time to remove the squeaky faucet handle. Here’s a step-by-step guide on how to do it:
- Locate the screw or fastener: Depending on the type of faucet handle you have, there may be a screw or fastener holding it in place. Look for a small set screw on the side or underneath the handle. This screw may be visible or hidden beneath a decorative cap.
- Loosen or remove the screw: Use an appropriate screwdriver (flathead or Phillips) to loosen or remove the screw. If it’s a set screw, rotate it counterclockwise until it’s loose enough to remove. If there’s a decorative cap covering the screw, gently pry it off using a flathead screwdriver or your fingernail.
- Slide the handle off: Once the screw or fastener is removed, grip the handle firmly and pull it straight off the faucet stem. It may require a bit of force, but be careful not to yank it too hard to avoid damaging any other components.
- Inspect the handle and stem: Take a moment to examine the removed handle and the exposed stem. Look for any signs of damage, corrosion, or debris that may be contributing to the squeaking noise. If you notice any issues, take note of them for further inspection and potential repairs.
Removing the faucet handle is a crucial step in identifying and resolving the cause of the squeaking noise. Once the handle is removed, you’ll have a better view of the internal components that may require lubrication, cleaning, or replacement. In the next step, we’ll delve into inspecting and addressing any underlying issues with the handle and valve.
To fix a squeaky faucet handle, try tightening the screw on the handle with a screwdriver. If that doesn’t work, you may need to replace the faucet cartridge.
Read more: How To Fix A Leaky Single Handle Faucet
Step 3: Inspecting the Handle and Valve
With the faucet handle removed, it’s time to inspect both the handle and the valve to determine the cause of the squeaking noise. This step will help you identify any visible damage, wear and tear, or build-up that may be contributing to the problem. Here’s how to proceed:
- Examine the handle: Take a close look at the removed faucet handle. Look for any signs of wear, cracks, or damaged components such as the screw, washer, or handle mechanism. If you notice any issues, consider replacing the damaged parts to ensure a long-lasting repair.
- Inspect the valve cavity: Use a flashlight to examine the inside of the valve cavity where the handle sits. Look for any debris, mineral build-up, or corrosion that may be causing friction and contributing to the squeaking noise. If you notice any blockage or build-up, it’s essential to clean it out thoroughly.
- Inspect the valve stem: Take a closer look at the valve stem, which is the metal rod connected to the handle. Check for any signs of corrosion, misalignment, or damage that may require attention. If the valve stem appears to be in good condition, move on to the next step. Otherwise, consider consulting a professional plumber for further assessment and potential repairs.
During the inspection process, it’s essential to handle the components with care to avoid causing any additional damage. Cleaning the valve cavity and removing any debris or build-up will help improve the functionality of the faucet. If you notice any major issues or have concerns about the condition of the handle or valve, it may be necessary to replace them with new parts.
Once you’ve thoroughly inspected the handle and valve, it’s time to move on to the next step: applying lubricant to reduce friction and silence the squeak.
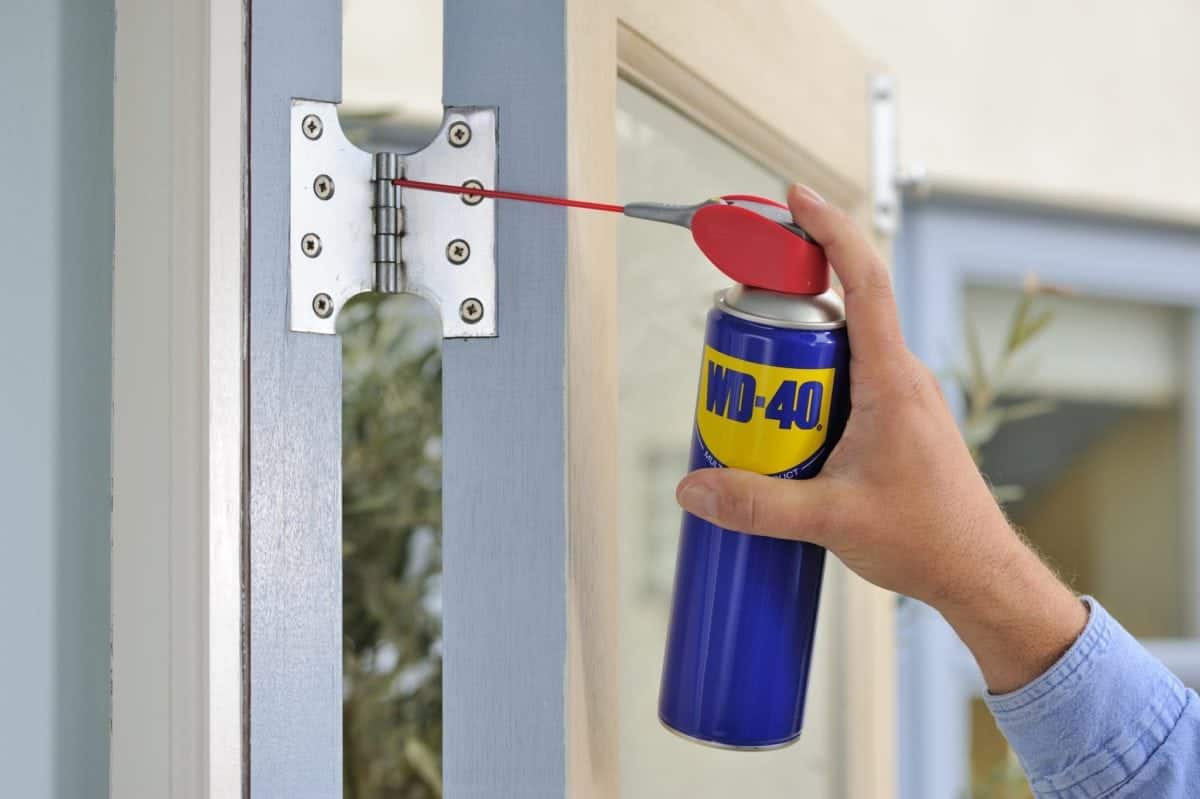
Step 4: Applying Lubricant
After inspecting the handle and valve, it’s time to address the source of the squeaking by applying lubricant. Lubrication helps reduce friction between the components, allowing for smooth and silent operation. Here’s how to properly apply lubricant to your faucet handle:
- Clean the components: Before applying lubricant, make sure to clean the handle, valve stem, and inside the valve cavity. Use a cloth or paper towel to remove any dirt, debris, or mineral build-up that may interfere with the effectiveness of the lubricant.
- Select the appropriate lubricant: Choose a plumber’s grease or a silicone-based lubricant specifically designed for plumbing applications. These lubricants are safe to use on faucet handles and will help reduce friction without causing damage or attracting dirt or debris.
- Apply the lubricant: Apply a small amount of lubricant to the handle mechanism and the valve stem. Pay attention to any areas that showed signs of wear during the inspection. Apply the lubricant evenly and sparingly, making sure not to overdo it. Too much lubricant can attract dust and dirt, leading to more problems down the line.
- Operate the handle: After applying the lubricant, move the faucet handle back and forth several times to distribute the lubricant and allow it to penetrate the components. This will help ensure that the lubricant reaches all the necessary areas and provides smooth operation.
By applying lubricant to the handle mechanism and valve stem, you will significantly reduce friction and eliminate the squeaking noise. Additionally, the lubricant will help prolong the lifespan of the components by preventing excessive wear and tear.
In the next step, we’ll move on to reassembling the faucet handle and testing its proper functioning.
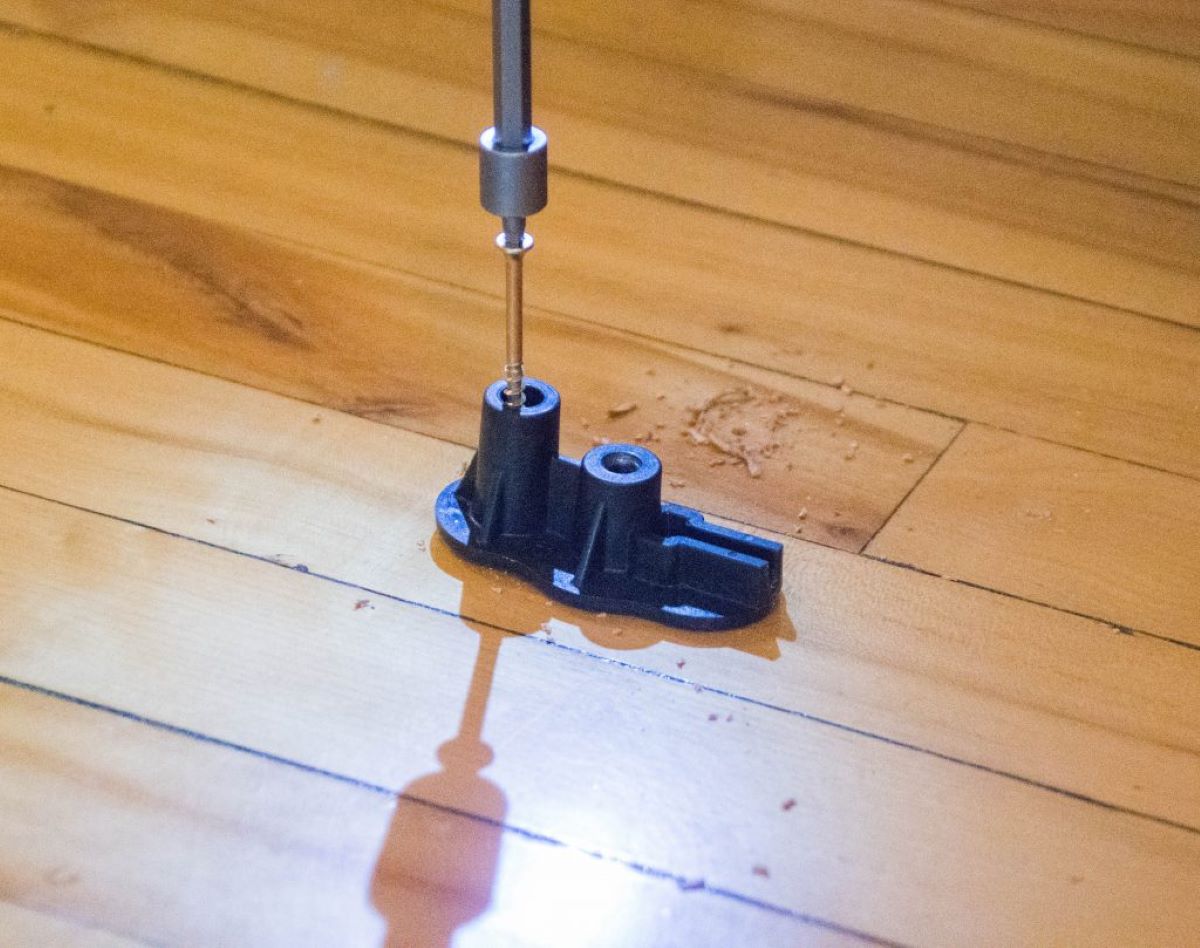
Step 5: Reassembling the Faucet Handle
Now that you’ve applied lubricant and addressed the source of the squeaking noise, it’s time to reassemble the faucet handle. Follow these steps to ensure a proper reassembly:
- Align the handle: Take the faucet handle and align it with the valve stem. Make sure that the handle is positioned correctly and fits snugly onto the stem.
- Reattach the screw or fastener: If you previously removed a screw or fastener to detach the handle, reattach it securely. Tighten the screw or fastener until it’s snug, but be careful not to overtighten and risk damaging the components.
- Test the handle: Once the handle is reattached, test its movement to ensure that it operates smoothly and without any squeaking. Turn the handle on and off, making sure it moves freely and without any resistance.
If the handle still squeaks after reassembly, it’s possible that the lubrication didn’t fully resolve the issue or that there’s an underlying problem. In such cases, you may need to repeat the lubrication process or consider consulting a professional plumber for further assistance.
It’s important to note that different faucet models and designs may have slight variations in the reassembly process. If you encounter any difficulties or are unsure about the correct steps for reassembling your specific faucet handle, refer to the manufacturer’s instructions or seek professional guidance.
Now that the faucet handle is reassembled and operating smoothly, it’s time to move on to the final step: testing for proper functioning.
Step 6: Testing for Proper Functioning
After reassembling the faucet handle, it’s important to test its proper functioning to ensure that the squeaking noise has been resolved. Here’s how you can test your faucet handle:
- Turn on the water: Slowly turn on the water supply by reopening the water shut-off valve. Gradually increase the water flow to avoid any sudden surges or leaks.
- Operate the handle: Gently turn the faucet handle on and off to check for smooth operation. Pay attention to any unusual sounds, leaks, or resistance. The handle should move effortlessly, without any squeaking or grinding noises.
- Check for leaks: While the water is running, inspect the base of the faucet handle and the surrounding area for any signs of water leakage. Look for any drips, drops, or puddles that may indicate a faulty seal or improper reassembly.
- Ensure proper water flow: Verify that the water flows steadily and evenly from the faucet without any irregularities or blockages. If you notice any issues with the water flow, it may indicate a separate problem that needs to be addressed.
If you’ve followed all the previous steps correctly and the faucet handle operates smoothly, without squeaking or leaking, then you’ve successfully fixed the squeaky faucet handle! Congratulations!
However, if you still encounter issues such as persistent squeaking or leaks, it may be necessary to recheck the handle and valve components for proper lubrication, cleanliness, or potential damage. Alternatively, you may need to consider consulting a professional plumber for further evaluation and assistance.
Remember, ensuring the proper functioning of your faucet handle is essential for a hassle-free and enjoyable experience in your kitchen or bathroom. Taking the time to properly address and fix any squeaking issues will help prevent further damage and extend the lifespan of your faucet.
As a final note, it’s always a good practice to periodically inspect and maintain your faucet handles to prevent future squeaks or other issues from arising. Regular cleaning, lubrication, and prompt repairs will help keep your faucets in excellent condition for years to come.
With that, you’ve completed the process of fixing a squeaky faucet handle. Enjoy the quiet and smooth operation of your faucet, and appreciate the effort you’ve put into resolving the issue!
Read more: How To Fix Leaky Two Handle Shower Faucet
Conclusion
Fixing a squeaky faucet handle is a task that can be easily accomplished with a bit of knowledge and the right tools. By following the step-by-step instructions outlined in this article, you can silence that annoying squeaking noise and enjoy the smooth and silent operation of your faucet once again.
Identifying the source of the squeak, gathering the necessary tools and materials, and following the proper steps for repair are key to successfully addressing the issue. Through careful inspection, application of lubricant, and reassembly, you can eliminate friction and restore functionality to your faucet handle.
Remember, safety should always be a priority. If you are unsure or uncomfortable with performing any of the repair steps, it’s best to consult a professional plumber who can assist you in resolving the issue without risking any further damage.
By taking the time to fix a squeaky faucet handle, you not only improve your daily life by eliminating an annoying noise, but you also ensure the longevity and efficiency of your plumbing fixtures. Maintaining your faucet regularly and addressing squeaks promptly will help prevent more significant issues from arising in the future.
Now that you have the knowledge and confidence to fix a squeaky faucet handle, you can enjoy a quiet and hassle-free experience in your kitchen or bathroom. So go ahead and tackle that squeak, and revel in the satisfaction of a job well done!
Now that you've tackled that squeaky faucet handle, why not dive deeper into other household fixes? Our comprehensive guide on home repair offers practical tips and straightforward advice for DIY enthusiasts. Whether you're looking to patch up drywall, fix a leaky roof, or just keep your home in top shape, this article has all the guidance you need. Roll up your sleeves and get ready to turn your home into a smoother-running machine.
Frequently Asked Questions about How To Fix Squeaky Faucet Handle
Was this page helpful?
At Storables.com, we guarantee accurate and reliable information. Our content, validated by Expert Board Contributors, is crafted following stringent Editorial Policies. We're committed to providing you with well-researched, expert-backed insights for all your informational needs.


0 thoughts on “How To Fix Squeaky Faucet Handle”