Articles
How To Fix Scratched Vinyl Floor
Modified: August 27, 2024
Learn effective methods and tips to repair scratches on your vinyl floor with our informative articles. Keep your floor looking pristine and beautiful!
(Many of the links in this article redirect to a specific reviewed product. Your purchase of these products through affiliate links helps to generate commission for Storables.com, at no extra cost. Learn more)
Introduction
Vinyl flooring is a popular choice for many homeowners. It’s durable, easy to maintain, and comes in a variety of styles and designs. However, even with its many benefits, vinyl floors are not immune to scratches. Over time, everyday wear and tear, furniture movement, and pet claws can leave unsightly marks on the surface of your vinyl floor.
While scratches may seem unavoidable, the good news is that you can fix them without replacing the entire floor. In this article, we will guide you on how to fix scratched vinyl flooring, whether they are minor surface scratches or deeper gouges.
Before we jump into the repair process, it’s important to understand the nature of vinyl floor scratches. Vinyl floors consist of a wear layer, which is the protective coating on the surface that determines its scratch resistance. Scratches typically occur when something sharp or abrasive comes into contact with the wear layer and leaves a visible mark.
To effectively fix vinyl floor scratches, you will need some essential tools and materials. These include:
- A clean, damp cloth
- Mild dish soap or vinyl floor cleaner
- A heat gun or blow dryer
- A putty knife or a plastic scraper
- Vinyl floor repair kit (for deeper scratches)
- Vinyl floor polish or wax
- A soft cloth or mop
With these tools and materials on hand, you’ll be ready to tackle those pesky scratches and restore the beauty of your vinyl floor.
Key Takeaways:
- Don’t let scratches ruin the beauty of your vinyl floor! Surface-level scratches can be easily buffed out, while deeper gouges may require a repair kit. With the right tools and techniques, you can restore your floor to its original luster.
- Prevent future scratches by using furniture pads, floor mats, and regular maintenance. By implementing these preventive measures, you can minimize wear and tear on your vinyl floor and enjoy its durability for years to come.
Read more: How To Fix Scratch On Laminate Floor
Understanding Vinyl Floor Scratches
Before diving into the process of fixing scratched vinyl floors, it’s important to understand the different types of scratches you may encounter.
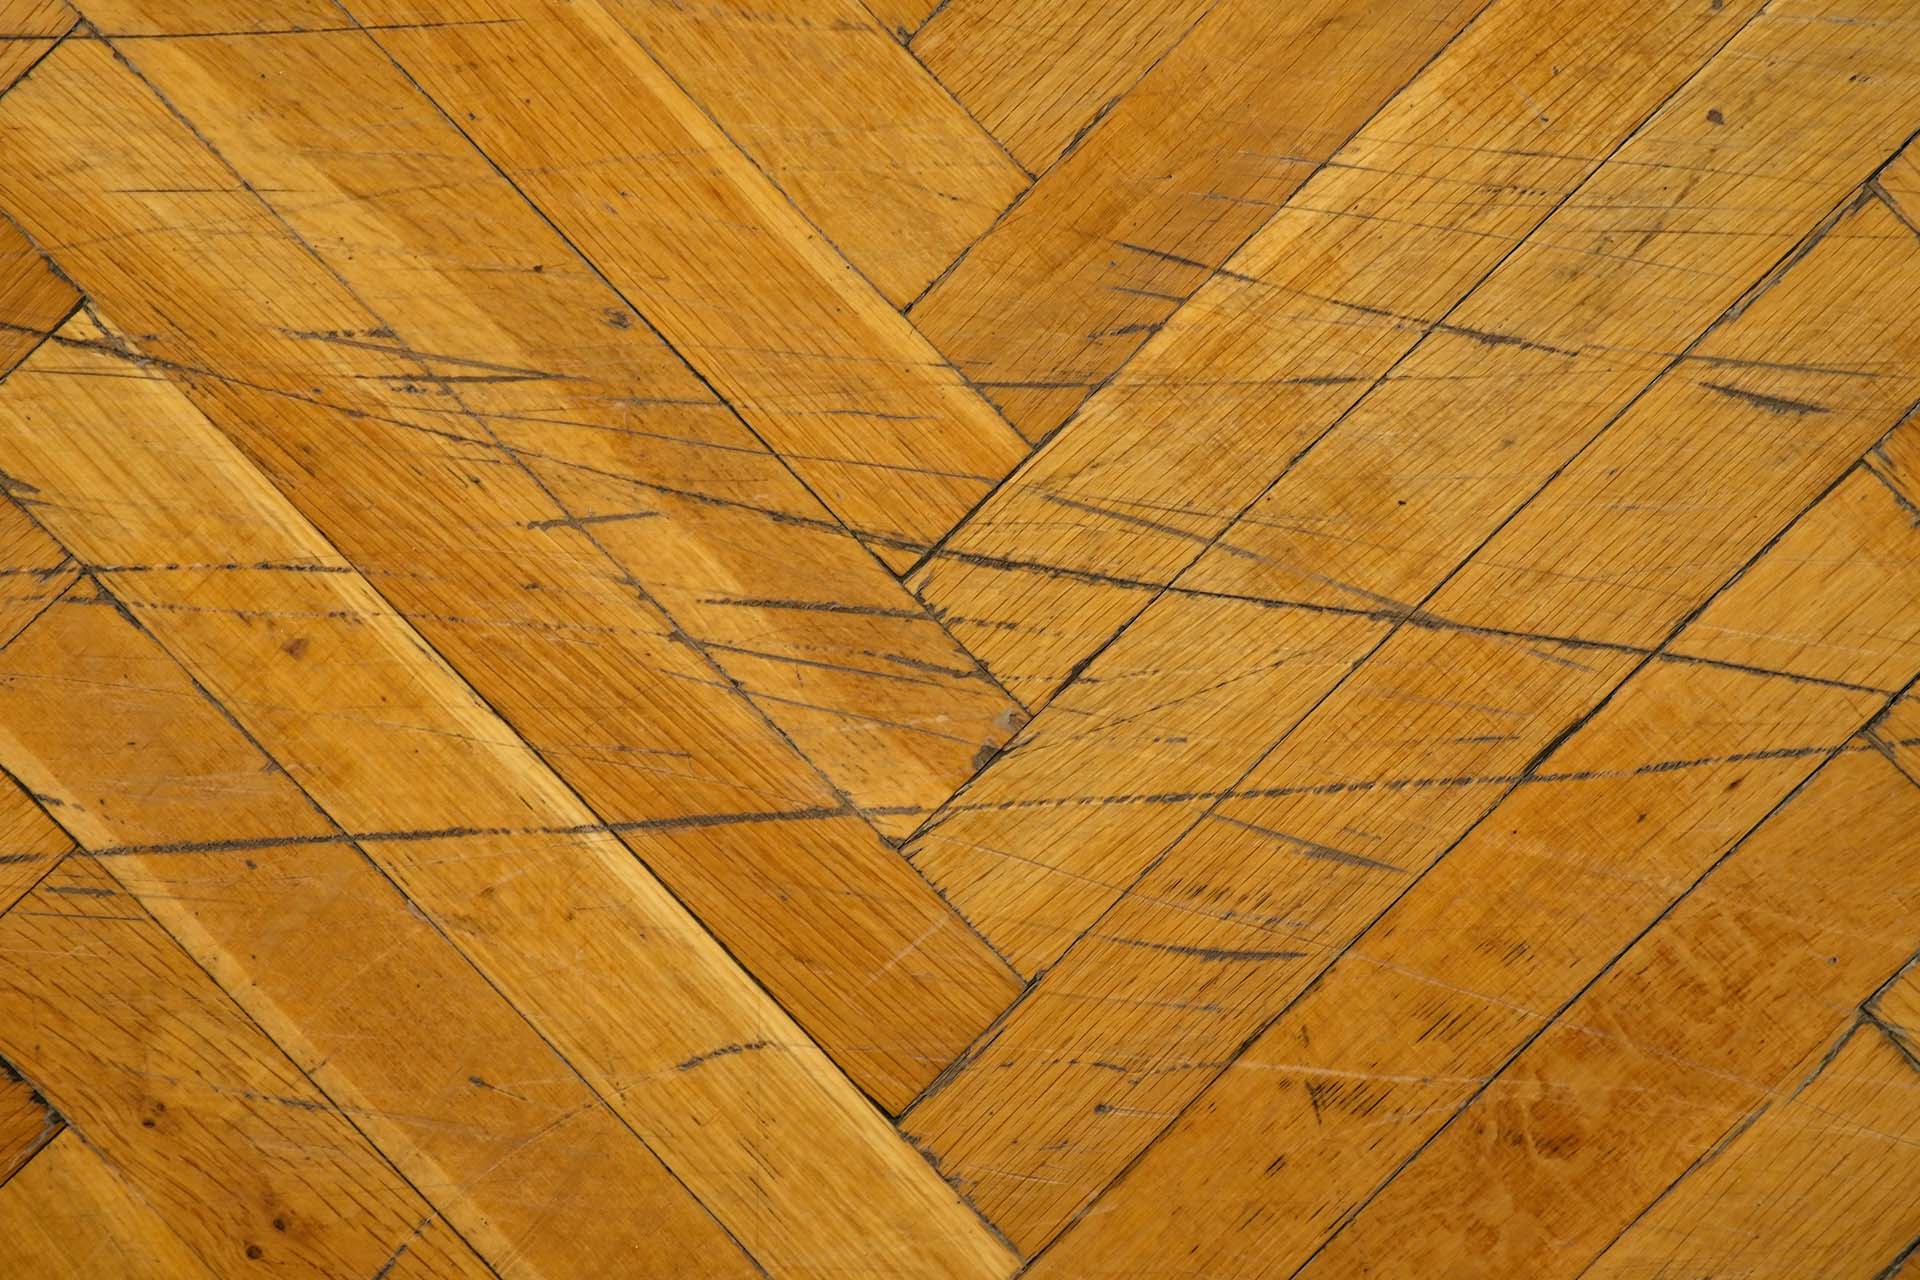
1. Surface Level Scratches: These are shallow scratches that only affect the topmost layer of the vinyl. They typically appear as light marks on the surface and do not penetrate deep into the flooring. Surface level scratches can be easily repaired and often require minimal intervention.
2. Deeper Scratches: These scratches are more noticeable and may have penetrated through the wear layer into the vinyl material itself. Deeper scratches are typically more challenging to repair and may require a bit more effort and specialized materials.
It’s essential to assess the depth of the scratch before attempting any repair. While surface level scratches can be easily fixed with simple cleaning and buffing techniques, deeper scratches may require additional steps, such as filling the scratch with a repair kit.
By understanding the nature and severity of the scratches, you can choose the appropriate repair method and ensure the best results.
Once you have assessed the depth of the scratch, you can proceed with the necessary steps to restore your vinyl floor’s appearance.
Tools and Materials Required
Before fixing scratched vinyl flooring, it’s important to gather the necessary tools and materials. Here’s a list of what you’ll need for the repair process:
- Clean, damp cloth: This will be used to clean the surface of the floor before applying any repairs.
- Mild dish soap or vinyl floor cleaner: Use this to remove dirt and grime from the scratched area.
- Heat gun or blow dryer: This will be used to heat the scratched area, making it easier to manipulate during the repair process.
- Putty knife or plastic scraper: These tools are essential for leveling and smoothing the surface during repairs.
- Vinyl floor repair kit: This kit contains materials like fillers, adhesive, and colorants to repair deeper scratches and restore the appearance of your floor.
- Vinyl floor polish or wax: For a finishing touch, use a vinyl floor polish or wax to restore shine and protect your floor from future scratches.
- Soft cloth or mop: Use a soft cloth or mop to apply the floor polish evenly and buff the floor.
Having these tools and materials ready will ensure a smooth and efficient repair process for your scratched vinyl floor. It’s essential to have everything on hand before starting the repairs to avoid any interruptions or delays.
Now that you have all the necessary tools and materials, you’re ready to move on to preparing the floor before starting the actual repair process.
Preparing the Floor
Before you begin repairing the scratched vinyl floor, it’s important to properly prepare the area. Here are the steps to follow:
- Clean the surface: Start by clearing the scratched area of any dirt, dust, or debris. Use a clean, damp cloth and mild dish soap or vinyl floor cleaner to gently remove any surface grime. Thoroughly dry the area before proceeding.
- Protect the surrounding area: To prevent accidental damage to adjacent sections of the floor, cover the surrounding area with a drop cloth or tape off the edges. This will help contain the repair process to the specific scratched area.
- Apply heat: If the scratch is shallow or the vinyl is rigid, using a heat gun or blow dryer on low heat can make the surface more pliable and easier to work with. Hold the heat source a few inches away from the scratch and move it back and forth for about 2-3 minutes. Be cautious not to overheat the vinyl, as excessive heat can cause damage.
- Smooth the edges: Use a putty knife or plastic scraper to gently smooth out any rough edges around the scratch. This will help create a level surface for the repair material to adhere to.
- Remove excess debris: Wipe away any loose particles or debris that may have been dislodged during the preparation process. This will ensure a clean and smooth surface for the repair.
By properly preparing the floor, you create an optimal foundation for the repair process. This step is crucial in achieving a seamless and effective result.
Once you have completed the preparation process, you can move on to assessing the depth of the scratch and determining the appropriate repair method.
Assessing the Depth of the Scratch
Before you can start the repair process, it’s crucial to assess the depth of the scratch on your vinyl floor. By understanding the severity of the damage, you can determine the most appropriate method for repairing it. Here’s how to assess the depth of the scratch:
- Visual examination: Take a close look at the scratch and observe its appearance. Surface level scratches are typically shallow and only affect the topmost layer of the vinyl. They may appear as light marks on the surface and are easier to repair. Deeper scratches, on the other hand, may have penetrated through the wear layer and into the vinyl material itself.
- Run your finger over the scratch: Gently run your finger over the scratch to feel its depth. If the scratch is shallow and you can barely feel it, it’s likely a surface level scratch. However, if you can feel a distinct groove or indentation, the scratch may be deeper.
- Observe with angled light: Shine a flashlight or a bright light at an angle across the scratched area. This will help you see any depth variations or irregularities that may not be immediately visible under normal lighting conditions.
By assessing the depth of the scratch, you can decide on the appropriate method for repair. Surface level scratches can often be fixed with simple cleaning and buffing techniques, while deeper scratches may require more involved measures such as using a vinyl floor repair kit.
Once you have determined the depth of the scratch, you can move forward with the specific repair method suited for your vinyl floor’s needs.
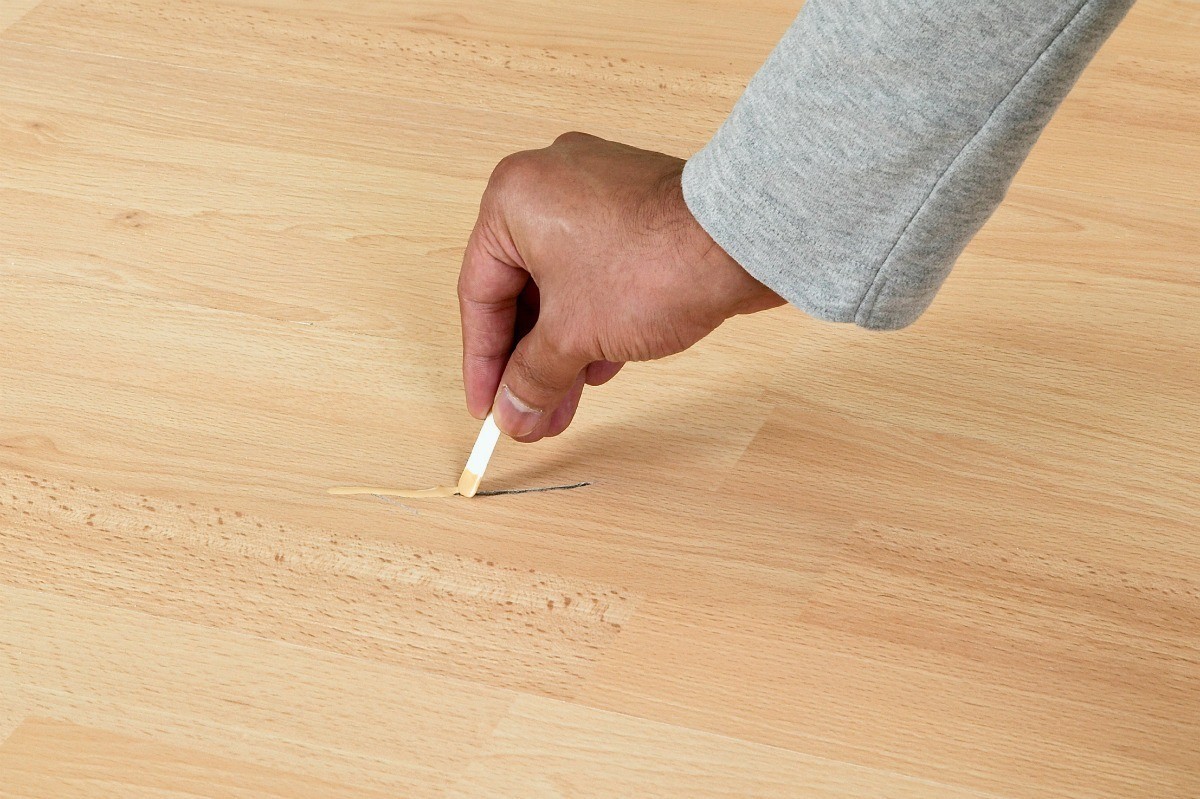
Use a vinyl floor repair kit to fill in the scratches. Clean the area first, then apply the filler according to the kit’s instructions. Sand and buff the area to blend with the rest of the floor.
Read more: How To Polish Vinyl Floor
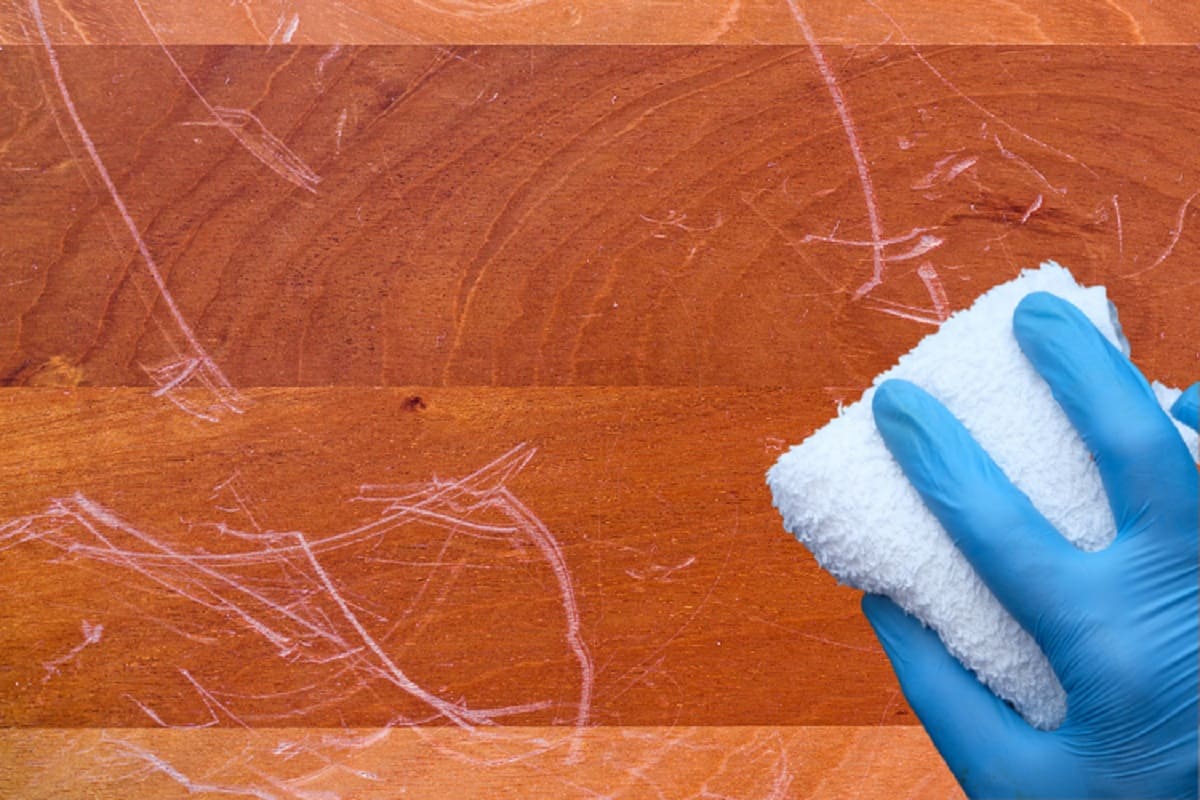
Fixing Surface Level Scratches
If you have surface-level scratches on your vinyl floor, you’re in luck! These types of scratches are relatively easy to fix and usually don’t require extensive repairs. Follow these steps to restore your floor’s appearance:
- Clean the scratched area: Begin by gently cleaning the surface of the scratch with a clean, damp cloth and mild dish soap or vinyl floor cleaner. This will remove any dirt or debris that may be present.
- Buff the scratch: Using a soft cloth or a buffing pad, apply gentle pressure and buff the scratch in a circular motion. This will help to blend the surrounding surface and minimize the visibility of the scratch. Continue buffing until the scratch becomes less noticeable.
- Inspect the results: After buffing, step back and assess the results. If the scratch is still visible, repeat the buffing process until you achieve a satisfactory outcome. Take your time and work gradually to avoid damaging the surrounding area.
- Apply vinyl floor polish or wax: Once the scratch is no longer noticeable, apply a vinyl floor polish or wax to the entire floor surface. This will help restore shine and provide an additional layer of protection against future scratches and wear. Follow the manufacturer’s instructions for applying the polish or wax and allow it to dry completely.
By following these steps, you can effectively repair surface-level scratches and revitalize the look of your vinyl floor. However, it’s worth noting that deep, noticeable scratches may require a different approach and more extensive repairs.
If you have deeper scratches on your vinyl floor, read on to learn how to tackle them effectively.
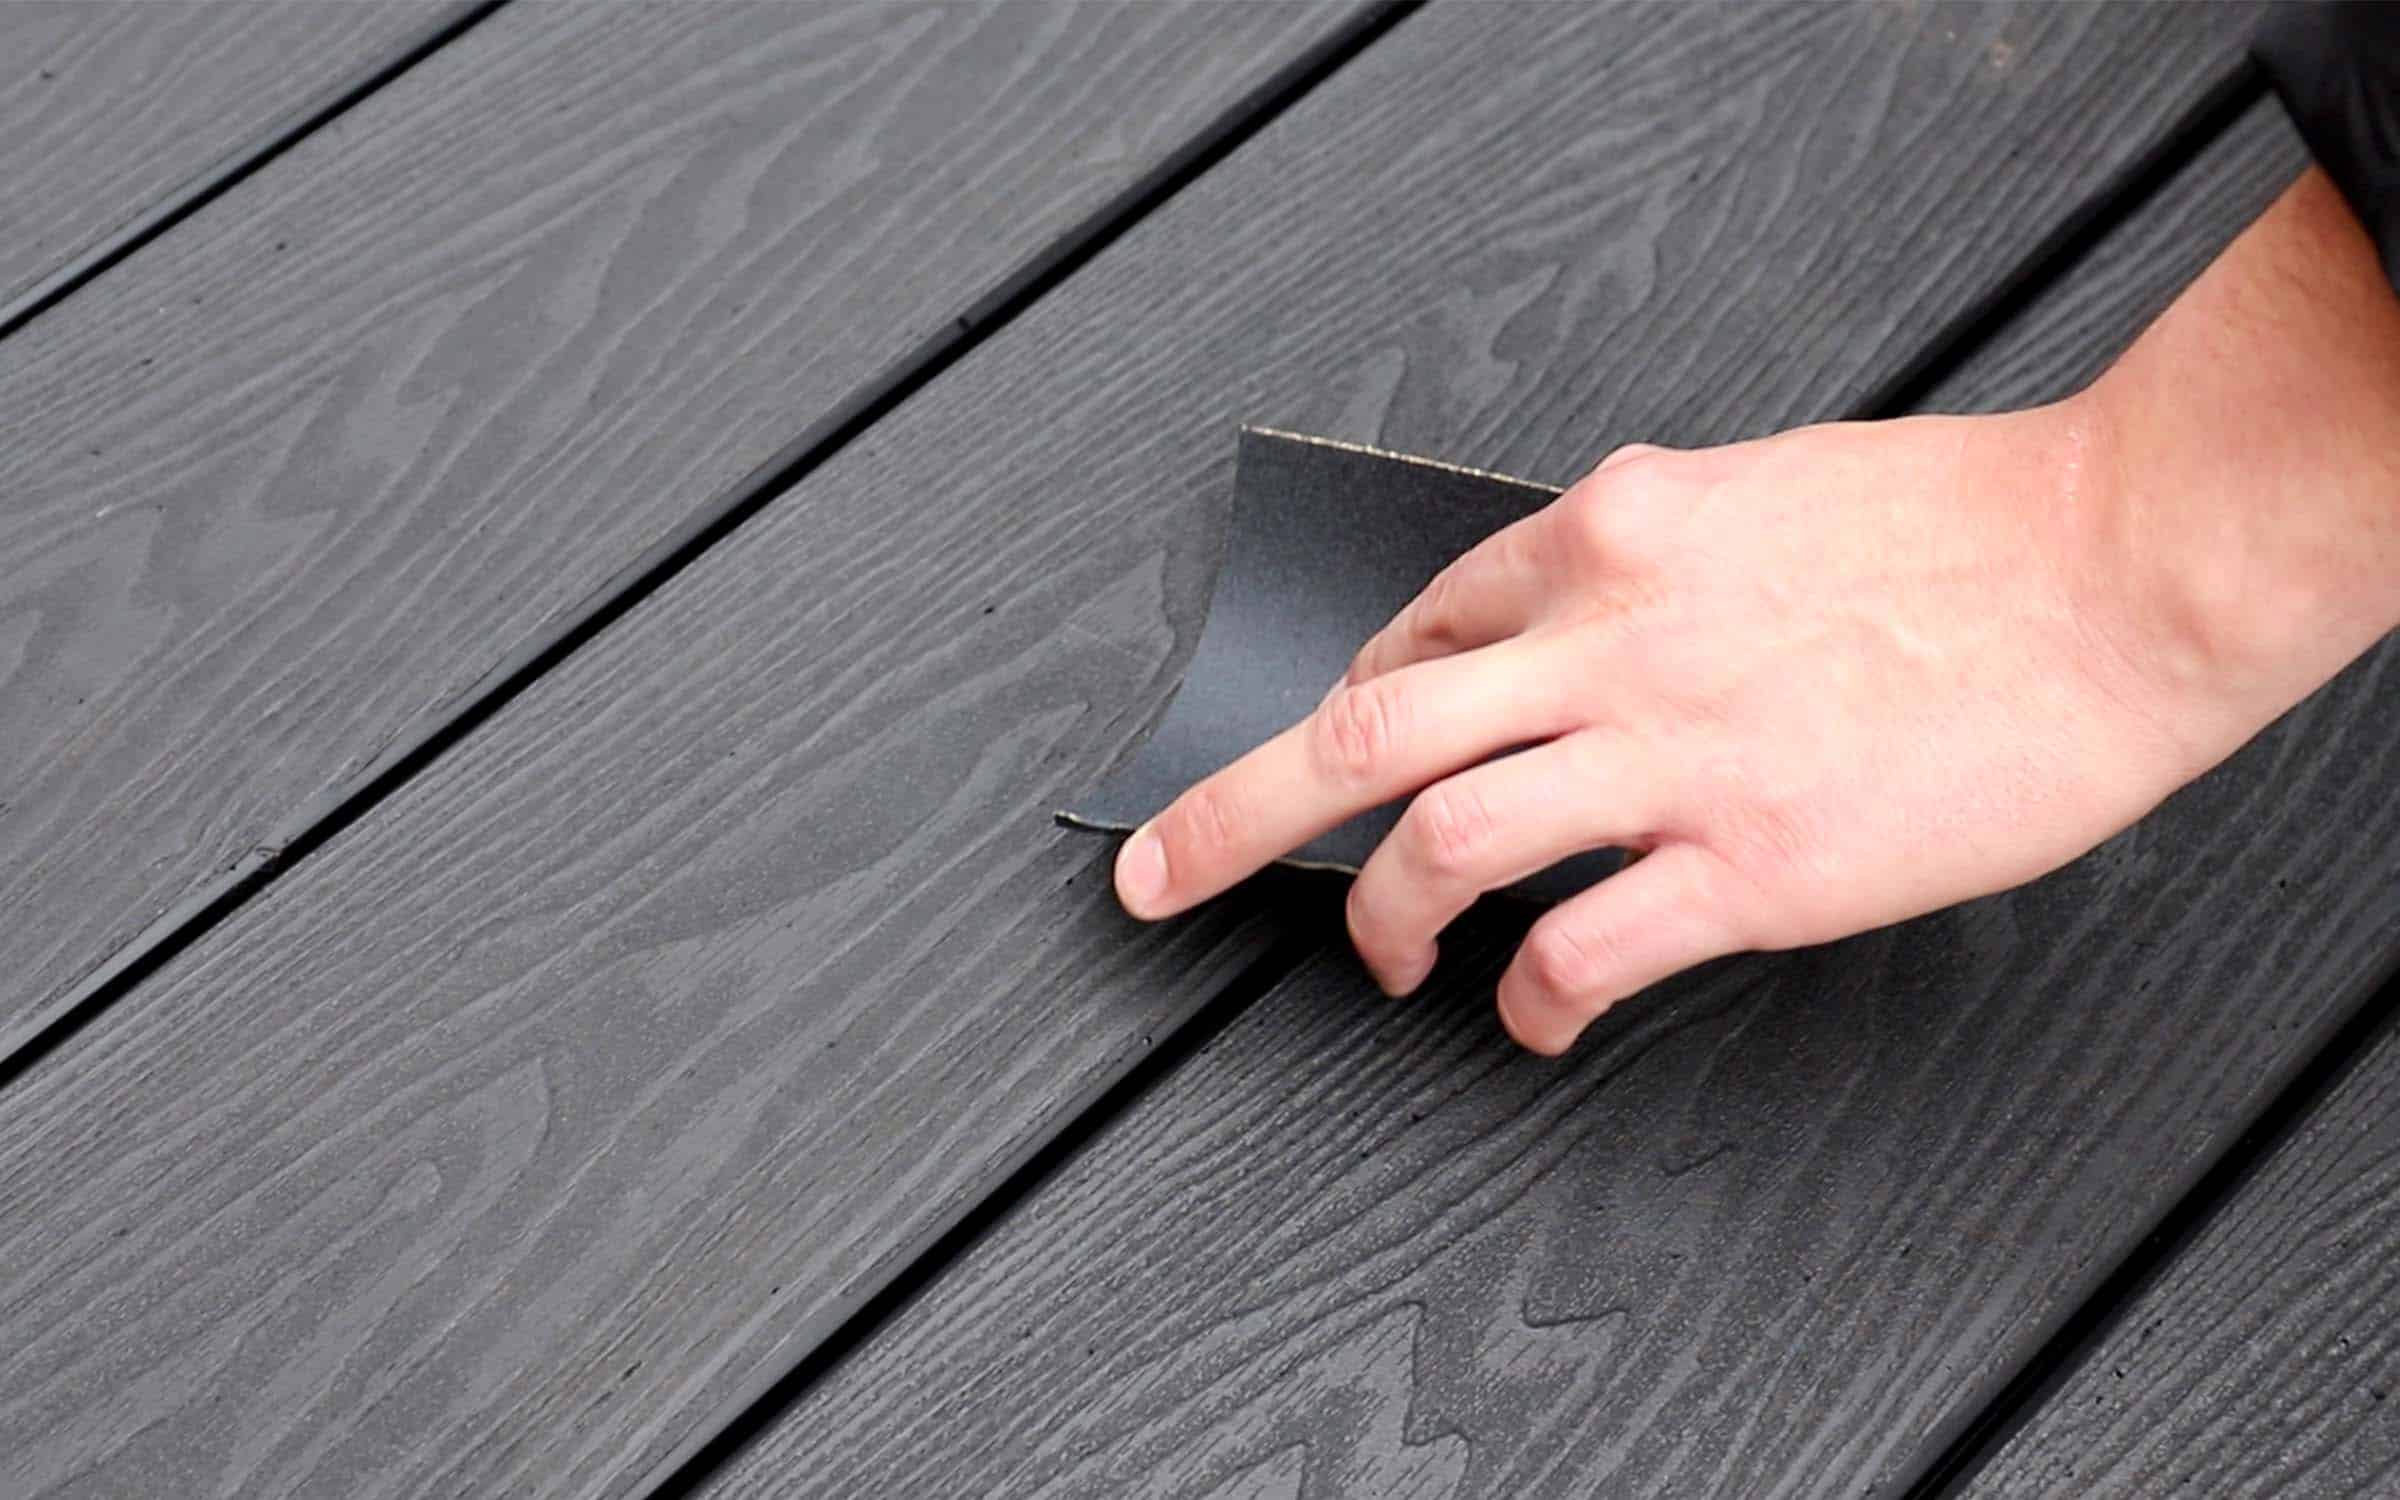
Repairing Deeper Scratches
Deeper scratches on vinyl flooring require a more involved repair process compared to surface-level scratches. Follow these steps to effectively repair and restore your vinyl floor:
- Clean the scratched area: Begin by cleaning the scratched area with a clean, damp cloth and mild dish soap or vinyl floor cleaner. This will ensure that the area is free from dirt and debris, allowing the repair materials to adhere properly.
- Prepare the repair compound: Depending on the type of vinyl floor repair kit you have, you may need to mix the repair compound following the manufacturer’s instructions. Ensure that the compound is well-mixed and ready for application.
- Fill the scratch: Use a putty knife or a plastic scraper to apply the repair compound into the scratch. Ensure that the compound is spread evenly and fills the entire depth of the scratch. Smooth out the surface of the compound using the putty knife or scraper, making it level with the surrounding floor surface.
- Let the compound dry: Allow the repair compound to dry according to the manufacturer’s instructions. This may take several hours or overnight, so be patient and avoid placing any weight or pressure on the repaired area during this time.
- Sand the repaired area: Once the repair compound has dried, use fine-grit sandpaper to gently sand the repaired area. This will help to level the surface and blend it with the rest of the floor. Be careful not to sand too aggressively, as it may damage the surrounding vinyl.
- Apply vinyl floor polish or wax: To complete the repair process, apply a vinyl floor polish or wax to the entire floor surface. This will ensure a consistent appearance and provide added protection. Follow the manufacturer’s instructions for applying the polish or wax and allow it to dry completely.
Repairing deeper scratches requires a bit more effort and patience, but it can effectively restore the appearance of your vinyl floor. Take your time during each step of the process to ensure a seamless and durable repair.
After completing the repair, you can proceed to the next and final step: buffing and polishing the floor to achieve a beautiful finish.
Buffing and Polishing the Floor
After repairing the scratches on your vinyl floor, it’s important to give it a final touch to enhance its appearance. Buffing and polishing the floor will help bring back its original shine and provide an extra layer of protection. Follow these steps to achieve a beautifully finished vinyl floor:
- Clean the floor: Before buffing and polishing, ensure that the floor is free from dust and debris. Use a soft cloth or a vacuum cleaner to remove any loose particles.
- Choose the right polish or wax: Select a high-quality vinyl floor polish or wax that is specifically designed for use on vinyl surfaces. Read the manufacturer’s instructions for application and safety precautions.
- Apply the polish or wax: Pour a small amount of the polish or wax onto the floor and use a soft cloth or mop to spread it evenly across the surface. Work in small sections to ensure thorough coverage.
- Buff the floor: Use a clean, dry cloth or a floor buffer with a soft pad to buff the floor in circular motions. Apply gentle pressure and continue buffering until the polish or wax is dry and the floor has a smooth, glossy appearance.
- Inspect the results: Step back and evaluate the floor’s appearance. If needed, repeat the polishing and buffing process to achieve the desired shine and finish.
Buffing and polishing not only enhance the aesthetic appeal of your vinyl floor but also provide a protective layer that helps guard against future scratches and wear. It’s recommended to periodically reapply the polish or wax to maintain the floor’s luster and protection.
By following these steps, you can successfully buff and polish your vinyl floor, leaving it looking clean, shiny, and like new.
Now that you have completed the repair process and finished buffing and polishing, let’s explore some preventive measures to help avoid scratches and maintain the beauty of your vinyl floor.
Preventive Measures for Future Scratches
While it’s inevitable that your vinyl floor may encounter some wear and tear over time, there are several preventive measures you can take to minimize the occurrence of scratches and keep your floor looking its best. Consider implementing the following practices:
- Use furniture pads: Place felt or rubber pads under furniture legs to prevent them from scratching or dragging across the floor. Regularly check the condition of these pads and replace them if they become worn or damaged.
- Use floor mats or rugs: Place floor mats or rugs in high-traffic areas and entrances to trap dirt and debris before they reach your vinyl floor. Ensure that these mats have non-slip backings to prevent accidental slips and falls.
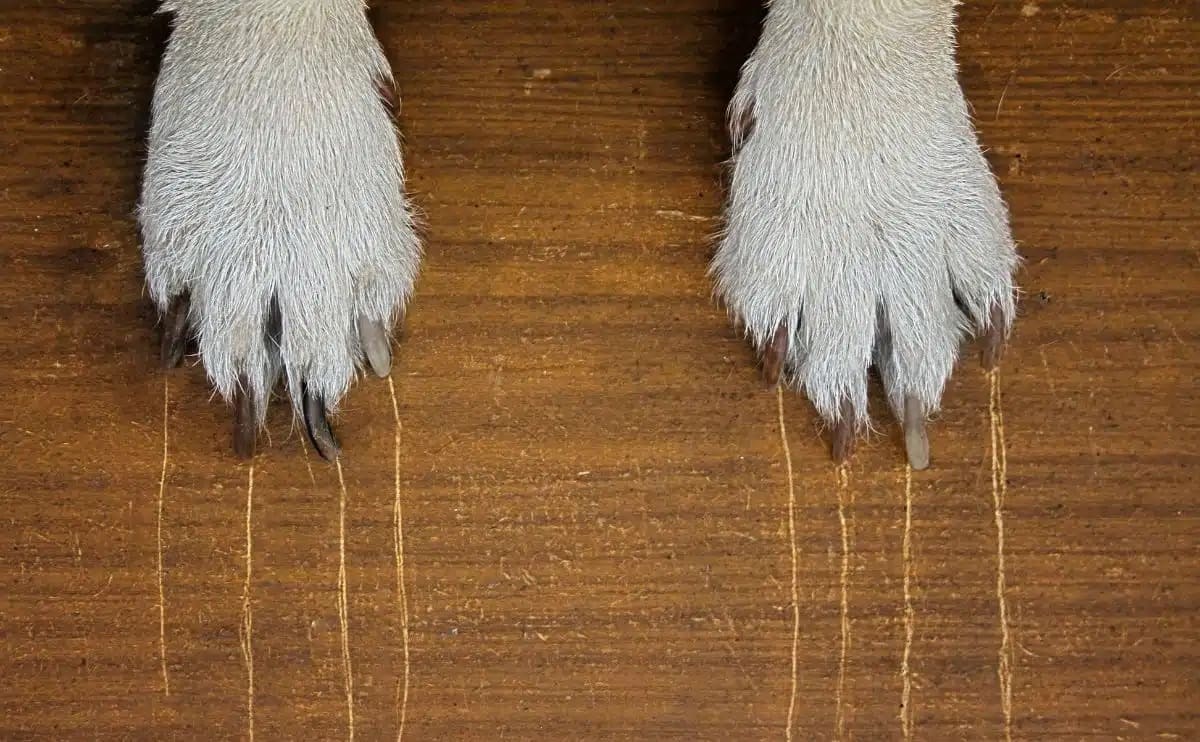
- Trim pet’s nails: If you have pets, regularly trim their nails to prevent them from accidentally scratching the floor. Additionally, consider placing a pet mat or rug near their food and water bowls to catch any spills or splashes.
- Avoid dragging heavy objects: When moving heavy furniture or appliances, lift them instead of dragging them across the floor. Use a furniture dolly or slide them on a blanket to minimize the risk of scratches.
- Regular maintenance: Keep your vinyl floor clean and well-maintained by sweeping or vacuuming regularly to remove dirt and debris that can potentially cause scratches. Follow the manufacturer’s recommendations for cleaning products and methods specific to your vinyl floor.
- Protect from direct sunlight: Prolonged exposure to direct sunlight can cause fading and discoloration on your vinyl floor. Consider using blinds or curtains to block out the sun’s rays during peak hours.
By practicing these preventive measures, you can significantly reduce the likelihood of scratches and prolong the lifespan of your vinyl floor. Remember, being proactive in protecting your floor will save you time and effort in the long run.
Now that you’re equipped with knowledge on how to fix and prevent scratches on your vinyl floor, you can confidently maintain its beauty and enjoy its durability for years to come.
Remember to regularly inspect and assess your vinyl floor for any new scratches or signs of wear, and promptly address them to ensure its continued longevity and aesthetic appeal.
Read more: How To Install Vinyl Floor
Conclusion
Vinyl floors are a popular choice for their durability and easy maintenance. However, scratches can still occur over time due to regular use and daily activities. The good news is that there are effective methods to fix and restore scratched vinyl flooring without the need for a complete replacement.
In this article, we have covered the process of repairing both surface level scratches and deeper gouges on vinyl floors. By understanding the nature of the scratches and assessing their depth, you can choose the appropriate repair method and achieve satisfactory results.
For surface level scratches, simple cleaning and buffing techniques can often restore the appearance of the floor. Deeper scratches, on the other hand, may require the use of a vinyl floor repair kit to fill and level the damaged area.
Once the scratch repair is complete, it’s important to give the floor a final touch by buffing and polishing it. This not only enhances its appearance but also provides an additional layer of protection against future scratches.
To prevent scratches from occurring in the first place, implementing preventive measures such as using furniture pads, floor mats, and regular maintenance can significantly reduce the risk of damage to your vinyl floor.
Remember that maintaining the beauty of your vinyl floor is an ongoing process. Regularly inspecting and addressing any scratches or signs of wear promptly will help keep your floor looking its best for years to come.
By following the steps and suggestions outlined in this article, you can confidently repair, protect, and maintain your vinyl floor, ensuring its longevity and preserving its aesthetic appeal.
So, go ahead and bid farewell to those unsightly scratches on your vinyl floor as you embark on the journey of revitalizing and restoring its original beauty!
Frequently Asked Questions about How To Fix Scratched Vinyl Floor
Was this page helpful?
At Storables.com, we guarantee accurate and reliable information. Our content, validated by Expert Board Contributors, is crafted following stringent Editorial Policies. We're committed to providing you with well-researched, expert-backed insights for all your informational needs.


0 thoughts on “How To Fix Scratched Vinyl Floor”