Articles
How To Fix A Well Water Pump
Modified: October 20, 2024
Discover helpful articles on how to fix a well water pump and solve common issues. Gain valuable insights and expert advice to keep your well water system running smoothly.
(Many of the links in this article redirect to a specific reviewed product. Your purchase of these products through affiliate links helps to generate commission for Storables.com, at no extra cost. Learn more)
Introduction
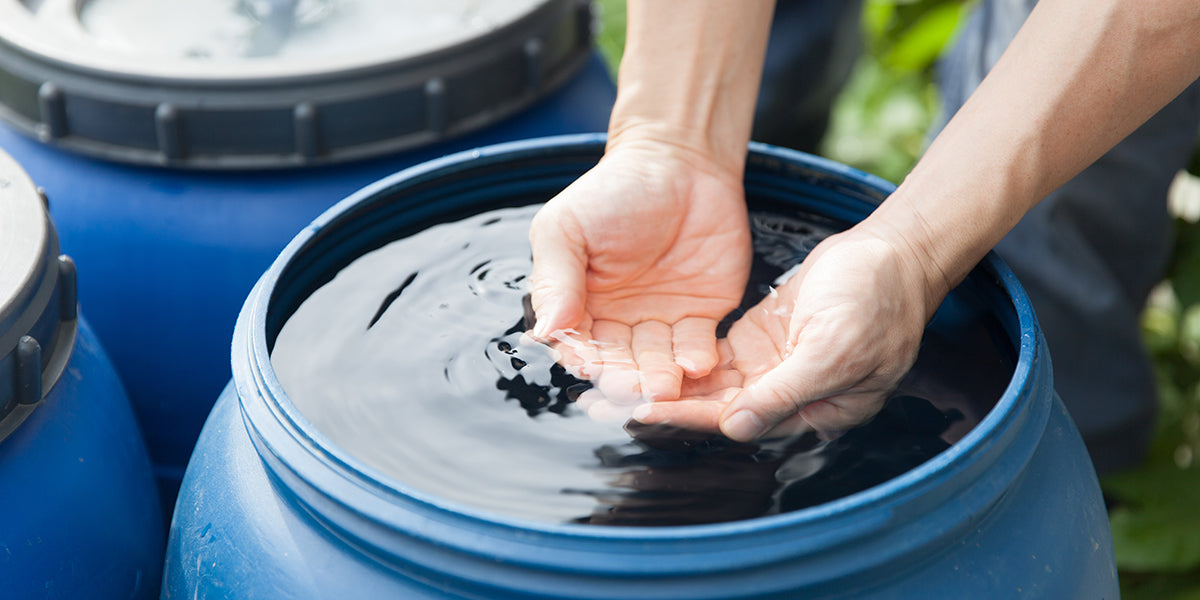
When it comes to accessing water in remote areas or rural locations, many households rely on well water systems. These systems are efficient and cost-effective, but like any mechanical equipment, they can encounter issues over time. One common problem homeowners face is a malfunctioning well water pump.
A well water pump is responsible for drawing water from the underground source and delivering it to the household. If the pump stops working, it can disrupt daily activities and cause inconvenience. However, before calling a professional plumber, there are a few troubleshooting steps you can take to try and fix the issue yourself.
In this article, we will guide you through the process of fixing a well water pump. We will provide step-by-step instructions and highlight the key components to check for any problems. It’s important to note that some steps might require basic knowledge of plumbing systems and electrical work. If you’re not comfortable or confident in performing these tasks, it’s best to consult a professional.
Before we begin, make sure you have the necessary tools on hand, including a multimeter, adjustable wrench, screwdriver, and pipe wrench. Safety should always be a priority, so ensure the power is turned off before attempting any repairs.
So, if you’re ready to get your well water pump up and running again, let’s dive into the troubleshooting process and explore the potential solutions. Starting with the power supply, we’ll walk you through each step to diagnose and fix the issue. By the end of this article, you’ll be equipped with the knowledge and confidence to tackle common well water pump problems and restore the flow of water to your household.
Key Takeaways:
- Troubleshooting your well water pump can be manageable with the right guidance. From checking power supply to assessing the well water level, you can tackle common issues and ensure a consistent water supply.
- Safety is paramount when dealing with electrical components and plumbing systems. If unsure, consulting a professional well water pump technician can provide specialized knowledge and long-term cost efficiency.
Read more: How To Prime A Water Pump On A Well
Step 1: Check for Power Supply
The first step in troubleshooting a well water pump is to check the power supply. Often, a simple power issue can be the root cause of a pump failure. Here’s what you need to do:
1. Verify Electricity: Ensure that the breaker for the well pump is in the “on” position. Sometimes, due to power surges or other electrical issues, the breaker can trip, cutting off the electricity supply to the pump. If the breaker is off, turn it back on and check if the pump starts running again.
2. Examine Wiring Connections: Inspect the wiring connections leading to the pump. Over time, these connections can become loose or corroded, preventing the power from reaching the pump. Carefully check each connection and tighten any loose wires. Be cautious and turn off the power before working with electrical connections.
3. Test Voltage: Use a multimeter to test the voltage at the pump. Disconnect the wires leading to the pump and set your multimeter to measure AC voltage. Touch the multimeter leads to the terminals where the wires were connected, and check if there is a voltage reading. If there is no voltage, it indicates a problem with the electrical supply or wiring.
4. Consult a Professional: If you’re not comfortable working with electrical components or if you’re unable to determine the cause of the power issue, it’s best to consult a professional electrician. They will have the expertise and tools to accurately diagnose the problem and make the necessary repairs.
Remember, safety should always be a priority when working with electricity. If you’re unsure about any step or feel uncomfortable handling electrical components, it’s best to seek the help of a professional.
Checking the power supply should be the first step in troubleshooting a well water pump. By ensuring that the pump is receiving adequate power, you can eliminate the possibility of a simple electrical issue causing the problem. If the power supply checks out and the pump is still not working, move on to the next step to inspect the pressure switch.
Step 2: Inspect the Pressure Switch
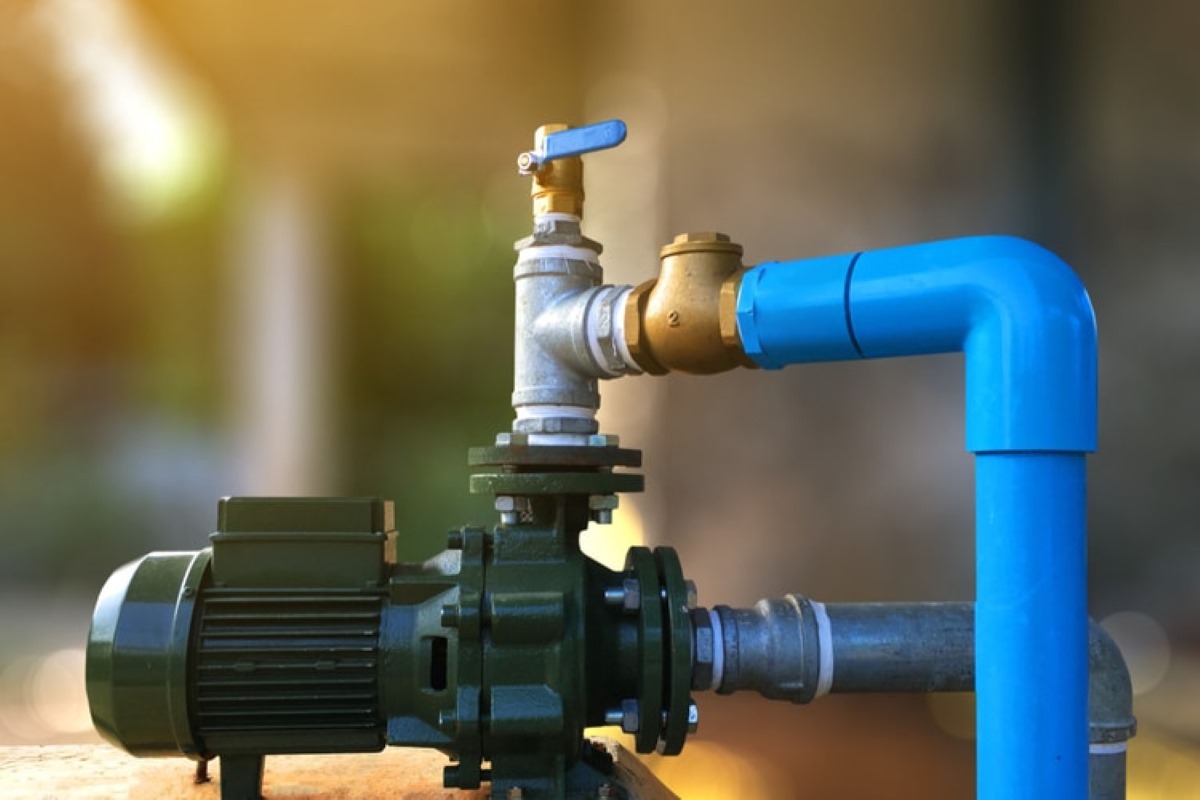
The next step in troubleshooting a well water pump is to inspect the pressure switch. The pressure switch is a crucial component that controls the operation of the pump based on the water pressure in the system. Here’s what you need to do:
1. Locate the Pressure Switch: The pressure switch is typically located near the pressure tank or on the supply pipe leading to the tank. It is a small device with electrical wires connected to it.
2. Turn off the Power: Before working on the pressure switch, make sure to turn off the power to the pump. This will prevent any accidental electrical shocks while you’re inspecting the switch.
3. Check for Clogs or Obstructions: Remove the cover of the pressure switch and visually inspect it for any clogs or obstructions. Sometimes debris or sediment can accumulate around the switch, causing it to malfunction. Clean any dirt or debris from the switch using a soft brush or cloth.
4. Test the Switch Operation: With the power to the pump still turned off, use a multimeter to test the operation of the pressure switch. Set the multimeter to measure continuity and touch the leads to the terminals on the pressure switch. You should hear a beep or see the multimeter display continuity if the switch is working correctly.
5. Adjust the Pressure Settings: The pressure switch has adjustable settings for the cut-in and cut-out pressure points. These points determine when the pump turns on and off. If the switch is not set to the correct pressure range, it can cause the pump to fail. Consult the manufacturer’s instructions or a professional to ensure the pressure settings are correct for your system.
6. Replace the Pressure Switch: If the pressure switch is visibly damaged or fails the continuity test, it may need to be replaced. Consult a professional plumber or refer to the manufacturer’s instructions for guidance on finding and installing a compatible replacement switch.
Inspecting the pressure switch is an important step in diagnosing well water pump issues. A malfunctioning pressure switch can prevent the pump from turning on or off at the appropriate times. By checking for clogs, testing the switch operation, and adjusting the pressure settings if necessary, you can determine if the pressure switch is the cause of the problem. If the pressure switch appears to be functioning correctly and the pump still does not work, proceed to the next step to verify the pressure tank’s air charge.
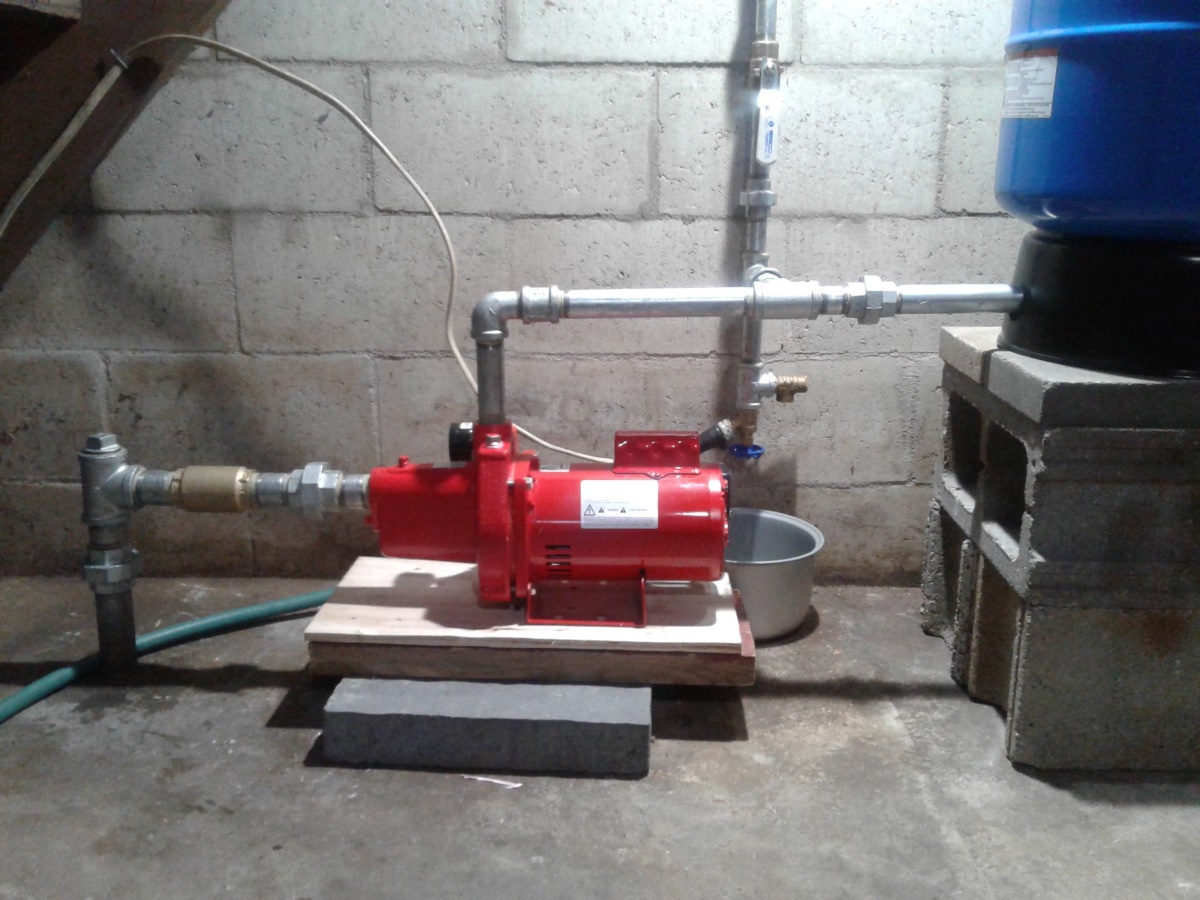
Step 3: Verify the Pressure Tank’s Air Charge
To ensure the proper functioning of a well water pump, it’s important to verify the pressure tank’s air charge. The pressure tank stores water and helps regulate the pressure in the system. Over time, the air charge in the tank can diminish, causing the pump to cycle frequently or not turn on at all. Follow these steps to verify and adjust the pressure tank’s air charge:
1. Turn off the Power: Before working on the pressure tank, make sure to turn off the power to the pump. This will prevent any accidents or injuries while inspecting or adjusting the tank.
2. Locate the Air Valve: The pressure tank will have an air valve on the top or side of the tank, usually covered with a protective cap. Remove the cap from the air valve.
3. Measure the Tank’s Pressure: Use a tire pressure gauge or an air pressure gauge to measure the pressure inside the tank. Insert the gauge into the air valve and firmly press down to get an accurate reading. The pressure reading should be a few PSI below the “cut-in” pressure of the pump.
4. Adjust the Air Pressure: If the pressure reading is significantly lower than it should be, the air charge in the tank needs to be adjusted. To do this, you will need an air compressor or a manual bicycle pump with a pressure gauge. Connect the compressor or pump to the air valve on the tank and slowly add air until the pressure reaches the desired level.
5. Check for Waterlogged Tank: If the pressure reading does not increase or drops rapidly after adding air, it may indicate a waterlogged tank. A waterlogged tank occurs when water fills the air space inside the tank, rendering it ineffective. In this case, it is recommended to consult a professional plumber to assess the tank and potentially replace it.
6. Test the Pump Operation: After adjusting the air charge in the tank, turn the power back on and test the operation of the well water pump. Monitor the pump’s cycling and listen for any unusual sounds. If the pump runs smoothly and maintains the appropriate pressure, the issue may have been resolved. Otherwise, proceed to the next step to check for obstructions or clogs in the pipes.
By verifying and adjusting the pressure tank’s air charge, you can ensure that the pump has the necessary pressure to function properly. Regular maintenance of the pressure tank will help extend the lifespan of your well water pump and prevent unnecessary disruptions in water flow.
Step 4: Check for Obstructions or Clogs in the Pipes
If your well water pump is still not functioning properly after verifying the pressure tank’s air charge, the next step is to check for any obstructions or clogs in the pipes. Over time, debris, sediment, or mineral deposits can accumulate in the pipes, causing restricted water flow and affecting the pump’s performance. Here’s how you can check for obstructions or clogs:
1. Turn off the Power: Before inspecting the pipes, always turn off the power to the well water pump to ensure your safety.
2. Inspect Valves and Filters: Start by inspecting the valves and filters in the system. Valves can become partially closed or stuck, limiting the water flow to the pump. Ensure that all valves are fully open and functioning correctly. Additionally, check any filters in the system, such as a sediment filter, and clean or replace them if necessary.
3. Examine Piping Connections: Inspect the piping connections, especially at joints and fittings, for any signs of leaks or blockages. Tighten any loose connections and ensure there are no obvious obstructions obstructing the flow of water.
4. Flush the Pipes: If you suspect there may be a buildup of sediment or debris in the pipes, a thorough flush can help clear any clogs. Turn off all faucets and fixtures connected to the well water system, including outdoor hoses. Open one or two faucets at a time and let the water flow for a few minutes to help clear any obstructions. Repeat this process for all faucets and fixtures in your home.
5. Check Well Screen or Foot Valve: If the pipes are clear, but you’re still experiencing low water flow or the pump not running correctly, you may need to inspect the well screen or foot valve. These components can become clogged with debris or sediment over time. Consult a professional to safely access and clean these components if necessary.
6. Monitor Pump Operation: Once you have checked for obstructions or clogs in the pipes and taken necessary steps to clear them, turn the power back on and monitor the pump’s operation. If the pump is running smoothly and providing adequate water flow, the issue may have been resolved. However, if the problem persists, further inspection may be required.
By checking for obstructions or clogs in the pipes, you can ensure that there are no physical blockages hindering the pump’s performance. Regular maintenance and periodic flushing of the pipes can help prevent future build-up and ensure smooth water flow from your well.
Regular maintenance of your well water pump is essential to prevent breakdowns. Check for any leaks, clean the pump and surrounding area, and test the pressure regularly to ensure it’s working efficiently.
Read more: How To Winterize Well Water Pump
Step 5: Inspect the Well Water Pump Motor
If you have already checked for power supply, inspected the pressure switch, verified the pressure tank’s air charge, and ensured there are no obstructions in the pipes, the next step is to inspect the well water pump motor. A malfunctioning motor can prevent the pump from operating correctly. Here’s how you can inspect the motor:
1. Turn off the Power: Before inspecting the well water pump motor, always turn off the power to the pump to avoid any electrical accidents.
2. Inspect the Motor Connections: Visually examine the motor connections for any loose or corroded wires. Over time, vibrations or moisture can cause the wires to become loose or deteriorate. Tighten any loose connections and clean any corrosion using a wire brush or contact cleaner.
3. Check Motor Capacitor: Some well water pump motors have a capacitor, which helps start the motor. Inspect the capacitor for any signs of physical damage, such as bulging or leaking. If the capacitor appears damaged, it should be replaced by a professional.
4. Test Motor Windings: Using a multimeter set to measure resistance, test the motor windings to ensure they are within the manufacturer’s specifications. First, disconnect the motor from the power supply. Then, touch the multimeter leads to the motor’s winding terminals, following the manufacturer’s instructions. Compare the readings to the specified range provided by the manufacturer. If the readings are outside the recommended range, there might be an issue with the motor windings.
5. Listen for Unusual Noises: Turn on the power to the well water pump and listen for any unusual noises coming from the motor. Grinding, screeching, or rattling sounds could indicate a mechanical problem with the motor. If you hear any abnormal noises, it’s best to contact a professional to diagnose and repair the motor.
6. Consult a Professional: If you’re unable to identify any issues with the motor or if you’re not comfortable working with electrical components, it’s advisable to consult a professional plumber or electrician. They have the expertise and tools to thoroughly inspect the motor and make any necessary repairs.
By inspecting the well water pump motor, you can identify any electrical or mechanical issues that may be hindering the pump’s operation. Regular maintenance and timely repairs can help extend the lifespan of the motor, ensuring reliable performance and consistent water supply from your well.
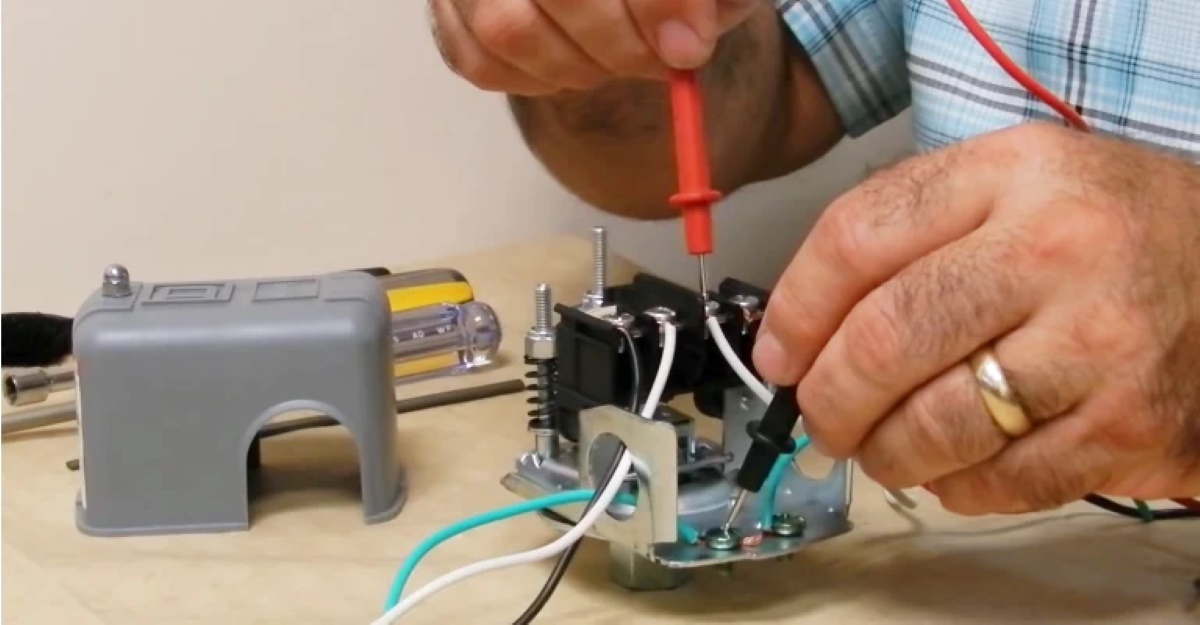
Step 6: Test the Pump Control Box
If you have gone through the previous steps in troubleshooting your well water pump and are still experiencing issues, it’s time to test the pump control box. The pump control box contains various electrical components that regulate the pump’s operation. Here’s how you can test the control box:
1. Turn off the Power: Before working on the pump control box, always ensure the power to the well water pump is turned off to avoid any electrical hazards.
2. Locate the Pump Control Box: The pump control box is usually situated near the well water pump or near the pressure tank. It contains electrical components such as relays, capacitors, and fuses.
3. Inspect for Physical Damage: Carefully examine the pump control box for any visible signs of physical damage, such as burnt wires or melted components. Damaged components may need to be replaced by a professional.
4. Check the Fuses and Circuit Breakers: Inspect the fuses and circuit breakers in the pump control box. If they appear blown or tripped, replace the fuses or reset the circuit breakers. Faulty or damaged fuses may cause the pump to stop functioning.
5. Test Capacitors: Some well water pump control boxes have capacitors. Capacitors store electrical energy and help start the pump motor. If you suspect a faulty capacitor, it is best to have it tested and replaced by a professional.
6. Check Wiring Connections: Inspect the wiring connections inside the pump control box. Ensure that all connections are securely tightened and that there are no loose or damaged wires. Loose or faulty connections can disrupt the electrical flow and affect the pump’s performance.
7. Consult a Professional: If you are unsure about any component or if you are unable to identify any issues in the pump control box, it is recommended to consult a professional electrician or plumber. They can perform a detailed inspection, accurately diagnose any problems, and make the necessary repairs.
The pump control box plays a vital role in operating and controlling the well water pump. By inspecting and testing the various electrical components, you can identify any issues that may be affecting the pump’s performance. Timely repairs and maintenance of the control box can help ensure the smooth operation of your well water system.
Step 7: Assess the Well Water Level
If you’ve followed the previous steps and are still experiencing issues with your well water pump, it’s important to assess the well water level. The water level in the well can directly impact the pump’s ability to draw water and maintain a consistent flow. Here’s how you can assess the well water level:
1. Ensure Power is Turned Off: Before assessing the well water level, always switch off the power to the well water pump to ensure safety.
2. Remove the Well Cap or Cover: Locate the well cap or cover, typically found above the well casing. Use a wrench or socket to loosen and remove the cap or cover. Be cautious as some well caps can be heavy or tightly sealed.
3. Observe Water Level: With the well cap or cover removed, take a close look inside the well casing and observe the water level. Ideally, the water level should be at least a few feet above the pump’s intake or well screen. If the water level appears to be too low, it could indicate an issue with the water table or the pump’s ability to draw water from the well.
4. Check for Contamination: While assessing the well water level, also make note of any signs of contamination, such as discoloration, strong odors, or floating debris. If you notice any of these indicators, it’s essential to contact a professional well water specialist for further analysis and potential treatment.
5. Monitor Water Level Changes: Leave the well cap or cover off and monitor the water level in the well over a period of time. Check back after a few hours or the next day to see if there are any significant changes in the water level. A steep drop in the water level could indicate a water supply issue, such as a dropping water table or a problem with the well itself.
6. Consult a Professional: If there are noticeable changes in the water level or if you are unable to determine the cause of the low water level, it’s advisable to consult a professional well water contractor. They have the expertise and equipment to assess the well’s condition, identify any underlying issues, and recommend appropriate solutions.
Assessing the well water level is crucial in determining the pump’s ability to draw water effectively. Low water levels may indicate an issue with the water supply or a malfunctioning pump. By thoroughly examining the well water level, you can gain valuable insights and make informed decisions regarding necessary repairs or professional assistance.
Step 8: Consult a Professional if Necessary
If you have gone through all the previous steps and are still unable to resolve the issues with your well water pump, it’s time to consider consulting a professional. While troubleshooting steps can address common problems, certain complex issues may require the expertise of a trained and experienced well water pump technician. Here’s why you should consider reaching out to a professional:
1. Specialized Knowledge: Well water pump professionals have specialized knowledge and expertise in diagnosing and repairing pump system issues. They are trained to identify intricate problems that may not be apparent to untrained individuals. A professional can accurately assess the situation and provide appropriate solutions.
2. Safety Precautions: Working with well water pumps involves electrical components, potentially hazardous materials, and confined spaces. Professionals are well versed in proper safety procedures and have the necessary tools and equipment to handle the job safely. By consulting a professional, you ensure the well-being and safety of yourself and your property.
3. Advanced Equipment: Well water pump professionals have access to advanced diagnostic equipment and tools that can help pinpoint the root cause of the problem. They can perform tests, measure water flow, and conduct comprehensive assessments to diagnose and resolve complex issues effectively.
4. Proper Repairs and Maintenance: Well water pump professionals have the experience to make accurate repairs or replacements of faulty components. They can ensure that the pump system is functioning optimally and recommend preventative maintenance to avoid future problems.
5. Long-Term Cost Efficiency: While consulting a professional may involve an investment, it can save you money in the long run. Professionals can accurately diagnose the issue, preventing unnecessary expenditure on trial-and-error repairs. They also provide valuable guidance to optimize the performance and longevity of your well water pump, avoiding potential recurring issues.
Remember that attempting repairs beyond your level of expertise can lead to further damage or personal injury. When in doubt or if you do not possess the necessary knowledge and skills to fix the problem, it is always best to consult a professional.
By consulting a professional well water pump technician, you can ensure a proper diagnosis of the issue, receive expert advice, and have the problem resolved efficiently and safely. They will provide the expertise needed to restore your well water pump and ensure a consistent water supply for your household.
Read more: How Much Is A New Well Water Pump
Conclusion
Troubleshooting and fixing issues with your well water pump can be a challenging task, but by following the steps outlined in this guide, you can increase your chances of resolving common problems on your own. From checking the power supply to inspecting the pressure switch, verifying the pressure tank’s air charge, checking for obstructions in the pipes, inspecting the well water pump motor, testing the pump control box, assessing the well water level, and consulting a professional if necessary, you have a comprehensive roadmap to diagnose and fix issues with your well water pump.
Remember, safety should always be a priority when working with electrical components and plumbing systems. If you are uncomfortable or unsure about any step, it is best to consult a professional well water pump technician. They have the expertise, specialized equipment, and knowledge to accurately diagnose and repair complex issues, ensuring the efficient and reliable operation of your well water pump.
Regular maintenance and periodic inspections are essential for preventing problems and extending the lifespan of your well water pump. Be proactive in addressing smaller issues before they escalate into more significant problems. Additionally, consider scheduling routine maintenance with a professional to ensure your well water pump remains in optimal condition.
By successfully troubleshooting and fixing issues with your well water pump, you can restore the flow of water to your household and enjoy the benefits of a reliable and efficient water supply. Taking the time to understand your well water system and performing basic maintenance can save you both time and money in the long run.
Remember, if at any point during the troubleshooting process you feel uncomfortable or uncertain, it is always advisable to seek the assistance of a professional. They possess the expertise and knowledge to resolve complex issues and ensure the proper functioning of your well water pump system.
By properly maintaining and addressing any problems with your well water pump, you can continue to enjoy the convenience and reliability of a well water system for years to come.
Frequently Asked Questions about How To Fix A Well Water Pump
Was this page helpful?
At Storables.com, we guarantee accurate and reliable information. Our content, validated by Expert Board Contributors, is crafted following stringent Editorial Policies. We're committed to providing you with well-researched, expert-backed insights for all your informational needs.


0 thoughts on “How To Fix A Well Water Pump”