Articles
How To Make A Quilt Without A Sewing Machine
Modified: August 22, 2024
Learn how to create a stunning quilt without the need for a sewing machine. Discover easy and efficient articles on quilting techniques, tips, and tricks.
(Many of the links in this article redirect to a specific reviewed product. Your purchase of these products through affiliate links helps to generate commission for Storables.com, at no extra cost. Learn more)
Introduction
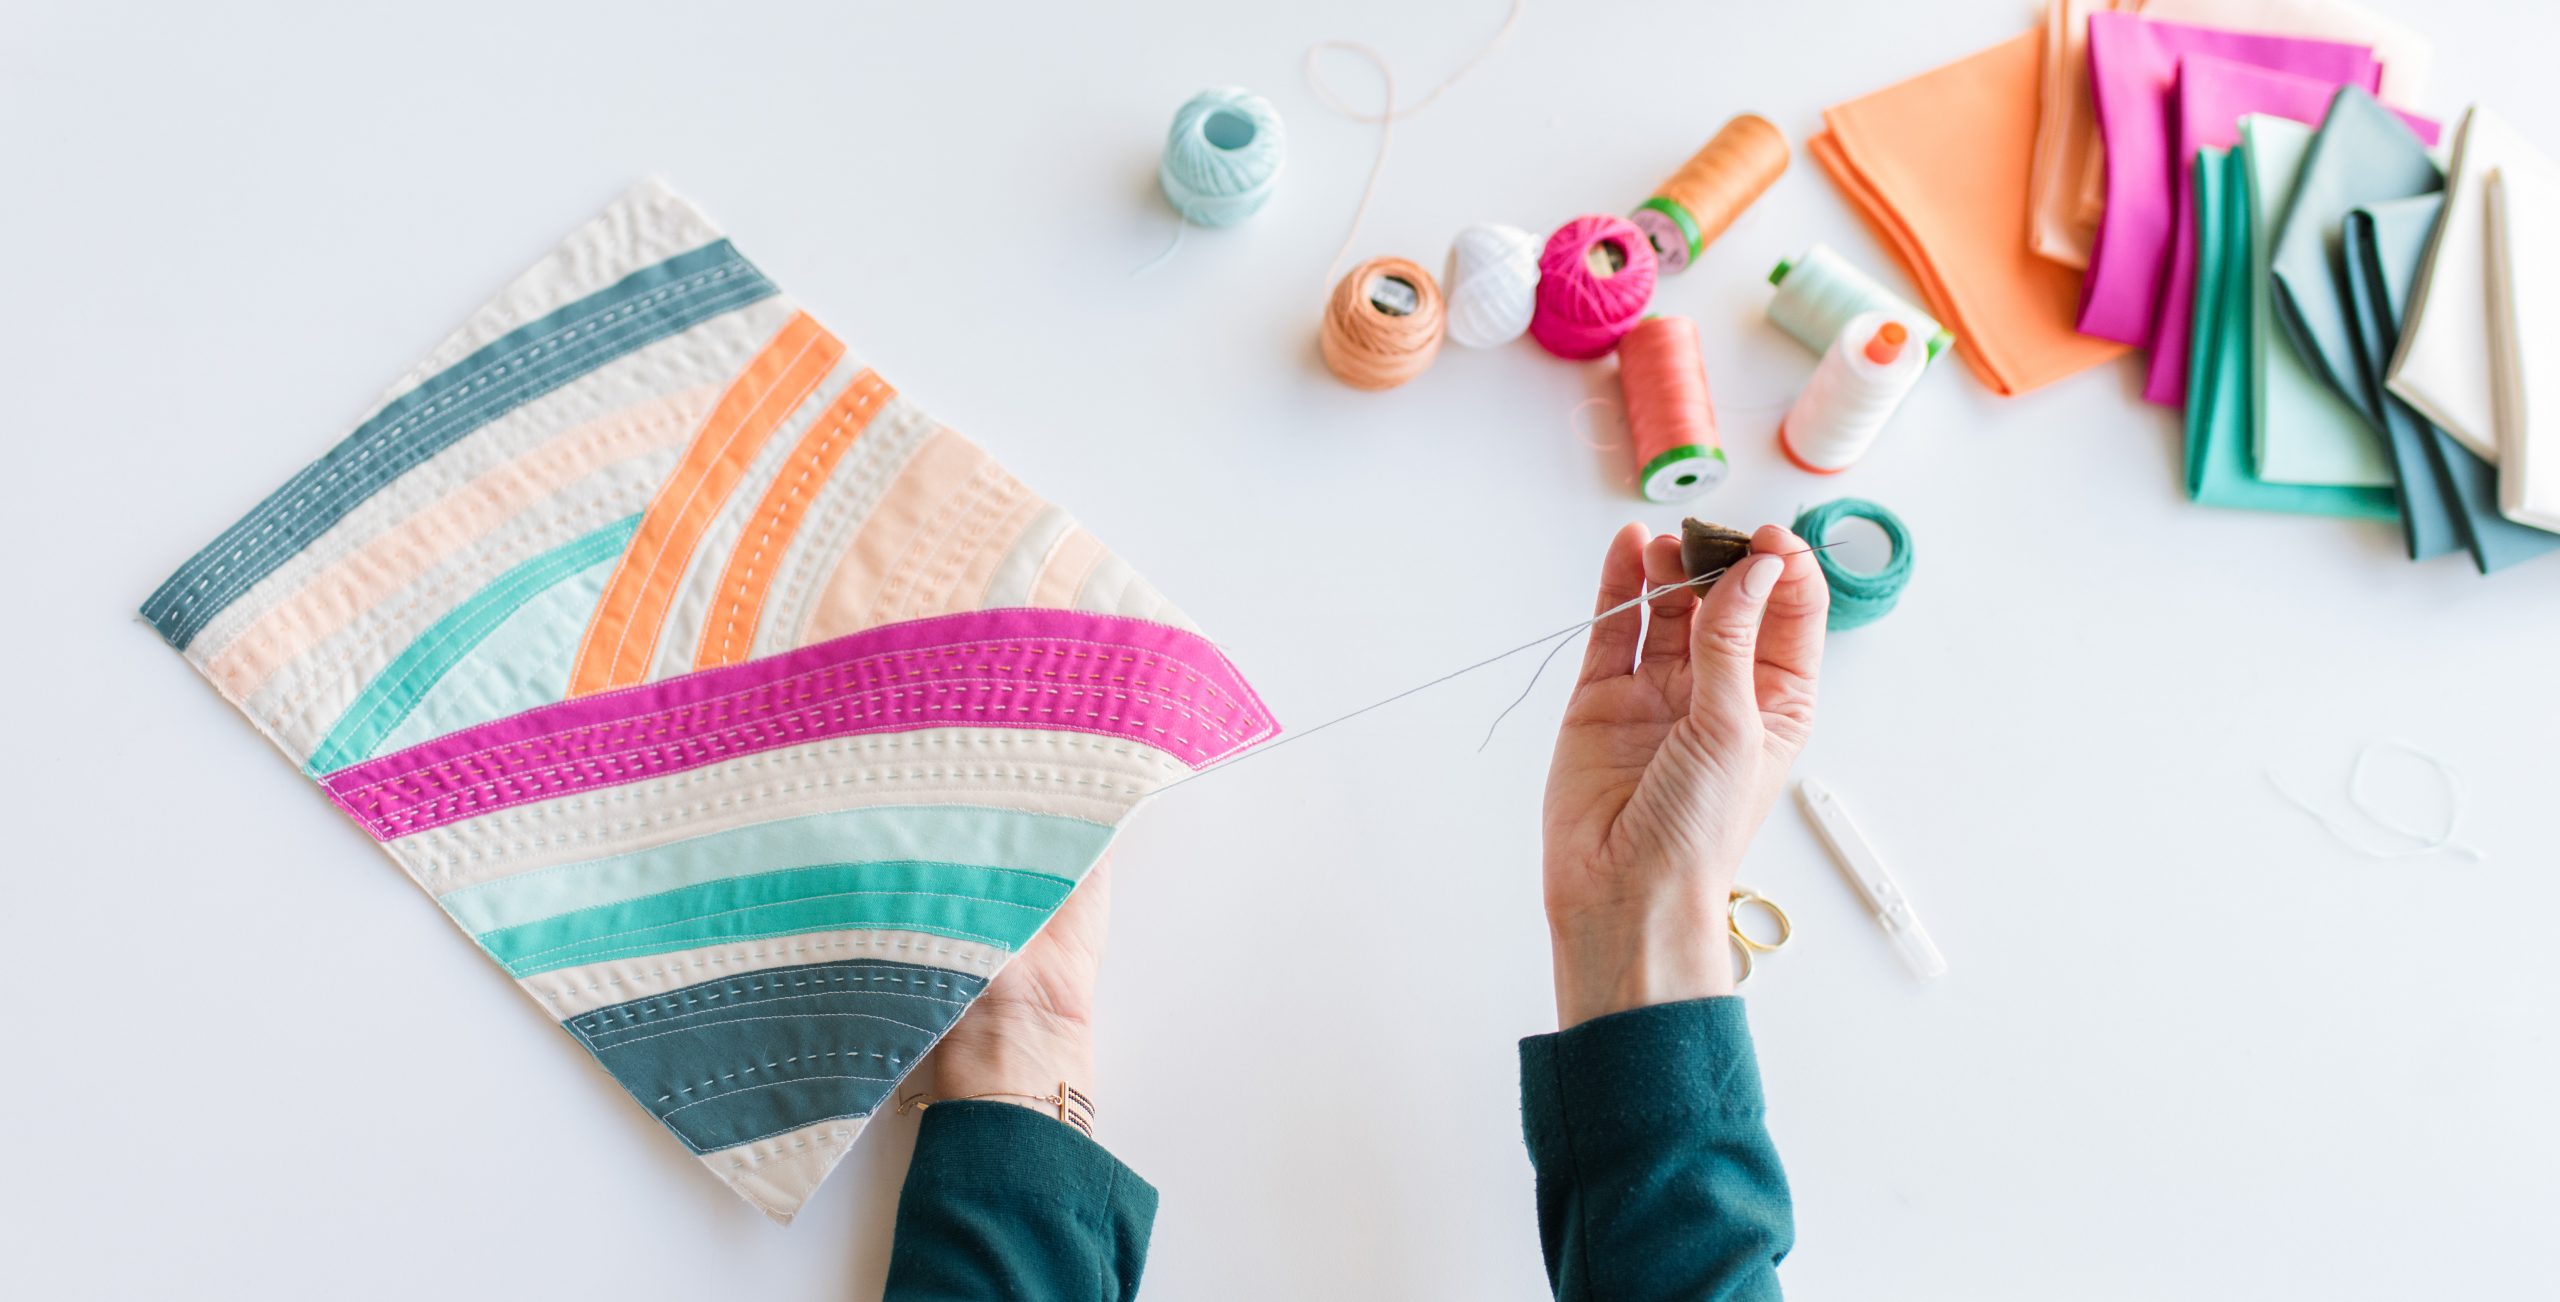
Quilting is a beautiful craft that allows you to create cozy and unique blankets, wall hangings, and more. Traditionally, quilts are made by sewing together layers of fabric using a sewing machine. However, not everyone has access to a sewing machine or may prefer to create a quilt using their hands. Whether you want to try your hand at quilting without a sewing machine or simply enjoy the slower pace of hand stitching, this article will guide you through the process of making a quilt without a sewing machine.
While making a quilt without a sewing machine requires more time and patience, it can be a rewarding and fulfilling experience. This method allows you to add a personal touch, as every stitch is made by your own hands. So, let’s gather our materials and delve into the world of hand quilting!
Key Takeaways:
- Embrace the Slow and Deliberate Art of Hand Quilting
Hand quilting without a sewing machine allows for a deeply personal and meditative experience, where every stitch reflects your craftsmanship and creativity. - Create Timeless and Personalized Quilts
By choosing to make a quilt without a sewing machine, you can infuse your unique style and personality into every stitch, resulting in a one-of-a-kind piece that will be cherished for generations.
Read more: How To Make A No Sew Fleece Quilt
Why Make a Quilt Without a Sewing Machine?
The decision to make a quilt without a sewing machine can stem from various reasons. Here are a few motivations to consider:
- Creativity and Personalization: Hand quilting allows for a greater level of creativity and personalization. You have complete control over every stitch and can experiment with different patterns, stitches, and designs. This enables you to create a one-of-a-kind quilt that reflects your personal style and artistic vision.
- Meditative and Relaxing: Hand quilting is a meditative and calming process. The rhythmic motion of stitching can help reduce stress, promote mindfulness, and provide a sense of relaxation. It allows you to slow down, focus on the present moment, and find joy in the act of creating something beautiful.
- Portability: Hand quilting can be done anywhere, making it a great option for those who enjoy quilting on-the-go. Whether you’re traveling or simply want to quilt in different locations around your home, you can easily bring your project along and work on it whenever and wherever inspiration strikes.
- Connection to Tradition: Hand quilting is deeply rooted in tradition and has been passed down through generations. By choosing to make a quilt without a sewing machine, you are honoring the heritage of quilting and participating in a time-honored craft. It can create a sense of connection to the past and a feeling of pride in preserving the art of hand quilting.
- Access and Affordability: Not everyone has access to a sewing machine or the financial means to purchase one. Hand quilting provides an affordable alternative that requires minimal equipment. With just a few basic tools and materials, you can embark on your quilting journey and create beautiful pieces without the need for expensive machinery.
These reasons, among others, make quilting without a sewing machine a compelling choice for those seeking a hands-on and personal approach to quilt making. It allows you to tap into your creativity, find relaxation, and connect with the rich history of quilting. So, let’s gather the necessary materials and explore the process of making a quilt by hand.
Materials Needed
To make a quilt without a sewing machine, you will need the following materials:
- Fabric: Select fabric of your choice for both the quilt top and backing. Consider the desired size of your quilt and purchase enough fabric to cover that area. Cotton fabric is a popular choice for quilting due to its durability and ease of handling.
- Batting: Choose a batting material to provide the warmth and thickness to your quilt. Batting comes in various types, such as cotton, polyester, or wool. Determine the desired loft and warmth of your quilt to select the appropriate batting.
- Thread: Use high-quality thread that is suitable for quilting. Cotton or polyester threads are commonly used for hand quilting. Ensure that the thread color complements your fabric choices.
- Needles: Select hand quilting needles in an appropriate size. The needle should have a sharp point and a larger eye to facilitate threading. Be sure to have multiple needles on hand, as they can sometimes break or become dull during the quilting process.
- Quilting Hoop or Frame: A quilting hoop or frame is used to secure the layers of the quilt while you hand stitch. Choose a size that is comfortable for you to work with and can accommodate the size of your quilt.
- Pins or Clips: Utilize pins or clips to hold the layers of your quilt together while you assemble and stitch. These will help prevent shifting and ensure your quilt stays aligned.
- Ruler and Rotary Cutter: A ruler and rotary cutter are useful for accurately cutting the fabric into desired shapes and sizes. Ensure that your ruler is long enough to measure the dimensions of your quilt.
- Marking Tools: Use marking tools to transfer quilting designs onto your quilt top. Fabric marking pens or chalk are commonly used for this purpose. Choose a marker or chalk color that is easily visible on your fabric.
- Scissors: Have a pair of sharp fabric scissors on hand for cutting threads and trimming excess fabric.
- Iron and Ironing Board: An iron and ironing board are essential for pressing seams and creating smooth fabric layers.
- Pins or Binding Tape: If you plan to add a binding to your quilt, you will need either pins or binding tape to secure it in place.
These materials will provide you with the necessary tools to start your hand quilting journey. Collect all the items and let’s move on to the next step of choosing the fabric for your quilt.
Choosing the Fabric
Choosing the right fabric for your quilt is an important step in the quilting process. It will not only determine the overall aesthetics of your quilt but also impact its durability and ease of handling. Here are some factors to consider when selecting fabric:
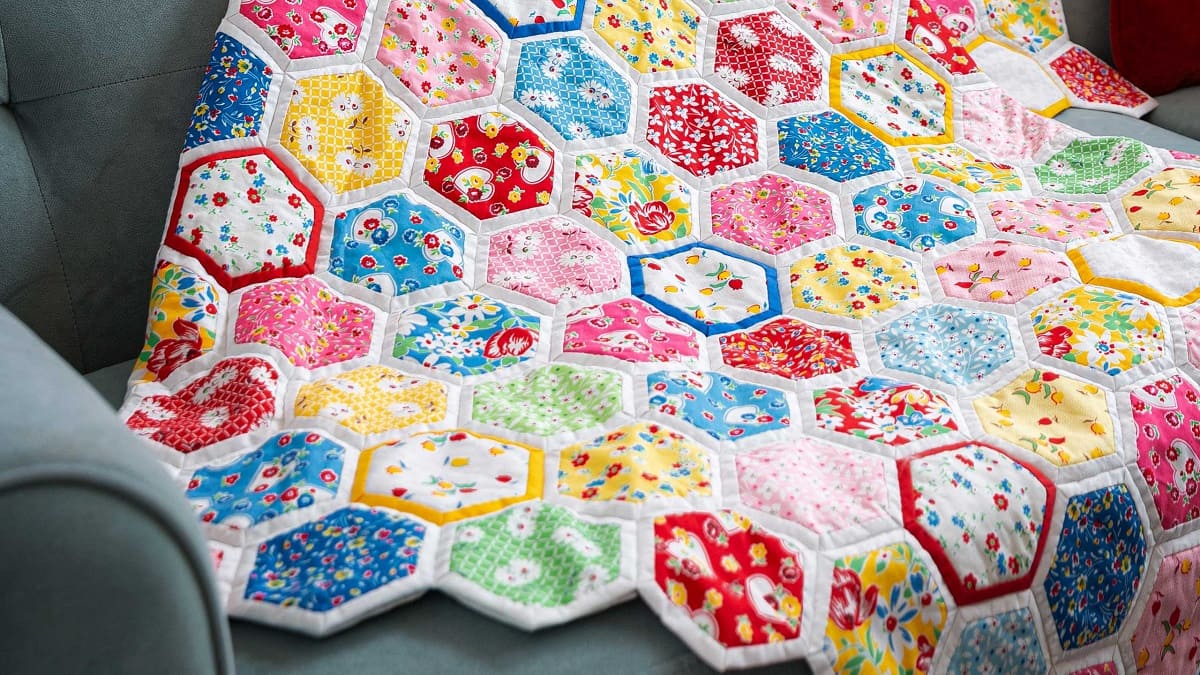
- Color and Pattern: Consider the color scheme and pattern that you want to incorporate into your quilt. Determine whether you want a cohesive color palette or a mix of contrasting colors. Select patterns that complement each other and create visual interest in your quilt.
- Fabric Type: The type of fabric you choose can affect the look and feel of your quilt. Cotton fabric is commonly used in quilting due to its versatility and durability. It is also easy to work with and comes in a wide range of colors and patterns. However, you can also experiment with other types of fabric such as flannel, linen, or even silk for a unique texture and appearance.
- Print Scale: Consider the scale of the prints on your fabric. Larger prints can create a bolder and more vibrant quilt, while smaller prints or solids can offer a more subtle and cohesive look.
- Fabric Quality: Choose high-quality fabric to ensure that your quilt will withstand wear and washing. Look for fabrics with tight weaves and minimal fraying. Touch and feel the fabric to assess its softness and durability.
- Theme or Purpose: If you have a specific theme or purpose for your quilt, choose fabrics that align with it. For example, you might want to create a baby quilt with cute animal prints or a seasonal quilt with fabrics depicting autumn leaves or holiday motifs.
- Contrast and Balance: Consider the contrast and balance between the fabrics you choose. Opt for a mix of light, medium, and dark-toned fabrics to add depth and visual interest to your quilt. Ensure there is a balance between busy patterns and more solid fabrics to avoid overwhelming the design.
- Personal Preference: Ultimately, select fabrics that you personally love and resonate with. Quilting is a creative and personal endeavor, and choosing fabrics that make you happy will ensure a more enjoyable quilting experience and a quilt that you cherish.
Take your time to browse fabrics, either at a local fabric store or online, and collect a variety of options that appeal to you. Lay them out together to visualize how they will look when combined in your quilt. Once you have selected your fabrics, it’s time to prepare them for the quilting process by washing, pressing, and cutting.
Preparing the Fabric
Before you start assembling your quilt, it is important to properly prepare the fabric. This involves washing, pressing, and cutting the fabric to ensure that it is clean, flat, and ready for quilting. Here’s how to prepare your fabric:
- Washing: Begin by washing your fabric to remove any excess dyes, chemicals, or dirt. This step helps prevent the fabric from shrinking or bleeding once the quilt is completed. Follow the manufacturer’s instructions for washing and drying the fabric or machine-wash it on a delicate cycle with mild detergent.
- Pressing: After washing, iron the fabric to remove any wrinkles and create a smooth surface. Set your iron to the appropriate heat setting for the type of fabric you are using. Press the fabric gently, being careful not to stretch or distort it. If the fabric is prone to fraying, consider using a pressing cloth to protect it.
- Cutting: Once the fabric is washed and pressed, it’s time to cut it into the desired shapes and sizes for your quilt. Use a ruler and rotary cutter to ensure precise and straight cuts. Measure and cut the pieces according to your quilt design and pattern, making sure to leave a seam allowance if needed.
- Trimming: After cutting the fabric, inspect the edges for any frayed or uneven edges. Trim any excess threads or uneven edges to maintain neat and clean fabric pieces. This step will make it easier to align and assemble the fabric during the quilting process.
- Organizing: As you cut the fabric, organize the pieces according to their placement in the quilt design. Use labels or a paper diagram to keep track of the different sections. This will help you stay organized and ensure that the right pieces are used in the right places.
By properly preparing your fabric, you are setting a solid foundation for your quilt. Washing and pressing the fabric not only ensures cleanliness but also helps minimize any potential disruptions during the quilting process. Accurate cutting and trimming contribute to precise and professional-looking quilt blocks. With your fabric ready, you can now move on to assembling your quilt.
Read more: How To Make Pillows Without Sewing
Cutting the Fabric
Once you have prepared your fabric, the next step in making a quilt without a sewing machine is cutting the fabric into the desired shapes and sizes. Precise and accurate cutting is crucial to ensure that the pieces fit together seamlessly. Here’s how to cut the fabric for your quilt:
- Refer to the Quilt Design: Begin by referring to your quilt design or pattern to determine the measurements and shapes of the fabric pieces you need. Take note of the dimensions and any specific cutting instructions provided.
- Measure and Mark: Use a ruler or measuring tape to accurately measure the dimensions specified in your design. Take your time to ensure that the measurements are precise. Mark the measurements on the fabric using a fabric marker or chalk, making straight lines as needed.
- Position and Align: Once the fabric is marked, position and align the ruler or straight edge along the marked lines. Ensure that the fabric is flat and secure before making the cuts.
- Cutting Techniques: Use a rotary cutter or fabric scissors to cut along the marked lines. If using fabric scissors, make sure to use a smooth and steady cutting motion to achieve clean and even edges. If using a rotary cutter, apply gentle pressure to ensure that the blade cuts through the fabric smoothly.
- Continue Cutting: Repeat the measuring, marking, and cutting process for each fabric piece required for your quilt. Take your time and double-check the measurements and alignment before making each cut.
- Trim Excess Threads: As you cut the pieces, trim any excess threads or loose threads to keep the edges neat and clean. This will make it easier to align and sew the fabric pieces together.
Remember to follow the cutting instructions provided by your quilt pattern and take care to make accurate cuts. Double-check the measurements and alignment before cutting to avoid any mistakes. As you cut the fabric pieces, keep them organized and easily accessible for the next step of assembling your quilt.
Now that you have the fabric pieces cut and ready, it’s time to move on to assembling the quilt!
When making a quilt without a sewing machine, use fabric glue or fusible bonding tape to secure the fabric layers together before hand-stitching the quilt top. This will help keep the layers in place and make the hand-stitching process easier.
Assembling the Quilt
Now that you have prepared and cut your fabric pieces, it’s time to assemble your quilt. Assembling a quilt without a sewing machine requires careful placement and hand stitching to securely join the fabric layers together. Here’s how to assemble your quilt:
- Lay Out the Quilt Design: Start by laying out your fabric pieces according to your quilt design. Arrange them in the desired pattern, making sure to maintain the correct orientation and alignment.
- Pinning or Clipping: Once the fabric pieces are arranged, secure them together using pins or clips. This will prevent the fabric from shifting as you stitch and ensure that the pieces stay in place.
- Thread your Needle: Thread a needle with a suitable quilting thread, making sure to leave a tail at the end for knotting. If needed, use a needle threader to assist with threading.
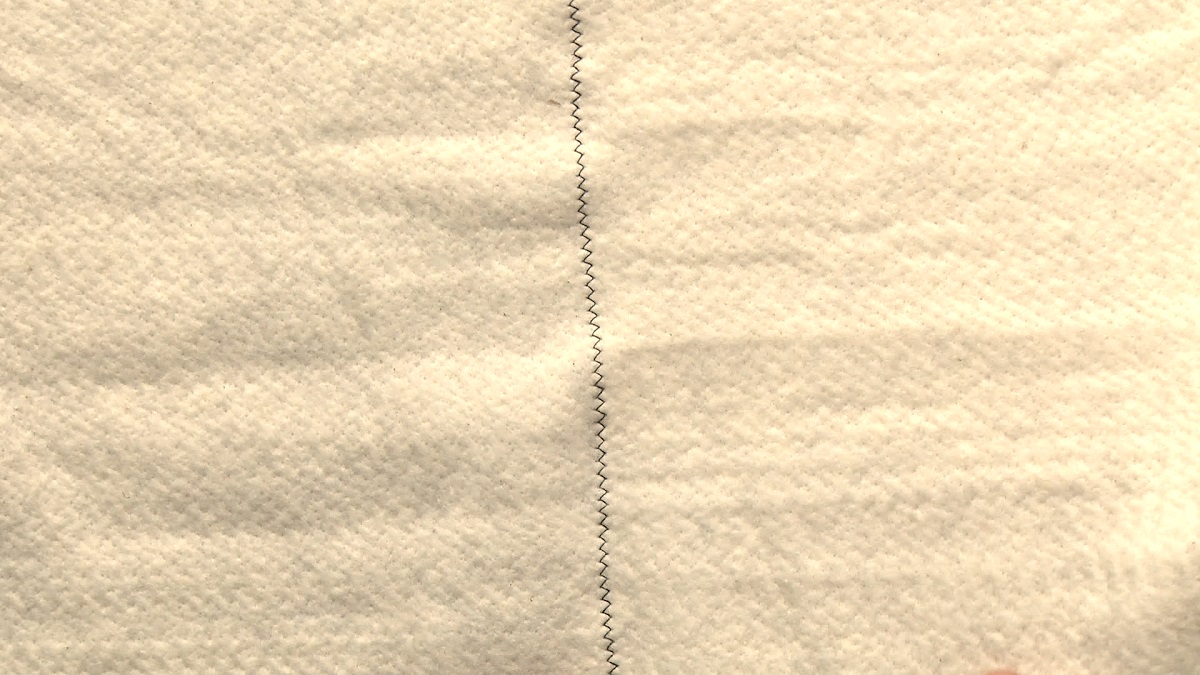
- Start Stitching: With your threaded needle, begin stitching the fabric pieces together. A common hand quilting technique is the running stitch, where you make even and straight stitches through the fabric layers. Take care to stitch through all layers and maintain consistent stitch lengths.
- Continue Stitching: Stitch along the edges of the fabric pieces, joining them together to form the quilt top. Take your time and stitch at a comfortable pace, ensuring that the stitches are secure and evenly spaced.
- Backstitching and Knotting: To secure your stitches, periodically backstitch by stitching backward for a few stitches and then forward again. This helps reinforce the stitching and prevents it from unraveling. When you reach the end of a thread or complete a section of stitching, knot the thread to secure it.
- Repeat the Process: Continue stitching and adding more fabric pieces until the entire quilt top is assembled according to your design. Take breaks as needed and maintain a relaxed and steady pace to ensure accuracy.
As you stitch, pay attention to maintaining consistent tension and creating even stitches. The stitching should go through all layers of fabric, including the quilt top, batting, and backing, to securely hold them together. Take breaks as needed to rest your hands and avoid strain.
Remember, hand stitching your quilt allows for a slower and more deliberate process. Embrace the rhythm of the stitching and enjoy the meditative nature of creating something beautiful by hand.
Once the quilt top is assembled, you can move on to creating the quilting design and adding the finishing touches to your quilt.
Creating the Quilting Design
Creating the quilting design is an essential step in hand quilting. The quilting design adds texture, reinforces the fabric layers, and enhances the overall appearance of the quilt. Here’s how to create your quilting design:
- Consider Quilting Techniques: Think about the quilting techniques you want to incorporate into your design. Common techniques include straight-line quilting, free-motion quilting, stippling, or using stencils. Choose a technique that suits your skill level and desired aesthetic.
- Plan the Quilting Design: Take time to plan your quilting design before you start stitching. Consider the size and shape of the quilt blocks, as well as any patterns or motifs you want to highlight. Sketch out your design on paper to visualize how it will look on the quilt top.
- Transfer the Design: Once you have finalized your quilting design, transfer it onto the quilt top. You can use fabric marking pens, chalk, or quilting stencils to mark the design onto the fabric. Test the marking tool on a scrap piece of fabric to ensure it is easily visible and will wash out or fade over time.
- Begin Quilting: Start quilting by following the design markings on the fabric. Use a quilting hoop or frame to stretch the quilt top and create tension for easier stitching. Choose an appropriate needle and weight of thread for the quilting technique you are using.
- Stitching Techniques: Experiment with different stitching techniques to add interest to your quilt design. Depending on your chosen technique, you may use straight stitches, curves, swirls, or other decorative stitches. Take your time with each stitch, ensuring they are even and secure.
- Quilting Borders and Sashing: Pay special attention to the borders and sashing of your quilt. Quilting along these sections will help stabilize and frame the quilt. Consider using different quilting designs or motifs in these areas to create visual interest.
- Quilt in Sections: If your quilt is larger, consider quilting it in sections. This will make it more manageable and allow you to focus on one area at a time. Seamlessly blend the quilting designs across sections to create a unified look.
- Enjoy the Process: Hand quilting is a labor of love, so enjoy the process and take pleasure in the details. Admire the texture and patterns that emerge as you stitch, and embrace the uniqueness of a quilt made by hand.
Remember to take breaks and rest your hands as needed during the quilting process. Hand quilting can be time-consuming, but the end result will be a beautifully quilted piece that showcases your artistry and dedication.
Once you have completed the quilting, it’s time to add the finishing touches to your quilt.
Hand Quilting Techniques
Hand quilting involves the art of stitching together the layers of fabric by hand, creating beautiful patterns and textures. Here are some hand quilting techniques you can use to enhance your quilt:
- Straight Line Quilting: Straight line quilting is a classic technique that involves quilting parallel lines that run vertically, horizontally, or diagonally across the quilt top. This technique creates a clean and modern look and is a great choice for beginners.
- Curved Line Quilting: Curved line quilting is another popular technique that adds fluidity and movement to the quilt. It involves stitching gentle curves or meandering lines throughout the quilt top, creating a soft and organic effect.
- Free-Motion Quilting: Free-motion quilting allows you to create intricate and detailed designs by moving the quilt under the needle of the sewing machine. However, you can achieve a similar effect by using the same technique with a hand quilting needle. Free-motion quilting allows for complete creative freedom as you can create loops, swirls, feathers, and other decorative motifs.
- Stippling: Stippling is a technique that involves creating dense, closely spaced quilting stitches in a random or meandering pattern. It adds texture and dimension to the quilt and works well for filling small areas or adding background texture. Stippling can be challenging, but with practice, you can achieve beautiful results.
- Echo Quilting: Echo quilting is the technique of stitching parallel lines around a shape or motif, creating a series of outlines. It adds depth and emphasis to specific areas of the quilt, allowing the design or shape to stand out. Echo quilting can be done using either straight lines or gentle curves.
- Outline Quilting: Outline quilting involves stitching around the outer edges of shapes or blocks within the quilt design. It defines and accentuates individual elements, creating a visually striking effect. Outline quilting can be done using straight lines, curves, or a combination of both.
- Trapunto: Trapunto is a technique that involves adding extra padding or stuffing to specific areas of the quilt before quilting. This creates raised or puffy sections that add texture and dimension to the design. Trapunto adds a luxurious and elegant touch to the quilt and can be used selectively to highlight certain motifs or shapes.
- Embroidery Embellishments: Embroidery can be incorporated into hand quilting to add additional embellishments and details. You can use embroidery stitches to create decorative motifs, add accents, or personalize the quilt with names or dates. Embroidery can be done using various stitching styles, such as satin stitch, backstitch, or French knots.
Experiment with these hand quilting techniques and discover what resonates with you and your quilt design. Combine different techniques, mix and match patterns, and let your creativity guide you. Hand quilting allows for endless possibilities to create a quilt that is truly unique and showcases your artistry.
Once you have completed the hand quilting, it’s time for the final steps to complete your quilt.
Read more: How To Make A Tablecloth Without Sewing
Finishing Touches
As you near the completion of your hand-quilted masterpiece, there are a few final touches you can add to perfect your quilt. These finishing touches will enhance its overall appearance and durability. Here are some steps to consider:
- Trim Excess Batting and Backing: After the quilting is complete, trim any excess batting and backing fabric from the edges of the quilt. Use scissors or a rotary cutter to achieve clean and straight edges.
- Add Binding: Binding is the final edge finish that encloses the raw edges of the quilt. You can use pre-made bias tape or create your own binding using coordinating fabric. Attach the binding to the quilt using a hand-stitching technique such as the slip stitch or ladder stitch.
- Label Your Quilt: Consider adding a label to your quilt that includes your name, the date, and any other relevant information. This will serve as a lasting reminder of your craftsmanship and can be a meaningful addition if the quilt is intended as a gift or family heirloom.
- Secure Loose Threads: Go over the entire quilt and check for any loose threads. Secure them by hand-stitching them back into the quilt or using a small knot. This will prevent them from coming undone and ensure the longevity of your quilt.
- Press the Quilt: Give your quilt a final press with an iron to smooth out any wrinkles and give it a polished appearance. Use a low heat setting and press gently to avoid damaging the fabric or quilting stitches.
- Inspect and Reinforce: Take the time to thoroughly inspect your quilt for any loose stitches or areas that may require reinforcement. Hand stitch any loose areas or make any necessary repairs to ensure that your quilt is sturdy and well-crafted.
- Celebrate and Display: Once your quilt is finished, take a moment to celebrate your accomplishment. Admire your handiwork and find the perfect spot to showcase your quilt, whether it’s on a bed, draped over a couch, or hung on a wall. Share your creation with friends and family, knowing that your time, effort, and creativity have resulted in a beautiful work of art.
These finishing touches will add that final professional touch to your hand-quilted masterpiece. Remember to approach these steps with care and attention to detail, ensuring that your quilt is not only visually pleasing but also built to last.
Now that your quilt is complete, it’s time to cherish and enjoy the warmth, comfort, and beauty that it brings to your home or to the lucky recipient.
Conclusion
Hand quilting without a sewing machine offers a unique opportunity to create a quilt that is not only a beautiful work of art but also a labor of love. Through the careful selection of fabric, precise cutting, and meticulous hand stitching, you can bring your vision to life and create a quilt that is truly one-of-a-kind.
Choosing to make a quilt without a sewing machine allows for a more personal and intimate quilting experience. The slow and deliberate stitching process can be meditative, allowing you to connect with the quilt and immerse yourself in the creative process. Each stitch bears the mark of your craftsmanship and adds to the overall beauty of the quilt.
Throughout the journey of hand quilting, you have learned the importance of preparing the fabric, cutting with precision, and exploring various hand quilting techniques. Whether you have chosen simple straight-line quilting or experimented with more intricate designs, each choice has contributed to the unique character of your quilt.
As you added the finishing touches, the binding, label, and careful inspection, you ensured the durability and longevity of your quilt. The attention to detail and love poured into the final steps will ensure that your quilt brings warmth and joy for years to come.
Hand quilting is not just a means to an end, but a fulfilling journey in itself. It allows you to slow down, express your creativity, and connect to the rich tradition of quilting. Each quilt tells a story and becomes a treasured heirloom, passed down through generations.
So, whether you are quilting for yourself, your loved ones, or as a gift, embrace the process and enjoy the artistry of hand quilting. Let your imagination soar, and infuse your unique style and personality into every stitch. The result will be a quilt that is not only visually stunning but also a reflection of your passion and dedication.
As you continue your quilting journey, don’t forget to share your skills and knowledge with others. Inspire and encourage fellow quilting enthusiasts to experience the joy of hand quilting and the satisfaction that comes with creating something beautiful by hand.
So gather your materials, immerse yourself in the art of hand quilting, and let your creativity shine as you stitch your way to a quilt that will be cherished and admired by all.
Frequently Asked Questions about How To Make A Quilt Without A Sewing Machine
Was this page helpful?
At Storables.com, we guarantee accurate and reliable information. Our content, validated by Expert Board Contributors, is crafted following stringent Editorial Policies. We're committed to providing you with well-researched, expert-backed insights for all your informational needs.


0 thoughts on “How To Make A Quilt Without A Sewing Machine”