
Articles
How To Sew Quilt Binding By Hand
Modified: February 24, 2024
Learn the art of hand-sewing quilt binding with our informative articles. Discover step-by-step guides and tips for achieving beautifully finished quilts.
(Many of the links in this article redirect to a specific reviewed product. Your purchase of these products through affiliate links helps to generate commission for Storables.com, at no extra cost. Learn more)
Introduction
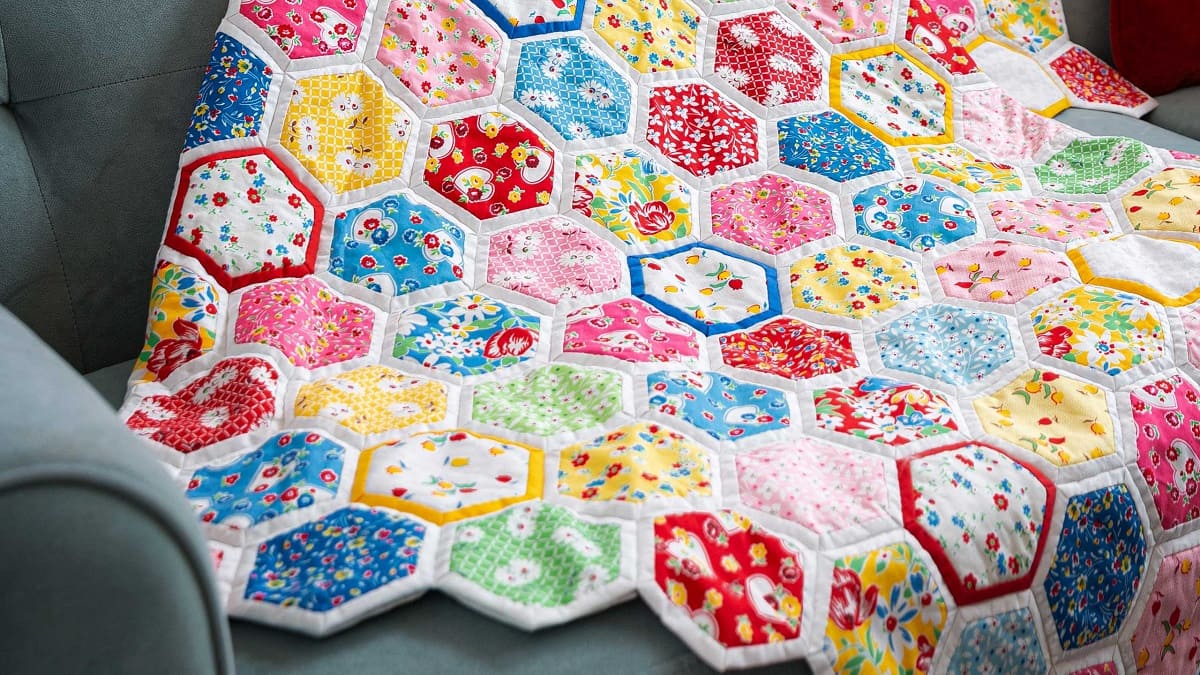
When it comes to sewing a quilt, one of the final steps is attaching the binding. Binding not only provides a polished and finished look to your quilt, but it also helps to secure the edges and keep the layers together. While there are various ways to attach the binding, sewing it by hand can add a personal touch and create a professional-looking finish.
In this article, we will guide you through the process of sewing quilt binding by hand. Whether you are a beginner or a seasoned quilter, following these steps will ensure that your binding is securely attached and adds a beautiful detail to your quilt.
Before we dive into the step-by-step process, let’s go over some materials that you will need.
Key Takeaways:
- Hand stitching quilt binding adds a personal touch and professional finish to your quilt, ensuring every stitch is perfectly placed for a beautiful and seamless edge.
- Incorporating tips like pressing as you go and using matching thread elevates the overall look of your quilt, showcasing your quilting skills and creativity.
Read more: How To Sew Satin Blanket Binding On A Quilt
Gathering Materials
Before you begin sewing quilt binding by hand, you will need to gather a few essential materials:
- Quilt – Make sure your quilt top, batting, and backing are all properly assembled and basted together.
- Fabric for Binding – Choose a fabric that complements your quilt design. You will need enough fabric to cut strips for the binding.
- Thread – Select a thread that matches your binding fabric or blends well with the overall color scheme of your quilt.
- Needle – Use a needle that is suitable for hand stitching. A sharp or quilting needle will work well for attaching the binding.
- Pins or Clips – These will help keep the binding in place as you sew.
- Scissors – Use a pair of sharp scissors for cutting fabric and trimming threads.
- Iron – A hot iron will come in handy for pressing the binding and ensuring crisp, neat edges.
- A quilt hoop (optional) – A quilt hoop can provide additional support and tension, making it easier to stitch the binding by hand.
Once you have gathered all the necessary materials, you are ready to start preparing your quilt for binding.
Preparing Your Quilt
Before you begin attaching the binding to your quilt, it’s essential to prepare it properly. Follow these steps to ensure that your quilt is ready:
- Press Your Quilt – Start by pressing your quilt top, batting, and backing to remove any wrinkles or creases. Use a hot iron, and make sure to press on the correct setting for the fabrics you used in your quilt.
- Trim Excess Fabric – Trim any excess fabric or batting that extends beyond the edges of your quilt top. This will create a clean and even edge for attaching the binding.
- Square Up the Quilt – Use a quilting ruler to ensure that the edges of your quilt are squared up and straight. Trim any uneven edges, making sure all four corners are 90-degree angles.
- Secure the Layers – Baste your quilt layers together to keep them secure during the binding process. You can use safety pins, basting spray, or hand basting stitches to hold the layers in place.
Once your quilt is pressed, trimmed, squared up, and securely basted together, you are ready to move on to cutting and preparing your binding strips.
Cutting and Preparing Your Binding Strips
Now that your quilt is prepared, it’s time to cut and prepare your binding strips. Follow these steps to ensure that your binding is the right size and ready to be attached:
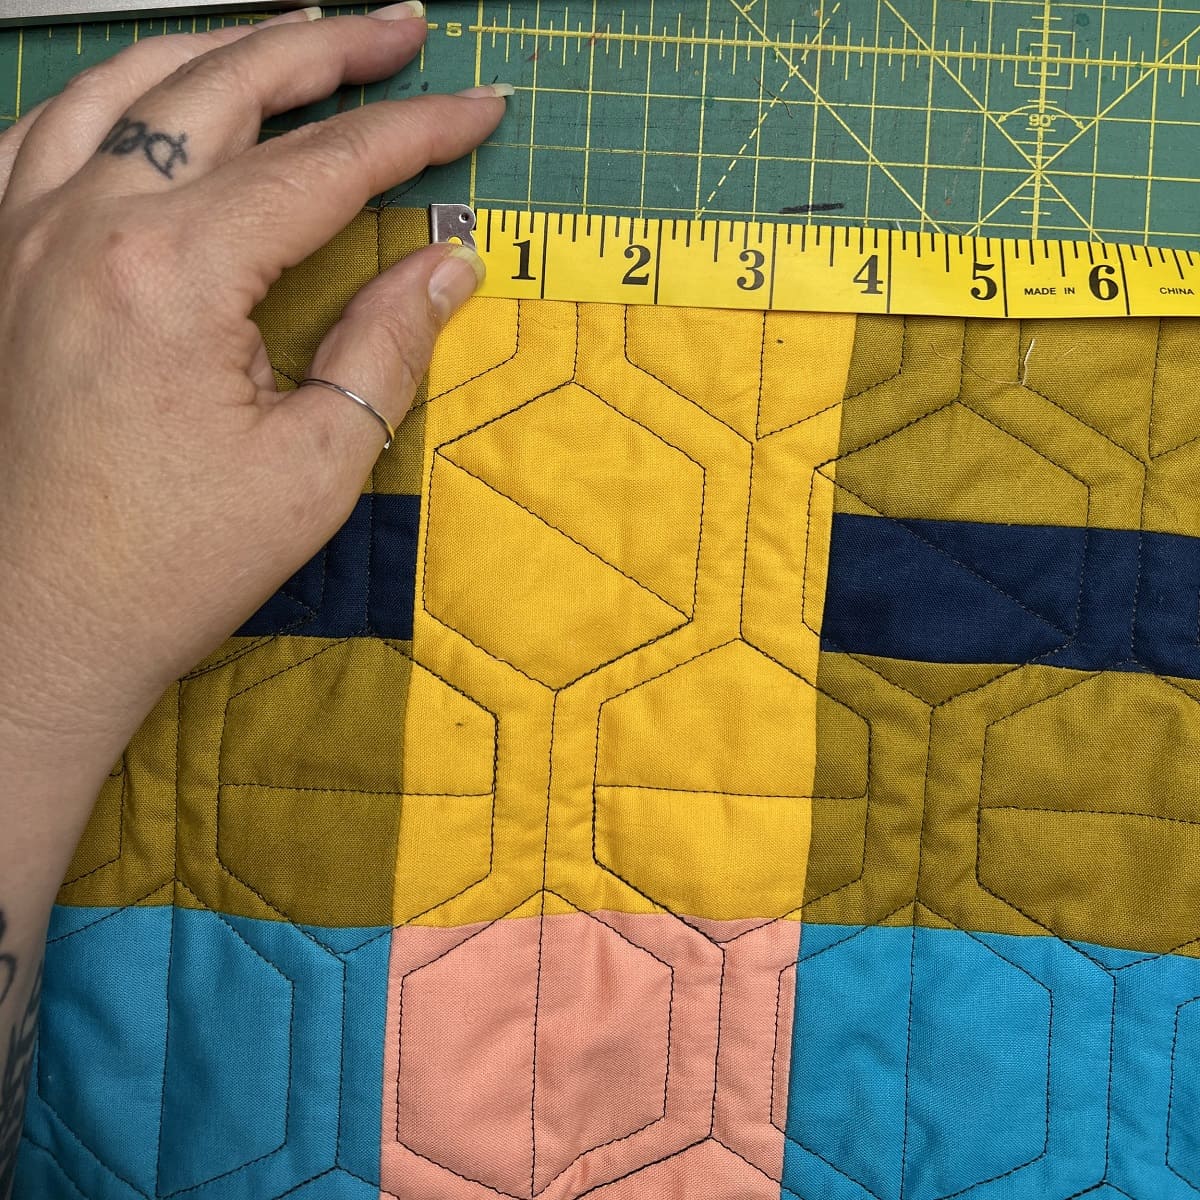
- Calculate the Length of Binding Needed – Measure the perimeter of your quilt to determine the length of the binding needed. Add a few extra inches to account for corners and joining the ends.
- Cut the Binding Fabric – Using a rotary cutter and ruler, cut strips of fabric for your binding. The width of the strips will depend on your personal preference, but 2.5 inches is a standard width. Align the ruler and cut straight, continuous strips across the width of the fabric.
- Join the Strips – If your quilt requires more than one strip of binding, join the strips together to create a continuous length. To do this, place two strips at right angles, right sides facing, and stitch diagonally from one corner to the opposite corner. Trim the excess fabric and press the seam open.
- Press the Binding Strips – Fold the binding strips in half lengthwise, wrong sides together, and press with an iron. This will create a crisp fold and make it easier to attach the binding to your quilt.
Now that your binding strips are cut and prepared, it’s time to attach them to your quilt.
Attaching the Binding to the Quilt
Now comes the exciting part – attaching the binding to your quilt. Follow these steps to secure the binding in place:
- Start on a Straight Edge – Choose a straight edge of your quilt to begin attaching the binding. Leave a few inches of the binding unstitched at the start.
- Align the Binding – Align the raw edges of the binding with the raw edge of your quilt, ensuring that the folded edge of the binding is on the inside, facing the quilt.
- Pinning or Clipping – Secure the binding in place by pinning or clipping it to your quilt. Place pins or clips at regular intervals along the edge to keep the binding from shifting as you sew.
- Stitching the Binding – Using a needle and thread, start stitching the binding to the quilt. Begin a few inches from the corner and use small backstitches to anchor the binding.
- Continue Along the Edge – Sew the binding in place, moving along the edge of your quilt. Keep the stitches close to the folded edge of the binding, ensuring that they catch both the top and bottom layers of the binding.
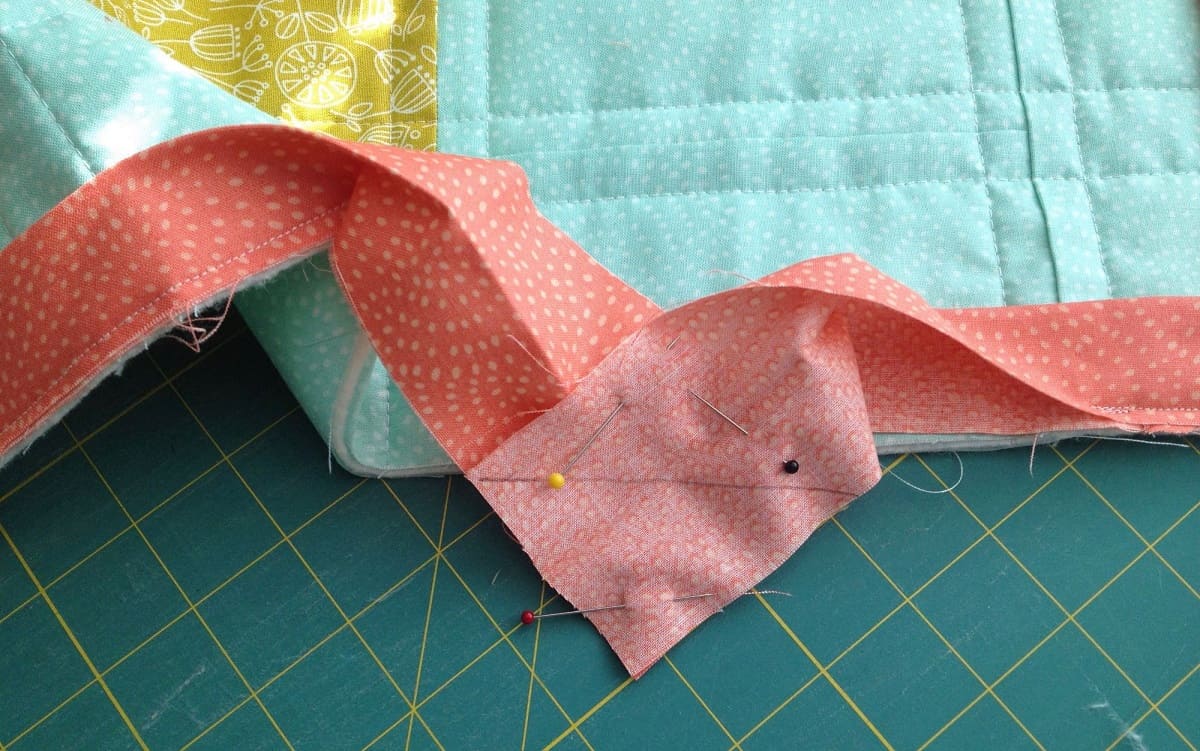
- Corners – When you approach a corner, stop stitching a quarter-inch away from the edge. Fold the binding up at a 45-degree angle, creating a neat mitered corner, and then fold it back down along the next edge. Continue stitching from the new edge.
- Repeat the Process – Continue sewing the binding to all sides of the quilt, mitring the corners as you go. When you reach the starting point, stop stitching a few inches before the end.
Now that your binding is attached, it’s time to work on mitering the corners for a professional finish.
When sewing quilt binding by hand, use a ladder stitch for an invisible finish. This stitch will blend seamlessly with the quilt binding and provide a professional look.
Read more: How To Hand Sew A Quilt Block
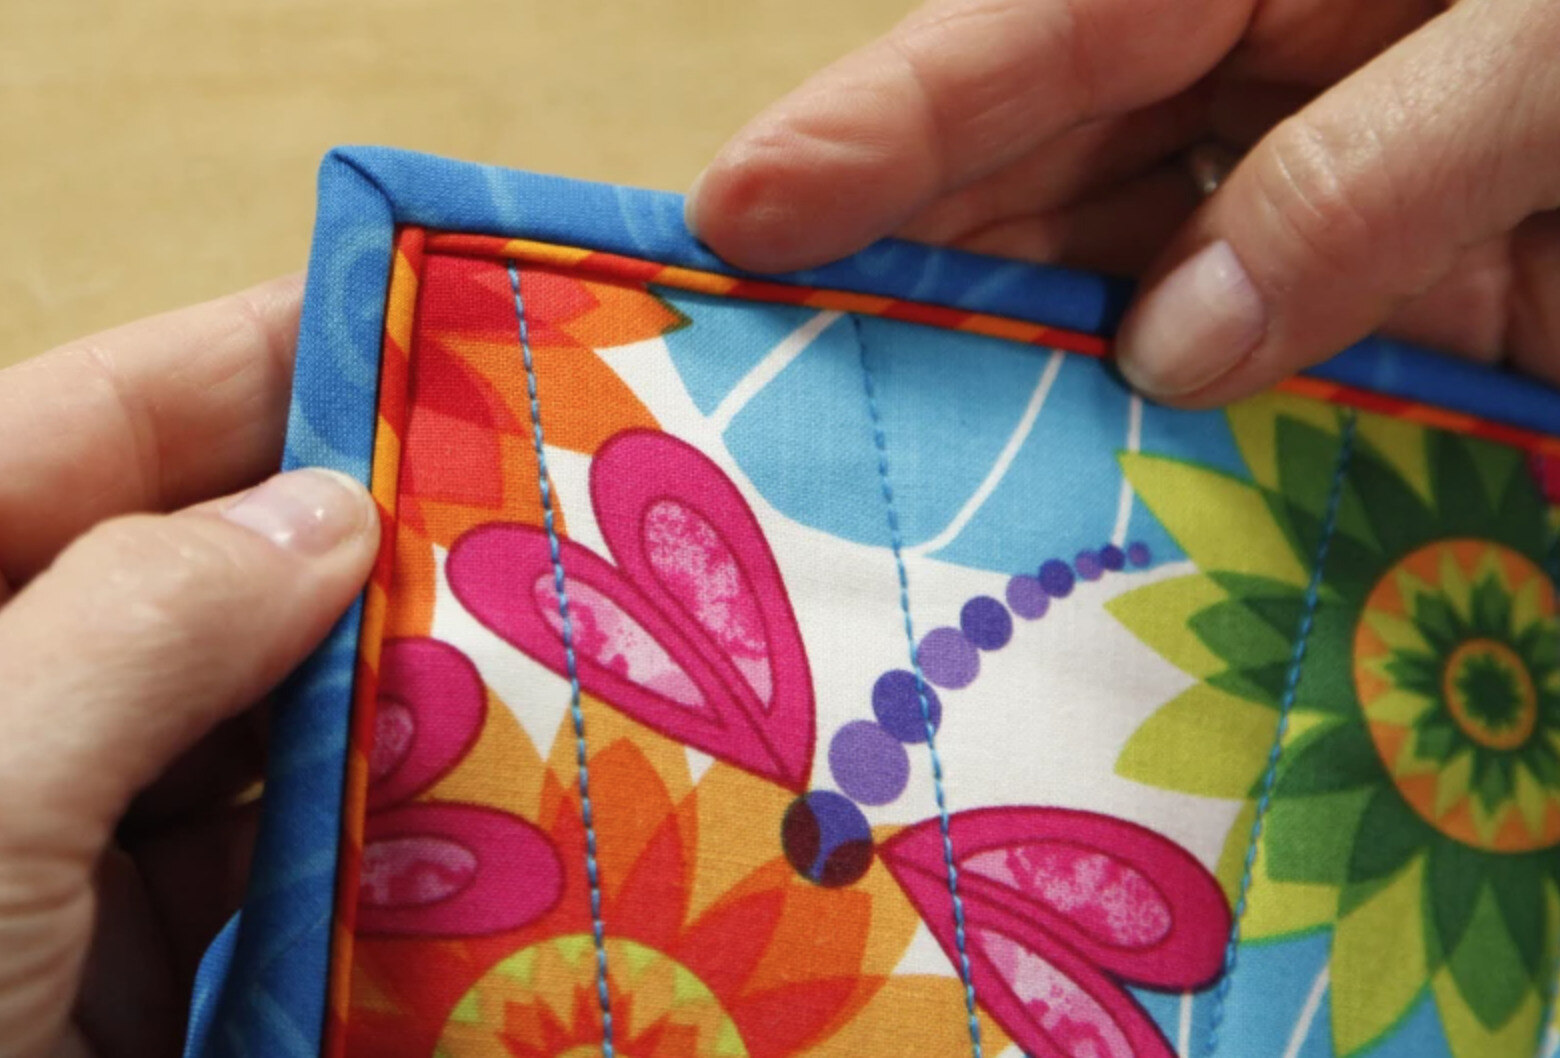
Mitering the Corners
Mitering the corners of your quilt binding is an important step in achieving a clean and professional look. Follow these steps to miter the corners:
- Stop Stitching – When you approach a corner, stop stitching a quarter-inch away from the edge.
- Fold the Binding – Fold the binding up at a 45-degree angle, creating a neat diagonal fold that aligns with the edge of the quilt.
- Fold Again – Fold the binding back down along the next edge, ensuring that the folded edge creates a mitered corner.
- Secure with a Pin – Place a pin through the layers of the mitered corner to hold it in place.
- Continue Stitching – Resume sewing the binding, starting from the new edge of the quilt.
- Repeat for Remaining Corners – Repeat the mitering process for each corner of your quilt.
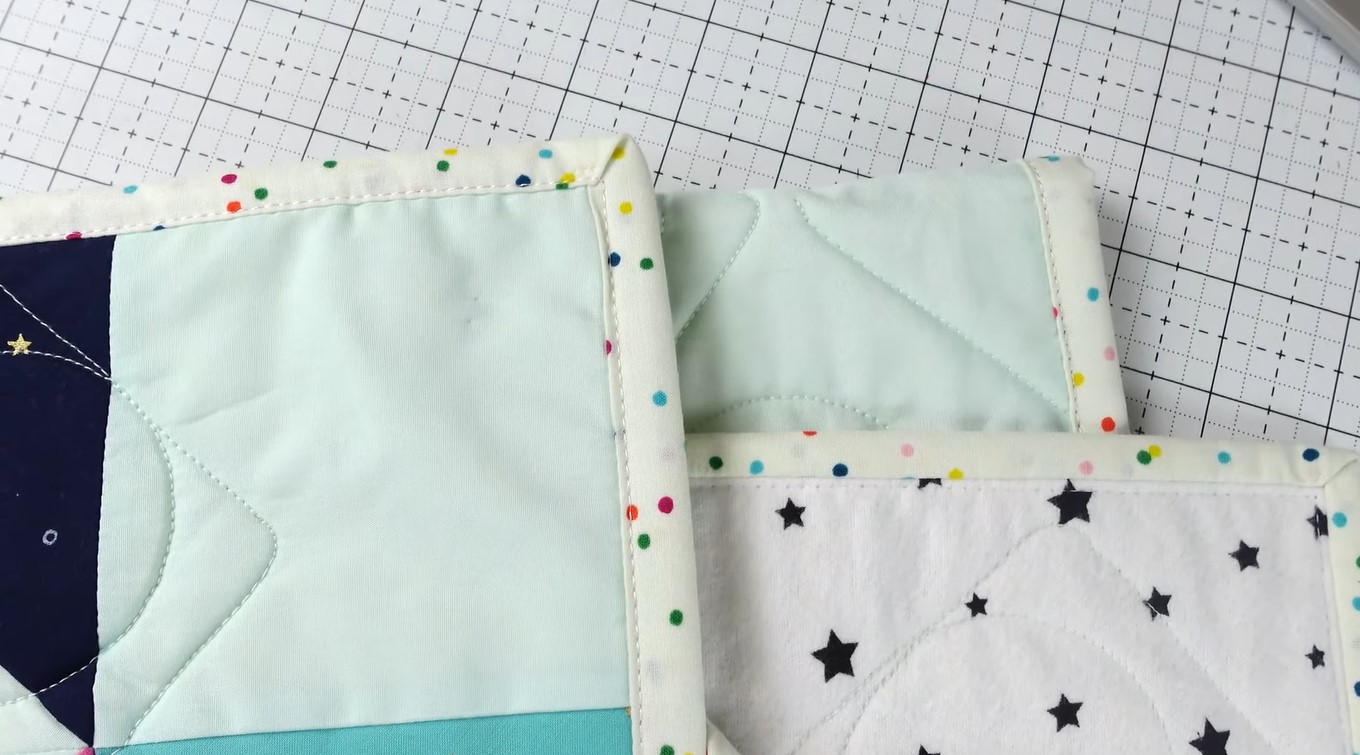
Mitering the corners will create sharp and crisp edges, giving your quilt a professional finish. Once all the corners are mitered, it’s time to move on to finishing the ends of the binding.
Finishing the Binding Ends
Now that you have sewn the binding around the perimeter of your quilt, it’s time to finish the ends for a neat and clean look. Follow these steps to complete the binding ends:
- Stop Stitching – When you have sewn the binding around the entire quilt, stop stitching a few inches before reaching the starting point.
- Trim the Binding – Trim the excess binding, leaving a few inches of overlap beyond the starting point.
- Fold the Binding – Fold the end of the binding back on itself, aligning it with the edge of the quilt. This will create a folded end that’s flush with the quilt’s edge.
- Overlap the Binding – Take the folded end of the binding and overlap it with the starting point. This will ensure a smooth and seamless finish.
- Secure with Pins – Use pins to hold the folded end in place, securing it to the starting point.
- Test the Fit – Check that the binding fits snugly when wrapped around the quilt’s edge. Make any necessary adjustments before securing it permanently.
- Stitch the Overlap – Using a hand needle and thread, stitch the overlapping ends of the binding together. Use small, even stitches to secure the overlap.
- Trim Excess Binding – Trim any excess binding fabric, ensuring that the finished end aligns perfectly with the edge of the quilt.
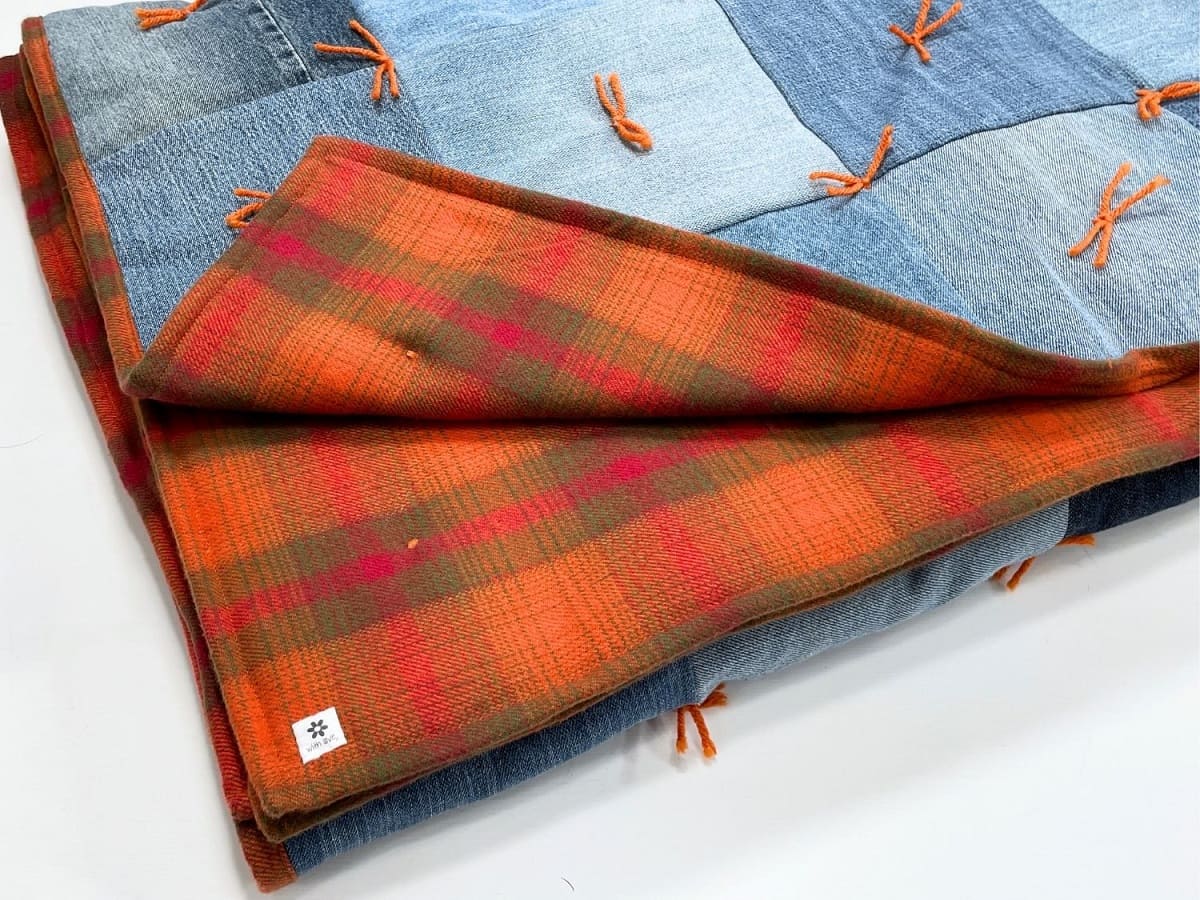
Finishing the binding ends will give your quilt a professional and seamless appearance. It’s now time to secure the binding by hand stitching.
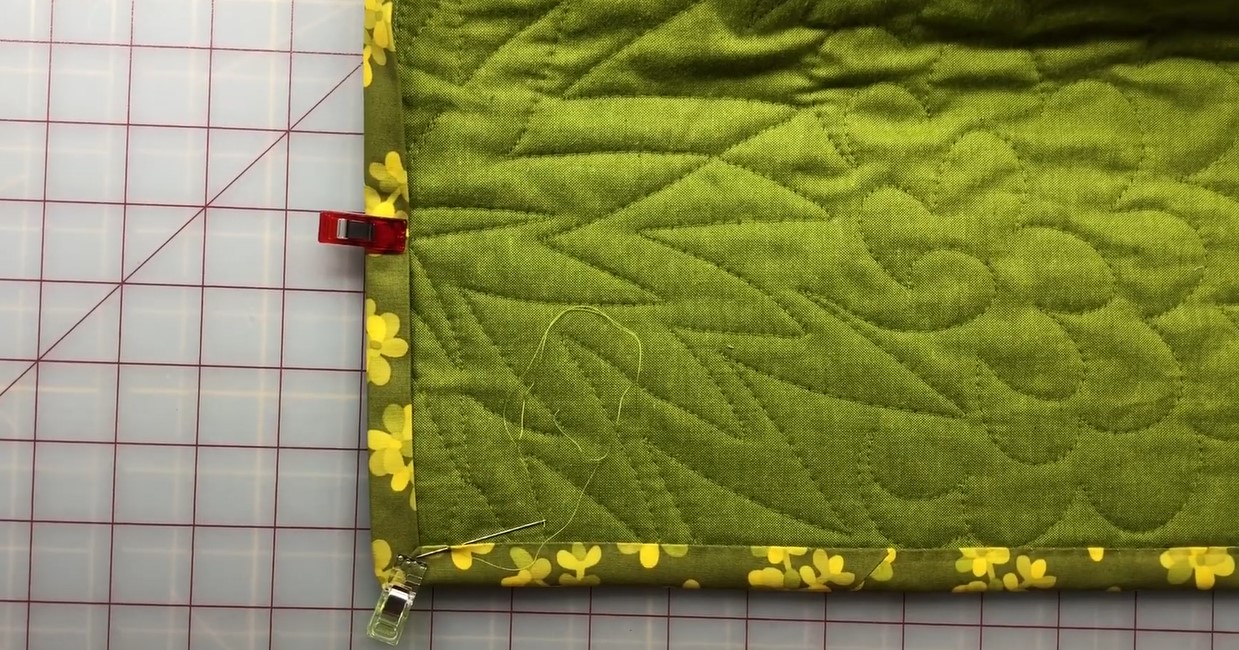
Securing the Binding by Hand Stitching
Hand stitching the binding is the final step in securing it to your quilt and adding that personal touch. Follow these steps to hand stitch the binding:
- Thread the Needle – Thread a needle with a thread that matches your binding fabric or blends well with the overall color scheme of your quilt.
- Knotted Start – Start by making a knot at the end of the thread. This will prevent it from pulling through the fabric as you stitch.
- Hidden Stitch – Place the needle through the back of the binding, catching a small section of the quilt underneath. Pull the thread through, ensuring that the knot is hidden beneath the binding.
- Stitch Length – Work with small, even stitches along the folded edge of the binding. The stitches should be virtually invisible on the front of the quilt.
- Consistent Tension – Maintain a consistent tension on the thread as you stitch, neither pulling it too tight nor leaving it too loose.
- Stitching Method – There are different stitching methods you can use, such as the slip stitch or ladder stitch. Choose the method that you find most comfortable and gives you the desired result.
- Mitered Corners – Pay extra attention to stitching the mitered corners, ensuring that the stitches go through all layers of the fabric for a secure and tidy finish.
- Continuity – Continue stitching all along the binding until you reach the starting point. Take care to keep your stitches even and consistently spaced.
Hand stitching the binding gives your quilt a handmade and professional look. Remember to take your time and enjoy the process of adding these final finishing touches.
Tips and Tricks for a Professional Finish
Here are some tips and tricks to help you achieve a professional finish when sewing quilt binding by hand:
- Press as You Go – Before attaching the binding, press it with an iron to ensure crisp folds and neat edges. Pressing as you sew will create a polished finish.
- Use Matching Thread – Choose a thread color that matches your binding fabric or blends well with your quilt’s color scheme. This will help hide your stitches and create a seamless look.
- Take Small Stitches – Take small, even stitches along the folded edge of the binding. This will keep your stitches virtually invisible on the front of the quilt.
- Secure Corners Well – When sewing the binding around the corners, make sure to secure them well with extra stitches. This will ensure that the corners stay neatly mitered and don’t come undone with use.
- Trim Excess Binding Carefully – When trimming the excess binding fabric, be careful not to cut too close to the stitches. Leave a small allowance to prevent the stitches from unraveling.
- Practice Consistency – Aim for consistent stitch length and spacing throughout the entire binding. This will give your quilt a professional and cohesive appearance.
- Take Breaks – Hand stitching can be time-consuming, so take breaks and rest your hand to avoid strain. This will help maintain control and precision in your stitches.
- Inspect Your Work – Periodically step back and inspect your stitches to ensure they are even and secure. Making small adjustments along the way will contribute to a well-finished quilt.
- Enjoy the Process – Sewing quilt binding by hand can be a slow and meticulous process, but it is also a labor of love. Enjoy the meditative quality of hand stitching and appreciate the craftsmanship that goes into your quilt.
By following these tips and tricks, you will enhance your skills and achieve a professional and polished finish when sewing quilt binding by hand.
Read more: How To Sew On Blanket Binding
Conclusion
Sewing quilt binding by hand is not only a practical step in finishing your quilt, but it also adds a personal touch and elevates the overall appearance of your creation. The process may require time and attention to detail, but the result is well worth the effort.
From gathering the materials and preparing your quilt to cutting and attaching the binding, mitering corners, and finishing the ends, each step contributes to a professional finish. Taking the time to hand stitch the binding ensures that every stitch is perfectly placed, resulting in a beautiful and seamless edge.
Remember to incorporate tips and tricks such as pressing as you go, using matching thread, and taking small, consistent stitches. These techniques will elevate the overall look of your quilt and give it that expert touch.
While sewing quilt binding by hand can be a labor of love, it’s also an opportunity to relax, enjoy the process, and appreciate the craftsmanship involved. Take pride in the time and effort spent on creating a quilt that is not only functional but also a work of art.
Now it’s time to put your newfound knowledge into practice. Gather your materials, prepare your quilt, and start sewing your quilt binding by hand. With determination and attention to detail, you will achieve a professional finish that showcases your quilting skills and creativity.
So, embrace the art of hand stitching and enjoy the journey of creating a beautifully bound quilt that will be cherished for years to come.
Frequently Asked Questions about How To Sew Quilt Binding By Hand
Was this page helpful?
At Storables.com, we guarantee accurate and reliable information. Our content, validated by Expert Board Contributors, is crafted following stringent Editorial Policies. We're committed to providing you with well-researched, expert-backed insights for all your informational needs.


0 thoughts on “How To Sew Quilt Binding By Hand”