Articles
How To Sew Quilt Together
Modified: February 24, 2024
Learn how to sew quilt articles together with our step-by-step guide. Discover the techniques and tips you need to create beautiful and durable quilts.
(Many of the links in this article redirect to a specific reviewed product. Your purchase of these products through affiliate links helps to generate commission for Storables.com, at no extra cost. Learn more)
Introduction
Welcome to the world of quilting! Creating a quilt is not only a satisfying and creative endeavor, but it is also a way to preserve memories and create something enduring and beautiful. One of the essential steps in quilt-making is sewing the quilt layers together. This process, known as quilting, ensures that the three layers of fabric – the quilt top, batting, and backing – are securely held together to create a cozy and durable finished product.
In this article, we will guide you through the step-by-step process of sewing a quilt together. Whether you are a beginner or an experienced quilter, these instructions will help you achieve professional-looking results.
Before we dive into the details, let’s quickly go over the materials you’ll need for this project.
Key Takeaways:
- Sewing a quilt together involves careful preparation, pinning, stitching, and finishing touches. Whether using a machine or hand-sewing, attention to detail and patience are key to creating a durable and beautiful quilt.
- Quilting is a creative and rewarding process that allows for personal expression and skill development. Embrace the journey, explore different techniques, and seek support from the quilting community to enhance your skills and create stunning quilts.
Read more: How To Sew Together Quilt Squares
Materials Needed
Before you begin sewing your quilt together, gather the following materials:
- Quilt top
- Backing fabric
- Batting
- Thread
- Sewing machine or needle and thread
- Pins or basting spray
- Scissors or rotary cutter
- Iron and ironing board
- Quilting ruler
- Optional: Quilting gloves or grippers
It’s important to choose high-quality fabrics for your quilt top and backing to ensure durability. The batting, which is the middle layer, provides insulation and warmth. Select a batting based on your desired level of thickness and warmth.
When it comes to thread, opt for a color that coordinates well with your fabric choices. Cotton or polyester thread is suitable for quilting. Consider using a quilting needle if you’re hand-sewing your quilt or a quilting foot for your sewing machine to make the process smoother.
Ensure that you have a clean and well-lit workspace to work comfortably. With all your materials gathered, you’re ready to start sewing your quilt together. Let’s begin!
Step 1: Prepare Your Quilt Layers
Before you start sewing your quilt layers together, it’s essential to prepare them properly. Here’s what you need to do:
- Press the fabric: Use an iron to remove any wrinkles or creases from your quilt top and backing fabric. Pressing the fabric will ensure a smooth and even surface, making it easier to sew.
- Cut the batting: Measure your batting and trim it to the same size as your quilt top and backing fabric. Make sure all three layers are the same size for a neat and professional finish. A rotary cutter and quilting ruler can be handy tools for precise cutting.
- Lay out your layers: Find a large flat surface, such as a table or the floor, and lay out your quilt backing fabric. Smooth it out, then place the batting on top. Finally, place your quilt top right side up on the batting. Make sure all layers are aligned properly.
- Square up your layers: Check that all sides of the quilt layers are straight and even. Use a quilting ruler to ensure that the top and bottom edges, as well as the sides, are parallel and square. Adjust as needed.
By taking the time to properly prepare your quilt layers, you’ll set yourself up for success and achieve a more polished final product. With your layers ready, it’s time to move on to the next step: pinning them together.
Step 2: Pin the Layers Together
Now that your quilt layers are prepared, it’s time to securely hold them together before sewing. Pinning the layers ensures that they stay in place during the quilting process. Here’s how to do it:
- Start from the center: Begin by placing a pin through all three layers at the center of your quilt. This will act as an anchor point and help keep everything aligned.
- Work outwards: Move outwards from the center in a grid-like pattern, placing pins at regular intervals. Aim for about every 4-6 inches along the quilt. Use quilt pins with large heads or safety pins to make them easier to handle.
- Avoid puckering: As you pin, smooth out any wrinkles or puckers that may appear on the quilt surface. Make sure the layers are flat and even.
- Secure the edges: Pay special attention to pinning the edges of the quilt, ensuring that all layers are held together securely. This will prevent any shifting or bunching during the sewing process.
Alternatively, you can use basting spray instead of pins to hold the layers together. Simply spray a thin, even layer of basting spray on the batting and smooth the quilt top over it. This method is particularly useful for small quilts or projects with intricate designs.
Remember, the goal is to keep the layers stable and smooth while you sew. Take your time with this step, as a well-pinned quilt will make the sewing process much easier and produce better results.
Now that your quilt layers are securely pinned or sprayed together, it’s time to move on to the next step: choosing your stitching method.
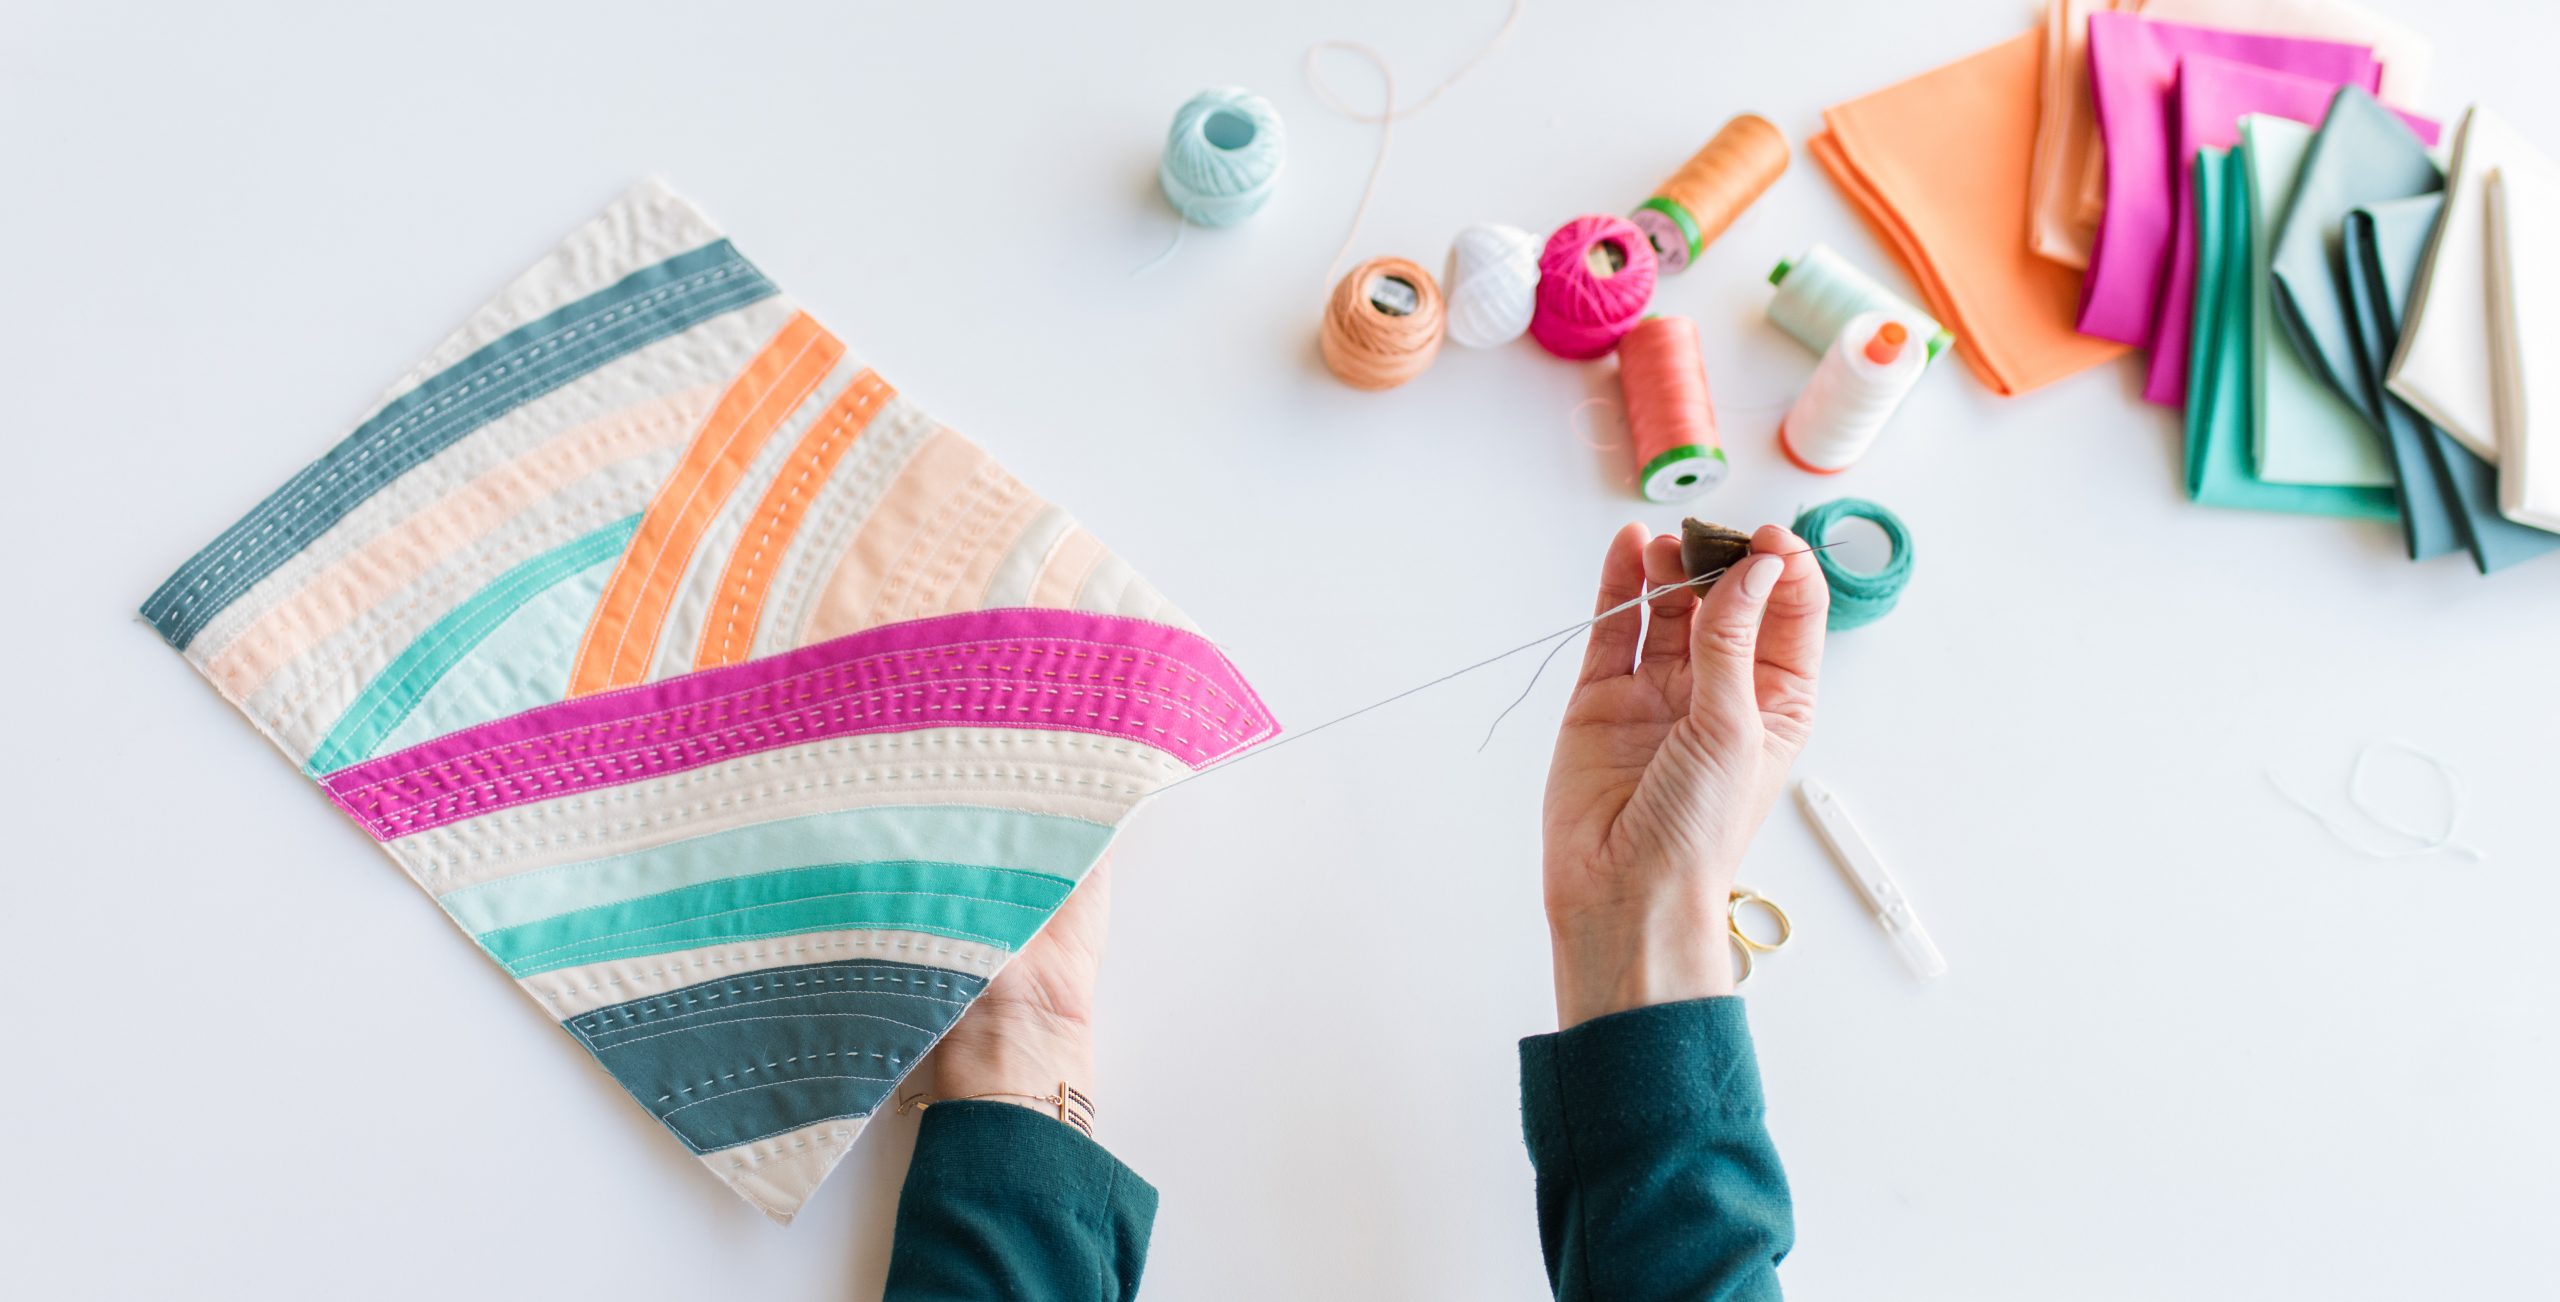
Step 3: Choose Your Stitching Method
When it comes to sewing your quilt layers together, there are a few different stitching methods you can choose from. The method you select will depend on your personal preference, the design of your quilt, and the equipment you have available. Here are three common stitching methods to consider:
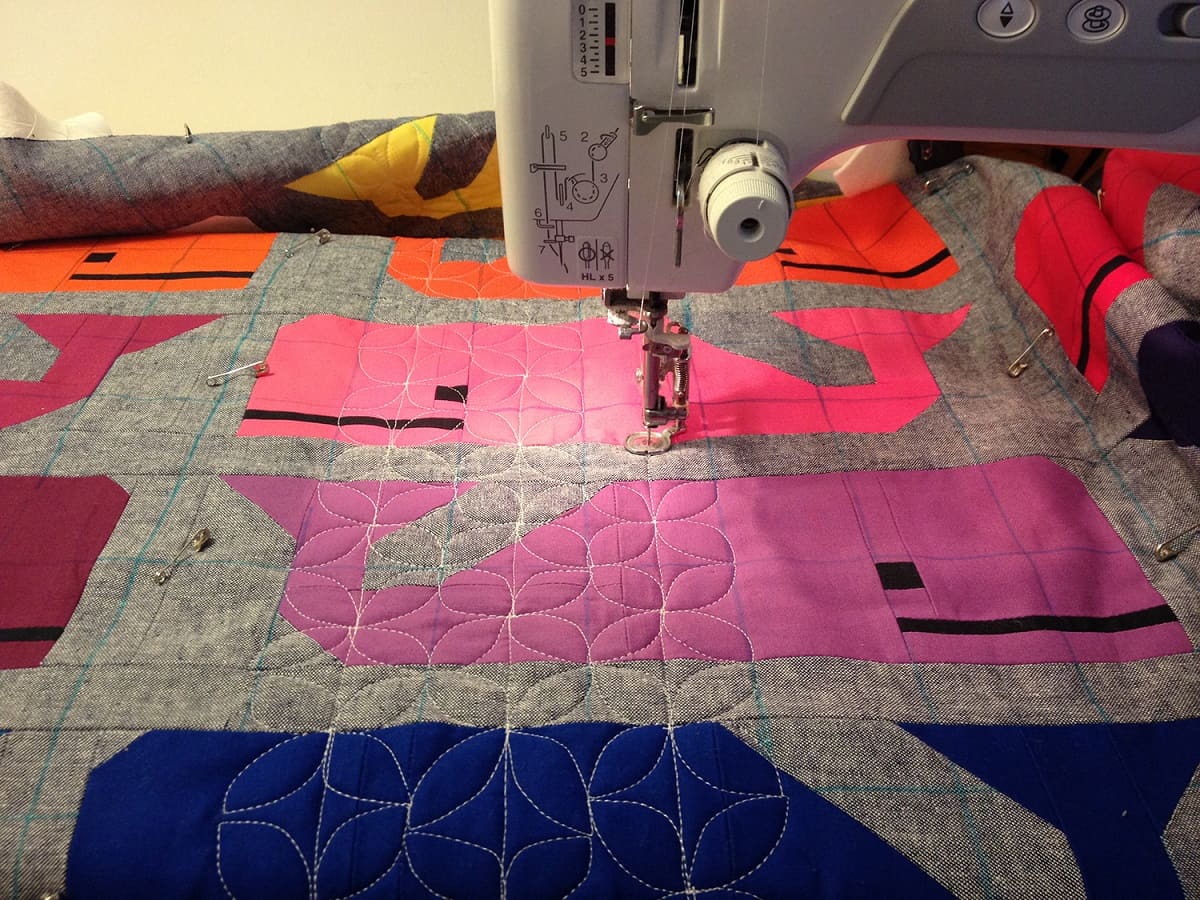
- Machine Quilting: If you have a sewing machine, machine quilting is a popular and efficient option. You can choose from various stitch patterns, such as straight lines, meandering lines, or decorative designs. Use a walking foot or a quilting foot to help feed the layers evenly through the machine. Remember to adjust the tension and stitch length according to your fabric and batting thickness.
- Hand Quilting: Hand quilting is a traditional and time-honored method that allows for intricate and detailed stitching. Thread a quilting needle with a double strand of thread and make small, even stitches through all three layers. Use a quilting hoop or frame to keep the layers taut and make the process more manageable. Hand quilting provides a unique and handmade look to your quilt.
- Tie Quilting: Tie quilting is a simple and beginner-friendly method that involves tying knots instead of stitching through the layers. Thread a large-eye needle with embroidery floss or yarn, then make a knot on the quilt surface at regular intervals. This method works well for quilts with a casual or cozy aesthetic.
Consider the design and purpose of your quilt when choosing your stitching method. Each method offers its own unique look and feel to your finished quilt. Whichever option you choose, make sure to practice on a scrap piece of fabric and adjust your machine settings or hand quilting technique before working on your actual quilt.
Now that you’ve selected your stitching method, it’s time to move on to the next step: sewing the quilt layers together.
When sewing a quilt together, use a walking foot to prevent shifting and puckering of the layers. This specialized foot helps to feed the layers evenly and smoothly through the machine, resulting in a professional-looking finish.
Read more: How To Sew Quilt Batting Together
Step 4: Start Sewing the Quilt Layers
With your chosen stitching method in mind, it’s time to start sewing the quilt layers together. Follow these steps to ensure a smooth and successful sewing process:
- Prepare your sewing machine: If you’re using a sewing machine, make sure it’s in good working condition. Check that the needle is sharp and appropriate for your fabric and that the thread is threaded correctly.
- Start sewing from the center: Begin sewing from the center of your quilt and work your way outwards. This helps distribute any potential fabric tension or bunching evenly.
- Follow your chosen stitch pattern: If you’re machine quilting, follow your chosen stitch pattern and guide the fabric layers under the machine foot. Keep your stitches straight and even. Take your time and go at a pace that feels comfortable for you.
- Backstitch at the beginning and end: When you start sewing, backstitch a few stitches to secure the threads. Similarly, backstitch at the end to ensure that the stitching doesn’t come undone. Trim any excess thread with scissors.
- If hand quilting, maintain even stitches: If you’re hand quilting, aim for uniform and even stitches. Take small stitches through all three layers of fabric, making sure the needle goes in and out smoothly. Use a thimble if necessary to protect your finger.
Take breaks as needed and check the back of your quilt occasionally to ensure that the stitches are consistent and secure. Remember, practice makes perfect, so don’t worry if your stitches are not flawless right away. With time and experience, your stitching skills will improve.
Continue sewing until you have quilted the entire surface of your quilt. This process may take some time, but the end result will be well worth the effort.
Now that you’ve sewn your quilt layers together, it’s time to move on to the next step: checking for any loose threads or uneven stitches.
Step 5: Sew the Entire Quilt Together
Now that you’ve started sewing your quilt layers together, it’s time to continue sewing until the entire quilt is finished. Follow these steps to ensure a smooth and cohesive quilt:
- Keep a consistent seam allowance: Whether you’re using a sewing machine or hand sewing, try to maintain a consistent seam allowance throughout the quilt. This will help ensure that the layers are sewn together evenly and prevent any puckering or bunching.
- Continue your chosen stitch pattern: If you’re machine quilting, follow your chosen stitch pattern consistently across the entire quilt. If you’re hand quilting, maintain even stitches throughout the quilt, adjusting your needle position as needed.
- Take breaks and adjust tension as necessary: Quilting can be time-consuming, so remember to take breaks when needed. Check the tension of your machine or the tightness of your hand stitches regularly and make any necessary adjustments.
- Smooth out any wrinkles or puckers: As you sew, periodically smooth out any wrinkles or puckers that may appear on the quilt surface. Gently tug and adjust the fabric layers to keep them flat and even.
- Backstitch and trim excess thread: Each time you begin or end a line of stitching, backstitch a few stitches to secure the threads. Trim any excess thread with scissors to keep your quilt neat and tidy.
Depending on the size and complexity of your quilt, this step may take some time and patience. Take breaks as needed to avoid fatigue and maintain focus. Remember that quilting is a labor of love, and the end result will be a beautiful, cozy quilt.
Once you’ve completed sewing the entire quilt together, it’s time to move on to the next step: checking for any loose threads or uneven stitches.
Step 6: Check for Any Loose Threads or Uneven Stitches
After sewing the entire quilt together, it’s important to check for any loose threads or uneven stitches. Taking the time to inspect and fix any issues will ensure a polished and professional-looking quilt. Follow these steps to complete this important step:
- Inspect the quilt carefully: Carefully examine the quilt surface, checking for any loose threads, skipped stitches, or areas where the layers may not be securely quilted together. These can sometimes go unnoticed during the sewing process, so a close inspection is essential.
- Fix loose threads: If you find any loose threads, use a needle or a seam ripper to gently pull them through to the back of the quilt. Tie a secure knot and trim the excess thread. This will prevent any threads from unraveling or poking out of the quilt.
- Fix skipped stitches: If you come across any skipped stitches or areas where the quilting is not complete, do some additional quilting in those spots. Use the same stitching method and thread that you used throughout the quilt to ensure consistency.
- Smooth out any puckers or wrinkles: If you notice any areas where the fabric layers are not smooth or have formed puckers, gently tug and adjust the fabric to smooth them out. Use your fingers or a quilting glove to facilitate this process.
- Trim any excess threads: Once you have inspected and addressed any loose threads or uneven stitches, trim any excess threads from the quilt surface. This will give your quilt a clean and finished appearance.
By taking the time to carefully check and fix any issues, you ensure that your quilt is not only visually appealing but also durable and long-lasting. Making these adjustments now will save you from potential problems later on.
With the loose threads addressed and the quilt surface smooth, you’re almost finished! The final step is to trim any excess fabric and add a few finishing touches.
Step 7: Trim Excess Fabric and Finishing Touches
Congratulations! You’re in the final stretch of completing your quilt. In this step, you’ll trim any excess fabric and add a few finishing touches to make your quilt look clean and professional. Follow these steps to complete this last phase:
- Trim the edges: Use a quilting ruler and rotary cutter to carefully trim the edges of your quilt, ensuring they are straight and even. Pay attention to any areas where the layers may have shifted during the quilting process. Trim off any excess batting or backing fabric.
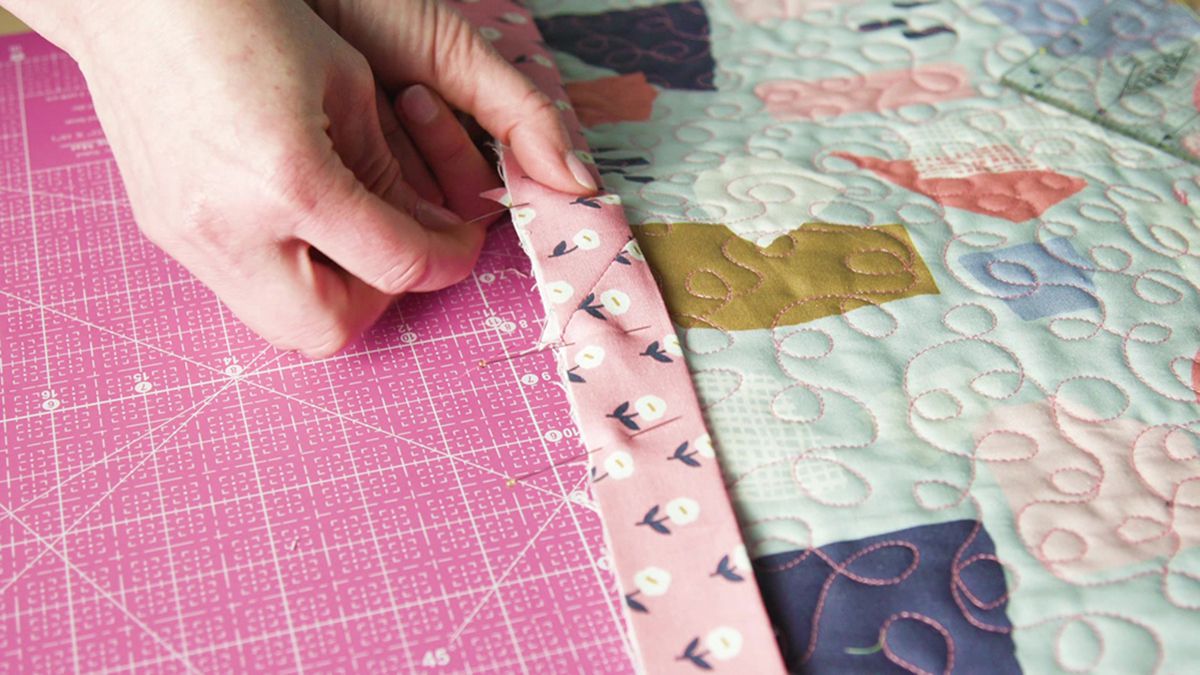
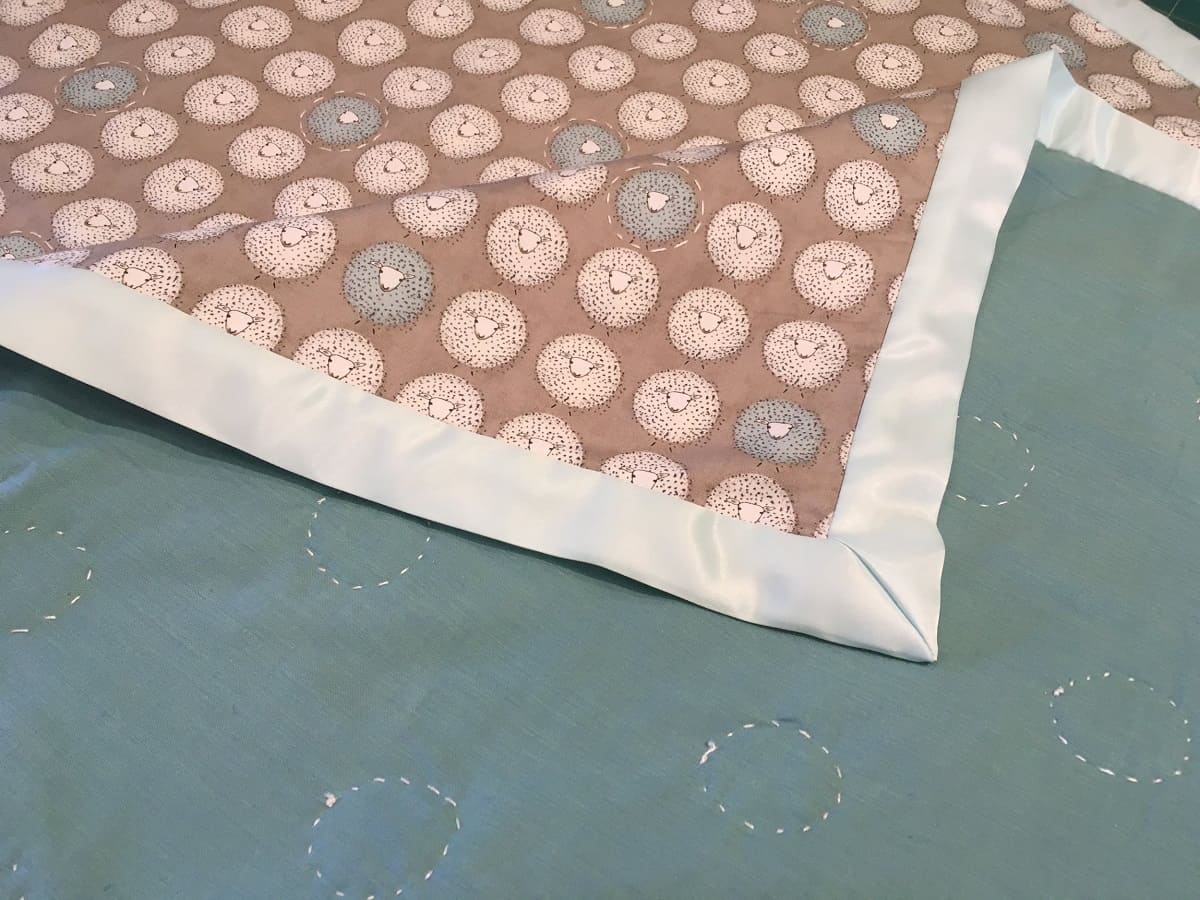
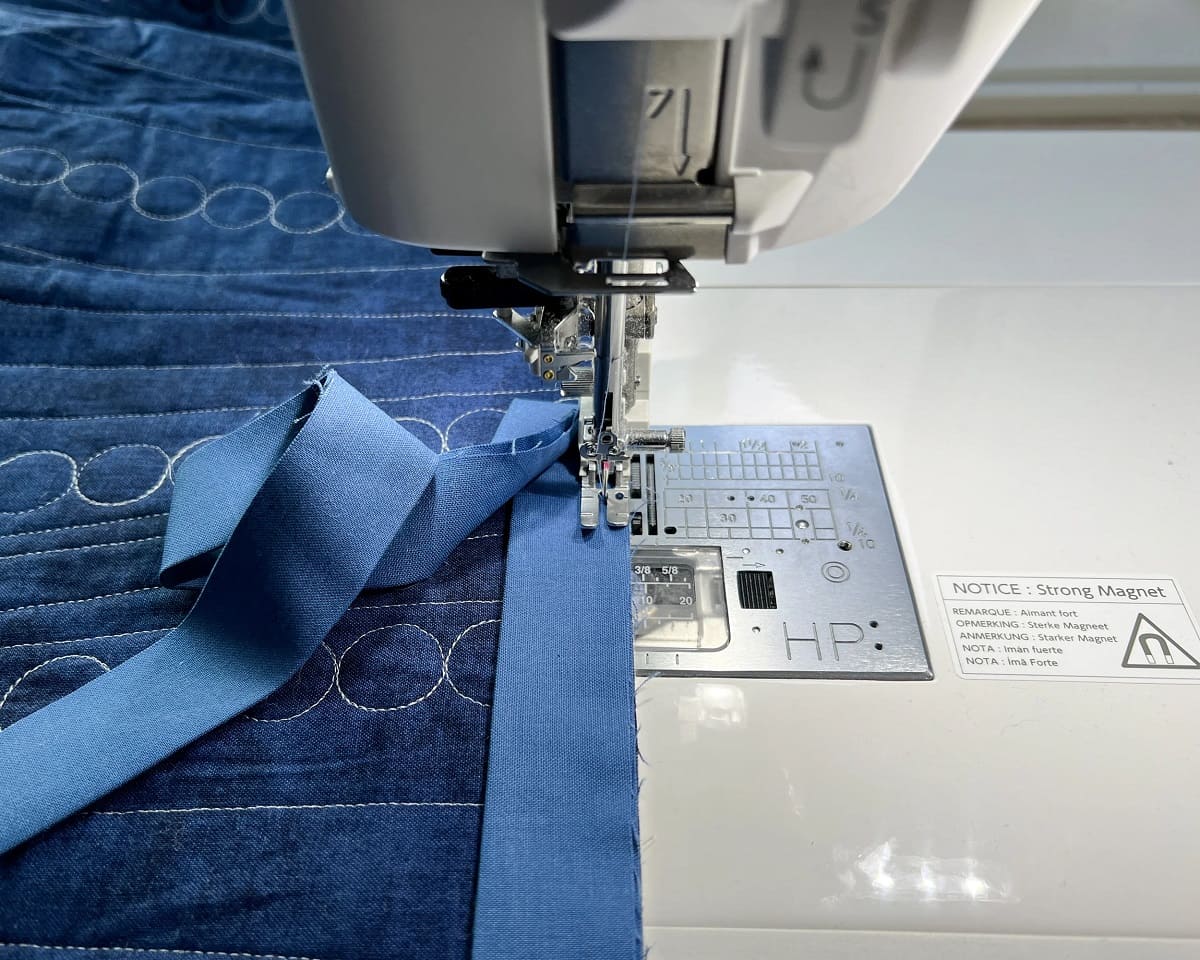
- Create binding: Binding is a fabric strip that covers the raw edges of your quilt, giving it a finished look. Measure and cut strips of binding fabric that are wide enough to cover the edges of your quilt. You can use a coordinating or contrasting fabric for the binding.
- Attach the binding: Fold one end of the binding strip at a 45-degree angle to create a neat, mitered corner. Starting in the middle of one side of the quilt, align the raw edge of the binding with the raw edge of the quilt. Pin or clip it in place. Sew the binding to the quilt, mitering the corners as you go. Once you reach the starting point, overlap the binding strip, trim any excess, and finish sewing it down.
- Hand or machine finish the binding: If you prefer a more traditional finish, you can hand-stitch the binding to the back of the quilt using a blind or whip stitch. Alternatively, you can machine stitch the binding, securing it with a straight stitch close to the edge. Choose the method that suits your preference and skill level.
- Add any desired embellishments: If you want to add some extra flair to your quilt, consider incorporating embellishments such as decorative buttons, embroidery, or applique. Be mindful not to overload the quilt with too many embellishments, as it may compromise the quilt’s durability and functionality.
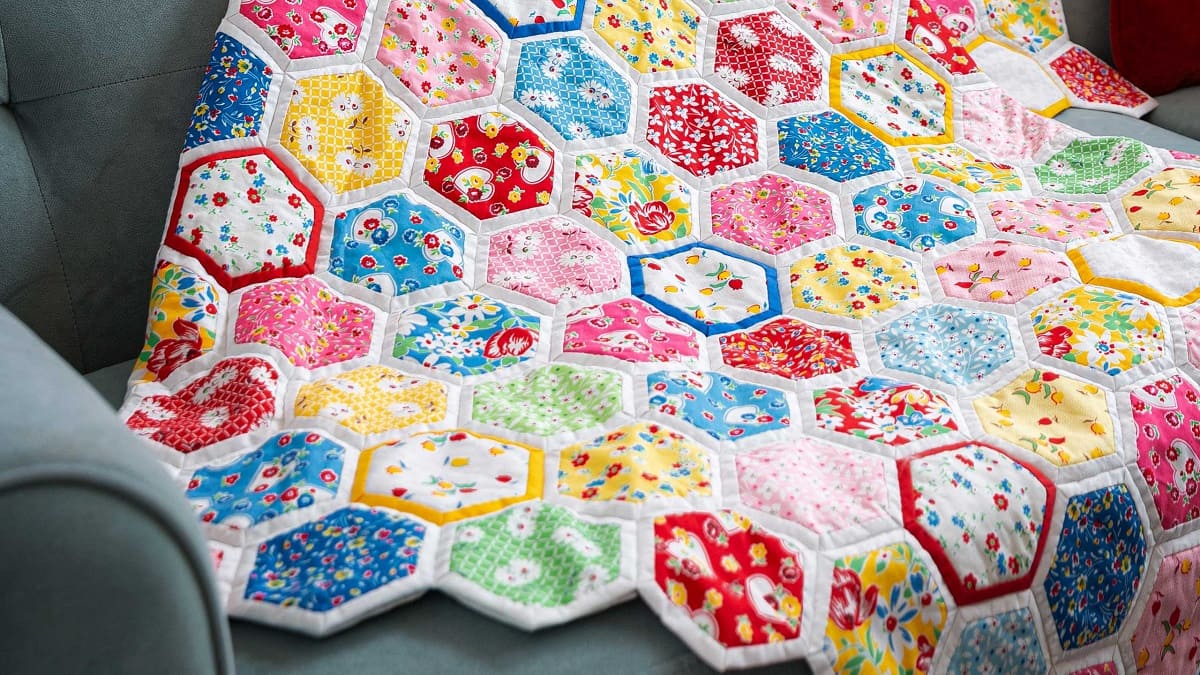
Once you’ve completed these final steps, step back and admire your finished quilt! You’ve successfully sewn your quilt layers together, checked for any imperfections, and added the final touches. Now, you can enjoy the warmth, comfort, and beauty of your handmade quilt.
Remember, quilting is a creative process, and each quilt you make is a unique expression of your skill and artistic vision. Don’t be afraid to experiment and try new techniques as you continue your quilting journey. Happy quilting!
Read more: How To Sew A Quilt Binding
Conclusion
Congratulations on completing your quilting journey! Sewing the quilt layers together is a crucial step in the quilting process, ensuring that your quilt is durable, cozy, and visually appealing. By following the steps outlined in this article, you have learned how to prepare your quilt layers, pin them together securely, choose the right stitching method, and sew the entire quilt together with precision.
Throughout this process, remember to take your time, be patient, and enjoy the creative journey. Quilting is not just about the finished product; it’s about the joy of making something by hand and putting your heart and soul into each stitch. Whether you’re a beginner or an experienced quilter, each quilt is a testament to your creativity and skill.
As you continue on your quilting adventures, keep in mind that there are endless possibilities for design, patterns, and techniques. Explore different stitching methods, experiment with fabric selections, and let your imagination run wild. The more you practice and explore, the more your quilting skills will develop, enabling you to create even more stunning quilts in the future.
Now that you have completed sewing your quilt layers together and added the finishing touches, take a step back and admire your creation. Your quilt is ready to bring warmth and comfort to your home or to be gifted to someone special.
Remember, the quilting community is a supportive and inspiring one. Don’t hesitate to seek advice and guidance from fellow quilters, join quilting groups or forums, and attend workshops or classes to further enhance your skills.
Thank you for joining us on this quilting journey. We hope that this article has provided you with valuable insights and guidance on sewing quilt layers together. Happy quilting!
Frequently Asked Questions about How To Sew Quilt Together
Was this page helpful?
At Storables.com, we guarantee accurate and reliable information. Our content, validated by Expert Board Contributors, is crafted following stringent Editorial Policies. We're committed to providing you with well-researched, expert-backed insights for all your informational needs.


0 thoughts on “How To Sew Quilt Together”