Articles
How To Install A Drawer In A Cabinet
Modified: October 28, 2024
Learn how to install a drawer in a storage cabinet with our easy step-by-step guide. Enhance your cabinet's functionality and maximize your storage space.
(Many of the links in this article redirect to a specific reviewed product. Your purchase of these products through affiliate links helps to generate commission for Storables.com, at no extra cost. Learn more)
Introduction
Welcome to our comprehensive guide on how to install a drawer in a cabinet. Adding drawers to your cabinets not only increases their functionality but also enhances their organization and storage capabilities. Whether you’re upgrading your kitchen cabinets or revamping your office storage, knowing how to install a drawer properly is essential. In this article, we’ll provide you with step-by-step instructions, tips, and tricks to ensure a smooth and successful installation process.
Before we dive into the installation process, it’s important to gather all the necessary tools and materials. Proper preparation will make the installation process easier and more efficient. Let’s take a look at what you’ll need.
Key Takeaways:
- Proper preparation, accurate measurements, and secure installation of drawer slides and front are crucial for a successful drawer installation in a cabinet. Enjoy enhanced storage and organization with a smoothly functioning drawer.
- Thoroughly test the drawer for alignment, smooth operation, weight capacity, and closure to ensure optimal functionality. Follow manufacturer’s instructions for specific adjustments and enjoy the benefits of a well-installed drawer.
Read more: How To Add Drawers To A Cabinet
Tools and Materials Needed
Before getting started with the installation, make sure you have the following tools and materials on hand:
- Power drill: A power drill will be necessary for creating holes and attaching screws.
- Measuring tape: The measuring tape will help you accurately measure the dimensions for the drawer and slides.
- Pencil: Use a pencil to mark the measurements and guide your installation process.
- Screwdriver: A screwdriver is essential for attaching screws and securing the drawer slides.
- Level: Use a level to ensure the drawer slides are properly aligned and installed straight.
- Drawer slides: Select high-quality drawer slides that are suitable for the weight and dimensions of your drawer.
- Drawer front: Choose a drawer front that matches the style and finish of your cabinet.
- Screws: You’ll need screws to attach the drawer slides to the cabinet and the drawer front to the drawer box.
- Drill bits: Have a set of drill bits on hand to create pilot holes for the screws.
- Safety goggles: Protect your eyes with safety goggles while drilling and handling tools.
Now that you have gathered the necessary tools and materials, let’s move on to preparing the cabinet for the installation.
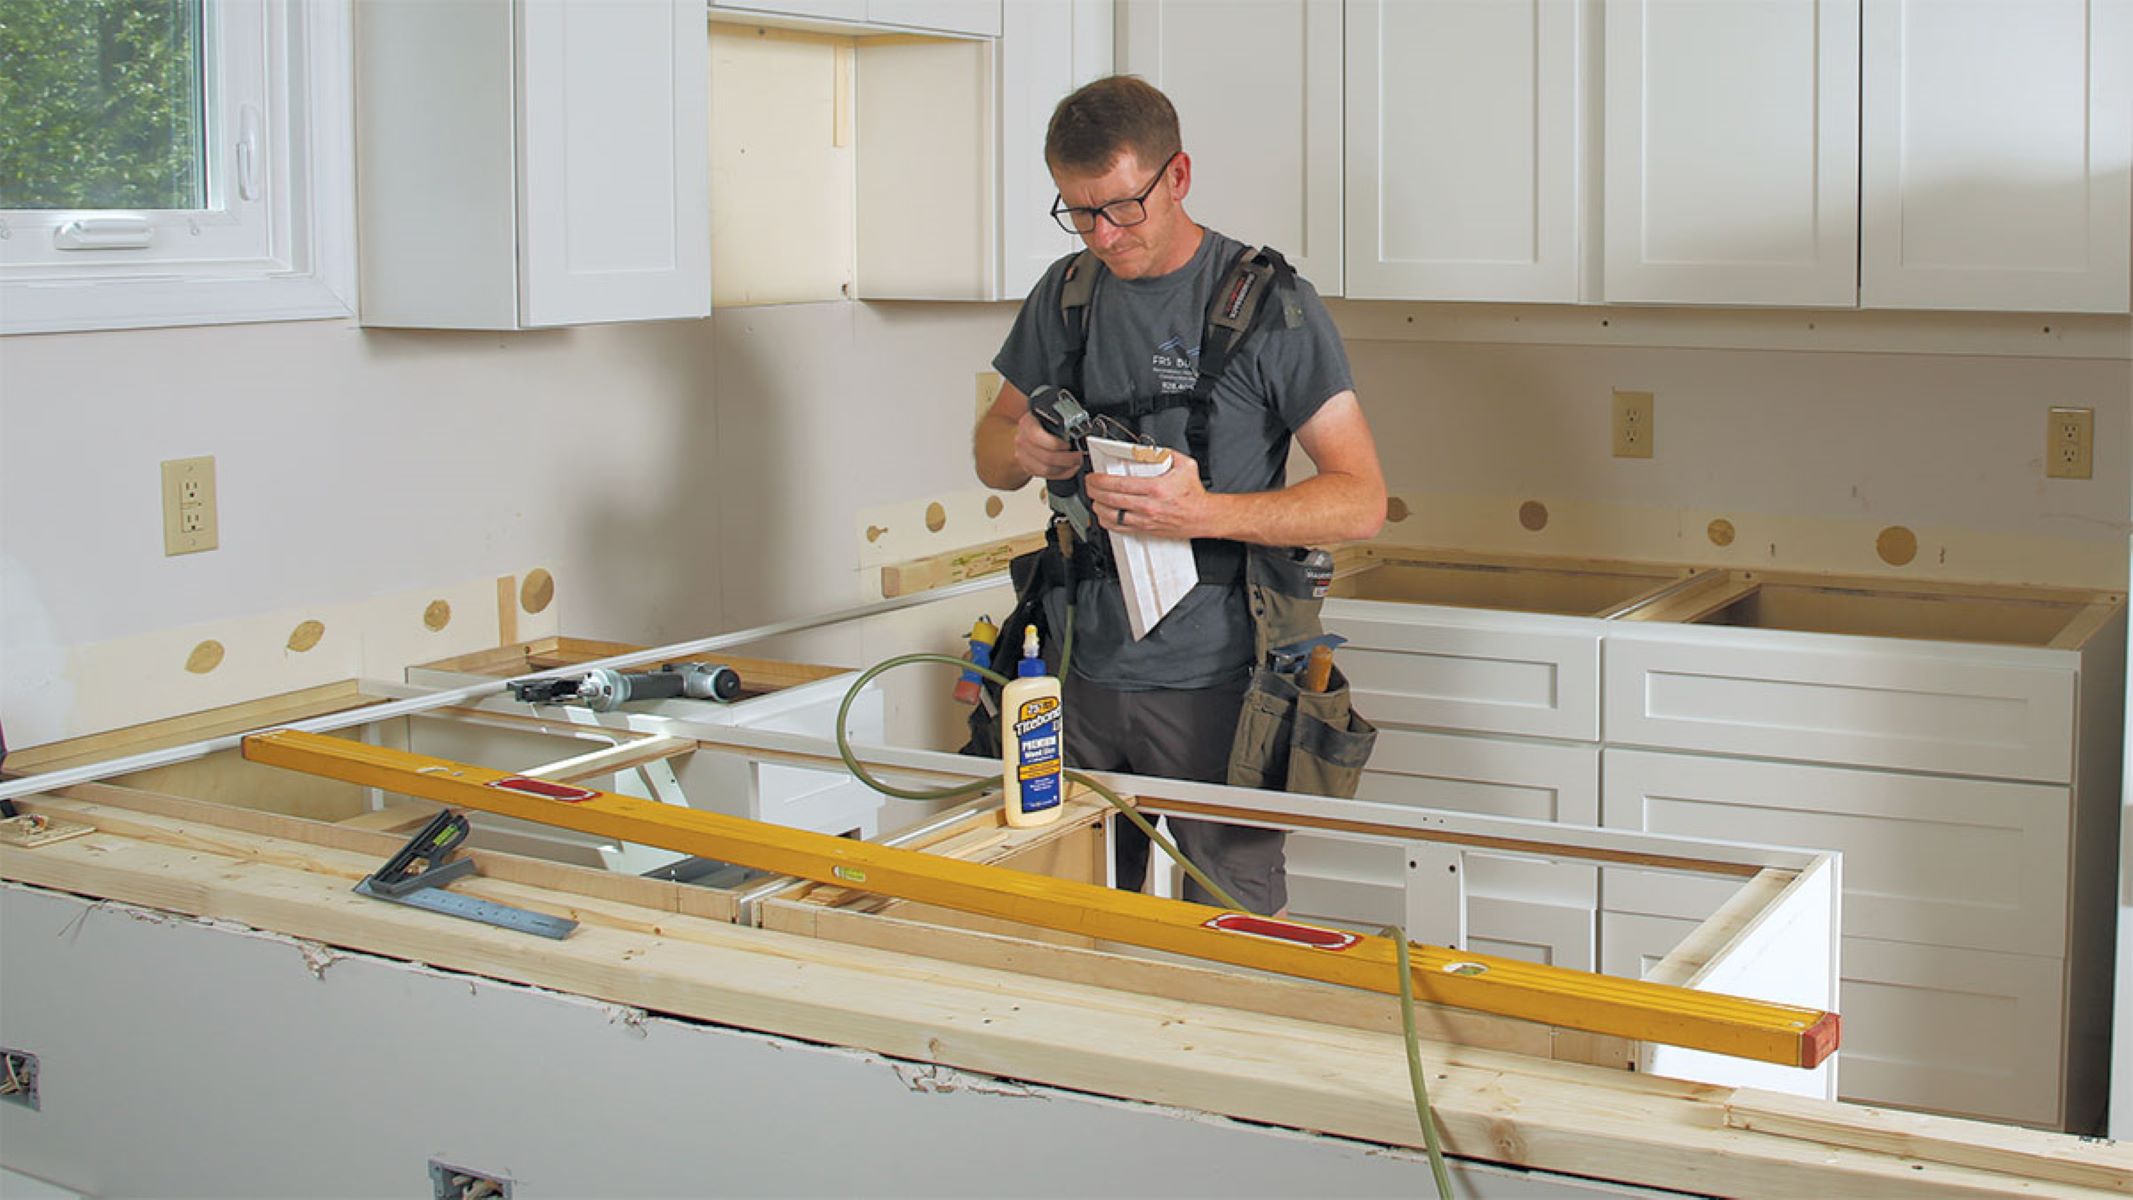
Preparing the Cabinet
Before installing the drawer, it’s essential to prepare the cabinet to ensure a smooth and secure fit. Follow these steps to prepare the cabinet:
- Empty the cabinet: Remove all items from the cabinet to provide clear access for the installation process.
- Clean the interior: Wipe down the interior of the cabinet to remove any dust, debris, or residue that may affect the drawer’s movement.
- Remove any obstacles: If there are any obstacles, such as shelves or brackets, that may interfere with the drawer installation, remove them temporarily.
- Inspect the cabinet walls: Check the cabinet walls to ensure they are solid and in good condition. If there are any loose or damaged areas, repair them before proceeding.
- Check for levelness: Use a level to make sure the cabinet is level. If it’s not, use shims to adjust the levelness and ensure a smooth sliding motion for the drawer.
By properly preparing the cabinet, you’ll create a solid foundation for the drawer installation. With the cabinet ready, let’s move on to the next step: measuring and marking for the drawer placement.
Measuring and Marking
Accurate measurements are crucial for properly installing the drawer in your cabinet. Follow these steps to measure and mark the correct placement for the drawer:
- Measure the cabinet opening: Measure the height, width, and depth of the cabinet opening. These measurements will help you choose the appropriate size of the drawer slides.
- Determine the drawer size: Based on your measurements, determine the size of the drawer you want to install. Consider the clearance space needed all around the drawer for smooth opening and closing.
- Mark the horizontal placement: Measure and mark the horizontal placement of the drawer slides on the inside walls of the cabinet. Ensure that the marks are level and aligned with each other.
- Mark the vertical placement: Measure and mark the vertical placement of the drawer slides on the inside walls of the cabinet. The marks should be evenly spaced and aligned with the horizontal marks.
- Mark the drawer front placement: Measure and mark the center point on the drawer front. This mark will guide you in aligning the drawer front to the drawer box later in the installation process.
Once you have measured and marked the cabinet and drawer, you’re ready to move on to the next step: installing the drawer slides.
When installing a drawer in a cabinet, make sure to measure the space accurately and use a level to ensure the drawer slides are installed straight. Double check the alignment before securing the slides in place.
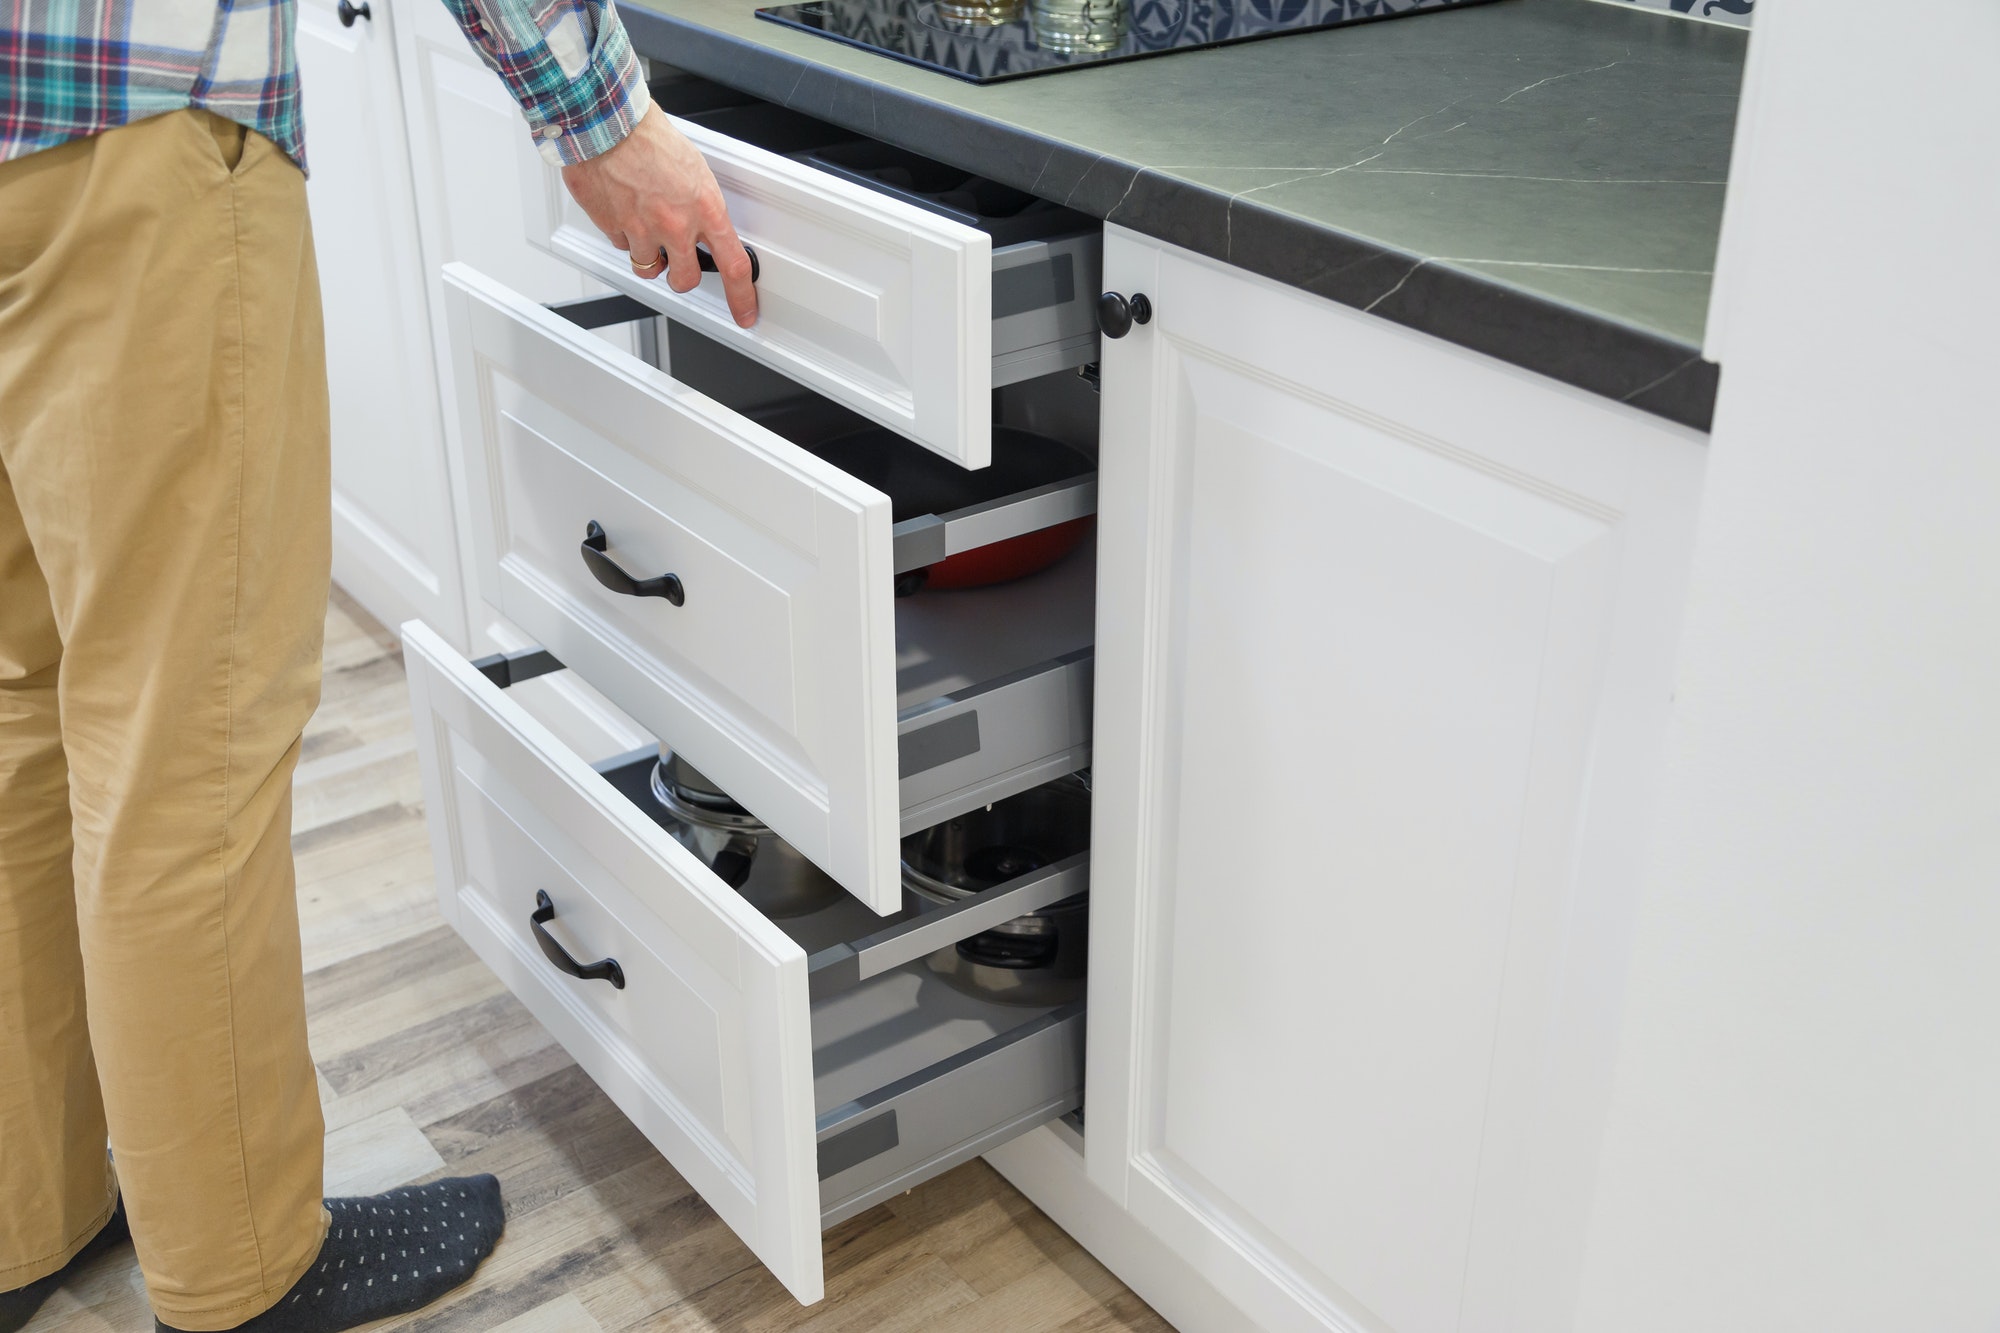
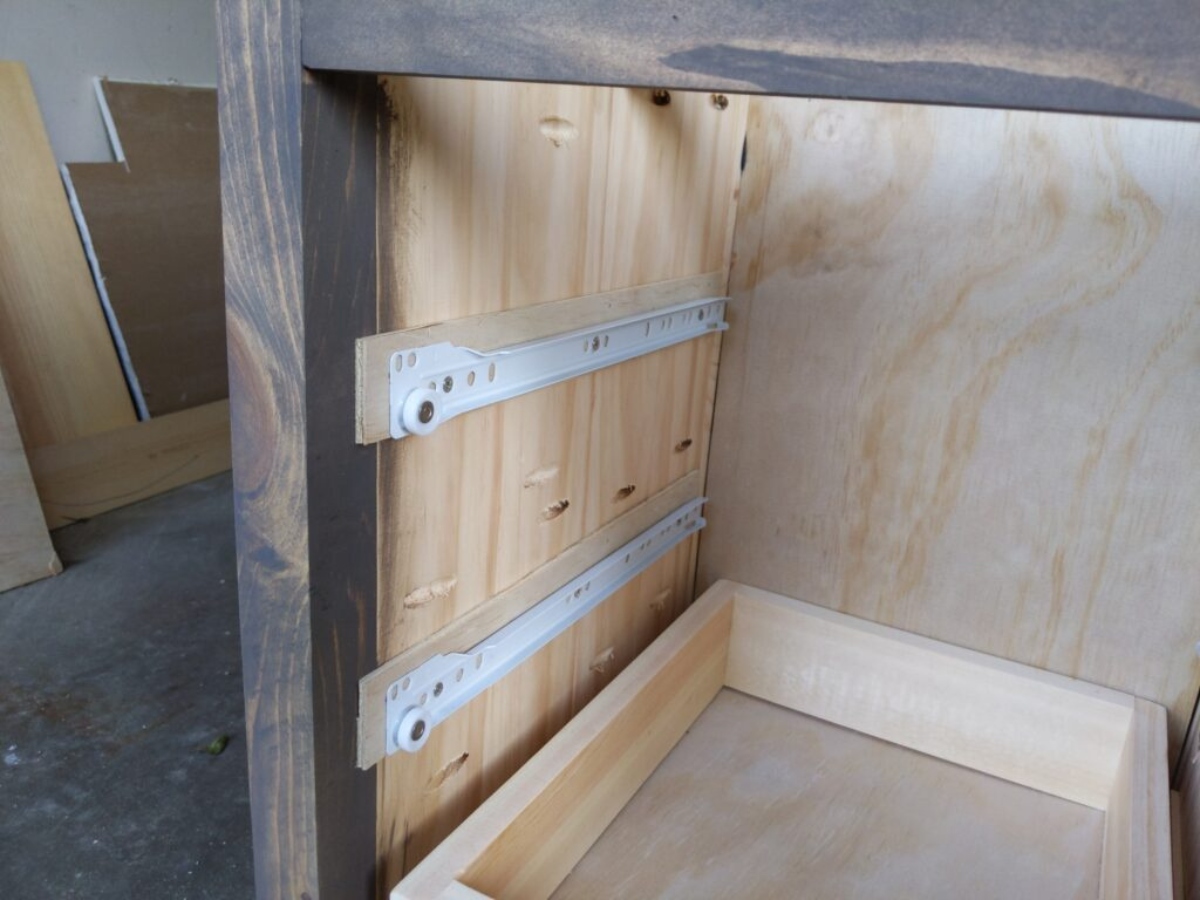
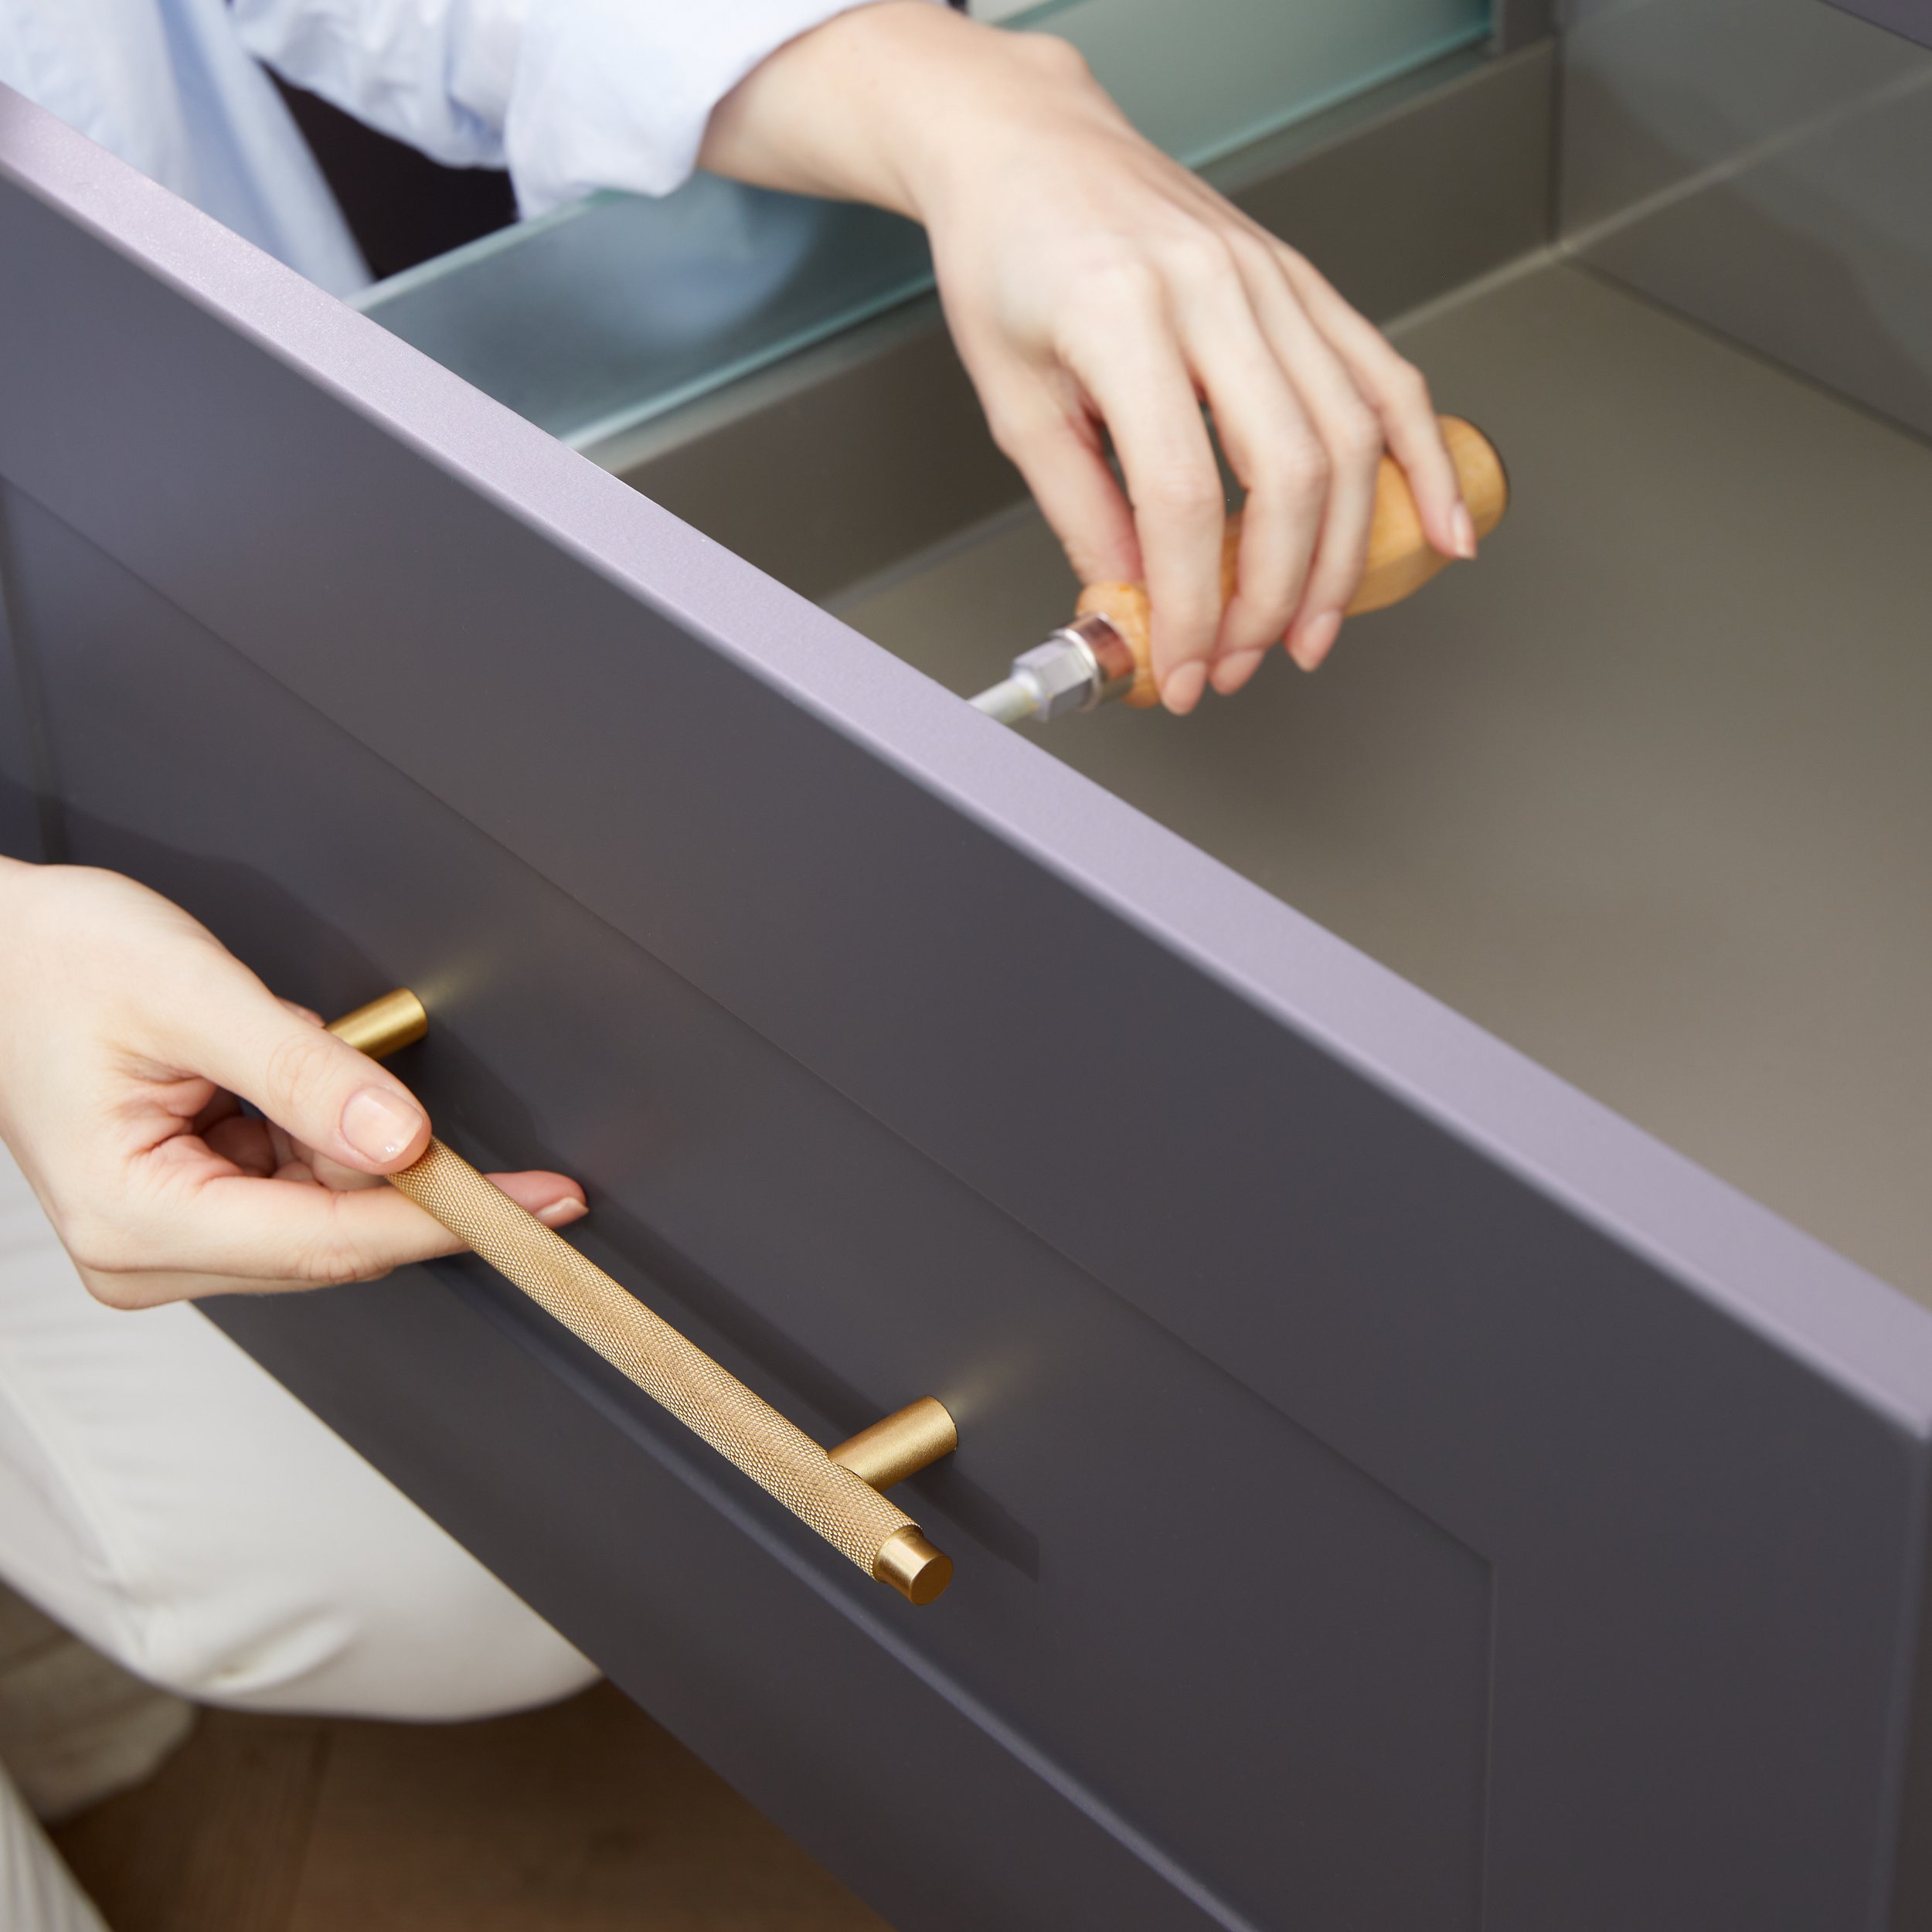
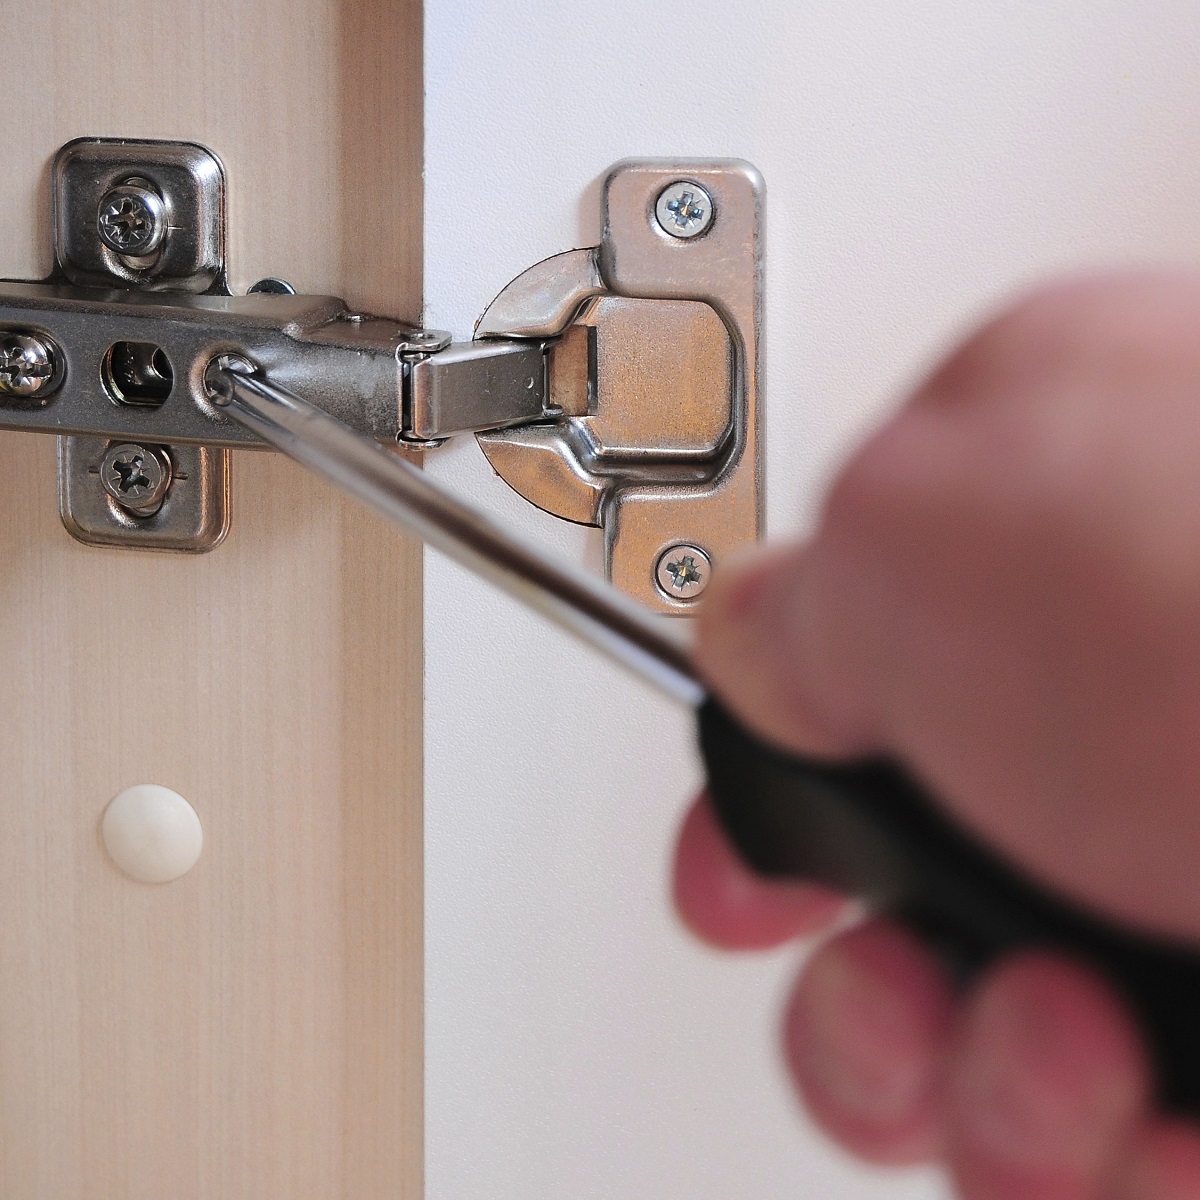
Installing Drawer Slides
Properly installing the drawer slides is crucial for ensuring smooth and stable drawer operation. Follow these steps to install the drawer slides:
- Attach the drawer slide brackets: Position the drawer slide brackets on the marked horizontal lines inside the cabinet. Ensure that the brackets are level and aligned with the vertical marks. Use a power drill and screws to attach the brackets securely to the cabinet walls.
- Install the drawer slides: Insert the drawer slides into the brackets, making sure they are fully engaged. Slide the drawer slides in and out a few times to ensure they operate smoothly.
- Position the drawer slide on the drawer: Hold the drawer slide against the side of the drawer, aligning it with the vertical marks. Mark the screw hole locations on the drawer slide.
- Attach the drawer slide to the drawer: Use a power drill and screws to attach the drawer slide to the side of the drawer, following the marked screw hole locations.
Once you have installed the drawer slides, it’s time to attach the drawer front to the drawer box. Let’s move on to the next step.
Read more: How To Fix A Cabinet Drawer
Attaching Drawer Front
Attaching the drawer front is the final step in installing a drawer in a cabinet. Follow these steps to securely attach the drawer front:
- Align the drawer front: Place the drawer front in front of the drawer box, aligning it with the center mark you made earlier. Ensure that the drawer front is positioned evenly on all sides.
- Secure the drawer front: Use clamps to hold the drawer front in place. Ensure that the drawer front is flush with the edges of the drawer. Double-check the alignment before proceeding.
- Attach the drawer front to the drawer box: With the drawer front held securely in place, use a power drill and screws to attach the drawer front to the drawer box. Start with the corners and work your way to the center, ensuring a tight and secure fit.
- Test the drawer: Carefully remove the clamps and test the drawer by sliding it in and out. Ensure that it operates smoothly and without any obstructions. Make any necessary adjustments if needed.
With the drawer front securely attached and the drawer functioning properly, your installation is complete. Take a moment to admire your newly installed drawer and the added functionality it brings to your cabinet.
Remember to follow the manufacturer’s instructions for your specific drawer slide and drawer front to ensure proper installation and compatibility. Each manufacturer may have specific guidelines and requirements.
Installing a drawer in a cabinet is a gratifying project that enhances the organization and functionality of your storage space. With the proper tools, materials, and techniques, you can achieve professional results. Congratulations on a successful installation!
Adjusting and Testing the Drawer
After installing the drawer, it’s important to adjust and test its functionality to ensure smooth and efficient operation. Follow these steps to make any necessary adjustments and thoroughly test the drawer:
- Check for alignment: Carefully examine the drawer slides and drawer front to ensure they are properly aligned. Adjust as needed to ensure the drawer glides smoothly and remains aligned with the cabinet opening.
- Test the drawer tracks: Slide the drawer in and out multiple times to test the movement and stability. Pay attention to any sticking points, wobbling, or uneven sliding. If any issues arise, make the necessary adjustments to the drawer slides or drawer front.
- Adjust the drawer height: If the drawer is too low or too high, causing it to scrape against the cabinet or leave gaps, adjust the height using the adjustment screws or levers on the drawer slides. Follow the manufacturer’s instructions for your specific drawer slide model.
- Test the weight capacity: Load the drawer with items that are typical of what you’ll store in it. Test the drawer’s weight capacity by placing various items inside and making sure it can handle the load without sagging or becoming difficult to open and close.
- Check for smooth operation: Open and close the drawer several times while paying attention to how smoothly it moves. Listen for any unusual sounds or resistance. If any issues are present, troubleshoot and make any necessary adjustments.
- Ensure drawer closure: Confirm that the drawer fully closes and aligns with the cabinet opening. If it doesn’t close properly, adjust the drawer slides or make minor changes to the drawer front positioning until it fits snugly.
By adjusting and thoroughly testing the drawer, you can ensure that it functions properly and meets your storage needs. Taking the time to make these adjustments will result in a more enjoyable and efficient experience when using your cabinet drawers.
Once you are satisfied with the adjustments and the smooth operation of the drawer, you can consider the installation process complete. Enjoy the enhanced storage and organization that your newly installed drawer brings to your cabinet!
Remember to refer to the manufacturer’s instructions and guidelines for specific adjustments and testing for your particular drawer slides and cabinet setup.
Conclusion
Installing a drawer in a cabinet is a rewarding project that enhances the functionality and organization of your storage space. By following the step-by-step instructions provided in this guide, you can successfully install a drawer and enjoy the convenience it brings.
From preparing the cabinet to measuring and marking, installing drawer slides, attaching the drawer front, and adjusting and testing the drawer, each stage plays a crucial role in achieving a smooth and efficient installation.
Remember to gather all the necessary tools and materials before you begin, and take the time to properly prepare the cabinet by emptying it, cleaning the interior, and ensuring levelness. Accurate measurements and careful marking are key to positioning the drawer slides and drawer front correctly.
When installing the drawer slides, make sure they are securely attached and operate smoothly. Take the necessary precautions to align the drawer front properly and secure it to the drawer box. Adjust and test the drawer to ensure optimal performance and alignment with the cabinet opening.
By following these steps, you can confidently install a drawer in your cabinet and enjoy the benefits of improved storage and organization in your home or office.
Remember to refer to the manufacturer’s instructions for specific guidance on your drawer slide and cabinet configuration. Each manufacturer may have unique recommendations and requirements.
Thank you for joining us on this comprehensive guide to installing a drawer in a cabinet. We hope you found this information helpful and that your installation process was a success.
Happy organizing!
Frequently Asked Questions about How To Install A Drawer In A Cabinet
Was this page helpful?
At Storables.com, we guarantee accurate and reliable information. Our content, validated by Expert Board Contributors, is crafted following stringent Editorial Policies. We're committed to providing you with well-researched, expert-backed insights for all your informational needs.


0 thoughts on “How To Install A Drawer In A Cabinet”