Home>Articles>How To Install Bathroom In Basement Without Breaking Concrete
Articles
How To Install Bathroom In Basement Without Breaking Concrete
Modified: October 20, 2024
Learn how to install a bathroom in your basement without the need for breaking concrete. Our articles provide step-by-step instructions and tips for a successful installation.
(Many of the links in this article redirect to a specific reviewed product. Your purchase of these products through affiliate links helps to generate commission for Storables.com, at no extra cost. Learn more)
Introduction
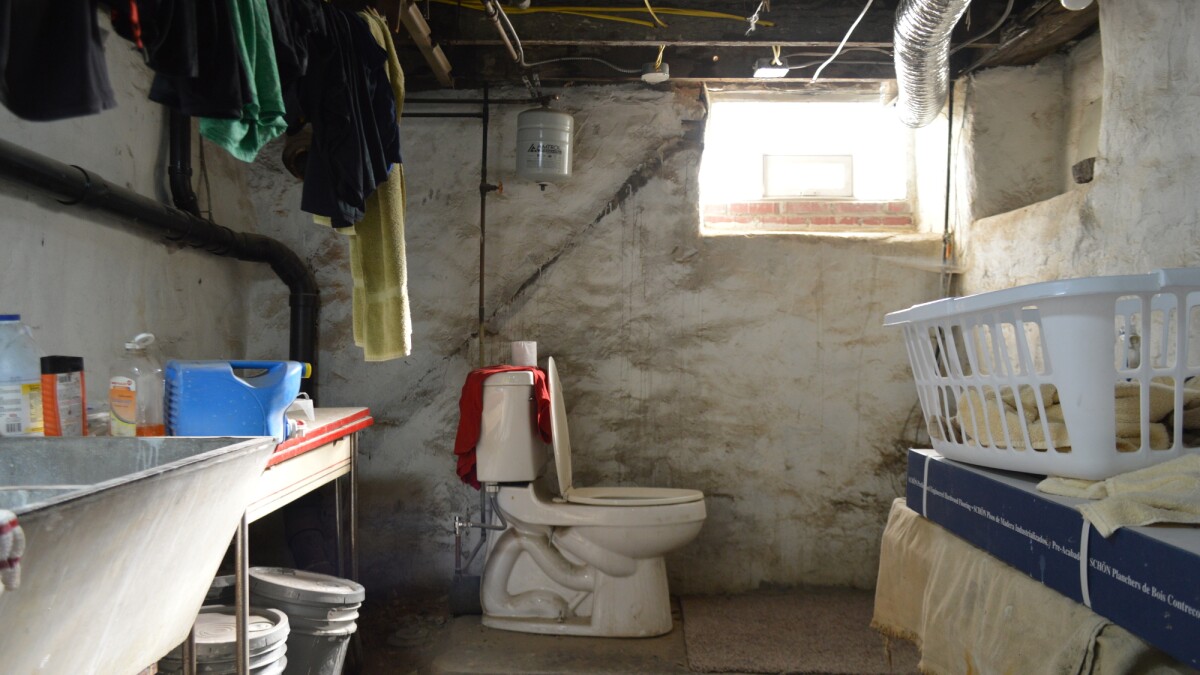
Many homeowners dream of having a functional bathroom in their basement, but the thought of breaking and excavating concrete can be daunting. The good news is that it is possible to install a bathroom in a basement without having to go through the hassle of breaking up the concrete floor. With careful planning and the right tools, you can transform your basement into a comfortable and convenient space.
In this article, we will guide you through the step-by-step process of installing a bathroom in your basement without breaking the concrete. We will cover everything from assessing the basement space to connecting fixtures to the plumbing. So, let’s get started!
Key Takeaways:
- Transform your basement into a functional bathroom space without the hassle of breaking concrete. Follow the step-by-step guide for a well-designed, code-compliant, and convenient installation process.
- Enjoy the convenience and value of a fully functional basement bathroom. From careful planning to thorough testing, create a space that enhances your daily life and adds value to your home.
Step 1: Assessing the Basement Space
The first step in installing a bathroom in your basement is to assess the available space. Start by measuring the area where you plan to install the bathroom. Take into consideration the overall dimensions, ceiling height, and any potential obstructions such as pipes or ductwork.
Next, consider the proximity to existing plumbing lines. It will be easier to install the bathroom if it is located near the main plumbing lines, as this will minimize the distance the pipes need to travel. Look for existing drain lines and water supply lines in the basement. If they are not nearby, you may need to consult a professional plumber to determine the best way to connect the new bathroom to the existing plumbing system.
In addition to plumbing considerations, think about the functionality and layout of the bathroom. Determine the placement of fixtures such as the toilet, sink, and shower, taking into account factors like ventilation and accessibility. Think about how the layout will best serve the needs of those who will be using the bathroom.
It is also important to consider the building codes and regulations in your area. Check with your local building department to determine if there are any specific requirements or permits needed for installing a bathroom in your basement. Adhering to these regulations will ensure the safety and compliance of your new bathroom.
Once you have assessed the basement space and considered all the necessary factors, you will have a clearer idea of how to proceed with the installation process. With careful planning and preparation, you can create a functional and stylish bathroom in your basement without the need to break up the concrete. Let’s move on to the next step: determining the plumbing requirements.
Step 2: Determining Plumbing Requirements
Before you start installing the bathroom fixtures, it’s crucial to determine the plumbing requirements for your basement bathroom. This step includes identifying the main drain line and water supply lines, as well as planning the proper drainage system.
Start by locating the main drain line in your basement. This is usually found near the floor and connects to the main sewer line. You will need to connect the bathroom’s drain lines to this main line. Measure the distance from the main drain line to the planned location of your bathroom fixtures, as this will help you determine the length and layout of the drain pipes.
Next, identify the water supply lines in your basement. You will need to connect the bathroom’s water supply lines to these existing lines. Measure the distance from the supply lines to the fixtures in your bathroom to determine the length of the water pipes needed.
When planning the drainage system, ensure that each fixture, such as the toilet, sink, and shower, has its own drain line that connects to the main drain line. Consider the slope of the pipes to ensure proper drainage. If necessary, consult a professional plumber to help with the planning and installation of the plumbing system.
Additionally, check with your local building codes to ensure compliance. The codes may have specific requirements regarding the size and type of pipes to be used, as well as the distance and connections between fixtures.
By determining the plumbing requirements ahead of time, you can ensure that your basement bathroom functions efficiently and meets all the necessary regulations. With the plumbing plan in place, you can move on to the next step: gathering the tools and materials needed for the installation process.
Step 3: Gathering Tools and Materials
Once you have determined the plumbing requirements for your basement bathroom, it’s time to gather the necessary tools and materials for the installation process. Having the right equipment at hand will make the job easier and more efficient.
Here is a list of tools and materials you will likely need:
- Tape measure: for measuring distances and dimensions
- Pipe wrench: for tightening and loosening pipe fittings
- Hacksaw: for cutting pipes to the desired length
- Adjustable wrench: for various plumbing connections
- Plumbers putty: for creating watertight seals
- PVC pipes and fittings: for drain lines
- Copper or PEX pipes and fittings: for water supply lines
- Bathroom fixtures: such as a toilet, sink, shower stall, and vanity
- Water supply valves: for controlling water flow to each fixture
- Toilet flange: for securely attaching the toilet to the drain pipe
- Plumbing tape: for sealing pipe threads to prevent leaks
- Drainage fittings: such as elbows and couplings
- Plumbing adhesive: for securing pipe joints
In addition to these tools and materials, it’s important to have safety equipment such as gloves, safety goggles, and a dust mask to protect yourself during the installation process.
Prior to purchasing the materials, it’s advisable to create a detailed list based on your specific requirements and measurements. This will help ensure that you have everything you need for a smooth installation process.
By gathering the necessary tools and materials ahead of time, you’ll be well-prepared to tackle the installation process without any unnecessary delays. In the next step, we will discuss how to plan the layout of your basement bathroom.
Step 4: Planning the Layout
Planning the layout of your basement bathroom is an important step that will determine the functionality and aesthetics of the space. The layout should take into account the available space, plumbing requirements, and the desired placement of fixtures.
Start by visualizing how you want the bathroom to look and how you want the fixtures to be arranged. Consider factors such as the location of existing plumbing lines, the position of windows and doors, and any structural elements that need to be taken into account.
When planning the layout, keep the following considerations in mind:
- Space efficiency: Make sure to optimize the use of available space. Consider the size and dimensions of the fixtures, ensuring they fit comfortably without appearing cramped.
- Functionality: Plan the layout so that the bathroom is functional and easy to use. Ensure that there is sufficient room around fixtures for comfortable movement and that there is adequate ventilation.
- Plumbing connections: Take into account the location of existing water supply and drain lines. Position the fixtures in a way that minimizes the need for extensive plumbing modifications.
- Accessibility: If the bathroom will be used by individuals with mobility challenges, consider incorporating features such as grab bars and wider doorways to make the space more accessible.
- Lighting and ventilation: Plan for adequate lighting and ventilation in the bathroom. Consider the placement of windows, artificial lighting fixtures, and exhaust fans to ensure a comfortable and well-lit space.
It can be helpful to create a scale drawing or use specialized software to visualize the layout. This will allow you to experiment with different configurations and make adjustments as needed. Consider consulting with a professional designer or architect for expert advice and guidance.
By carefully planning the layout of your basement bathroom, you can create a functional and visually pleasing space that meets your needs and preferences. Now that the layout is finalized, it’s time to move on to the next step: marking and cutting openings in the concrete.
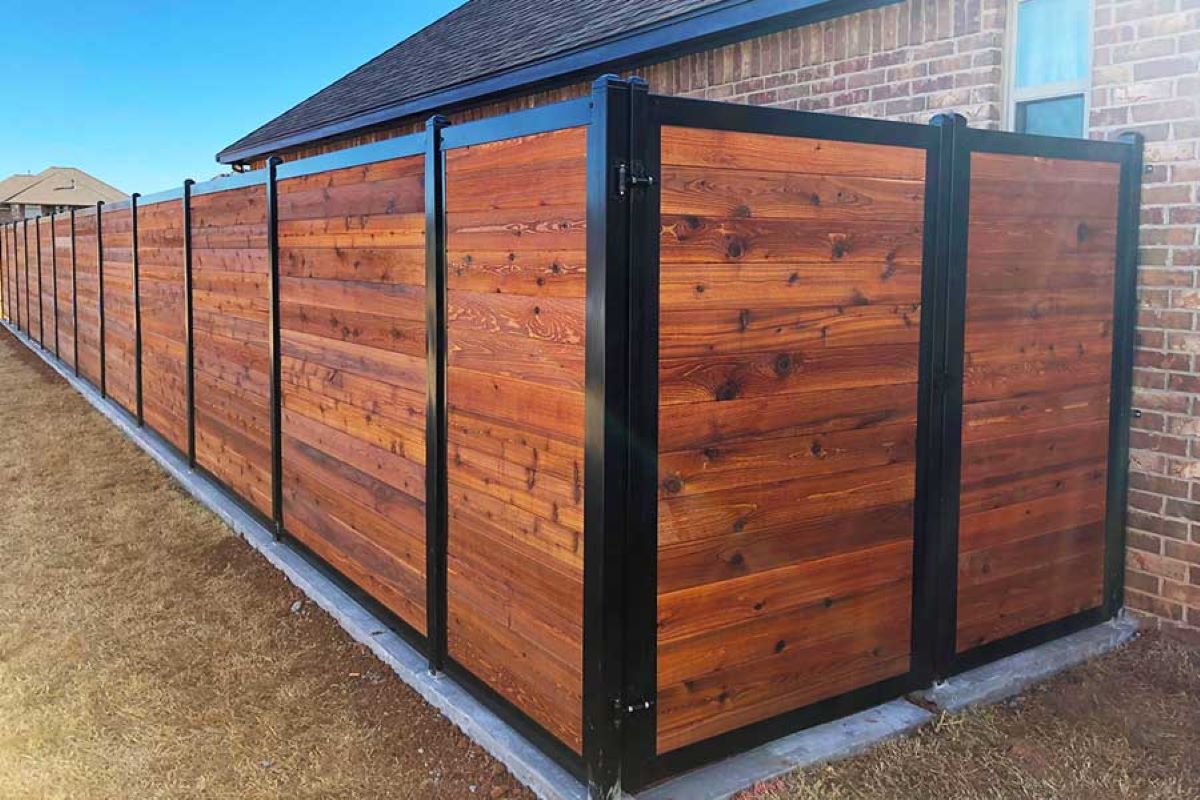
Read more: How To Install Fence Post Without Concrete
Step 5: Marking and Cutting Openings
Once you have finalized the layout of your basement bathroom, the next step is to mark and cut openings in the concrete floor for the installation of plumbing pipes and fixtures. This step requires precision and careful planning to ensure accurate placement of the openings.
Here is a step-by-step guide to marking and cutting the openings:
- Measure and mark: Use a tape measure and pencil to mark the exact locations where the openings need to be made. This includes marking the positions for the toilet, sink, shower drain, and any other fixtures.
- Check for obstructions: Before cutting, double-check for any pipes or electrical wires that may be running beneath the concrete floor. It’s important to avoid cutting into any existing utility lines.
- Use a hammer drill: A hammer drill fitted with a masonry bit is the most efficient tool for cutting through the concrete. Start by drilling pilot holes along the marked lines to create a guide for the subsequent cutting process.
- Use a concrete saw: Once the pilot holes are drilled, use a concrete saw to carefully cut along the marked lines. Take your time and follow the lines precisely to ensure accurate cuts.
- Remove the cut sections: Remove the concrete cut sections using a pry bar or similar tool. Be cautious when removing the concrete to avoid damaging any surrounding areas.
- Clean the openings: After the cut sections have been removed, clean the openings and remove any debris or dust. This will ensure a clean and smooth surface for the installation of plumbing pipes and fixtures.
It’s important to note that cutting into concrete can be a challenging task and may require professional expertise. If you are not confident in your ability to cut through concrete, it is recommended to hire a professional contractor who specializes in concrete cutting.
By accurately marking and cutting the openings in the concrete floor, you will be one step closer to installing the plumbing pipes and fixtures in your basement bathroom. In the next step, we will discuss how to connect the drainage pipes for proper wastewater disposal.
Step 6: Connecting the Drainage Pipes
Connecting the drainage pipes is a crucial step in installing a bathroom in your basement. It involves connecting the fixtures to the main drain line to ensure proper wastewater disposal. Follow these steps to effectively connect the drainage pipes in your basement bathroom:
- Plan the pipe layout: Start by planning the layout of the drainage pipes based on the location of the fixtures and the main drain line. Measure and cut the PVC pipes to the required lengths.
- Dry fit the pipes: Before applying any adhesive, dry fit the pipes to ensure they fit properly. Make any necessary adjustments and ensure that the pipes are properly aligned and level.
- Apply PVC primer and adhesive: Apply PVC primer to the outside of the pipes and the inside of the fittings. Next, apply PVC adhesive to both the pipe and the fitting. Quickly and securely join the pipes and fittings together.
- Use a level and plumb line: Use a level and plumb line to ensure that the pipes are straight and properly aligned. This will prevent any potential issues with drainage and flow.
- Install cleanouts: Install cleanouts at strategic points along the drainage pipes. These access points allow for easy maintenance and clearing of any potential blockages.
- Secure the connections: Once the pipes are properly aligned, use pipe hangers or straps to secure the pipes to the basement walls or ceiling joists. This provides added stability and prevents any movement.
- Perform a water test: After the drainage pipes are connected, it’s crucial to perform a water test to check for any leaks or issues. Fill the pipes with water and observe for any drips or leaks. Make any necessary adjustments or repairs as needed.
It is important to follow your local plumbing codes and regulations when connecting the drainage pipes. These codes may dictate specific pipe sizes, slope requirements, and venting specifications. Consulting with a professional plumber or checking with your local building department can help ensure compliance.
By effectively connecting the drainage pipes, you will facilitate the proper disposal of wastewater from your basement bathroom. In the next step, we will discuss the installation of the toilet flange and drain pipe.
Consider using a macerating toilet system, which grinds waste and pumps it to existing plumbing lines, eliminating the need to break concrete for new drainage. This can make basement bathroom installation much easier and less invasive.
Step 7: Installing Toilet Flange and Drain Pipe
The installation of the toilet flange and drain pipe is a critical step in the process of installing a bathroom in your basement. The flange and drain pipe create a secure connection between the toilet and the main drain line. Follow these steps for a successful installation:
- Prepare the flange: Start by positioning the toilet flange over the drain pipe opening. Ensure that the flange is aligned properly and sits flush with the floor.
- Mark the flange screw holes: Mark the positions of the screw holes on the floor by using a pencil or marker. These holes will be used to secure the flange to the floor.
- Drill pilot holes: Use an appropriate-sized drill bit to drill pilot holes into the marked locations on the floor. These holes will make it easier to insert the screws and secure the flange.
- Secure the flange: Place the flange back over the drain pipe opening and align it with the pilot holes. Insert screws into the pilot holes and tighten them to secure the flange firmly to the floor.
- Connect the drain pipe: Attach the drain pipe to the flange using a PVC coupling. Apply PVC primer and adhesive to both the pipe and coupling before joining them together. Ensure a tight and secure connection.
- Measure and cut the drain pipe: Measure the height required for the drain pipe to connect with the main drain line. Cut the drain pipe to the appropriate length using a hacksaw.
- Connect the drain pipe to the main line: Use a coupling or appropriate connector to join the drain pipe with the main drain line. Apply PVC primer and adhesive to both ends before making the connection.
- Perform a water test: After the drain pipe is connected, perform a water test to ensure there are no leaks or issues. Pour water into the toilet flange and observe for any signs of leakage. Make any necessary adjustments or repairs as needed.
It is important to follow your local plumbing codes and regulations when installing the toilet flange and drain pipe. Adhering to these codes ensures a proper and secure connection, preventing any potential leaks or damage.
By properly installing the toilet flange and drain pipe, you are one step closer to completing the installation of your basement bathroom. In the next step, we will discuss the installation of water supply lines.
Step 8: Installing Water Supply Lines
Installing water supply lines is an essential part of setting up your basement bathroom. Proper installation ensures a steady and reliable water supply to your fixtures. Here are the steps to install water supply lines:
- Plan the pipe layout: Determine the location and path of the water supply lines based on the fixtures’ positions and the existing supply lines. Measure and cut the copper or PEX pipes to the required lengths.
- Shut off the main water supply: Locate the main water shut-off valve and turn it off to prevent any water flow during the installation process.
- Prepare the pipes: Remove any burrs or rough edges from the cut ends of the pipes using a deburring tool or sandpaper. Ensure the pipes are clean and smooth for proper connections.
- Install supply line valves: Install shut-off valves at the desired locations for each fixture. Solder or connect the valves onto the supply lines, ensuring they are securely attached.
- Assemble fittings and connectors: Attach the necessary fittings, such as elbows and tees, to connect the supply lines. Use compression fittings or solder the connections, depending on the type of pipes you are using.
- Connect the supply lines: Connect the supply lines to the existing water supply system using appropriate connectors. Ensure that the connections are tight and secure to prevent any leaks.
- Perform a pressure test: After the supply lines are connected, turn on the main water supply and perform a pressure test. Check for any leaks or issues, and make any necessary adjustments or repairs as needed.
It’s crucial to follow your local plumbing codes and regulations when installing water supply lines. These codes may specify requirements for pipe sizing, materials, and installation techniques. Additionally, consult a professional plumber if you are uncertain about any aspect of the installation.
By properly installing the water supply lines, you will ensure a reliable source of water for your basement bathroom fixtures. In the next step, we will discuss the installation of a shower stall.
Read more: How To Break Up Concrete With Hand Tools
Step 9: Installing Shower Stall
Installing a shower stall in your basement bathroom can add both functionality and style to the space. Here are the steps to successfully install a shower stall:
- Choose the shower stall: Select a shower stall that fits your space and meets your design preferences. Consider factors such as size, style, and any specific features you desire.
- Prepare the installation area: Ensure the area where the shower stall will be installed is clean and leveled. Remove any obstructions or debris that may hinder the installation process.
- Position the shower stall: Carefully place the shower stall in its designated location. Make sure it is aligned properly with the drain and water supply lines.
- Connect the drain: Attach the shower drain to the drain pipe using the appropriate fittings. Follow the manufacturer’s instructions to ensure a proper and secure connection.
- Install the shower base: Place the shower base in position over the drain and secure it according to the manufacturer’s instructions. Ensure it is level and properly seated.
- Connect the water supply: Install the shower mixing valve and connect it to the water supply lines. Ensure all connections are tight and leak-free.
- Install the shower walls: Follow the manufacturer’s instructions to install the shower walls. This may involve attaching the panels or tiles to the existing walls or shower base.
- Seal the shower stall: Use appropriate sealant or caulk to seal the joints and edges of the shower stall to prevent water leakage.
- Test the shower: Turn on the water supply and test the shower for any leaks or issues. Adjust the showerhead and water pressure to your liking.
It’s important to follow the manufacturer’s instructions during the installation process, as each shower stall may have specific requirements and installation techniques. Additionally, consider consulting a professional if you are uncertain about any aspect of the installation or if you need assistance with plumbing or electrical connections.
By properly installing the shower stall, you will create a comfortable and functional space for bathing in your basement bathroom. In the next step, we will discuss the installation of a sink and vanity.
Step 10: Installing Sink and Vanity
Installing a sink and vanity in your basement bathroom adds convenience and functionality to the space. Here are the steps to successfully install a sink and vanity:
- Choose the sink and vanity: Select a sink and vanity that fits your style and meets your needs. Consider factors such as size, style, storage options, and compatibility with your plumbing system.
- Prepare the installation area: Ensure the installation area is clean and leveled. Measure and mark the positions where the sink and vanity will be installed.
- Install the sink: Follow the manufacturer’s instructions to install the sink. This may involve attaching mounting brackets, connecting the faucet, and sealing the sink to the countertop.
- Connect the water supply: Connect the water supply lines to the sink’s faucet and drain. Use the appropriate connectors and ensure tight and leak-free connections.
- Secure the vanity: Place the vanity in its designated position and ensure it is leveled. Secure the vanity to the wall using screws or brackets provided by the manufacturer.
- Connect the plumbing: Connect the drainage pipe from the sink to the main drain line. Use appropriate fittings and ensure a secure connection.
- Install the countertop: If your vanity has a countertop, carefully place it on top of the vanity and secure it according to the manufacturer’s instructions.
- Attach the backsplash: Install the backsplash, if included, by applying adhesive and securely pressing it against the wall. Ensure it lines up properly with the countertop.
- Seal the sink and vanity: Use silicone caulk to seal around the sink and countertop edges to prevent water leakage.
- Test the sink: Turn on the water supply and test the sink for any leaks or issues. Check for proper drainage and functionality of the faucet and handles.
It’s important to follow the manufacturer’s instructions and use the appropriate tools and materials during the installation process. Additionally, consult a professional plumber or contractor if you are uncertain about any aspect of the installation, especially if it involves modifying or connecting to your existing plumbing system.
By properly installing the sink and vanity, you will create a fully functional and aesthetically pleasing bathroom in your basement. In the next step, we will discuss connecting the fixtures to the plumbing system.
Step 11: Connecting Fixtures to Plumbing
Connecting the fixtures to the plumbing system is the final step in installing your basement bathroom. This step involves connecting the toilet, shower, and sink to the respective drain and water supply lines to ensure proper functionality. Follow these steps to successfully connect the fixtures to the plumbing:
- Toilet: Connect the toilet to the drain pipe by aligning the toilet flange with the toilet’s waste outlet. Secure the toilet in place using the provided bolts and nuts. Attach the water supply line to the toilet’s fill valve, ensuring a tight connection.
- Shower: Connect the shower drain to the shower stall’s drain pipe, ensuring a proper and secure connection. Attach the showerhead and control valves according to the manufacturer’s instructions. Connect the showerhead and control valves to the water supply lines.
- Sink: Connect the sink’s drain assembly to the sink’s drain opening, ensuring a proper seal. Attach the water supply lines to the sink’s faucet or mixing valves, ensuring tight connections. Install the sink’s faucet handles or control knobs according to the manufacturer’s instructions.
- Check for leaks: Once all the fixtures are connected, turn on the water supply and carefully inspect for any leaks. Check beneath the sink, around the toilet base, and the shower stall for any signs of water leakage. If you notice any leaks, tighten the connections or replace any faulty components.
- Test the functionality: Test each fixture to ensure proper functionality. Flush the toilet and check for proper waste disposal, turn on the shower and check for adequate water flow and temperature control, and run water in the sink to ensure proper drainage.
- Seal around fixtures: Use silicone caulk or plumber’s putty to seal around the base of the toilet, sink, and shower stall. This helps prevent water leakage and provides a neat and finished appearance.
It’s crucial to follow the manufacturer’s instructions and use the appropriate tools and materials during the connection process. If you are unsure about any aspect of the installation or encounter difficulties, it’s advisable to consult a professional plumber to ensure a proper and secure connection.
By connecting the fixtures to the plumbing system, you will complete the installation of your basement bathroom and enjoy a fully functional space. In the final step, we will discuss the importance of testing the system before concluding the project.
Step 12: Testing the System
Before concluding your basement bathroom installation project, it’s crucial to thoroughly test the system to ensure everything is in proper working order. Testing the system not only helps detect any potential issues but also provides peace of mind knowing that your newly installed bathroom is ready for use. Follow these steps to effectively test the system:
- Water Flow: Turn on the water supply and check the flow in each fixture. Ensure that faucets have steady and adequate water pressure, and that the showerhead provides a consistent and comfortable flow of water.
- Drainage: Run water down each drain and observe the drainage. Ensure that water goes down smoothly without any backup or slow draining. Consider using a drain cleaner if you notice any issues.
- Toilet: Flush the toilet and observe its performance. Confirm that it flushes properly, refills the tank correctly, and does not create any leaks or excessive noise. Adjust the water level in the tank if needed.
- Seals and Connections: Check all seals and connections for any signs of leakage. Inspect underneath the sink, around the toilet base, and around the shower and sink fixtures. If you detect any leaks, tighten connections or replace faulty parts.
- Pressure Test: Conduct a pressure test to ensure the plumbing system can handle the water pressure without any leaks. You can use a pressure gauge to monitor the stability of the system. If there are any significant pressure drops or leaks, address them promptly.
- Ventilation: Ensure that the bathroom has proper ventilation. Check the functionality of the exhaust fan or any ventilation system in place to prevent moisture buildup, condensation, and potential mold growth.
Testing the system allows you to identify and address any potential issues or adjustments needed before the final completion of your basement bathroom installation. By taking the time to thoroughly test the system, you can ensure a hassle-free and fully functional bathroom.
Upon completing the testing and resolving any identified issues, congratulate yourself on a job well done! Your basement bathroom is now ready for use, providing convenience and comfort to your home. Enjoy your newly installed space!
As a final note, always keep in mind that if you encounter any difficulties during the installation process or are unsure about certain aspects, it is recommended to consult a professional plumber or contractor to ensure a safe and successful installation.
Read more: How Thick Is Basement Concrete Floor
Conclusion
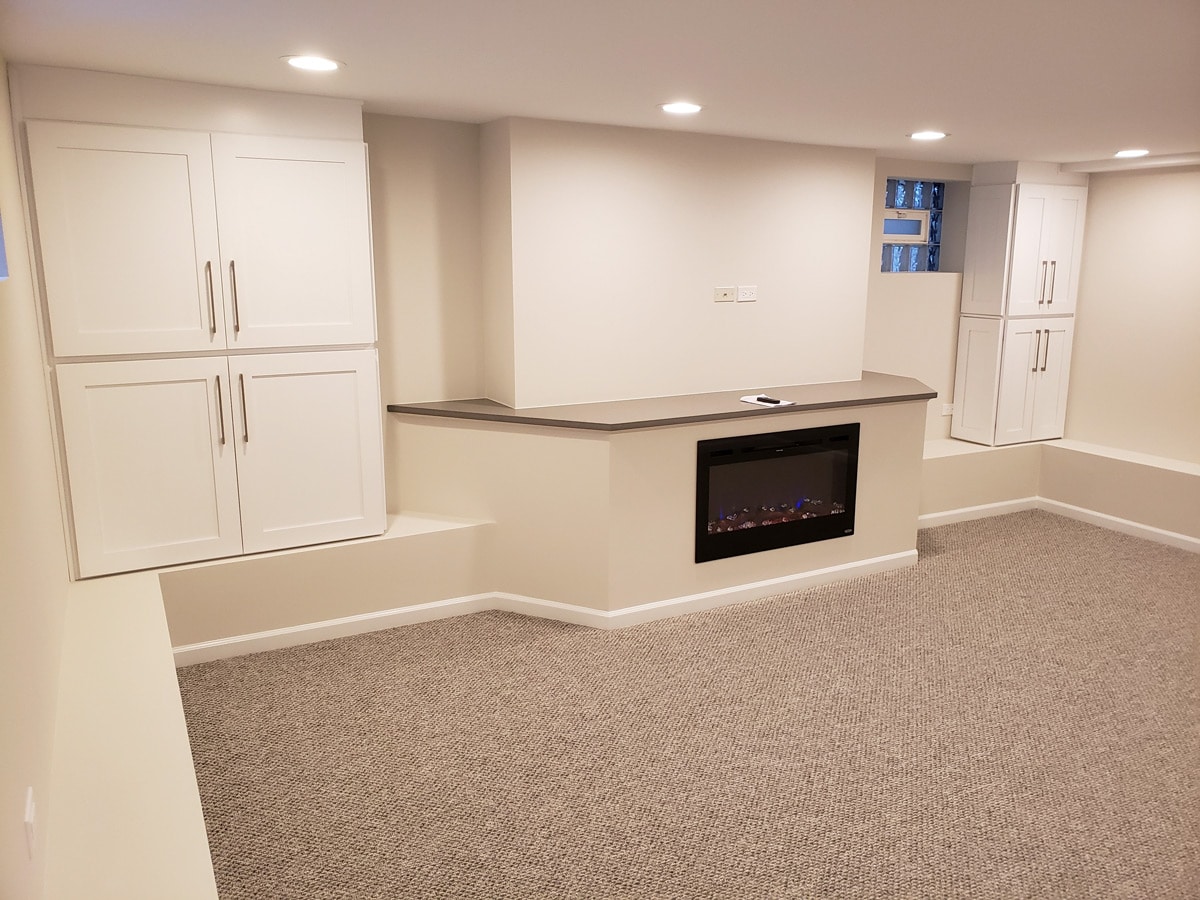
Congratulations on successfully installing a bathroom in your basement without having to break the concrete! By following the step-by-step process outlined in this guide, you have transformed your basement into a functional and convenient space that adds value to your home.
We started by assessing the basement space and determining the plumbing requirements. Through careful planning and consideration of the layout, you were able to create a well-designed bathroom that maximizes the available space while adhering to local building codes and regulations.
Gathering the necessary tools and materials ensured that you had everything you needed on hand for a smooth installation process. Marking and cutting openings in the concrete floor allowed for proper placement of plumbing pipes and fixtures, while connecting the drainage pipes and water supply lines ensured the proper flow of water throughout the bathroom.
Installing the shower stall, sink, and vanity added functionality and style to your basement bathroom. Connecting the fixtures to the plumbing system was the final step, followed by thorough testing of the entire system to ensure its proper functioning and address any issues or leaks that may arise.
Through your hard work and attention to detail, you have created a fully functional and aesthetically pleasing bathroom in your basement. This additional living space will not only enhance your daily life but also add value to your home.
Remember, if you encounter any difficulties during the installation process or have concerns about specific aspects, it’s always wise to seek the guidance of a professional plumber or contractor. They can provide expertise and ensure that your basement bathroom installation meets the highest standards of safety and functionality.
Enjoy your new basement bathroom and the convenience it brings to your home. Take pride in your accomplishment, and may your newly transformed space bring you joy for years to come!
Frequently Asked Questions about How To Install Bathroom In Basement Without Breaking Concrete
Was this page helpful?
At Storables.com, we guarantee accurate and reliable information. Our content, validated by Expert Board Contributors, is crafted following stringent Editorial Policies. We're committed to providing you with well-researched, expert-backed insights for all your informational needs.


0 thoughts on “How To Install Bathroom In Basement Without Breaking Concrete”