Articles
How To Flash Around A Chimney On A Metal Roof
Modified: October 20, 2024
Learn how to properly flash around a chimney on a metal roof with our informative articles. Get expert tips and tricks for a leak-proof installation.
(Many of the links in this article redirect to a specific reviewed product. Your purchase of these products through affiliate links helps to generate commission for Storables.com, at no extra cost. Learn more)
Introduction
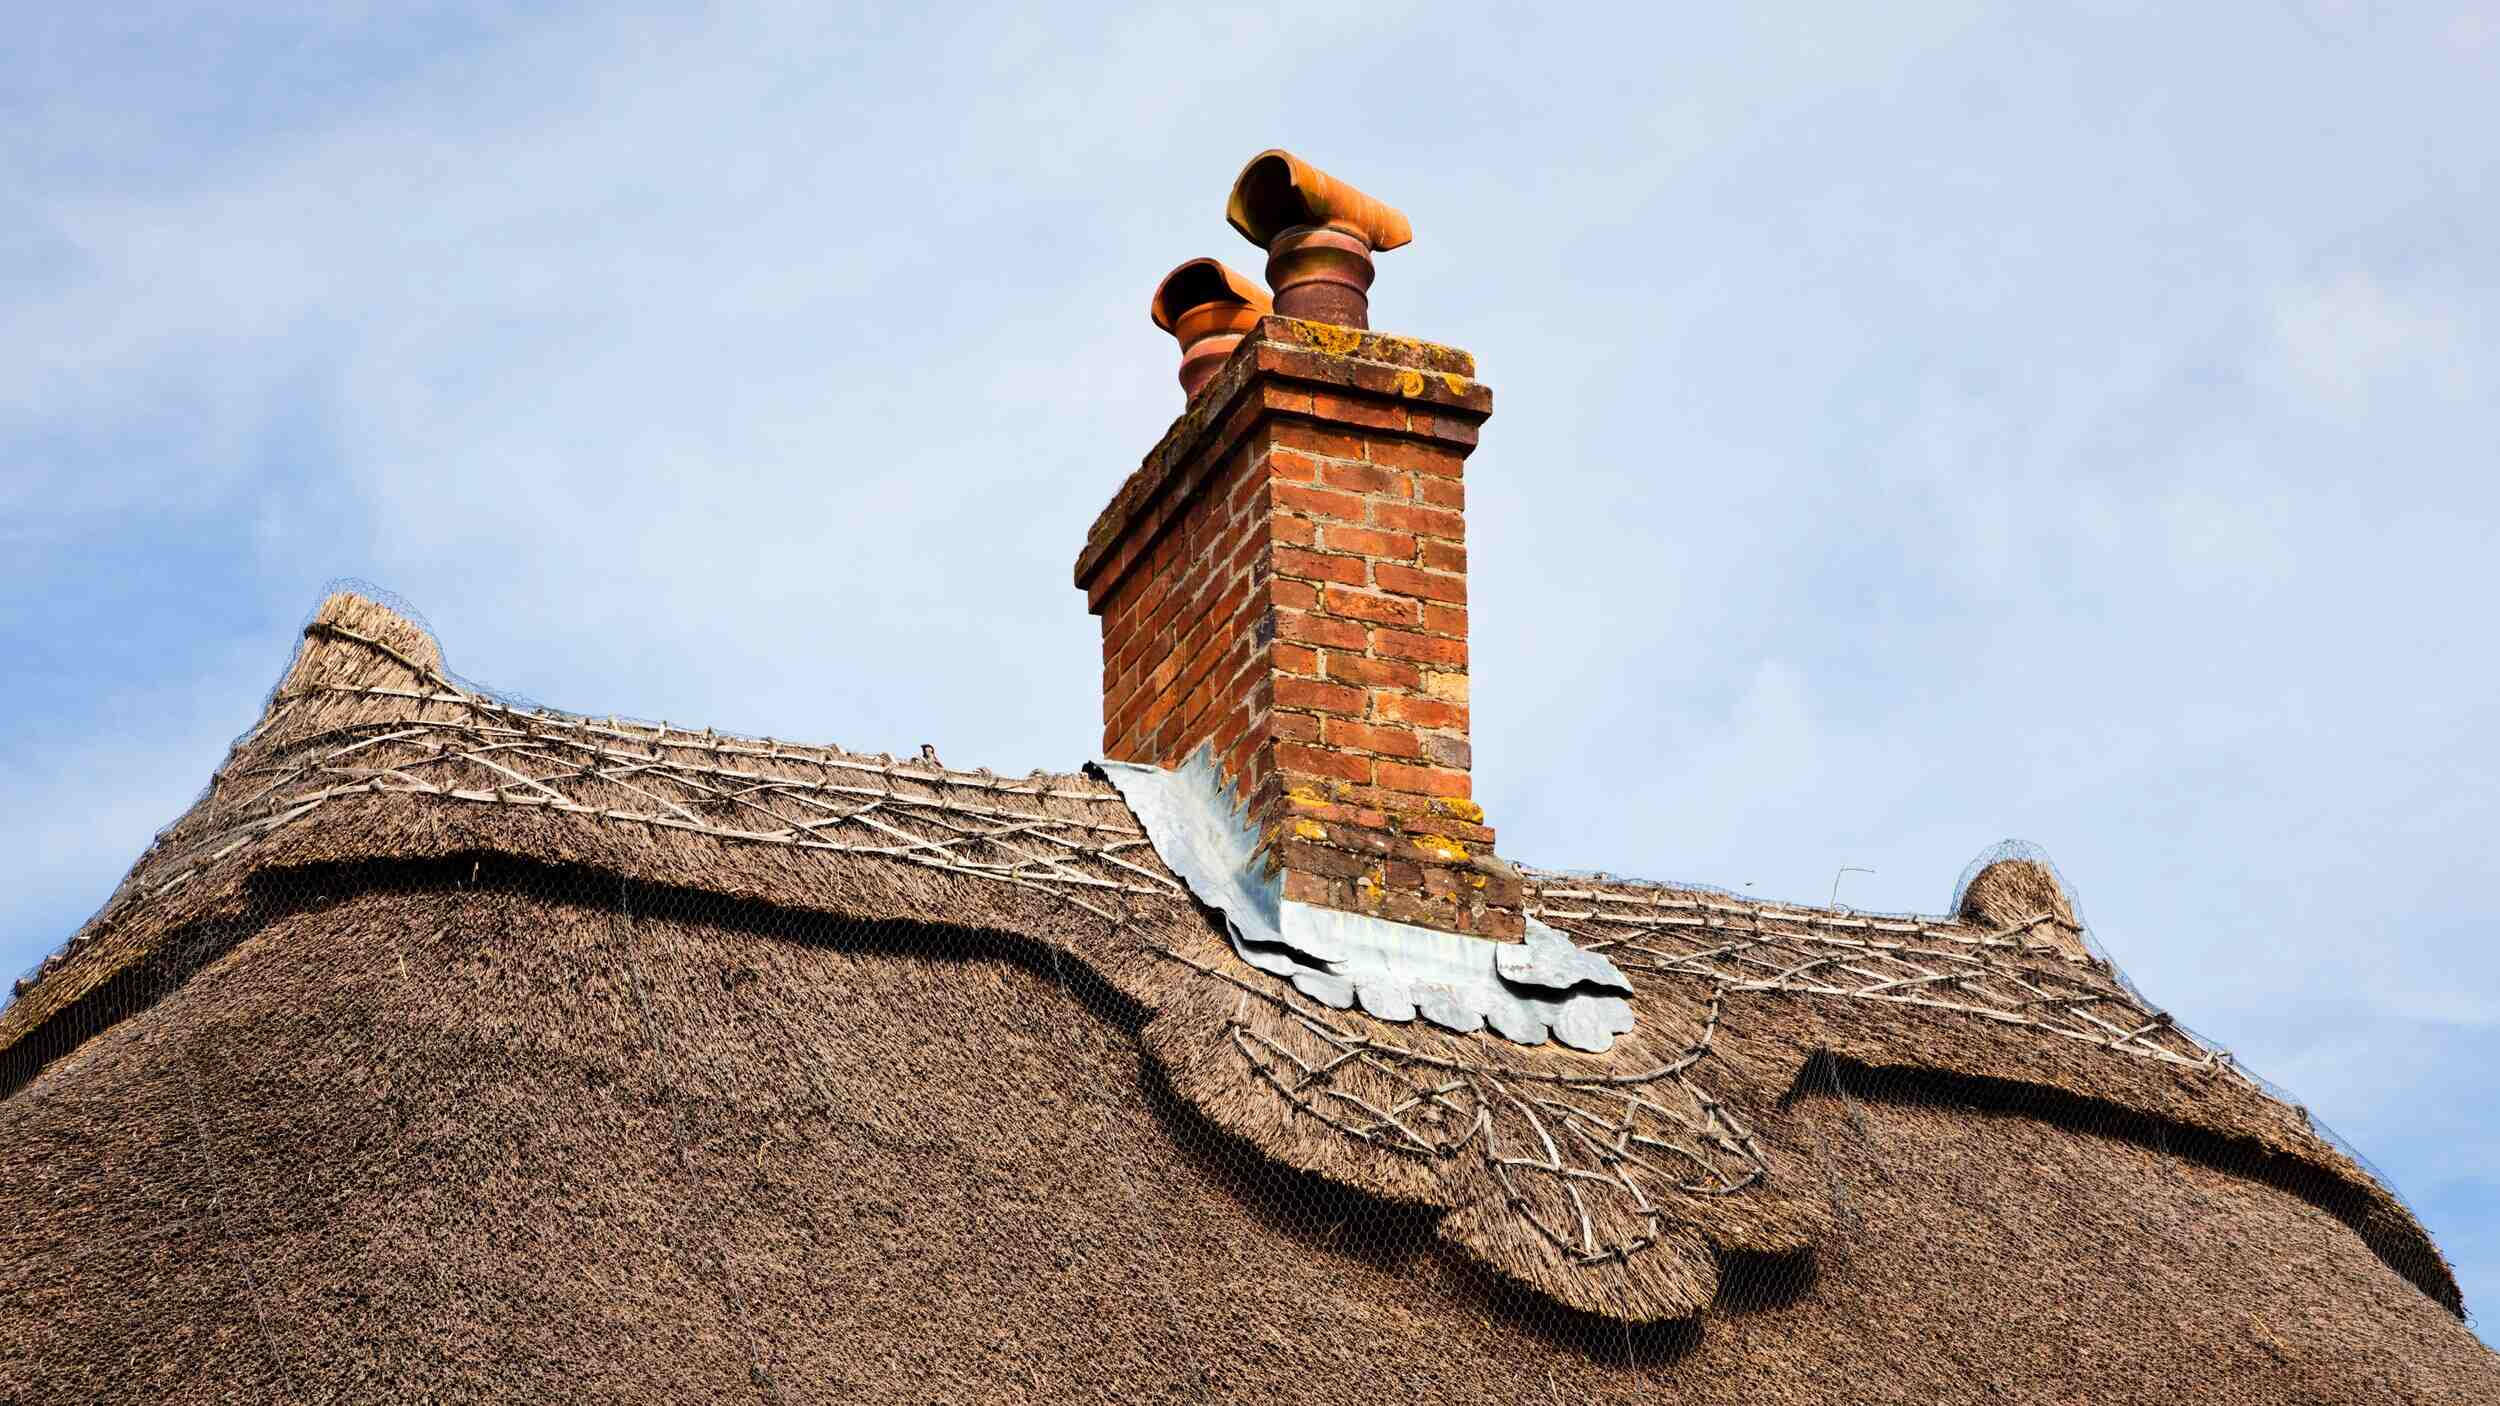
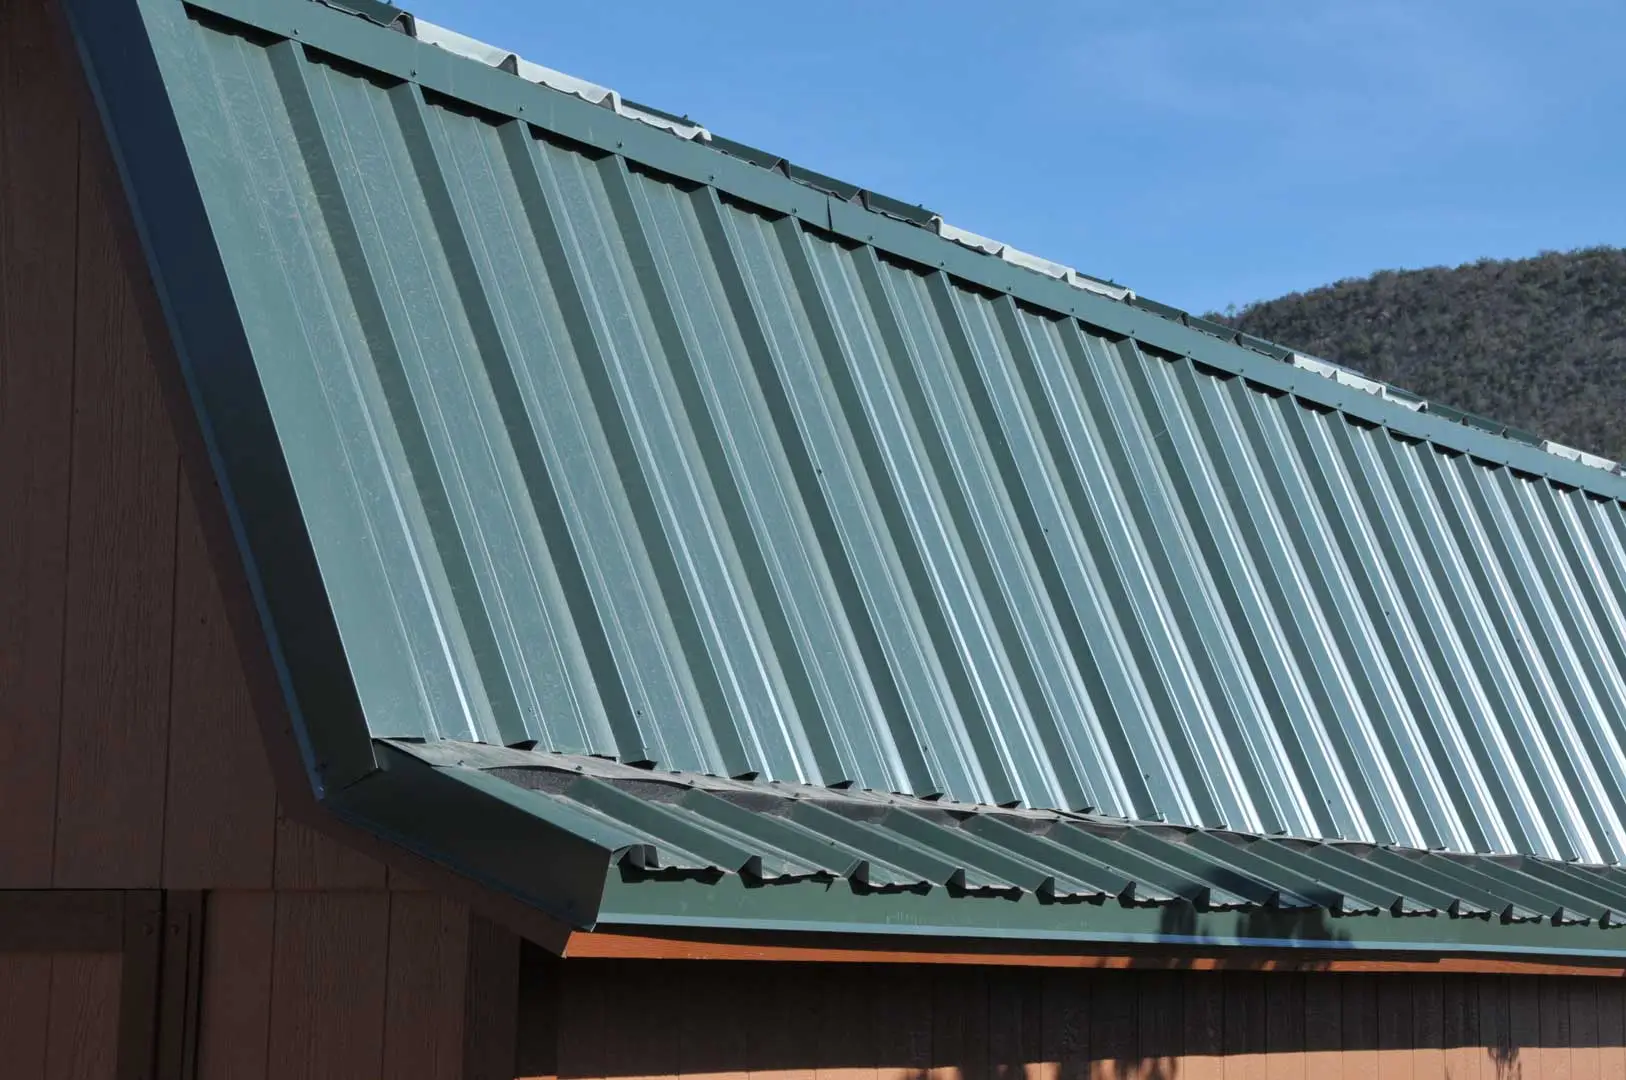
Welcome to our comprehensive guide on how to correctly flash around a chimney when installing a metal roof. Flashing is a critical component of any roofing system, as it provides a watertight seal and prevents water from entering the interior of your home through gaps and joints. When it comes to flashing around a chimney on a metal roof, it requires careful planning and precise execution to ensure long-term protection and durability.
Flashing serves as a barrier between the roof and chimney, redirecting water away from vulnerable areas and preventing leaks. Properly installed flashing can also help prevent damage to the chimney itself, such as corrosion or deterioration caused by prolonged exposure to water or debris.
In this guide, we will take you through the step-by-step process of flashing around a chimney on a metal roof. From assessing the chimney and roof to applying the necessary materials and ensuring a waterproof seal, we will cover everything you need to know to get the job done right.
We will also provide valuable tips and insights to help you optimize the flashing process for SEO purposes. By incorporating targeted keywords seamlessly into the article, we can enhance its visibility in search engine results and attract a wider audience of homeowners and roofing professionals seeking expert advice on metal roof flashing.
Remember, flashing is not a one-size-fits-all solution. The specific steps and materials required may vary depending on the design and structure of your chimney and roof. However, by following this guide, you will gain a solid understanding of the fundamental principles and techniques involved, allowing you to adapt and apply them to your unique roofing project.
Now, let’s dive into the first step: assessing the chimney and roof to determine the best course of action for flashing around a chimney on a metal roof.
Key Takeaways:
- Properly flashing around a chimney on a metal roof is crucial for long-term protection, and the step-by-step guide provides the necessary knowledge and confidence to tackle the flashing project effectively.
- Thorough assessment, precise preparation, and meticulous installation of flashing components are essential for creating a secure and watertight barrier, ensuring the durability and performance of the metal roof flashing.
Read more: How To Flash Around A Chimney
Step 1: Assessing the Chimney and Roof
The first step in flashing around a chimney on a metal roof is to thoroughly assess the condition of the chimney and the roofing system. This evaluation will help you determine any potential issues or challenges you may encounter during the flashing process.
Start by examining the chimney itself. Look for any signs of damage, such as cracks, loose bricks, or deteriorating mortar. It’s crucial to address any structural issues before proceeding with the flashing installation. Consult a professional if you’re unsure about the chimney’s stability or if major repairs are needed.
Next, examine the metal roof surrounding the chimney. Pay close attention to the condition of the roofing material, whether it’s steel, aluminum, or another type of metal. Look for any areas where the roof may be damaged, corroded, or experiencing excessive wear and tear.
Determine the pitch or slope of the roof, as this will affect the type and placement of the flashing. Flatter roofs may require a different flashing technique to ensure adequate water runoff and prevent pooling. Consider factors such as the roof’s orientation, exposure to sunlight and precipitation, and any potential areas where water might accumulate.
Take measurements of the chimney’s width, height, and depth. This information will be crucial when selecting the appropriate flashing materials and determining the quantity needed for the installation. Note down the measurements accurately to avoid any estimation errors that could impact the flashing’s effectiveness and efficiency.
Lastly, evaluate the existing flashing, if any, around the chimney. Determine whether it needs to be repaired or replaced, depending on its condition. Remove any old or damaged flashing carefully, ensuring not to cause any additional damage to the roof or chimney.
By thoroughly assessing the chimney and roof, you will have a solid foundation for the flashing installation process. Understanding the condition, dimensions, and other unique characteristics will allow you to plan and execute the flashing in a way that ensures maximum protection and a watertight seal.
Next up, let’s move on to step 2: gathering the necessary tools and materials to complete the flashing around a chimney on a metal roof.
Step 2: Gathering the Necessary Tools and Materials
Before you can begin flashing around the chimney on your metal roof, it is essential to gather all the necessary tools and materials. Having everything you need at the start of the project will help ensure a smooth and efficient installation process.
Here is a list of the tools and materials you will need:
- Safety equipment: Always prioritize safety when working on a roof. Make sure to have personal protective equipment (PPE) such as gloves, safety glasses, and non-slip footwear.
- Tape measure: Accurate measurements are vital for properly sizing and cutting the flashing materials.
- Chalk line: A chalk line will help you create straight lines and guide your installation.
- Hacksaw or tin snips: These tools will be used to cut the flashing materials to the required size and shape.
- Nail gun or roofing nails: Depending on your preference, choose a nail gun or roofing nails to secure the flashing components into place.
- Sealant or caulk: A high-quality sealant or caulk that is compatible with metal roofs will be used to create a watertight seal around the flashing.
- Flashing material: Select the appropriate flashing material based on your specific metal roof and chimney. Options include aluminum, galvanized steel, or specialized chimney flashing kits.
- Underlayment: Install a suitable underlayment layer beneath the flashing to provide an additional layer of waterproofing protection.
- Metal shears: Metal shears can be helpful for making precise cuts in the flashing material.
- Roofing cement: Roofing cement can be used to reinforce the seal between the flashing and the roof surface.
Ensure that all the tools and materials are of high quality and suitable for use on metal roofs. This will help guarantee the durability and effectiveness of the flashing installation.
Once you have gathered all the necessary tools and materials, you will be ready to move on to the next step: removing the existing flashing. We will cover this process in detail in the following section.
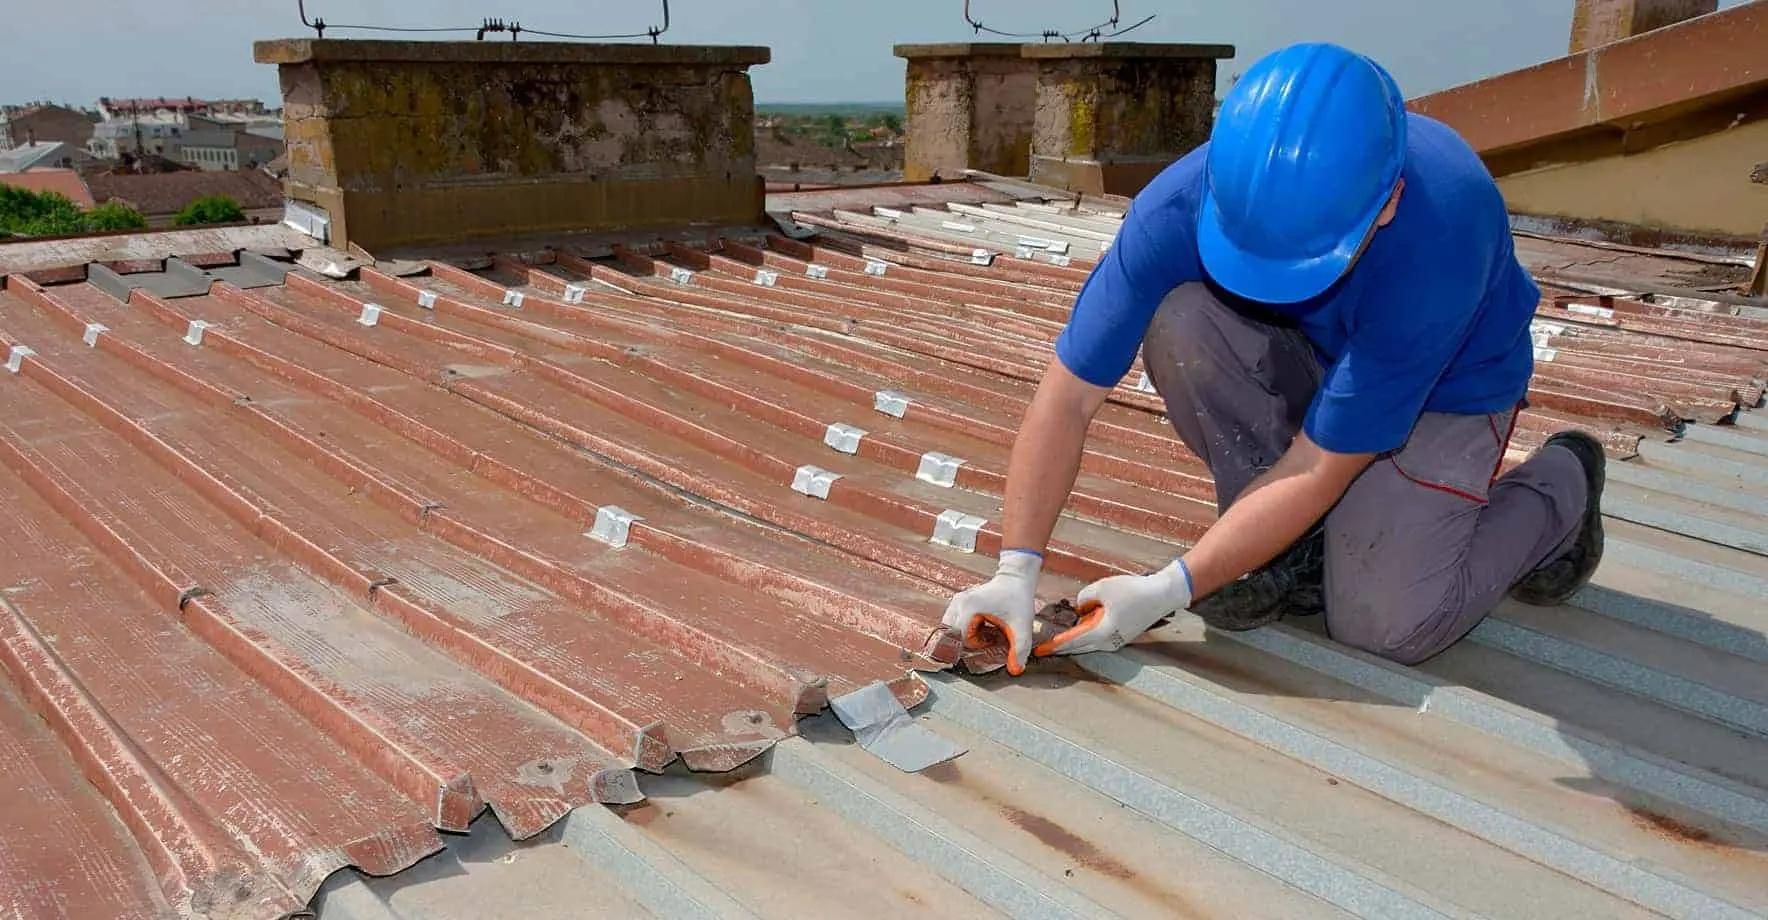
Step 3: Removing the Existing Flashing
Before you can install new flashing around the chimney on your metal roof, you need to remove any existing flashing that may be present. This step is crucial to ensure a clean and proper installation of the new flashing components.
Here’s a step-by-step guide on how to remove the existing flashing:
- Start by carefully inspecting the existing flashing. Look for any signs of damage or deterioration that may have compromised its effectiveness.
- If the flashing is damaged or in poor condition, use a pry bar or a flathead screwdriver to gently lift and remove any nails or fasteners securing it to the roof.
- Slowly and carefully remove the flashing piece by piece. Take note of the sequence in which the flashing was installed, as this will be helpful during the re-installation process.
- Use caution when removing the flashing near the chimney to avoid causing any damage to the chimney structure or the roof itself.
- Inspect the area where the flashing was removed for any remaining nails or debris. Remove any remaining fasteners or materials to ensure a clean surface for the new flashing.
- Take this opportunity to inspect the roof surface around the chimney for any signs of damage or wear. Address any necessary repairs to ensure a strong foundation for the new flashing.
It is crucial to be cautious and methodical when removing the existing flashing. Take your time to avoid damaging the roof or chimney structure. If you are unsure about any aspect of this process, it is advisable to consult a roofing professional for assistance.
Once you have successfully removed the existing flashing, you can proceed to the next step: preparing the chimney for flashing. We will cover this step in detail in the following section.
Step 4: Preparing the Chimney for Flashing
Preparing the chimney for flashing is a crucial step in ensuring a proper and long-lasting installation. This step involves cleaning the chimney, applying a chimney sealer, and creating a smooth surface for the flashing components.
Here’s a step-by-step guide on how to prepare the chimney for flashing:
- Start by thoroughly cleaning the chimney. Remove any dirt, debris, or loose mortar from the chimney surface. A stiff brush or a scraper can be used to clean the chimney effectively.
- Inspect the chimney for any cracks, gaps, or areas of deteriorated mortar. Use a chimney sealer or high-quality caulk to fill in these gaps. This will help create a watertight seal and prevent water intrusion in the future.
- Smooth out any rough or uneven surfaces on the chimney. Use a wire brush or sandpaper to remove any loose material. The goal is to create a flat and even surface for the flashing components to adhere to.
- If the chimney has a metal flue, ensure that it is securely attached and in good condition. Check for any signs of rust or damage. If necessary, repair or replace the metal flue before proceeding with the flashing installation.
- Apply a layer of chimney primer or bonding agent to the chimney surface. This will promote better adhesion between the chimney and the flashing material.
- Allow the primer or bonding agent to dry fully before proceeding with the flashing installation. Refer to the manufacturer’s instructions for the recommended drying time.
By properly preparing the chimney, you create a solid foundation for the flashing components. The cleaning and sealing process helps ensure that no water or debris can penetrate the chimney and compromise the integrity of the flashing installation.
Once the chimney is cleaned, sealed, and primed, you are ready to move on to the next step: installing the underlayment. We will cover this step in detail in the following section.
Read more: What Is Flashing On A Chimney
Step 5: Installing the Underlayment
The underlayment is a critical layer of protection in the flashing process. It serves as an additional barrier, shielding the roof and chimney from water infiltration. Installing the underlayment properly ensures a watertight seal and enhances the longevity of the flashing installation.
Here’s a step-by-step guide on how to install the underlayment:
- Start by measuring the length and width of the chimney base. Add a few inches to each measurement to ensure adequate coverage.
- Roll out the underlayment material on the roof surface around the chimney. Align it with the edge of the chimney to ensure proper positioning.
- Cut the underlayment material to the measured dimensions using a utility knife or a pair of scissors. Make sure the cut edges are straight and even.
- Attach the underlayment to the roof surface using roofing nails or staples. Start at the bottom of the chimney and work your way up. Space the fasteners approximately 6 to 8 inches apart along the edges of the underlayment.
- Overlap each subsequent row of underlayment by a few inches to ensure water drains properly. Secure the overlapping edges with roofing nails or staples.
- Apply pressure to the underlayment with a roller or by stepping on it to ensure optimal adhesion to the roof surface.
It is important to use an appropriate underlayment material for your specific metal roof. Common options include synthetic underlayment or self-adhesive bitumen rolls. Consult the manufacturer’s instructions or seek advice from a roofing professional to determine the best underlayment for your project.
By installing the underlayment correctly, you provide an additional layer of protection against water infiltration. This layer, combined with the flashing, creates a robust and watertight seal around the chimney on your metal roof.
With the underlayment in place, you are now ready to move on to the next step: applying the chimney base flashing. We will cover this step in detail in the following section.
When flashing around a chimney on a metal roof, make sure to use a high-quality, weather-resistant flashing material and follow the manufacturer’s installation instructions carefully to ensure a watertight seal.
Step 6: Applying the Chimney Base Flashing
Applying the chimney base flashing is a crucial step in the process of flashing around a chimney on a metal roof. The base flashing serves as the foundation for the rest of the flashing components, providing a secure and waterproof seal between the chimney and the roof.
Here’s a step-by-step guide on how to apply the chimney base flashing:
- Measure the dimensions of the chimney base and transfer those measurements onto the flashing material. Use a tape measure and a marker or pencil to mark the appropriate dimensions.
- Cut the flashing material according to the marked dimensions. A hacksaw, tin snips, or metal shears can be used to make accurate cuts.
- Position the cut flashing material at the base of the chimney, ensuring that it completely covers the area where the chimney meets the roof. The flashing should extend a few inches up the sides of the chimney and onto the roof surface.
- Secure the base flashing in place by using roofing nails or a nail gun. Space the nails evenly along the edges of the flashing, ensuring a secure attachment to the roof and chimney.
- Additionally, you can use roofing cement or a compatible adhesive to reinforce the seal between the flashing and the chimney. Apply a thin layer of cement along the edges of the flashing where it meets the chimney, smoothing it out for a watertight seal.
- Inspect the base flashing to ensure a tight fit and proper alignment with the chimney and roof. Make any necessary adjustments or repositioning before proceeding to the next step.
Properly installing the chimney base flashing is essential for the overall effectiveness of your flashing system. It creates a secure barrier that prevents water from seeping into the vulnerable area around the chimney.
With the chimney base flashing securely in place, we can now move on to the next step: installing the step flashing. This step targets the edges of the chimney and helps divert water away from potential entry points. We will explore this process in detail in the following section.
Step 7: Installing the Step Flashing
Installing the step flashing is a crucial step in the process of flashing around a chimney on a metal roof. Step flashing serves to redirect water away from the edges of the chimney, preventing water penetration and potential leaks.
Here’s a step-by-step guide on how to install the step flashing:
- Start by measuring and marking the dimensions for each individual step flashing piece. The step flashing should be sized to fit alongside the chimney and the overlapping shingles or roof panels.
- Cut the step flashing pieces according to the marked dimensions using a hacksaw or tin snips.
- Apply a generous amount of roofing cement or compatible adhesive to the backside of the step flashing piece.
- Position the step flashing against the chimney, allowing it to overlap the base flashing. Press the step flashing firmly against the chimney and roof surface to ensure a secure fit.
- Secure the step flashing in place by nailing it to the roof surface. Use roofing nails or a nail gun, placing the nails near the top edge of the step flashing.
- Repeat the process for each successive step flashing piece, ensuring proper overlap and alignment.
- As you install each step flashing piece, be careful to maintain a consistent overlap pattern to ensure efficient water runoff.
- Apply additional roofing cement or adhesive where each step flashing piece meets the chimney to create a watertight seal.
- Inspect the step flashing installation to ensure all pieces are securely attached and provide proper coverage along the chimney edges.
By installing the step flashing correctly, you create a reliable barrier against water infiltration along the edges of the chimney. The step flashing diverts water away from these vulnerable areas, protecting your roof and preventing potential leaks.
With the step flashing in place, we can now move on to the next step: adding counter flashing. Counter flashing provides an additional layer of protection and a finished appearance to the flashing system. We will explore this process in detail in the following section.
Step 8: Adding Counter Flashing
Adding counter flashing is an essential step in the process of flashing around a chimney on a metal roof. Counter flashing provides an additional layer of protection and helps create a finished, aesthetically pleasing appearance to your flashing system.
Here’s a step-by-step guide on how to add counter flashing:
- Measure and mark the dimensions for each piece of counter flashing. The counter flashing should be sized to fit snugly against the chimney and overlap the step flashing.
- Cut the counter flashing pieces according to the marked dimensions using a hacksaw or tin snips.
- Apply a generous amount of roofing cement or compatible adhesive to the backside of each counter flashing piece. This will help create a secure bond and seal against the chimney.
- Position the counter flashing against the chimney, aligning it with the step flashing and allowing it to overlap the step flashing.
- Press the counter flashing firmly against the chimney and roof surface to ensure a tight fit.
- Secure the counter flashing in place by nailing it to the roof surface. Use roofing nails or a nail gun, placing the nails near the top edge of the counter flashing.
- Repeat the process for each successive piece of counter flashing, ensuring proper overlap and alignment.
- Apply additional roofing cement or adhesive where each counter flashing piece meets the chimney and step flashing to create a watertight seal.
- Inspect the counter flashing installation to ensure all pieces are securely attached and provide proper coverage along the chimney edges.
- Consider adding a cosmetic cover or cap to the top of the counter flashing for a finished appearance and added protection against the elements.
Adding counter flashing helps further strengthen the waterproofing barrier around the chimney while enhancing the overall visual appeal of the flashing system. It provides an extra layer of protection against water infiltration and helps maintain the integrity of the flashing installation.
With the counter flashing in place, we can now move on to the next step: sealing and waterproofing. This crucial step ensures the complete protection of the flashing system and prevents water from penetrating any gaps or openings. We will explore this process in detail in the following section.
Read more: How Much To Replace Chimney Flashing
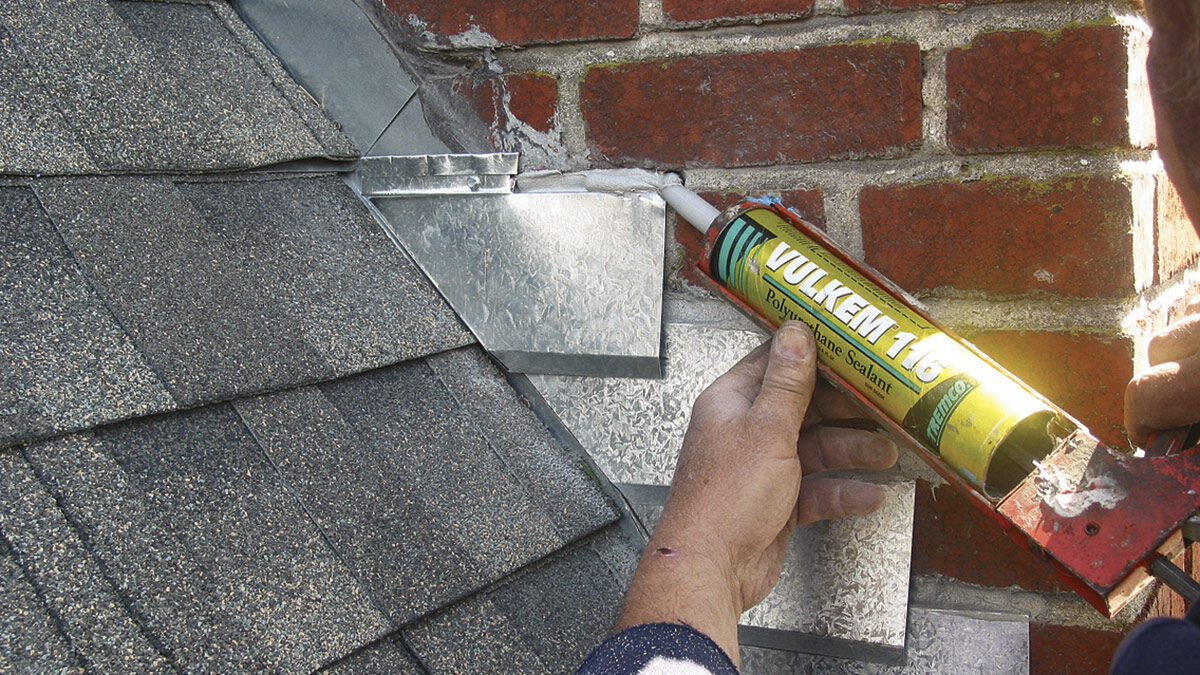
Step 9: Sealing and Waterproofing
Sealing and waterproofing the flashing system is a critical step in the process of flashing around a chimney on a metal roof. This step ensures that all joints, gaps, and connections are properly sealed, leaving no room for water to penetrate and cause damage.
Here’s a step-by-step guide on how to seal and waterproof the flashing system:
- Inspect the entire flashing system for any gaps, openings, or areas that may require additional sealing.
- Use a high-quality sealant or roofing cement that is compatible with both the metal roof and the flashing material.
- Apply the sealant or roofing cement to any gaps or joints where two flashing components meet, ensuring a complete and even coverage.
- Pay special attention to the intersections of the base flashing, step flashing, and counter flashing. Apply an extra layer of sealant or roofing cement to create a strong and watertight seal.
- Smooth out the sealant or roofing cement with a putty knife or a caulk tool to ensure a neat and uniform appearance.
- Allow the sealant or roofing cement to dry fully according to the manufacturer’s instructions.
- Inspect the sealed areas to ensure there are no visible gaps or openings. Make any necessary touch-ups or reapplications to ensure a complete seal.
- Check the flashing system for any signs of wear or damage and address any issues promptly to prevent future water infiltration.
By sealing and waterproofing the flashing system, you provide an additional layer of protection against water infiltration and ensure the long-term durability of your metal roof flashing. This step is crucial for maintaining the integrity of the flashing installation and preventing potential leaks or water damage.
With the flashing system properly sealed and waterproofed, we can move on to the final step: inspecting and adding finishing touches. This step ensures that the entire flashing installation is secure, functional, and visually appealing. We will cover this step in detail in the following section.
Step 10: Inspecting and Finishing Touches
The final step in flashing around a chimney on a metal roof is to thoroughly inspect the entire installation and make any necessary finishing touches. This step ensures that the flashing system is secure, functional, and visually appealing.
Here’s a step-by-step guide on how to inspect and add finishing touches to the flashing installation:
- Inspect the entire flashing system, including the base flashing, step flashing, counter flashing, and any sealant or roofing cement applied. Look for any signs of damage, gaps, or loose components.
- Tightly secure any loose components by using additional fasteners. Ensure that all nails or screws are properly driven and flush with the surface of the flashing.
- Check for any gaps or openings in the sealant or roofing cement. Fill in any gaps or reapply sealant as needed to ensure complete protection against water infiltration.
- Verify that the flashing components provide proper coverage and overlap. Adjust or reposition any flashing pieces that may not be aligned correctly.
- Inspect the surrounding roofing materials, such as shingles or panels, for any signs of damage or dislodging. Make any necessary repairs or replacements to maintain the integrity of the entire roofing system.
- Ensure that all seams and connections between the flashing components and the roof surface are tight and secure.
- Check the chimney for any gaps or cracks around the flashing. Apply additional sealant or roofing cement as needed to create a watertight seal.
- Once the inspection is complete, step back and evaluate the overall appearance of the flashing installation. Make any final adjustments or touch-ups to ensure a clean and visually appealing finish.
By thoroughly inspecting the flashing installation and adding any necessary finishing touches, you ensure that the chimney on your metal roof is properly protected against water intrusion. This final step also contributes to the overall appearance and longevity of the flashing system.
With the inspection and finishing touches complete, you have successfully completed the process of flashing around a chimney on a metal roof. Congratulations on a job well done!
Remember, proper flashing installation is crucial for the longevity and performance of your metal roof. If you are unsure or uncomfortable with any aspect of the flashing process, it is always best to consult with a professional roofing contractor for guidance and assistance.
Thank you for following our comprehensive guide on how to flash around a chimney on a metal roof. We hope this step-by-step tutorial has provided you with the necessary knowledge and confidence to tackle your flashing project effectively.
Conclusion
In conclusion, properly flashing around a chimney on a metal roof is crucial for maintaining a watertight seal and protecting your home from potential water damage. By following the step-by-step process outlined in this comprehensive guide, you can confidently install flashing that will last for years while providing optimal protection.
We started by thoroughly assessing the condition of the chimney and roof, gathering the necessary tools and materials, and removing any existing flashing. We then prepared the chimney for flashing by cleaning, sealing, and creating a smooth surface. With the underlayment installed, we proceeded to apply the base flashing, step flashing, and counter flashing to form a secure and watertight barrier.
The sealing and waterproofing step was crucial to ensure the gaps and joints were properly sealed, preventing water infiltration. Finally, we inspected the entire flashing installation, making any necessary adjustments and adding finishing touches to enhance both performance and appearance.
Remember, while this guide provides a comprehensive overview, it is important to consider the specific requirements of your chimney and roofing system. If you have any doubts or concerns about the flashing process, it is advisable to consult with a professional roofing contractor who can offer expert guidance.
By following these steps with precision and attention to detail, you can confidently flash around a chimney on a metal roof, providing durable protection and ensuring the longevity of your roofing system.
Thank you for taking the time to learn and understand the process of flashing around a chimney on a metal roof. We hope this guide has been informative and helpful in your roofing endeavors. Happy flashing!
Now that you've mastered the steps for flashing around a chimney on a metal roof, why not dive deeper into the essentials of this crucial process? Our next article, "What Is Flashing On A Chimney," offers a thorough breakdown of chimney flashing, helping you understand its importance and the roles it plays in protecting your home from water damage. Don't miss out on gaining more valuable insights that will aid in maintaining your home's integrity.
Frequently Asked Questions about How To Flash Around A Chimney On A Metal Roof
Was this page helpful?
At Storables.com, we guarantee accurate and reliable information. Our content, validated by Expert Board Contributors, is crafted following stringent Editorial Policies. We're committed to providing you with well-researched, expert-backed insights for all your informational needs.


0 thoughts on “How To Flash Around A Chimney On A Metal Roof”