
Articles
How To Install Insulation In Garage
Modified: October 20, 2024
Learn how to install insulation in your garage with these informative articles. Find step-by-step guides, tips, and advice for a successful insulation project.
(Many of the links in this article redirect to a specific reviewed product. Your purchase of these products through affiliate links helps to generate commission for Storables.com, at no extra cost. Learn more)
Introduction
Welcome to our comprehensive guide on how to install insulation in your garage. Adding insulation to your garage can provide numerous benefits, such as improving energy efficiency, maintaining a more comfortable temperature, reducing noise levels, and protecting your belongings from extreme weather conditions. Whether you use your garage for storing vehicles, as a workshop, or as an additional living space, insulating it can make a significant difference.
In this article, we will take you through a step-by-step process on how to properly install insulation in your garage. We will cover everything from gathering materials and measuring the space to choosing the right insulation type and sealing any gaps or air leaks. We will also provide additional tips and considerations to help you achieve the best results.
Before we dive into the installation process, let’s discuss why insulating your garage is important. Most garages are not built with the same level of insulation as the rest of the house, which can result in significant energy loss. Without proper insulation, garages can become uncomfortably hot in the summer and freezing cold in the winter. This not only affects your comfort level but also puts additional strain on your heating and cooling systems.
Installing insulation in your garage can help regulate the temperature, reduce energy waste, and lower your utility bills. It can also provide a barrier against outside noise, making your garage a quieter space. Additionally, if you use your garage as a workshop or living area, proper insulation can create a more comfortable environment and improve the overall usability of the space.
Now that we understand the importance of insulating your garage, let’s move on to the step-by-step process of installation.
Key Takeaways:
- Properly insulating your garage can improve energy efficiency, temperature control, and noise reduction, creating a more comfortable and functional space for various uses, from vehicle storage to workshops or living areas.
- The step-by-step process of gathering materials, measuring the space, choosing the right insulation type, and sealing gaps ensures a successful garage insulation project, providing long-term benefits and savings.
Read more: How To Install Insulation On Garage Door
Step 1: Gather Materials
Before you begin the insulation installation process, it’s important to gather all the necessary materials. Having everything ready beforehand will help streamline the process and prevent unnecessary delays. Here’s a list of the materials you’ll need:
- Insulation material: There are various types of insulation available, such as fiberglass batts, foam boards, and reflective insulation. Choose the type that suits your needs and budget.
- Tape measure: You’ll need a tape measure to accurately measure the dimensions of your garage and the insulation materials.
- Utility knife: A sharp utility knife will be used to cut the insulation material to the required size.
- Safety equipment: It’s important to protect yourself during the installation process. Wear safety goggles, gloves, and a dust mask to prevent any accidents or exposure to harmful particles.
- Staple gun and staples: A staple gun will be needed to secure the insulation in place. Make sure to have enough staples for the entire project.
- Caulk or sealant: You’ll need caulk or sealant to fill in any gaps or cracks in the garage walls or ceiling before installing the insulation.
- Aluminum foil tape: This tape is used to seal and cover the seams and joints of the insulation material.
- Ladder: Depending on the height of your garage, you may need a ladder to reach higher areas for installation.
- Measuring and cutting tools: Along with a tape measure and utility knife, you may require other measuring and cutting tools depending on the type of insulation material you’re using.
Once you have gathered all the necessary materials, double-check to make sure you haven’t missed anything. It’s always better to have everything on hand before starting the installation process.
Now that you have all the materials ready, let’s move on to the next step, which is measuring the garage to determine the amount of insulation required.
Step 2: Measure the Garage
Before you can start installing insulation in your garage, it’s crucial to accurately measure the space. This will ensure that you purchase the correct amount of insulation material and cut it to the appropriate size. Here are the steps to follow:
- Start by measuring the length, width, and height of each wall in your garage. Use a tape measure to get precise measurements.
- Measure the dimensions of any windows or doors on the walls that you’ll be insulating. This will help you determine if you need to cut insulation to fit around them.
- Calculate the total square footage of the walls and ceiling that you’ll be insulating. To do this, multiply the length by the height for each wall, and add up all the measurements.
- Consider any obstructions in your garage, such as wiring, pipes, or structural elements. Take note of their location and dimensions, as you’ll need to work around them when installing the insulation.
- If you plan to insulate the garage door as well, measure its dimensions. This will help you determine the amount of insulation material needed for the door.
Once you have all the measurements, it’s a good idea to add a little extra to account for any errors or miscalculations. It’s better to have more insulation material than you need than to run out in the middle of the installation process.
Keep in mind that the insulation material you choose may come in specific sizes or rolls. Check the packaging or consult with a professional to determine the best options for your garage’s dimensions. This will help you ensure that you purchase enough insulation to cover the entire space.
With the garage measured and the amount of insulation material determined, you’re ready to move on to the next step, which involves selecting the right type of insulation for your garage.
Step 3: Choose the Insulation Type
Choosing the right insulation type is a crucial step in the garage insulation process. There are several factors to consider when making this decision, such as the climate you live in, your budget, and the specific needs of your garage. Here are some common insulation types to consider:
- Fiberglass Batts: Fiberglass batts are one of the most common and affordable types of insulation. They come in pre-cut panels and are made from glass fibers. Fiberglass insulation is effective at reducing heat transfer and sound transmission.
- Foam Boards: Foam boards are rigid panels made from polystyrene or polyurethane foam. They provide excellent insulation and are resistant to moisture. Foam boards are easy to cut, making them ideal for fitting around obstructions.
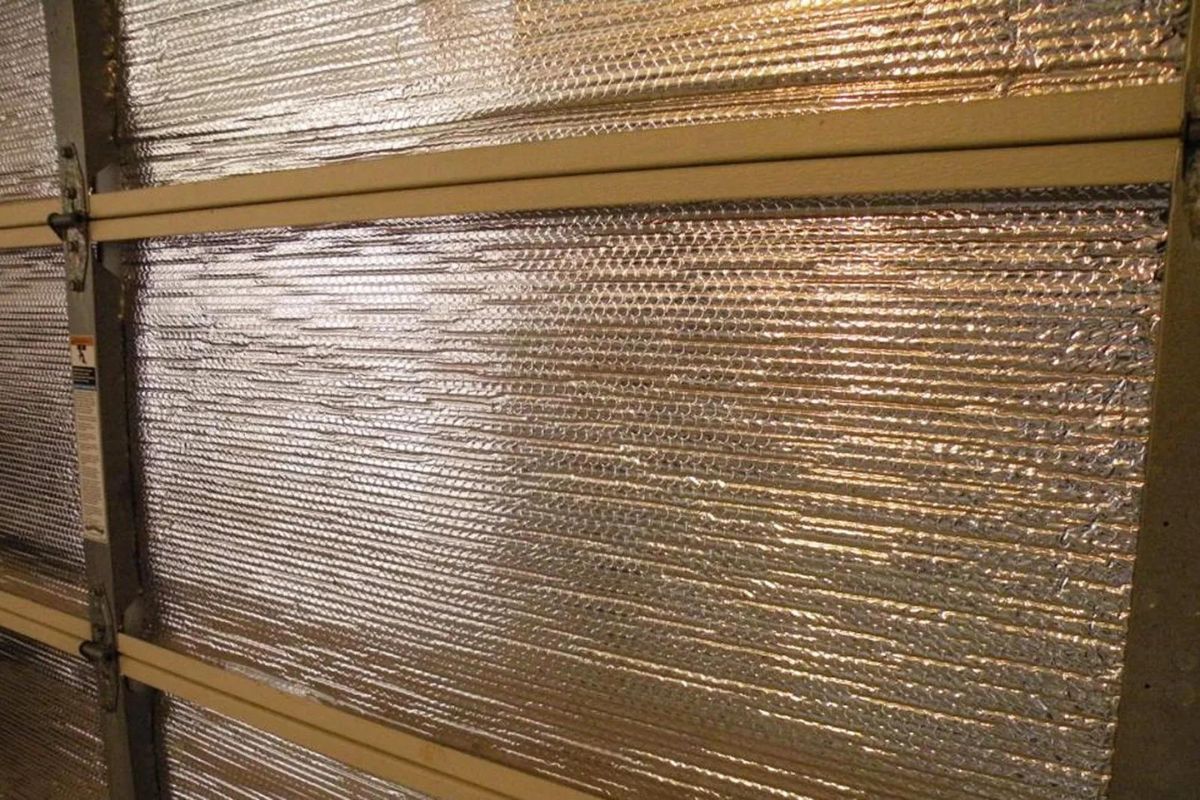
- Reflective Insulation: Reflective insulation consists of a layer of foil or plastic film that reflects heat away from the garage. It is typically used in hot climates to reduce heat gain. Reflective insulation is lightweight and easy to install.
- Spray Foam: Spray foam insulation is a popular choice for garages as it provides excellent insulation and seals gaps effectively. It expands when applied, filling in all cavities. However, spray foam insulation can be more expensive than other options.
Consider the specific needs of your garage when choosing insulation. If you plan to use your garage as a living space or workshop, you may want to prioritize insulation types that provide superior soundproofing. If you live in a colder climate, consider insulation materials with higher R-values, which indicate better thermal resistance.
Consult with insulation professionals or read product specifications to determine which insulation type best suits your needs. They can provide guidance on the most suitable material for your climate and budget.
Once you have chosen the insulation type, you’re ready for the next step: preparing your garage for installation.
Step 4: Prepare the Garage
Before you can start installing insulation in your garage, it’s essential to prepare the space properly. Preparing the garage will ensure a smooth and effective insulation installation process. Here are the steps to follow:
- Clear the Space: Remove any items, vehicles, or debris from the garage to create a clear and open workspace. This will make it easier to access all areas and ensure that the insulation is installed properly.
- Clean the Walls and Ceiling: Thoroughly clean the walls and ceiling of your garage to remove any dirt, dust, or cobwebs. This will provide a clean surface for the insulation material to adhere to and improve its effectiveness.
- Repair Any Damage: Inspect the walls and ceiling for any damages, such as cracks, holes, or water leaks. Repair any necessary repairs before installing the insulation. Use caulk or sealant to fill in cracks, and patch any holes with appropriate materials.
- Seal Gaps and Air Leaks: Use weatherstripping or caulk to seal any gaps or air leaks in the garage walls, windows, and doors. This will help prevent drafts and improve the insulation’s efficiency.
- Consider Air Vents and Electrical Outlets: Take note of any air vents or electrical outlets on the walls or ceiling. Determine if they need to be insulated or if additional steps are required to ensure their functionality after insulation installation. Consult with a professional if needed.
- Protect Accessible Wiring and Pipes: Insulation installation can involve moving or applying insulation near wiring and pipes. Take precautions to protect any accessible wiring or pipes to avoid any damage or accidents during the installation process.
By properly preparing your garage, you create an ideal environment for insulation installation. Taking the time to address any repairs and seal gaps will maximize the effectiveness of the insulation and help you achieve the desired results.
Now that your garage is prepared, it’s time to move on to the next step: installing the insulation.
Read more: How To Insulate Garage Floor
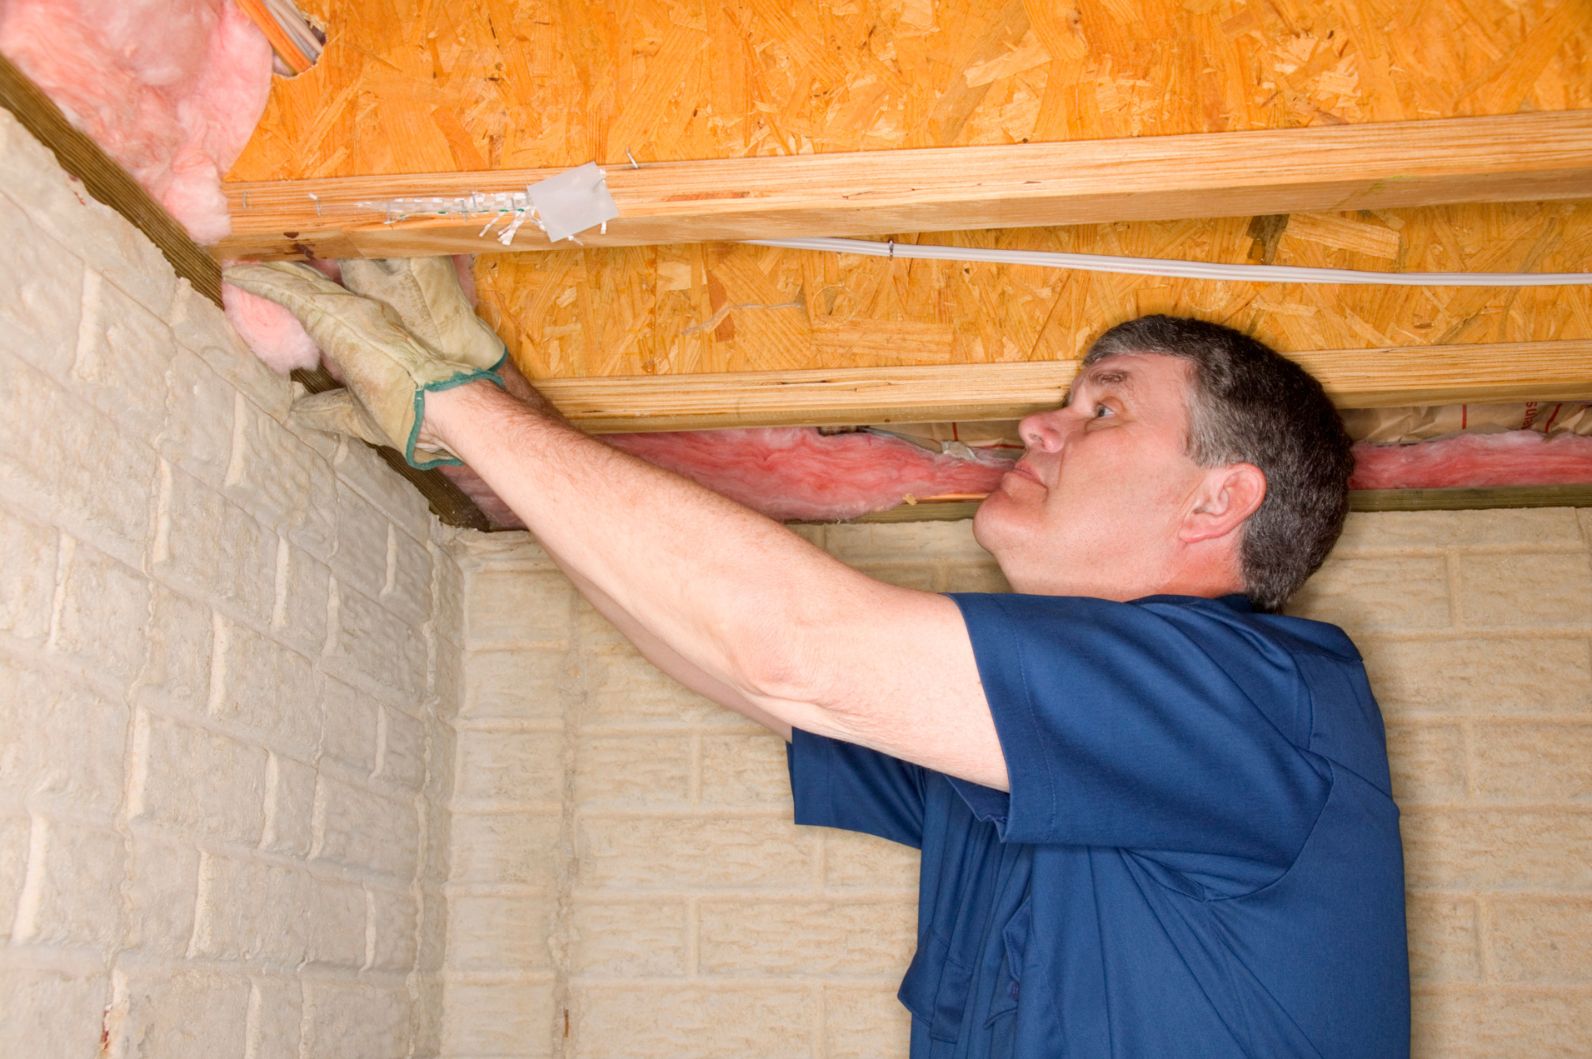
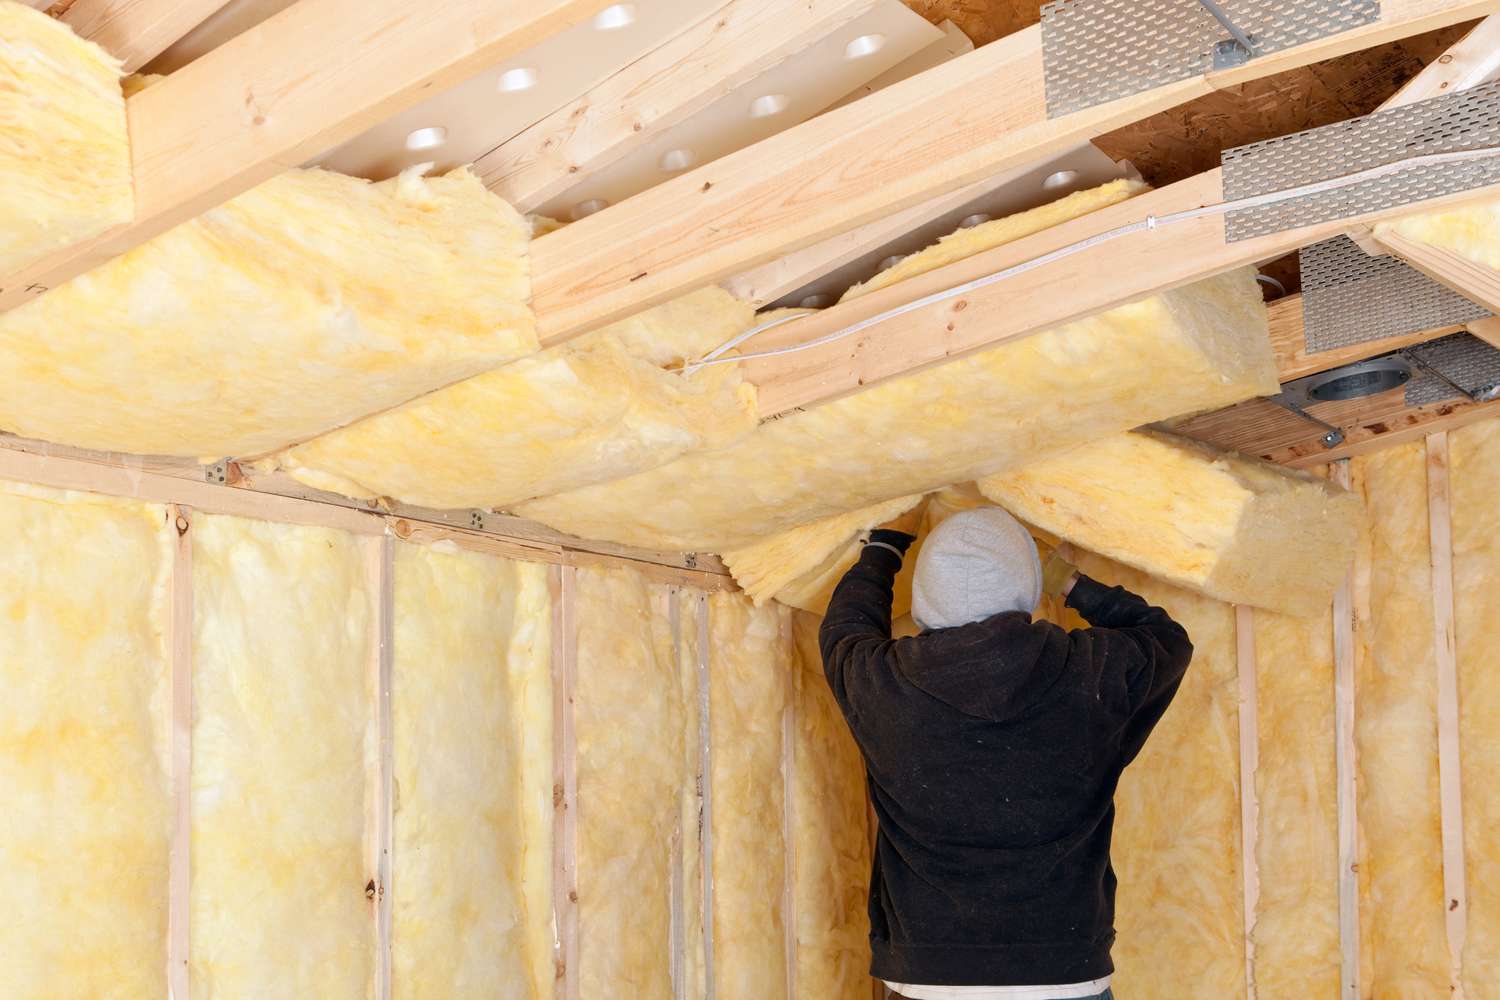
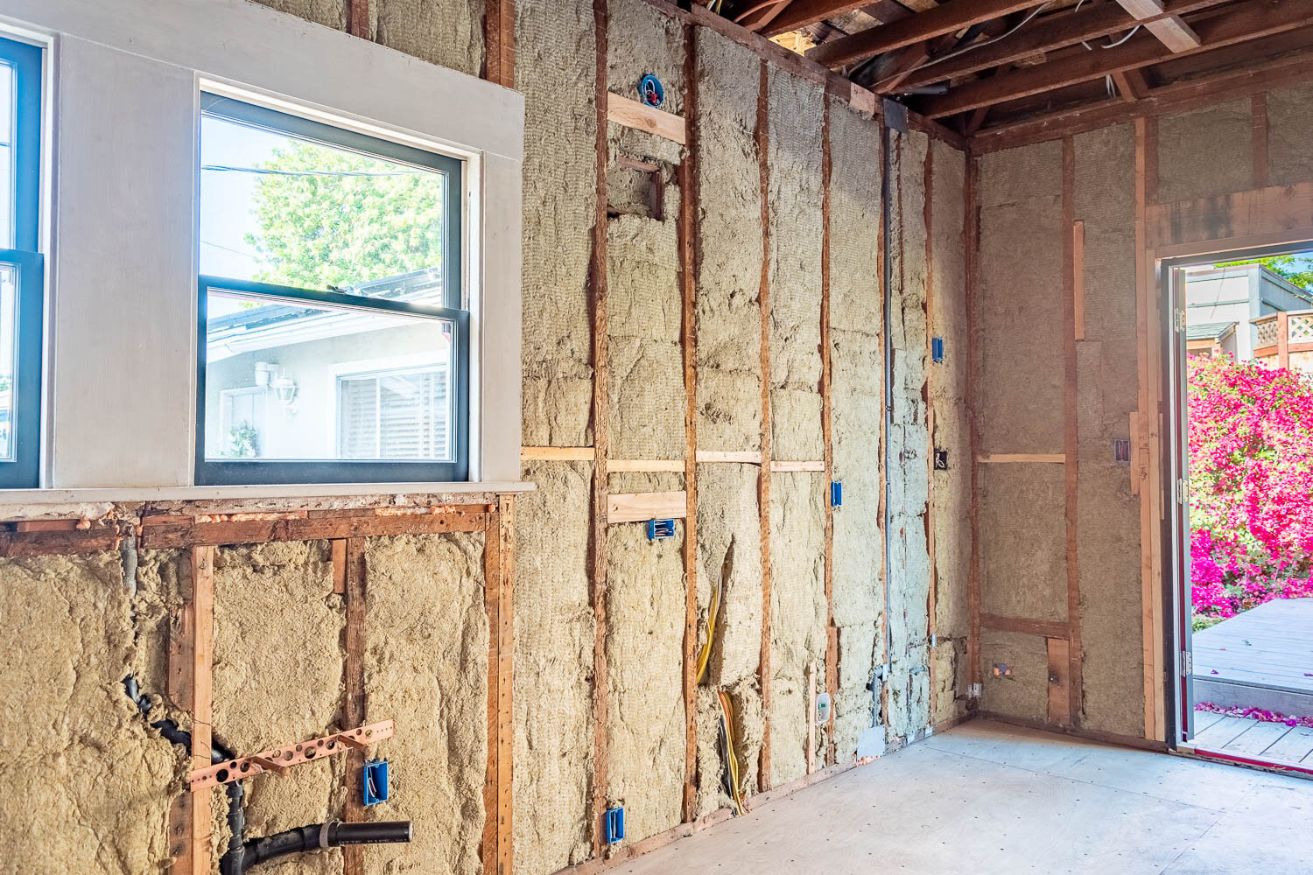
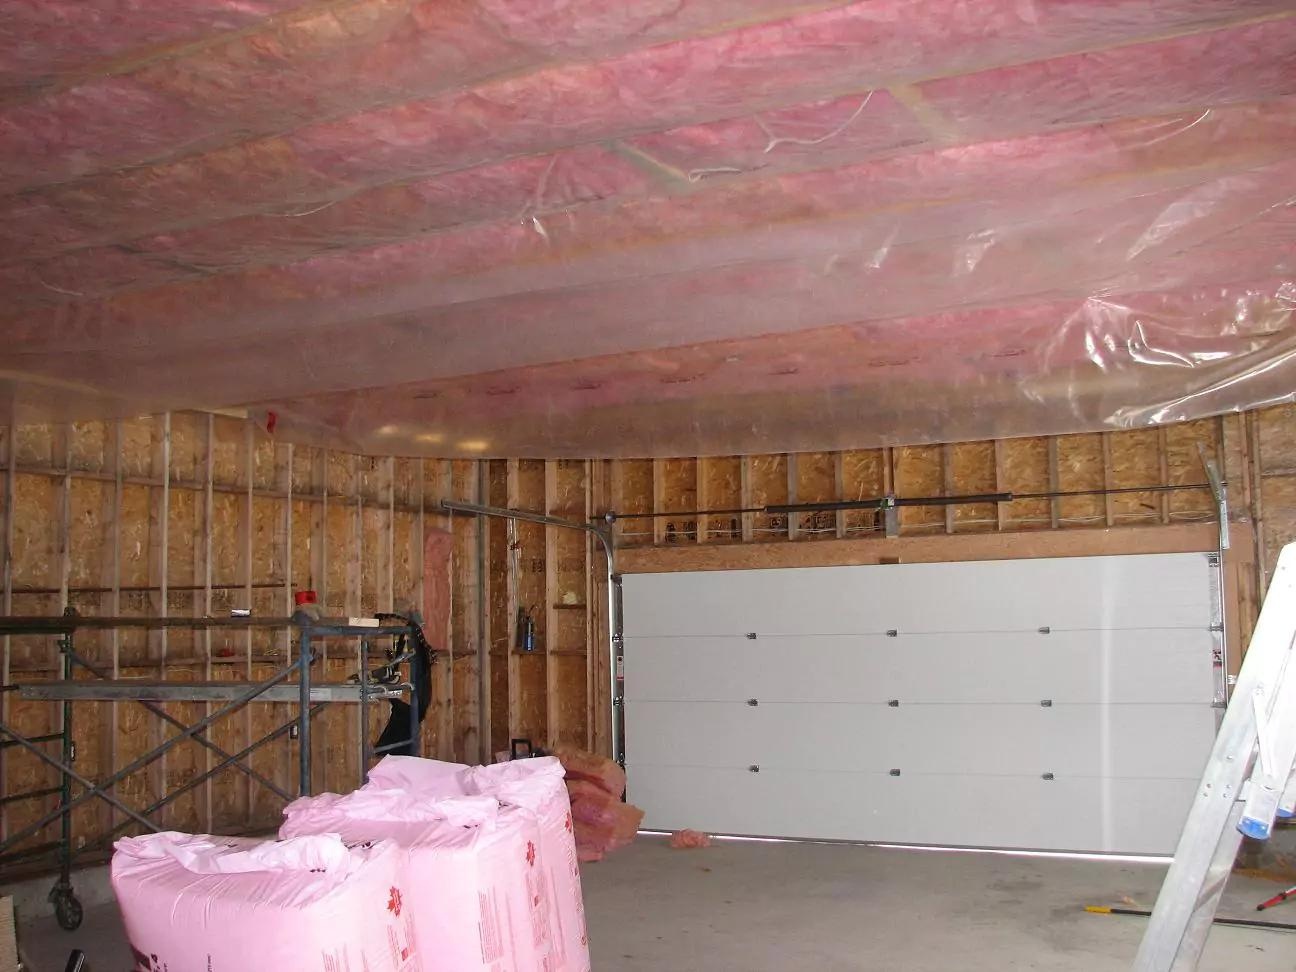
Step 5: Install the Insulation
Now that your garage is prepared, it’s time to start installing the insulation. The process may vary depending on the type of insulation you have chosen. Here’s a general guide to help you with the installation process:
- Start with the Walls: Begin by installing insulation on the walls of your garage. Measure the height of the wall and cut the insulation panels to fit the length. Place the panels against the wall, ensuring they fit snugly and cover the entire area. Use a staple gun to attach the insulation to the studs, making sure it is secure and properly aligned.
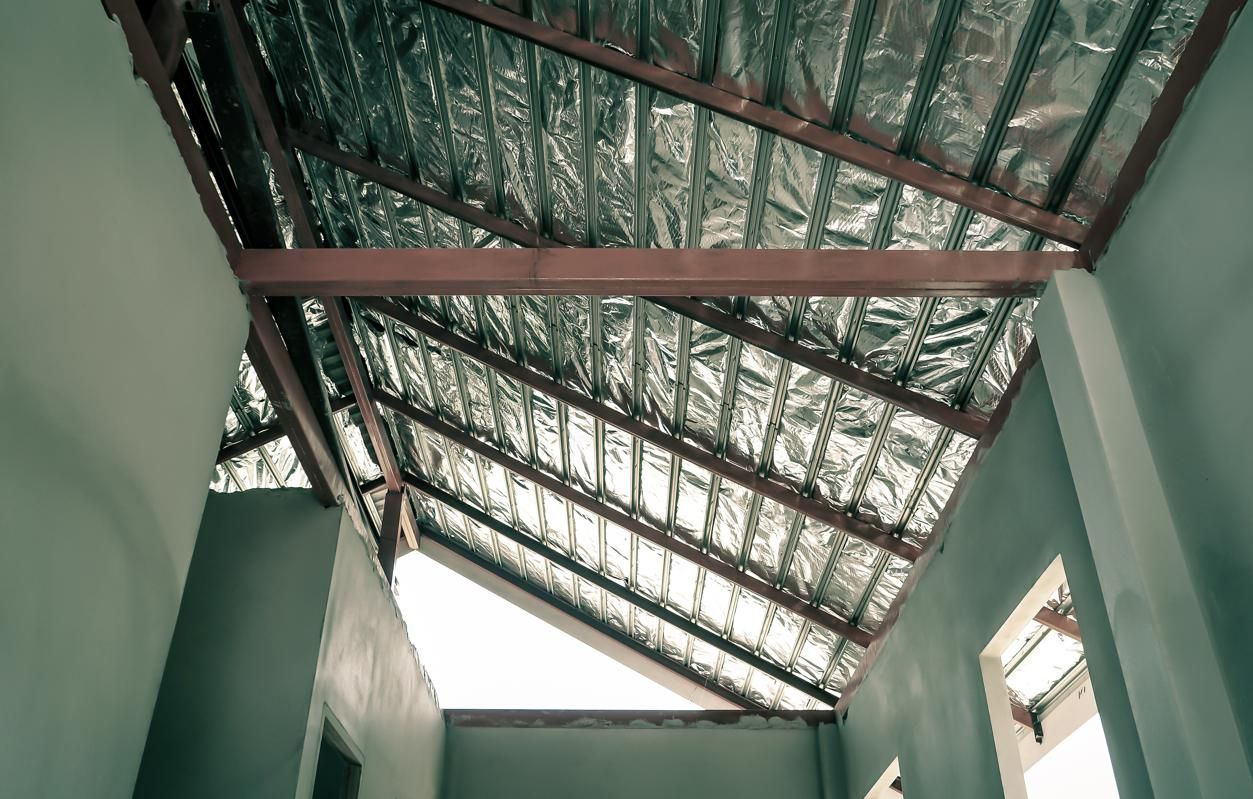
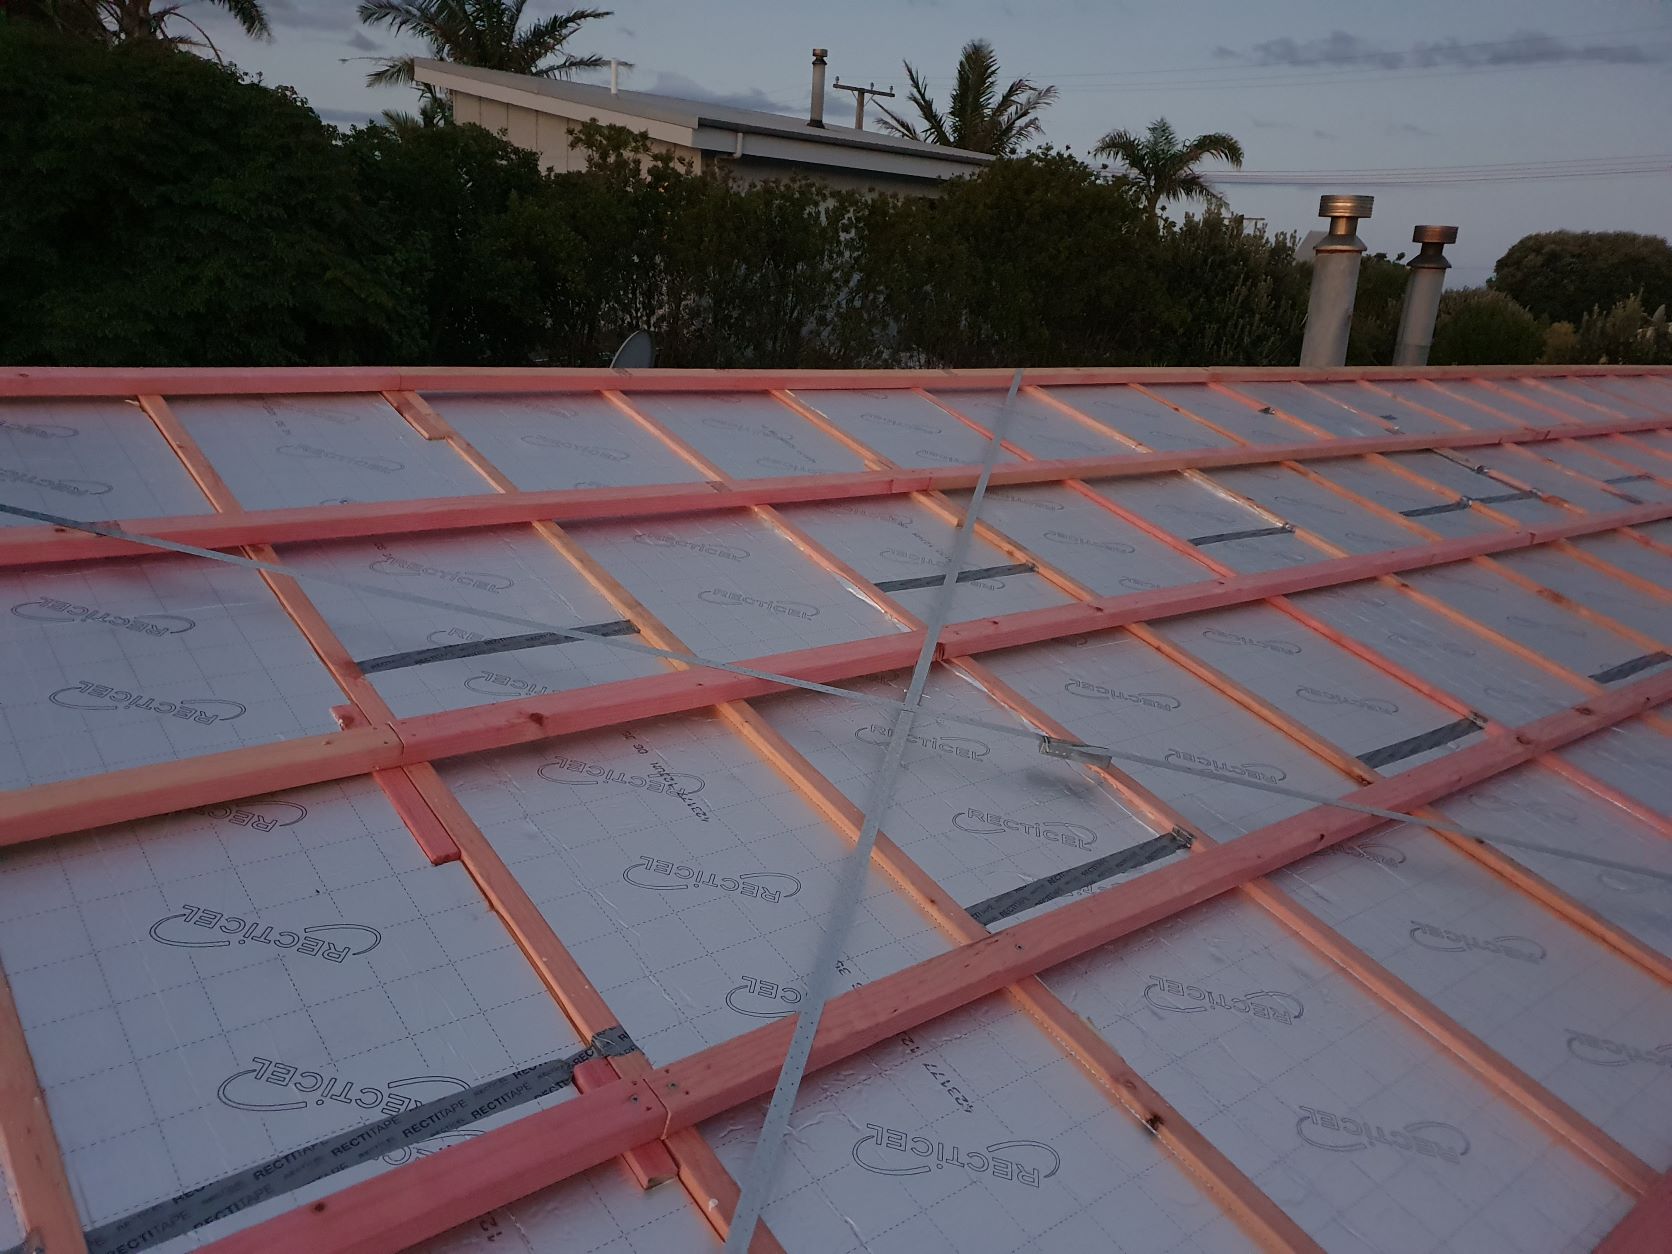
- Continue with the Ceiling: If you plan to insulate the ceiling, measure the dimensions and cut the insulation material accordingly. Carefully place the insulation between the ceiling joists, ensuring it is properly aligned and covers the entire space. Use a staple gun to secure the insulation in place.
- Fit Insulation around Obstructions: If there are any electrical outlets, air vents, or other obstructions on the walls or ceiling, cut the insulation material to fit around them. Make precise measurements and use a utility knife to create openings for these fixtures.
- Seal Seams and Joints: For maximum effectiveness, use aluminum foil tape to seal any seams or joints in the insulation material. This will prevent air leakage and improve the insulation’s performance.
- Repeat the Process: Continue installing insulation panels or materials until you have covered all the walls and ceiling. Take your time to ensure each piece fits properly and is securely fastened.
- Consider Double Layering: In colder climates or if you require additional insulation, you may opt to install a second layer of insulation. Simply repeat the insulation installation process using the same method as before.
Remember to follow the manufacturer’s instructions and safety precautions while installing the insulation. Take breaks as needed, especially if you’re working with a large garage or if the installation process is physically demanding.
Once you have installed the insulation, it’s time to move on to the next step: sealing any gaps and air leaks to further enhance the insulation’s effectiveness.
When installing insulation in a garage, make sure to wear protective gear such as gloves, a mask, and safety glasses to prevent irritation from the insulation materials. Proper ventilation is also important to avoid inhaling any harmful particles.
Step 6: Seal Gaps and Air Leaks
After installing the insulation, it’s crucial to seal any gaps and air leaks to maximize its effectiveness. This step will help prevent unwanted drafts and maintain a more consistent temperature in your garage. Here’s how you can seal gaps and air leaks:
- Inspect the Walls and Ceiling: Carefully examine the walls and ceiling of your garage for any gaps, cracks, or openings that may allow air to leak in or out. Common areas to check include around windows, doors, electrical outlets, and pipes.
- Use Caulk or Weatherstripping: Apply caulk or weatherstripping to seal gaps around windows and doors. Make sure to cover all the edges and ensure a tight seal. For larger gaps or cracks, you may need to use expanding foam to fill them properly.
- Seal Electrical Outlets and Switches: If there are electrical outlets or switches on the walls, consider using foam gaskets or outlet insulation pads to seal them. This will prevent drafts and improve energy efficiency.
- Insulate Pipes: Pay attention to any exposed pipes in the garage and insulate them with foam pipe insulation. This will help prevent heat loss and protect the pipes from extreme temperatures.
- Check Ventilation: It’s important to ensure that any air vents or ventilation systems in your garage are not blocked by the insulation. Consult with a professional if necessary to make sure the insulation installation does not interfere with proper ventilation.
- Test for Air Leaks: Once you have sealed the gaps and air leaks, it’s a good idea to perform an air leak test. Close all windows, doors, and vents, and turn on any exhaust fans. Light an incense stick or hold a piece of tissue near potential leak areas. If you notice the smoke or tissue moving, it indicates the presence of air leaks that need to be addressed.
Sealing gaps and air leaks is an essential step in creating an energy-efficient and well-insulated garage. Taking the time to properly seal these areas will help maintain a consistent temperature, prevent energy loss, and improve overall comfort.
Once you have completed this step, you can proceed to insulating the garage door, which is covered in the next step.
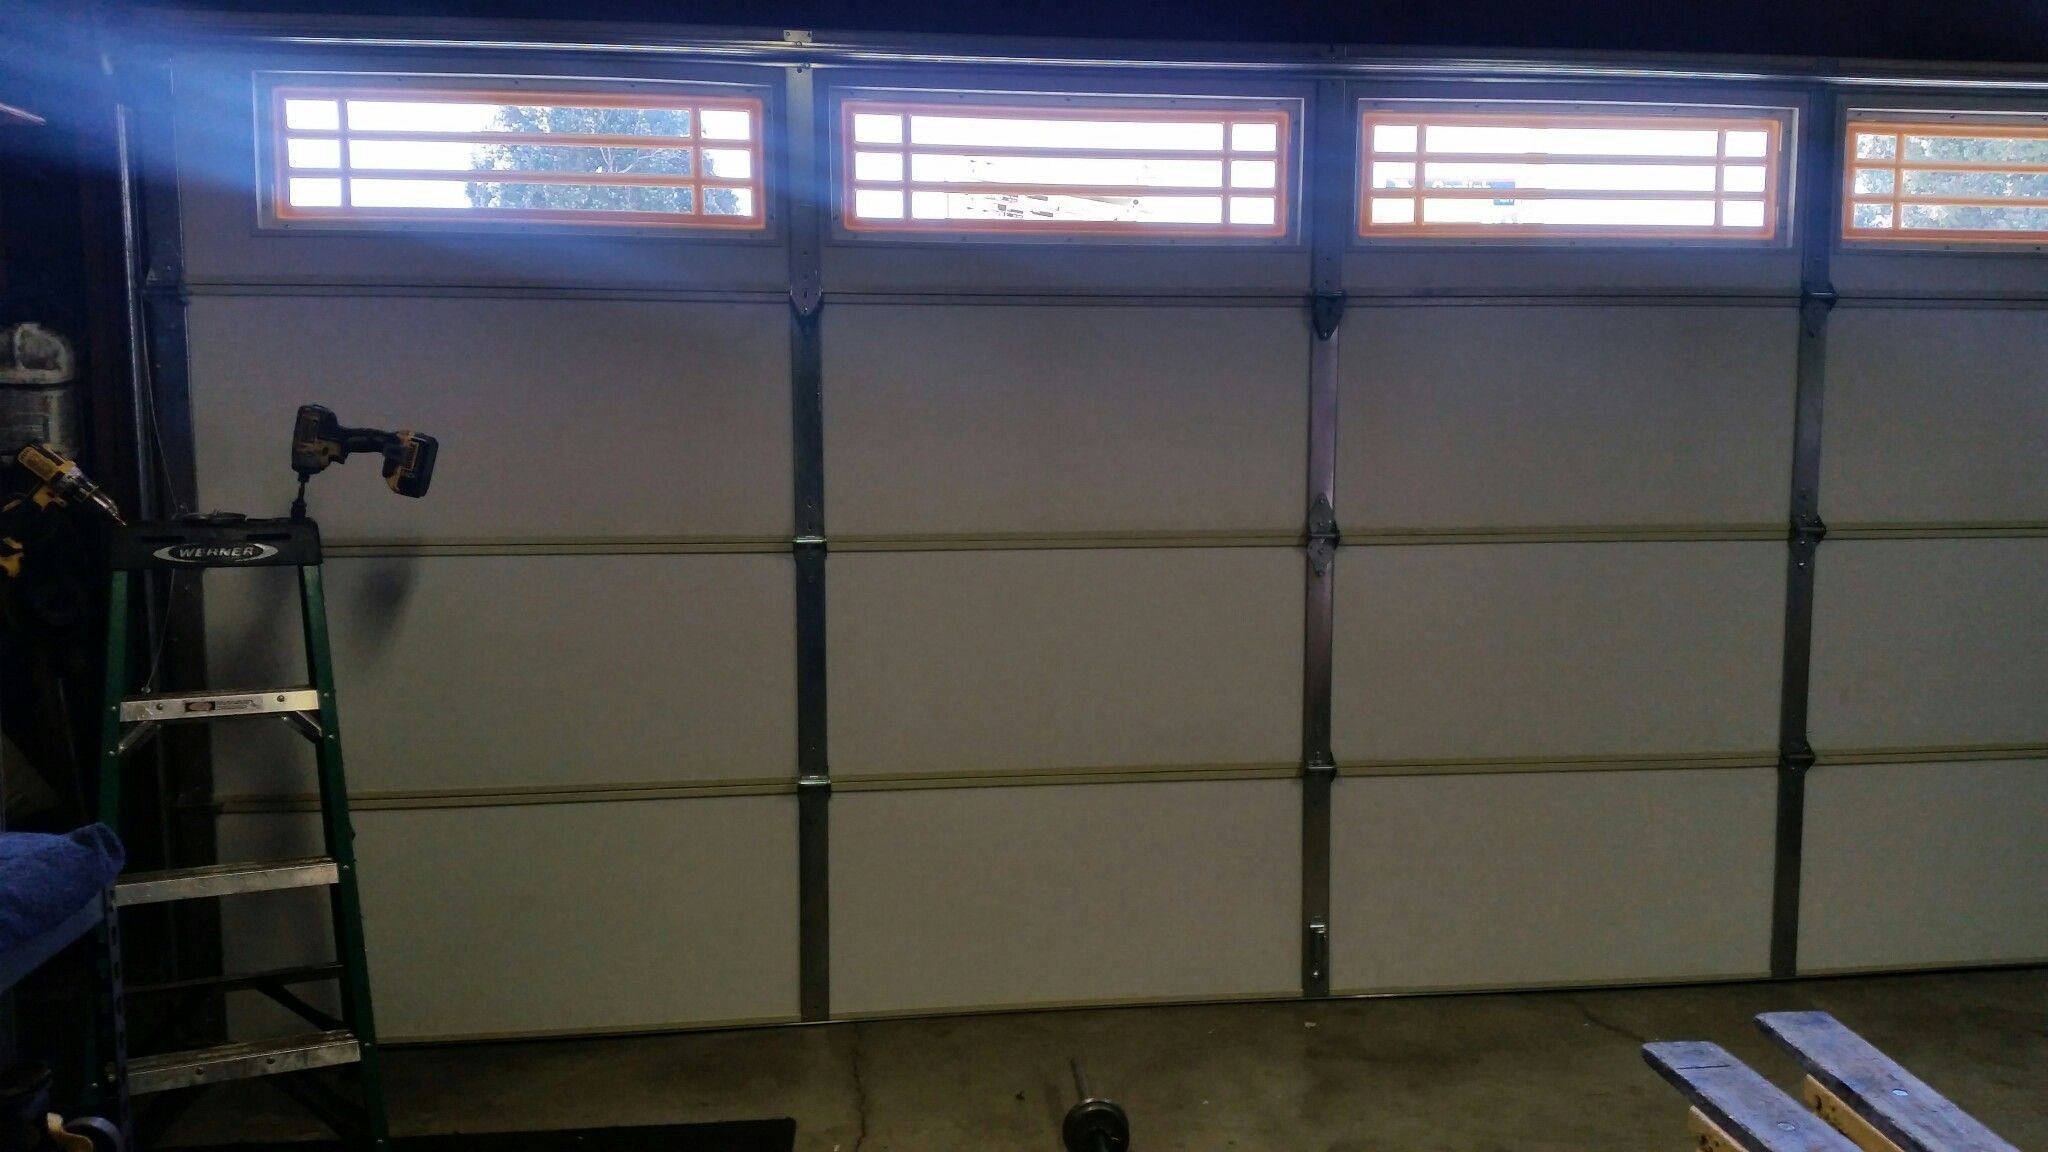
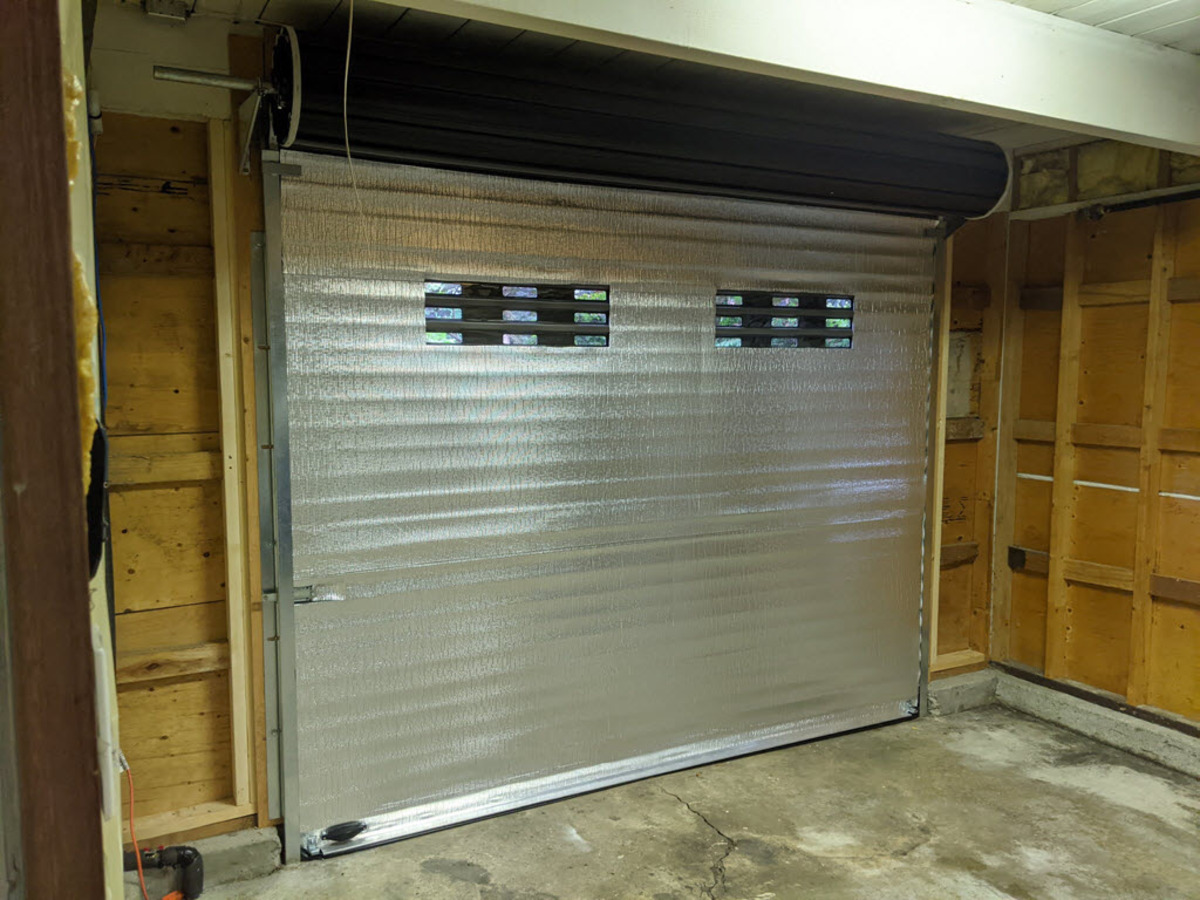
Step 7: Insulate the Garage Door
Insulating your garage door is an important step to further enhance the energy efficiency of your garage. Garage doors are often a significant source of heat loss or gain, so insulating them can help maintain a more comfortable temperature and reduce energy consumption. Here’s how you can insulate your garage door:
- Choose the Right Insulation Material: There are several options for insulating a garage door, including reflective panels, foam board panels, or insulation kits designed specifically for garage doors. Consider the insulation material’s R-value, ease of installation, and durability when making your choice.
- Measure the Garage Door Panels: Measure the dimensions of each panel on the garage door. Take note of any windows or obstructions that may require different-sized insulation pieces.
- Cut the Insulation Material: Using a utility knife or appropriate cutting tools, cut the insulation material to fit the measurements of each garage door panel. Make sure to follow the manufacturer’s instructions for cutting and installing the specific insulation material you’re using.
- Attach the Insulation Panels: Depending on the type of insulation material, you may need to use adhesive or double-sided tape to attach the insulation panels to the garage door. Make sure the panels are properly aligned and secure.
- Seal the Edges: To further improve the insulation’s effectiveness, use weatherstripping or adhesive-backed foam tape to seal the edges of the insulation panels. This will help prevent any air infiltration around the edges of the garage door.
- Consider Insulating the Garage Door Windows: If your garage door has windows, you can apply window insulation film or add window inserts to improve insulation around them. This will help minimize heat transfer and maintain a more consistent temperature inside the garage.
Insulating your garage door not only helps regulate the temperature but also reduces noise transmission and enhances the overall insulation of your garage. It’s a relatively simple and cost-effective way to further improve energy efficiency and comfort.
Once you have completed insulating the garage door, you can move on to the optional step of installing a vapor barrier, which is covered in the next step.
Step 8: Install a Vapor Barrier (optional)
Installing a vapor barrier in your garage is an optional step that can provide additional protection against moisture and condensation. A vapor barrier is a material that helps prevent the movement of moisture from one area to another. While not all garage insulation projects require a vapor barrier, it can be beneficial in certain situations, such as in humid climates or if your garage is prone to moisture issues. Here’s how you can install a vapor barrier in your garage:
- Assess the Need for a Vapor Barrier: Determine whether your garage requires a vapor barrier. Consider factors such as the climate in your area, the level of moisture in the garage, and the potential for condensation.
- Choose the Right Vapor Barrier: There are different types of vapor barrier materials available, such as plastic sheeting or foil-faced insulation. Select a material that is appropriate for your garage’s needs and compatible with the insulation material you have installed.
- Prepare the Garage: Ensure that the garage walls and ceiling are clean and dry before installing the vapor barrier. If there are any existing moisture issues, address them before proceeding.
- Measure and Cut the Vapor Barrier: Measure the dimensions of the walls and ceiling where you plan to install the vapor barrier. Cut the vapor barrier material to fit the size of each area, leaving a small overlap at the edges for proper sealing.
- Install the Vapor Barrier: Attach the vapor barrier to the garage walls and ceiling using adhesive or staples. Make sure there are no gaps or openings where moisture could penetrate. Overlap the edges of the vapor barrier and seal them with tape or caulk for optimum protection.
- Consider Vents and Openings: Take into account any vents or openings in the garage when installing the vapor barrier. Ensure the vapor barrier is correctly integrated around these areas to maintain proper ventilation and airflow.
Installing a vapor barrier can help prevent moisture-related issues, such as mold and mildew growth, and protect the integrity of your insulation. However, it’s important to note that vapor barriers are not always necessary and may not be recommended in certain situations. If you are unsure whether a vapor barrier is required for your garage, consult with a professional for guidance.
With the optional step of installing a vapor barrier covered, we can now move on to additional tips and considerations for your garage insulation project.
Read more: How To Insulate A Garage Ceiling
Step 9: Additional Tips and Considerations
As you near the completion of your garage insulation project, here are some additional tips and considerations to keep in mind:
- Consider Garage Door Seals: Install weatherstripping or garage door seals to further improve the insulation around the edges of the garage door. This will help prevent drafts and enhance energy efficiency.
- Insulate the Garage Floor: If you have an unheated crawl space beneath your garage, insulating the garage floor can help prevent heat loss and increase overall energy efficiency. Consider using foam board insulation or other suitable materials for this purpose.
- Maintain Proper Ventilation: While sealing gaps and air leaks is important for insulation, it is equally crucial to maintain proper ventilation in your garage. Ensure that any air vents or ventilation systems are not obstructed by insulation and are functioning correctly.
- Monitor Moisture Levels: Regularly check for signs of moisture accumulation in your garage, such as condensation or dampness. If you notice any issues, investigate and address them promptly to prevent damage to the insulation or other structures.
- Consider Professional Assistance: If you’re unsure about any aspect of the insulation installation or if you have a large or complex garage, it may be beneficial to seek professional assistance. Insulation professionals can provide guidance, ensure proper installation, and address any specific challenges or requirements you may have.
- Follow Safety Precautions: Throughout the insulation installation process, always prioritize safety. Wear appropriate protective gear, such as gloves and goggles, and exercise caution when using tools or working at heights. If you’re working with unfamiliar materials or techniques, take the time to educate yourself or consult with a professional.
Remember, insulating your garage is an investment that can provide long-term benefits in terms of energy savings, comfort, and protection of your belongings. Proper insulation will help regulate the temperature, reduce energy waste, minimize noise, and create a more enjoyable overall space.
By following these additional tips and considerations, you can ensure that your garage insulation project is successful and meets your specific needs.
With Step 9 and the additional tips completed, you have reached the end of our comprehensive guide on how to install insulation in your garage. We hope this guide has been informative and helpful in your insulation journey. Enjoy your improved, well-insulated garage!
Note: Remember to always refer to manufacturer’s instructions and consult with professionals when necessary for specific guidance regarding your insulation materials and installation process.
Conclusion
Congratulations on completing the installation of insulation in your garage! By following the steps outlined in this comprehensive guide, you have taken the necessary measures to improve energy efficiency, maintain comfortable temperatures, reduce noise levels, and protect your belongings from extreme weather conditions.
Insulating your garage goes beyond just creating a more comfortable environment. It also helps reduce energy waste, lower utility bills, and enhance the overall functionality of the space. Whether you use your garage for storing vehicles, as a workshop, or even as an additional living area, proper insulation can make a significant difference.
Throughout this guide, we discussed the importance of gathering materials, measuring the space, choosing the right insulation type, preparing the garage, installing the insulation, sealing gaps and air leaks, insulating the garage door (if applicable), considering a vapor barrier (if necessary), and incorporating additional tips and considerations. By carefully following these steps, you have successfully completed your garage insulation project.
Remember to regularly monitor the insulation, check for any signs of moisture or damage, and maintain proper ventilation in your garage. By doing so, you can ensure that your insulation continues to perform optimally and provides long-term benefits.
If you ever have questions or need assistance with your garage insulation or any other home improvement projects, don’t hesitate to consult with professionals for guidance. They can provide expert advice and ensure that your insulation meets the highest standards of efficiency and effectiveness.
Thank you for choosing this guide as your resource for installing insulation in your garage. We hope it has been helpful, informative, and empowering. Enjoy the improved comfort, energy efficiency, and functionality that your well-insulated garage now offers!
Frequently Asked Questions about How To Install Insulation In Garage
Was this page helpful?
At Storables.com, we guarantee accurate and reliable information. Our content, validated by Expert Board Contributors, is crafted following stringent Editorial Policies. We're committed to providing you with well-researched, expert-backed insights for all your informational needs.


0 thoughts on “How To Install Insulation In Garage”