Articles
How To Install Radiant Barrier Insulation
Modified: October 31, 2024
Learn how to install radiant barrier insulation with our informative articles. Save energy and reduce heat transfer in your home.
(Many of the links in this article redirect to a specific reviewed product. Your purchase of these products through affiliate links helps to generate commission for Storables.com, at no extra cost. Learn more)
Introduction
Radiant barrier insulation is an effective way to improve energy efficiency in homes and buildings. It works by reducing radiant heat transfer, which is the primary source of heat gain or loss in a structure. By installing radiant barrier insulation, you can significantly reduce the amount of heat that enters your home during hot summer months, and also prevent heat loss during colder months.
The concept of radiant barrier insulation is based on the principle of reflecting radiant heat rather than absorbing it. Traditional insulation materials, such as fiberglass or cellulose, work by slowing down heat transfer through conduction and convection. However, they are not as effective in blocking radiant heat.
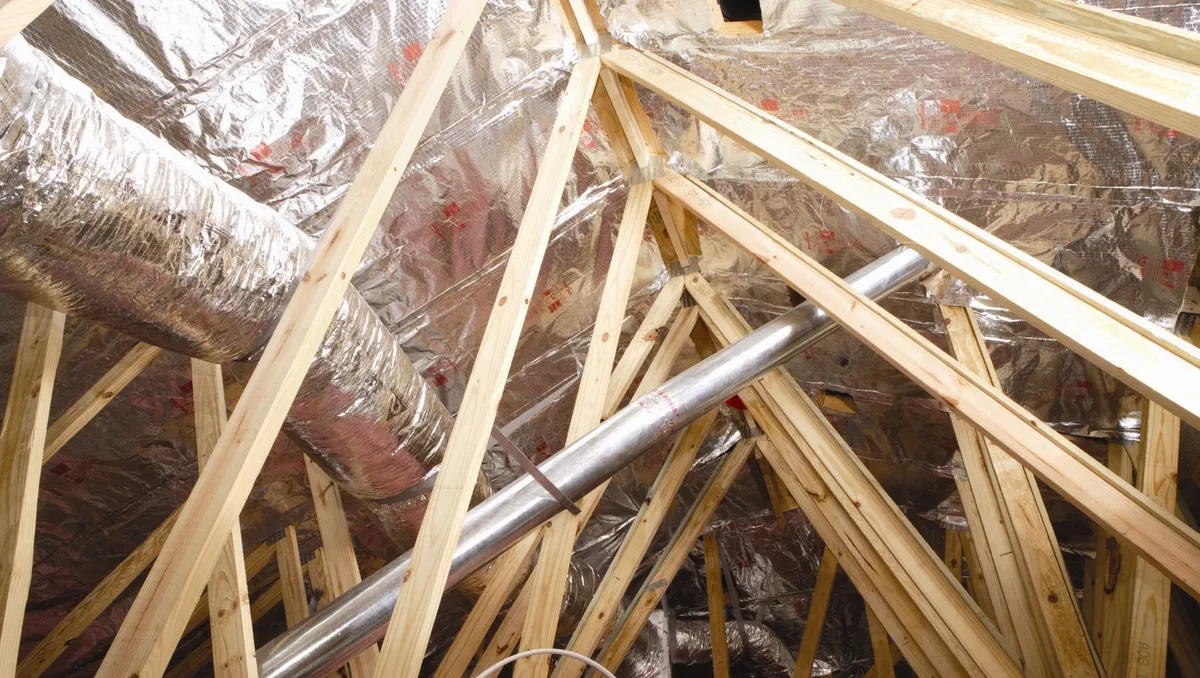
Radiant barrier insulation typically consists of a reflective material, such as aluminum foil, which is installed in the attic or on the underside of the roof. This reflective surface reflects radiant heat back towards its source, preventing it from entering the living space below. It acts as a barrier, minimizing the transfer of heat through radiation.
In addition to its energy-saving benefits, radiant barrier insulation also helps to improve overall comfort levels in the home. By reducing the amount of heat entering the living space, it helps to maintain a more consistent and comfortable indoor temperature.
In this article, we will guide you through the process of installing radiant barrier insulation in your home. We will cover the steps involved, the tools and materials you will need, and provide some tips and tricks for a successful installation. So, let’s get started and learn how to install radiant barrier insulation!
Key Takeaways:
- Installing radiant barrier insulation in your attic can significantly improve energy efficiency, reduce utility bills, and create a more comfortable living environment by reflecting radiant heat and preventing its transfer.
- Proper preparation, precise measuring and cutting, thorough installation, and secure fastening are essential steps to ensure the effectiveness and longevity of radiant barrier insulation in your home.
Read more: What Is Radiant Barrier Insulation
What is Radiant Barrier Insulation?
Radiant barrier insulation is a type of insulation that prevents radiant heat transfer. Unlike traditional insulation materials that rely on slowing down the transfer of heat through conduction and convection, radiant barrier insulation focuses on reflecting radiant heat.
Radiant heat is energy that is transferred in the form of electromagnetic waves. It moves in a straight line and can travel through empty space. When the sun’s rays hit the roof of a house, for example, they transfer heat directly to the surface of the roof. This heat then radiates down and warms up the attic and the living spaces below.
Traditional insulation materials, such as fiberglass or cellulose, are effective in reducing heat transfer through conduction and convection. However, they have limitations when it comes to blocking radiant heat. This is where radiant barrier insulation comes in.
Radiant barrier insulation typically consists of a reflective material, such as a layer of aluminum foil. This reflective surface is installed in the attic or on the underside of the roof. It works by reflecting the radiant heat back towards its source, preventing it from entering the living spaces below.
By installing radiant barrier insulation, you can reduce the amount of heat that enters your home during hot summer months. This can lead to lower cooling costs and a more comfortable indoor environment. In colder months, radiant barrier insulation can also help to prevent heat loss from the interior of your home, keeping it warmer and reducing heating costs.
Radiant barrier insulation is especially beneficial in hot climates or regions with long, intense summers. It can help to reduce the load on your air conditioning system and improve overall energy efficiency.
It is important to note that radiant barrier insulation complements traditional insulation materials and should be used in conjunction with them. While traditional insulation slows down heat transfer through conduction and convection, radiant barrier insulation focuses on blocking radiant heat.
In the next section, we will explore the benefits of radiant barrier insulation in more detail. Understanding the advantages can help you make an informed decision about whether radiant barrier insulation is right for your home.
Benefits of Radiant Barrier Insulation
Radiant barrier insulation offers several benefits that can greatly improve the comfort, energy efficiency, and cost-effectiveness of your home. Let’s explore the advantages of installing radiant barrier insulation:
- Increased Energy Efficiency: One of the primary benefits of radiant barrier insulation is its ability to improve energy efficiency. By reflecting radiant heat back towards its source, it reduces the amount of heat that enters your home during hot summer months. This means that your cooling system doesn’t have to work as hard to maintain a comfortable indoor temperature, resulting in lower energy consumption and reduced cooling costs.
- Enhanced Comfort: Radiant barrier insulation helps to maintain a more consistent indoor temperature by minimizing the transfer of heat through radiation. This creates a more comfortable living space, especially in rooms directly below the attic or roof where radiant heat can have a significant impact.
- Lower Utility Bills: With improved energy efficiency comes reduced utility bills. By reducing the workload on your cooling system, radiant barrier insulation can lead to substantial savings on your monthly energy bills. It also helps to lower heating costs during colder months by preventing heat loss through the roof.
- Extended Lifespan of HVAC Systems: By reducing the strain on your air conditioning system, radiant barrier insulation can help extend its lifespan. Your cooling system won’t have to work as hard and will experience less wear and tear, leading to potential savings on maintenance and replacement costs.
- Eco-Friendly Solution: Using radiant barrier insulation can contribute to a more sustainable and environmentally friendly home. By reducing energy consumption, you are reducing your carbon footprint and helping to preserve natural resources.
- Easy Installation: Radiant barrier insulation is relatively easy to install, especially when compared to other types of insulation. With the right tools and materials, it is a project that can be completed by homeowners with basic DIY skills.
- Long-lasting Performance: Once installed, radiant barrier insulation can provide long-lasting performance. It is not prone to settling or compressing over time, ensuring its effectiveness in blocking radiant heat for many years.
By taking advantage of these benefits, you can create a more energy-efficient and comfortable living environment while also saving money on your utility bills.
In the next section, we will discuss the tools and materials you will need to install radiant barrier insulation in your home.
Tools and Materials Needed
Before you begin installing radiant barrier insulation in your home, it’s essential to gather all the necessary tools and materials. Here’s a list of items you will need:
Tools:
- Measuring tape
- Utility knife
- Straight edge or ruler
- Stapler or staple gun
- Staple remover
- Protective gloves
- Protective eyewear
- Ladder or scaffolding (if needed)
Read more: How To Install Radiant Barrier In Attic
Materials:
- Radiant barrier insulation (rolls or sheets)
- Adhesive spray or double-sided tape (optional)
- Duct tape or foil tape
- Staples
- Foam insulation (for sealing gaps or cracks, if necessary)
The type and quantity of radiant barrier insulation materials you will need depend on the size of your attic or the area you plan to insulate. Measure the area accurately to determine the total square footage and ensure that you purchase enough material to cover the intended space.
When purchasing radiant barrier insulation, consider the reflective properties and the recommended R-value. The R-value measures the insulation’s thermal resistance; the higher the R-value, the better the insulation’s ability to resist heat flow. Ensure that the radiant barrier insulation you choose meets the recommended R-value for your region.
Additionally, you may want to consider using an adhesive spray or double-sided tape to help secure the insulation in place. This is particularly useful if the attic has an uneven surface or if you want to ensure a more permanent installation.
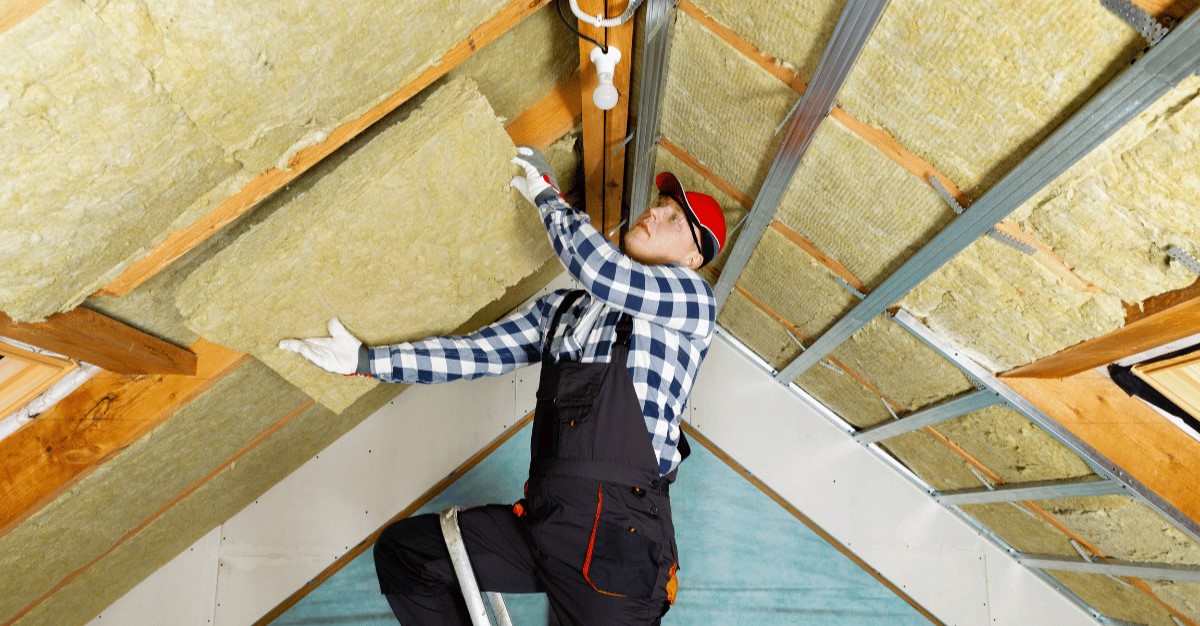
Lastly, remember to prioritize safety during the installation process. Use protective gloves and eyewear to shield yourself from potential injuries. If working at heights, make sure you have a stable ladder or scaffolding to safely access the installation area.
Now that you have gathered all the necessary tools and materials, you are ready to move on to the next step: preparing the attic for the radiant barrier insulation installation.
Step 1: Preparing the Attic
Before installing radiant barrier insulation in your attic, it’s important to properly prepare the space to ensure a smooth and effective installation. Follow these steps to prepare your attic:
- Clean and declutter: Start by clearing out any debris, clutter, or obstructions in your attic. This will provide you with a clean and organized space to work in. Remove any items that might hinder the installation process or block access to the areas where the radiant barrier insulation will be placed.
- Inspect for leaks or damage: Check the attic for any signs of water leaks or damage. Look for stains, wet spots, or any visible signs of moisture. Address any existing issues or leaks before proceeding with the installation to ensure that your attic remains dry and free from potential damage.
- Seal gaps and cracks: Inspect the attic for any gaps, cracks, or openings that may allow air to escape or enter. Use foam insulation or caulk to seal these areas, ensuring that there are no air leaks that can affect the performance of the radiant barrier insulation. This step will help to improve energy efficiency and prevent air leakage from the living space below.
- Ensure proper ventilation: Adequate attic ventilation is crucial for maintaining a healthy and energy-efficient home. Check that your attic has proper ventilation in place, such as vents or fans, to allow for air circulation and prevent the buildup of moisture or heat. If necessary, consult with a professional to ensure that your attic ventilation is up to code.
- Consider safety measures: Attics can be challenging to navigate, especially with limited lighting. Prioritize safety by ensuring that your attic has sufficient lighting and that you have a clear pathway to access the installation areas. Be cautious of any tripping hazards, loose floorboards, or exposed wiring.
By properly preparing your attic, you will create an optimal environment for the installation of radiant barrier insulation. A clean, well-sealed, and ventilated attic will maximize the performance and energy-saving benefits of the insulation.
Once you have completed the preparation steps, you are ready to move on to measuring and cutting the radiant barrier insulation in the next step.
Step 2: Measuring and Cutting the Radiant Barrier
Once your attic is prepared, the next step in installing radiant barrier insulation is to measure and cut the material to fit the installation area. Follow these steps for accurate measuring and cutting:
- Measure the attic space: Use a measuring tape to determine the dimensions of the areas where you will be installing the radiant barrier insulation. Measure the length and width of each section accurately to ensure you have the correct amount of material.
- Add extra inches: When measuring, add a few extra inches to the dimensions to allow for overlap and coverage. This will ensure that the radiant barrier insulation fully covers the intended area and prevents any radiant heat from passing through. The amount of overlap required may vary based on the specific installation instructions provided by the manufacturer.
- Mark and cut the material: Using a straight edge or ruler, mark the measurements on the radiant barrier insulation material. Use a utility knife to carefully cut along the marked lines. Take your time and ensure clean, straight cuts to ensure a neat and professional-looking installation.
- Repeat for each section: If you have multiple sections in your attic, repeat the measuring and cutting process for each section. This will ensure that you have the right size and shape of radiant barrier insulation to cover the entire installation area.
It’s important to adhere to the manufacturer’s instructions when measuring and cutting the radiant barrier insulation. Follow any specific guidelines regarding overlap, trimming, or joining multiple pieces together to ensure the best performance and installation results.
Remember to wear protective gloves and eyewear while handling and cutting the material to avoid any potential injuries. Handle the radiant barrier insulation with care to avoid tears or damage that may compromise its effectiveness.
Once you have correctly measured and cut the radiant barrier insulation, you are ready to proceed to the next step: installing the radiant barrier.
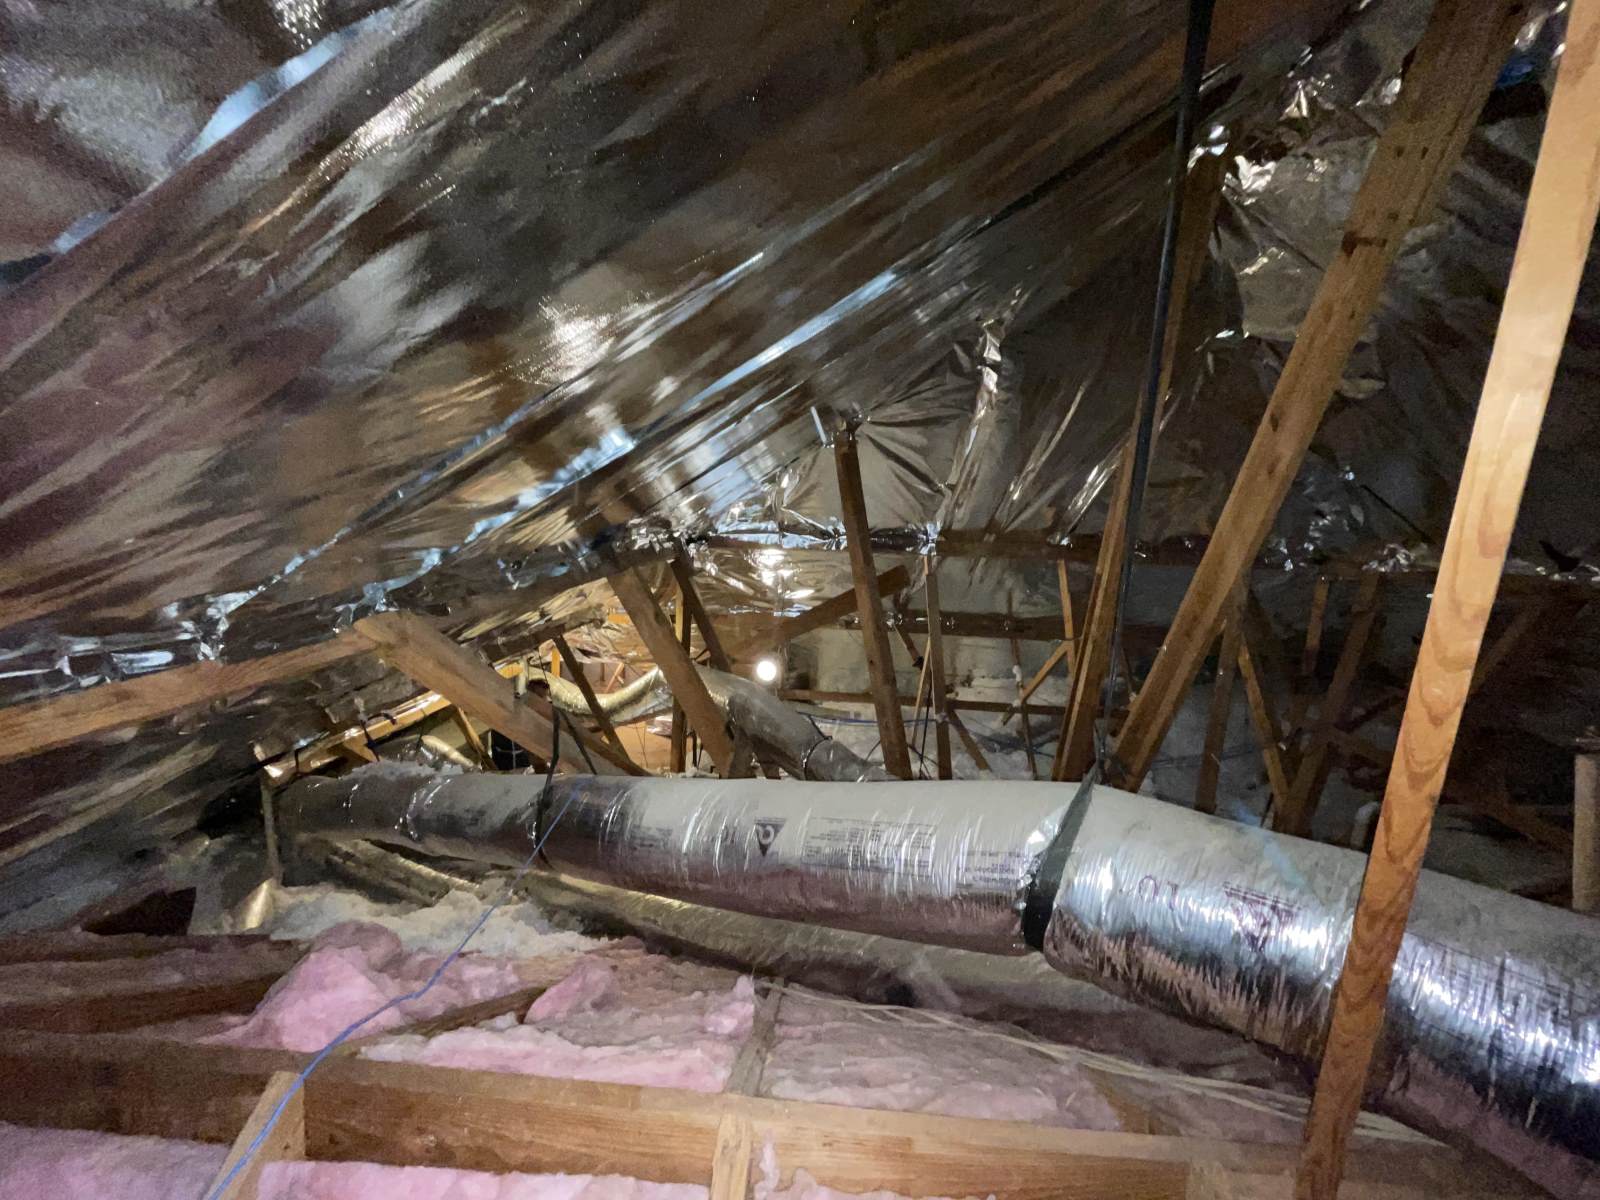
When installing radiant barrier insulation, make sure to leave an air gap between the insulation and the roof for it to be effective in reflecting heat.
Step 3: Installing the Radiant Barrier
With the radiant barrier insulation material pre-cut and ready, it’s time to install it in your attic. Follow these steps to ensure a proper and effective installation:
- Start from one end: Begin the installation process from one end of the attic, working your way across the space. This will ensure a systematic and organized approach, allowing for easier installation and a neater end result.
- Unroll the radiant barrier insulation: If you are using rolls of radiant barrier insulation, unroll the material as you move along the installation area. If you are using pre-cut sheets, have them ready for placement.
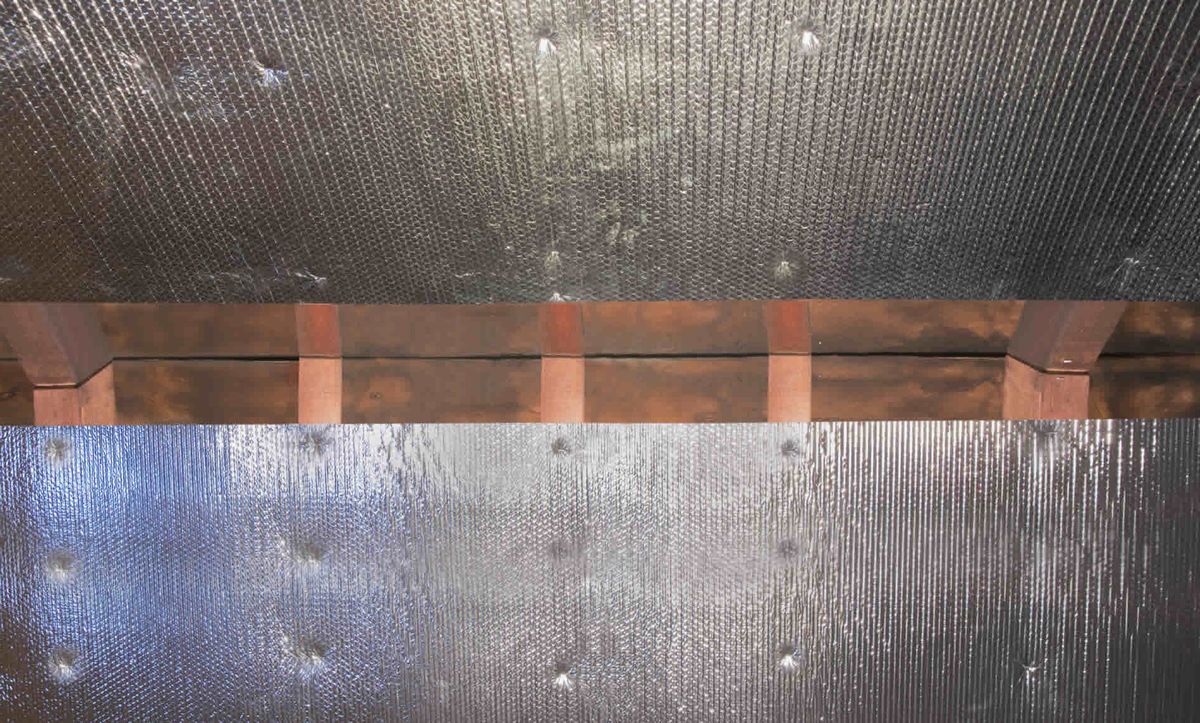
- Position the material: Place the radiant barrier insulation with the reflective side facing downward, towards the living space below. The reflective side is designed to reflect radiant heat, so it should face the side where the heat is coming from (typically the roof).
- Smooth out any wrinkles or folds: As you position the material, ensure that it lays flat and smooth. Smooth out any wrinkles, folds, or creases to maximize the contact between the radiant barrier insulation and the surface it is covering. This will help to ensure proper heat reflection and performance.
- Overlap the insulation: As you move from one section to another, overlap each piece of radiant barrier insulation by a few inches. This will create a continuous barrier that prevents any gaps for radiant heat to pass through.
- Avoid covering vents or electrical fixtures: Take caution not to cover any vents, electrical fixtures, or other important components in the attic. Ensure that these areas remain accessible and free from obstruction.
- Trim as needed: If any pieces of radiant barrier insulation are too long or extend beyond the intended area, use a utility knife to carefully trim them to the appropriate size. Trim with precision to maintain a clean and professional appearance.
- Continue until the installation is complete: Repeat the process of positioning, smoothing, overlapping, and trimming until you have covered the entire installation area with the radiant barrier insulation. Take your time and ensure a thorough and precise installation.
Proper positioning, smoothing, and overlapping of the radiant barrier insulation is crucial to ensure its effectiveness in reflecting radiant heat. Take care to follow the manufacturer’s guidelines and any specific instructions provided to achieve the best results.
Once you have completed the insulation installation, you can proceed to the next step: securing the radiant barrier.
Step 4: Securing the Radiant Barrier
After installing the radiant barrier insulation in your attic, it’s important to securely fasten it in place to ensure it remains in position. Follow these steps to properly secure the radiant barrier:
- Use a staple gun or stapler: Depending on the type of radiant barrier insulation material, use a staple gun or stapler to secure the material to the framing or support structures in the attic. Position the staples approximately 6 to 12 inches apart along the edges of the material, ensuring a secure attachment.
- Staple around vents and fixtures: When stapling around vents or fixtures, carefully staple near the edges without covering or obstructing the opening. Ensure that the radiant barrier insulation remains securely in place while allowing proper airflow and functionality of these components.
- Consider additional securing methods: If necessary, use additional securing methods such as adhesive spray, double-sided tape, or foil tape. These can provide extra reinforcement and help keep the radiant barrier insulation in place, especially on curved or uneven surfaces.
- Inspect and reinforce: Once you have stapled or secured the radiant barrier insulation, inspect the installation for any areas that may require additional reinforcement. Pay attention to corners, edges, or any sections where the material may be prone to sagging or coming loose.
- Make adjustments if needed: If you notice any areas that need adjustment or repositioning, carefully remove the staples or securing methods and make the necessary corrections. Ensure that the radiant barrier insulation is properly aligned and secured before proceeding.
Properly securing the radiant barrier insulation will prevent it from shifting or coming loose over time. This ensures that it maintains its effectiveness in reflecting radiant heat and helps maximize energy efficiency in your home.
Take the time to ensure a thorough and secure attachment, paying attention to any areas that may require extra reinforcement. Following these steps will help ensure a successful installation of the radiant barrier insulation in your attic.
Now that the radiant barrier is securely in place, you can move on to the final step: inspecting the installation to ensure its quality and effectiveness.
Step 5: Inspecting the Installation
After completing the installation and securing of the radiant barrier insulation in your attic, it’s important to inspect the installation to ensure its quality and effectiveness. Follow these steps to conduct a thorough inspection:
- Check for complete coverage: Inspect the entire installation area to ensure that the radiant barrier insulation is fully covering the intended spaces. Look for any gaps, areas of incomplete coverage, or places where the insulation may have shifted or come loose during the installation process. Identify areas that may require additional attention or adjustment.
- Verify proper alignment: Ensure that the radiant barrier insulation is properly aligned and straight along the surfaces it covers. Straight and even placement helps to maximize its ability to reflect radiant heat. Make any necessary adjustments to align the material correctly.
- Inspect for tears or damage: Carefully examine the radiant barrier insulation for any tears, punctures, or damage that may have occurred during installation or stapling. These areas can compromise the effectiveness of the insulation. If any damage is found, repair it by patching or replacing the affected section.
- Check for proper sealing: Verify that any gaps or cracks in the attic have been properly sealed before installing the radiant barrier insulation. Ensure that the insulation is not covering any vents, electrical fixtures, or other important components. Proper sealing and ventilation are essential for maintaining a healthy and energy-efficient attic space.
- Assess overall appearance: Step back and assess the overall appearance of the installation. Look for any areas that may require tidying up or adjustment to achieve a neat and professional look. Straighten any edges or corners that may have become misaligned during the securing process.
- Consider professional inspection: If you have any doubts about the quality or effectiveness of the installation, consider seeking the assistance of a professional. They can provide expert guidance and ensure that the radiant barrier insulation is correctly installed to deliver the maximum energy-saving benefits.
Inspecting the installation allows you to identify any areas that may need improvement or correction. By addressing these issues promptly, you can ensure that the radiant barrier insulation is functioning optimally.
Remember that regular maintenance and inspections are essential to prolong the lifespan and effectiveness of the radiant barrier insulation. Periodically check the installation to ensure ongoing performance and make any necessary repairs or adjustments as needed.
Congratulations on completing the installation of your radiant barrier insulation! By following these steps, you have taken a significant step towards improving the energy efficiency and comfort of your home.
Finally, let’s conclude our guide to installing radiant barrier insulation in your home.
Conclusion
Installing radiant barrier insulation in your home’s attic is a valuable investment in improving energy efficiency and enhancing comfort. By reflecting radiant heat and preventing its transfer into your living spaces, radiant barrier insulation can help reduce cooling costs during hot summer months and prevent heat loss in colder seasons. Moreover, it provides additional benefits such as increased HVAC system lifespan, lower utility bills, and a more sustainable living environment.
Throughout this guide, we’ve covered the step-by-step process of installing radiant barrier insulation, starting from preparing the attic and measuring the material, to securing the insulation in place and conducting a thorough inspection. By following these steps and using the appropriate tools and materials, you can successfully complete the installation on your own.
Remember to prioritize safety by wearing protective gear and taking caution while working in your attic. It’s also crucial to comply with the manufacturer’s instructions and guidelines to ensure proper performance and effectiveness of the radiant barrier insulation.
Regularly inspecting the installation, maintaining a clean attic, and addressing any maintenance issues that may arise will help to optimize the performance of the radiant barrier insulation over time.
With the installation of radiant barrier insulation complete, you can now enjoy the benefits of improved energy efficiency, lower utility bills, and a more comfortable living environment. Take pride in knowing that you have taken a proactive step towards reducing your carbon footprint and creating a more sustainable home.
If you have any concerns or are unsure about the installation process, it’s always wise to consult with a professional for guidance and assistance. They can provide personalized advice based on your specific needs and ensure a successful installation.
Thank you for following this guide on how to install radiant barrier insulation. We hope that it has been informative, and we wish you success in your energy-saving endeavors!
Frequently Asked Questions about How To Install Radiant Barrier Insulation
Was this page helpful?
At Storables.com, we guarantee accurate and reliable information. Our content, validated by Expert Board Contributors, is crafted following stringent Editorial Policies. We're committed to providing you with well-researched, expert-backed insights for all your informational needs.


0 thoughts on “How To Install Radiant Barrier Insulation”