Articles
How To Install Radon Fan
Modified: October 19, 2024
Learn how to install a radon fan in your home with our informative articles. Discover the steps and tools needed for a successful installation.
(Many of the links in this article redirect to a specific reviewed product. Your purchase of these products through affiliate links helps to generate commission for Storables.com, at no extra cost. Learn more)
Introduction
Welcome to this comprehensive guide on how to install a radon fan in your home. Radon is a colorless, odorless, and tasteless gas that can seep into your home from the ground. It is a naturally occurring gas that results from the decay of radioactive elements found in the soil and rocks. Prolonged exposure to high levels of radon can pose serious health risks, including an increased risk of lung cancer.
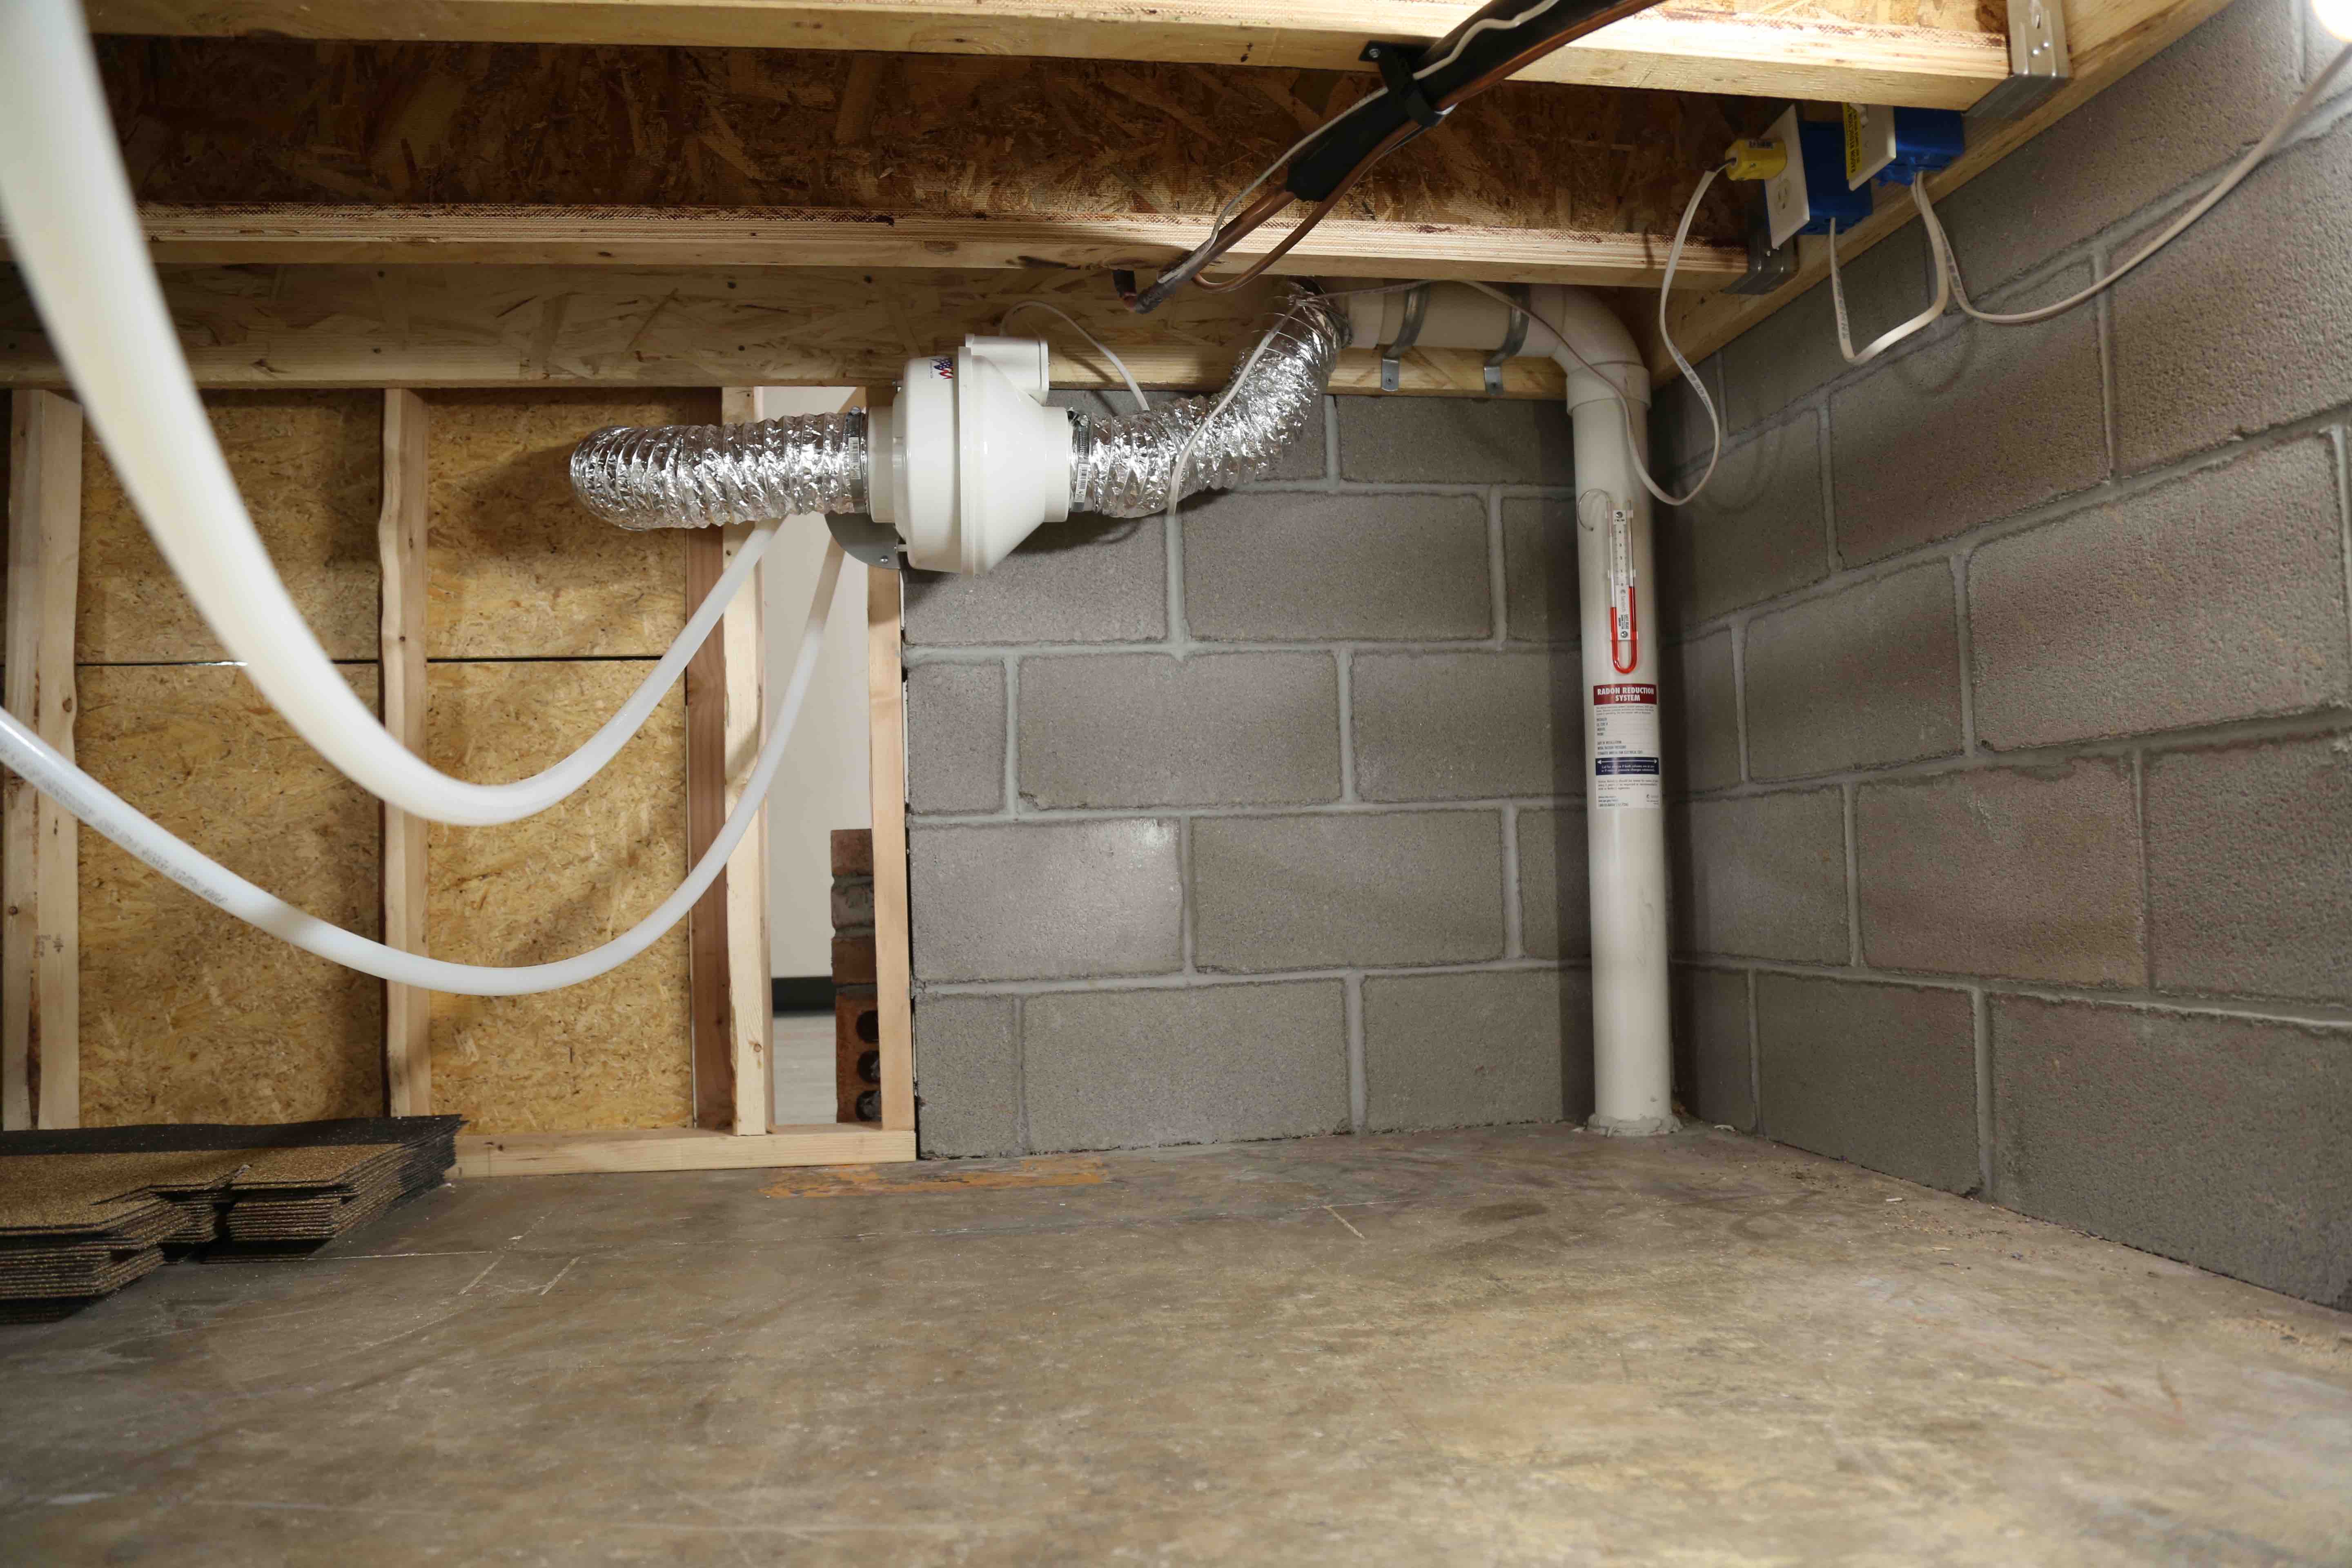
Installing a radon fan is one of the most effective ways to reduce radon levels in your home. The fan creates negative pressure under your home’s foundation, preventing the radon gas from entering your living spaces. In this guide, we will walk you through each step of the installation process, from gathering the necessary tools to testing the radon fan’s functionality.
Before we dive into the installation process, it is important to note that while this guide provides general instructions, it is always recommended to follow manufacturer guidelines and consult with a professional if you are unsure about any aspect of the installation. Now, let’s get started with step one.
Key Takeaways:
- Prioritize safety and thorough preparation when installing a radon fan. Gather necessary tools, choose the right location, and ensure proper ventilation to effectively mitigate radon gas and create a healthier living environment.
- Regularly test, monitor, and maintain the radon fan to ensure optimal functionality. Sealing and securing the installation is crucial to prevent radon gas leakage. Consult professionals for any doubts or concerns.
Read also: 11 Best Radon Fan for 2025
Step 1: Gather Necessary Tools and Materials
Before you begin the installation process, it’s essential to gather all the necessary tools and materials. Here’s a list of items you’ll need:
- Radon fan: Choose a fan that is suitable for your home’s size and radon levels. Consider consulting with a radon mitigation professional to determine the appropriate fan for your specific needs.
- PVC piping: You’ll need enough PVC pipe to create a pathway for the radon gas to be vented from your home. The length and diameter of the pipe will depend on your home’s layout and the distance required to vent the gas safely away from your living spaces.
- PVC fittings and connectors: These will be necessary to connect the pipe sections and create a secure and airtight pathway for the radon gas.
- Mastic or caulk: Use mastic or caulk to seal any gaps or joints in the PVC piping system and ensure that there are no leaks.
- Screws and brackets: Depending on the mounting requirements of your radon fan, you may need screws and brackets to secure it in place.
- Drill and/or screwdriver: These tools are necessary for mounting the fan and making any necessary holes or adjustments during the installation process.
- Measurement tools: A tape measure and level will come in handy for accurately measuring and aligning the PVC pipe and fan.
- Safety equipment: It is crucial to prioritize your safety during the installation process. Wear gloves, safety goggles, and a mask to protect yourself from any potential hazards.
Make sure to gather all these tools and materials before you start the installation process. Having everything readily available will help streamline the process and ensure you have what you need at each step.
With all the necessary tools and materials in hand, you’re now ready to move on to the next step: choosing the installation location.
Step 2: Choose the Installation Location
Choosing the right location for installing your radon fan is crucial for optimal performance. Here are some factors to consider when selecting the installation spot:
- Access to the sub-slab area: The radon fan should be installed in the sub-slab area, where the highest concentration of radon is present. This area is typically located beneath the basement or crawl space.
- Accessibility for maintenance: Ensure that the chosen location allows easy access to the fan for regular maintenance and inspection. This will make it easier to replace the fan or perform any necessary repairs in the future.
- Away from living spaces: Place the radon fan in an area away from frequently occupied areas. This will help minimize noise disturbances caused by the fan’s operation.
- Avoid direct sunlight and extreme temperatures: Choose a location that is shaded or protected from direct sunlight and extreme temperatures. This will help prolong the life of the fan and prevent overheating.
- Consider aesthetics: While the functionality of the radon fan is of utmost importance, it’s also worth considering its visual impact. Try to choose a location that is inconspicuous or can be easily camouflaged, especially if it is visible from the exterior of your home.
Once you have evaluated these factors, mark the chosen location for the radon fan. Use a pencil or marker to make a reference point on the wall or floor. This will help you during the installation process.
Now that you have chosen the installation location, it’s time to move on to step three: preparing the installation area.
Step 3: Prepare the Installation Area
Before you begin installing the radon fan, it’s important to properly prepare the installation area. Follow these steps to ensure a smooth and efficient installation:
- Clean the area: Clear any debris or obstructions from the installation spot. This will provide a clean and unobstructed workspace for the installation process.
- Measure and mark the hole: Using a tape measure, carefully measure and mark the spot where the hole for the PVC pipe will be drilled. Double-check the measurements to ensure accuracy.
- Drill the hole: With a drill and the appropriate drill bit, carefully drill a hole through the wall or floor, following the marked spot. Make sure the hole is wide enough to accommodate the PVC pipe.
- Smooth the edges: After drilling the hole, use sandpaper or a file to smooth the edges around the hole. This will prevent any sharp edges from damaging the PVC pipe during installation.
- Secure the brackets (if necessary): Depending on your fan’s mounting requirements, you may need to attach brackets to the installation area before mounting the fan. Follow the manufacturer’s instructions to securely fasten the brackets in place.
- Prepare the sub-slab area: If you’re installing the radon fan in a basement or crawl space, make sure the area underneath is free from any obstacles. Remove any loose objects or debris that may obstruct the installation process.
- Ensure proper ventilation: If the sub-slab area is poorly ventilated, consider improving the airflow to prevent moisture buildup. This will help prolong the life of the radon fan and minimize the risk of mold or other issues.
By thoroughly preparing the installation area, you’ll create an ideal environment for the radon fan’s installation and ensure its long-term functionality. Once you’ve completed these steps, you’re ready to move on to the next phase: installing the radon fan.
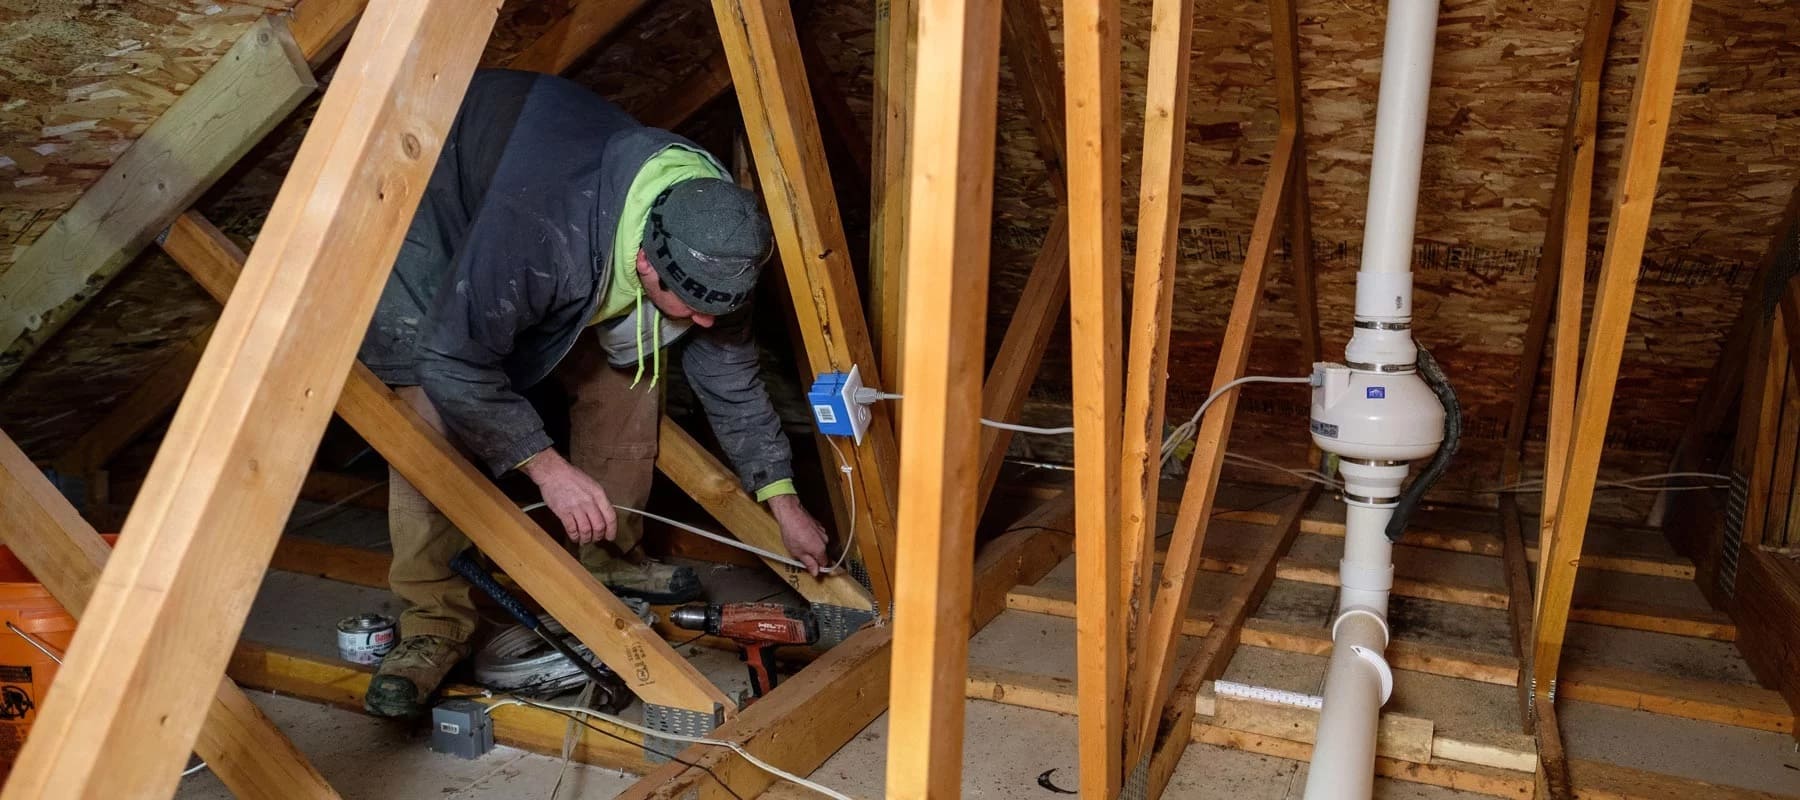
Step 4: Install the Radon Fan
Now that you have gathered the necessary tools, chosen the installation location, and prepared the area, it’s time to install the radon fan. Follow these steps to ensure a successful installation:
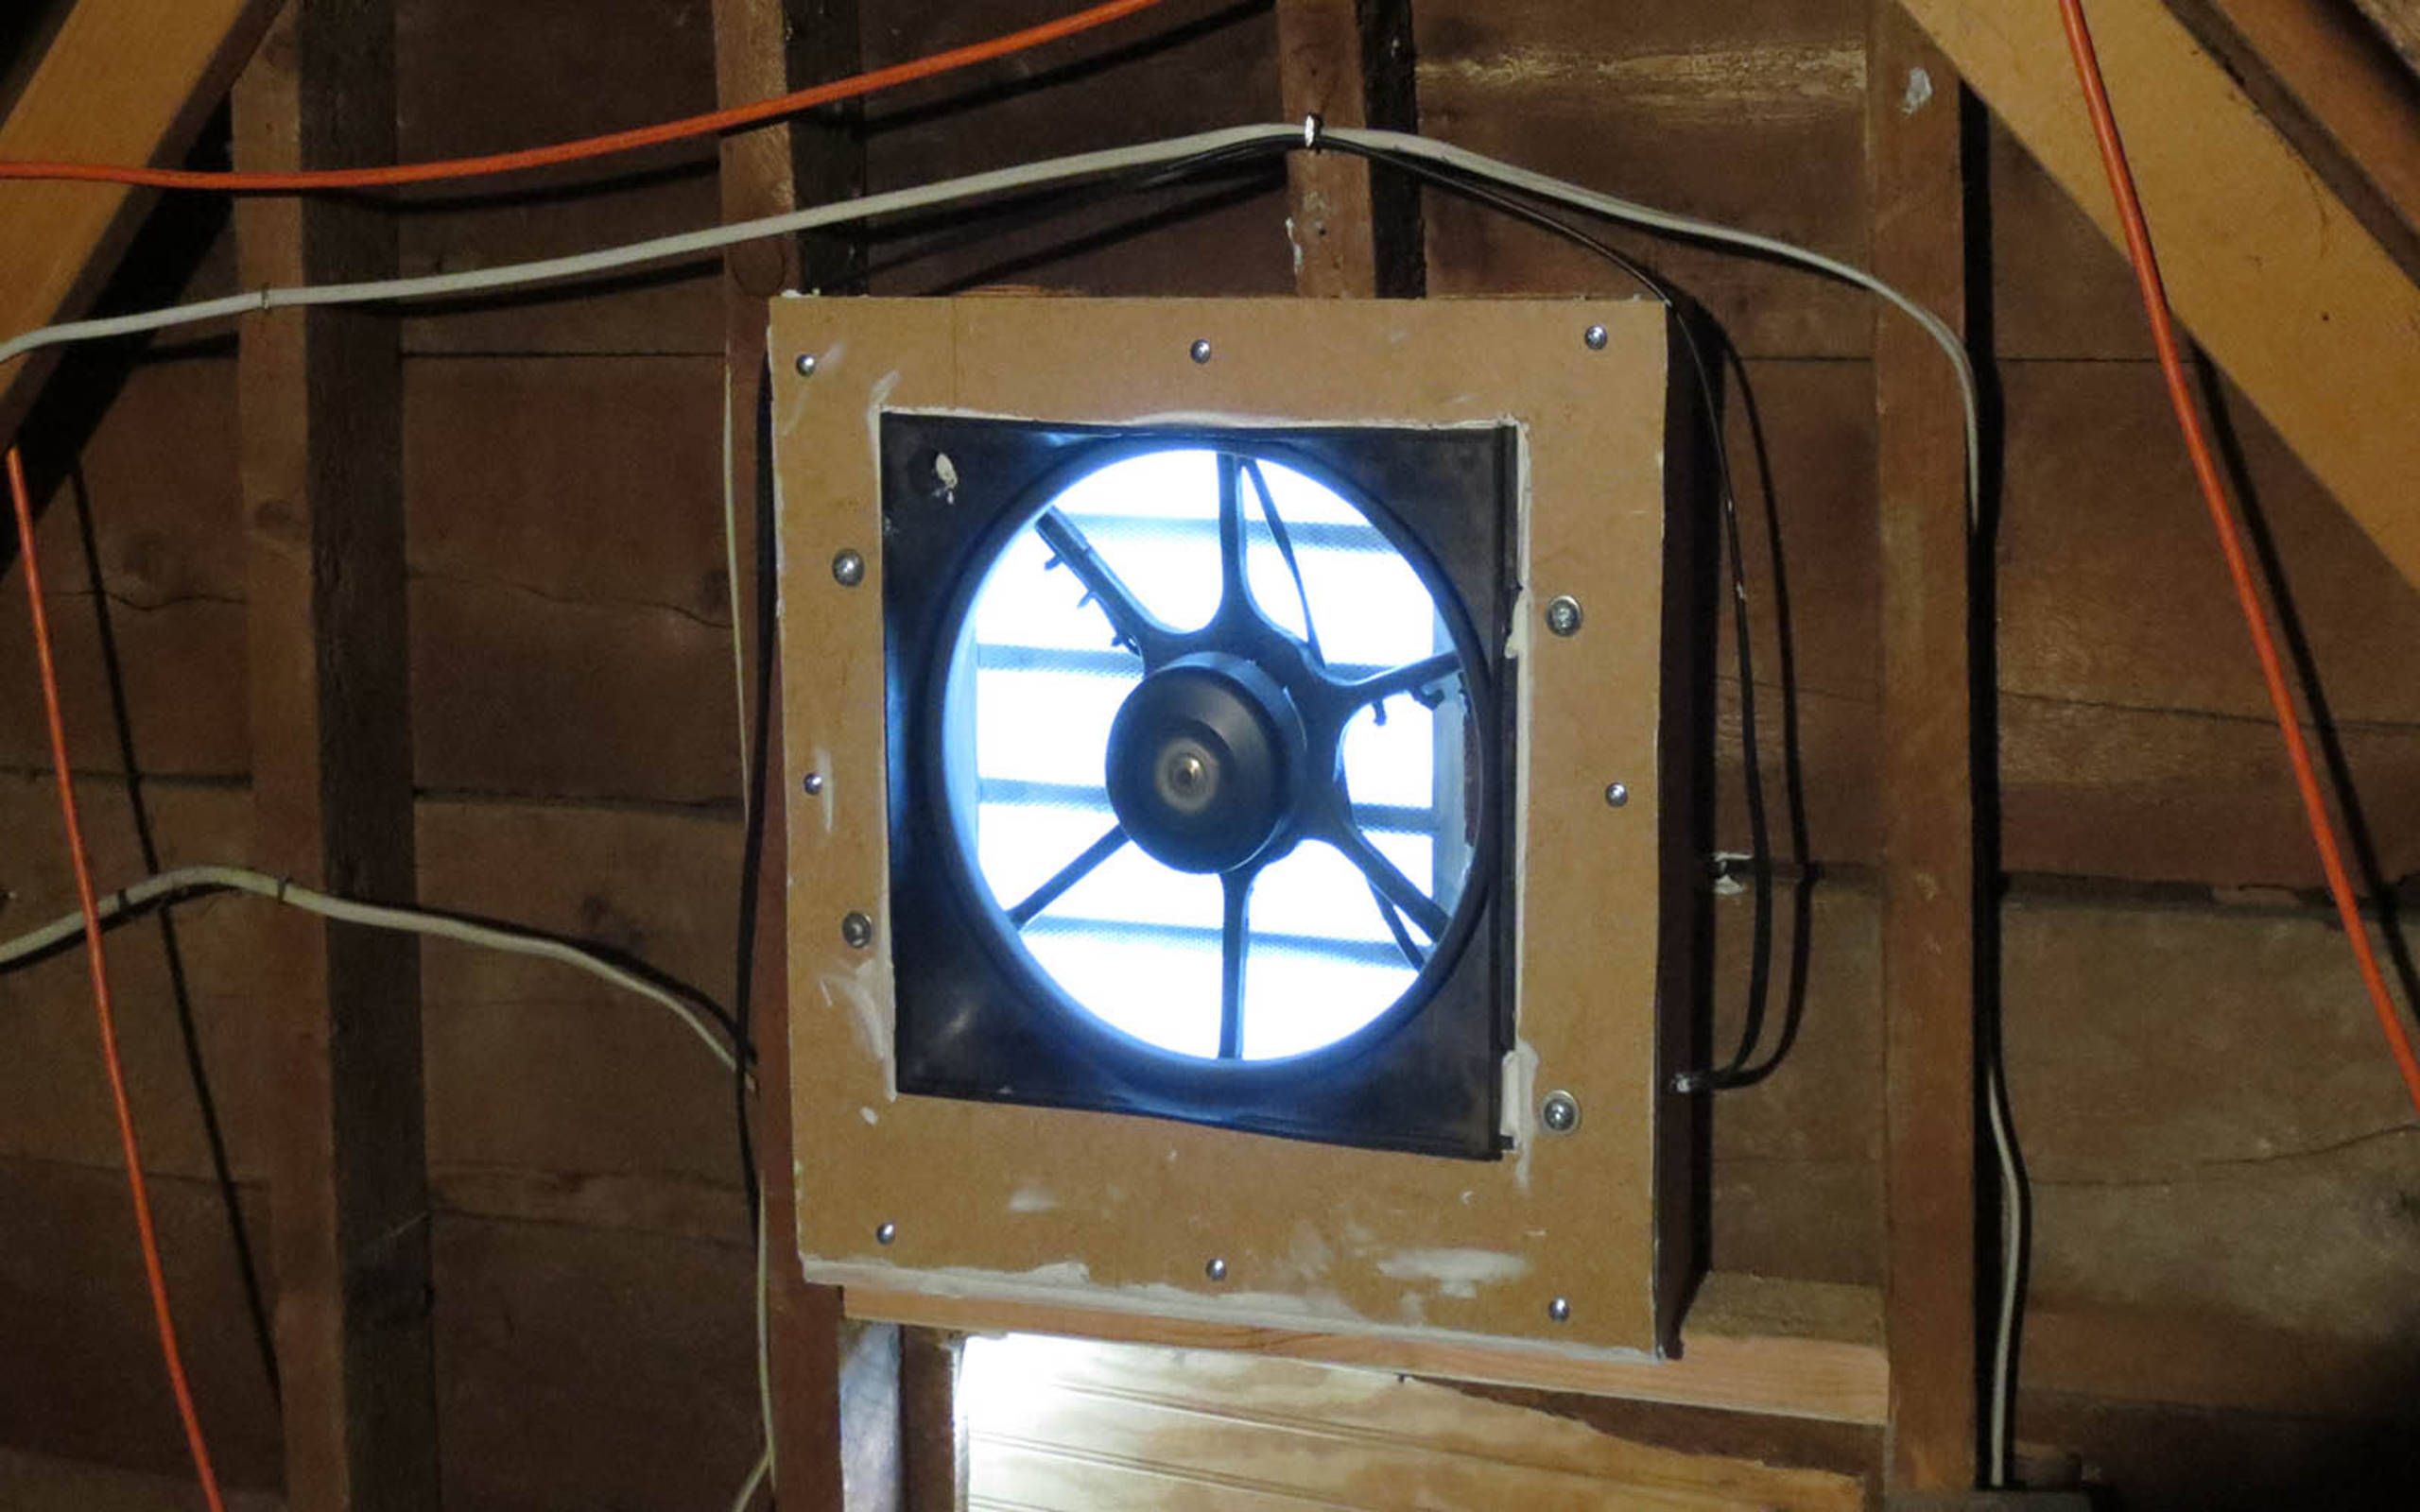
- Position the fan: Carefully position the radon fan near the designated installation spot. Ensure that the fan is aligned with the drilled hole for the PVC pipe.
- Secure the fan: Using screws or brackets, securely fasten the radon fan to the designated mounting area. Ensure that the fan is stable and tightly secured to prevent any vibrations or movement.
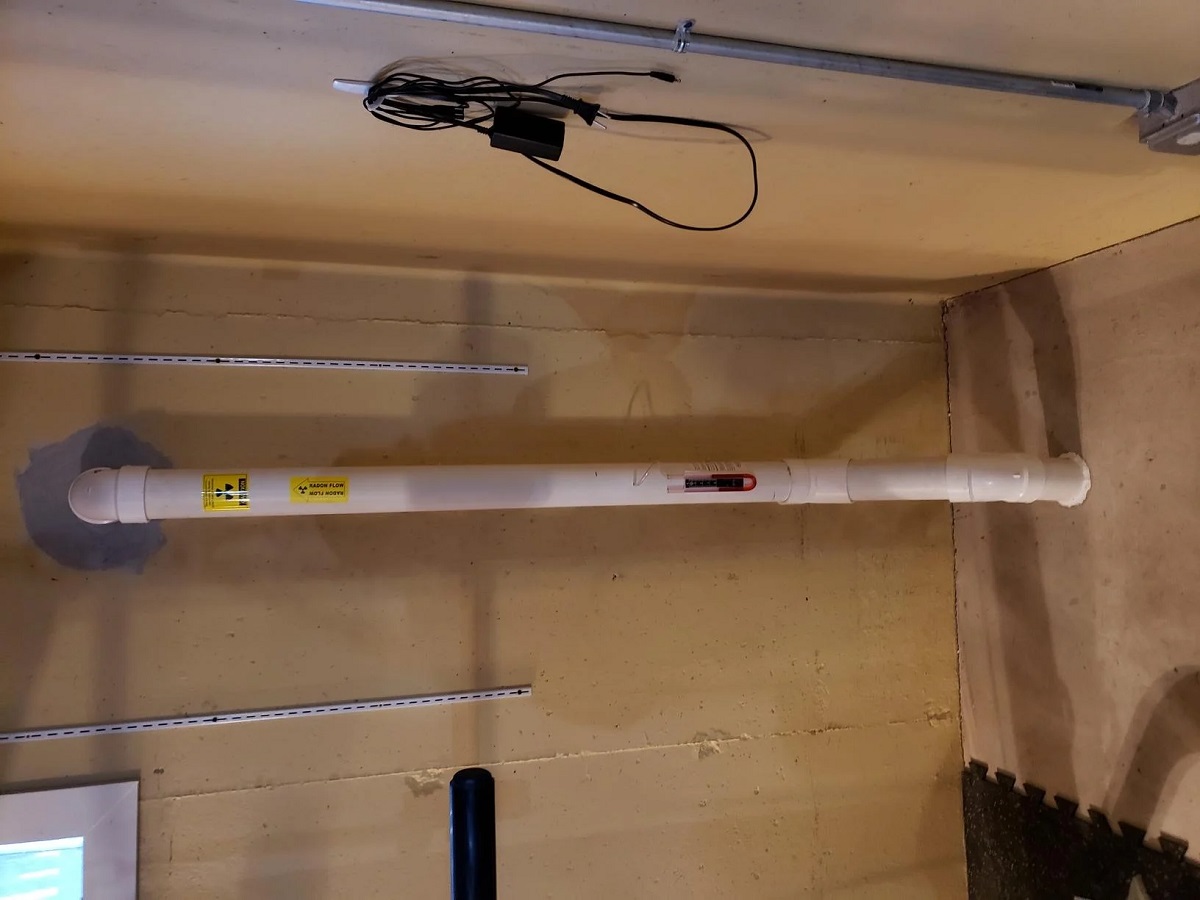
- Connect the PVC piping: Attach one end of the PVC pipe to the outlet of the radon fan. Make sure to create a tight and secure connection to prevent any leaks.
- Extend the PVC pipe: Extend the PVC pipe through the drilled hole in the wall or floor. Gradually feed the pipe into the hole, ensuring that it fits securely and is aligned properly.
- Secure the PVC pipe: Use PVC fittings or straps to secure the pipe along its route. Make sure the pipe is affixed firmly to prevent any movement or dislodgement.
- Ensure proper slope: If the PVC pipe needs to be installed vertically or at an angle, ensure that it slopes away from your home’s foundation. This will allow the radon gas to be safely vented outside.
- Seal any gaps: Inspect the connections and joints in the PVC pipe system for any gaps or leaks. Use mastic or caulk to seal any openings and ensure an airtight pathway for the radon gas.
It’s important to carefully follow the manufacturer’s instructions and guidelines while installing the radon fan. This will ensure that the fan is installed correctly and optimally, allowing for efficient radon mitigation.
With the radon fan installed, you’re now ready to move on to the next step: connecting the power source.
When installing a radon fan, make sure to place it in an outdoor location to prevent radon gas from re-entering the home. Additionally, seal any cracks or openings in the foundation to maximize the fan’s effectiveness.
Step 5: Connect the Power Source
Connecting the power source is a crucial step in the installation process of a radon fan. Here’s how you can do it correctly:
- Locate a nearby power outlet: Identify a power outlet near the installation area of the radon fan. Ensure that it is properly grounded and can handle the power requirements of the fan.
- Turn off the power: Before proceeding with the electrical connections, turn off the power to the outlet at the circuit breaker to ensure your safety.
- Run the power cord: Attach the power cord of the radon fan to the designated power outlet. Ensure that the cord is securely connected and does not pose any tripping hazards or obstructions.
- Use a dedicated circuit: If possible, it is recommended to connect the radon fan to a dedicated circuit. This helps to prevent overload and ensures that the fan operates efficiently.
- Check the power supply: Once the power cord is connected, double-check the power supply to confirm that there is electricity flowing through the circuit. You can use a multimeter or plug in a device to test the outlet.
- Turn on the power: After ensuring everything is properly connected and checking the power supply, you can turn on the power at the circuit breaker. This will activate the radon fan.
It’s important to prioritize safety throughout this step. If you are unsure about any electrical connections or lack the necessary knowledge, it is recommended to consult with a professional electrician who can safely handle the power source connection for you.
With the power source connected, you’re now one step closer to completing the installation process. The next step involves testing the radon fan to ensure it is functioning correctly.
Step 6: Test the Radon Fan
After installing the radon fan and connecting the power source, it’s essential to test the fan to ensure it is operating as intended. Here’s how you can perform a basic test:
- Ensure proper ventilation: Before testing the radon fan, ensure that the area where the radon gas is being vented has proper ventilation. This will prevent any buildup of radon gas or other harmful substances.
- Check for fan operation: Listen for the sound of the fan running and feel for the airflow at the outlet. If the fan is operating correctly, you should be able to hear a steady humming noise and feel air being expelled from the outlet.
- Test radon levels: Use a radon detector or hire a professional radon testing service to measure the levels of radon in your home both before and after the installation of the fan. This will help determine if the fan is effectively reducing radon levels.
- Monitor radon levels: After the initial test, continue to monitor the radon levels in your home periodically. This will help ensure that the fan is consistently working to reduce the radon gas concentration.
- Consult a professional: If you have any doubts about the effectiveness of the radon fan or if the radon levels do not decrease significantly after installing the fan, it is recommended to consult with a professional radon mitigation specialist. They can assess the situation and provide appropriate recommendations or adjustments to the installation.
Remember, the radon fan may need adjustments or maintenance over time. Regularly inspect the fan, check the connections, and clean or replace air filters if necessary. This will help maintain the fan’s efficiency and ensure optimal performance.
Once you have tested the radon fan and verified its functionality, it’s time to move on to the final step: sealing and securing the installation.
Step 7: Seal and Secure the Installation
Securing and sealing the radon fan installation is crucial to ensure its long-term effectiveness and prevent any potential issues. Follow these steps to properly seal and secure the installation:
- Inspect the connections: Carefully inspect all the connections in the PVC pipe system, including the fittings, joints, and connections to the fan. Ensure that there are no gaps or leaks.
- Use mastic or caulk: Apply mastic or caulk to seal any gaps or openings in the PVC pipe system. This will help create an airtight seal and prevent any radon gas from escaping.
- Secure the PVC pipe: Check that the PVC pipe is securely fastened to the designated brackets or straps along its route. This will prevent any movement or dislodgement of the pipe.
- Inspect the fan mounting: Double-check the screws or brackets holding the fan in place. Ensure that they are tightened securely to prevent any vibrations or movement.
- Seal the drilling hole: Check the drilled hole for the PVC pipe where it enters the wall or floor. Use caulk or an appropriate sealant to seal any gaps or openings around the hole.
- Clean the surrounding area: Remove any debris or excess caulk around the installation area. This will provide a clean and neat appearance to the installation.
- Monitor for leaks or issues: After sealing and securing the installation, monitor the system for any leaks or issues. If you notice any unusual sounds, vibrations, or detect radon gas indoors, seek professional assistance to address the problem promptly.
Properly sealing and securing the radon fan installation will help ensure its optimal performance and minimize the risk of any radon gas leakage. Additionally, periodically check the system for any signs of wear or damage and address any issues as soon as possible.
Congratulations! You have successfully installed a radon fan in your home, reducing the radon levels and enhancing the safety of your living environment. Regularly test and monitor the radon levels to ensure the fan continues to effectively mitigate radon gas.
Remember, if you have any doubts or concerns during the installation process, it’s always best to consult with a professional who specializes in radon mitigation. They can provide expert guidance and assistance to ensure the proper installation and functioning of the radon fan. Stay safe and enjoy the peace of mind of a radon-free home!
Conclusion
Installing a radon fan is a crucial step in mitigating radon gas and creating a healthier living environment. By following the steps outlined in this guide, you can confidently install a radon fan in your home and significantly reduce radon levels. Remember to always prioritize safety and consult with professionals whenever necessary.
Throughout the installation process, we discussed the importance of gathering the necessary tools and materials, choosing the right installation location, and preparing the area for the installation. We also covered the steps for installing the radon fan, connecting the power source, testing its functionality, and sealing and securing the installation.
Remember, radon is a silent and invisible threat, and long-term exposure can have serious health implications, including an increased risk of lung cancer. Installing a radon fan is an effective and proactive step you can take to protect yourself and your loved ones.
While this guide provides a comprehensive overview of the installation process, it’s important to note that every home is unique, and specific circumstances may require additional considerations. If you have any doubts or questions throughout the process, do not hesitate to seek professional assistance from a radon mitigation specialist.
Regularly monitor the radon levels in your home to ensure the radon fan is functioning optimally. Periodic maintenance and inspections are essential to keep the fan running smoothly and effectively. By staying vigilant and proactive, you can create a safe and healthy living environment for you and your family.
Thank you for taking the time to learn about the installation process of a radon fan. By implementing these steps, you are taking a significant step towards safeguarding your home from the dangers of radon gas. Remember, your health and well-being are worth the effort. Take control, mitigate radon, and enjoy a safer living environment.
Frequently Asked Questions about How To Install Radon Fan
Was this page helpful?
At Storables.com, we guarantee accurate and reliable information. Our content, validated by Expert Board Contributors, is crafted following stringent Editorial Policies. We're committed to providing you with well-researched, expert-backed insights for all your informational needs.


0 thoughts on “How To Install Radon Fan”