Home>Articles>How To Install Radon Mitigation System In Basement
Articles
How To Install Radon Mitigation System In Basement
Modified: April 22, 2024
Learn how to install a radon mitigation system in your basement with our informative articles. Discover step-by-step instructions and expert tips to keep your home safe from radon gas.
(Many of the links in this article redirect to a specific reviewed product. Your purchase of these products through affiliate links helps to generate commission for Storables.com, at no extra cost. Learn more)
Introduction
Welcome to the guide on how to install a radon mitigation system in your basement. Radon is a colorless, odorless, and tasteless radioactive gas that can seep into your home through cracks and openings in the foundation. Prolonged exposure to radon can lead to serious health issues, including lung cancer. Therefore, it is crucial to take necessary steps to reduce radon levels in your home.
A radon mitigation system is designed to effectively reduce the concentration of radon gas in your basement and prevent it from entering your living spaces. By following the steps outlined in this guide, you will be able to install a radon mitigation system in your basement and protect your family’s health.
Before we dive into the installation process, let’s first gain a better understanding of radon and its dangers.
Key Takeaways:
- Protect your family’s health by installing a radon mitigation system in your basement. Understand radon, choose the right system, and follow the step-by-step guide for a safe living environment.
- Regularly test, monitor, and maintain your radon mitigation system to ensure its effectiveness. Stay informed, take proactive steps, and prioritize the well-being of your loved ones.
Understanding Radon and its Dangers
Radon is a naturally occurring radioactive gas that is formed from the decay of uranium in the soil, rock, and water. It can seep into your home through cracks and openings in the foundation, becoming trapped and accumulating in the basement. Radon is the second leading cause of lung cancer after smoking, and it is estimated to be responsible for thousands of deaths each year.
Radon is a silent and invisible danger because you cannot see, smell, or taste it. It can build up to high concentrations in enclosed spaces, such as basements, where the gas may become trapped. Prolonged exposure to high levels of radon can significantly increase your risk of developing lung cancer, especially if you are a smoker.
It is important to note that radon levels can vary from one home to another, even within the same neighborhood. Factors such as the geology of the area, construction techniques, and ventilation systems can all impact radon levels. Therefore, it is essential to test your home for radon to determine if mitigation measures are necessary.
Now that you understand the dangers of radon, let’s explore the different types of radon mitigation systems available.
Types of Radon Mitigation Systems
There are several types of radon mitigation systems that can be installed in the basement. The most common ones include:
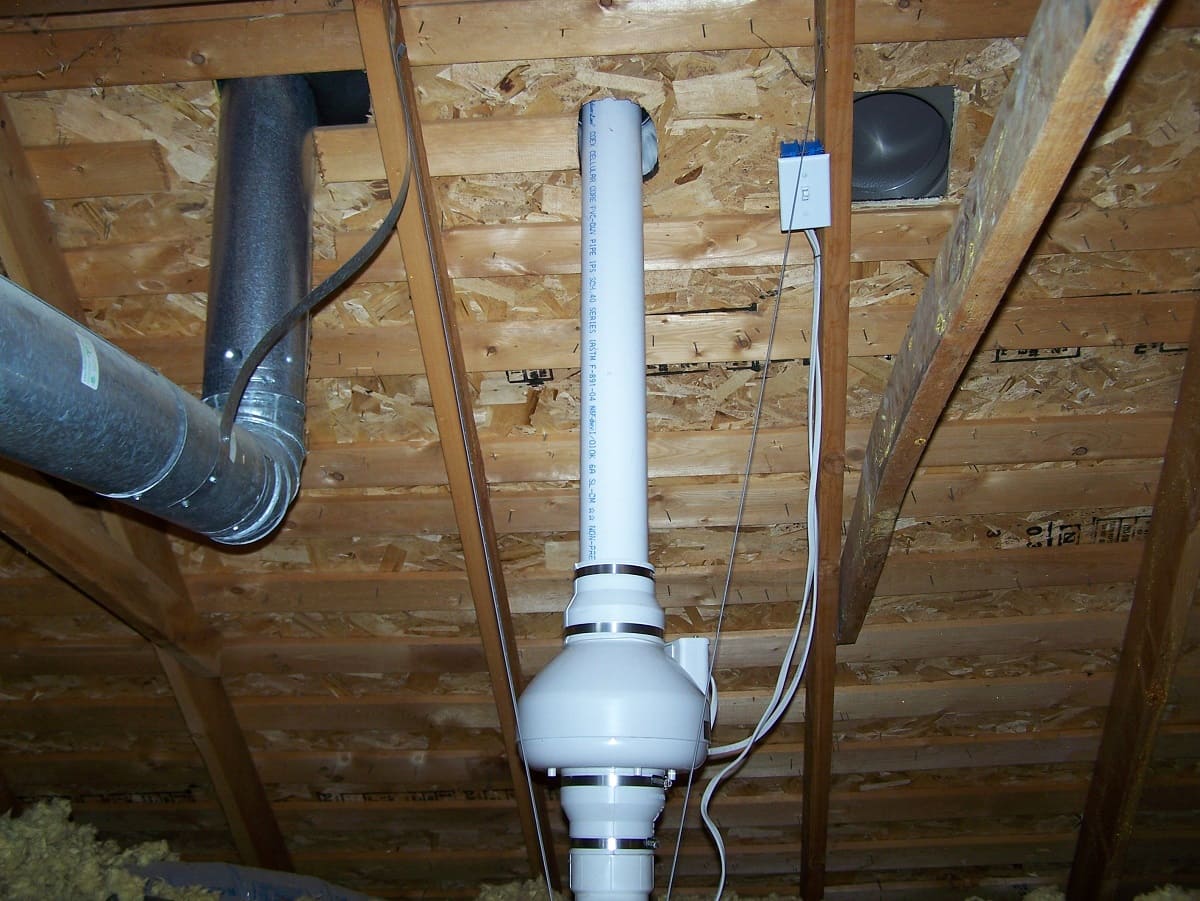
- Sub-slab depressurization system: This is the most commonly used radon mitigation system. It involves installing a pipe beneath the basement floor, which is connected to a fan. The fan creates suction and pulls radon gas from under the foundation, venting it out of the home through a vent pipe. This system effectively prevents radon from entering the living spaces.
- Sump hole suction system: If your basement has a sump pump, this system can be utilized. A hole is created in the sump pump cover, and a pipe is connected to a fan to remove radon gas. The fan creates negative pressure, removing radon before it can enter your home.
- Drain tile suction system: This system is suitable for homes with drain tiles installed around the basement perimeter. A vent pipe is connected to the drain tiles, and a fan helps draw radon gas from the soil before it enters your basement. This system can be very effective in reducing radon levels.
- Block wall suction system: If you have hollow concrete block walls in your basement, this system can be used. It involves drilling small holes into the concrete blocks and inserting vent pipes. A fan creates suction, pulling radon gas from the gaps and cracks in the blocks and venting it outside.
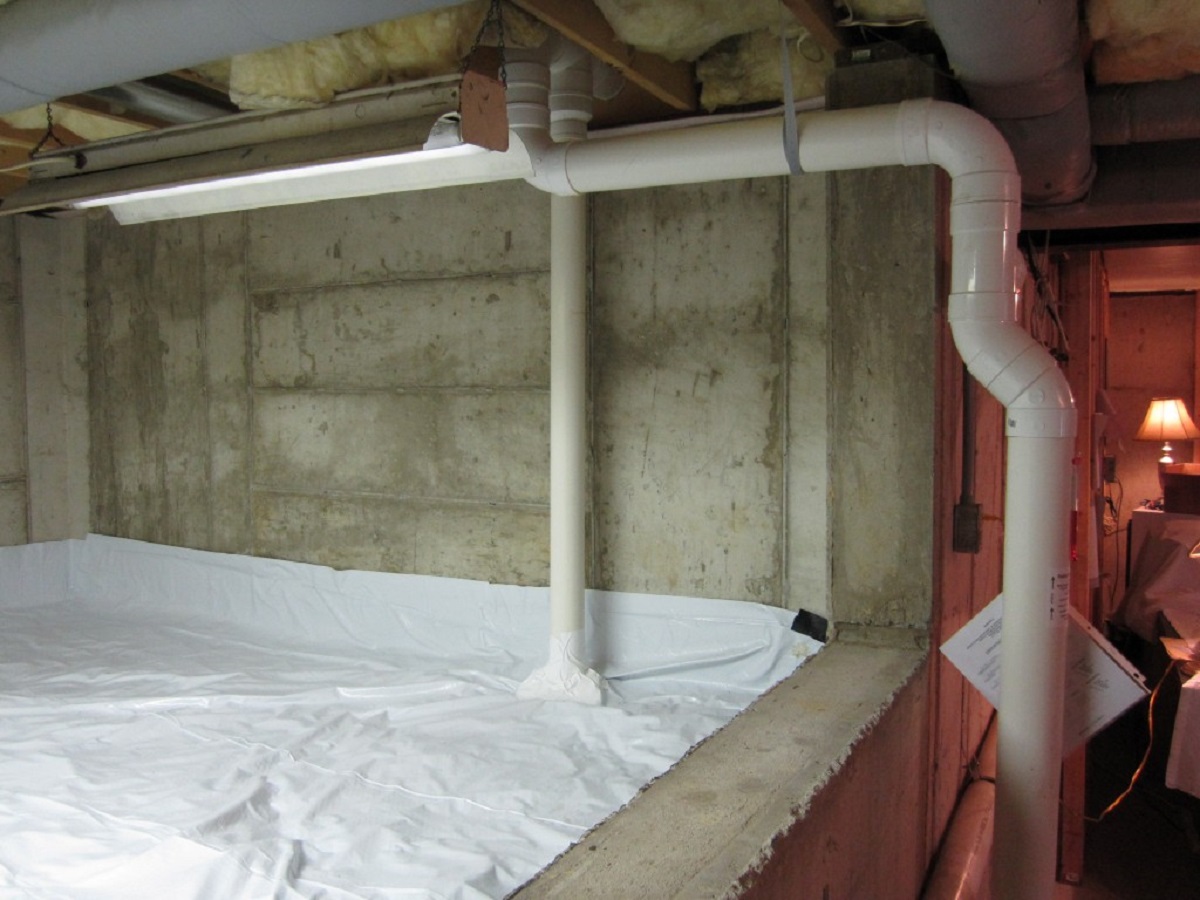
- Crawl space encapsulation: For homes with crawl spaces, encapsulation can be an effective radon mitigation method. It involves covering the soil with a plastic vapor barrier and sealing any cracks or openings. A vent pipe and fan can also be installed to draw out any radon that may enter the crawl space.
Each type of radon mitigation system has its own advantages and suitability depending on the structure of your basement. It is recommended to consult with a radon mitigation professional to determine the most appropriate system for your specific situation.
Now that we have explored the types of radon mitigation systems available, let’s move on to the materials and tools needed for the installation process.
Materials and Tools Needed
Before you begin installing a radon mitigation system in your basement, it is important to gather all the necessary materials and tools. Here is a list of items you will need:
- Radon mitigation system kit: This typically includes a radon suction pipe, couplings, a vent pipe, a fan, and a manometer to monitor pressure levels.
- Plastic sheeting: This is used to cover the crawl space or basement floor to prevent radon gas from seeping into living spaces.
- PVC pipes and fittings: These pipes and fittings are needed to create a ventilation system for radon gas to escape from the basement.
- Silicone caulk: This is used to seal any cracks or openings in the foundation walls or floors.
- Concrete patching compound: If you need to create access points in the basement floor or walls for the radon mitigation system, you will need a concrete patching compound to seal these openings once the system is installed.
- Drill and masonry bits: These are required to create holes for the vent pipes or access points in the basement floor or walls.
- Screwdriver and wrenches: These tools are needed for connecting and securing the various components of the radon mitigation system, such as the fan and vent pipes.
- Measuring tape and level: These tools will help ensure accurate placement and alignment of the radon mitigation system components.
- Gloves and safety goggles: It is important to protect yourself while working with tools and materials. Wear gloves to protect your hands and safety goggles to shield your eyes from any debris.
- Dust mask or respirator: When working with concrete or drilling into walls, it is recommended to wear a dust mask or respirator to prevent inhalation of fine particles.
Having these materials and tools ready beforehand will ensure a smooth installation process. Additionally, always follow the manufacturer’s instructions and any local building codes or regulations while installing the radon mitigation system.
Now that you are prepared with the necessary materials and tools, let’s move on to the step-by-step guide for installing a radon mitigation system in your basement.
When installing a radon mitigation system in your basement, make sure to seal any cracks or openings in the foundation to prevent radon from entering the home. This will help the mitigation system work more effectively.
Step-by-step Guide to Installing a Radon Mitigation System in the Basement
Installing a radon mitigation system in your basement may seem daunting, but by following these step-by-step instructions, you can successfully complete the process:
- Conduct a radon test: Before starting the installation, it is important to conduct a radon test to determine the baseline radon levels in your basement. This will help you assess the effectiveness of the mitigation system once it is installed.
- Choose the appropriate radon mitigation system: Based on the type of basement and foundation you have, consult with a radon mitigation professional to determine the most suitable system for your home.
- Prepare the basement: Clear the basement of any objects or obstacles that may hinder the installation process. Ensure that the basement floor and walls are free from debris and clean.
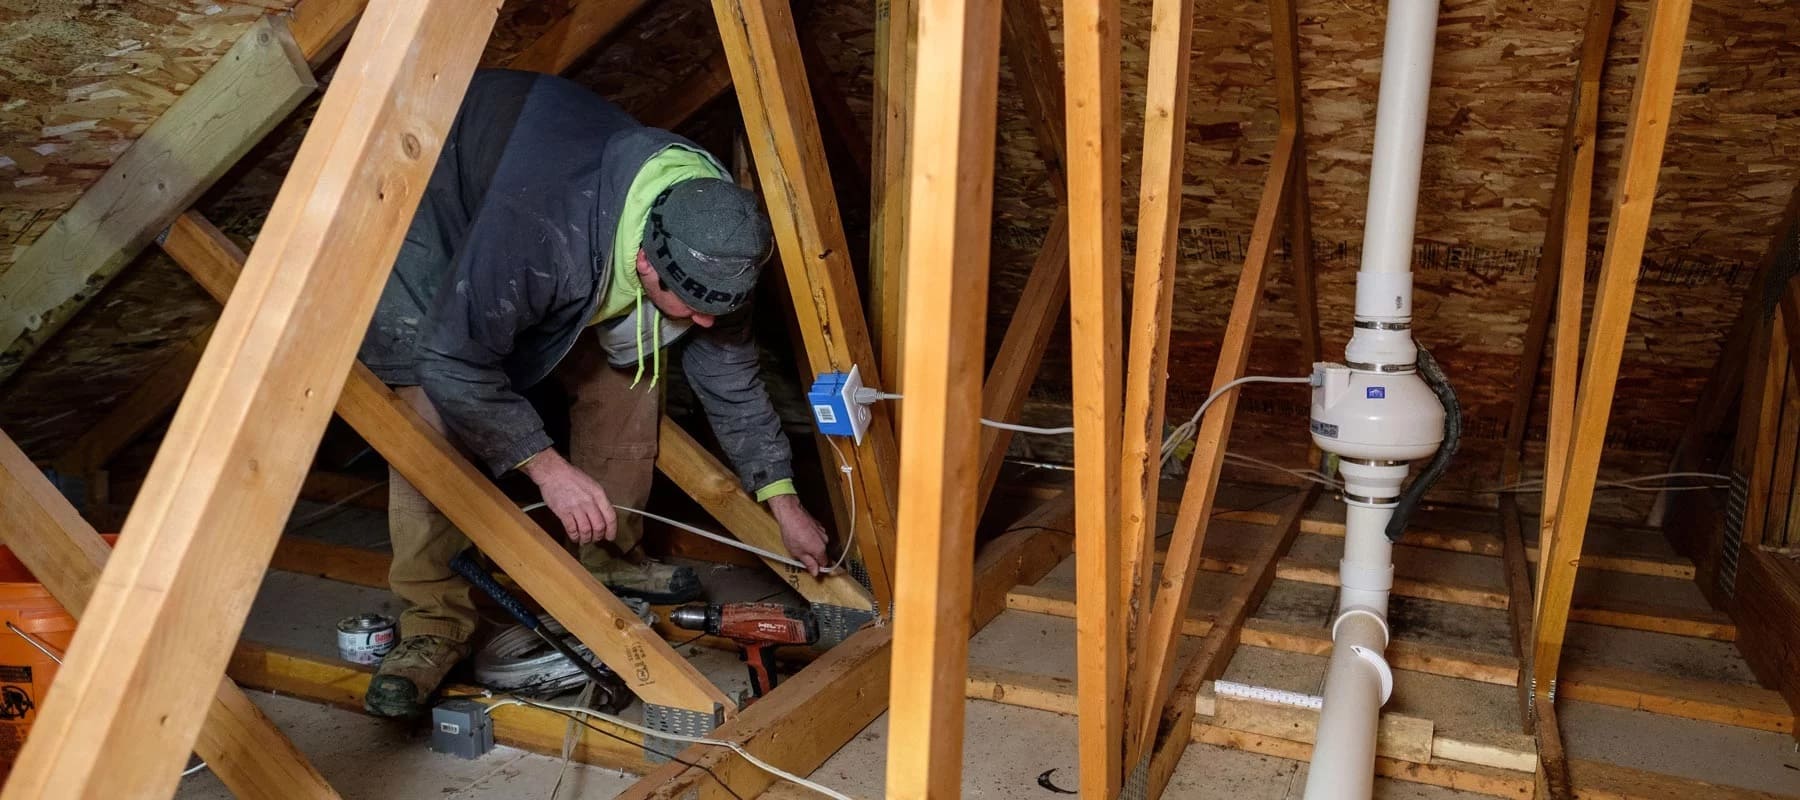
- Create an access point: If required by the chosen mitigation system, drill a hole in the basement floor or wall to create an access point for the vent pipe. Make sure to use an appropriate drill bit for your concrete or masonry surface.
- Install the suction pipe: Place the suction pipe beneath the basement floor, ensuring it reaches the lowest point. Connect the suction pipe to the vent pipe using the provided couplings or fittings.
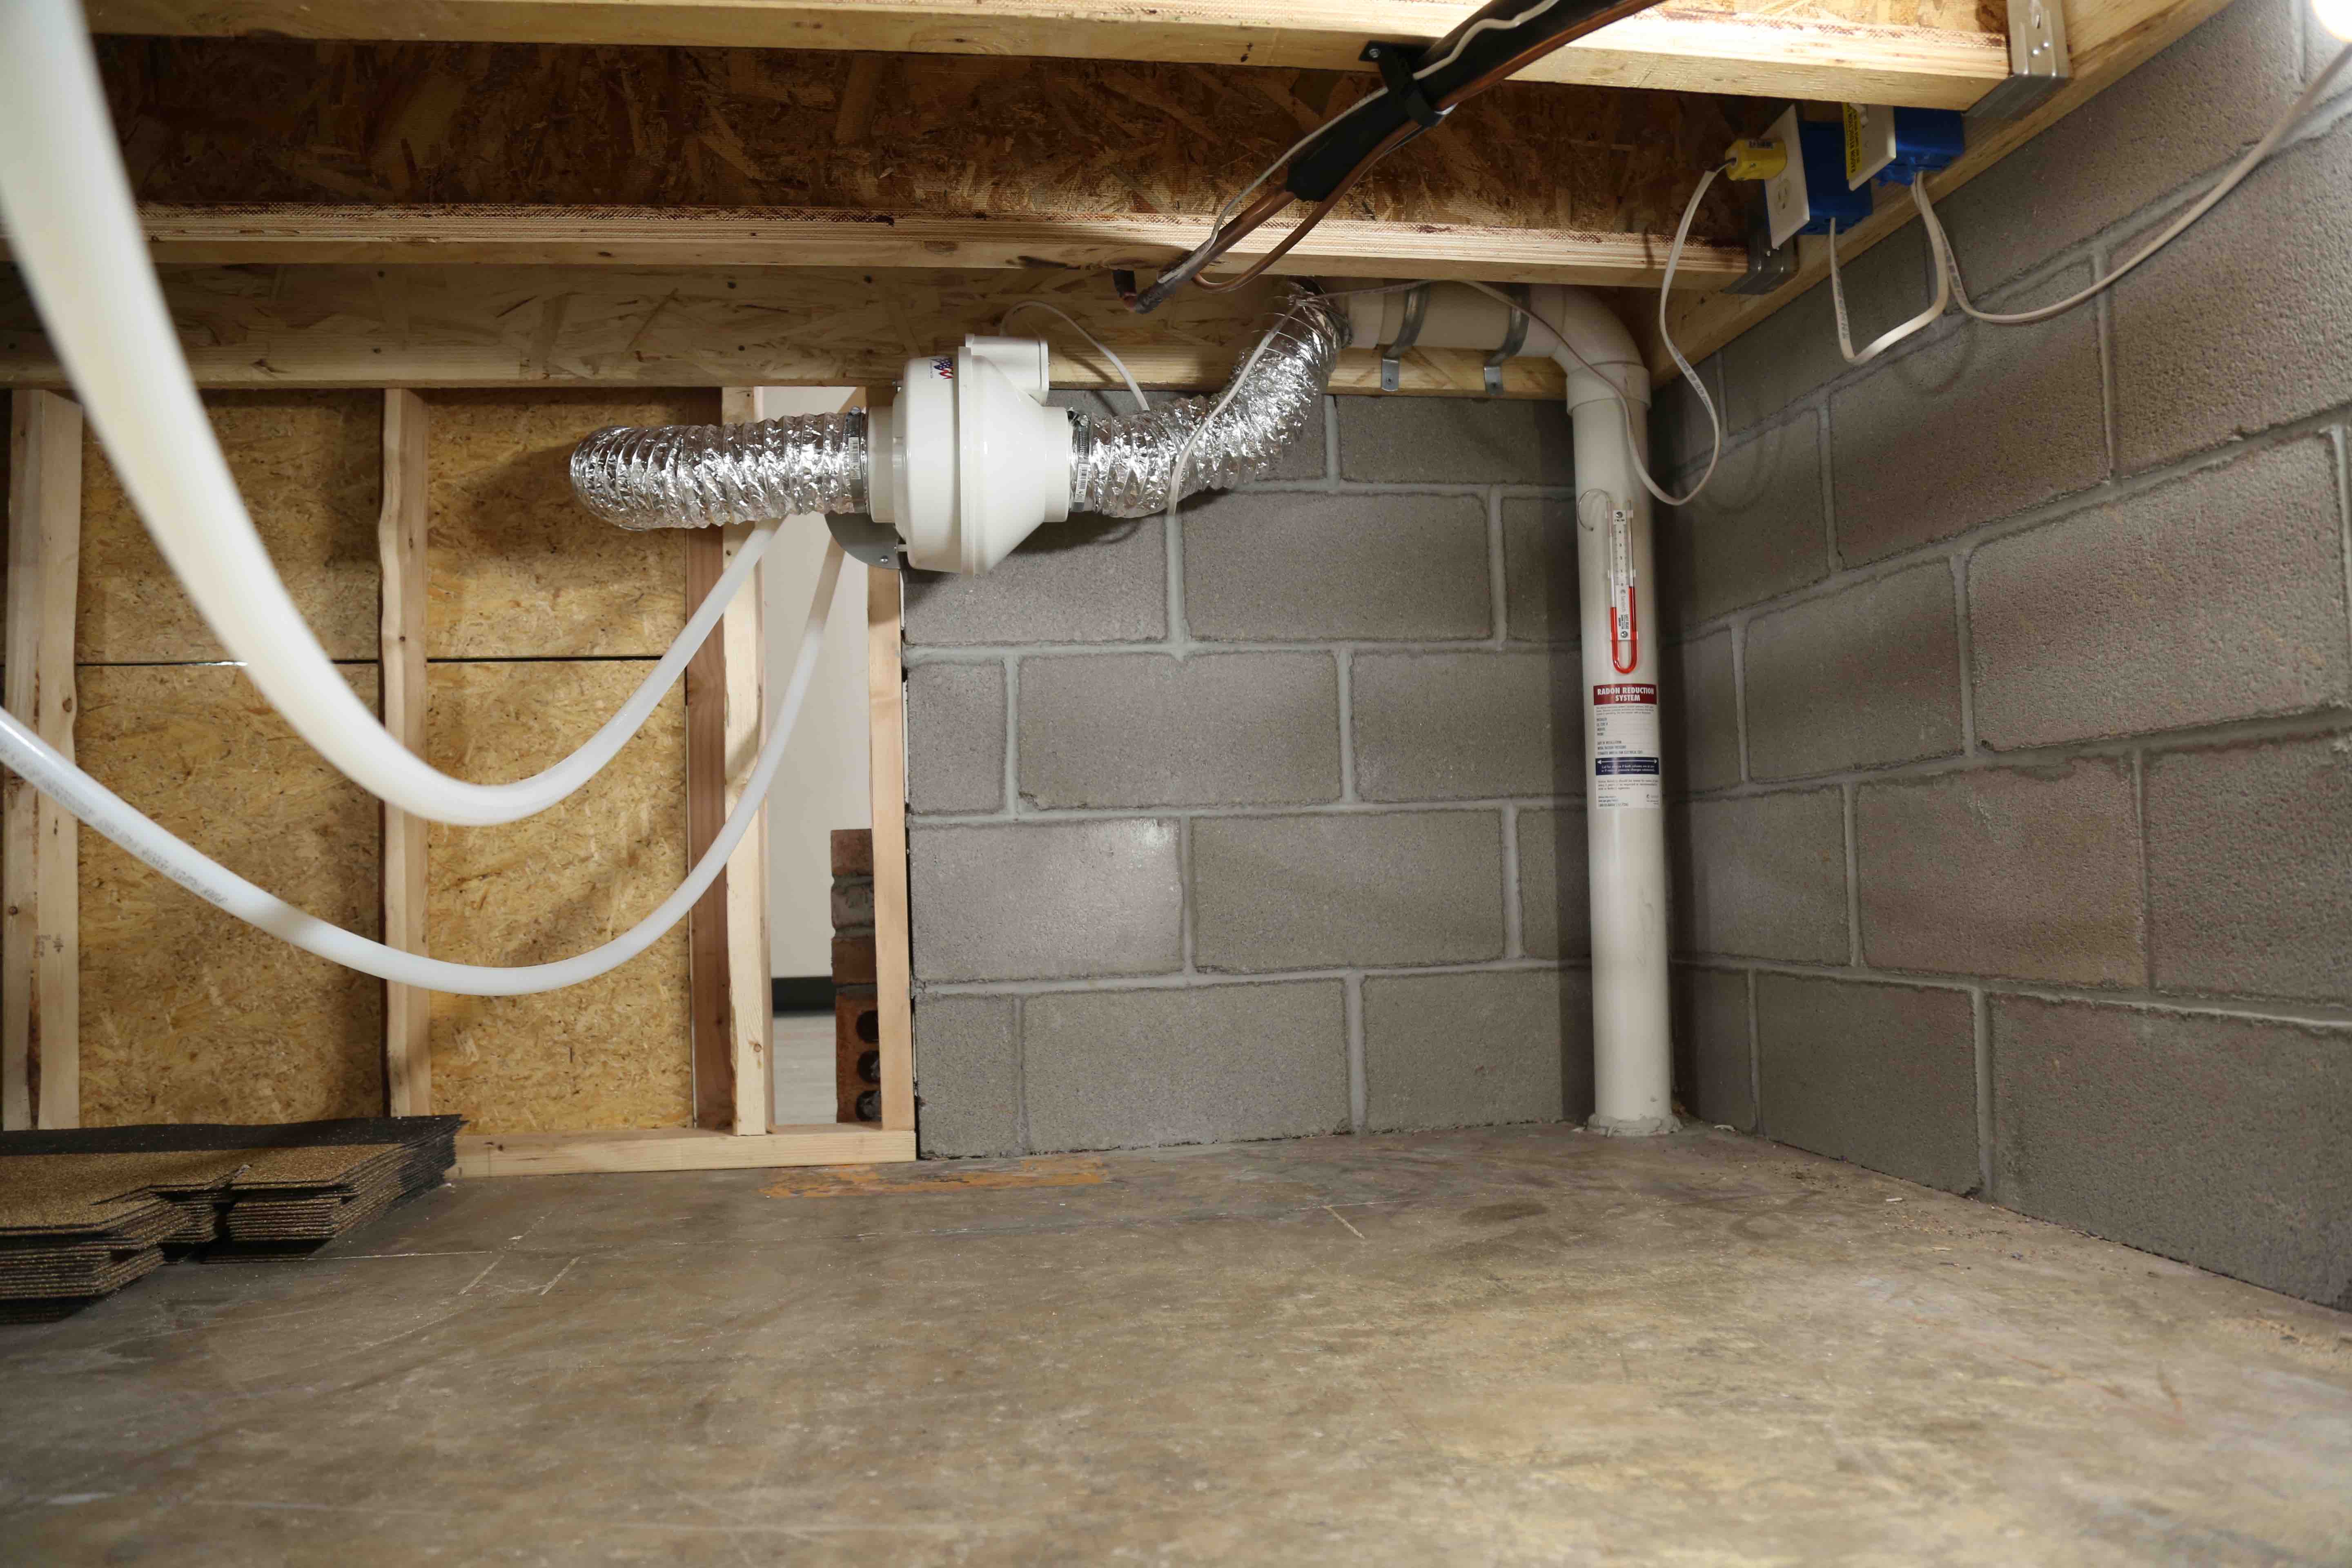
- Install the fan: Mount the fan on an exterior wall or on a support structure, as instructed by the manufacturer. Connect the fan to the vent pipe, ensuring a secure and airtight connection.
- Seal cracks and openings: Use silicone caulk to seal any cracks or openings in the basement walls or floor. This will prevent radon gas from entering your living spaces through these gaps.
- Install the vent pipe: Extend the vent pipe from the fan to the exterior of your home. It should be long enough to ensure that the exhaust gases are safely and effectively vented outside, away from windows and doors.
- Secure and align the components: Ensure that all the components of the mitigation system, including the fan, pipes, and access point, are securely installed and aligned properly. Use measuring tape and a level to ensure accuracy.
- Test the system: Once the installation is complete, test the radon levels in your basement again to determine the effectiveness of the mitigation system. This will help you ensure that the system is reducing radon levels to an acceptable level.
It is important to note that the installation process may vary depending on the type of radon mitigation system chosen and the specific requirements of your home. Always refer to the manufacturer’s instructions and consult with a professional if needed.
Now that you have successfully installed a radon mitigation system in your basement, it is important to regularly test and monitor radon levels to ensure the continued effectiveness of the system.
Let’s explore testing and monitoring radon levels in the next section.
Read more: What Is Radon In Basement
Testing and Monitoring Radon Levels
Once you have installed a radon mitigation system in your basement, it is crucial to regularly test and monitor radon levels to ensure the effectiveness of the system and the safety of your home. Here are some important steps to follow:
- Baseline test: Conduct an initial radon test after the installation of the mitigation system to establish a baseline radon level. This will help you determine the effectiveness of the system in reducing radon levels.
- Long-term testing: Perform long-term radon testing, which typically takes place over a period of three months or more. This will provide a more accurate assessment of the average radon levels in your home.
- Short-term testing: Short-term tests, lasting anywhere from two to seven days, can be conducted to get a quick snapshot of radon levels. These tests are useful for periodic monitoring and can help identify any fluctuations in radon levels.
- Test placement: Place the radon test device in the lowest livable area of your home, such as the basement. Follow the manufacturer’s instructions for proper placement and ensure that the test device is not obstructed by objects or in direct contact with drafts.
- Retest periodically: It is recommended to periodically retest your home for radon, even after the installation of a mitigation system. Retesting every two to five years, or as recommended by local authorities or professionals, will help ensure that radon levels remain within safe limits.
- Consider professional testing: If you are unsure about conducting radon testing yourself or want a more comprehensive assessment, consider hiring a professional radon testing service. They have the expertise and specialized equipment to accurately measure radon levels and provide detailed reports.
- Monitor the manometer: If the radon mitigation system includes a manometer, regularly check it to ensure that the fan is operational and the system is maintaining the required level of suction.
- Take action if necessary: If the radon levels measured during testing exceed the recommended action level by local authorities or guidelines (usually 4 picocuries per liter or higher), it is important to take immediate steps to address the issue. Contact a radon mitigation professional to assess the system and make any necessary adjustments.
Regularly monitoring radon levels and conducting periodic testing is vital to ensure the continued effectiveness of the radon mitigation system and the safety of your home. By staying proactive and taking necessary action when required, you can protect your family from the dangers of radon exposure.
Now that you are aware of how to test and monitor radon levels, let’s move on to the last section of this guide, which covers important maintenance and troubleshooting tips for your radon mitigation system.
Maintenance and Troubleshooting Tips
Maintaining your radon mitigation system is essential to ensure its optimal performance and effectiveness in reducing radon levels in your basement. Here are some maintenance and troubleshooting tips to keep in mind:
- Regularly inspect the system: Perform periodic visual inspections of the radon mitigation system to check for any signs of damage, leaks, or blockages. Ensure that all components, including the fan, vent pipes, and access points, are in good working condition.
- Keep the access point clear: If your system has an access point, make sure it remains unobstructed. Clear away any debris, furniture, or objects that may block the vent pipe or prevent proper air circulation.
- Test the fan: Check the fan regularly to ensure it is running smoothly and efficiently. Listen for any abnormal sounds or vibrations that may indicate a malfunction. If you suspect an issue with the fan, contact a radon mitigation professional for inspection and repairs.
- Monitor the manometer: If your radon mitigation system includes a manometer, regularly check it to ensure that the pressure levels are within the recommended range. A significant drop in pressure could indicate a problem with the system and may require professional attention.
- Seal cracks and openings: Regularly inspect and seal any new cracks or openings that may develop in the basement walls or floor. This will prevent the entry of radon gas through these gaps and maintain the effectiveness of the mitigation system.
- Keep the surrounding area clear: Avoid placing any objects or clutter near the exterior vent pipe outlet. Clear away leaves, snow, or debris that may obstruct the proper flow of air from the system.
- Address elevated radon levels: If you notice a significant increase in radon levels during testing or experience symptoms of increased radon exposure, such as persistent coughing or difficulty breathing, it is important to address the issue promptly. Contact a radon mitigation professional to assess the system and make any necessary adjustments or repairs.
- Stay informed: Stay updated with local guidelines and regulations regarding radon mitigation systems and testing procedures. This will ensure that you are following the recommended practices and taking appropriate actions to maintain a safe living environment.
Remember, regular maintenance and proactive troubleshooting are key to maintaining the performance and efficiency of your radon mitigation system. By following these tips, you can ensure that your system continues to effectively reduce radon levels and protect your family’s health.
Now that you have a good understanding of maintenance and troubleshooting, let’s summarize what we have covered in this guide.
Conclusion
Installing a radon mitigation system in your basement is a crucial step in protecting your family’s health from the dangers of radon gas. Radon is a silent and invisible threat that can seep into your home and accumulate in high concentrations, potentially leading to lung cancer. By following the step-by-step guide outlined in this article, you can successfully install a radon mitigation system and reduce radon levels in your basement.
Throughout this guide, we discussed the importance of understanding radon and its dangers. We explored the different types of radon mitigation systems available, as well as the materials and tools needed for the installation process. Additionally, we provided a detailed step-by-step guide to help you navigate through the installation process with ease.
We also emphasized the significance of testing and monitoring radon levels in your home. Regular testing and monitoring will help ensure the effectiveness of the mitigation system and provide peace of mind knowing that radon levels are within safe limits. We discussed the various testing methods and offered maintenance and troubleshooting tips to keep your system in optimal condition.
Remember, radon levels can vary from one home to another, so it is important to conduct proper testing and follow recommended guidelines for your area. If you encounter any issues or concerns, do not hesitate to consult a radon mitigation professional who can provide expert advice and support.
By taking the necessary steps to install a radon mitigation system and regularly monitoring radon levels, you are making a proactive effort to safeguard the well-being of your loved ones. Prioritize the health and safety of your home by addressing the risk of radon, and enjoy the peace of mind that comes with a radon-free living environment.
Thank you for taking the time to read this comprehensive guide. Stay vigilant, stay informed, and stay safe!
Frequently Asked Questions about How To Install Radon Mitigation System In Basement
Was this page helpful?
At Storables.com, we guarantee accurate and reliable information. Our content, validated by Expert Board Contributors, is crafted following stringent Editorial Policies. We're committed to providing you with well-researched, expert-backed insights for all your informational needs.


0 thoughts on “How To Install Radon Mitigation System In Basement”