Articles
How To Install Siding On A Mobile Home
Modified: August 31, 2024
Looking for articles on how to install siding on a mobile home? Check out our comprehensive guide for step-by-step instructions and expert tips.
(Many of the links in this article redirect to a specific reviewed product. Your purchase of these products through affiliate links helps to generate commission for Storables.com, at no extra cost. Learn more)
Introduction
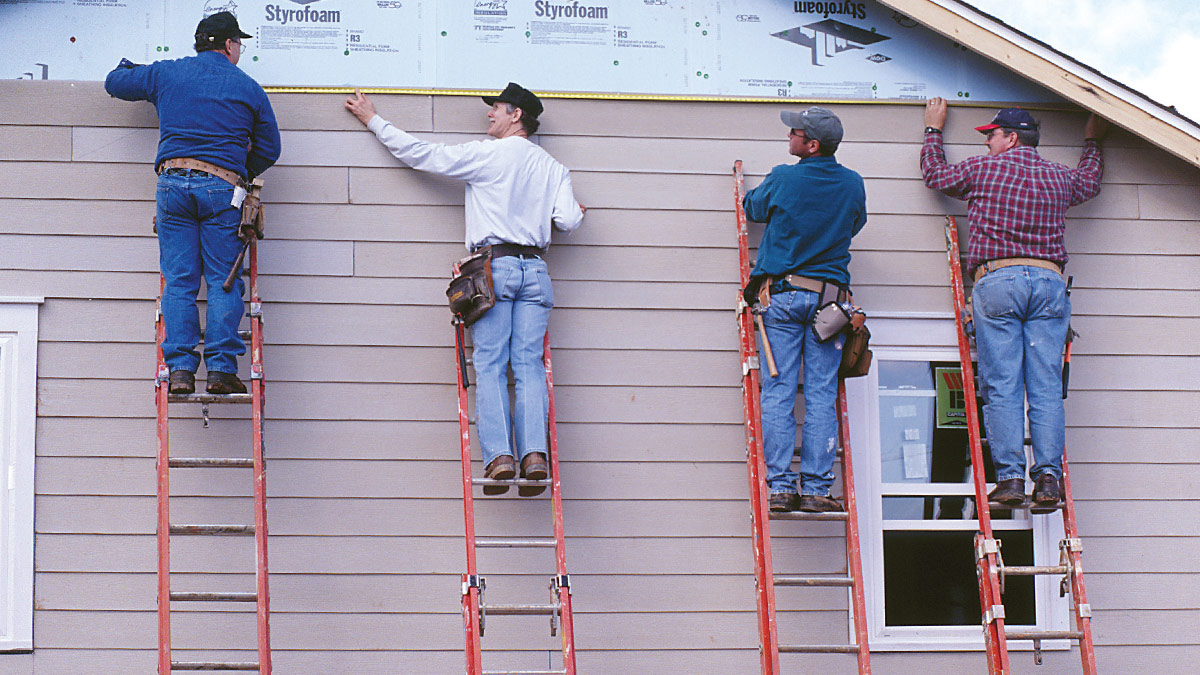
Installing siding on a mobile home not only enhances its appearance but also protects it from the elements. Siding provides insulation and acts as a barrier against wind, rain, and other external factors. It can also improve the energy efficiency of the home, reducing heating and cooling costs. Whether you’re looking to replace old siding or add new siding to your mobile home, this article will guide you through the process step-by-step. With the right materials and tools, as well as some basic knowledge, you can easily install siding on a mobile home, giving it a fresh, updated look.
Before starting the installation process, it’s important to gather all the necessary materials and tools. This includes siding panels, corner posts, trim pieces, starter strips, J-channels, screws, and any additional accessories recommended by the siding manufacturer. Having everything ready beforehand will ensure a smooth and efficient installation process.
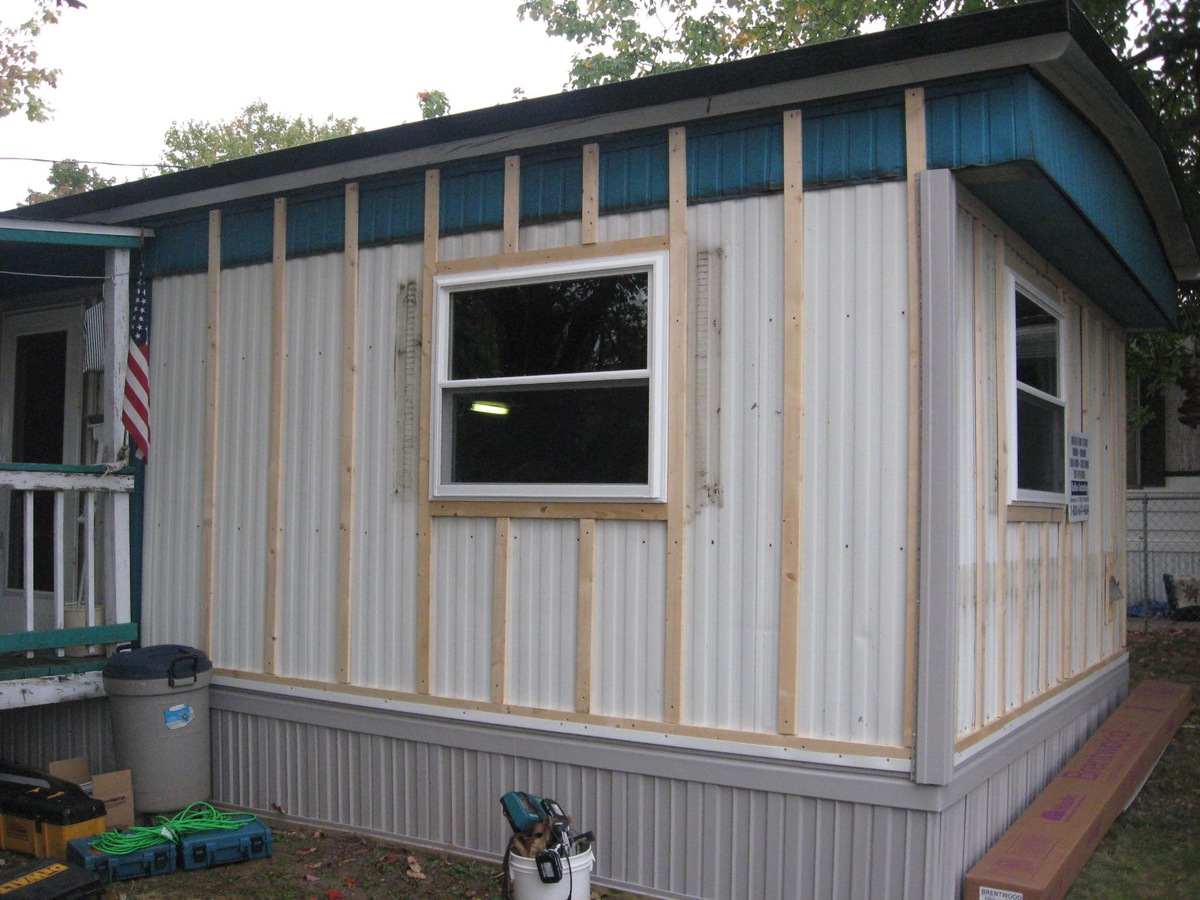
The next step is to prepare the mobile home’s exterior. Start by cleaning the surface thoroughly, removing any dirt, dust, or debris. It’s important to have a clean and smooth surface for proper adhesion of the siding panels. Repair any damaged areas or rotting wood, and make sure the mobile home is structurally sound. Taking the time to properly prepare the exterior will ensure a long-lasting and aesthetically pleasing result.
Once the exterior is prepared, it’s time to install the starter strip. This is a crucial component that provides a solid base for the siding panels. The starter strip should be installed horizontally along the bottom edge of the mobile home’s exterior, ensuring it is level and securely fastened. It acts as a guide for the rest of the siding installation process.
Next, mount J-channels along the windows and doors. J-channels are necessary for proper water drainage and to give a finished look around these areas. They should be installed vertically and securely fastened to the mobile home’s exterior. Careful measurement and precise installation of the J-channels are essential to ensure a professional and polished finish.
To further enhance the appearance and durability of the mobile home, corner posts need to be installed. These posts provide stability and support for the siding panels, especially around corners. They should be securely mounted at each corner of the mobile home, ensuring they are plumb and level. Properly installed corner posts will ensure the siding panels are aligned and properly attached.
Key Takeaways:
- Proper preparation is essential for successful siding installation on a mobile home. Thoroughly clean the exterior, repair any damage, and measure accurately to ensure a smooth and durable installation.
- Attention to detail is crucial throughout the installation process. From aligning the starter strip to securing the trim pieces, precision and care result in a professional and visually appealing outcome.
Step 1: Gather necessary materials and tools
Before you begin the installation process, it’s important to gather all the necessary materials and tools. Having everything organized and readily available will make the installation process smoother and more efficient. Here is a list of the essential items you will need:
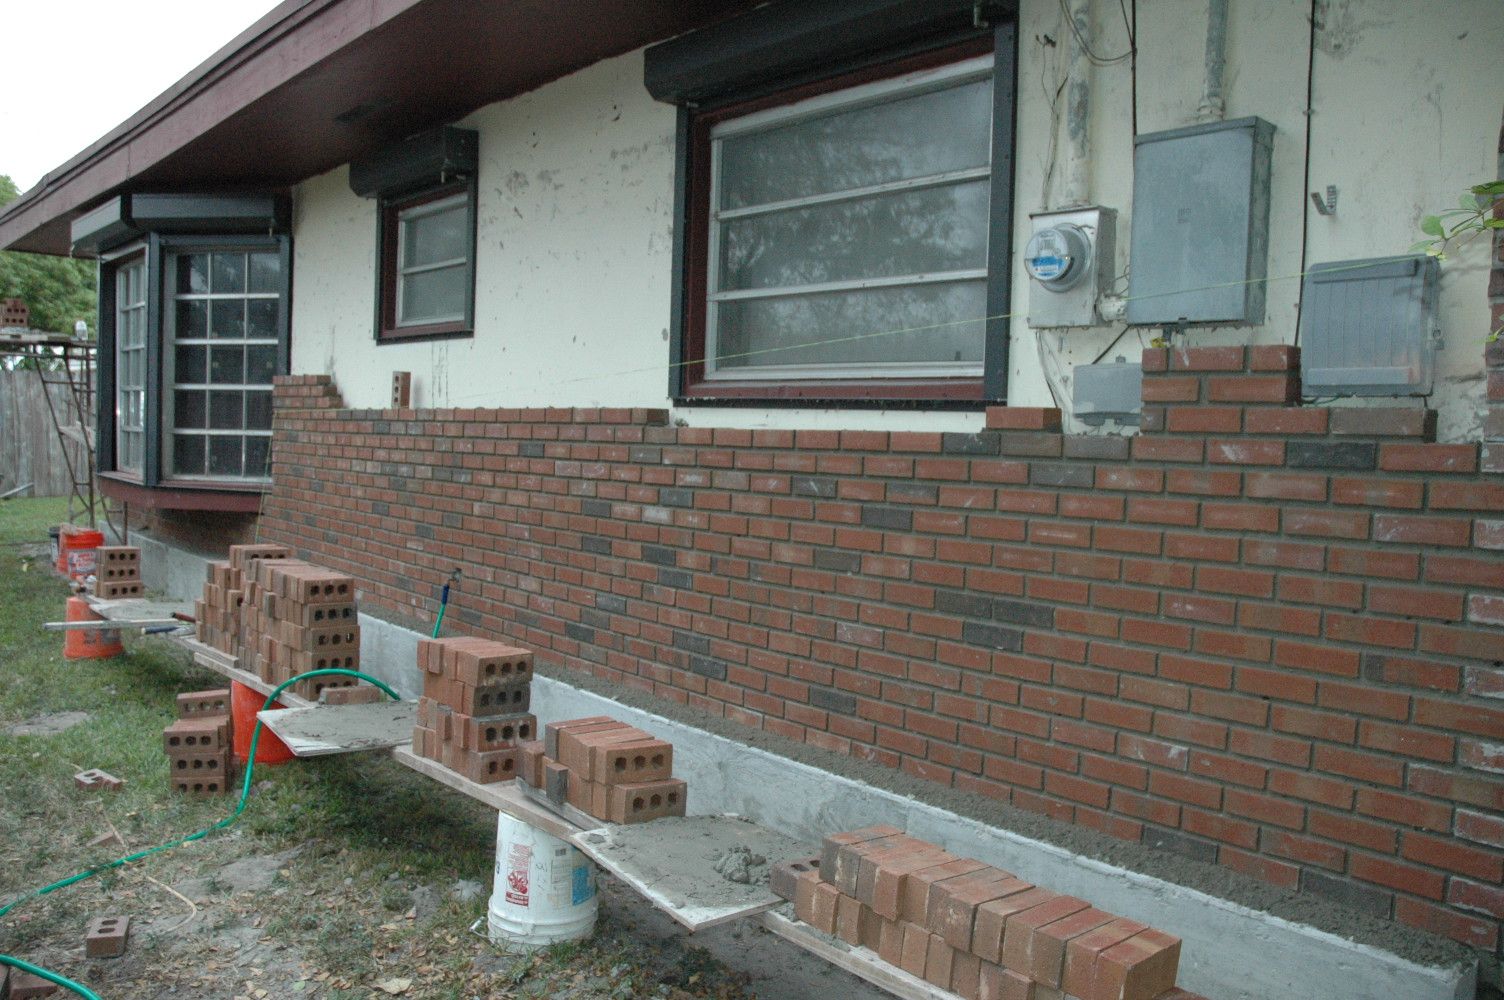
- Siding panels: Choose siding panels that best suit your mobile home’s aesthetic and climate requirements. Options include vinyl, fiber cement, wood, or metal.
- Corner posts: These posts provide stability and support for the siding panels, especially around corners. Make sure to choose corner posts that are compatible with your chosen siding material.
- Starter strips: The starter strip acts as a foundation for the siding panels and helps ensure a level installation. It should be compatible with your chosen siding material.
- J-channels: J-channels are necessary for proper water drainage and to give a finished look around windows and doors. Choose J-channels that match your siding material.
- Screws: Depending on the type of siding panels you choose, you may need screws to secure them to the mobile home’s exterior wall.
- Hammer or nail gun: A hammer or nail gun will be used to attach corner posts, starter strips, and J-channels.
- Tape measure: Accurate measurements are crucial for a precise and professional-looking installation. Use a tape measure to ensure proper alignment and spacing of the siding panels.
- Level: A level will help you ensure that the starter strip, corner posts, and J-channels are installed straight and level.
- Saw: If necessary, you may need a saw to cut siding panels to the appropriate size.
- Caulk and caulk gun: Caulk is used to seal any gaps or seams in the siding. Choose a caulk that is compatible with your siding material.
- Safety equipment: Wear safety goggles, gloves, and appropriate clothing to protect yourself during the installation process.
Once you have gathered all the necessary materials and tools, take the time to familiarize yourself with them. Read the manufacturer’s instructions and guidelines for installation. Having a clear understanding of how each component should be used and installed will ensure a smooth and successful siding installation.
It’s also worth noting that additional accessories or tools may be required depending on the specific siding material you choose. Consult the manufacturer’s recommendations to ensure you have everything you need.
With all the materials and tools ready, you’re now prepared to proceed with the installation process. The next step is to prepare the mobile home’s exterior before installing the siding panels.
Step 2: Prepare the mobile home exterior
Before installing the siding panels, it’s important to properly prepare the exterior of the mobile home. This step ensures a clean and smooth surface for the siding to adhere to and helps to maintain the longevity of the installation. Follow these steps to prepare the mobile home’s exterior:
- Clean the surface: Start by thoroughly cleaning the exterior of the mobile home. Remove any dirt, dust, or debris using a mild detergent and water. Scrub the surface gently with a soft brush or sponge, paying attention to hard-to-reach areas and crevices. Rinse with clean water and allow the surface to dry completely before proceeding.
- Repair any damage: Inspect the mobile home’s exterior for any damage or decayed areas. Replace any rotting wood or damaged sections. Fill in any cracks or holes with a suitable filler and allow it to dry according to the manufacturer’s instructions.
- Ensure structural integrity: Check the overall condition of the mobile home’s structure. Look for any signs of water damage or structural weaknesses. Repair or reinforce any areas that may compromise the stability of the installation.
- Remove old siding: If you are replacing old siding, remove it carefully. Use a pry bar or appropriate tools to loosen and remove the old panels. Dispose of the old siding properly.
- Inspect insulation: Take this opportunity to inspect the insulation of the mobile home. Make sure it is in good condition and adequately covers the entire exterior. Replenish or replace any insulation if necessary.
By thoroughly cleaning and inspecting the mobile home’s exterior, you are creating a solid foundation for the siding installation. This step ensures proper adhesion and reduces the risk of future issues such as mold or water damage.
Before proceeding with the installation, it’s important to measure and calculate the amount of siding needed. Measure the height and width of each wall, accounting for any windows, doors, or other obstacles. Allow for a small buffer to account for waste and cutouts.
With the mobile home’s exterior prepared and measurements taken, you are now ready to move on to the next step: installing the starter strip.
Step 3: Install starter strip
The starter strip is a critical component of the siding installation process. It serves as the foundation for the siding panels and ensures a level and secure placement. Follow these steps to install the starter strip:
- Measure and cut: Begin by measuring the length of the wall where the starter strip will be installed. Cut the starter strip to match the measured length using a saw or appropriate cutting tool.
- Position the starter strip: Place the starter strip along the bottom edge of the wall, ensuring it is level and straight. Align it with the corner of the wall and use a level to double-check its positioning.
- Secure the starter strip: Once the starter strip is in position, secure it to the wall using nails, screws, or adhesive, depending on the manufacturer’s recommendations. Make sure to follow the specified spacing guidelines to ensure proper attachment.
- Continue installing the starter strip: Repeat the process described above for each wall of the mobile home where siding will be installed. Cut, position, and secure the starter strip along the entire perimeter of the structure.
- Trim excess: If there is any excess starter strip extending beyond the edge of the wall, trim it using a saw or cutting tool. This will ensure a clean and neat finish.
The starter strip provides a level base for the siding panels and makes the installation process easier and more efficient. It helps to maintain a consistent height and alignment throughout the installation, resulting in a professional and visually appealing outcome.
Before proceeding to the next step, take a moment to double-check the alignment and positioning of the starter strip. It is crucial to ensure it is level and securely fastened, as any misalignment or instability could affect the overall appearance and durability of the siding installation.
With the starter strip securely in place, you are now ready to move on to the next step: mounting J-channels along windows and doors.
Step 4: Mount J-channel along windows and doors
Mounting J-channel along windows and doors is an essential step in installing siding on a mobile home. J-channels not only provide a finished look but also serve as a drainage system to prevent water from seeping behind the siding. Follow these steps to properly mount J-channel:
- Measure and cut: Begin by measuring the length of the windows and doors where J-channel will be installed. Cut the J-channel pieces to match the measured lengths using a saw or appropriate cutting tool.
- Position the J-channel: Start by placing the first piece of J-channel vertically along one side of a window or door. Align it with the edge of the window or door frame, ensuring it is straight and level. Use a level to double-check its positioning.
- Secure the J-channel: Once the first piece of J-channel is in position, secure it to the mobile home’s exterior wall using nails, screws, or adhesive, depending on the manufacturer’s recommendations. Make sure to follow the specified spacing guidelines for attachment.
- Continue installing the J-channel: Repeat the process described above for each window and door. Cut, position, and secure the J-channel around the entire perimeter of the windows and doors.
- Overlap J-channel at corners: When you reach a corner, cut the end of the J-channel at a 45-degree angle. This will allow the pieces to overlap neatly around the corner. Secure them in place using nails, screws, or adhesive.
- Ensure proper water drainage: As you install the J-channel, make sure the bottom edge of each piece is slightly angled downward. This will ensure proper water drainage, preventing any potential water damage behind the siding.
Properly mounting J-channel along windows and doors not only improves the aesthetic appeal of the mobile home but also helps to protect the siding and the underlying structure from moisture-related issues. Taking the time to accurately measure, position, and secure the J-channel will contribute to a seamless and long-lasting siding installation.
Before moving on to the next step, carefully inspect the installed J-channel to ensure it is straight, level, and securely fastened. Any misalignment or instability could impact the overall appearance and functionality of the siding installation.
With the J-channel securely in place, the next step is to install the corner posts for additional stability and support.
Step 5: Install corner posts
Corner posts play a crucial role in the installation of siding on a mobile home. They provide stability, support, and a visually pleasing finish around the corners. Follow these steps to properly install corner posts:
- Measure and cut: Start by measuring the height of the corner where the post will be installed. Cut the corner post to match the measured height using a saw or appropriate cutting tool.
- Position the corner post: Place the corner post at the corner of the mobile home, ensuring it is plumb and level. Use a level to double-check its positioning and make any necessary adjustments.
- Secure the corner post: Once the corner post is in position, secure it to the mobile home’s exterior wall using nails, screws, or adhesive, depending on the manufacturer’s recommendations. Ensure it is firmly attached and provides adequate support.
- Repeat for each corner: Continue the process described above for each corner of the mobile home where siding will be installed. Measure, position, and secure the corner posts to ensure uniformity and a polished finish throughout.
- Overlap corner posts: When you reach an external corner where two walls meet, cut the end of one corner post at a 45-degree angle. This will allow the two posts to overlap neatly. Secure them in place using nails, screws, or adhesive.
Properly installed corner posts not only enhance the appearance of the mobile home but also provide structural support for the siding panels. It’s important to accurately measure, position, and secure the corner posts to ensure a professional and long-lasting siding installation.
Before moving on to the next step, inspect the installed corner posts to ensure they are plumb, level, and securely fastened. Any misalignment or instability could affect the overall integrity and visual appeal of the siding installation.
With the corner posts securely in place, you are now ready to move on to the next step: attaching the first siding panel.
When installing siding on a mobile home, make sure to properly prepare the surface by cleaning and repairing any damage. Use the correct type of siding for mobile homes and follow the manufacturer’s instructions for installation.
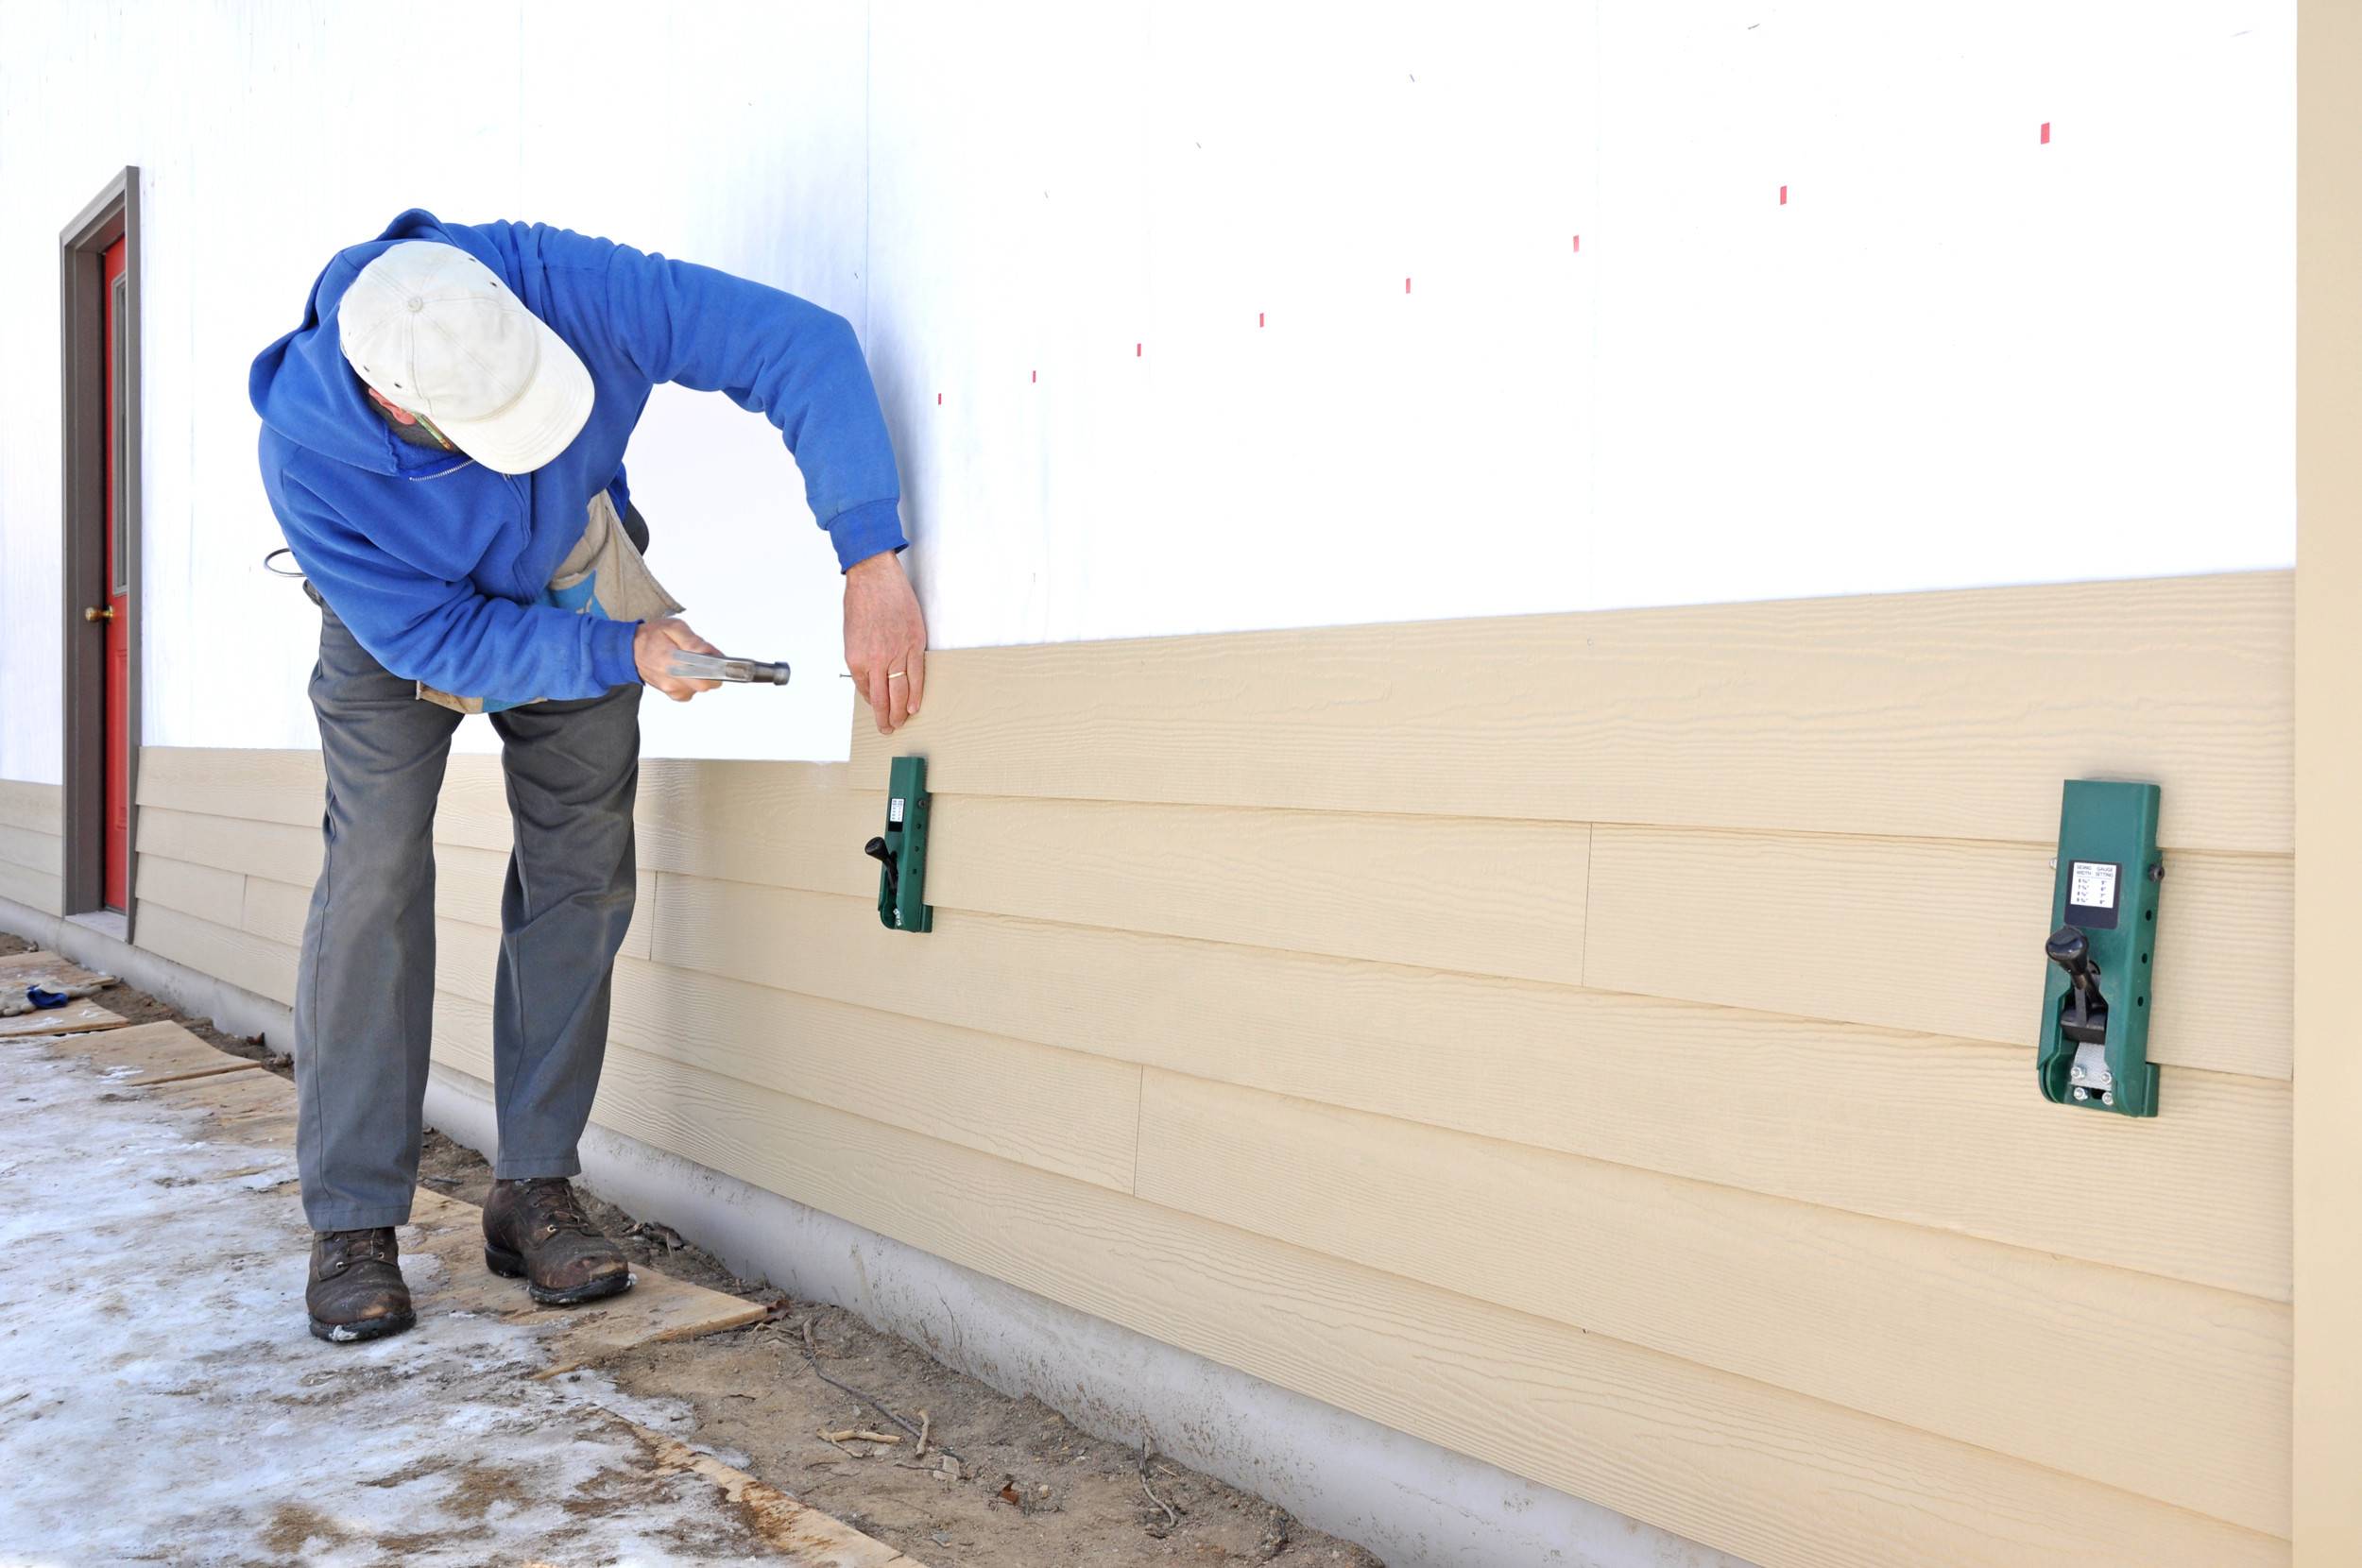
Step 6: Attach the first siding panel
With the necessary preparations in place, it’s time to start installing the siding panels on your mobile home. Follow these steps to properly attach the first siding panel:
- Measure and cut: Begin by measuring the height of the wall where the first siding panel will be installed. Cut the siding panel to match the measured height using a saw or appropriate cutting tool.
- Position the siding panel: Start at one corner of the mobile home and position the first siding panel against the wall, just above the starter strip. Ensure that it is level and align it with the corner post or J-channel. Use a level to double-check its positioning.
- Secure the siding panel: Once the siding panel is in position, secure it to the mobile home’s exterior wall using nails or screws. Place the fasteners in the pre-drilled holes or slots provided by the manufacturer. Make sure to follow the recommended spacing between fasteners.
- Continue attaching the first row: Repeat the process described above to attach the remaining section of the first siding panel. Ensure that each piece interlocks and properly overlaps with the adjacent piece for a seamless appearance.
- Double-check alignment and levelness: As you install the first siding panel, regularly check that it remains level and properly aligned with the starter strip, corner posts, and J-channels. Adjust as necessary to achieve a uniform and visually appealing result.
Attaching the first siding panel correctly is crucial, as it sets the foundation for the rest of the installation. Take your time to accurately measure, position, and secure the siding panel to ensure a professional and durable finish.
Before moving on to the next step, inspect the installed siding panel to ensure it is level, aligned, and securely fastened. Pay attention to any visible gaps or inconsistencies that may impact the overall appearance and functionality of the siding installation.
With the first siding panel securely attached, you can now proceed to the next step: continuing the installation by attaching additional siding panels.
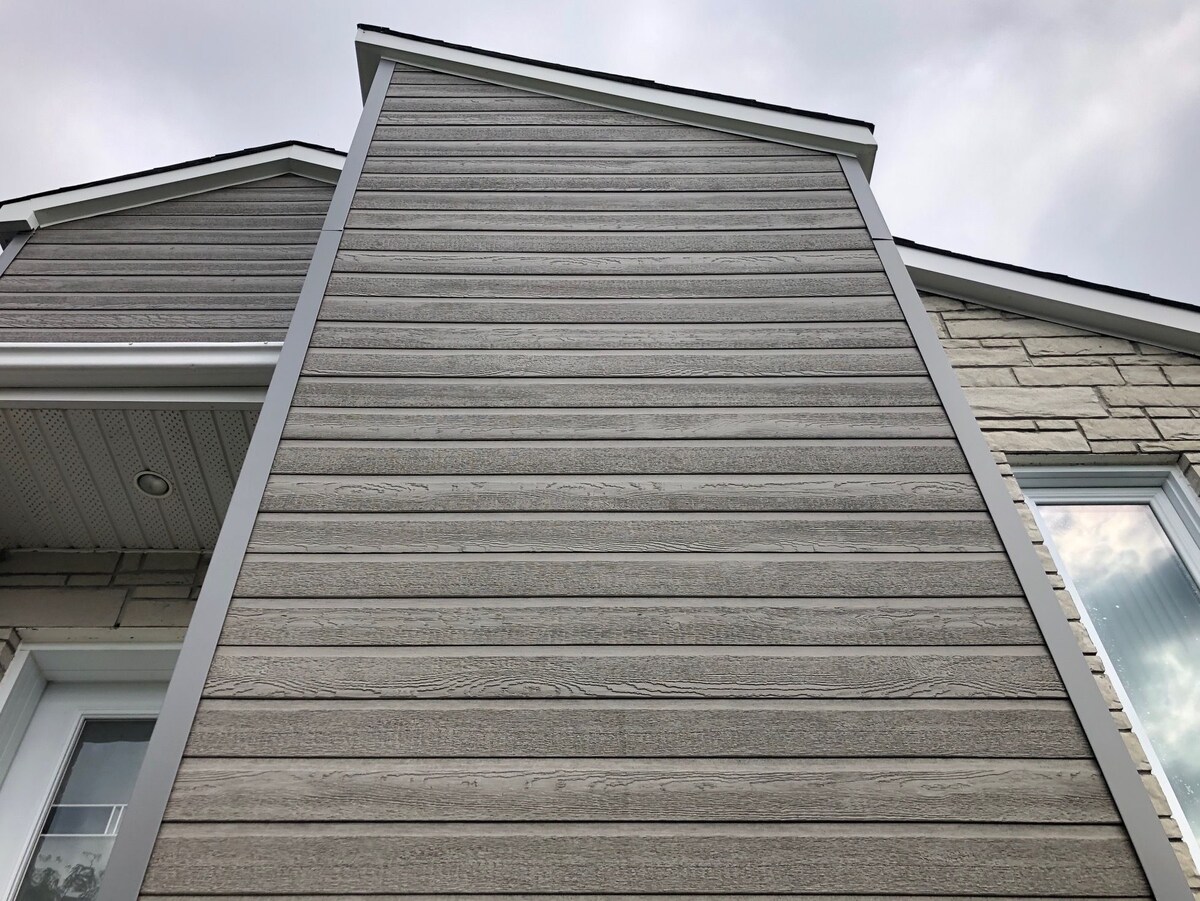
Step 7: Continue installing siding panels
Now that the first siding panel is securely attached, it’s time to continue the installation by attaching additional siding panels. Follow these steps to ensure a smooth and professional installation:
- Measure and cut: Measure the length of the next section of the wall where a siding panel will be installed. Cut the siding panel to match the measured length using a saw or appropriate cutting tool. Take into account any necessary allowances for overlaps and trim pieces.
- Position the siding panel: Starting from the bottom, position the next siding panel against the already installed panel. Ensure that the interlocking edges fit snugly together and align the panel with the starter strip, corner posts, and J-channels.
- Secure the siding panel: Once the siding panel is properly positioned, secure it to the mobile home’s exterior wall using nails or screws. Follow the manufacturer’s recommendations on spacing and placement to ensure a secure and durable attachment.
- Repeat for each siding panel: Continue measuring, cutting, positioning, and securing the remaining siding panels in the same manner. Follow a consistent pattern to achieve a uniform and visually appealing installation.
- Ensure proper alignment and levelness: Regularly check the alignment and levelness of the siding panels as you progress in the installation. Make any necessary adjustments to maintain a straight and visually consistent appearance.
- Overlap and interlock panels: Ensure that each siding panel overlaps and interlocks with the previous panel. This will create a tight, weather-resistant seal and give the siding a finished look.
As you continue installing siding panels, it’s essential to maintain attention to detail and precision. Take the time to ensure proper alignment, levelness, and secure fastening to achieve a professional and long-lasting siding installation.
Before moving on to the next step, conduct a thorough inspection of the installed siding panels. Check for any visible gaps, loose panels, or misalignments. Address any issues promptly to maintain the integrity and visual appeal of the installation.
With the siding panels securely installed, you are one step closer to completing the siding installation on your mobile home.
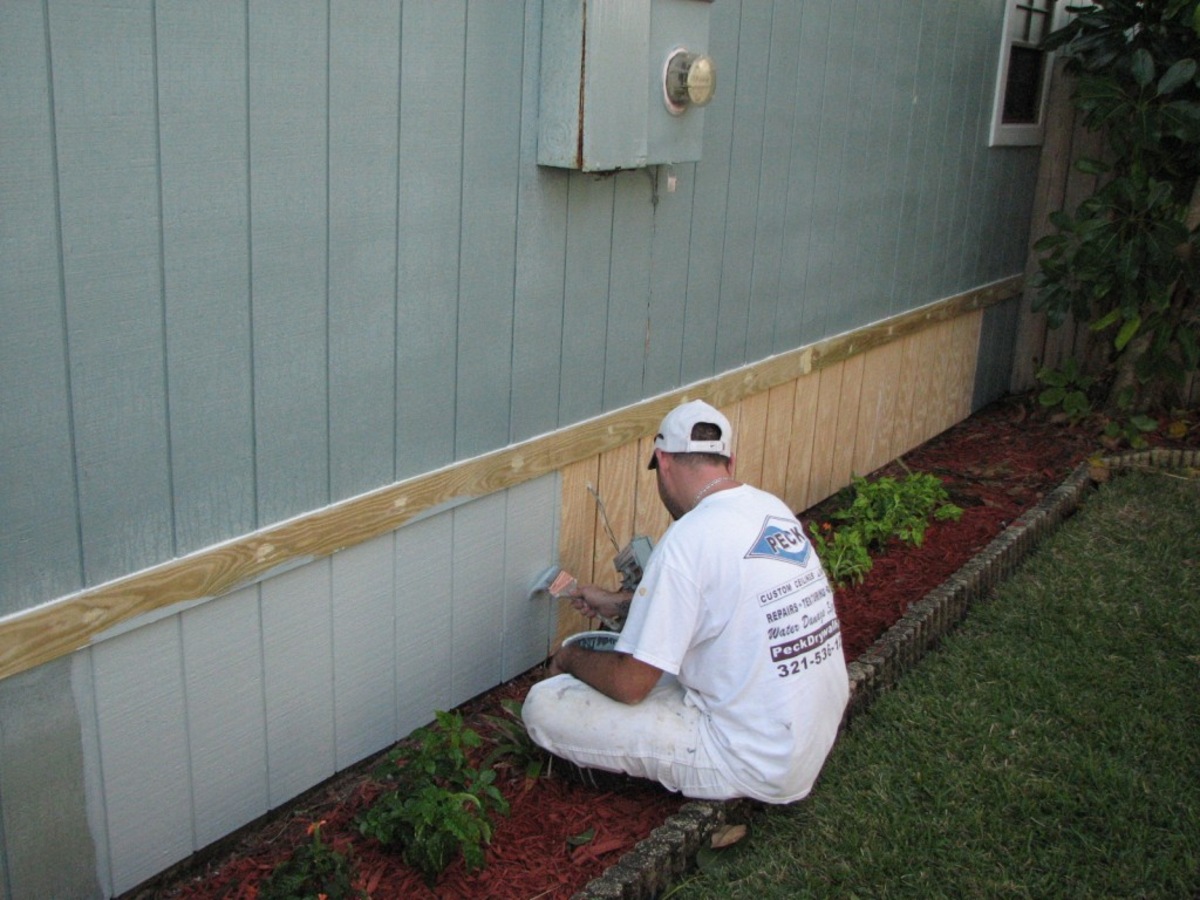
Step 8: Trim excess siding
Once all the siding panels are securely installed, it’s time to trim any excess siding for a clean and polished finish. Trimming the siding ensures that it fits neatly and seamlessly against the edges and corners of the mobile home. Follow these steps to trim the excess siding:
- Measure and mark: Use a tape measure to determine how much excess siding needs to be trimmed. Mark the areas where the excess siding extends beyond the edges or corners.
- Cut off the excess: Carefully cut along the marked lines using a saw or appropriate cutting tool. Ensure that the cuts are straight and clean for a professional-looking result. Take caution to avoid cutting into the underlying structure or adjacent siding panels.
- Smooth the edges: After trimming, use a file or sandpaper to smooth any rough or jagged edges. This will create a seamless transition between the trimmed siding and the adjacent surfaces.
Trimming the excess siding is an important step to achieve a neat and visually pleasing final installation. It helps create clean lines and prevents any protrusions or uneven edges.
Before moving on to the next step, carefully inspect the trimmed areas to ensure they are smooth and seamless. Address any rough edges or uneven cuts to maintain the overall quality and appearance of the siding installation.
With the excess siding trimmed and the edges smoothed, you’re ready to move on to the next step: installing the trim pieces for a finished look.
Read more: How To Install An Awning On A Mobile Home
Step 9: Install trim pieces
Installing trim pieces is the final touch that adds a polished and finished look to your siding installation on a mobile home. Trim pieces not only enhance the aesthetic appeal but also provide additional protection against moisture and other elements. Follow these steps to properly install trim pieces:
- Measure and cut: Begin by measuring the length needed for each trim piece. Use a tape measure to determine the precise dimensions and cut the trim pieces accordingly using a saw or appropriate cutting tool.
- Position the trim piece: Start at one corner of the mobile home and position the first trim piece against the edge of the siding panels. Ensure that it aligns with the overall level and height of the siding installation, and check for any required gaps or overlaps as per manufacturer specifications.
- Secure the trim piece: Once the trim piece is properly positioned, secure it to the mobile home’s exterior using nails, screws, or adhesive, depending on the manufacturer’s recommendations. Ensure that it is securely fastened, but be careful not to overdrive the fasteners.
- Continue installing trim pieces: Repeat the process described above for each section of the mobile home where trim pieces are required. Take care to align and securely attach each trim piece to the corresponding areas.
- Trim to fit around openings: When encountering windows, doors, or other openings, make the necessary cuts and adjustments to trim pieces so that they fit neatly around these areas. Use a saw or appropriate cutting tool to create accurate and clean miters or angles.
- Inspect and touch-up: After installing all the trim pieces, carefully inspect the areas for any visible gaps or imperfections. Make any necessary touch-ups, such as filling gaps with caulk or applying paint or sealant, to ensure a seamless and cohesive appearance.
Installing trim pieces provides the final layer of detail and refinement to your mobile home siding installation. Proper alignment and secure attachment of the trim pieces contribute to a professional and visually appealing finished look.
Before moving on to the final step, take the time to thoroughly inspect the installed trim pieces. Check for any loose or uneven sections and address them promptly to maintain the quality and longevity of the siding installation.
With the trim pieces securely installed and any necessary touch-ups completed, you’re now ready for the final step: applying the finishing touches to complete the siding installation on your mobile home.
Step 10: Apply finishing touches
Congratulations, you’re nearing the end of your siding installation journey! Step 10 focuses on applying the final touches to ensure a professional, polished, and long-lasting result. Follow these steps to complete the finishing touches:
- Clean the siding: Before considering any additional finishing touches, take the time to clean the installed siding panels and trim pieces. Use a mild detergent, water, and a soft brush or sponge to remove any dirt, debris, or marks. Rinse with clean water and allow the siding to dry thoroughly.
- Apply caulk: Inspect the joints, seams, and gaps between the siding panels and trim pieces. Apply a suitable caulk to seal any gaps and create a weather-resistant barrier. Make sure to use caulk that is compatible with your chosen siding material. Smooth the caulk lines with a caulk tool or your finger for a neat and professional finish.
- Touch up paint or stain: If necessary, touch up any areas where the siding panels or trim pieces may have been scratched or damaged during the installation process. Match the paint or stain color to the original siding for a seamless appearance.
- Inspect for any loose fasteners: Take the time to inspect the siding panels, trim pieces, and all the fasteners used in the installation process. Ensure that all nails, screws, or other fasteners are properly tightened and secure. Tighten or replace any loose or missing fasteners as needed.
- Check for proper ventilation: Confirm that ventilation elements, such as soffit vents or ridge vents, are unobstructed and functioning correctly. Adequate ventilation is crucial in maintaining the longevity and quality of your siding installation.
- Remove any protective film: If your siding panels or trim pieces came with a protective film to prevent damage during installation, remove it carefully. Dispose of the film properly and ensure the siding is free from any residue.
By applying these finishing touches, you’ll ensure the siding installation on your mobile home is not only visually appealing but also durable and protected against the elements.
Before considering the installation complete, take some time to step back and examine your mobile home’s exterior. Conduct a thorough inspection, making any necessary touch-ups, adjustments, or corrections to guarantee the best possible outcome.
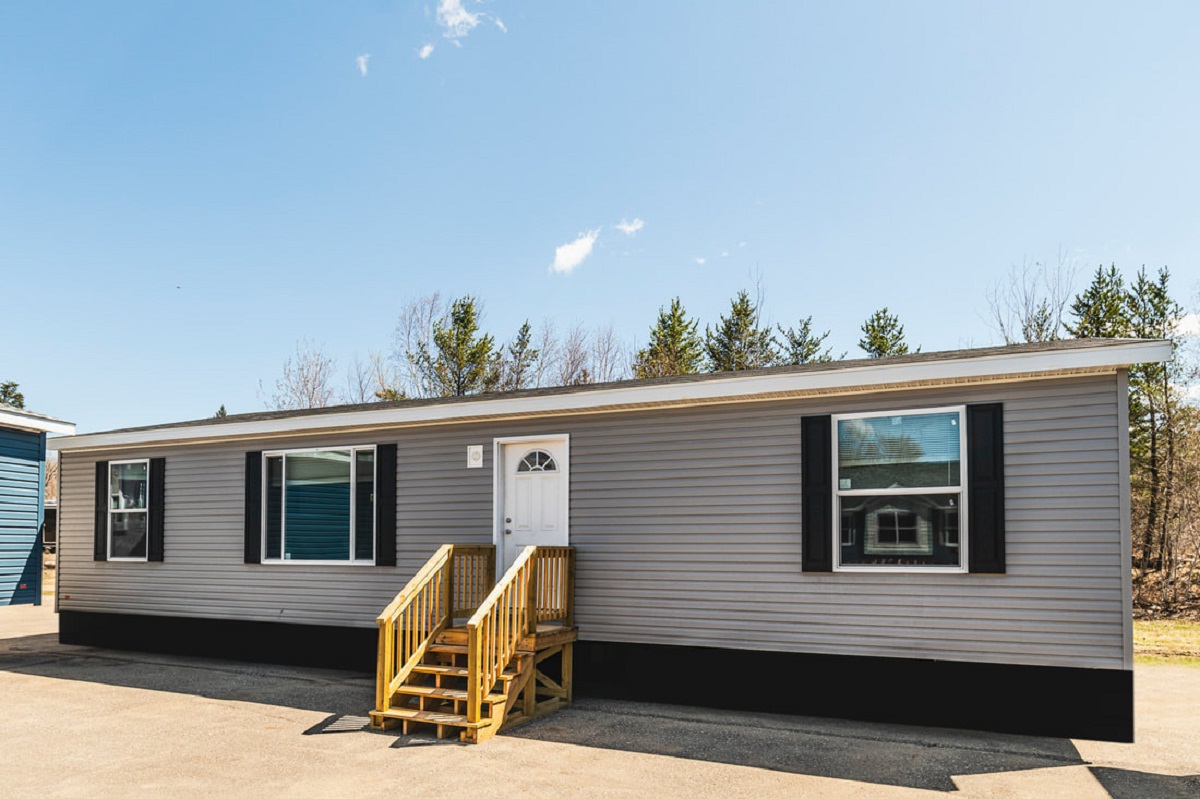
Now that you’ve completed the necessary steps in installing siding on your mobile home, you can admire your hard work and enjoy the improved appearance, protection, and energy efficiency it provides.
Conclusion
Installing siding on a mobile home is a rewarding project that can enhance its aesthetic appeal, improve energy efficiency, and provide protection against the elements. By following the step-by-step guide outlined in this article, you now have the knowledge and confidence to tackle the installation process successfully.
Throughout the installation, it’s important to gather all the necessary materials and tools, properly prepare the mobile home’s exterior, and install the starter strip, J-channel, corner posts, siding panels, trim pieces, and other finishing touches. Take your time to measure accurately, align properly, and secure securely to achieve a professional-looking and long-lasting result.
Remember to pay attention to details, such as trimming excess siding and applying caulk, to ensure a clean and polished appearance. Regularly inspect the installation for any loose or damaged components and address them promptly to maintain the integrity of your siding.
As you complete the installation, take pride in the transformation of your mobile home. Not only does siding enhance the curb appeal, but it also contributes to the overall value and durability of your home.
If you encounter any challenges or have specific questions throughout the installation process, consult the manufacturer’s instructions or seek guidance from professionals. Safety should always be a priority, so be sure to wear appropriate protective gear and use tools correctly.
Now that you have successfully installed siding on your mobile home, sit back and enjoy the benefits it brings. Appreciate the improved insulation, weather protection, and visual appeal that your newly clad home now offers.
Remember, maintenance is key to preserving the siding’s integrity. Regularly inspect and clean the siding, addressing any issues promptly. With the proper care and maintenance, your siding installation will continue to enhance your mobile home for years to come.
Congratulations on completing your siding installation project and creating a more functional and beautiful space for yourself and your family!
Now that you've mastered siding installation on your mobile home, why not explore other ways to spruce up its exterior? Our latest article discusses 8 amazing vinyl siding options perfect for 2024. Each selection offers unique benefits, ensuring your home not only stands out but also withstands the elements effectively. Don't miss out on transforming your space with these stylish and durable choices.
Frequently Asked Questions about How To Install Siding On A Mobile Home
Was this page helpful?
At Storables.com, we guarantee accurate and reliable information. Our content, validated by Expert Board Contributors, is crafted following stringent Editorial Policies. We're committed to providing you with well-researched, expert-backed insights for all your informational needs.

0 thoughts on “How To Install Siding On A Mobile Home”