Home>Home Security and Surveillance>How To Install An Outdoor Camera On A Vinyl Siding

Home Security and Surveillance
How To Install An Outdoor Camera On A Vinyl Siding
Modified: September 1, 2024
Enhance your home security and surveillance with our easy step-by-step guide on installing an outdoor camera on vinyl siding. Safeguard your property with reliable monitoring.
(Many of the links in this article redirect to a specific reviewed product. Your purchase of these products through affiliate links helps to generate commission for Storables.com, at no extra cost. Learn more)
Introduction
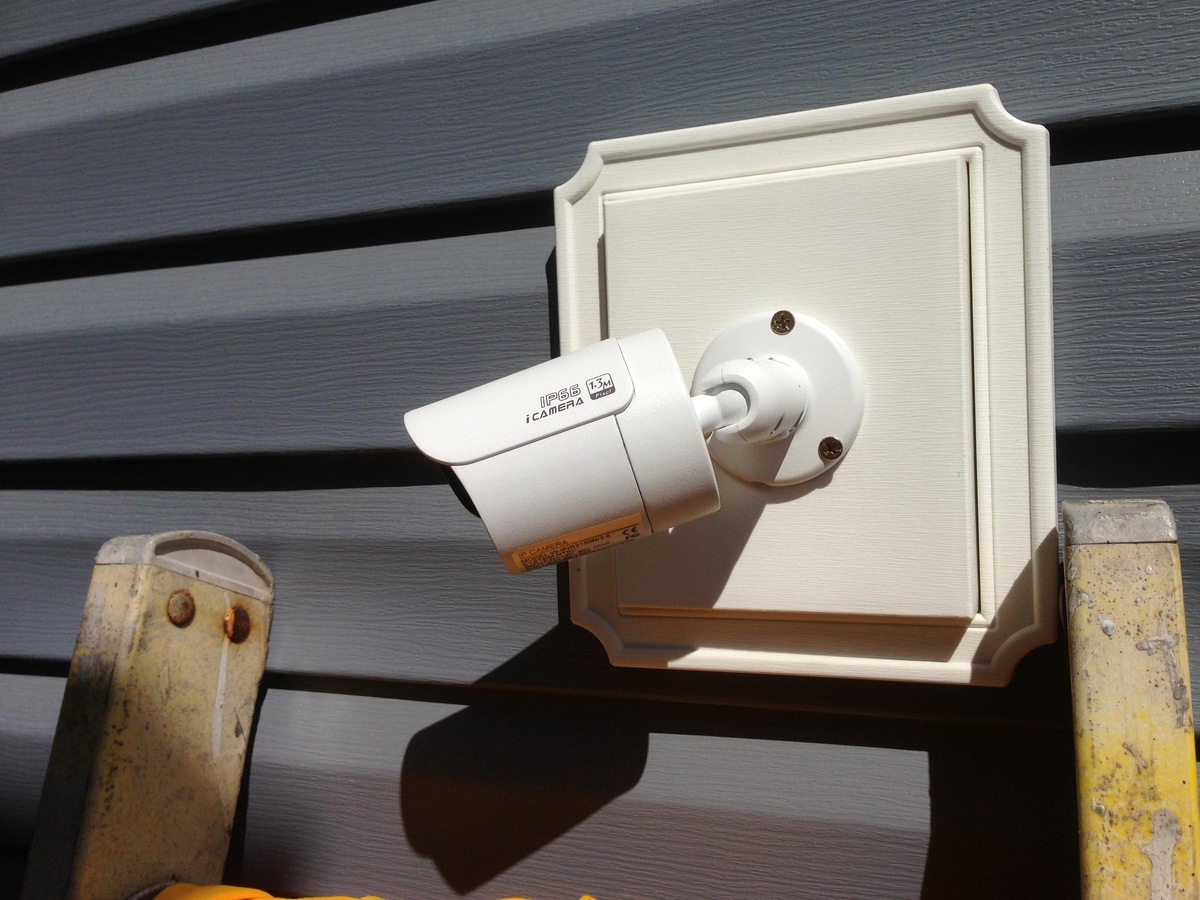
Installing an outdoor camera on vinyl siding is an essential step in strengthening the security of your home. With advancements in technology, surveillance cameras have become more accessible and affordable, allowing homeowners to monitor their property and deter potential intruders.
Vinyl siding has gained popularity in recent years due to its durability, low maintenance, and pleasing aesthetics. However, installing a camera on this type of siding requires some careful considerations and proper techniques to ensure a secure and long-lasting installation. In this article, we will guide you through the step-by-step process of installing an outdoor camera on vinyl siding.
By installing a camera on your home’s exterior, you can keep an eye on the surroundings, have a clear view of any potential threats, and provide peace of mind to your family. Whether you are looking to deter burglars, monitor packages, or simply keep an eye on your property, an outdoor camera is an effective tool for home security.
Before we delve into the installation process, it’s important to choose the ideal outdoor camera for your needs. There are various types available, including wireless cameras, wired cameras, and those that come with advanced features such as motion detection and night vision. Consider the specific requirements of your home and the level of security you desire when selecting your camera.
Furthermore, it’s essential to gather the necessary tools and materials before you begin the installation. This will ensure a smooth and efficient process while minimizing any potential delays. Some common tools you may need include a drill, screws, a screwdriver, a level, cable connectors, and a power source for the camera.
In the next section, we will discuss crucial factors to consider when determining the best location for mounting the camera. The placement of the camera plays a vital role in capturing the desired field of view and maximizing its effectiveness. Proper positioning will help you monitor entrances, driveways, yards, or any specific areas you wish to cover with the camera.
Preparing the vinyl siding for installation is an essential step to ensure a solid and secure attachment. We will guide you through the process of preparing the siding and creating a stable surface for mounting the camera bracket. Taking the time to properly prepare the siding will prevent potential damage and ensure a reliable installation.
Once the vinyl siding is ready, we will move on to mounting the camera bracket. This step requires precision and the use of appropriate tools to securely attach the bracket to the siding. Depending on the type of camera and bracket you have, the installation process may vary. We will provide detailed instructions to help you navigate this step effectively.
Stay tuned for the following sections where we will cover how to connect the camera to power and other devices, adjust and secure the camera position, and perform a successful test to ensure proper functioning. By following these step-by-step instructions, you will be well on your way to installing an outdoor camera on vinyl siding and enhancing the security of your home. Let’s get started!
Key Takeaways:
- Choosing the right outdoor camera is crucial. Consider factors like camera type, resolution, field of view, night vision, weather resistance, and budget to ensure it meets your home security needs.
- Proper preparation, secure mounting, and thorough testing are essential for installing an outdoor camera on vinyl siding. Ensure optimal placement, stable attachment, and functional features for effective home surveillance.
Step 1: Choose the Ideal Outdoor Camera
When it comes to selecting an outdoor camera for your home security needs, there are a few factors to consider. The right camera will depend on your specific requirements, budget, and desired features. Here are some key points to keep in mind when choosing the ideal outdoor camera:
1. Type of camera: There are three primary types of outdoor cameras to choose from: wireless cameras, wired cameras, and battery-powered cameras. Wireless cameras are easy to install and offer flexibility in placement, while wired cameras require a more complex installation process but provide a reliable power source. Battery-powered cameras are ideal for areas where power sources are not easily accessible.
2. Resolution and image quality: The resolution of the camera determines the clarity of the footage. Higher resolution cameras, such as those with 1080p or 4K resolution, offer clearer images and make it easier to identify faces and other details. Consider the level of detail you require and choose a camera with suitable resolution.
3. Field of view: The field of view refers to the area that the camera can capture. Cameras with wide-angle lenses offer a broader view, allowing you to monitor larger areas with fewer cameras. However, cameras with narrower lenses provide more focused and detailed footage. Consider the specific areas you want to cover and choose a camera with an appropriate field of view.
4. Night vision: If you want to monitor your property at night or in low light conditions, consider a camera with night vision capabilities. Look for cameras that have infrared sensors or built-in LED lights to capture clear footage in the dark. The range of the night vision feature is also important, so choose a camera that covers the desired distance.
5. Weather resistance: Since the camera will be exposed to the elements, it’s crucial to choose a camera that is weather-resistant. Look for cameras with an IP65 or higher rating, as these are designed to withstand rain, dust, and extreme temperatures. This ensures that your camera will remain operational and reliable in various weather conditions.
6. Additional features: There are several additional features that you may find beneficial for your outdoor camera. These can include motion detection, two-way audio, remote viewing capabilities, and cloud storage options. Consider your specific requirements and preferences when evaluating these features, as they can enhance the functionality and convenience of your camera.
7. Budget: Set a budget for your outdoor camera and stick to it. Determine how much you are willing to invest in a camera without compromising on quality and necessary features. Consider the long-term benefits and potential cost savings that a reliable security camera can provide.
By considering these factors, you can choose an outdoor camera that best suits your home security needs. Take the time to research different models, read reviews, and compare prices before making a final decision. Remember, investing in a high-quality camera will provide you with peace of mind and help protect your home and family.
Step 2: Gather the Necessary Tools and Materials
Before you begin installing an outdoor camera on vinyl siding, it is essential to gather all the necessary tools and materials. Having everything you need on hand will ensure a smooth and efficient installation process. Here are the tools and materials you will need:
1. Drill: A drill with the appropriate drill bits will be needed to create holes in the vinyl siding for mounting the camera bracket.
2. Screws: Choose screws that are suitable for outdoor use and can securely fasten the camera bracket to the vinyl siding. Opt for rust-resistant screws to ensure durability.
3. Screwdriver: A screwdriver will be required to tighten the screws and secure the camera bracket to the vinyl siding.
4. Level: A level is necessary to ensure that the camera bracket is properly aligned and mounted in a straight position. This will help achieve optimal camera position and angle.
5. Cable connectors: Depending on the type of camera you have, you may need cable connectors to connect the camera to the power source and other devices. Purchase connectors that are compatible with your specific camera model.
6. Power source: Determine the power source for your camera. It may be a nearby electrical outlet, a power over Ethernet (PoE) connection, or a battery pack for wireless cameras. Ensure that you have the necessary cables or adapters to connect the camera to the power source.
7. Mounting plate or bracket: Depending on the type of camera you have, you may need a mounting plate or bracket to attach the camera to the vinyl siding. Make sure to choose a mounting plate or bracket that is compatible with your camera model.
8. Ladder or step stool: Depending on the height at which you will be installing the camera, you may need a ladder or step stool to reach the desired location. Ensure that the ladder or step stool is stable and secure to prevent accidents or injuries.
9. Safety equipment: It is always advisable to wear safety gear, such as gloves and safety glasses, while working with tools and materials. This will protect your hands and eyes from any potential hazards.
10. Optional: Cable clips or adhesive hooks: If you want to route the cables neatly along the vinyl siding, you can use cable clips or adhesive hooks to secure the cables in place. These accessories can help maintain a clean and organized appearance.
Before you start the installation process, double-check that you have all the tools and materials listed above. This will save you from any last-minute delays or interruptions during the installation. It’s always better to be prepared and have everything readily available.
By gathering these tools and materials, you are ready to move on to the next step of determining the best location for mounting the camera on your vinyl siding.
Step 3: Determine the Best Location for Mounting the Camera
Determining the best location for mounting your outdoor camera is crucial to ensure optimal coverage and visibility. Proper placement will allow you to monitor the desired areas and capture clear footage. Here are some factors to consider when choosing the best location:
1. Coverage area: Assess the areas you want to monitor and determine the coverage area of the camera. It could be your front yard, driveway, back porch, or any other specific spots you want to keep an eye on. Consider the field of view of the camera and ensure that it aligns with your monitoring needs.
2. Accessibility: Choose a location that is easily accessible for mounting the camera and performing maintenance tasks. You may need to periodically clean the camera lens or adjust the camera angle, so make sure there is enough space and convenience for these tasks.
3. Power source availability: Consider the proximity of a power source when selecting the camera’s mounting location. If you are using a wired camera, ensure that there is an electrical outlet nearby. If you are using a battery-powered camera, access to the camera’s battery compartment should be easy for replacement or recharging.
4. Height and angle: Determine the appropriate height and angle for the camera to capture the desired view. Mount the camera at a height that is out of reach but still provides a clear view of the area. Experiment with different angles to find the most suitable one for monitoring the specific area effectively.
5. Obstructions and light sources: Take note of any potential obstructions that may hinder the camera’s view. Avoid mounting the camera behind tree branches, fences, or other objects that could obstruct the line of sight. Additionally, consider the sources of light in the area, as excessive glare or shadows could affect the camera’s performance.
6. Protection from weather: Ensure the chosen location provides some protection for the camera from direct exposure to rain, snow, or intense sunlight. It is also important to consider the prevailing wind direction and choose a spot where the camera is less likely to be affected by strong gusts of wind.
7. Security: Mount the camera in a location that is less vulnerable to tampering or vandalism. Consider areas that are visible to deter potential intruders and ensure that the camera cannot be easily accessed or removed by unauthorized individuals.
Once you have analyzed these factors, select the best location for your outdoor camera. Keep in mind that it may be necessary to adjust the camera’s position after installation to achieve the desired coverage and ensure optimal performance. Taking the time to determine the ideal location will enhance the effectiveness and efficiency of your camera system.
In the next step, we will discuss how to prepare the vinyl siding for installation, ensuring a secure foundation for the camera bracket.
Step 4: Prepare the Vinyl Siding for Installation
Before you can mount the camera bracket on the vinyl siding, it’s necessary to prepare the surface to ensure a secure and stable installation. Proper preparation will prevent damage to the siding and ensure a long-lasting attachment. Follow these steps to prepare the vinyl siding:
1. Inspect the siding: Begin by inspecting the vinyl siding to ensure it is in good condition and free from any cracks, damage, or loose sections. If you notice any issues, repair or replace the damaged siding before proceeding with the installation. It’s important to have a solid foundation for mounting the camera bracket.
2. Clean the siding: Clean the area where you plan to install the camera bracket. Use a mild detergent and water solution or a vinyl siding cleaner to remove any dirt, grime, or debris from the surface. Rinse thoroughly with water and allow the siding to dry completely before proceeding.
3. Measure and mark the location: Using a tape measure and a pencil, measure and mark the exact location where you want to mount the camera bracket on the vinyl siding. Ensure that the marks are level and aligned with the desired angle and height for the camera.
4. Locate studs or solid backing: In order to ensure a sturdy installation, it’s important to mount the camera bracket on a stud or solid backing behind the vinyl siding. Use a stud finder or gently tap the siding to find the area where the studs are located. Once you locate a stud, mark its position on the siding.
5. Create pilot holes: Using a drill with an appropriate drill bit, create pilot holes in the vinyl siding at the marked locations. Pilot holes are small guide holes that will help you position the screws accurately when attaching the camera bracket. Ensure that the pilot holes are slightly smaller than the screws you will be using.
6. Protect the siding: To prevent any damage to the vinyl siding during the installation process, place a piece of cardboard or a small wooden block behind the area where you’ll be drilling the pilot holes. This will act as a buffer and protect the siding from accidental scratches or gouges.
7. Clear away excess debris: After drilling the pilot holes, make sure to clear away any excess debris or vinyl shavings from the holes and the surrounding area. This will ensure a clean and secure fit for the camera bracket.
By following these steps, you will have prepared the vinyl siding for the installation of the camera bracket. Taking the time to properly prepare the surface will provide a stable foundation for mounting the bracket and help prevent damage to the siding. In the next step, we will guide you through the process of mounting the camera bracket securely to the vinyl siding.
When installing an outdoor camera on vinyl siding, use a mounting kit specifically designed for siding to ensure a secure and weatherproof installation. Follow the manufacturer’s instructions carefully for best results.
Step 5: Mount the Camera Bracket to the Vinyl Siding
Now that the vinyl siding is prepared, it’s time to mount the camera bracket securely. The camera bracket serves as a sturdy platform for attaching the outdoor camera to the siding. Follow these steps to mount the camera bracket to the vinyl siding:
1. Align the bracket: Position the camera bracket over the pilot holes that you drilled in the previous step. Make sure the bracket is level and aligned with the marks you made on the siding. Double-check the angle and height to ensure that it provides the desired view.
2. Insert screws: Insert screws into the pre-drilled pilot holes, starting at the top of the bracket. Use appropriate screws that are long enough to securely attach the bracket to the siding. Begin by driving the screws partially to hold the bracket in place.
3. Check alignment: Once the top screws are partially inserted, check the alignment of the bracket using a level. Adjust the bracket if necessary to make sure it remains level and plumb. Once satisfied, tighten the screws firmly but be cautious not to overtighten and damage the siding.
4. Insert remaining screws: Proceed to insert the remaining screws into the remaining pilot holes of the bracket. As before, drive the screws partially at first, then check the alignment using a level and adjust if needed. Once the bracket is level, tighten all the screws securely.
5. Ensure stability: Shake the camera bracket gently to ensure it is firmly attached to the vinyl siding. It should feel stable and not wobble or move. If there is any instability, check the screws and make sure they are tightened appropriately.
6. Trim excess siding: If the camera bracket installation has caused the vinyl siding to protrude slightly, use a utility knife to carefully trim off any excess siding. This will create a neat and flush appearance around the bracket.
7. Optional: Apply silicone sealant: To further secure the camera bracket and protect against moisture, you can apply a thin bead of silicone sealant around the edges where the bracket meets the vinyl siding. This will help create a watertight seal and prevent water from entering behind the siding.
By following these steps, you will have successfully mounted the camera bracket to the vinyl siding. Ensure that the bracket is firmly attached and level to provide a stable platform for your outdoor camera. In the next step, we will discuss how to connect the camera to power and any other necessary devices.
Step 6: Connect the Camera to Power and Other Devices
Now that the camera bracket is securely mounted on the vinyl siding, it’s time to connect the camera to a power source and any other devices that may be necessary for its operation. Follow these steps to connect the camera effectively:
1. Power source: Determine the power source for your camera. If you are using a wired camera, locate the nearest electrical outlet or use a power over Ethernet (PoE) connection if available. For battery-powered cameras, ensure that the batteries are charged or install fresh batteries as needed.
2. Position the camera and adjust cables: Carefully position the camera on the camera bracket, ensuring it is properly aligned and facing the desired direction. Adjust the cables and wires, ensuring they are neatly routed and free from any kinks or tension. Avoid any sharp edges or pinch points where the cables could be damaged.
3. Connect the camera to power: Depending on the camera’s power requirements, connect it to the power source using the appropriate cables or connectors. For wired cameras, make sure to follow the manufacturer’s instructions for proper connection. Ensure that the connections are secure to provide a reliable power supply to the camera.
4. Optional: Connect to a network or recording device: If your camera requires a network or recording device, such as a network video recorder (NVR) or a digital video recorder (DVR), follow the manufacturer’s instructions to establish the connection. This may involve connecting Ethernet cables or Wi-Fi setup, depending on the camera’s features.
5. Secure and conceal cables: Once all the connections are made, secure the cables and wires to prevent them from being exposed or easily tampered with. You can use cable clips, adhesive hooks, or cable channels to route the cables neatly along the siding, keeping them organized and hidden from view. Take care to avoid any sharp objects or potential hazards that could damage the cables.
6. Test the camera: After completing the connections and cable management, it’s important to test the camera to ensure proper functioning. Check the camera’s live feed on your computer, smartphone, or any device that you plan to use for monitoring. Verify that the camera provides a clear and steady image, and the video is properly streaming or recording.
By following these steps, you will have successfully connected the camera to a power source and any other necessary devices. Ensure that all connections are secure and properly established. Don’t forget to test the camera to ensure that everything is functioning as expected. In the next step, we will discuss how to adjust and secure the camera position for optimal performance.
Step 7: Adjust and Secure the Camera Position
After connecting the camera to power and other devices, it’s important to adjust and secure the camera position for optimal performance. Proper positioning will ensure that the camera captures the desired view and provides effective coverage. Follow these steps to adjust and secure the camera position:
1. Check the camera’s view: Verify that the camera is capturing the desired view by checking the live feed or recorded footage. Ensure that it covers the intended area and captures important details and angles. Make adjustments as necessary to achieve the desired field of view.
2. Angle adjustment: If the camera’s angle needs adjustment, loosen the screws or locknuts on the camera bracket that hold the camera in place. Gently adjust the camera’s angle until it captures the desired view. Once the angle is adjusted, tighten the screws or locknuts securely to hold the camera in place.
3. Test camera movement: Some cameras come with pan and tilt features, allowing you to remotely adjust the position of the camera. If your camera has this functionality, test its movement and adjust it to your liking using the control options available in the camera’s software or app.
4. Ensure stability: After adjusting the camera’s position, check for any wobbling or instability. It’s important to ensure that the camera remains securely in position and doesn’t move or shift unexpectedly. If necessary, tighten the screws or adjust the camera bracket to increase stability.
5. Consider visual obstructions: Double-check for any potential visual obstructions in the camera’s field of view, such as tree branches, plants, or other objects. Trim or move any obstructions that may obstruct clear visibility. Keep in mind that obstructions can affect the camera’s effectiveness in capturing important details.
6. Secure the camera: Once you are satisfied with the camera’s position, ensure that the mounting screws or bolts are securely tightened. Check the stability of the camera by gently shaking it to ensure it remains firmly in place. This will help prevent any accidental movement or tampering.
7. Test the camera’s view again: After securing the camera, recheck the camera’s view to ensure that it continues to capture the desired area and maintains proper focus. Adjustments may be necessary to achieve the best possible coverage and clarity.
By following these steps, you will have adjusted and secured the camera position to maximize its effectiveness. Take the time to ensure that the camera is capturing the desired view and that it remains stable and securely mounted. In the final step, we will discuss how to test the camera and ensure its proper functioning.
Step 8: Test the Camera and Ensure Proper Functioning
Testing the camera and ensuring its proper functioning is a crucial step to ensure that your outdoor surveillance system is ready to keep your home and property secure. Follow these steps to test the camera and verify that everything is in working order:
1. Check the video feed: Monitor the live video feed from the camera on your computer, smartphone, or other monitoring device. Ensure that the camera is providing a clear and steady image without any distortion or artifacts. Check for any issues with the image quality, such as blurriness or pixelation.
2. Verify the camera’s field of view: Check if the camera is capturing the desired field of view. Ensure that it covers the specific areas you want to monitor and that there are no blind spots. Adjust the camera’s position or angle if necessary to achieve the desired coverage.
3. Check night vision capabilities: If your camera has night vision capabilities, test them in low-light conditions or during nighttime. Ensure that the infrared sensors or LED lights are properly illuminating the area, providing clear visibility in the dark. Adjust the camera’s position or night vision settings if needed.
4. Test motion detection: If your camera has motion detection features, test them by walking or moving within the camera’s field of view. Verify that the camera properly detects and captures motion-triggered events. Adjust the sensitivity settings if necessary to avoid false alarms or missed detections.
5. Test remote viewing and alerts: If your camera supports remote viewing and alerts, test these features. Access the camera’s video feed remotely through the manufacturer’s app or software. Verify that you can view the feed from outside your home network and that you receive alerts for motion detection or other events.
6. Verify recording and storage: If you have a recording feature or cloud storage option, ensure that the camera is correctly recording and storing the footage. Check the recording settings and verify that you can access the stored footage without any issues.
7. Perform regular maintenance checks: It’s essential to perform regular maintenance checks on your outdoor camera system. Inspect the camera and its components for any signs of damage or wear. Clean the camera lens and ensure that all cables and connections are secure.
8. Review the camera’s performance: After testing, take some time to review the camera’s performance and evaluate its effectiveness. Assess whether the camera meets your expectations in terms of coverage, image quality, and features.
By following these testing steps, you can ensure that your outdoor camera is properly functioning and providing the intended security benefits. Regularly check and maintain your camera system to ensure its ongoing performance and reliability. With your camera in place and functioning well, you can enjoy enhanced peace of mind and home security.
Conclusion
Installing an outdoor camera on vinyl siding is a valuable step in bolstering the security and surveillance of your home. By following the step-by-step process outlined in this guide, you can successfully mount an outdoor camera on your vinyl siding while ensuring optimum functionality and performance.
Choosing the ideal outdoor camera based on your specific needs and requirements is critical. Factors such as camera type, resolution, field of view, night vision capabilities, weather resistance, and additional features should be considered to ensure that you have a camera that meets your security objectives.
Gathering the necessary tools and materials before you begin the installation process is essential. Along with the essential tools like drills, screws, screwdrivers, and a level, double-check that you have a power source available and any additional cables or connectors needed for your camera.
Determining the best location for mounting the camera is crucial for capturing the desired areas and maximizing its effectiveness. Factors such as coverage area, accessibility, power source availability, height and angle, obstructions, and weather protection should be taken into account to ensure optimal camera placement.
Preparing the vinyl siding by inspecting, cleaning, measuring, and creating pilot holes ensures a secure and stable surface for mounting the camera bracket. Carefully aligning and securely attaching the camera bracket to the vinyl siding minimizes the risk of damage and provides a reliable base for installing the camera.
Connecting the camera to power and other necessary devices, such as network or recording devices, ensures its proper operation. Securely routing and concealing cables helps maintain a tidy appearance and protects them from potential damage.
Adjusting and securing the camera position to capture the desired view is essential for effective monitoring. Check that the camera angle is correct, test its movement if applicable, consider visual obstructions, and ensure stability by tightening screws and verifying that the camera remains securely in place.
After completing the installation, test the camera’s features and functionality. Check the video feed, verify the camera’s field of view, test night vision capabilities, motion detection, remote viewing, and recording features. Regularly maintain and review the camera’s performance to ensure ongoing security and reliability.
By following these steps and guidelines, you can successfully install an outdoor camera on your vinyl siding, enhancing the security and surveillance of your home. Remember to prioritize safety, regularly maintain your camera system, and stay updated with any software or firmware upgrades to make the most of your outdoor surveillance setup.
Frequently Asked Questions about How To Install An Outdoor Camera On A Vinyl Siding
Was this page helpful?
At Storables.com, we guarantee accurate and reliable information. Our content, validated by Expert Board Contributors, is crafted following stringent Editorial Policies. We're committed to providing you with well-researched, expert-backed insights for all your informational needs.