Home>Furniture>Kitchen Furniture>How to Bypass 3 Wire GE Washer Lid Switch
Kitchen Furniture
How to Bypass 3 Wire GE Washer Lid Switch
Modified: August 27, 2024
Learn how to bypass the 3 wire GE washer lid switch with our informative articles. Get step-by-step instructions and troubleshoot your washer quickly and easily.
(Many of the links in this article redirect to a specific reviewed product. Your purchase of these products through affiliate links helps to generate commission for Storables.com, at no extra cost. Learn more)
How To Bypass 3 Wire Ge Washer Lid Switch
The lid switch in a Ge washer is an essential safety feature that prevents the washer from spinning when the lid is open. However, there may be instances when you need to bypass the lid switch for troubleshooting or other purposes. In this article, we will guide you through the process of bypassing the 3 wire Ge washer lid switch.
Why Bypass the Lid Switch?
There are several reasons why you may want to bypass the lid switch in your Ge washer. It could be to test other components of the washer, such as the motor or drain pump, without the lid being closed. It could also be to perform repairs or maintenance tasks that require the washer to remain operational with the lid open.
Safety Precautions
Before attempting to bypass the lid switch, ensure that you unplug the washer from the power source. This will prevent any accidental activation of the washer while you are working on it and minimize the risk of electrical shock or injury.
Tools and Materials
To bypass the 3 wire Ge washer lid switch, you will need the following tools:
- Screwdriver
- Wire cutters/strippers
In addition to the tools, you will need the following materials:
- Electrical tape
- Wire nuts
It is important to gather all the necessary tools and materials before you start the bypassing process.
Step-by-Step Procedure
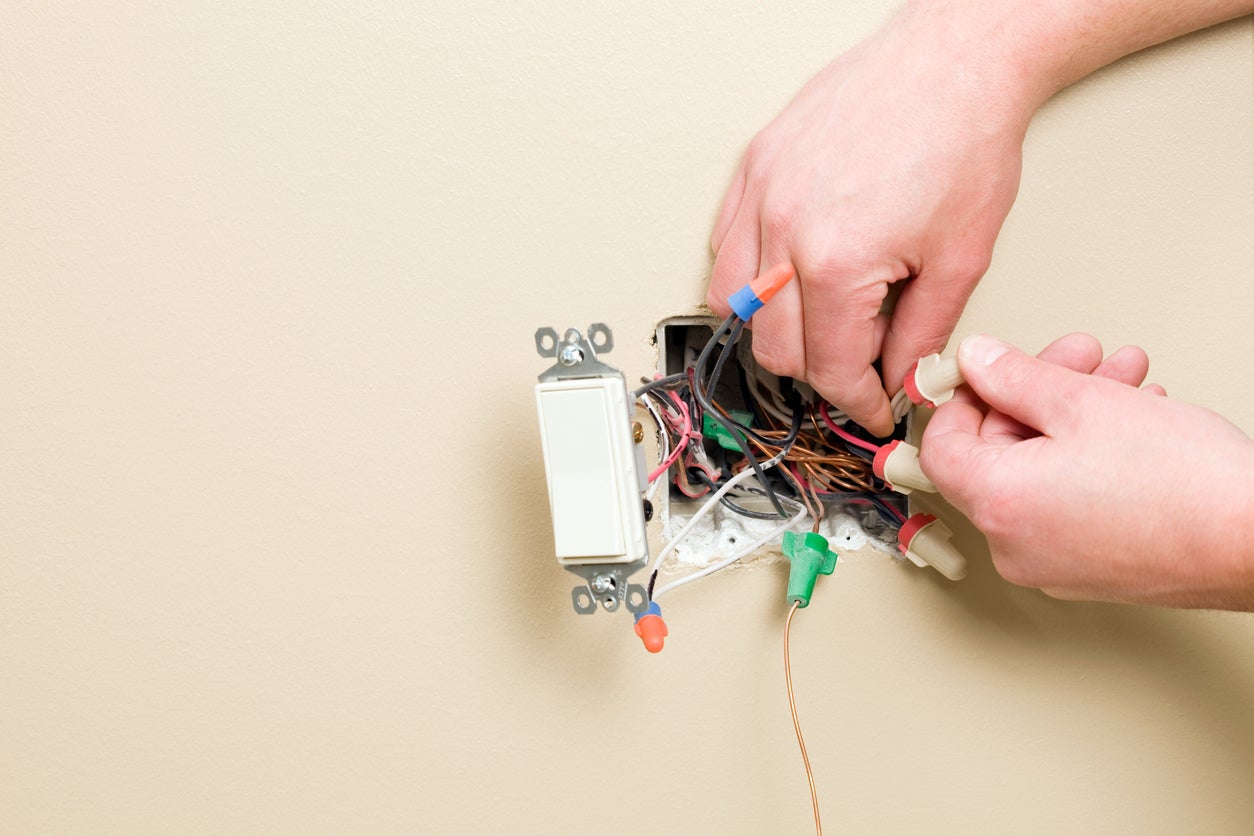
- Remove the control panel of the washer to gain access to the lid switch.
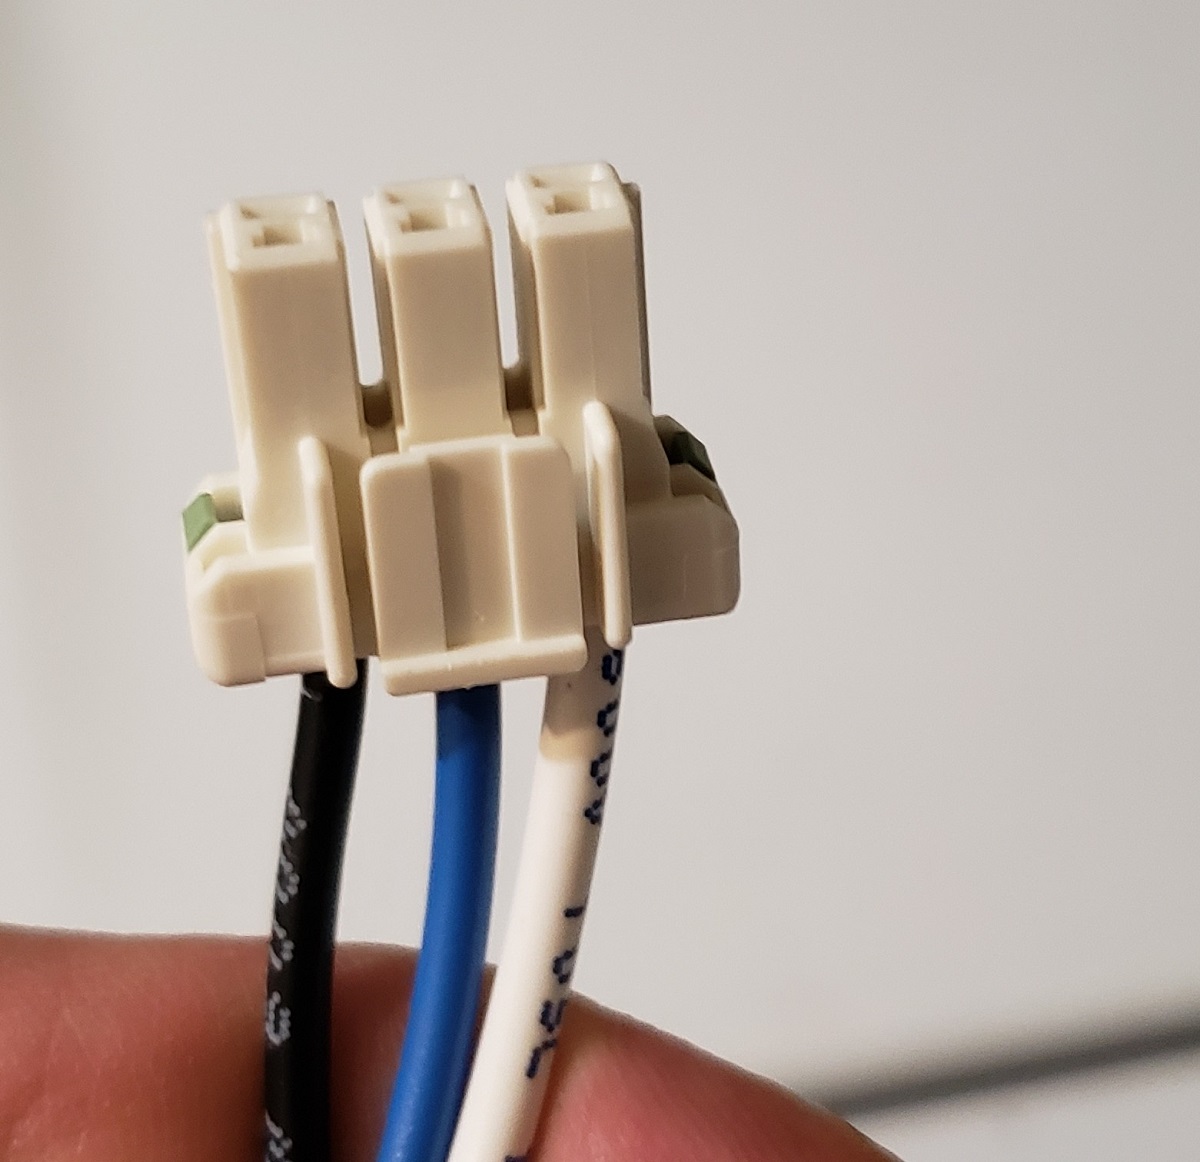
- Locate the three wires connected to the lid switch: one wire from the power source, one wire going to the motor, and one wire going to the lid lock.
- Using wire cutters, carefully cut the wire going to the lid lock. Leave enough wire on both ends for reconnecting later if needed.
- Strip the insulation from the ends of the cut wire to expose the copper wires.
- Twist the copper wires from both ends together, ensuring a secure connection.
- Use wire nuts to secure the twisted wires.
- Wrap electrical tape around the wire nuts to provide insulation and prevent any accidental contact.
- Reassemble the control panel and make sure all connections are secure.
Testing and Safety Considerations
After bypassing the lid switch, it is important to test the functionality of your washer. Close the lid and plug in the power cord. Start a wash cycle and observe the washer’s operation. If the washer functions properly without any issues, then the bypass was successful. However, if you notice any abnormalities or malfunctions, it is recommended to consult a professional technician for further assistance.
Remember to always practice caution and follow proper safety guidelines when working with electrical appliances.
Troubleshooting
If you encounter any problems during the bypass process or if the washer does not operate correctly after bypassing the lid switch, here are a few troubleshooting tips:
- Double-check the connections and ensure they are secure.
- Verify that the wires are properly stripped and twisted together.
- Make sure the wire nuts are tight and properly insulated with electrical tape.
If the troubleshooting tips do not resolve the issue, it is advisable to contact a professional technician for assistance.
Final Thoughts
Bypassing the 3 wire Ge washer lid switch can be a useful technique for testing, repairing, or maintaining your washer. However, it is important to remember that the lid switch is an important safety feature, and bypassing it should only be done when necessary and with caution.
Always prioritize safety and consult a professional if you are unsure about performing any repairs or modifications on your washer. We hope this guide has helped you understand how to bypass the 3 wire Ge washer lid switch and provided valuable insights for your washer maintenance needs.
How To Bypass 3 Wire Ge Washer Lid Switch
Introduction
The lid switch in a Ge washer is a safety feature designed to prevent the washer from spinning when the lid is open. It is a three-wire switch that detects whether the lid is closed or not. While the function of the lid switch is crucial for user safety, there are situations where you may need to bypass it temporarily.
Brief Overview of the 3 Wire Ge Washer Lid Switch
The 3 wire Ge washer lid switch consists of three wires – one wire from the power source, one wire connected to the motor, and one wire connected to the lid lock mechanism. When the lid is closed, the switch sends a signal to the washer’s control board, allowing it to operate. If the lid is open, the switch interrupts the power supply to prevent the washer from spinning and avoid any accidents.
Importance of Bypassing the Lid Switch
There are situations where you may need to bypass the lid switch temporarily. For example, if you’re troubleshooting other components of the washer, such as the motor, pump, or control board, you may need to keep the lid open during testing. By bypassing the lid switch, you can ensure that the washer remains operational, allowing you to diagnose and fix the issue more effectively.
Additionally, if you need to perform repairs or maintenance tasks in the washer’s interior, bypassing the lid switch can make the process more convenient. It allows you to access the components without constantly closing the lid, providing easier and safer access to the washer’s internals.
Note on Safety Precautions
Before attempting to bypass the lid switch, it’s crucial to prioritize safety. Always start by disconnecting the washer from the power source to avoid any electrical accidents. Unplugging the washer will ensure that no power flows through the machine while you’re working on it.
Furthermore, it’s important to handle the wires and connections with care. Use appropriate tools, such as wire cutters and strippers, to cut and strip the wires. Ensure that all connections are secure and properly insulated to prevent any electrical hazards.
Remember, bypassing the lid switch should only be done when necessary and with caution. Once you have completed the bypass, it’s recommended to test the washer thoroughly to ensure that it functions properly and there are no safety concerns.
In the following sections, we will provide you with a step-by-step procedure for bypassing the 3 wire Ge washer lid switch. We will also discuss testing and safety considerations to help you ensure the proper functioning of your washer after the bypass process.
How To Bypass 3 Wire Ge Washer Lid Switch
Tools and Materials
Before proceeding with the bypassing process, it’s important to gather all the necessary tools and materials. Here is a list of tools and materials you will need:
Tools:
- Screwdriver
- Wire cutters/strippers
Materials:
- Electrical tape
- Wire nuts
Safety Equipment:
While performing the bypass, it’s crucial to protect yourself and adhere to safety guidelines. Here are some safety equipment items you should have:
- Safety goggles
- Insulated gloves
- Protective clothing
Having the right tools, materials, and safety equipment will ensure a smooth and safe bypassing process. The screwdriver will be used to remove the control panel and gain access to the lid switch. Wire cutters/strippers will help in cutting and stripping the wires to properly bypass the switch.
Electrical tape will be used to insulate the bypassed wires and prevent any accidental contact or short circuits. Wire nuts are essential for securing the twisted wires, ensuring a reliable connection.
Wearing safety goggles will protect your eyes from any potential hazards during the procedure. Insulated gloves will provide an extra layer of protection when handling electrical components. Additionally, wearing protective clothing will further minimize any risks associated with the bypassing process.
By equipping yourself with the right tools, materials, and safety equipment, you can ensure a safe and successful bypass of the 3 wire Ge washer lid switch.
In the next section, we will guide you through the step-by-step procedure to bypass the lid switch in your Ge washer.
How To Bypass 3 Wire Ge Washer Lid Switch
Step-by-Step Procedure
Here is a detailed step-by-step guide on how to bypass the 3 wire Ge washer lid switch:
- Disconnect the washer from the power source by unplugging it.
- Locate the control panel on your Ge washer and remove any screws or clips holding it in place.
- Gently lift the control panel to access the lid switch.
- Identify the three wires connected to the lid switch – one wire from the power source, one wire going to the motor, and one wire going to the lid lock mechanism.
- Using wire cutters or strippers, carefully cut the wire going to the lid lock. Be sure to leave enough wire on both ends for reconnecting later if needed.
- Strip about 1/2 inch of insulation from the ends of the cut wire to expose the copper wires.
- Twist the copper wires from both ends together, ensuring a secure connection.
- Use a wire nut to secure the twisted wires. Twist the wire nut clockwise until it is tight and secure.
- Wrap electrical tape around the wire nut and the exposed copper wires to provide insulation and prevent any accidental contact.
- Reassemble the control panel by aligning it properly and securing any screws or clips.
Tips and Tricks:
- Take pictures of the wiring connections before starting the bypass process. This will help you reference the original wiring if needed.
- Label the wires or make a note of their location and function to ensure proper reconnection in case you need to revert the bypass later.
- Double-check all the connections before reassembling the control panel to avoid any loose or incorrect connections.
- Test the washer after the bypass process to ensure that it operates smoothly without any issues.
Following these step-by-step instructions and tips will help you successfully bypass the 3 wire Ge washer lid switch. Remember to always prioritize safety and consult a professional if you are unsure about performing any repairs or modifications on your washer.
In the next section, we will discuss testing the bypassed lid switch and important safety considerations to keep in mind.
How To Bypass 3 Wire Ge Washer Lid Switch
Testing and Safety Considerations
After bypassing the lid switch in your Ge washer, it is important to test the functionality of the bypassed switch and prioritize safety. Here are some key considerations:
Importance of Testing the Bypassed Lid Switch
Testing the bypassed lid switch is crucial to ensure that your washer operates smoothly and safely. It allows you to verify that the bypass was successful and that the washer can function without any issues. By conducting a thorough test, you can identify any potential problems or malfunctions early on, avoiding any future complications.
How to Check if the Bypass is Functioning Properly
To check if the bypassed lid switch is functioning properly, follow these steps:
- Close the lid of the washer.
- Plug in the power cord and turn on the washer.
- Select a wash cycle and observe the washer’s operation.
- Check if the washer fills with water, agitates, drains, and spins as intended.
If the washer operates as expected without any abnormalities or malfunctions, it indicates that the bypassed lid switch is functioning properly.
Safety Considerations to Keep in Mind During and After the Bypass
During the bypassing process and after completing the bypass, it is important to prioritize safety. Here are some safety considerations to keep in mind:
- Always disconnect the washer from the power source before starting the bypass process and whenever you need to make further adjustments.
- Handle the wires, connections, and electrical components with care to avoid the risk of electrical shock or short circuits.
- Ensure that all connections are secure and properly insulated with electrical tape to prevent any accidental contact.
- Wear safety goggles and insulated gloves to protect yourself from potential hazards during the bypass process.
- Follow proper safety guidelines and consult a professional technician if you are unsure about any aspect of the bypassing process.
By adhering to these safety considerations, you can minimize the risk of accidents and ensure a safe bypassing process for your Ge washer.
In the next section, we will discuss troubleshooting tips that can help you address any potential issues that may arise during the bypass process.
How To Bypass 3 Wire Ge Washer Lid Switch
Troubleshooting
While bypassing the lid switch in your Ge washer, you may encounter some common issues. Here are a few problems that may arise and their possible solutions:
Issue: Washer doesn’t start or operate after the bypass
Solution: Double-check the connections and ensure they are secure. Verify that the cut wire is properly stripped and twisted together. Make sure the wire nut is tight and properly insulated with electrical tape. If the connections are correct and secure, consider checking other components of the washer for potential issues.
Issue: Lid lock mechanism still engages after the bypass
Solution: Verify that you have cut the correct wire going to the lid lock mechanism. Ensure that the lid lock wire is properly stripped and twisted together with the other wires. Check for any loose or incorrect connections. If the problem persists, consult a professional technician for further assistance.
Issue: Washer displays error codes after the bypass
Solution: Some Ge washers may display error codes when the lid switch is bypassed. Refer to the washer’s user manual or the manufacturer’s website to identify the error codes and their corresponding troubleshooting steps. Follow the recommended steps to address the error codes and resolve any underlying issues.
Additional Tips for Smooth Troubleshooting:
- Ensure that you have a clear understanding of the bypassing process by following the provided steps carefully.
- Refer to the wiring diagram or take pictures of the original wiring configuration before starting the bypass. This will help you reference the original setup if needed.
- Label the wires or follow a systematic approach to keep track of the connections and avoid confusion during troubleshooting.
- Before performing any further troubleshooting steps, double-check all the bypassed connections to ensure they are secure and properly insulated.
- Take note of any abnormal sounds, behaviors, or error messages displayed by the washer during the troubleshooting process. This information can be helpful when seeking professional assistance.
By troubleshooting any issues that may arise during the bypass process, you can ensure a successful and functional bypassed lid switch in your Ge washer.
In the final section, we will provide some closing thoughts and reminders to keep in mind while bypassing the 3 wire Ge washer lid switch.
How To Bypass 3 Wire Ge Washer Lid Switch
Final Thoughts
Recap of the importance of bypassing the 3 wire Ge washer lid switch:
Bypassing the lid switch in your Ge washer can be crucial for various troubleshooting, maintenance, and repair tasks. It allows you to test other components of the washer, perform repairs or maintenance tasks, and access the interior of the washer more conveniently. By temporarily bypassing the lid switch, you can ensure that the washer remains operational while you work on it, improving efficiency and effectiveness.
Final Reminders and Precautions
As you bypass the lid switch in your Ge washer, keep the following reminders and precautions in mind:
- Always prioritize safety and adhere to proper safety guidelines. Unplug the washer from the power source before starting the bypass process and handle electrical components with care.
- Double-check all connections and ensure they are secure and properly insulated with electrical tape.
- Test the bypassed lid switch by observing the washer’s operation. If any abnormalities or malfunctions occur, consult a professional technician for further assistance.
- If you ever need to revert to the original configuration, refer to any documentation or images you took during the bypass process for guidance.
Encouragement for Readers
We hope that this guide has provided you with valuable insights on how to bypass the 3 wire Ge washer lid switch. Your experiences and questions are important to us. If you have any tips, suggestions, or stories about bypassing the lid switch, we encourage you to share them with us and the wider community. Feel free to ask any questions you may have, and we’ll do our best to provide helpful answers.
Remember, while bypassing the lid switch can be a useful technique, always prioritize safety and consult a professional if you are unsure about any aspect of the process. With the necessary tools, materials, and precautions, you can successfully bypass the 3 wire Ge washer lid switch and maintain the efficiency and functionality of your washer.
Curious about upgrading your home appliances? Don't miss our detailed guide on selecting the perfect washer lid switch for newer Whirlpool models. This must-read resource offers insights into the best features to look for in 2024, ensuring your laundry setup keeps running smoothly. Whether you're repairing or upgrading, our tips will help you make an informed decision.
Frequently Asked Questions about How To Bypass 3 Wire GE Washer Lid Switch
Was this page helpful?
At Storables.com, we guarantee accurate and reliable information. Our content, validated by Expert Board Contributors, is crafted following stringent Editorial Policies. We're committed to providing you with well-researched, expert-backed insights for all your informational needs.


0 thoughts on “How to Bypass 3 Wire GE Washer Lid Switch”