Home>Construction & Tools>Building Materials>How To Lay Brick Floor
Building Materials
How To Lay Brick Floor
Modified: October 19, 2024
Learn how to lay a durable and stylish brick floor with our comprehensive guide. Find the best building materials and expert tips for a successful project.
(Many of the links in this article redirect to a specific reviewed product. Your purchase of these products through affiliate links helps to generate commission for Storables.com, at no extra cost. Learn more)
Introduction
Are you considering a timeless and elegant upgrade for your home or outdoor space? A brick floor can infuse warmth, character, and rustic charm into any environment, making it a popular choice for homeowners and designers alike. Whether you're envisioning a cozy kitchen, a welcoming entryway, or a charming patio, laying a brick floor can transform the ambiance of the space and add enduring appeal.
In this comprehensive guide, we'll walk you through the step-by-step process of laying a brick floor. From preparing the subfloor to mixing mortar and laying the bricks, we'll cover everything you need to know to undertake this rewarding project. By the end of this journey, you'll have the knowledge and confidence to create a stunning brick floor that not only exudes classic beauty but also stands the test of time.
So, roll up your sleeves and get ready to embark on a rewarding endeavor that will elevate the aesthetic and functionality of your living space. Whether you're a seasoned DIY enthusiast or a novice looking for a fulfilling project, laying a brick floor is a gratifying and achievable undertaking that promises to leave a lasting impression. Let's dive into the world of bricklaying and unlock the potential of this timeless building material.
Key Takeaways:
- Laying a brick floor requires meticulous preparation, precision in setting the layout, and careful attention to detail when mixing mortar and laying the bricks. The finishing touches, including grouting, cleaning, and sealing, are essential for creating a visually stunning and enduring brick floor.
- By following the step-by-step process outlined in this guide, you can transform your living space with a timeless and elegant brick floor. From choosing high-quality materials and tools to applying the finishing touches, each phase of the installation contributes to the creation of a durable, visually striking, and inviting brick floor.
Read more: How To Lay Brick
Materials and Tools Needed
Before diving into the intricacies of laying a brick floor, it’s essential to gather the necessary materials and tools to ensure a smooth and efficient process. Here’s a comprehensive list of what you’ll need:
Materials:
- Bricks: Choose high-quality, durable bricks that are suitable for flooring. Common options include clay bricks, paver bricks, or reclaimed bricks for a rustic look.
- Mortar: Select a suitable mortar mix for brick flooring. Type S mortar is often recommended for its strength and durability.
- Grout: Opt for a grout that complements the color of your bricks and enhances the overall aesthetic appeal of the floor.
- Sealer: Invest in a quality brick sealer to protect the floor from moisture, stains, and wear over time.
- Sand: You'll need sand for creating a level base and filling gaps between the bricks.
- Primer: If you're working on a concrete subfloor, a primer designed for masonry surfaces will help ensure proper adhesion of the mortar.
Tools:
- Trowel: A notched trowel is essential for spreading mortar evenly on the subfloor.
- Level: A spirit level will help you maintain a consistent and level surface throughout the brick-laying process.
- Measuring Tape: Accurate measurements are crucial for achieving a symmetrical and visually appealing layout.
- Hammer and Chisel: These tools are necessary for cutting and shaping bricks to fit the edges and corners of the floor.
- Bucket and Mixing Drill: For preparing the mortar mixture with the right consistency.
- Broom: A broom will come in handy for cleaning the subfloor and sweeping sand into the gaps between the bricks.
- Protective Gear: Don't forget gloves, safety goggles, and a dust mask to ensure your safety during the bricklaying process.
By ensuring that you have all the required materials and tools at your disposal, you’ll be well-equipped to tackle each phase of the brick floor installation with confidence and precision.
Preparing the Subfloor
Before you can begin laying the bricks, it’s crucial to prepare the subfloor to create a stable and level foundation for the brick floor. Here’s a detailed guide to the subfloor preparation process:
Read more: How To Lay Brick For A Fireplace
Assess the Condition of the Subfloor:
Start by inspecting the existing subfloor, whether it’s concrete, wood, or another material. Ensure that the surface is clean, dry, and free from any debris, grease, or paint that could hinder the adhesion of the mortar.
Repair Any Damage:
Address any cracks, uneven patches, or structural issues in the subfloor. Fill in cracks with suitable patching compound and use a leveling compound to even out any dips or bumps in the surface.
Apply a Primer (if necessary):
If you’re working with a concrete subfloor, applying a primer designed for masonry surfaces can enhance the bond between the subfloor and the mortar, ensuring a secure and long-lasting installation.
Create a Level Base:
Use a leveling compound or a layer of sand to create a flat and even surface for laying the bricks. A level subfloor is essential for preventing unevenness and potential damage to the bricks over time.
Read more: How To Lay Laminate Floor
Allow for Expansion Joints:
Depending on the size of the area, it’s important to incorporate expansion joints to accommodate natural movement and prevent the formation of cracks in the brick floor. Place spacers or leave small gaps between sections of the subfloor as needed.
By meticulously preparing the subfloor, you’ll establish a solid and dependable foundation for your brick floor, setting the stage for a successful and visually stunning installation process.
Setting the Layout
Setting the layout is a critical step that determines the visual appeal and symmetry of your brick floor. Careful planning and attention to detail during this phase will ensure a professional-looking and structurally sound result. Here’s how to set the layout for your brick floor:
Choose a Pattern:
Select a brick laying pattern that complements the design and dimensions of the space. Common options include running bond, herringbone, basket weave, and more. Consider the size and shape of your bricks when choosing a pattern.
Measure and Mark Guidelines:
Use a measuring tape, chalk lines, and a framing square to establish reference lines and mark the layout of the bricks. This step is crucial for maintaining straight lines and achieving a balanced, harmonious appearance.
Read more: How To Lay A Mortared Brick Patio
Plan for Cuts and Edges:
Anticipate the need for cutting bricks to fit the edges and corners of the floor. Measure the space carefully and calculate the dimensions of the partial bricks required to complete the layout seamlessly.
Dry Lay the Bricks:
Before applying mortar, dry lay the bricks along the marked guidelines to ensure that the layout is visually appealing and that any necessary adjustments can be made before the bricks are permanently set in place.
Adjust for Symmetry:
Make minor adjustments as needed to ensure that the layout is symmetrical and balanced, especially in relation to prominent architectural features or focal points in the room.
By taking the time to meticulously plan and set the layout of your brick floor, you’ll create a visually striking and cohesive pattern that enhances the overall aesthetic of the space while ensuring a structurally sound and durable installation.
Mixing Mortar
Preparing the mortar mixture is a crucial aspect of laying a brick floor, as it directly impacts the strength, stability, and longevity of the installation. Follow these steps to ensure that your mortar is mixed to the appropriate consistency for laying the bricks:
Read more: How To Lay Bricks For Garden Edging
Choose the Right Mortar Mix:
Select a high-quality mortar mix suitable for brick flooring. Type S mortar is commonly recommended for its strength and durability, making it an ideal choice for this application.
Measure the Ingredients:
Follow the manufacturer’s instructions to measure the correct ratio of mortar mix, sand, and water. Consistency is key, so precise measurements are essential for achieving an optimal mortar mixture.
Combine the Mortar and Sand:
In a large mixing container, combine the mortar mix and sand, ensuring that the two dry ingredients are thoroughly blended before adding water. Use a shovel or a mixing drill for this step.
Add Water Gradually:
Slowly incorporate water into the dry mixture, using a mixing drill or a hoe to achieve a uniform consistency. Be mindful not to add too much water, as overly wet mortar can compromise the strength of the installation.
Read more: How To Lay Out Floor Tile
Achieve the Right Consistency:
Aim for a mortar mixture that is workable and holds its shape without being overly stiff or runny. The ideal consistency is similar to that of peanut butter, allowing for easy application and strong adhesion to the bricks.
Allow for Proper Mixing Time:
Once the mortar is thoroughly mixed, let it rest for a few minutes to attain the desired plasticity and ensure that the ingredients are fully integrated.
By following these steps and paying close attention to the mixing process, you’ll create a high-quality mortar mixture that provides the necessary adhesion and support for laying the bricks, ultimately contributing to a durable and visually appealing brick floor.
Laying the Bricks
With the subfloor prepared, the layout set, and the mortar mixed, it’s time to embark on the exciting phase of laying the bricks. This transformative step brings the vision of a brick floor to life, adding character and elegance to the space. Here’s a detailed guide to laying the bricks:
Begin at the Starting Point:
Commence the brick laying process at the predetermined starting point, typically near a prominent feature or at the center of the room. This ensures a balanced and visually appealing layout.
Read more: How To Lay Tile On Concrete Floor
Apply Mortar to the Subfloor:
Use a notched trowel to spread a layer of mortar on the prepared subfloor, following the marked guidelines for the first section of the floor. Work in small, manageable areas to prevent the mortar from drying out before the bricks are laid.
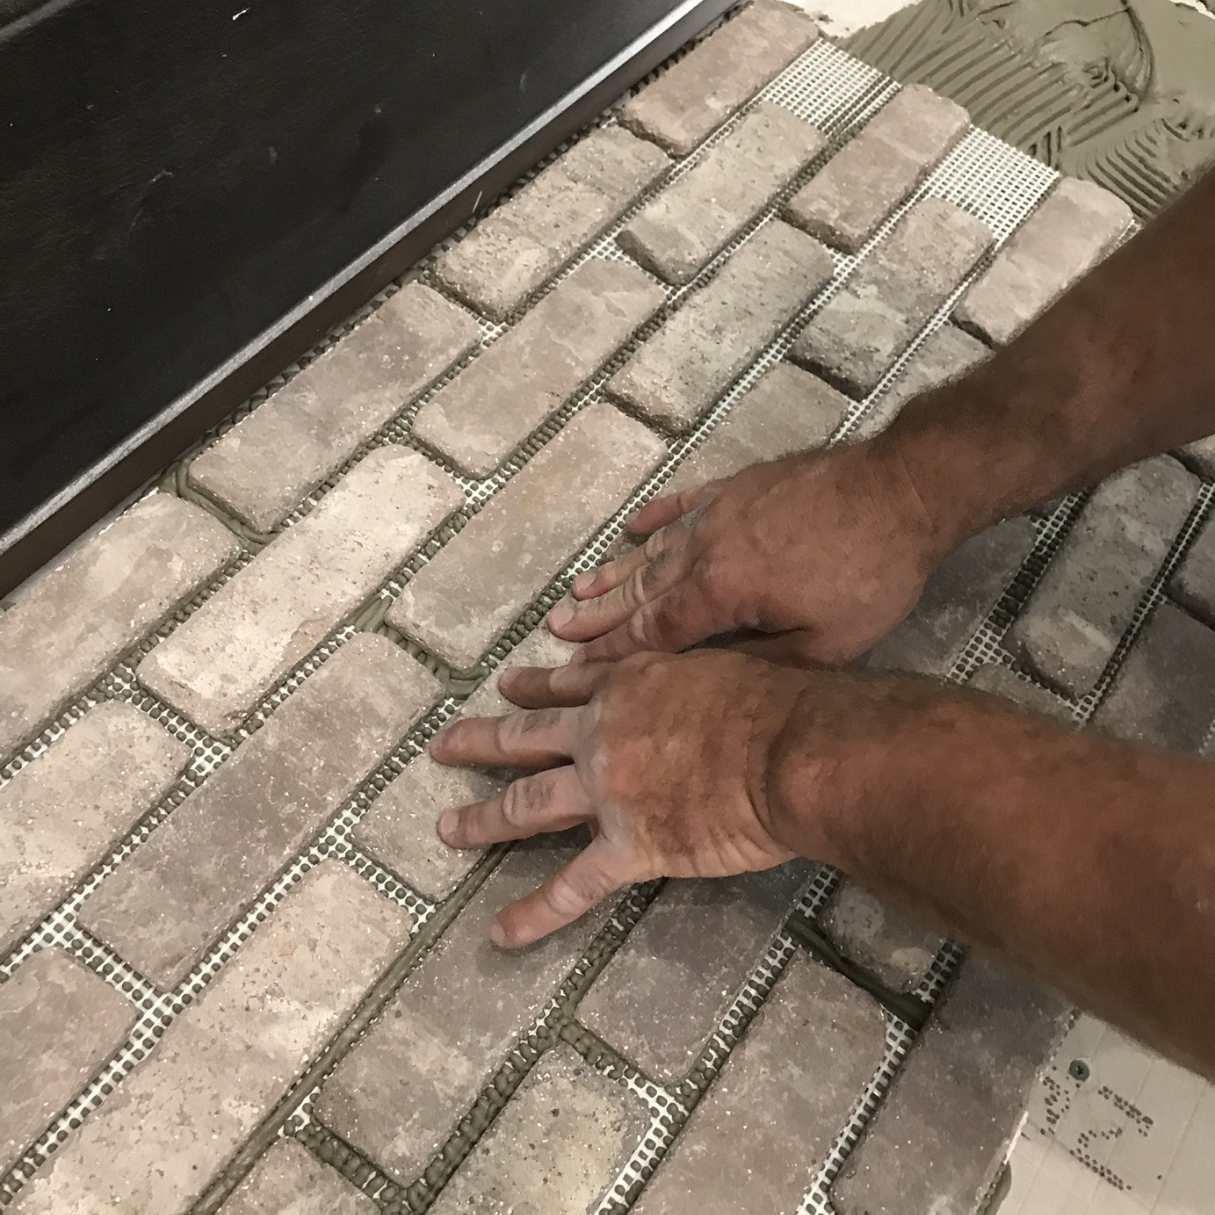
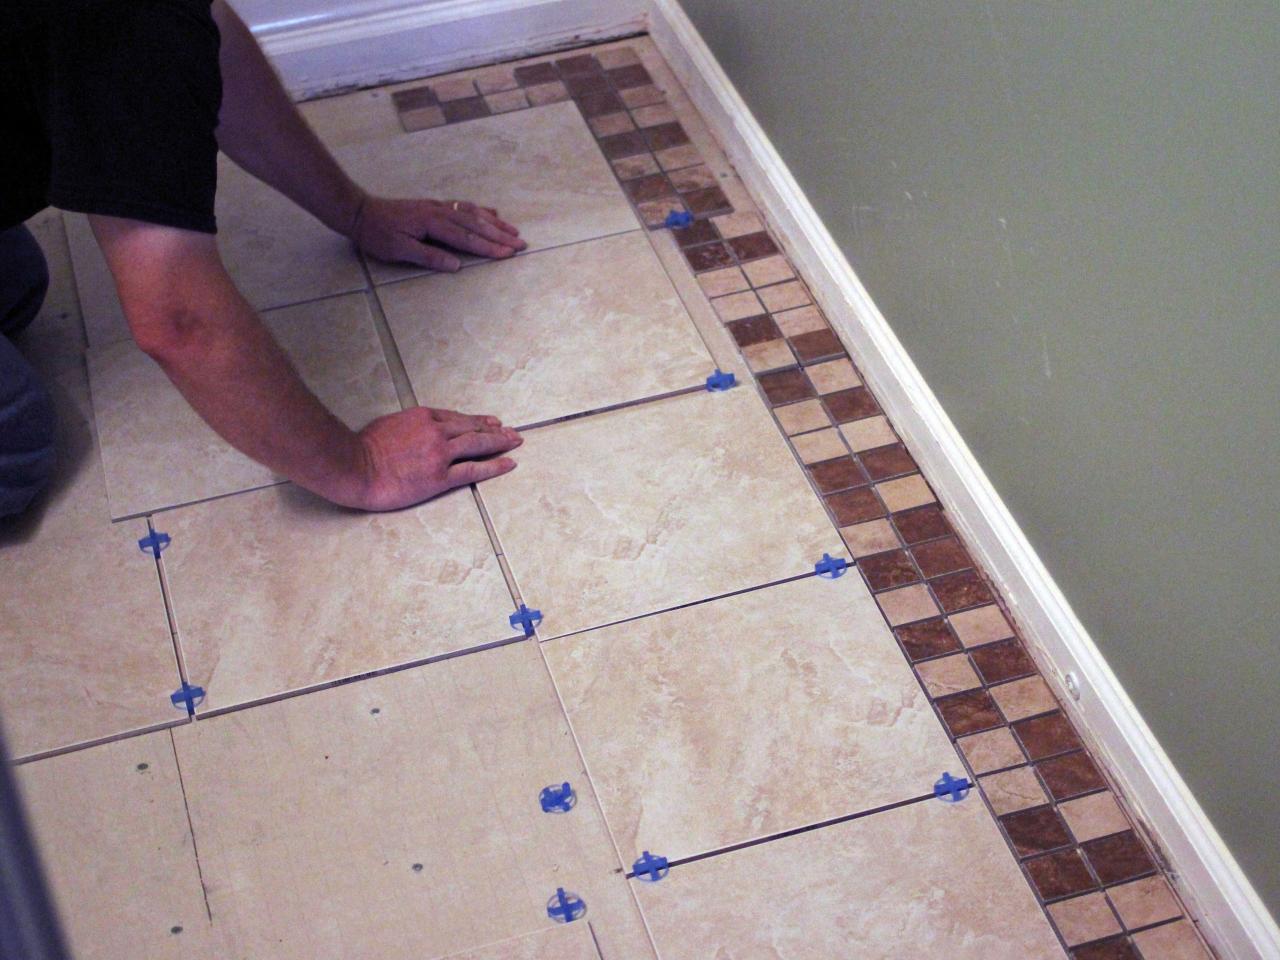
Set the Bricks in Place:
Carefully press each brick into the mortar, using a slight twisting motion to ensure a secure bond. Maintain consistent spacing between the bricks using spacers or by eye, depending on the desired grout width.
Check for Level and Alignment:
Use a spirit level to ensure that the bricks are laid evenly and align with the established guidelines. Making adjustments as you progress will help maintain a uniform and visually pleasing surface.
Continue in Sections:
Work methodically, laying the bricks in sections and applying mortar as needed. Periodically step back to assess the overall alignment, spacing, and visual appeal of the floor as it takes shape.
Read more: How To Lay Mosaic Floor Tile
Clean Excess Mortar:
As you go, promptly remove any excess mortar that squeezes out between the bricks, using a trowel or a pointing tool to achieve clean and uniform joints.
By following these steps and exercising precision and care throughout the brick laying process, you’ll create a stunning and enduring brick floor that enriches the ambiance of the space and reflects your attention to detail and craftsmanship.
Cutting Bricks for Edges and Corners
As you approach the edges and corners of the floor, the need for custom-fitted bricks becomes inevitable to achieve a seamless and professional finish. Precision and attention to detail are crucial during this phase of the bricklaying process. Here’s a comprehensive guide to cutting bricks for edges and corners:
Measure and Mark:
Begin by carefully measuring the dimensions of the space where a partial brick is required. Use a pencil or chalk to mark the cutting lines directly on the brick’s surface, ensuring accuracy and precision.
Use a Brick Hammer and Chisel:
Place the brick on a stable surface and, using a brick hammer and a chisel, score along the marked cutting lines. Make several shallow passes with the chisel to create a groove along the intended cut.
Read more: How To Lay A Brick Walkway Over Concrete
Break the Brick:
Once the groove is established, carefully strike the brick with the brick hammer along the scored line. Exercise caution and use controlled force to break the brick cleanly along the intended cut, resulting in a precise and smooth edge.
Refine the Edges:
After breaking the brick, use the brick hammer and chisel to refine the edges and corners as needed, ensuring that the cut brick fits seamlessly into the designated space without gaps or unevenness.
Test the Fit:
Place the cut brick into position to verify that it fits snugly and aligns seamlessly with the surrounding bricks. Make any necessary adjustments to achieve a perfect fit before applying mortar.
Repeat for Multiple Cuts:
If multiple custom-fitted bricks are required for the edges and corners, repeat the measuring, marking, cutting, and fitting process with precision and patience to ensure a cohesive and polished result.
By approaching the task of cutting bricks for edges and corners with meticulous care and precision, you’ll achieve a flawless and visually appealing finish that enhances the overall aesthetic and durability of your brick floor.
Read more: How To Lay A Ceramic Tile Floor
Finishing the Floor
As the brick floor nears completion, attention turns to the final steps that will refine the surface, enhance its durability, and ensure a polished appearance. From grouting the joints to cleaning the bricks, the finishing touches play a pivotal role in the overall outcome of the installation. Here’s a comprehensive guide to finishing the floor:
Grouting the Joints:
Once the mortar has set and the bricks are firmly in place, it’s time to fill the gaps between the bricks with grout. Choose a grout color that complements the bricks and the overall aesthetic of the space. Use a grout float to press the grout into the joints, ensuring full coverage and a uniform appearance.
Smooth and Clean the Surface:
After grouting, use a damp sponge to smooth and clean the surface of the bricks, removing any excess grout and achieving tidy, uniform joints. Take care not to remove too much grout from the joints during this process.
Allow for Drying Time:
Let the grout dry and cure according to the manufacturer’s recommendations, ensuring that the floor remains undisturbed during this crucial phase to achieve a durable and long-lasting finish.
Read more: How To Lay Tile On Wood Floor
Inspect for Imperfections:
Once the grout has fully cured, inspect the entire floor for any imperfections, uneven joints, or residual grout haze. Address any issues promptly to ensure a flawless and visually appealing result.
Seal the Bricks:
To enhance the durability and longevity of the brick floor, consider applying a suitable brick sealer. This protective treatment will safeguard the bricks from moisture, stains, and wear, while also enriching their natural color and texture.
Final Cleaning and Inspection:
Thoroughly clean the surface of the bricks to remove any remaining grout residue, dust, or debris. Step back and inspect the finished floor, ensuring that it meets your expectations in terms of appearance, durability, and overall quality.
By meticulously attending to the finishing details and ensuring that the floor is polished, protected, and visually appealing, you’ll complete the installation with confidence, knowing that your brick floor is not only a stunning focal point but also a resilient and enduring feature of your living space.
Sealing the Bricks
Sealing the bricks is a crucial step in the final stages of laying a brick floor, offering protection against moisture, stains, and wear while enhancing the natural beauty and longevity of the installation. Here’s a comprehensive guide to sealing the bricks:
Read more: How To Cover A Brick Floor
Choose the Right Sealer:
Select a high-quality brick sealer specifically formulated for flooring applications. Consider factors such as breathability, durability, and the desired finish (enhancing natural color or providing a satin sheen).
Prepare the Surface:
Ensure that the bricks are clean, dry, and free from any residual grout, dust, or debris before applying the sealer. Thoroughly clean the floor and allow it to dry completely before proceeding.
Apply the Sealer:
Using a paintbrush, roller, or sprayer, apply the sealer evenly and consistently across the surface of the bricks, working in manageable sections to ensure thorough coverage. Pay special attention to grout lines and edges, ensuring that the sealer penetrates and protects all exposed surfaces.
Allow for Absorption Time:
Let the sealer penetrate the bricks for the specified duration, allowing it to be absorbed into the porous material. This allows the sealer to create a protective barrier without leaving excess residue on the surface.
Read more: How To Lay Mortared Brick On Front Steps
Remove Excess Sealer:
After the absorption period, carefully inspect the floor for any excess sealer that has not been absorbed. Use a clean cloth or applicator to remove any residual sealer, ensuring a uniform and natural appearance without streaks or buildup.
Allow for Curing Time:
Once the sealer has been applied and excess residue removed, allow the floor to cure according to the manufacturer’s instructions. This ensures that the sealer fully bonds with the bricks, providing long-lasting protection and enhancement.
Maintain Regular Maintenance:
After sealing the bricks, follow the manufacturer’s recommendations for ongoing maintenance and reapplication of the sealer as needed. Regular upkeep will preserve the integrity and appearance of the brick floor over time.
By sealing the bricks with care and attention to detail, you’ll fortify the surface against environmental factors and everyday use, ensuring that your brick floor remains a timeless and resilient feature of your living space for years to come.
Conclusion
Congratulations on completing the journey of laying a brick floor, a rewarding endeavor that has transformed the ambiance and character of your living space. By following the step-by-step process outlined in this guide, you’ve not only created a visually stunning and enduring feature but also honed your skills as a craftsman. The timeless appeal and rustic charm of a brick floor are now yours to enjoy, adding warmth and personality to your home or outdoor area.
From the meticulous preparation of the subfloor to the precision of setting the layout, mixing mortar, laying the bricks, and applying the finishing touches, each phase of the installation has contributed to the creation of a durable, visually striking, and inviting brick floor. Your attention to detail and craftsmanship have culminated in a space that exudes classic elegance and enduring appeal.
As you admire the seamless pattern, the tactile texture, and the rich hues of your brick floor, take pride in the transformation you’ve achieved. The inherent beauty of this timeless building material now enriches your surroundings, creating a focal point that captivates the eye and evokes a sense of warmth and authenticity.
Whether you’ve chosen a traditional running bond pattern, a captivating herringbone design, or a unique layout that reflects your personal style, your brick floor stands as a testament to your creativity and dedication. It is a canvas that embodies the artistry and craftsmanship of its creator, inviting admiration and appreciation from all who encounter it.
As you bask in the glow of your newly laid brick floor, take a moment to savor the satisfaction of a project well executed. Your commitment to quality, attention to detail, and the enduring allure of brick have converged to create a space that not only enriches your daily life but also stands as a testament to the time-honored art of bricklaying.
So, embrace the enduring beauty of your brick floor, knowing that it will continue to delight and inspire for years to come, a testament to the timeless allure and enduring craftsmanship of this beloved building material.
Frequently Asked Questions about How To Lay Brick Floor
Was this page helpful?
At Storables.com, we guarantee accurate and reliable information. Our content, validated by Expert Board Contributors, is crafted following stringent Editorial Policies. We're committed to providing you with well-researched, expert-backed insights for all your informational needs.


0 thoughts on “How To Lay Brick Floor”