Home>Gardening & Outdoor>Outdoor Structures>How To Lay A Concrete Slab For A Shed
Outdoor Structures
How To Lay A Concrete Slab For A Shed
Published: January 19, 2024
Learn how to properly lay a concrete slab for your shed with our step-by-step guide. Ensure a solid foundation for your outdoor structures. Expert tips and techniques included.
(Many of the links in this article redirect to a specific reviewed product. Your purchase of these products through affiliate links helps to generate commission for Storables.com, at no extra cost. Learn more)
Introduction
Building a shed in your backyard can be a rewarding project, providing valuable storage space and enhancing the overall aesthetic of your outdoor area. One crucial aspect of constructing a sturdy and durable shed is laying a solid foundation, and a concrete slab serves as an ideal base for the structure. In this comprehensive guide, we will walk you through the step-by-step process of laying a concrete slab for your shed, ensuring that you are well-equipped with the knowledge and skills needed to tackle this essential aspect of shed construction.
A well-laid concrete slab not only provides a level and stable surface for your shed but also helps to protect the structure from moisture and ground movement. By following the guidelines outlined in this article, you can ensure that your shed's foundation is built to last, offering the necessary support and durability for years to come.
Whether you are a seasoned DIY enthusiast or a novice looking to embark on your first construction project, this guide will equip you with the information and insights needed to successfully lay a concrete slab for your shed. From planning and preparation to the final finishing touches, we will cover each phase of the process in detail, providing valuable tips and recommendations along the way. So, roll up your sleeves, gather your materials, and let's dive into the exciting world of shed construction as we master the art of laying a concrete slab.
Key Takeaways:
- Laying a concrete slab for a shed requires meticulous planning, precise site preparation, and careful execution to ensure a sturdy and durable foundation for the structure.
- Proper formwork setup, precise concrete mixing and pouring, and thorough finishing and curing are essential for creating a reliable and visually appealing concrete slab for your shed.
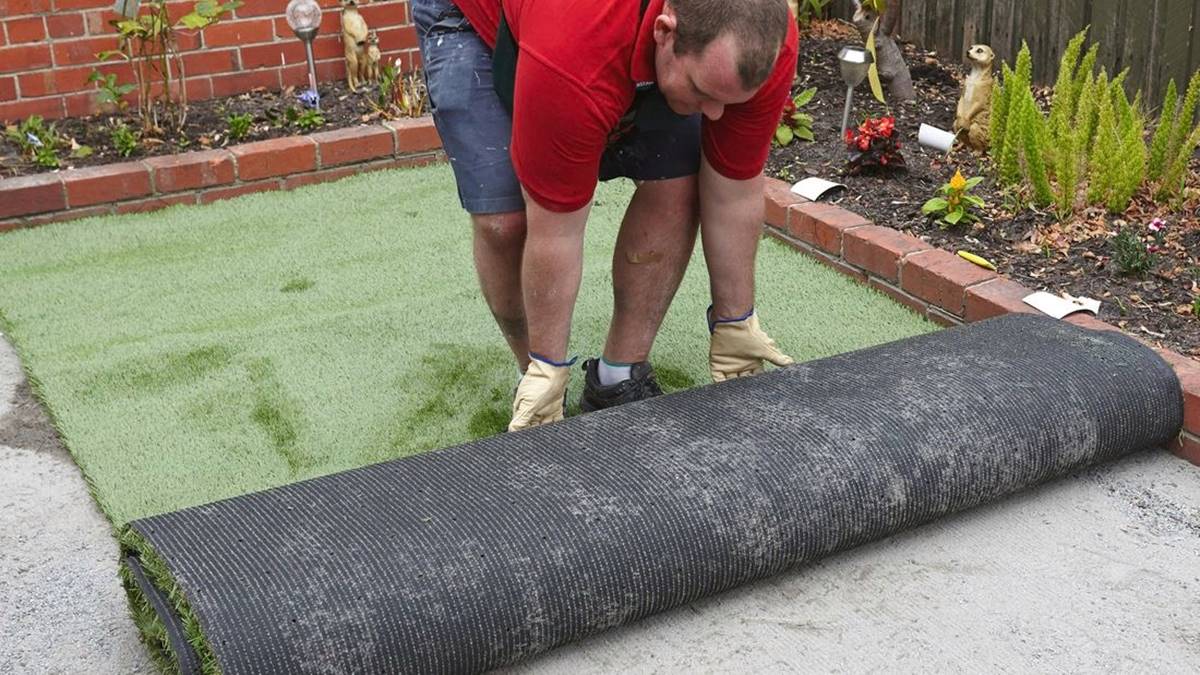
Read more: How To Lay Concrete Slabs On Grass
Planning and Preparation
Before embarking on the task of laying a concrete slab for your shed, meticulous planning and thorough preparation are essential. Start by determining the dimensions of the slab, ensuring that it provides ample space for your shed and allows for a small apron or overhang around the perimeter. Consider the load-bearing requirements based on the size and intended use of your shed, and factor in any additional weight that may be placed on the slab in the future.
Next, assess the site where the shed will be located. Ensure that the ground is level and free from any obstructions such as tree roots or large rocks. If the ground is uneven, you may need to excavate and level the area to create a suitable foundation for the concrete slab. Additionally, consider the drainage in the area to prevent water from pooling around the shed. Proper drainage will help protect the slab from water damage and prolong its lifespan.
Once you have finalized the dimensions and location of the slab, it’s time to gather the necessary permits and approvals. Check with your local building authorities to determine if there are any specific regulations or building codes that need to be adhered to. Obtaining the required permits ensures that your project is in compliance with local guidelines and helps prevent any potential issues down the line.
As part of the preparation process, make a list of the materials and tools you will need for the project. This typically includes concrete mix, reinforcement mesh or rebar, formwork boards, a shovel, a wheelbarrow, a concrete mixer or mixing tools, a level, and protective gear such as gloves and safety glasses. Having all the required materials and tools on hand before you start will streamline the construction process and minimize delays.
Lastly, consider the timing of the project. Avoid scheduling the concrete pour during extreme weather conditions, such as heavy rain or extreme heat, as these can negatively impact the quality of the slab. Ideally, choose a day with mild temperatures and minimal wind to create optimal working conditions for the concrete placement and finishing.
By meticulously planning and preparing for the task ahead, you set the stage for a successful concrete slab construction, laying the groundwork for a sturdy and reliable foundation for your shed.
Gathering Materials and Tools
As you prepare to lay a concrete slab for your shed, assembling the necessary materials and tools is a critical step in ensuring a smooth and efficient construction process. The following items are essential for the successful completion of the project:
- Concrete Mix: Select a high-quality concrete mix suitable for slab construction. The mix should ideally have a compressive strength appropriate for the intended use of the shed.
- Reinforcement Mesh or Rebar: Depending on the size and load-bearing requirements of the slab, you may need to incorporate reinforcement mesh or rebar to enhance its strength and durability.
- Formwork Boards: These boards are used to create the outer perimeter of the slab and contain the concrete during the pouring and curing process.
- Shovel and Wheelbarrow: Essential for mixing and transporting the concrete mix to the site of the slab.
- Concrete Mixer or Mixing Tools: Depending on the volume of concrete needed, a mixer or mixing tools such as a hoe and a wheelbarrow can be used to prepare the concrete mix.
- Level: A spirit level is crucial for ensuring that the slab surface is even and level during the construction process.
- Protective Gear: Gloves, safety glasses, and appropriate footwear are essential for personal safety during the concrete mixing and pouring stages.
Additionally, consider the quantity of materials required based on the dimensions of the slab and the thickness of the concrete. It’s advisable to procure slightly more concrete mix than the estimated amount to account for any variations in the actual volume needed.
When selecting the tools for the project, prioritize quality and durability. Investing in high-quality tools ensures greater precision and efficiency during the construction process, ultimately contributing to the overall strength and integrity of the concrete slab.
By gathering the right materials and tools in advance, you set the stage for a well-equipped and organized approach to laying the concrete slab for your shed. This meticulous preparation paves the way for a successful construction endeavor, ensuring that you have everything you need to bring your project to fruition.
Site Preparation
Prior to commencing the construction of the concrete slab, thorough site preparation is essential to ensure a solid and level foundation for your shed. The following steps outline the key aspects of site preparation:
- Clearing and Excavation: Begin by clearing the area of any debris, vegetation, or obstructions. If the ground is uneven, proceed with excavation to create a level surface for the slab. Use a shovel and a rake to remove any protruding roots, rocks, or other impediments.
- Marking the Perimeter: Once the area is cleared, mark the perimeter of the slab using stakes and string. This will define the boundaries of the construction area and provide a visual guide for the formwork placement.
- Grading and Compaction: Use a compactor or hand tamper to compact the soil within the marked perimeter. This process helps to stabilize the ground and prevent settling after the concrete is poured.
- Vapor Barrier Installation: In areas with high moisture levels, consider installing a vapor barrier to prevent moisture from seeping into the concrete slab. This step is particularly important for sheds storing items sensitive to moisture or in regions prone to high humidity.
Throughout the site preparation phase, it’s crucial to maintain accurate measurements and ensure that the ground is uniformly graded and compacted. Taking the time to meticulously prepare the site sets the stage for a stable and durable foundation, laying the groundwork for a successful concrete slab construction.
By paying careful attention to site preparation, you can create an optimal environment for the subsequent stages of the project, ensuring that the concrete slab is positioned on a solid and level base. This meticulous approach to site preparation is instrumental in achieving a high-quality and long-lasting foundation for your shed.
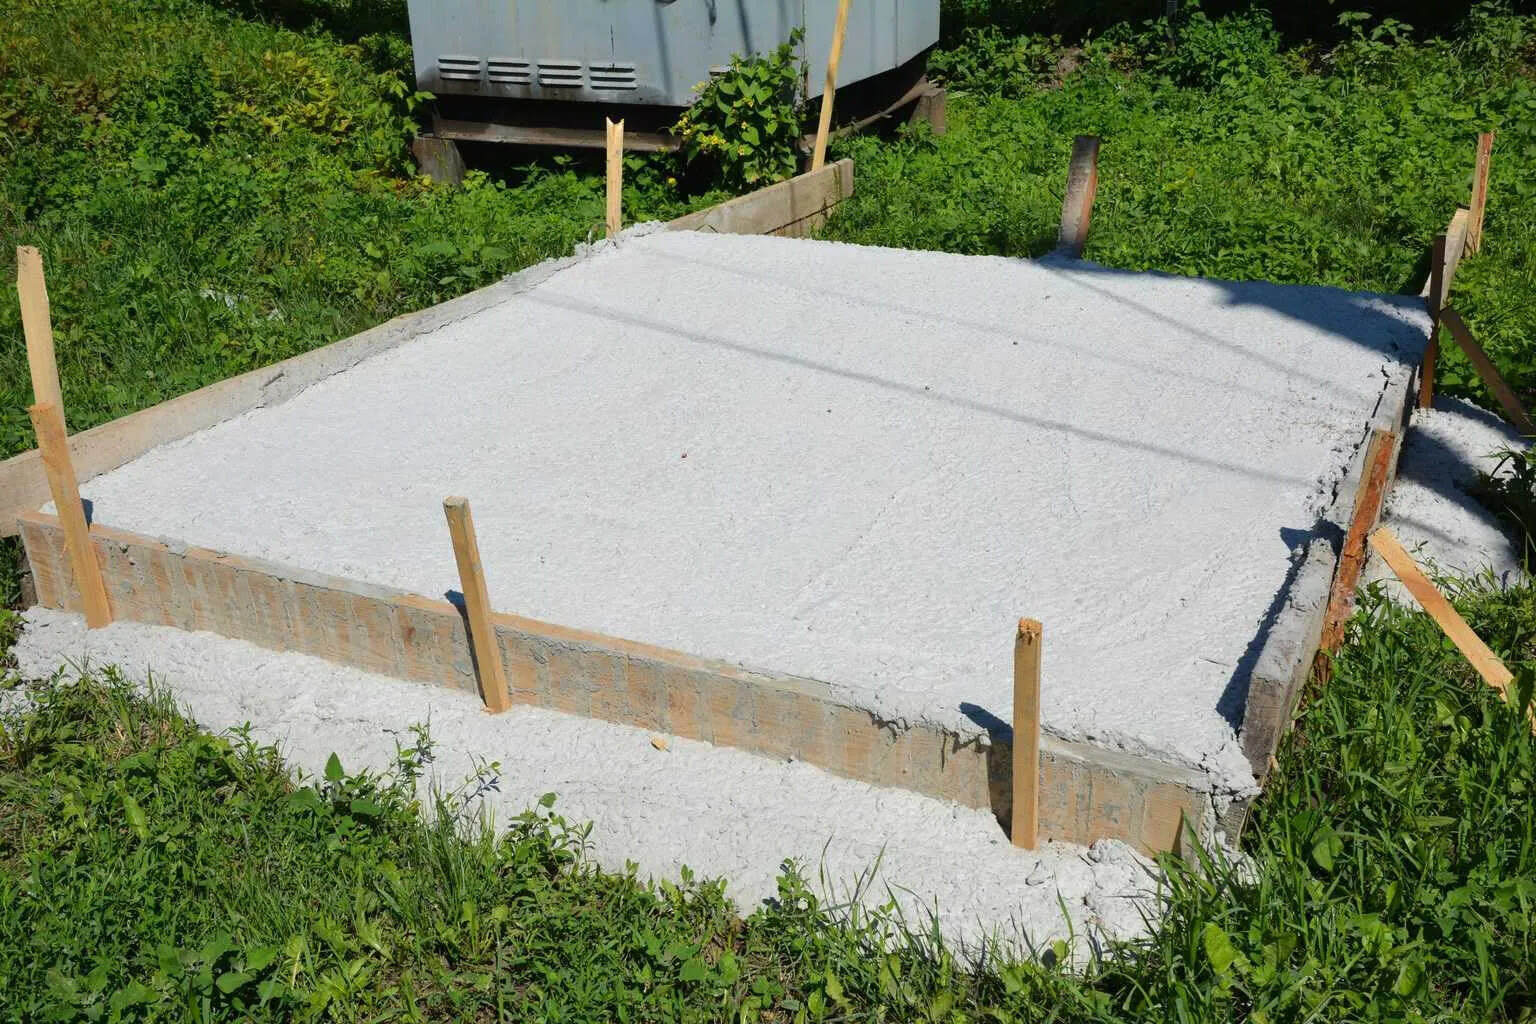
Before pouring concrete, make sure the ground is level and compacted. Use wooden forms to create a perimeter for the slab. Add a layer of gravel for drainage and reinforcement. Finally, pour and level the concrete, then let it cure for at least 48 hours before using the shed.
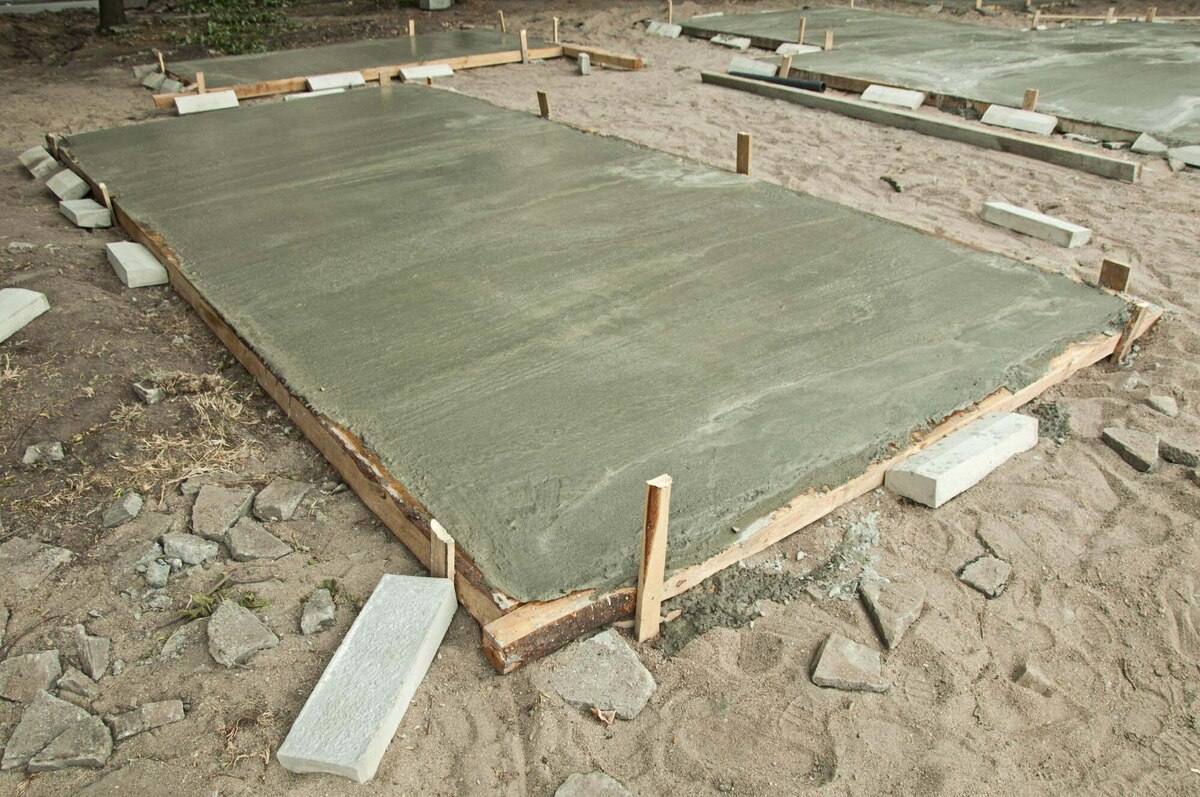
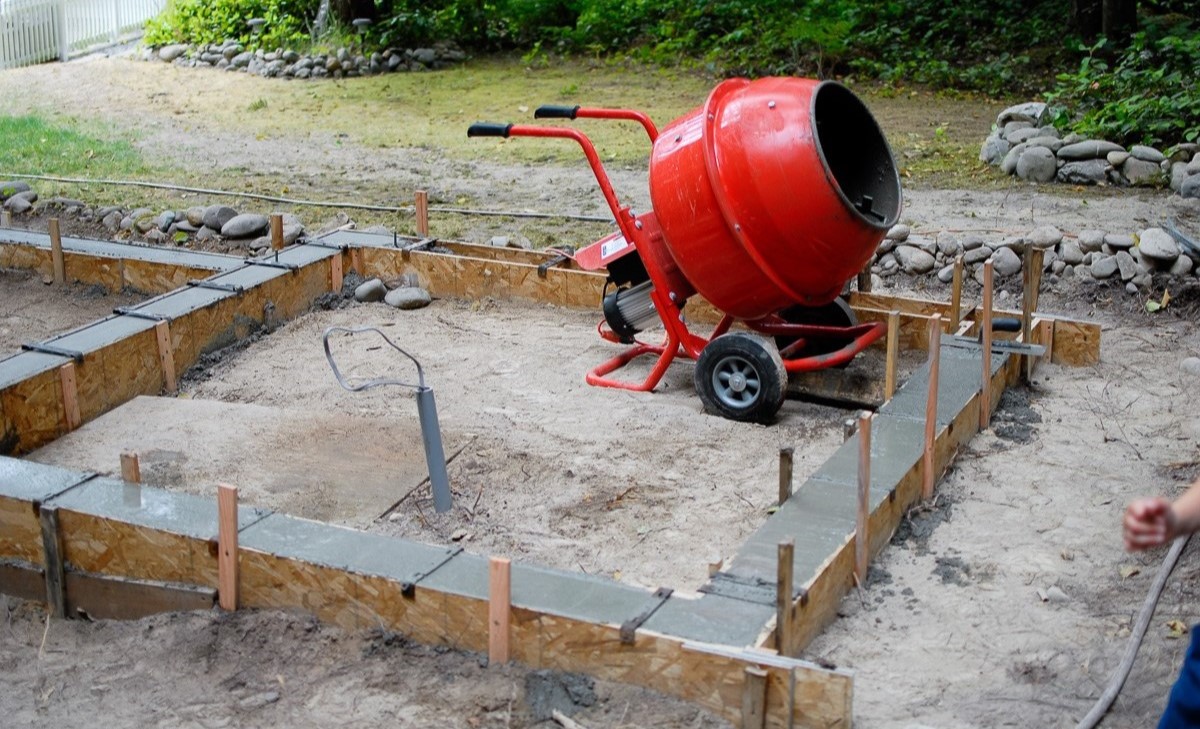
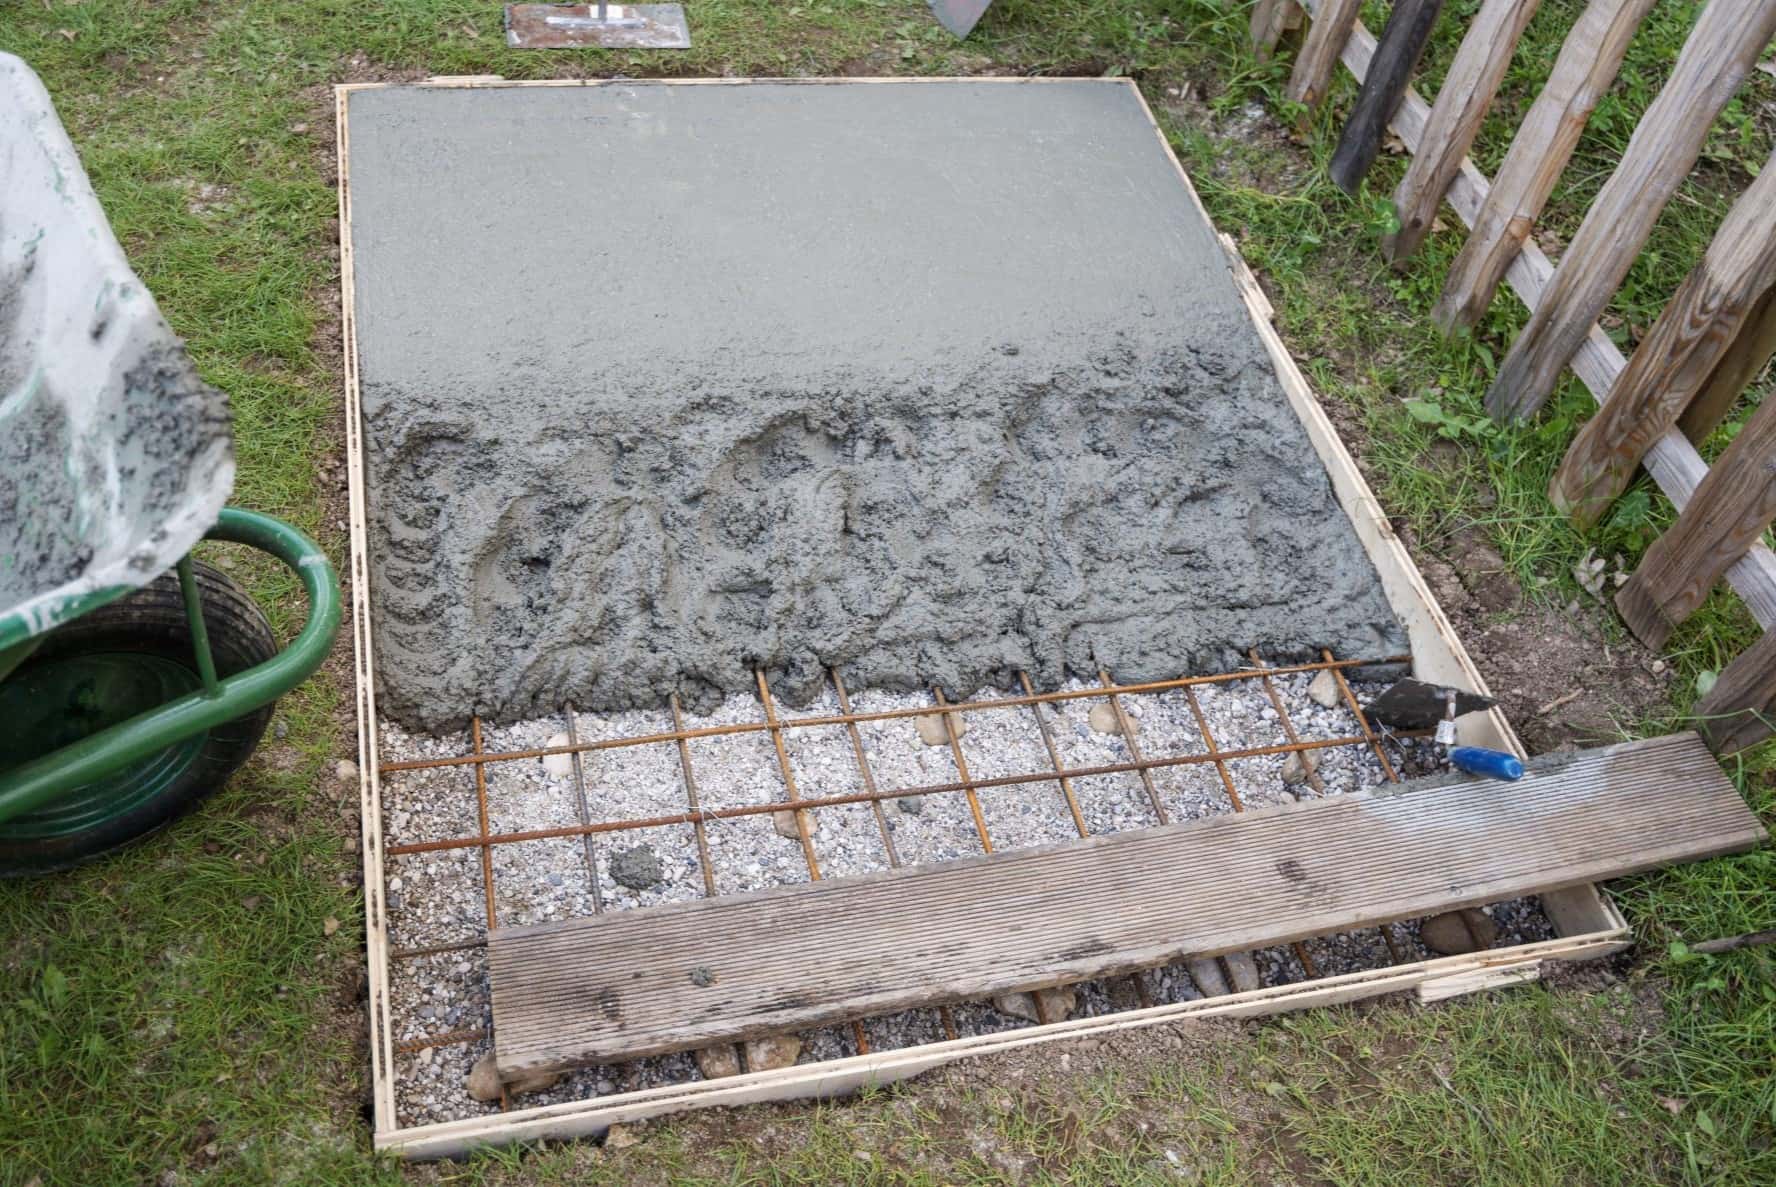
Setting Up the Formwork
Formwork serves as the mold for the concrete slab, defining its shape and dimensions while containing the concrete during the pouring and curing stages. Proper setup of the formwork is crucial to achieving a uniform and structurally sound slab. Here’s a step-by-step guide to setting up the formwork:
- Measure and Cut the Boards: Begin by measuring and cutting the formwork boards to the required lengths, ensuring that they correspond to the dimensions of the slab. Use a saw to achieve precise cuts, and verify that the boards are straight and free from defects.
- Positioning the Boards: Place the boards along the marked perimeter of the slab, ensuring that the corners are square and the boards are securely positioned. Use stakes and braces to support the formwork and prevent any movement during the concrete pouring process.
- Leveling the Formwork: Use a spirit level to ensure that the formwork boards are level and even. Adjust the height of the boards as needed to achieve a consistent depth for the concrete slab.
- Sealing Joints: To prevent the concrete mix from leaking, seal the joints between the formwork boards using caulk or specialized formwork sealing products. This step helps maintain the integrity of the formwork and ensures that the concrete is contained within the designated area.
- Reinforcement Placement: If reinforcement mesh or rebar is required, position it within the formwork at the appropriate depth as specified in the construction plans. Ensure that the reinforcement is adequately supported and does not come into direct contact with the soil beneath the slab.
Properly setting up the formwork is essential for achieving a precise and uniform concrete slab. The formwork not only contains the concrete during the pouring process but also determines the final shape and dimensions of the slab. Attention to detail during this phase contributes to the overall strength and integrity of the shed’s foundation.
By meticulously following the steps outlined for setting up the formwork, you establish a solid framework for the subsequent stages of the concrete slab construction. This careful preparation ensures that the concrete is contained and shaped according to the desired specifications, laying the groundwork for a robust and reliable foundation for your shed.
Read more: How To Build A Shed On A Concrete Slab
Mixing and Pouring the Concrete
With the formwork in place and the site meticulously prepared, it’s time to mix and pour the concrete for the shed’s foundation. This critical phase demands precision and attention to detail to ensure that the slab achieves the desired strength and durability. Here’s a comprehensive guide to the mixing and pouring process:
- Preparing the Concrete Mix: Follow the manufacturer’s instructions to prepare the concrete mix, ensuring that the correct ratio of water to concrete is maintained. Consider using a concrete mixer for large volumes of concrete to achieve a consistent and homogenous mix.
- Transporting the Concrete: Use a wheelbarrow or concrete buggy to transport the mixed concrete to the site of the slab. Avoid excessive movement or agitation of the concrete during transportation to maintain its integrity.
- Pouring and Spreading: Pour the concrete mix into the formwork, starting from one corner and working towards the opposite end. Use a shovel or rake to spread the concrete evenly within the formwork, ensuring that it reaches all corners and edges.
- Leveling and Smoothing: Once the concrete is in place, use a screed board or a straight piece of lumber to level the surface of the concrete, moving it back and forth in a sawing motion. This step helps achieve a smooth and even finish for the slab.
- Vibrating the Concrete: To eliminate air pockets and ensure proper compaction, use a concrete vibrator to gently agitate the concrete. This process enhances the density and strength of the slab, minimizing the risk of voids or weak spots.
Throughout the mixing and pouring process, it’s essential to work efficiently and methodically to prevent premature setting of the concrete. Additionally, consider the weather conditions and adjust the pouring schedule accordingly to avoid complications such as rapid drying or excessive moisture retention.
By meticulously following the steps outlined for mixing and pouring the concrete, you lay the groundwork for a solid and durable foundation for your shed. This critical phase sets the stage for the subsequent finishing and curing processes, ensuring that the concrete slab achieves the necessary strength and structural integrity.
Finishing and Curing
As the concrete slab is successfully poured, the finishing and curing stages are crucial for ensuring the strength, durability, and aesthetic appeal of the foundation. By following the appropriate techniques and allowing the concrete to cure properly, you can achieve a high-quality and long-lasting result. Here’s a detailed guide to the finishing and curing process:
- Edging the Slab: Use an edging tool to create a smooth and rounded edge along the perimeter of the slab. This not only enhances the visual appeal but also helps prevent chipping and spalling over time.
- Float and Trowel Finish: After the initial setting of the concrete, use a float to smooth the surface and eliminate any imperfections. Follow this with a trowel finish to achieve a sleek and uniform appearance for the slab.
- Curing Compound Application: Apply a curing compound to the surface of the concrete to promote gradual and controlled hydration during the curing process. This helps prevent premature drying and enhances the overall strength and durability of the slab.
- Covering and Moisture Retention: After the application of the curing compound, cover the slab with a plastic sheet or specialized curing blankets to retain moisture. This step is crucial for preventing rapid evaporation and ensuring optimal curing conditions.
- Curing Duration: Allow the concrete to cure undisturbed for the recommended duration, typically around 7 days, to achieve the desired strength and durability. During this period, monitor the moisture levels and take measures to prevent the slab from drying out too quickly.
Proper finishing and curing are essential for achieving a high-quality and long-lasting concrete slab for your shed. By adhering to the recommended techniques and allowing the concrete to cure under optimal conditions, you ensure that the foundation is robust, durable, and capable of providing reliable support for your shed.
By meticulously following the steps outlined for finishing and curing the concrete slab, you lay the foundation for a sturdy, reliable, and visually appealing base for your shed. This careful attention to detail contributes to the overall quality and longevity of the concrete slab, ensuring that it meets the necessary standards for supporting your shed for years to come.
Conclusion
Congratulations! You have successfully navigated the intricate process of laying a concrete slab for your shed, laying the groundwork for a sturdy and reliable foundation. By meticulously following the steps outlined in this guide, you have equipped yourself with the knowledge and skills needed to undertake this essential aspect of shed construction with confidence and precision.
From the initial planning and preparation to the meticulous site preparation, formwork setup, concrete mixing and pouring, and the critical finishing and curing stages, you have demonstrated a commendable level of dedication and attention to detail. By prioritizing precision and adhering to best practices, you have set the stage for a concrete slab that offers the necessary support, durability, and longevity for your shed.
As you reflect on the journey from an idea to a solid foundation, remember that the successful completion of the concrete slab marks a significant milestone in your shed construction project. The attention to detail and the careful execution of each phase of the process have culminated in the creation of a robust and reliable base for your shed, ensuring that it stands the test of time and provides a secure storage space for your belongings.
With the concrete slab in place, you are now well-prepared to proceed with the construction of your shed, confident in the knowledge that it is anchored to a solid and level foundation. Embrace the sense of accomplishment that comes with mastering the art of laying a concrete slab, and carry this confidence forward as you embark on the next stages of your shed construction journey.
As you move forward, remember that the skills and insights gained from this experience extend beyond the construction site. The discipline, precision, and attention to detail honed during the process of laying a concrete slab are valuable attributes that can be applied to future endeavors, both in construction projects and in various aspects of life.
So, take pride in your achievement, and may the sturdy foundation you have created serve as a testament to your dedication and craftsmanship. As you continue to build and create, may the lessons learned from this endeavor inspire and guide you in your future pursuits. Congratulations on mastering the art of laying a concrete slab for your shed!
Frequently Asked Questions about How To Lay A Concrete Slab For A Shed
Was this page helpful?
At Storables.com, we guarantee accurate and reliable information. Our content, validated by Expert Board Contributors, is crafted following stringent Editorial Policies. We're committed to providing you with well-researched, expert-backed insights for all your informational needs.


0 thoughts on “How To Lay A Concrete Slab For A Shed”