
Articles
How To Make A Collage Quilt
Modified: August 22, 2024
Learn how to create a stunning collage quilt with our helpful articles. Gain inspiration, tips, and techniques for making your own unique masterpiece.
(Many of the links in this article redirect to a specific reviewed product. Your purchase of these products through affiliate links helps to generate commission for Storables.com, at no extra cost. Learn more)
Introduction
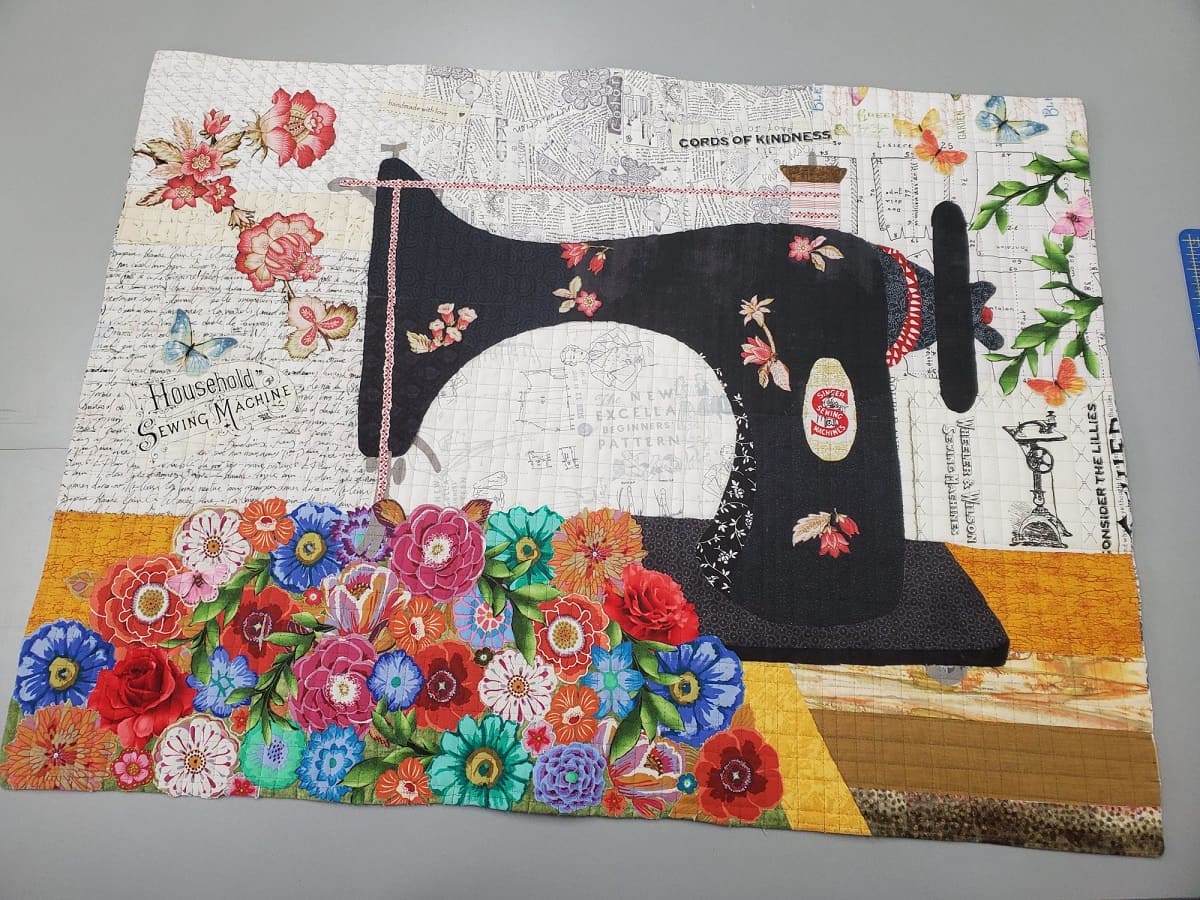
Welcome to the world of collage quilting – a creative and versatile way to express your sewing skills and artistic vision. A collage quilt is a unique form of quilt-making that involves using various fabric scraps to create a visually stunning design. Unlike traditional quilting techniques that rely on precise piecing and sewing, collage quilting allows you to let your imagination run wild by combining different fabrics, textures, and patterns.
Creating a collage quilt is not only a delightful journey of self-expression but also an opportunity to showcase your personal style and individuality. Whether you are a seasoned quilter looking to try something new or a beginner eager to dive into the world of quilting, this article will guide you through the steps of making a beautiful collage quilt.
Before we embark on this creative adventure, it’s important to gather all the necessary materials. Don’t worry – you won’t need a whole fabric store for this project! Let’s explore what you’ll need to get started.
Key Takeaways:
- Collage quilting offers a liberating and expressive approach to traditional quilting, allowing for creative freedom in fabric selection, design, and embellishments. Embrace the process and let your imagination run wild!
- From gathering materials to adding embellishments, collage quilting is a journey of self-expression and artistic exploration. Develop your own style, experiment with textures, and enjoy the unique beauty of each quilt creation.
Read more: How To Make A Wall Collage Of Picture Frames
Gathering Materials
Before you begin your collage quilt project, it’s essential to gather all the necessary materials. Here’s a list of items you’ll need:
- Fabric scraps: Look for a variety of colors, patterns, and textures to create interest and depth in your quilt. Raid your own fabric stash, ask friends or family members for scraps, or visit a fabric store for inspiration.
- Background fabric: Choose a solid or subtle patterned fabric that will serve as the base for your collage design. This fabric should complement the colors and patterns of your scraps.
- Fusible web: This adhesive material will help you secure the fabric pieces to the base fabric. Look for a lightweight fusible web that can be easily stitched through.
- Scissors or rotary cutter: You’ll need a sharp pair of scissors or a rotary cutter with a self-healing mat to cut your fabric scraps into desired shapes and sizes.
- Iron and ironing board: A hot iron will be used to fuse the fabric pieces onto the base fabric. Make sure your iron is clean and in good working condition.
- Sewing machine and thread: A sewing machine with a zigzag stitch and matching thread will be needed to secure the fabric pieces in place.
- Backing fabric and batting: These materials are essential for the finishing of your quilt. Choose a fabric for the backing that complements the front design, and select a batting that provides the desired level of warmth and thickness.
- Quilting needles and pins: You’ll need needles that are suitable for stitching through multiple layers of fabric. A variety of pins, including quilting pins and appliqué pins, will also be helpful.
- Optional embellishments: If you want to add extra flair to your quilt, consider including embellishments like buttons, beads, embroidery floss, or ribbons.
Having these materials prepared and organized before starting your collage quilt project will save you time and make the process more enjoyable. Now that we have our materials ready, let’s move on to the next step: choosing and preparing fabrics.
Choosing and Preparing Fabrics
Now that you’ve gathered your materials, it’s time to dive into the exciting task of choosing and preparing your fabrics for your collage quilt. Here are some tips to help you make the most of your fabric selection:
- Color palette: Decide on a color scheme or palette that reflects your desired theme or mood for the quilt. You can opt for a harmonious mix of colors or experiment with contrasting shades to create visual interest.
- Fabric textures: Consider incorporating a variety of fabric textures to add depth and dimension to your collage quilt. Mix smooth silky fabrics with rougher textured ones, or incorporate fabrics with patterns that offer a tactile element.
- Fussy cutting: Fussy cutting is the technique of selecting specific motifs or patterns from fabric and cutting them out to use in your quilt. This technique can add unique focal points and visual interest to your design.
- Pre-washing: It is recommended to pre-wash your fabrics before starting your collage quilt to remove any excess dyes or chemicals. Follow the fabric care instructions to ensure proper shrinkage and preparation.
- Ironing: Before cutting your fabric scraps, ensure they are smooth and free from wrinkles by ironing them. This will make it easier to work with and achieve clean cuts.
Once you have selected your fabrics and prepared them, it’s time to move on to the next step: selecting a theme or design for your collage quilt.
Selecting a Theme or Design
Choosing a theme or design for your collage quilt is a crucial step that sets the tone for your entire project. There are several ways to approach this creative decision:
- Inspiration from nature: Consider drawing inspiration from the natural world around you. Whether it’s a specific flower, landscape, or animal, capturing the beauty of nature in your quilt can be a captivating theme.
- Personal memories or experiences: Your collage quilt can be a reflection of your personal stories and memories. Consider incorporating fabrics that hold special meaning to you, such as old clothing or fabrics from significant events.
- Abstract designs: If you prefer a more abstract approach, you can create a collage quilt without a specific theme in mind. Explore different shapes, colors, and patterns to create a visually stunning and abstract design.
- Quilt patterns: Traditional quilt patterns can also be adapted to create a collage quilt. Choose a pattern that you are fond of and incorporate a variety of fabrics to give it a unique twist.
- Mood or emotion: Your quilt can capture a specific mood or emotion, such as joy, tranquility, or energy. Think about the colors and textures that evoke the feeling you want to convey and choose fabrics accordingly.
Once you have a theme or design concept in mind, it’s time to move on to the next step: cutting and arranging fabric pieces to bring your vision to life.
Cutting and Arranging Fabric Pieces
Now that you have your theme or design concept in mind, it’s time to bring your collage quilt to life by cutting and arranging the fabric pieces. Follow these steps to create a visually appealing composition:
- Trace or draw your design: Start by sketching your design on paper or directly on the base fabric. This will serve as a guide for cutting and arranging your fabric pieces.
- Cut fabric scraps: Use scissors or a rotary cutter to cut your fabric scraps into various shapes and sizes. You can cut them into squares, rectangles, circles, or even irregular shapes, depending on your design.
- Arrange fabric pieces: Lay out your fabric pieces on your base fabric, referring to your design sketch. Play around with different configurations until you are satisfied with the arrangement. Consider the balance of colors, patterns, and textures.
- Fuse fabric pieces: Once you are happy with the arrangement, use a fusible web to secure the fabric pieces to the base fabric. Follow the manufacturer’s instructions for ironing the fusible web onto the fabrics.
- Stitch fabric pieces: To ensure that your fabric pieces are securely attached, stitch around the edges of each piece using a zigzag stitch or other decorative stitches. This will also add texture and dimension to your collage quilt.
- Layer additional fabric pieces: If desired, continue layering and arranging additional fabric pieces to build depth and complexity in your design.
Remember, collage quilting is a freeform and creative process, so don’t be afraid to experiment and make adjustments as you go. Take breaks to step back and assess your composition, making any necessary changes to ensure a visually pleasing result.
Once you have completed cutting and arranging your fabric pieces, it’s time to move on to the next step: attaching the fabrics to a base.
When making a collage quilt, be sure to use a variety of fabric textures and colors to add depth and interest to your design. This will make your quilt visually appealing and unique.
Read more: How To Make A Quilt
Attaching Fabrics to a Base
Now that you have arranged your fabric pieces on the base fabric, it’s time to securely attach them. Follow these steps to ensure your fabric pieces stay in place:
- Prepare your base fabric: If you haven’t done so already, make sure your base fabric is smooth and free of wrinkles. Iron it to ensure a clean, flat surface.
- Cut fusible web: Cut small pieces of fusible web and place them on the back of each fabric piece. Make sure the fusible side is facing down onto the back of the fabric.
- Secure with heat: Using your iron, press down firmly on the fabric pieces with the fusible web for the recommended amount of time. The heat will activate the adhesive and fuse the fabric to the base fabric. Repeat this step for each fabric piece.
- Stitch for extra security: While the fusible web provides initial adhesion, it’s a good idea to add stitching for extra security. Use your sewing machine and matching thread to stitch along the edges of each fabric piece. This stitching not only ensures durability but also adds a decorative element to your collage quilt.
As you work on attaching the fabric pieces, remember to refer to your design sketch to maintain the desired composition. Take your time and make adjustments as needed to achieve the desired visual impact.
Once you have completed attaching all the fabric pieces, your collage quilt will start to come to life. Now, let’s move on to the next step: adding embellishments to enhance the overall design.
Adding Embellishments
Adding embellishments to your collage quilt can elevate its visual appeal and add a personal touch. Whether you want to add a touch of sparkle, additional texture, or intricate details, here are some ideas for incorporating embellishments:
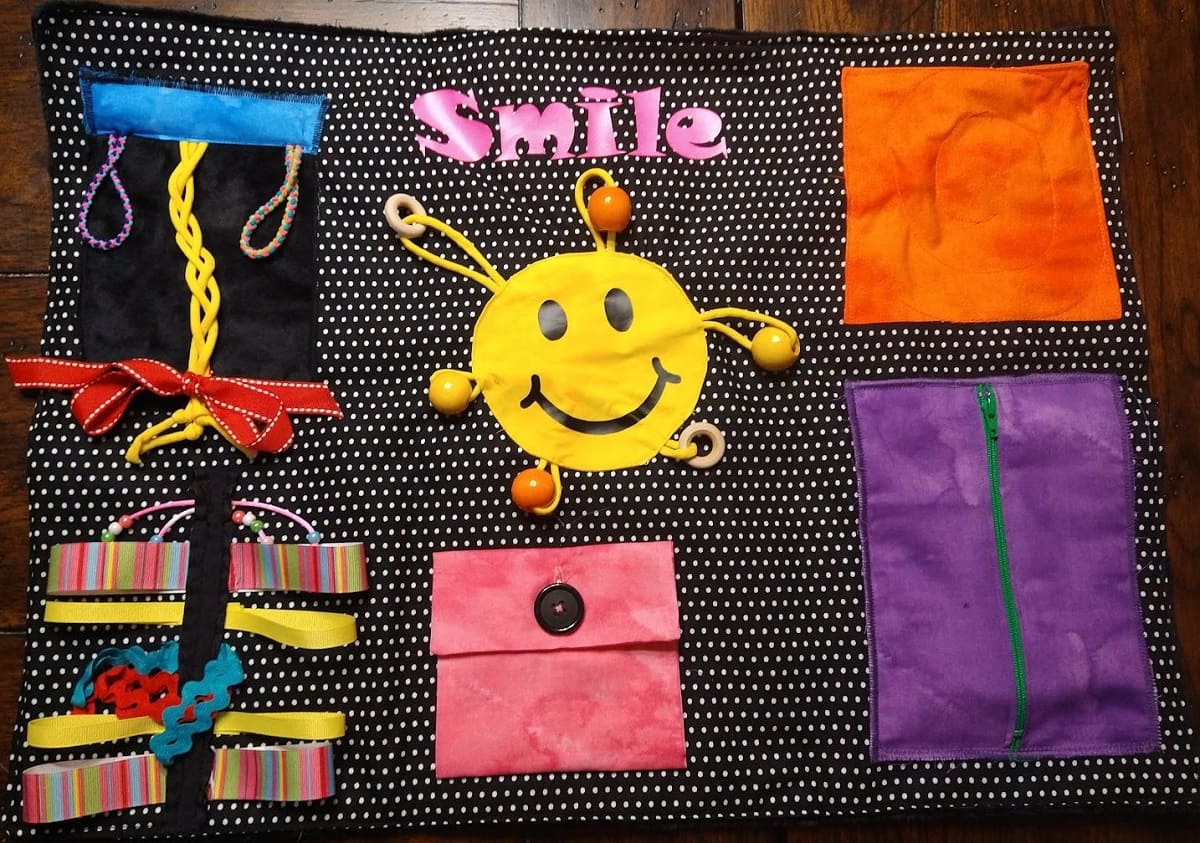
- Buttons: Sewing buttons onto your collage quilt can add a playful and whimsical element. Choose buttons of different shapes, sizes, and colors to create visual interest.
- Beads: Incorporating beads can bring a touch of elegance and sparkle to your quilt. Sew individual beads or create clusters to accentuate specific areas of your design.
- Embroidery: Use embroidery thread to stitch intricate patterns or designs onto your fabric pieces. This adds a unique handmade touch and can bring out the details in your quilt.
- Ribbons and trim: Adding ribbons or decorative trims can enhance the edges of your fabric pieces and create a polished finish. Choose ribbons or trims that complement your color scheme or add a pop of contrasting color.
- Thread painting: Thread painting involves using a sewing machine and different colored threads to create detailed and intricate designs on your quilt. This technique allows you to add depth and dimension to specific areas of your collage.
When adding embellishments, it’s important to strike a balance between enhancing your design and not overwhelming the overall composition. Experiment with different placement options and take a step back to assess the impact before committing the embellishments permanently.
As you progress with your embellishments, remember the importance of securing them properly to ensure they stay in place over time. Use a strong thread and consider reinforcing with hand stitches when necessary.
Once you’re satisfied with the embellishments, it’s time to move on to the final steps: finishing and binding your collage quilt.
Finishing and Binding the Quilt
Congratulations! You are nearing the completion of your collage quilt. The final steps involve finishing and binding the quilt to give it a polished and professional look. Here’s how to finish your quilt:
- Trim the edges: Use a rotary cutter and ruler to trim any excess fabric from the edges of your quilt. This step ensures that all sides are even and gives your quilt a clean and tidy appearance.
- Prepare the backing fabric: Lay your quilt top on a flat surface, right side down. Place the backing fabric on top, right side up, ensuring it aligns with the quilt top. Smooth out any wrinkles and use pins or basting spray to hold the layers together.
- Add batting: If you desire a thicker and warmer quilt, place a layer of batting on top of the quilt top and backing fabric. Make sure the batting is slightly larger than the quilt top to allow for folding and binding.
- Quilt the layers together: Secure all the layers by stitching them together. You can opt for simple straight-line quilting, free-motion quilting, or any other quilting design that complements your collage quilt. Experiment with different quilting techniques to enhance the overall look of your quilt.
- Bind the quilt: Binding is the final step that gives your quilt a finished edge. Cut strips of fabric, typically 2.5 inches wide, from your chosen binding fabric. Sew the strips together to create a continuous binding strip. Fold the strip in half lengthwise, press, and attach it to the edges of your quilt using a ¼ inch seam allowance.
- Hand stitch the binding: Fold the binding strip over the edges of the quilt to the backside, enclosing the raw edges. Hand stitch the binding down using a blind stitch or whipstitch, making sure your stitches are invisible from the front.
Once you have finished binding the quilt, take a moment to admire your beautiful creation. Check for any loose threads or imperfections, and make any final adjustments necessary to ensure a polished finish.
Congratulations on completing your collage quilt! Your unique blend of fabrics, colors, and embellishments has created a one-of-a-kind piece of art that showcases your creativity and sewing skills.
Before we conclude, let’s go over some tips and tricks to help you along your collage quilting journey.
Tips and Tricks
As you continue your collage quilting journey, here are some valuable tips and tricks to enhance your experience and ensure successful results:
- Organize your fabric scraps: Keep your fabric scraps neatly organized by color, pattern, or texture. This will make it easier to find the perfect fabric piece when you need it.
- Start with a simple design: If you’re new to collage quilting, begin with a simple design or smaller project to build your confidence and familiarize yourself with the techniques.
- Play with scale and proportion: Experiment with different sizes and scales of fabric pieces to create visual interest and balance in your composition.
- Layer fabrics strategically: Layering fabrics can add depth to your quilt. Consider overlapping pieces or placing lighter fabrics on top of darker ones to create dimension.
- Consider the background fabric: Choose a background fabric that complements your fabric scraps and enhances the overall design. A neutral or solid color often works well, allowing the focus to be on the collage.
- Contemplate negative space: Don’t shy away from leaving some areas of negative space in your quilt. This can help highlight specific fabric pieces and add visual breathing room.
- Use contrasting threads: Consider using contrasting thread colors for quilting and stitching to add visual interest and create texture.
- Experiment with different embellishments: Explore various types of embellishments like trim, ribbon, or even three-dimensional elements to add unique touches to your quilt.
- Develop your own style: Collage quilting is a form of artistic expression, so don’t be afraid to develop your own style and break the rules. Let your creativity shine through!
- Practice patience: Collage quilting is a process that requires patience and attention to detail. Take your time, enjoy the journey, and trust in your artistic instincts.
By incorporating these tips and tricks into your collage quilting process, you will enhance your skills, explore new creative possibilities, and create stunning works of fabric art.
Now that you have learned the essential steps, techniques, and insider tips, it’s time to embark on your own collage quilting adventure. Enjoy the process, let your creativity flow, and create beautiful and unique collage quilts that reflect your personal style and artistic vision.
Happy quilting!
Read more: How To Make A Quilt Larger
Conclusion
Congratulations on completing this comprehensive guide to making a collage quilt! You have learned the essential steps, from gathering materials to adding embellishments and finishing with binding. Collage quilting is a versatile and creative technique that allows you to express your unique artistic vision through a combination of colors, textures, and patterns.
Throughout this journey, you have discovered the importance of choosing and preparing fabrics, selecting a theme or design, cutting and arranging fabric pieces, attaching them to a base, and adding embellishments to enhance the overall aesthetic. With each step, you have honed your skills and developed your own style in collage quilting.
Remember, as you continue to explore the world of collage quilting, there are no limits to your creativity. Experiment with different fabrics, colors, and embellishments. Embrace the imperfections and the unexpected outcomes, as they often lead to the most remarkable designs.
Share your creations with others, whether it’s through displaying them in your home, giving them as unique gifts, or even participating in quilting communities or exhibits. Your collage quilts are a testament to your talent, passion, and dedication to the art of quilting.
But most importantly, have fun! Collage quilting is an opportunity to let your imagination soar and enjoy the process of creating something truly special. So gather your materials, let the fabrics inspire you, and embark on your next collage quilt adventure. Happy quilting!
Frequently Asked Questions about How To Make A Collage Quilt
Was this page helpful?
At Storables.com, we guarantee accurate and reliable information. Our content, validated by Expert Board Contributors, is crafted following stringent Editorial Policies. We're committed to providing you with well-researched, expert-backed insights for all your informational needs.


0 thoughts on “How To Make A Collage Quilt”