Articles
How To Make A Paper Quilt For Kids
Modified: January 5, 2024
Learn how to create a fun and engaging paper quilt for kids with our informative articles. Engage their creativity and keep them entertained for hours.
(Many of the links in this article redirect to a specific reviewed product. Your purchase of these products through affiliate links helps to generate commission for Storables.com, at no extra cost. Learn more)
Introduction
Quilting is a beloved craft that has been passed down through generations, known for its intricate patterns and cozy warmth. While traditional quilts are often made from fabric, they can also be created using an unexpected material – paper! Making a paper quilt is a fun and creative activity that children can enjoy, allowing them to explore their artistic side while learning about patterns and colors.
In this article, we will guide you through the step-by-step process of making a paper quilt for kids. We will cover everything from choosing the right paper to cutting and arranging the squares, all the way to adding decorative elements to make the quilt unique.
So grab your scissors and glue, and let’s get started on this exciting paper quilting adventure!
Key Takeaways:
- Paper quilting is a delightful way for kids to explore their creativity, learn about patterns and colors, and develop fine motor skills. It’s a fun and educational activity that results in a beautiful and personalized paper quilt.
- The process of making a paper quilt encourages children to let their imagination soar, experiment with different designs, and enjoy the journey of creating something unique. It’s a hands-on project that fosters artistic expression and brings joy to both kids and adults.
Read more: How To Paper Piece A Quilt Block
Materials Needed
Before we dive into the project, let’s gather all the materials you’ll need to create your paper quilt:
- Colorful construction paper or scrapbooking paper
- Scissors
- Glue stick or craft glue
- Markers, colored pencils, or crayons
- Ruler
- Pencil
- Optional: additional decorative elements such as stickers, ribbon, or sequins
Make sure you have all these supplies handy before you begin, as they are essential for a successful paper quilting experience. It’s also a good idea to lay down some newspapers or a plastic tablecloth to protect your work surface from any potential glue or marker mishaps.
With your materials ready, let’s move on to the next step: choosing the perfect paper for your paper quilt!
Step 1: Choosing the Paper
The first step in making a paper quilt is selecting the right paper for your project. You’ll want to choose paper that is sturdy enough to hold its shape, but not too thick or heavy, as it will be easier to cut and manipulate.
Colorful construction paper or scrapbooking paper is an excellent choice for this project. They are readily available in a variety of shades and patterns, allowing you to create a vibrant and visually appealing quilt. You can either choose a cohesive color scheme or opt for a mix of different colors and patterns to add variety to your quilt.
If you want to take it a step further, you can also consider using textured or patterned papers to give your quilt an extra dimension. For example, you can use paper with a faux fabric texture to mimic the look of a traditional quilt.
Keep in mind that the size of the paper squares will determine the overall size of your quilt. You can use standard-sized construction paper (8.5 x 11 inches) or cut larger sheets of paper into smaller squares.
Once you have gathered your desired papers, it’s time to move on to the next step – creating the design for your paper quilt!
Step 2: Creating the Quilt Design
Now that you have your paper ready, it’s time to plan out the design of your paper quilt. The design can be as simple or as intricate as you like, depending on your child’s age and skill level.
Start by deciding on a pattern or theme for your quilt. You can choose classic quilt patterns like squares, triangles, or diamonds, or get creative and come up with your own unique design. Encourage your child to let their imagination run wild!
If your child needs some inspiration, you can search for quilt patterns online or in craft books. You can use these patterns as a guide or modify them to suit your child’s preferences.
Once you have a design in mind, use a pencil and ruler to lightly sketch the pattern on the back of each paper square. This will serve as a guide during the cutting and arranging process.
Remember to keep the design consistent throughout the quilt. This will create a cohesive and visually appealing finished product.
Now that you have your design planned out, it’s time to move on to the next step – cutting the paper squares.
Step 3: Cutting the Paper Squares
With the design sketched out on the back of each paper square, it’s time to bring out your scissors and start cutting!
Using the ruler as a guide, measure and mark the desired size for each square. Depending on the complexity of your design, you may need squares of different sizes or shapes.
Once you have marked the measurements, carefully cut along the lines to create your paper squares. Encourage your child to practice their scissor skills and be cautious while cutting to avoid any accidents.
It’s important to note that the size of the squares will determine the final size of your quilt. If you want a smaller quilt, cut smaller squares. For a larger quilt, use larger squares.
If you’re unsure about the size or shape of the squares, you can use a template or stencil to ensure consistency throughout the quilt.
As you cut the squares, set them aside and organize them according to your design. This will make the next step of arranging the squares much easier.
With the squares cut and ready, let’s move on to the next step – arranging the squares to create your paper quilt!
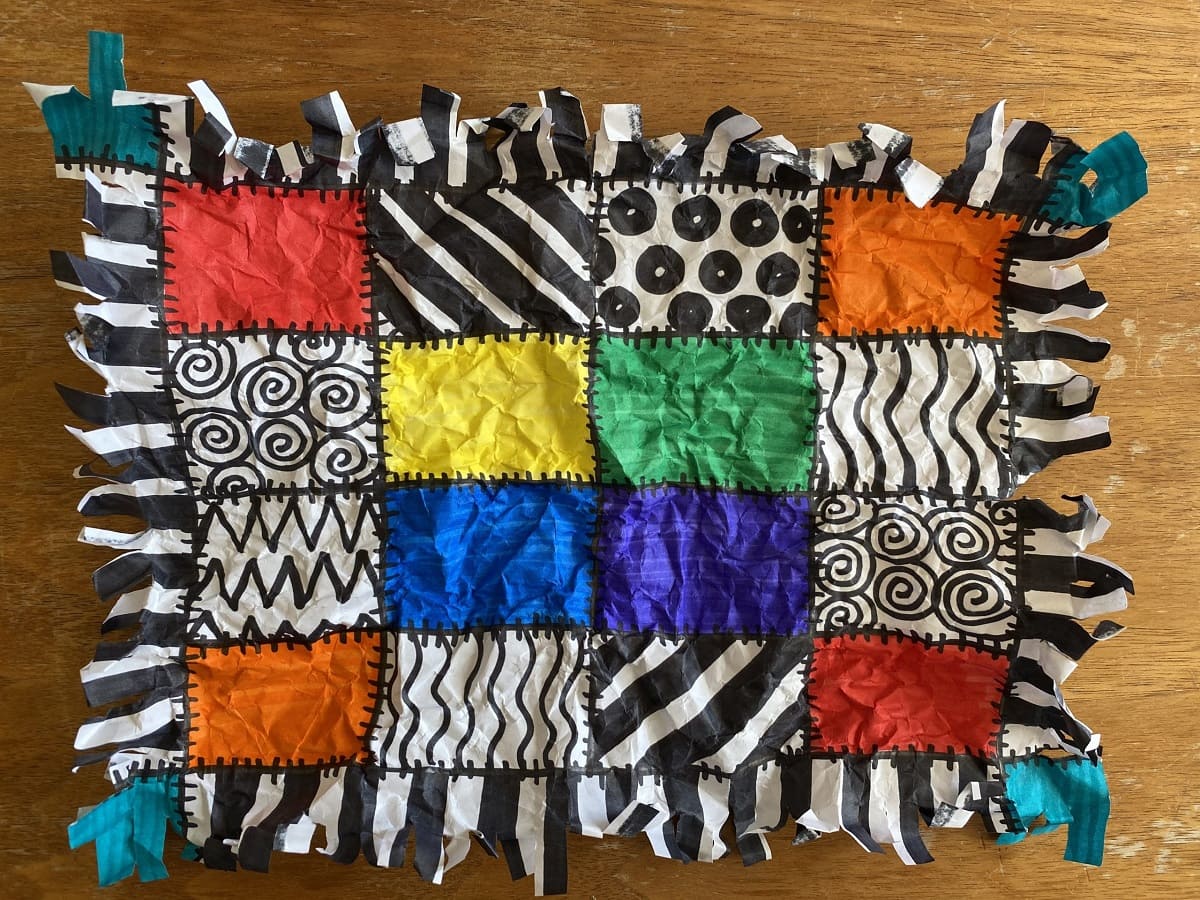
When making a paper quilt with kids, use colorful construction paper and glue to create a fun and easy project. Encourage creativity and experimentation with different patterns and shapes.
Read more: How To Make A Quilt
Step 4: Arranging the Squares
Now that you have your paper squares cut and organized, it’s time to start arranging them to create your paper quilt. This step is where you can get creative and play around with different patterns and placements.
Lay out a large piece of paper or a poster board as your base. This will serve as the canvas for your quilt. You can use a plain white sheet or choose a colored background that complements the colors of your paper squares.
Start by arranging the squares on the base, following your design plan. Experiment with different layouts and patterns to find the one that you like best. You can create straight lines, diagonal lines, or even a random arrangement – it’s all up to you!
As you place the squares, you can leave a small gap between each one to create the effect of stitching. This will give your paper quilt a more realistic and quilt-like appearance.
Take your time during this step, as arranging the squares can be a fun and creative process. Encourage your child to express their artistic vision and let their imagination soar!
Once you are satisfied with the arrangement, you can move on to the next step – gluing the squares onto the base to secure them in place.
Step 5: Gluing the Squares
Now that you have the squares arranged on your base, it’s time to secure them in place by gluing them down. This step will not only ensure that your paper quilt stays intact but also adds a professional touch to the finished product.
Start by lifting one square at a time and applying a thin layer of glue to the back. Use a glue stick or craft glue for this step. Avoid using too much glue, as it may cause the paper to become wrinkled or damp.
Place the glued square back onto the base, aligning it with the design and position you had previously chosen. Press down gently but firmly to make sure it adheres properly. Continue this process with each square until you have glued them all down.
It’s important to take your time and be patient during this step. Ensure that each square is properly aligned and secured to create a neat and polished appearance for your paper quilt.
If you notice any excess glue seeping out from the edges of the squares, you can use a damp cloth to carefully wipe it away before it dries.
Allow the glue to dry completely before moving on to the next step. This will ensure that the squares stay in place and maintain the desired arrangement.
With the squares securely glued, it’s time to add some decorative elements to make your paper quilt even more visually appealing. Let’s move on to the next step!
Step 6: Adding Decorative Elements
Now that your paper squares are securely in place, it’s time to add some extra flair to your paper quilt. Adding decorative elements can make your quilt more visually interesting and personalized.
You have a wide range of options when it comes to embellishing your paper quilt. Here are a few ideas to get you started:
- Use markers, colored pencils, or crayons to add additional designs or patterns to the squares. This can include doodles, shapes, or even intricate details like stitching.
- Add stickers or cut-outs to create focal points or accents on the quilt. You can choose stickers that match your design theme or opt for fun and whimsical options.
- Experiment with different textures by attaching pieces of ribbon, fabric scraps, or even pieces of tissue paper to specific areas of the squares. This can add depth and tactile interest to your quilt.
- Consider adding sequins, glitter, or small beads to bring a touch of sparkle and shine to your paper quilt. These can be glued onto specific squares or sprinkled sparingly across the entire quilt.
Remember, the goal is to enhance the visual appeal of your paper quilt and make it unique to your child’s imagination. Encourage them to express their creativity and have fun with the decorative elements.
Once you’re satisfied with the added decorations, it’s time for the final step – adding the finishing touches to complete your paper quilt!
Step 7: Finishing Touches
Congratulations, you’re in the final step of creating your paper quilt! Now it’s time to add some finishing touches to complete the project and give it a polished look.
Start by trimming any excess paper or overlapping edges that may be sticking out from the squares, using scissors or a paper trimmer. This will give your paper quilt clean and crisp edges for a professional finish.
Next, take a few moments to observe your quilt and make any necessary adjustments. Check for any loose squares or areas that may need a bit more glue to secure them in place.
If you’d like to protect your paper quilt and make it more durable, you can laminate it. This will ensure that it withstands handling and lasts longer. Take your quilt to a local print shop or use a home laminator if you have one available.
Finally, step back and admire your completed paper quilt! Give yourself a pat on the back for a job well done and celebrate your creative achievement.
You can display your paper quilt on a wall, use it as a table centerpiece, or even gift it to family or friends. It’s a wonderful keepsake that your child can be proud of and will cherish for years to come.
Remember, the joy of paper quilting not only lies in the final product but also in the process of creating and exploring different patterns, colors, and textures. So have fun, let your imagination run wild, and enjoy this artistic journey with your child!
With the final touches complete, we’ve reached the end of our guide for making a paper quilt for kids. We hope you and your child had a great time creating this beautiful and unique craft project. Happy paper quilting!
Read more: How To Make A Quilt Larger
Conclusion
Making a paper quilt for kids is a fun and creative activity that allows children to express their artistic flair while learning about patterns, colors, and design. It’s a fantastic project that can be enjoyed by kids of all ages, and the end result is a beautiful and personalized paper quilt that they can proudly display or give as a thoughtful gift.
In this article, we walked you through the step-by-step process of making a paper quilt. We began with choosing the right paper, exploring different designs and patterns, cutting and arranging the squares, gluing them onto the base, adding decorative elements, and finally, adding the finishing touches.
Through each step, we encouraged you and your child to let your creativity shine and make the paper quilt truly your own. Whether you follow traditional quilt patterns or invent your own unique design, the possibilities are endless.
The process of making a paper quilt not only sharpens artistic skills but also enhances fine motor skills, patience, and attention to detail. It’s a wonderful way for children to engage in a hands-on project and experience the satisfaction of creating something beautiful with their own hands.
So, gather your materials and embark on this exciting paper quilting adventure with your child. Enjoy the journey of cutting, arranging, and decorating the squares, and marvel at the finished quilt that reflects your child’s imagination.
Remember, the most important aspect of making a paper quilt is to have fun and embrace the creative process. Whether you’re a seasoned crafter or a beginner, the joy of paper quilting lies in the journey itself.
So, grab those scissors and glue, unleash your creativity, and create a beautiful paper quilt that will be treasured for years to come. Happy paper quilting!
Frequently Asked Questions about How To Make A Paper Quilt For Kids
Was this page helpful?
At Storables.com, we guarantee accurate and reliable information. Our content, validated by Expert Board Contributors, is crafted following stringent Editorial Policies. We're committed to providing you with well-researched, expert-backed insights for all your informational needs.


0 thoughts on “How To Make A Paper Quilt For Kids”