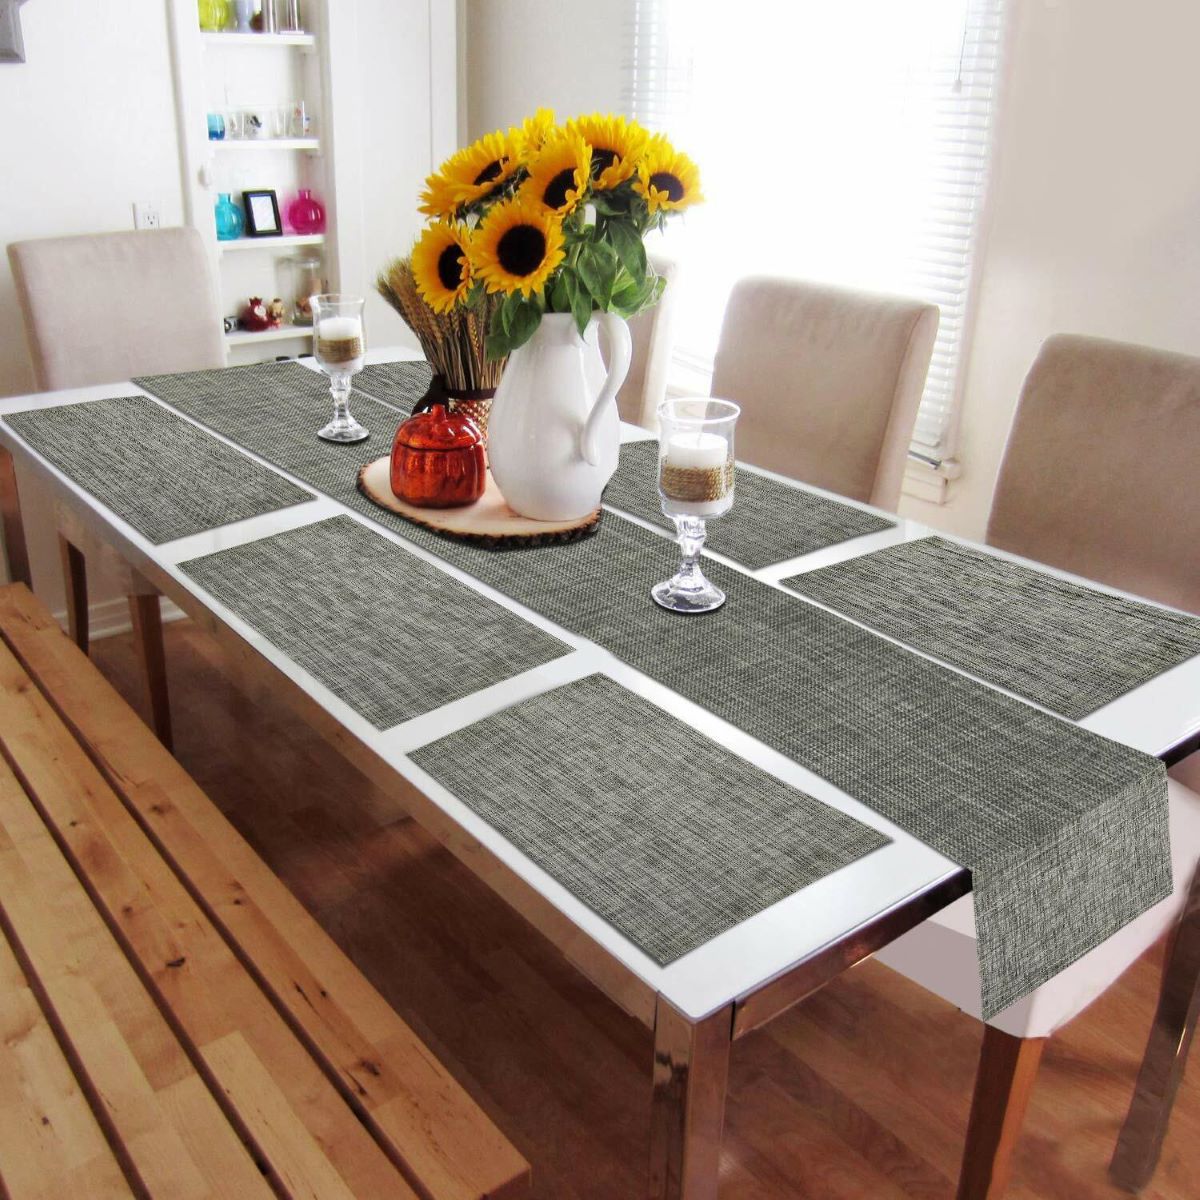
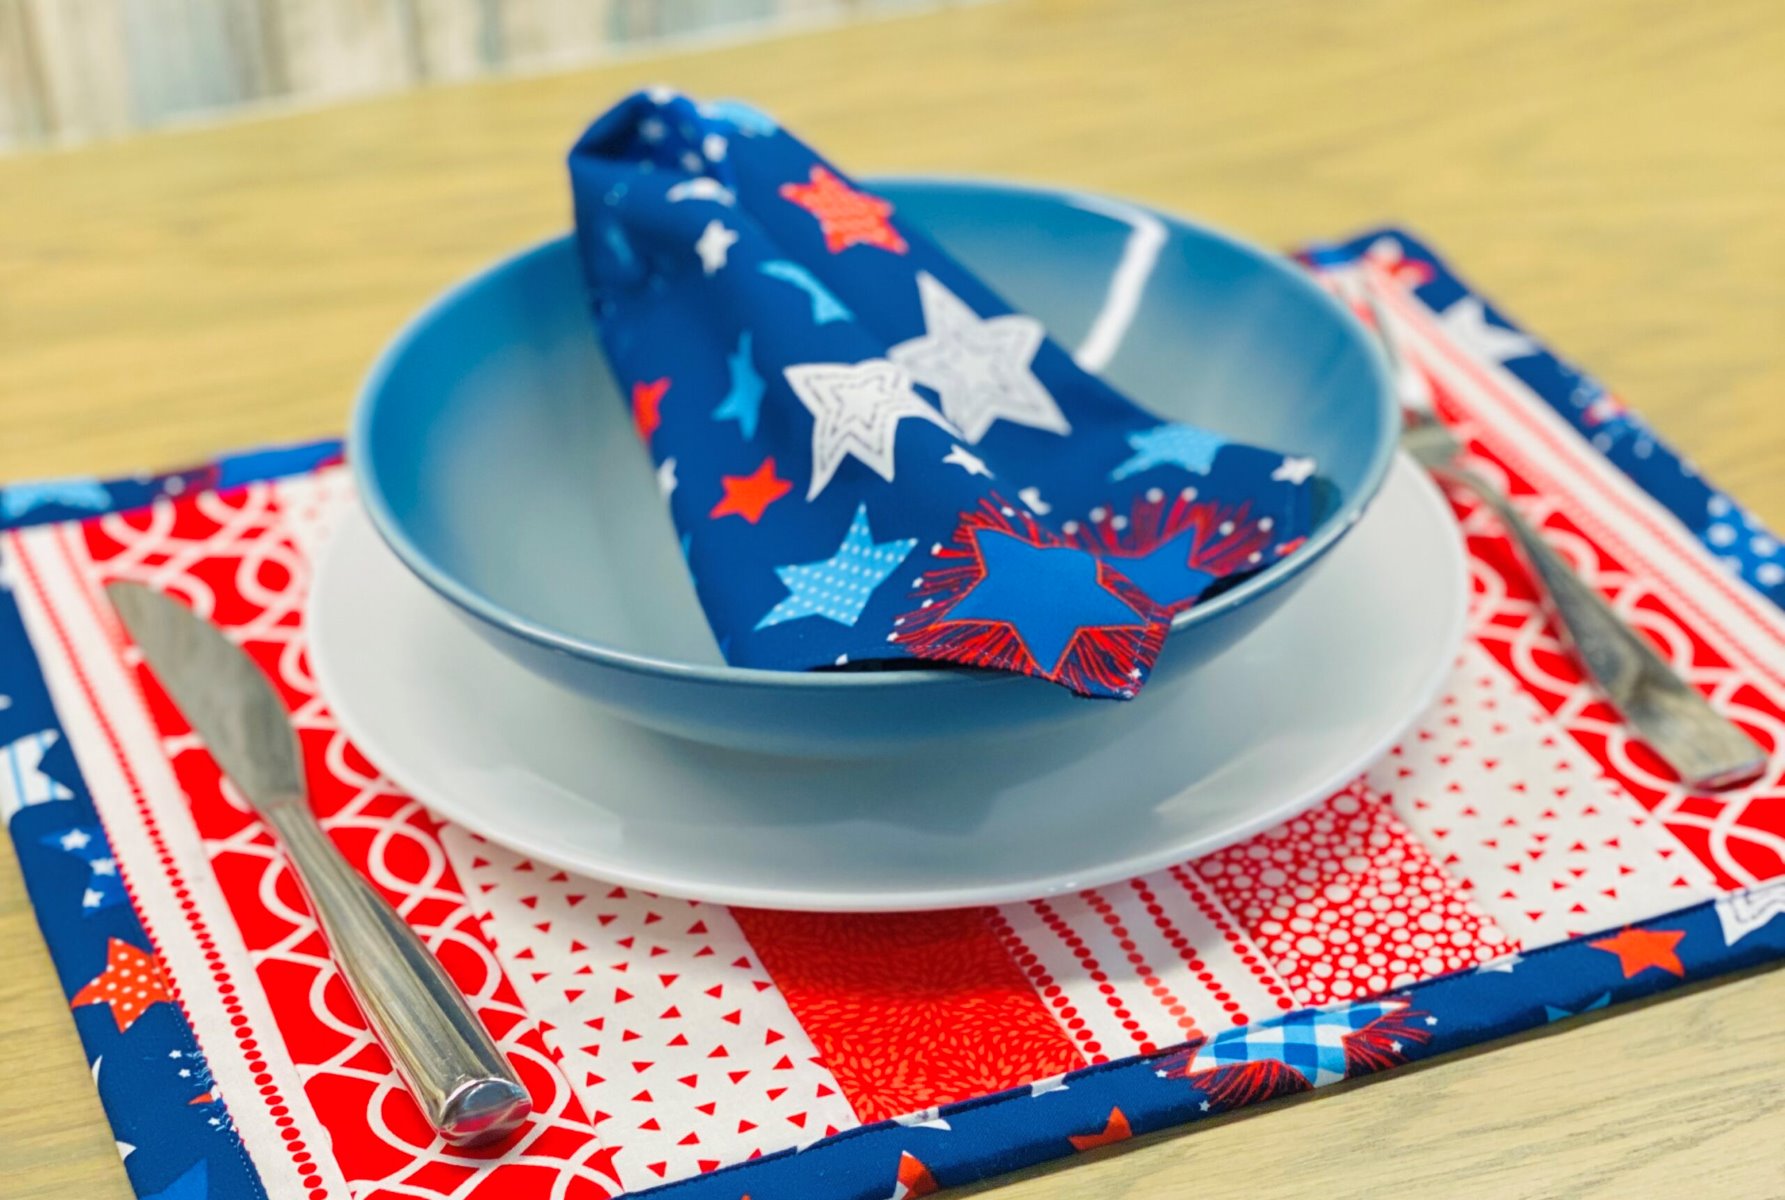
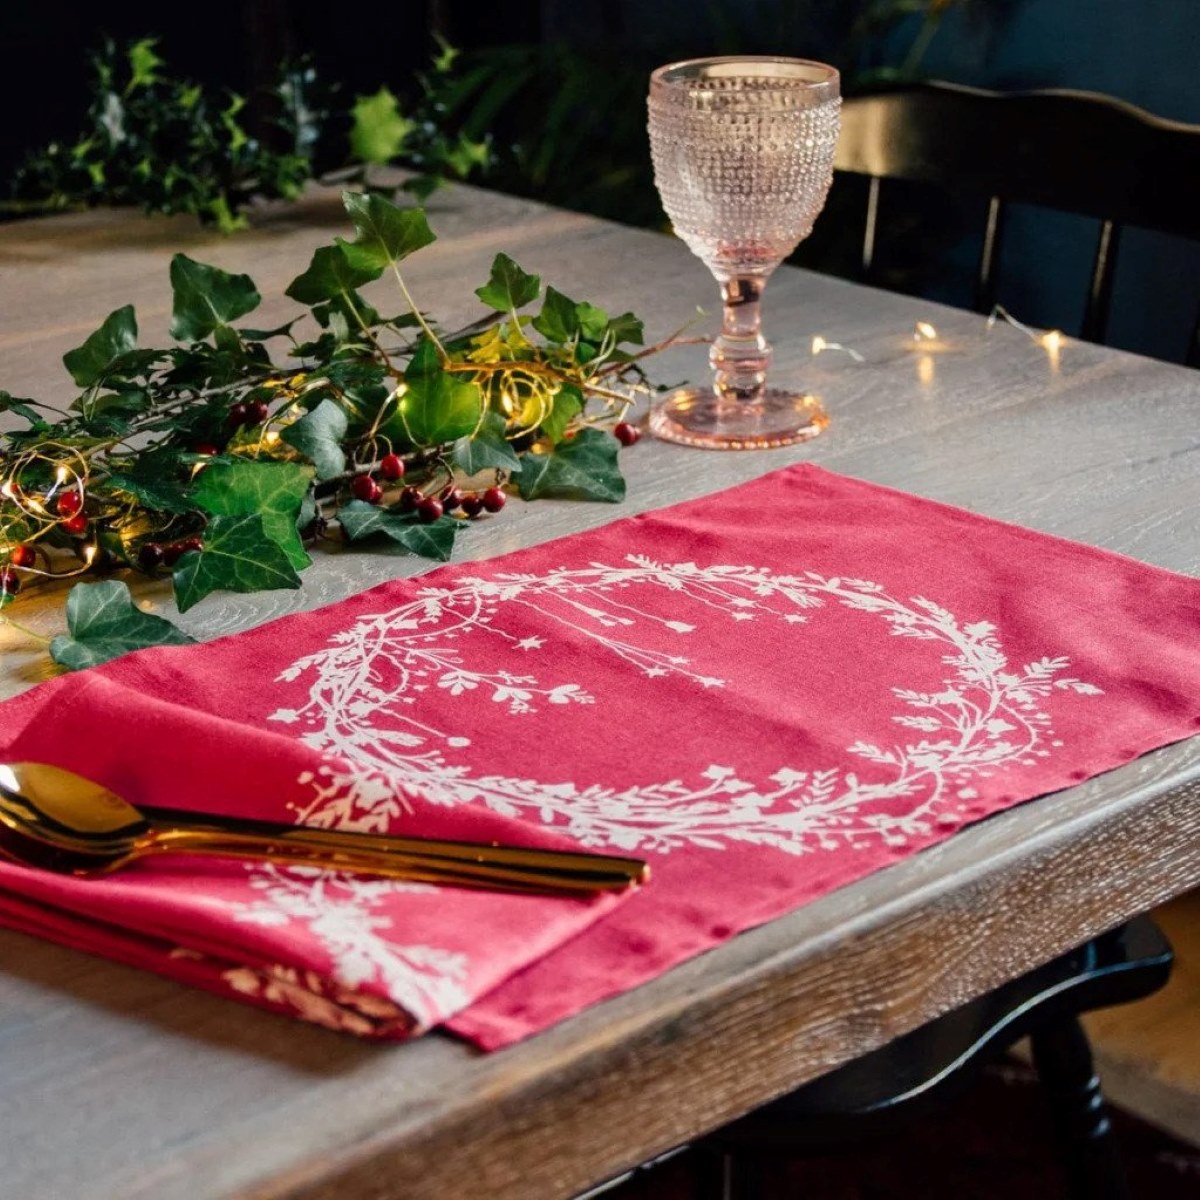
Tableware
How To Make A Quilted Placemat
Modified: January 4, 2024
Learn how to create beautiful and functional quilted placemats for your tableware. Step-by-step instructions and helpful tips to make your own unique designs.
(Many of the links in this article redirect to a specific reviewed product. Your purchase of these products through affiliate links helps to generate commission for Storables.com, at no extra cost. Learn more)
Introduction
Welcome to our guide on how to make a quilted placemat! Placemats are not only practical but also a great way to add a touch of style and personalization to your dining table. Whether you’re looking to make a set of placemats for yourself or to give as a thoughtful gift, this step-by-step tutorial will walk you through the process of creating a beautiful and functional quilted placemat.
Making a quilted placemat is a wonderful way to explore your creativity and experiment with different fabric combinations. You can choose fabrics that match your existing décor or opt for bold patterns and colors to make a statement. The possibilities are endless, and with a little guidance, you’ll have a gorgeous placemat in no time.
In this tutorial, we’ll cover all the essential steps involved in making a quilted placemat, from choosing the fabric and cutting it to piecing the top, adding batting, quilting, and adding the finishing touches. Whether you’re a beginner or an experienced seamstress, you’ll find helpful tips and techniques to create a placemat that is not only visually appealing but also durable and functional.
Before getting started, let’s gather all the materials you’ll need for this project.
Key Takeaways:
- Create personalized quilted placemats to add style and functionality to your dining table. Experiment with fabric, quilting designs, and finishing touches to reflect your unique taste and creativity.
- Handcraft quilted placemats as thoughtful gifts or for personal use. Explore fabric options, cutting techniques, and decorative elements to make each placemat a cherished and practical addition to any dining experience.
Read more: How To Quilt Placemats
Materials Needed
Before you start making your quilted placemat, it’s important to gather all the necessary materials. Here’s a list of what you’ll need:
- Fabric: Choose two types of fabric for the top and backing of the placemat. You’ll also need a separate piece of fabric for the binding. Consider using cotton or linen for a classic look.
- Batting: This is the middle layer of the placemat that provides thickness and insulation. Look for batting specifically designed for placemats.
- Thread: Select a thread that complements the colors of your fabric. Polyester or cotton threads work well for quilting.
- Ruler and rotary cutter: These tools will help you accurately measure and cut your fabric.
- Scissors: You’ll need scissors for trimming threads and cutting the binding fabric.
- Pins or clips: Use these to hold the layers of fabric together during quilting.
- Iron and ironing board: Pressing your fabric at each step will ensure crisp, professional-looking results.
- Sewing machine: A sewing machine will make the process quicker and easier, but you can also hand sew if you prefer.
- Quilting gloves (optional): If you find it helpful, quilting gloves can provide a better grip while maneuvering the fabric during quilting.
Once you have gathered all the materials, find a clean and well-lit workspace where you can comfortably work on your placemat. Now that you have everything you need, let’s move on to the first step: choosing the fabric.
Step 1: Choosing Fabric
Choosing the right fabric is a crucial step in creating a stunning quilted placemat. The fabric you select will determine the overall look and feel of your placemat, so take some time to consider your options. Here are a few factors to keep in mind:
1. Color and Pattern: Consider the color scheme of your dining area and choose fabrics that will complement or enhance it. You can opt for solid colors, subtle patterns, or bold prints depending on your personal style and the aesthetic you want to achieve.
2. Fabric Type: Look for fabrics that are durable, easy to clean, and suitable for a dining environment. Cotton and linen are popular choices for placemats because they are absorbent, long-lasting, and can withstand regular washing.
3. Theme or Occasion: If you’re making placemats for a specific occasion or theme, such as a holiday or special event, consider selecting fabrics that reflect that theme. For example, for a Christmas dinner, you could choose fabrics with festive prints or colors.
4. Contrast: To create visual interest, consider using fabrics with contrasting colors or patterns. This will make your placemat stand out and add dimension to your table setting.
5. Personal Preference: Ultimately, choose fabrics that speak to your personal style and make you happy. Trust your instincts and go with fabrics that you love and feel excited to work with.
Once you’ve chosen your fabrics, make sure to wash and iron them before starting the project. This will remove any dirt or chemicals and ensure that your placemat retains its shape after washing.
Now that you have your fabric ready, we can move on to the next step: cutting the fabric.
Step 2: Cutting Fabric
Now that you have selected your fabric for the quilted placemat, it’s time to cut it into the appropriate sizes and shapes. Precise and accurate cutting is essential to ensure that all the pieces fit together seamlessly. Here’s how to do it:
1. Measure and Mark: Start by measuring the size you want your placemat to be. A standard size is around 14 inches by 20 inches, but you can adjust the dimensions based on your preferences. Use a ruler and fabric pen or chalk to mark the measurements on the wrong side of the fabric.
2. Cut the Top and Backing Fabrics: Cut two pieces of fabric based on the measurements you marked in the previous step. These will be the top and backing of your placemat.
3. Cut the Batting: Now it’s time to cut the batting, which will go between the top and backing fabrics to provide insulation and thickness. Cut the batting to the same size as the top and backing fabrics.
4. Cut the Binding Fabric: The binding will create a finished edge around the placemat. Measure and cut the binding fabric into strips that are 2.5 inches wide and long enough to go around the perimeter of the placemat.
As you cut the fabric, double-check your measurements to ensure accuracy. It’s also helpful to use a rotary cutter and a self-healing cutting mat for clean and precise cuts.
Once you have all the fabric pieces cut, take a moment to organize them and make sure they are all aligned correctly. This will make the next step of piecing the top much easier.
Now that you have your fabric pieces ready, it’s time to move on to the next step: piecing the top of the placemat.
Step 3: Piecing the Top
Now that your fabric pieces are cut and ready, it’s time to piece them together to create the top of your quilted placemat. This step involves arranging and sewing the fabric pieces in a visually pleasing and cohesive way. Here’s how to do it:
1. Lay Out the Fabric: Start by laying out the backing fabric right side down. Next, place the batting on top of the backing fabric, followed by the top fabric right side up. Make sure all the edges are aligned.
2. Pin or Clip: Use pins or clips to secure the layers of fabric together. Place them about 3-4 inches apart to prevent shifting as you sew.
3. Sewing: Set up your sewing machine with a straight stitch and a 1/4-inch seam allowance. Starting in the middle of one side, sew along the edges, removing the pins or clips as you go. Sew all around the placemat, leaving a 4-5 inch opening along one side for turning later.
4. Backstitching: Backstitch at the beginning and end of the sewing to secure the stitches and prevent unraveling.
5. Trimming: Trim the excess fabric and batting around the edges, leaving a 1/4-inch seam allowance.
6. Turning: Carefully turn the placemat right side out through the opening that you left. Gently push out the corners to ensure they are fully turned.
7. Pressing: Use an iron set to the appropriate heat level for your fabric and press the placemat flat. Pay extra attention to the edges to create crisp and neat lines.
Congratulations! You have successfully pieced the top of your quilted placemat. Take a moment to admire your work before moving on to the next step.
In the next step, we will add batting to provide thickness and insulation to the placemat. Stay tuned!
When quilting your placemat, be sure to use a walking foot on your sewing machine to help prevent shifting and puckering of the layers. This will result in a more professional and polished finish.
Read more: How To Make Woven Placemats
Step 4: Adding Batting
Adding batting to your quilted placemat is an essential step to provide thickness, insulation, and a soft texture. The batting layer will sit between the top fabric and the backing fabric, giving your placemat a padded feel. Here’s how you can add the batting:
1. Prepare the Batting: Cut a piece of batting to the same size as your placemat top. Make sure the batting is clean and free of any wrinkles or folds.
2. Place the Batting: Lay the batting on a flat surface and place the placemat top right side up on top of it. Align the edges of the placemat top and batting to ensure they are perfectly matched.
3. Smooth Out and Pin: Smooth out any wrinkles or folds in the batting and the placemat top. Pin all layers together using straight pins or clips. Place pins about 3-4 inches apart to secure the layers and prevent shifting as you quilt.
4. Baste the Layers: Basting stitches will temporarily hold the layers together as you quilt. You can use either hand basting or machine basting. Hand basting involves using large, loose stitches to join the layers. Machine basting uses a long stitch length on your sewing machine. Choose the method that is most comfortable for you.
5. Remove the Pins: Once the layers of fabric and batting are basted together, carefully remove the pins or clips to avoid any accidents during quilting.
With the batting securely added, your quilted placemat is now ready for the next step: quilting. Stay tuned!
Step 5: Quilting the Placemat
Quilting adds decorative stitching and texture to your placemat while securely holding the layers together. There are various quilting techniques and designs you can choose from, depending on your skill level and desired outcome. Here’s how you can quilt your placemat:
1. Prepare your sewing machine: Set up your sewing machine with the desired quilting thread and a quilting needle. You may want to use a walking foot or quilting foot for better fabric feeding and stitch consistency.
2. Choose your quilting design: Consider different quilting patterns such as straight lines, diagonals, or free-motion quilting (if you have experience with it). Alternatively, you can use a quilting stencil or marking tool to trace a design onto the placemat.
3. Start quilting: Begin quilting from the center of the placemat and work your way outward. Sew along the marked lines or freehand as desired. Take it slow and steady, keeping the layers smooth and avoiding puckering or bunching.
4. Secure your stitching: Backstitch or tie off your quilting stitches at the beginning and end of each line. This will ensure the stitches are secure and won’t unravel.
5. Explore additional quilting: If you want to add more visual interest, you can experiment with additional quilting techniques such as echo quilting, stippling, or decorative motifs. Make sure to plan and mark your quilting lines accordingly.
6. Press and trim: Once you have finished quilting, gently press the placemat to remove any wrinkles. Trim any excess batting or fabric from the edges to create clean lines and ensure a tidy finish.
Quilting your placemat adds a beautiful touch and enhances its functionality. With the quilting complete, it’s time to move on to the final step: adding the binding. Stay tuned!
Step 6: Adding Binding
The binding is the finishing touch that gives your quilted placemat a polished and professional look. It also serves to secure the raw edges and provide durability. Follow these steps to add the binding to your placemat:
1. Prepare the Binding: Cut strips of fabric for the binding that are 2.5 inches wide and long enough to go around the entire perimeter of the placemat. If necessary, sew the strips together at a 45-degree angle to create one continuous piece.
2. Fold and Press: Fold the binding strip in half lengthwise, wrong sides together, and press along the entire length. This creates a clean fold and ensures a neat finish.
3. Attach the Binding: Starting from the bottom edge of the placemat, align the raw edges of the binding strip with the raw edges of the placemat. Leave a few inches of binding unstitched at the beginning. Pin or clip the binding in place to secure it.
4. Sew the Binding: Using a straight stitch, sew the binding to the placemat, aligning the raw edges. Sew with a 1/4-inch seam allowance, removing the pins or clips as you go. Stop sewing a few inches before reaching the starting point, leaving an opening to join the ends of the binding.
5. Join the Binding: Lay the ends of the binding flat and overlap them. Mark the overlapping point and trim any excess binding. Fold the ends back, right sides together, and sew them together along the marked line. Trim the excess binding and press the seam open.
6. Finish the Binding: Continue sewing the binding to the placemat until you reach the starting point. Fold the binding over the raw edge of the placemat to the backside, covering the stitching line. Pin or clip in place.
7. Hand or Machine Stitching: You can choose to hand-sew or machine-sew the binding to the backside of the placemat. If hand-sewing, use a slip stitch to invisibly sew the binding in place. If machine-sewing, use a straight stitch or decorative stitch to secure the binding.
8. Finishing Touches: Give your placemat a final press to ensure the binding lays flat and smooth. Trim any loose threads for a clean finish.
With the binding attached, your quilted placemat is now complete! Admire your handiwork and get ready to showcase your beautiful creation on your dining table.
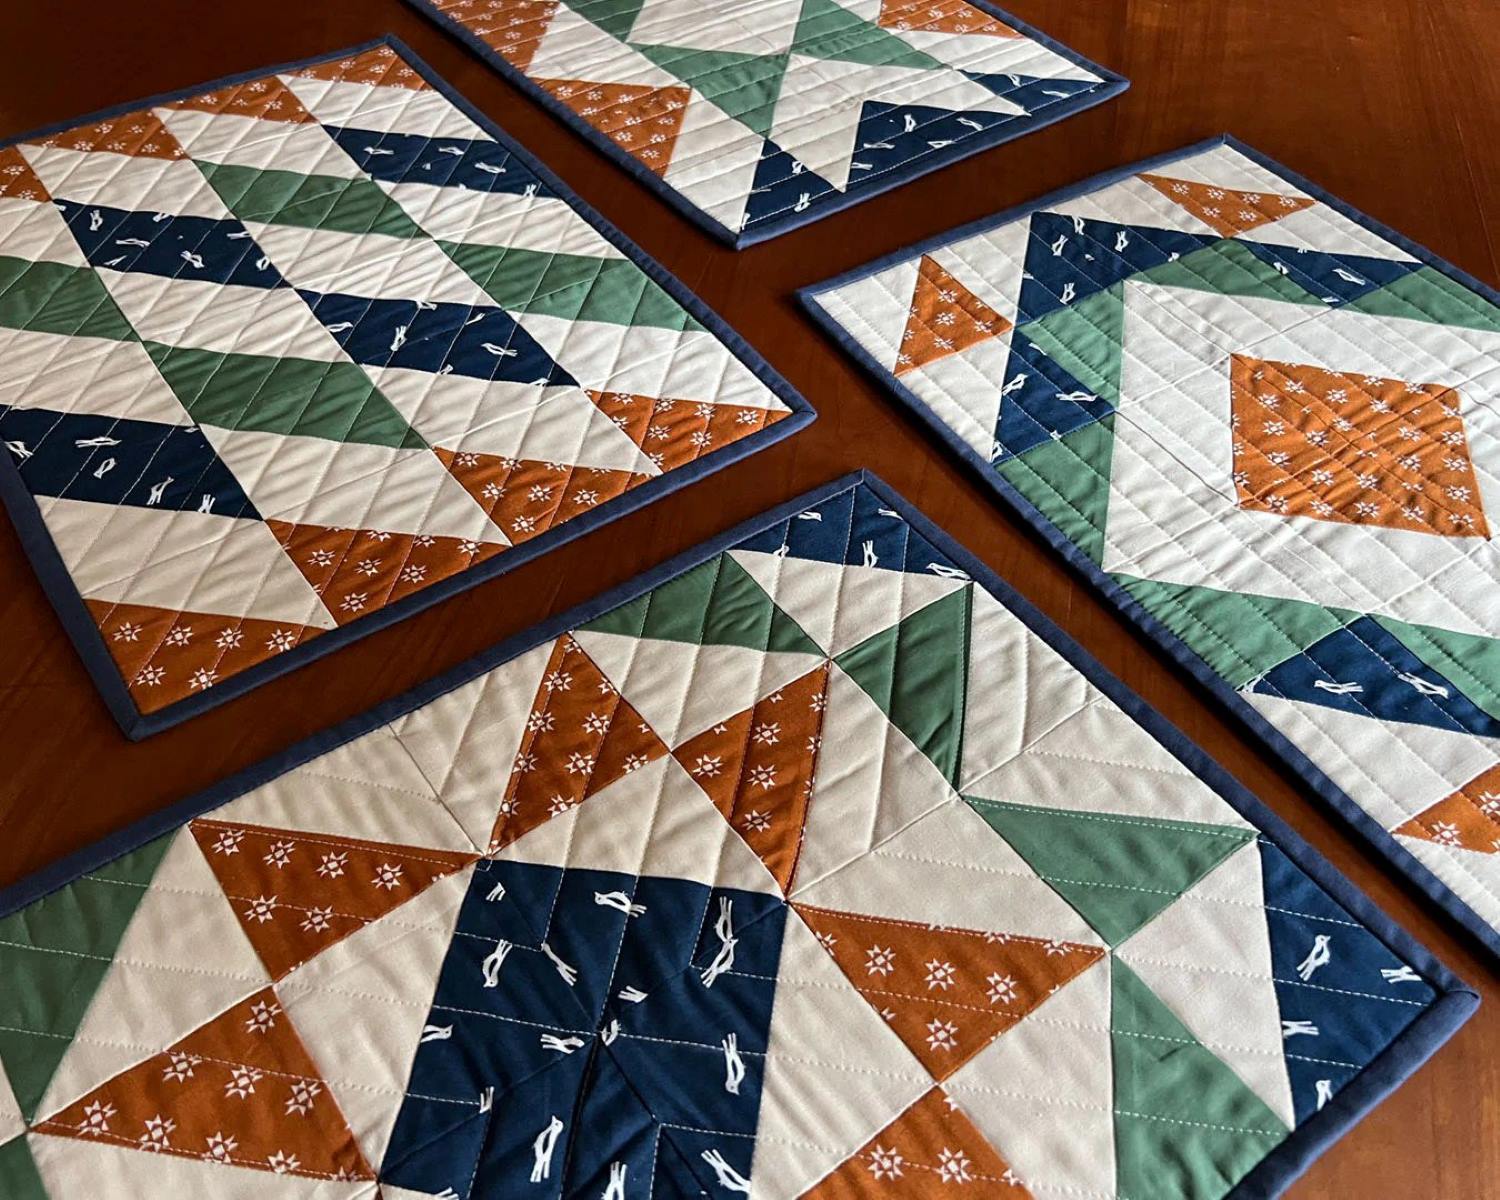
Now that you know how to make a quilted placemat, you can create sets in different colors and patterns to suit various occasions or seasons. Enjoy the process of making these functional and stylish pieces that will add a personal touch to your dining experience.
Whether you’re a seasoned quilter or a beginner, this project allows for creativity and customization. Have fun exploring different fabrics, quilting designs, and binding options to create unique placemats that reflect your personal style.
Thank you for following this step-by-step guide. Happy quilting!
Step 7: Finishing Touches
With the binding attached, your quilted placemat is almost complete. However, there are a few finishing touches you can add to give it an extra special touch. Consider these final steps to further enhance the appearance and functionality of your placemat:
1. Decorative Stitching: If you desire, you can add additional decorative stitching to your placemat. Use a contrasting thread color and experiment with different stitch patterns to add visual interest.
2. Embellishments: Consider adding embellishments such as fabric appliques, buttons, or embroidery to personalize your placemat. These small details can add charm and uniqueness to your creation.
3. Labeling: To make your placemat extra special or to give as a gift, you can sew a small fabric label onto the backside. The label can include a name, a special message, or the date it was made.
4. Care Instructions: If you plan on selling or gifting your placemats, it can be helpful to include care instructions. Write or print a small card with information on how to properly care for and clean the placemat.
5. Set of Placemats: Consider making a matching set of quilted placemats to create a cohesive and stylish dining experience. Coordinate your fabrics and designs to create a visually appealing table setting.
6. Gift Wrapping: If you plan to give your quilted placemat as a gift, consider wrapping it in tissue paper or placing it in a beautiful gift box. Adding a hand-written note or a ribbon can also make the gift more special.
Remember, the finishing touches are an opportunity to get creative and add your personal touch to the placemat. Have fun exploring different ideas and techniques to make your placemat truly unique.
Now that you have completed the finishing touches, step back and admire your beautiful quilted placemat! It’s ready to be used and enjoyed. Whether you’re keeping it for yourself or giving it as a gift, your hard work and creativity have paid off.
Thank you for following along with this guide on how to make a quilted placemat. We hope you’ve enjoyed the process and feel inspired to continue exploring the world of quilting. Happy dining and happy quilting!
Read more: How To Make Placemats With Batting
Conclusion
Congratulations! You have successfully learned how to make a quilted placemat. By following the steps outlined in this guide, you have created a beautiful and functional piece that adds a touch of style to your dining table. Crafting your own quilted placemats allows you to personalize your home decor and showcase your creativity.
Throughout this tutorial, we covered the essential steps involved in making a quilted placemat, from choosing the fabric and cutting it to piecing the top, adding batting, quilting, and adding the finishing touches. By carefully selecting fabrics, considering color schemes, and adding your personal flair, you can create unique placemats that reflect your style and taste.
Remember to experiment with different quilting designs, decorative stitching, and embellishments to create placemats that are truly one-of-a-kind. Whether you’re a seasoned quilter or a beginner, this project allows for creativity and customization.
Additionally, don’t forget about the functionality of these placemats. They not only protect your table from spills and stains but also add a layer of insulation. And with proper care, your quilted placemats can be cherished and used for many years to come.
Now that you have acquired the knowledge and skills to make quilted placemats, you can continue making more to expand your collection or even consider making them as heartfelt gifts for friends and family. Your handmade placemats will undoubtedly be appreciated and treasured.
We hope you enjoyed this guide on how to make a quilted placemat. Whether you’re a hobbyist or an avid quilter, the art of quilting offers endless possibilities for creative expression. So gather your materials, unleash your imagination, and enjoy the process of creating beautiful and functional quilted placemats to enhance your dining experience.
Thank you for joining us on this quilting journey, and happy quilting!
Frequently Asked Questions about How To Make A Quilted Placemat
Was this page helpful?
At Storables.com, we guarantee accurate and reliable information. Our content, validated by Expert Board Contributors, is crafted following stringent Editorial Policies. We're committed to providing you with well-researched, expert-backed insights for all your informational needs.


0 thoughts on “How To Make A Quilted Placemat”