Articles
How To Make A Piano Keys Quilt Border
Modified: August 22, 2024
Learn how to create a stunning border design for your quilt with piano keys pattern. Our articles provide step-by-step instructions and tips for perfecting this unique quilting technique.
(Many of the links in this article redirect to a specific reviewed product. Your purchase of these products through affiliate links helps to generate commission for Storables.com, at no extra cost. Learn more)
Introduction
Welcome to the wonderful world of quilting! If you’re a quilting enthusiast or a beginner looking to take on a new project, you’re in for a treat. Quilting is not only a creative outlet but also a way to create beautiful, functional pieces of art. In this article, we’ll delve into the art of making a piano keys quilt border.
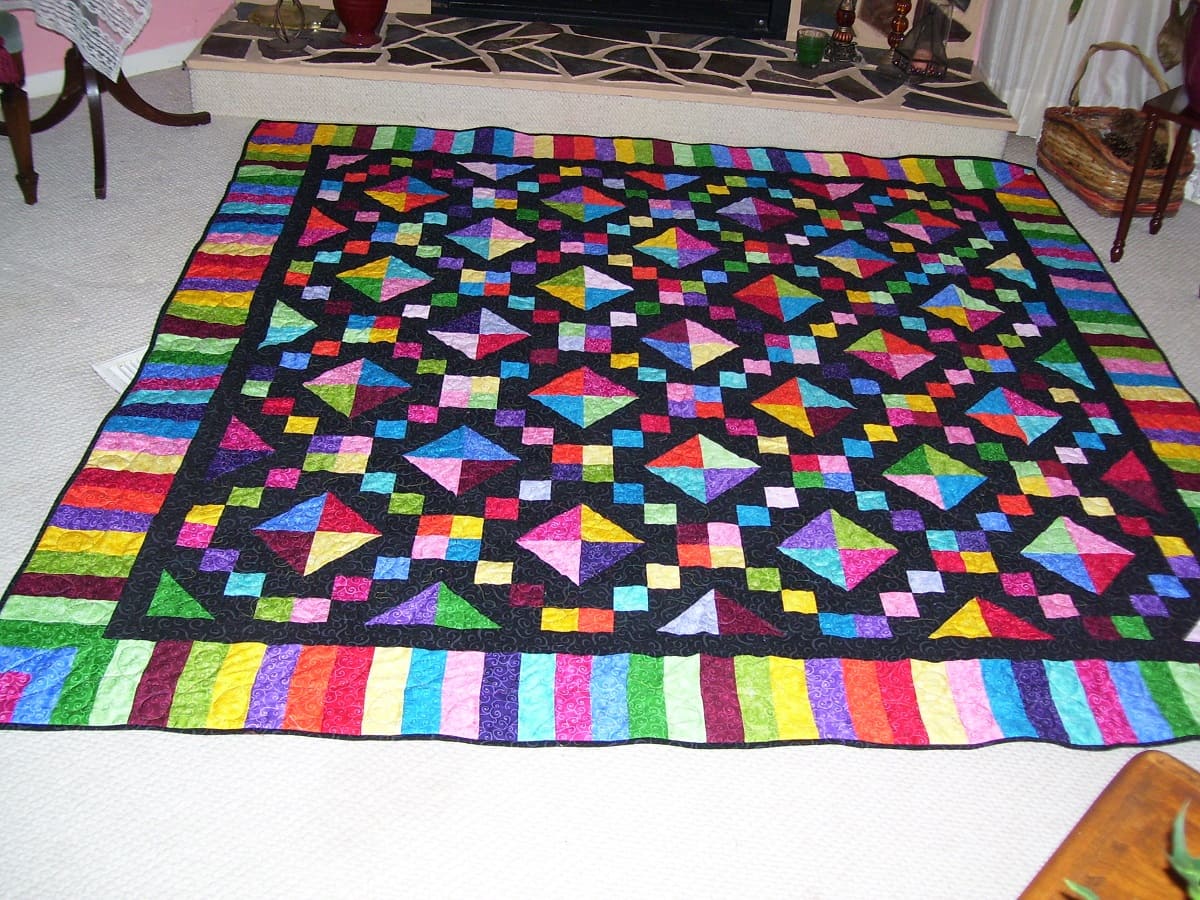
The piano keys quilt border is a classic design that adds a touch of sophistication and elegance to any quilt. It mimics the arrangement of keys on a piano, hence the name. The border consists of long, narrow strips of fabric sewn together to create a visually appealing border around the quilt.
Creating a piano keys quilt border is a fun and rewarding process that allows you to showcase your creativity and personal style. From choosing the fabric to sewing and quilting, every step is an opportunity to put your mark on the project and bring your vision to life.
In this tutorial, we’ll guide you through the step-by-step process of making a piano keys quilt border. We’ll cover everything from selecting the right fabric to attaching the border to your quilt. By the end of this article, you’ll have the knowledge and confidence to create a stunning piano keys quilt border that will impress everyone who sees it.
So, let’s gather our materials and get started on this exciting quilting journey!
Key Takeaways:
- The piano keys quilt border adds elegance and sophistication to any quilt, and the process of choosing fabric, cutting and sewing strips, and attaching the border requires precision and creativity.
- Quilting is a fulfilling and rewarding craft that allows for personal expression and creativity. The piano keys quilt border is just one of many techniques to explore, so embrace the creative journey and enjoy the process.
Read more: How To Make Borders For A Quilt
Materials Needed
Before we jump into the process of creating a piano keys quilt border, let’s make sure we have all the necessary materials. Here’s a list of what you’ll need:
– Fabric: Choose a variety of fabrics in different colors and patterns for your piano keys. Consider using quilt cotton or other woven fabrics.
– Cutting mat: A self-healing cutting mat will provide a sturdy and safe surface for cutting your fabric.
– Rotary cutter: This tool will make cutting your fabric strips quick and precise.
– Quilting ruler: A clear, acrylic quilting ruler with measurement markings will help you achieve accurate cuts.
– Sewing machine: A sewing machine will make the sewing process faster and more efficient, but you can also hand sew if you prefer.
– Thread: Choose a high-quality thread that matches or complements your fabric colors.
– Pins: Pins will come in handy for securing your fabric pieces together.
– Scissors: Sharp fabric scissors are essential for cutting threads and trimming excess fabric.
– Iron: An iron will be used to press your fabric, ensuring smooth and crisp seams.
– Ironing board: A stable ironing board with a padded surface will provide the ideal working space.
– Quilt batting: This is the padding that goes between your quilt top and backing fabric.
– Quilt backing fabric: Choose a fabric that coordinates well with your quilt top.
– Binding fabric: You’ll need fabric for binding the edges of your quilt.
Make sure you have these materials on hand before you begin the project. This will ensure a smooth and uninterrupted quilting experience. Once you’re ready, we can move on to the next step: choosing the fabric for your piano keys quilt border.
Step 1: Choosing Fabric
Choosing the right fabric is crucial for creating a visually striking piano keys quilt border. You’ll want to select a variety of fabrics in different colors and patterns that complement each other. Here’s how you can go about choosing the fabric for your quilt border:
- Consider the quilt’s color scheme: Take a look at the colors and patterns used in your quilt top. You’ll want to choose fabrics that coordinate well with these colors. For a cohesive look, select fabrics that complement and enhance the overall color scheme of your quilt.
- Choose contrasting colors: To make your piano keys quilt border visually captivating, opt for fabrics with contrasting colors. This will create a dynamic and vibrant border that stands out.
- Play with patterns: Experiment with combining different patterns in your quilt border. You can choose fabrics with small-scale prints, bold geometric designs, or even solid colors to add interest and dimension to the border.
- Consider fabric textures: Don’t be afraid to mix and match fabrics with different textures. Combining fabrics with varying textures, such as smooth cotton and textured linen, can add visual interest and depth to your quilt border.
- Bring in a focal fabric: If you have a particular fabric that you love, consider using it as a focal fabric in your piano keys border. This fabric can be a standout piece that adds personality and uniqueness to your quilt.
As you choose your fabrics, lay them out together and see how they look as a group. Pay attention to the overall color balance, contrasts, and visual appeal. Trust your instincts and select fabrics that resonate with you.
Once you have your fabric pieces chosen, it’s time to move on to the next step: cutting the fabric strips for your piano keys quilt border.
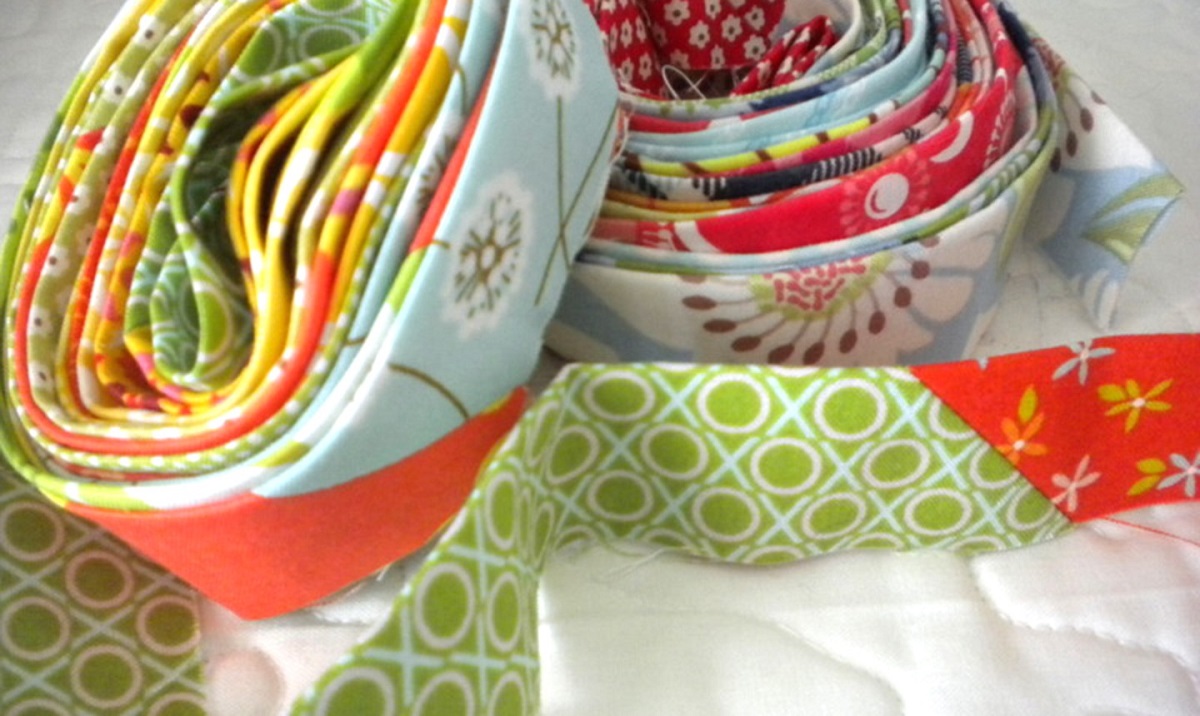
Step 2: Cutting the Fabric Strips
Now that you have chosen your fabrics for the piano keys quilt border, it’s time to cut the fabric into strips. The width of the fabric strips will depend on the desired size of your border. Here’s how you can proceed with cutting the fabric strips:
- Measure and mark the width: Determine the width you want for your fabric strips. Common widths for piano keys quilt borders are around 2 ½ to 3 inches. Using a quilting ruler and a fabric marker, measure and mark the required width on your fabric.
- Align and cut: Place your fabric on a self-healing cutting mat and align the markings with the edge of the fabric. Use a rotary cutter to cut straight along the marked lines, ensuring clean and even cuts. Repeat this process for all the fabrics you have chosen.
- Create uniform strips: To maintain consistency, it’s important to ensure that all your fabric strips are of the same width. Double-check your measurements and adjust as needed to achieve uniformity.
As you cut the fabric strips, be careful to avoid any frayed edges or jagged cuts. Take your time and make precise cuts to ensure your strips are clean and accurately sized.
Once you have cut the fabric strips, arrange them in the desired order to create a visually pleasing arrangement. You can play around with the colors and patterns to find the best combination. With the fabric strips ready, it’s time to move on to the next step: sewing the strips together to form the piano keys border.
When making a piano keys quilt border, consider using a variety of contrasting fabrics to create visual interest and dimension. Be sure to measure and cut the strips accurately to ensure a clean and polished look.
Step 3: Sewing the Strips Together
With your fabric strips cut and arranged, it’s time to sew them together to create the piano keys border. The sewing process will involve joining the fabric strips in a specific order to achieve the desired pattern. Here’s how you can proceed with sewing the strips together:
- Arrange the fabric strips: Lay out your fabric strips in the desired order, creating a pleasing arrangement of colors and patterns. This will help you visualize how the piano keys border will look once it’s sewn together.
- Place the first two strips right sides together: Take the first two fabric strips from your arrangement and align them with right sides together. Make sure the edges are even and secure them with pins or clips.
- Sew the strips together: Using a ¼-inch seam allowance, stitch along the length of the strips, joining them together. Backstitch at the beginning and end to secure the stitching. Press the seam open or to one side, according to your preference.
- Continue adding strips: Take the third fabric strip and place it right sides together with the second strip. Sew them together as before. Repeat this process with the remaining fabric strips, always aligning the right sides together and sewing them in the desired sequence.
- Press the seams: After sewing each strip, press the seams open or to one side. This will help create flat and smooth seams, ensuring a neat finish.
Take your time and be mindful of maintaining consistent seam allowances and accurate stitching. As you sew the fabric strips together, the piano keys pattern will start to emerge. Admire your progress as you see the border taking shape!
Once all the fabric strips are sewn together, trim any excess fabric and threads. Your piano keys border is now ready to be attached to your quilt. But before we move on to the next step, let’s take a moment to appreciate the progress you’ve made so far. You’re well on your way to creating a stunning piano keys quilt border!
Read more: How To Make A Diamond Quilt Border
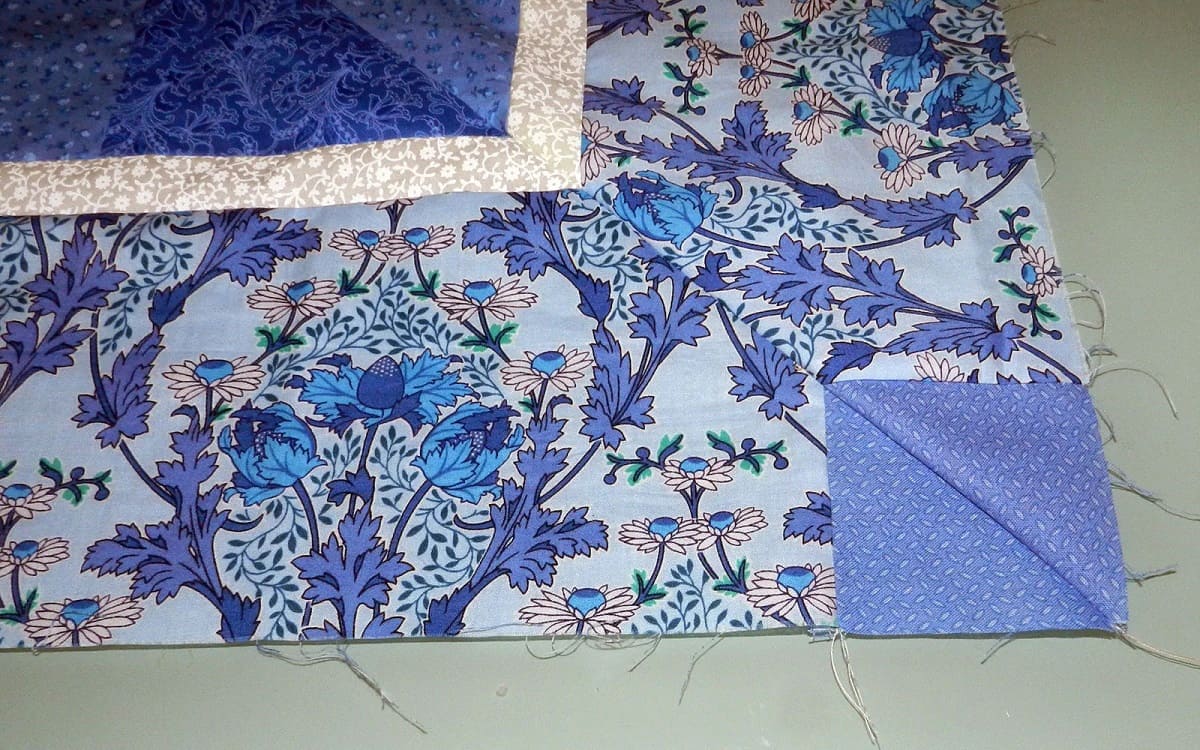
Step 4: Attaching the Piano Keys Border
Now that you have sewn the fabric strips together to create the piano keys border, it’s time to attach the border to your quilt. This step will give your quilt a polished and finished look. Here’s how you can proceed with attaching the piano keys border:
- Measure and cut the border strips: Measure the length of each side of your quilt that will receive the piano keys border. Cut fabric strips that match these measurements, ensuring they are wide enough to accommodate the width of your piano keys border.
- Place the quilt top and border strips right sides together: Lay your quilt top on a flat surface, right side up. Position one of the border strips along one edge, aligning the raw edges. If necessary, pin or clip the strip in place to hold it securely.
- Sew the border strip to the quilt top: Using a ¼-inch seam allowance, stitch along the length of the border strip, attaching it to the quilt top. Backstitch at the beginning and end to secure the stitching. Repeat this process for each side of the quilt.
- Press the seams: After sewing each border strip, press the seams open or toward the border strip. This will help create flat and smooth seams, ensuring a neat finish.
- Trim any excess fabric and threads: Once all the border strips are sewn on, trim any excess fabric and threads to achieve a clean and professional look.
Take your time and be mindful of aligning the border strips evenly and sewing them securely. Ensure that the corners of your quilt are mitered or pieced together smoothly for a seamless appearance. As you attach the piano keys border, the beauty of your quilt will truly start to shine.
With the border attached, step back and admire the transformation of your quilt. The piano keys border adds a touch of elegance and sophistication, elevating your quilt from ordinary to extraordinary.
Next, it’s time to move on to the final steps: quilting your project and adding those finishing touches that will make your piano keys quilt truly spectacular!
Step 5: Quilting and Finishing Touches
Now that you have attached the piano keys border to your quilt, it’s time to complete the final steps of quilting and adding those finishing touches to your project. These steps will add texture, depth, and a professional touch to your quilt. Here’s how you can proceed:
- Prepare the quilt sandwich: Lay your quilt backing fabric with the right side down. Place the quilt batting on top of the backing fabric, followed by your quilt top with the piano keys border. Smooth out any wrinkles or creases. Pin or baste the layers together to hold them in place.
- Choose your quilting design: Decide on the quilting design you want to use for your quilt. This can be simple straight lines, free-motion quilting, or any other design that suits your taste and skill level.
- Quilt the layers together: Using your chosen quilting method, stitch through all the layers of the quilt sandwich. Start quilting from the center and work your way outwards to avoid any puckering or distortion. Take your time and quilt with even stitches.
- Trim the excess batting and backing fabric: Once you have finished quilting, trim away any excess batting and backing fabric, leaving a small border around the quilt top.
- Add binding: To finish the edges of your quilt, attach binding strips. Fold the binding strips in half lengthwise and sew them to the edges of the quilt, wrapping them around to the back. Hand stitch or machine stitch the binding in place for a secure finish.
- Press and admire your finished quilt: Press the quilt to remove any wrinkles and give it a polished look. Take a step back and admire your completed piano keys quilt. You have created a beautiful and unique masterpiece!
With the quilting and finishing touches complete, your piano keys quilt is ready to be displayed or gifted to someone special. The combination of the stunning border and your quilting expertise will make this quilt a cherished keepsake for years to come.
Remember, quilting is a personal expression of creativity, and there are endless possibilities to explore. Feel free to experiment with different fabrics, patterns, and quilting techniques to create unique variations of the piano keys quilt border. Let your imagination guide you and enjoy the process of bringing your vision to life.
Congratulations on completing your piano keys quilt with a beautifully crafted border. Your dedication and skill have allowed you to create a work of art that will be cherished and admired. Happy quilting!
Conclusion
Congratulations on completing your journey to create a stunning piano keys quilt border! Throughout this article, we explored the process of choosing fabric, cutting fabric strips, sewing them together, attaching the border, and adding quilting and finishing touches. You have learned valuable techniques and tips that will help you create beautiful quilts with a touch of elegance and sophistication.
By choosing fabrics that coordinate well, playing with color and pattern, and paying attention to detail in your sewing, you have created a visually pleasing piano keys quilt border that adds a unique touch to your quilt. The process of sewing the strips together and attaching the border requires precision and patience, but the end result is well worth it.
Quilting is a truly fulfilling and rewarding craft that allows you to express your creativity and create beautiful pieces of art. The piano keys quilt border is just one of many techniques you can explore to enhance your quilting projects. Don’t be afraid to experiment with different fabrics, colors, and patterns to create your own unique designs.
Remember to take your time with each step and enjoy the process. Quilting is not only about the end result but also about the joy and satisfaction you experience along the way. Embrace the creative journey and let your quilts reflect your own personal style and passion.
As you continue to embark on new quilting projects, don’t hesitate to expand your skills and try out different techniques. The possibilities are endless, and each quilt you create is an opportunity to learn and grow as a quilter.
Now that you have completed your piano keys quilt border, take a step back and admire your masterpiece. Your hard work, dedication, and attention to detail have resulted in a quilt that is sure to impress and inspire others.
So, gather your materials, unleash your creativity, and let the sewing machine hum with excitement as you create more beautiful quilts. With each project, you are honing your skills and leaving a piece of your artistry behind.
Happy quilting!
Frequently Asked Questions about How To Make A Piano Keys Quilt Border
Was this page helpful?
At Storables.com, we guarantee accurate and reliable information. Our content, validated by Expert Board Contributors, is crafted following stringent Editorial Policies. We're committed to providing you with well-researched, expert-backed insights for all your informational needs.


0 thoughts on “How To Make A Piano Keys Quilt Border”