Articles
How To Make Borders For A Quilt
Modified: August 22, 2024
Learn how to make beautiful borders for your quilt with these helpful articles. Find step-by-step instructions and expert tips to enhance your quilting skills.
(Many of the links in this article redirect to a specific reviewed product. Your purchase of these products through affiliate links helps to generate commission for Storables.com, at no extra cost. Learn more)
Introduction
Welcome to the world of quilting! If you’re an aspiring quilter or have some experience in the craft, you might be looking to add borders to your quilt to give it that finishing touch. Borders not only enhance the overall aesthetic appeal of a quilt but also help frame the design and add structural stability.
In this article, we’ll explore the process of making borders for a quilt, from selecting the perfect fabric to attaching and embellishing them. Whether you’re a beginner or an experienced quilter, you’ll find useful tips and techniques to help you create beautiful borders that will elevate your quilt to the next level.
Before we dive into the details, it’s important to note that the techniques and measurements mentioned in this article are general guidelines. Depending on the specific quilt project you’re working on, you may need to adapt and modify them accordingly.
So, let’s roll up our sleeves and begin the journey of adding stunning borders to your quilt!
Key Takeaways:
- Elevate your quilting game by choosing the perfect fabric, calculating accurate measurements, and mastering the art of attaching, mitering, and embellishing quilt borders for a professional and polished finish.
- Transform your quilt into a work of art with carefully selected fabric, precise measurements, seamless piecing, and creative embellishments, showcasing your unique style and quilting expertise.
Read more: How To Make A Diamond Quilt Border
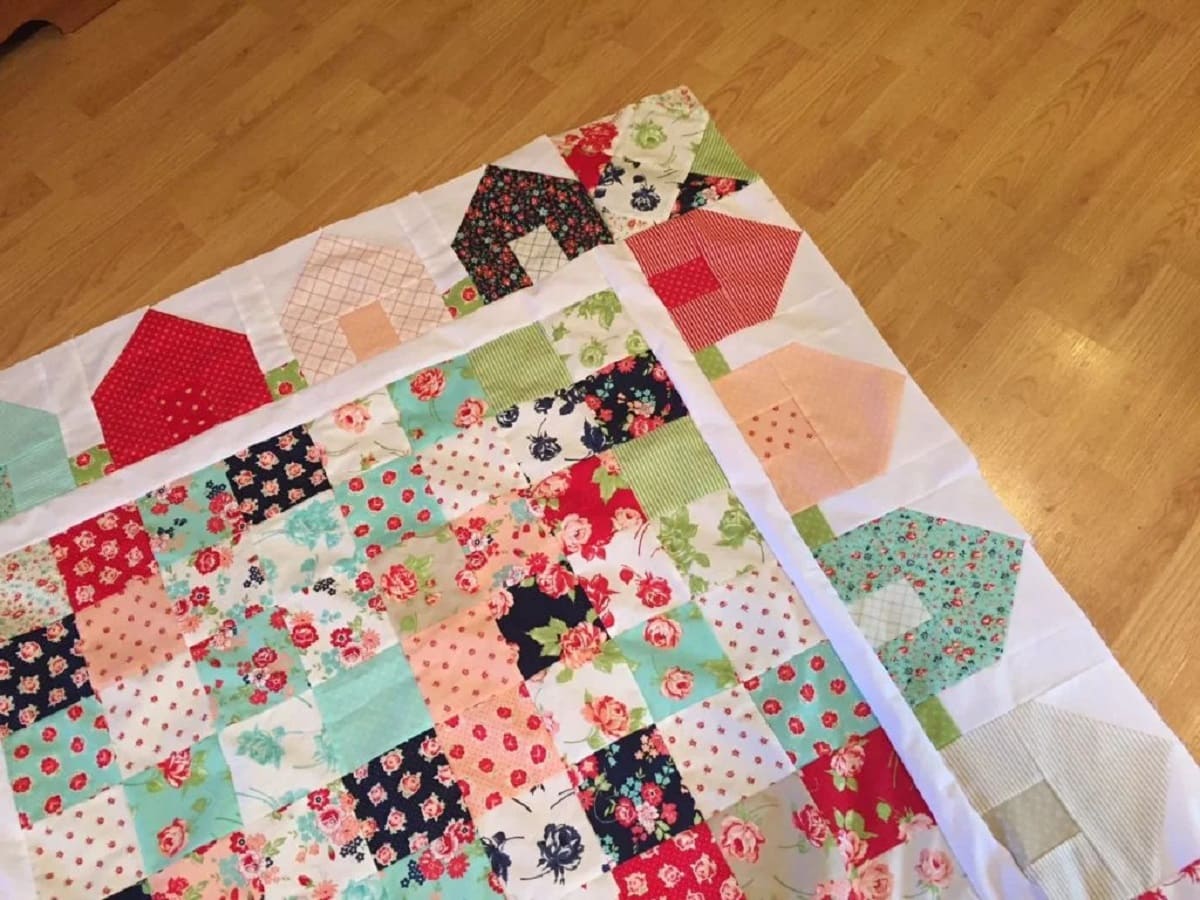
Choosing Fabric for Borders
When it comes to selecting the fabric for your quilt borders, there are a few factors to consider. The border fabric should complement the colors and patterns used in the quilt top while also adding visual interest and balance.
One approach is to choose a fabric that matches the main color or dominant pattern in your quilt. This will create a cohesive look and make the borders feel like a natural extension of the quilt top. Alternatively, you can opt for a contrasting fabric to add a pop of color or create a dynamic visual impact.
Consider the scale and density of the fabric’s print. If the quilt top has intricate or busy patterns, you may want to use a more subtle or solid fabric for the borders to avoid overwhelming the overall design. On the other hand, if the quilt top features larger blocks or simpler designs, a fabric with a bold print can add interest and create visual movement.
Another aspect to keep in mind is the fabric’s texture and weight. Quilt borders are typically made from cotton or other quilting fabrics, but you can also experiment with different textures like flannels, silks, or even velvet for a unique touch. Make sure that the chosen fabric is compatible with the rest of the quilt in terms of weight and care requirements.
Lastly, consider the overall theme or style of your quilt. If you’re making a traditional quilt, you might opt for a border fabric with a vintage or classic print. For a modern or contemporary quilt, a geometric or abstract print can work well. Don’t be afraid to explore different fabric options and trust your instincts when choosing the perfect border fabric.
Once you’ve selected the fabric for your borders, it’s time to calculate the measurements needed to cut and piece them. Let’s move on to the next section to learn how to calculate border measurements accurately.
Calculating Border Measurements
Accurate measurements are crucial when calculating and cutting border fabric for your quilt. Correct measurements ensure that the borders fit properly and maintain the overall symmetry of the quilt. Here’s a step-by-step guide to help you calculate border measurements:
- Measure your quilt top: Start by measuring the length and width of your quilt top. Take note of these measurements as they will be used to determine the length and width of your borders.
- Decide on the border width: Determine how wide you want your borders to be. This can vary depending on personal preference and the size of your quilt. A border width of 2-4 inches is a common choice.
- Calculate the length of your borders: To calculate the length of your borders, add the quilt top’s length measurement to twice the desired border width. For example, if your quilt top is 60 inches long and you want a 3-inch border, the formula would be: 60 + (2 * 3) = 66 inches.
- Calculate the width of your borders: Apply the same formula to calculate the width of your borders. Add the quilt top’s width measurement to twice the desired border width.
- Determining the total fabric needed: Once you have the length and width of your borders, multiply each measurement by the number of borders you plan to add. Typically, quilts have borders on all four sides, so the formula would be: (Length of borders * 2) + (Width of borders * 2).
- Account for seam allowances: Remember to add seam allowances to your measurements. A 1/4-inch seam allowance is standard in quilting, so adjust your measurements accordingly.
By following these steps and performing the necessary calculations, you can ensure that your borders fit well and complement your quilt top. Preparing accurate measurements will save you time and frustration during the quilting process.
Now that you know how to calculate border measurements, the next step is cutting and piecing the border strips. Let’s move on to the next section to learn the techniques for seamless borders.
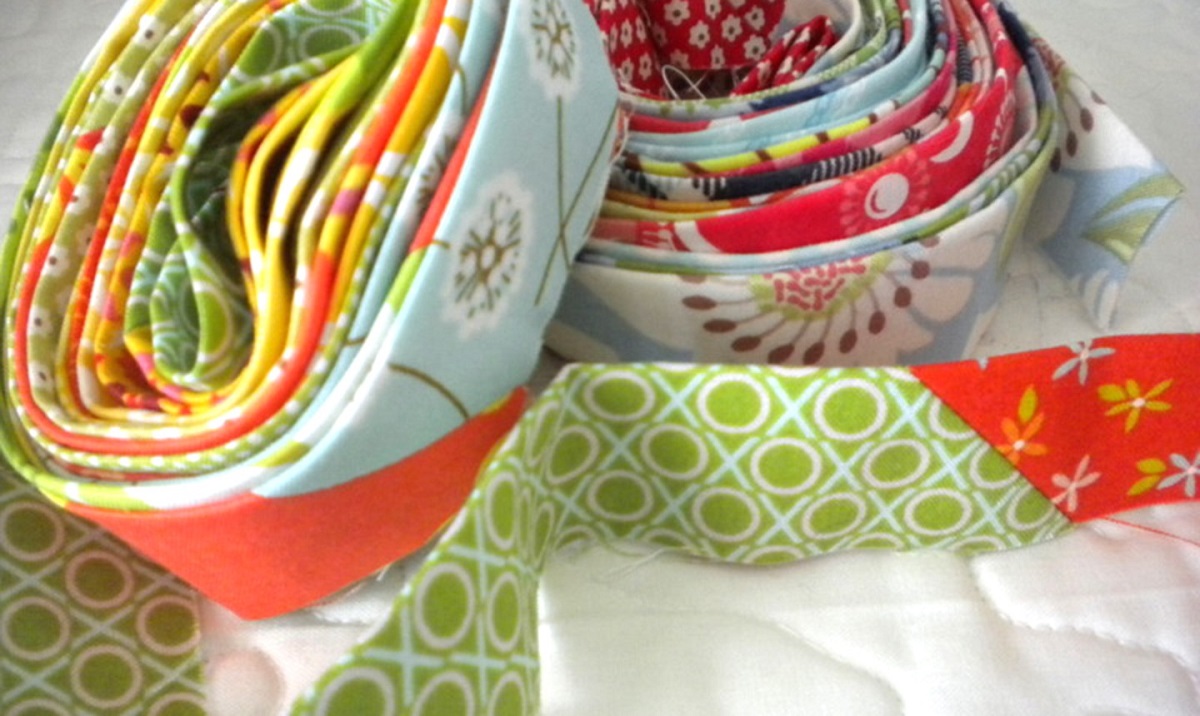
Cutting and Piecing Border Strips
Now that you have your border measurements, it’s time to cut and piece the border strips for your quilt. Follow these steps to ensure precise and seamless borders:
- Cut the fabric: Using a fabric rotary cutter or scissors, cut strips of fabric according to the calculated measurements for the length and width of your borders. Make sure to align the edges of the fabric properly before cutting to ensure straight and accurate strips.
- Join the strips: If your quilt requires multiple strips of fabric for each border, you’ll need to join them together to create longer strips. To do this, place the ends of two fabric strips right sides together and sew along the raw edges with a ¼-inch seam allowance. Press the seam open or to one side for a flat finish.
- Trim and square: After joining the strips, trim any excess fabric and square up the edges to ensure they are straight and aligned. This step is important to maintain the overall shape and integrity of your quilt.
- Attach the border strips to the quilt top: With right sides together, align the raw edges of the border strip with the corresponding side of the quilt top. Pin the fabric in place to prevent shifting during sewing. Sew along the raw edges with a ¼-inch seam allowance, removing the pins as you go. Repeat this step for each border.
- Press the seams: After attaching the border strips, press the seam allowances towards the borders to create a smooth and professional finish. Use a hot iron and press with firm, even pressure. Take care not to stretch or distort the fabric as you press.
By following these steps, you’ll be able to cut and piece the border strips accurately, ensuring a neat and seamless appearance for your quilt. It’s important to take your time and pay attention to detail to maintain the overall quality of your quilt.
Next, we’ll learn about mitered corners, a technique used to create clean and professional-looking border corners for your quilt.
Attaching Borders to Quilt Top
Attaching the borders to your quilt top is an important step in the quilting process. Properly aligning and sewing the borders will ensure that they lie flat and frame the quilt’s design seamlessly. Here’s a step-by-step guide to help you attach the borders to your quilt top:
- Prepare the quilt top: Lay your quilt top flat on a clean and smooth surface. Ensure that it is well-pressed and free from wrinkles or folds.
- Measure and mark: Start by measuring the length of your quilt top along the outer edges. Divide this measurement into thirds and mark the spots with pins or temporary fabric markers. Repeat this process to mark the width of the quilt top as well. These markings will help you evenly distribute and attach the borders.
- Align and pin: Take one border strip and align its raw edge with one side of the quilt top, right sides together. Match the markings on both the border strip and the quilt top. Pin the fabric in place at regular intervals, ensuring it is evenly distributed and there are no wrinkles or puckers.
- Sew the border: Using a ¼-inch seam allowance, stitch along the pinned edge of the border strip, attaching it to the quilt top. Remove the pins as you sew, keeping the fabric taut but not stretched. Repeat this step for the remaining sides of the quilt top, aligning and sewing the border strips accordingly.
- Press the seams: After attaching the borders, press the seam allowances towards the borders to create a smooth and flat finish. Use a hot iron and press with firm, even pressure. Take care not to distort or stretch the fabric as you press.
Take your time and be mindful of maintaining the overall squareness and alignment of your quilt top as you attach the borders. It’s important to sew with accuracy to ensure a professional-looking result.
Once the borders are attached, you can move on to the next step, which is creating mitered corners to add a polished touch to your quilt. We’ll explore this technique in the following section.
When making borders for a quilt, always measure the quilt top in three places (along the sides and through the middle) and use the average measurement to cut your border strips. This will help ensure that the borders lay flat and the quilt stays square.
Read more: How To Make A Piano Keys Quilt Border
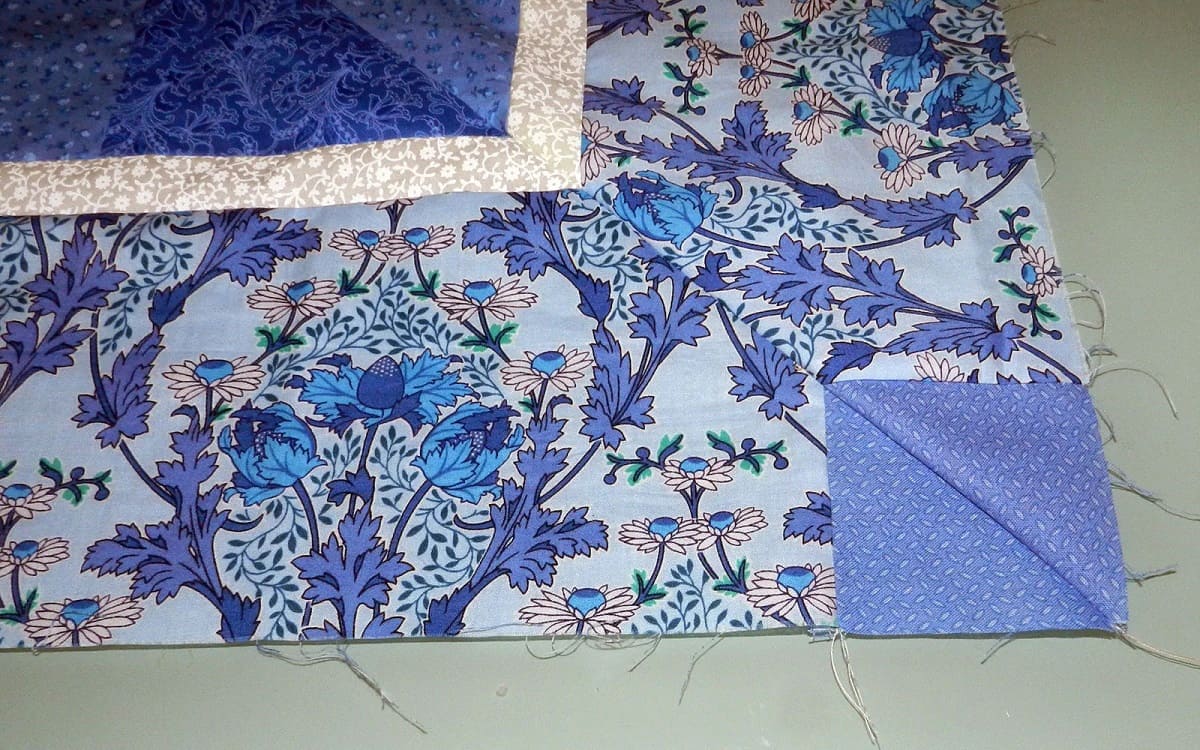
Mitered Corners for Borders
Mitered corners are a technique used to create clean and professional-looking corners for your quilt borders. They provide a seamless transition between the border strips and create a polished finish. Here’s a step-by-step guide to help you create mitered corners:
- Prepare your quilt top: Ensure that your quilt top and border strips are well-pressed and ready for the next steps.
- Mark the corner: Measure and mark a 45-degree angle starting from the corner of your quilt top. You can use a quilting ruler and fabric marking tool to create the angle accurately.
- Trim the excess fabric: Carefully trim away the excess fabric along the marked 45-degree angle. Take care to not cut into the seam allowance or the quilt top.
- Align and pin: Fold the border strip up and away from the quilt top, aligning the raw edge of the border strip with the adjacent side of the quilt top. The folded edge should align with the trimmed angle. Pin the fabric in place to secure it.
- Sew the corner: Sew along the pinned edge, starting at the edge of the border strip and ending at the 45-degree mark. Use a ¼-inch seam allowance and backstitch at the beginning and end to secure the stitches. Repeat this step for all four corners of the quilt top.
- Press the seams: After sewing, press the mitered corners open with a hot iron. Take care to press from the back and front to ensure that the corner lies flat and the seam is crisp.
Mitered corners create a clean and professional look for your quilt borders, adding a touch of elegance to your finished project. Practice this technique on scrap fabric before attempting it on your quilt top to ensure accuracy and confidence.
Once the mitered corners are complete, you’re ready to move on to the final steps of pressing and finishing the borders. Let’s explore these steps in the next section.
Pressing and Finishing the Borders
Proper pressing and finishing of the borders is essential to give your quilt a polished and professional appearance. Here are the steps to follow to achieve a well-pressed and finished border:
- Press the borders: Start by pressing the borders with a hot iron. Set the iron to the appropriate heat setting for the fabric you used in your borders and quilt top. Press the borders from the backside, moving the iron in a gentle up and down motion. Take care not to drag or distort the fabric as you press.
- Trim any excess fabric: After pressing, check for any excess fabric that may extend beyond the quilt top. Use fabric scissors or a rotary cutter to trim the borders evenly with the edges of the quilt top.
- Prepare for quilting: At this stage, you have the option to add any quilting stitches or designs to the borders. If you choose to do so, baste or mark your quilting lines before moving on to the next step.
- Attach the quilt backing: Place your quilt top with the attached borders face down on a clean and flat surface. Align the quilt backing fabric on top, right sides together. Pin or baste the layers together to prevent shifting during sewing.
- Sew around the edges: Using a ¼-inch seam allowance, stitch around the edges of the quilt, leaving a small opening for turning. Backstitch at the beginning and end to secure the stitches. Trim any excess threads or fabric.
- Turn right side out and press: Carefully turn the quilt right side out through the opening, then gently push out the corners using a blunt tool. Press the entire quilt, paying attention to the borders, to create a crisp and neat finish.
- Closing the opening: To close the opening left for turning, use a hand needle and matching thread to sew it closed using an invisible stitch or ladder stitch. Knot the thread securely and trim any excess.
Once the opening is closed, your quilt borders are pressed and finished, ready to be admired! Take a moment to give your quilt a final press to ensure that all the stitches and edges are smooth before displaying or gifting your beautiful creation.
In the final section, we’ll explore the idea of adding embellishments to your quilt borders to add a personal touch.
Adding Border Embellishments
Adding embellishments to your quilt borders can bring a unique and personal touch to your project. Whether you prefer a subtle accent or a bold statement, there are various options to explore. Here are some ideas for adding border embellishments:
- Embroidery: Consider adding embroidery stitches or designs to your borders. You can use different threads and stitches to create intricate patterns, monograms, or motifs that complement the overall quilt design.
- Appliqué: Appliqué is another popular way to embellish quilt borders. You can add fabric shapes, motifs, or even personalized elements such as your initials or favorite symbols. Hand appliqué or machine appliqué techniques can be used, depending on your preference.
- Ribbon or Trim: Explore adding decorative ribbons, trims, or lace to your quilt borders. These can be stitched along the edge or attached to the surface of the border for a visually pleasing contrast and texture.
- Buttons or Beads: Use buttons or beads to create eye-catching embellishments on your quilt borders. You can sew them in a specific pattern or scatter them randomly for a playful effect.
- Quilting designs: Enhance your quilt borders with quilting designs that complement the overall theme. Intricate or geometric quilting patterns can be sewn directly on the border fabric to create visual interest and texture.
- Piping: Adding piping along the edge of your quilt borders can create a defined and polished finish. It can be made using contrasting or coordinating fabric and gives a subtle yet elegant accent.
When adding embellishments, it’s important to consider the overall balance and harmony of your quilt design. Experiment with different options on sample fabric pieces before committing to a specific embellishment. Take your time, and let your creativity guide you in choosing the perfect embellishments for your quilt.
With the border embellishments complete, your quilt will truly be a one-of-a-kind piece of art. In the final section, let’s wrap up our discussion and reflect on the journey of making borders for a quilt.
Conclusion
Congratulations on successfully learning how to make borders for a quilt! Throughout this article, we explored the process of choosing fabric, calculating measurements, cutting and piecing border strips, attaching borders, creating mitered corners, pressing and finishing, and adding embellishments. Each step plays a crucial role in enhancing the overall aesthetic and functionality of your quilt.
By choosing the right fabric for your borders, you can create a cohesive and visually pleasing quilt design. Accurately calculating border measurements ensures a precise fit and maintains the symmetry of your quilt. Cutting and piecing border strips with care ensures seamless joins and a professional finish. Attaching the borders correctly frames your quilt top and gives it a polished appearance. Creating mitered corners adds an extra level of sophistication to your quilt’s borders. Pressing and finishing the borders provide the perfect finishing touches, while adding embellishments allows you to infuse your personal style and creativity into the design.
Remember that these techniques and guidelines are meant to serve as a starting point. As you gain more experience and develop your own quilting style, feel free to experiment and adapt the techniques to suit your needs.
Quilting is a labor of love, and the process of creating borders for your quilt adds the final touches that bring your vision to life. It requires patience, precision, and attention to detail. Enjoy the journey and take pride in the quilt you have crafted.
We hope this article has empowered you with the knowledge and confidence to create beautiful and captivating quilt borders. Whether it’s a cozy lap quilt, a stunning wall hanging, or a cherished heirloom, your quilt will be a testament to your creativity and skill.
So, gather your fabric, sharpen your scissors, and let your imagination soar as you embark on your next quilting adventure. Happy quilting!
Frequently Asked Questions about How To Make Borders For A Quilt
Was this page helpful?
At Storables.com, we guarantee accurate and reliable information. Our content, validated by Expert Board Contributors, is crafted following stringent Editorial Policies. We're committed to providing you with well-researched, expert-backed insights for all your informational needs.


0 thoughts on “How To Make Borders For A Quilt”