
Articles
How To Make Bread In A Bread Machine
Modified: February 26, 2024
Discover the best articles on how to make bread in a bread machine. Step-by-step guides, tips, and tricks to help you bake delicious homemade bread effortlessly.
(Many of the links in this article redirect to a specific reviewed product. Your purchase of these products through affiliate links helps to generate commission for Storables.com, at no extra cost. Learn more)
Introduction
There’s nothing quite like the smell of fresh bread filling your home. The warm, comforting aroma creates a sense of coziness and anticipation. While baking bread traditionally can be a time-consuming and labor-intensive process, using a bread machine simplifies the task significantly. Whether you’re a seasoned baker or a novice in the kitchen, making delicious bread in a bread machine is easier than you might think.
In this article, we’ll guide you through the process of making bread in a bread machine, from choosing the right machine to troubleshooting common issues. We’ll provide step-by-step instructions, helpful tips, and insights to ensure that your bread-making experience is a success.
So, if you’re ready to embark on a delightful baking adventure and fill your home with the tantalizing smell of freshly baked bread, let’s get started!
Key Takeaways:
- Choosing the right bread machine, preparing the bread pan, and adding ingredients in the correct order are crucial steps for successful bread-making in a bread machine. Pay attention to details for a delightful baking experience.
- From selecting the correct setting to troubleshooting common issues, mastering the art of bread-making in a bread machine requires patience, precision, and a willingness to experiment. Embrace the process and enjoy the satisfaction of creating delicious homemade bread.
Read more: How To Make Dough In Bread Machine
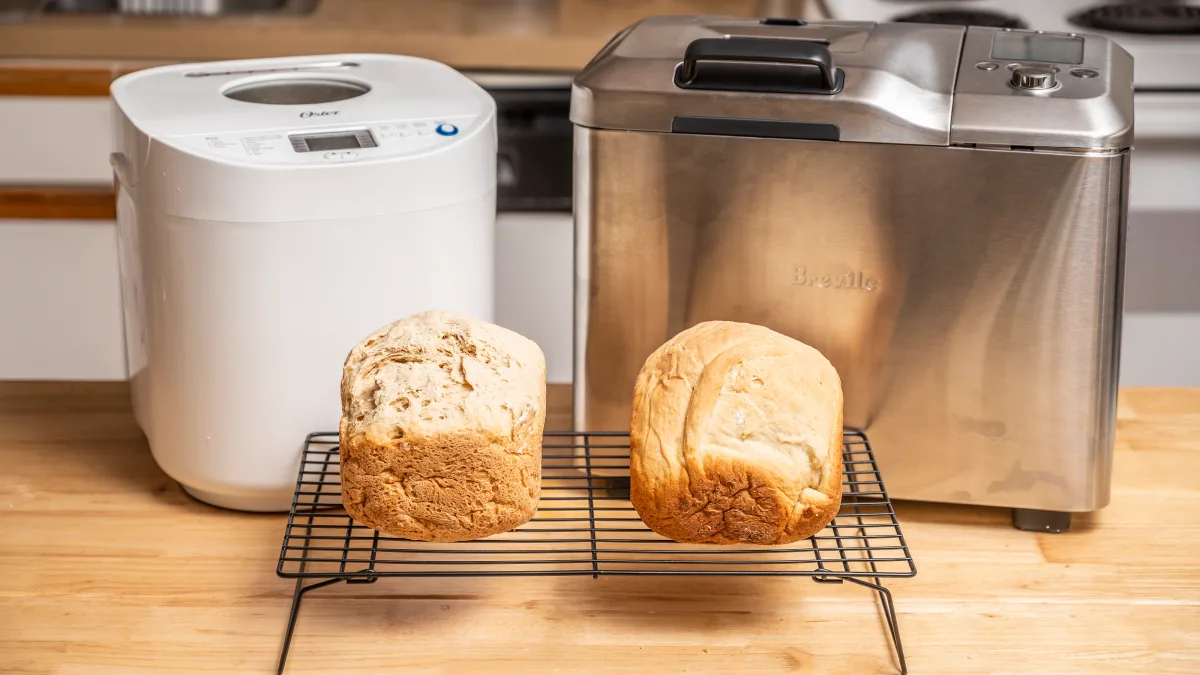
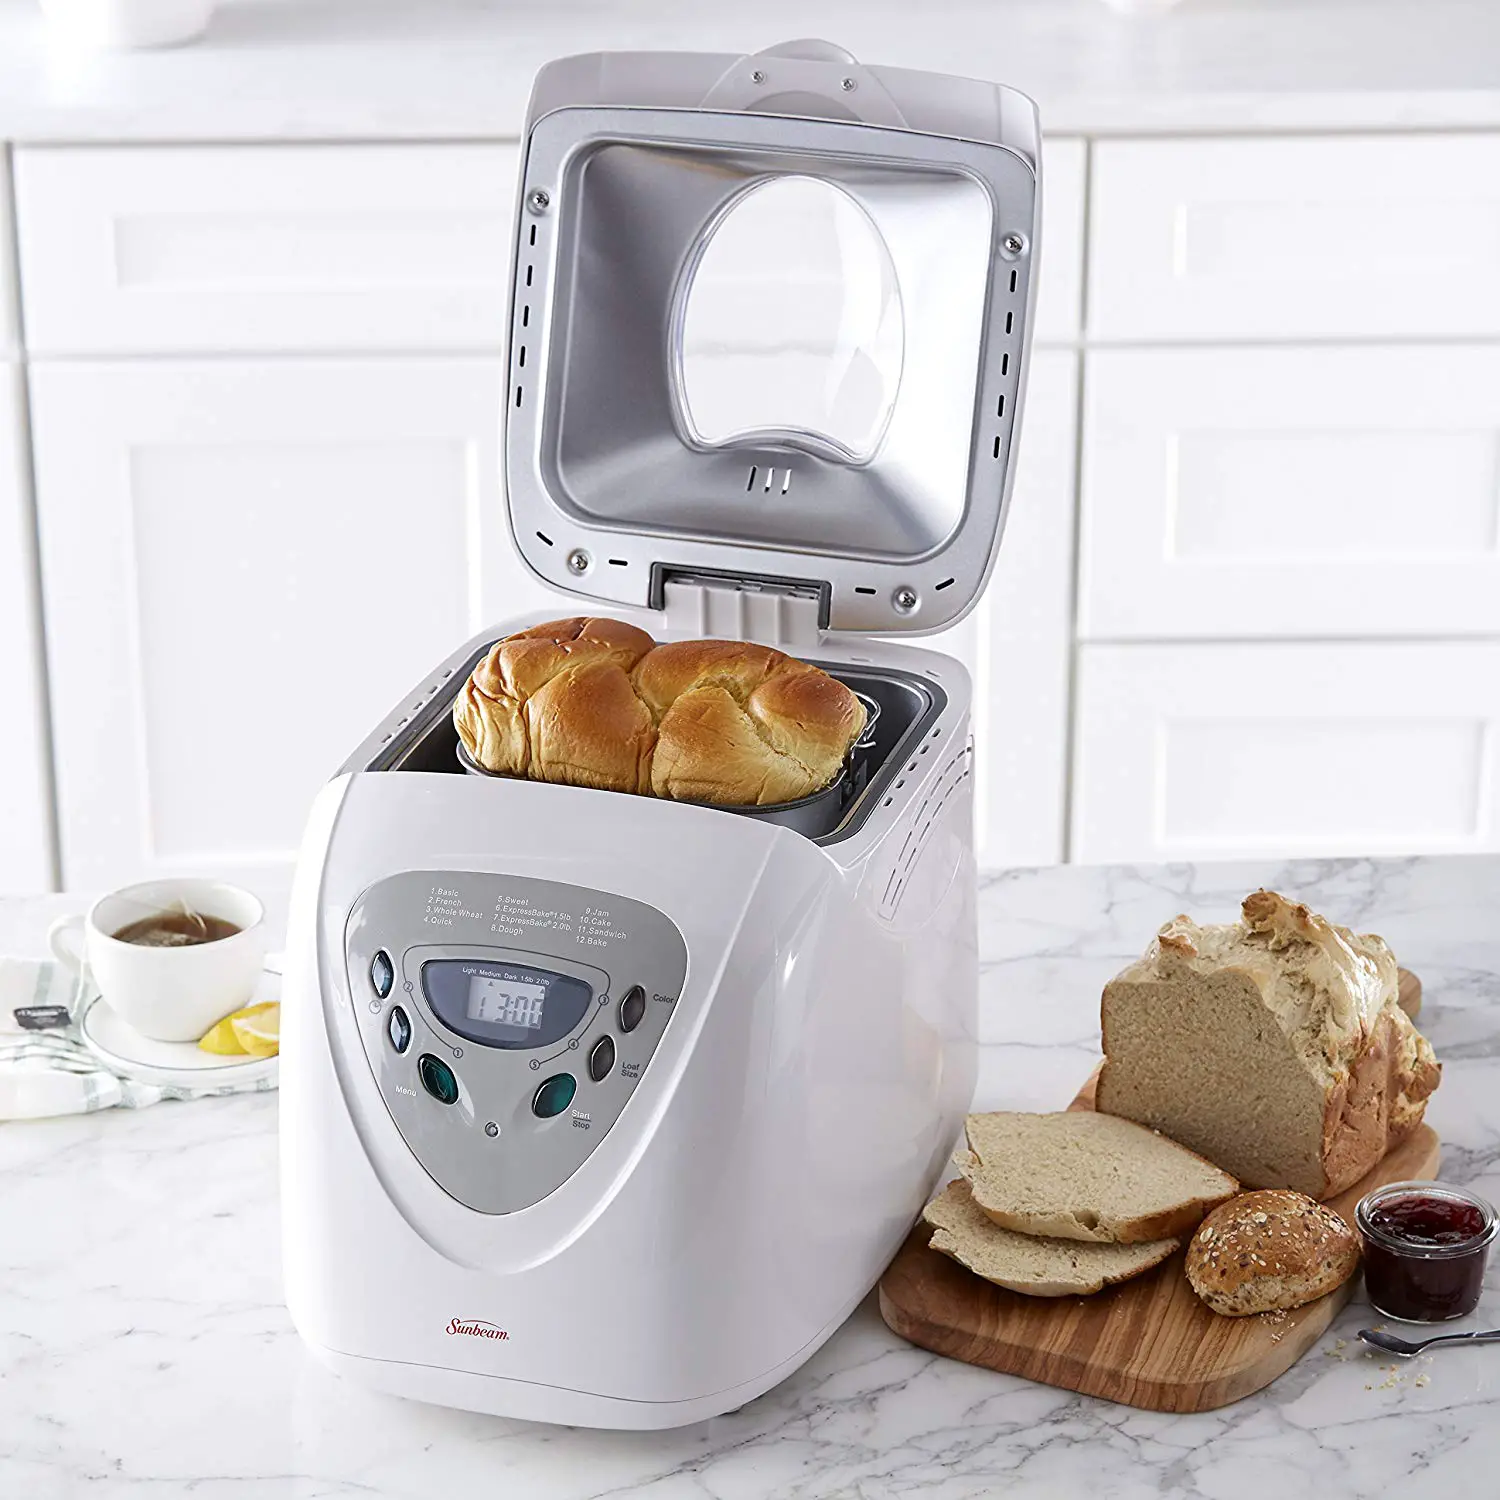
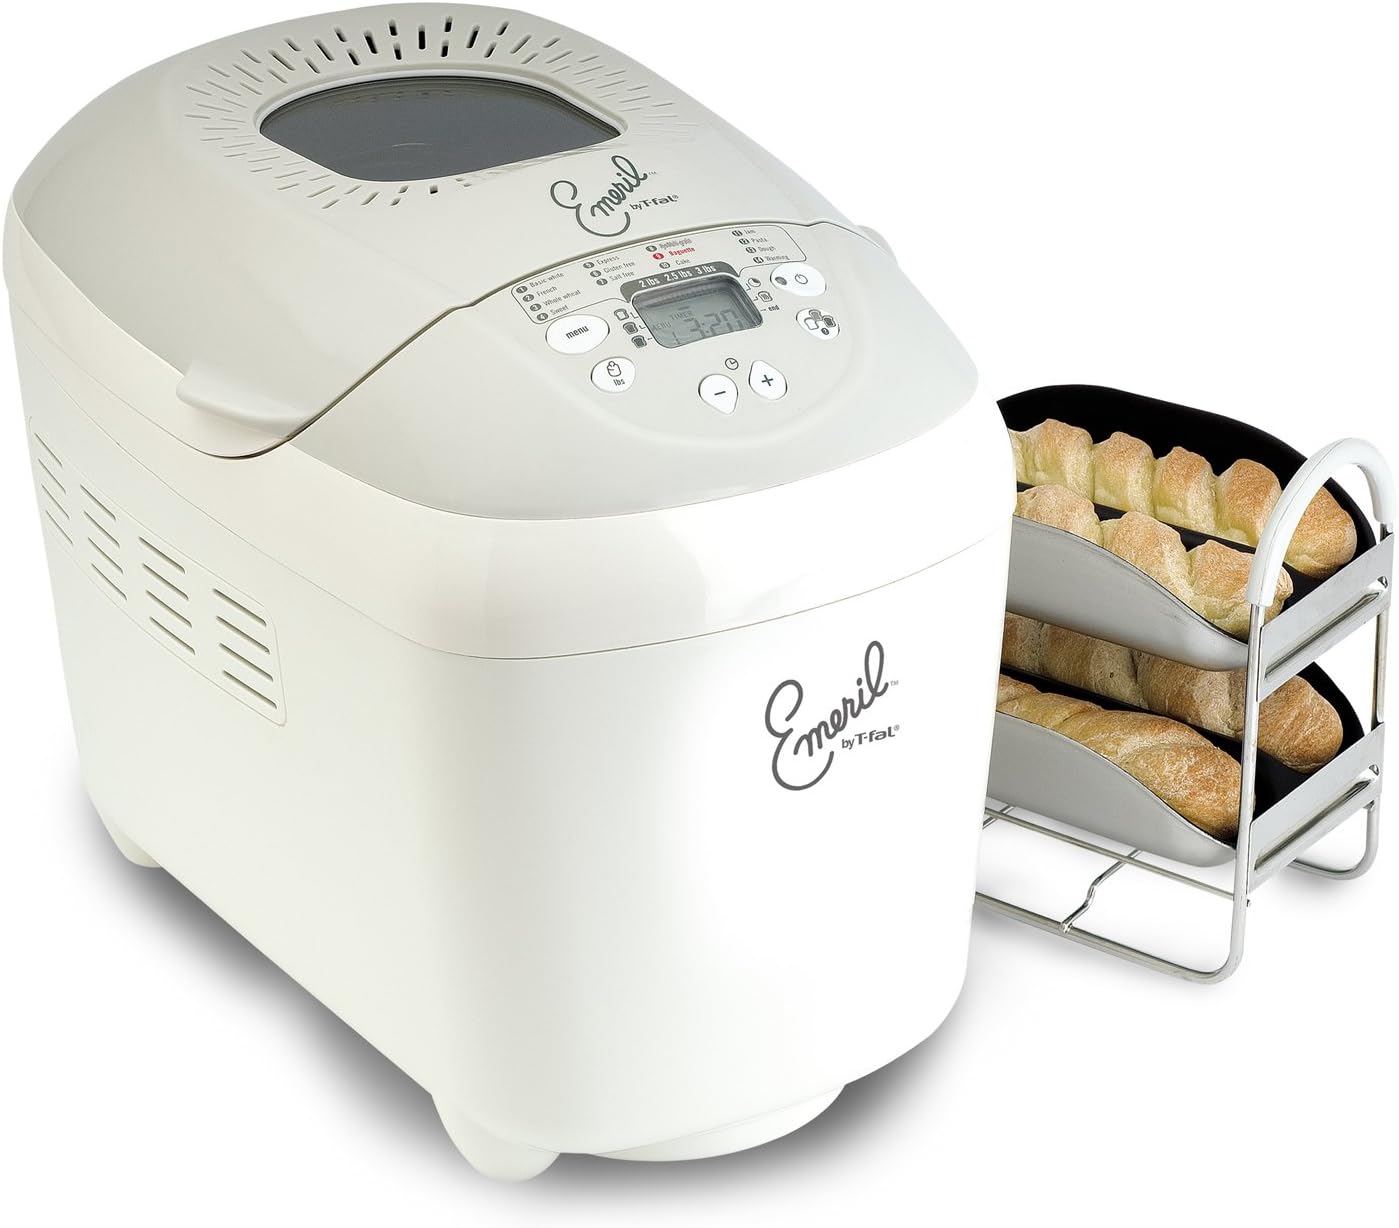
Choosing the Right Bread Machine
When it comes to selecting a bread machine, there are a few key factors to consider. Here’s a guide to help you make the right choice:
- Size: Consider the capacity of the bread machine and choose a size that suits your needs. If you have a small household, a compact machine with a smaller loaf size might be sufficient. However, if you have a large family or plan on baking bread for gatherings, opt for a larger machine with a higher loaf capacity.
- Settings: Look for a bread machine with a variety of settings to cater to different types of bread. Basic settings such as white bread, whole wheat, and dough are essential. Additional settings like gluten-free, artisan, and sweet bread can offer more versatility.
- Timer: A programmable timer allows you to set the machine to start at a specific time, so you can wake up to freshly baked bread in the morning or come home to a warm loaf in the evening. This feature is particularly convenient for those with busy schedules.
- Crust Options: Some bread machines offer different crust settings, allowing you to choose between light, medium, or dark crust. This allows you to customize the bread to your preferred level of crispness.
- Additional Features: Consider any additional features that might be important to you, such as a delay start function or a keep-warm setting that maintains the temperature of the bread after it’s done baking. Some machines even have built-in fruit and nut dispensers, making it easier to add mix-ins to your bread.
- Reviews and Ratings: Read customer reviews and check the ratings of different bread machines to get an idea of their performance, reliability, and durability. This can help you make an informed decision and choose a machine that has consistently positive feedback.
By considering these factors, you can find a bread machine that suits your needs, preferences, and budget. Once you have chosen the perfect machine, you’ll be one step closer to baking delightful homemade bread.
Ingredients and Measurements
Before you start baking bread in your bread machine, it’s important to gather all the necessary ingredients and ensure accurate measurements. Here’s a list of common ingredients and their measurements for a basic bread recipe:
- Flour: The main ingredient in bread is flour. Most recipes call for all-purpose flour or bread flour. The amount can vary, but a typical recipe may require around 3 cups (360 grams) of flour.
- Yeast: Yeast is responsible for leavening the bread and giving it its fluffy texture. Active dry yeast or instant yeast can be used. The amount usually ranges from 1 to 2 1/4 teaspoons, depending on the recipe.
- Liquid: Common liquids used in bread recipes include water and milk. The amount can vary, but as a general guideline, around 1 1/2 cups (360 milliliters) of liquid is used.
- Sugar: Sugar is added to feed the yeast and enhance the flavor of the bread. Typically, around 2 tablespoons of granulated sugar is used in a basic bread recipe.
- Salt: Salt adds flavor and helps to regulate the yeast. A teaspoon of salt is usually sufficient for most recipes.
- Fat: Fat adds moisture and richness to the bread. Common fats used in bread recipes include butter, oil, or even margarine. The quantity can range from 1 to 4 tablespoons, depending on your preference.
It’s important to emphasize that these measurements are just a guideline. Different recipes may have slight variations in ingredient quantities. Always refer to a specific recipe for accurate measurements.
Additionally, it’s crucial to measure your ingredients correctly. Use measuring cups or a kitchen scale to ensure accurate proportions. In bread baking, precision is key for successful results.
Now that you’re familiar with the common ingredients and basic measurements, you’re ready to move on to the next step of preparing your bread machine and pan.
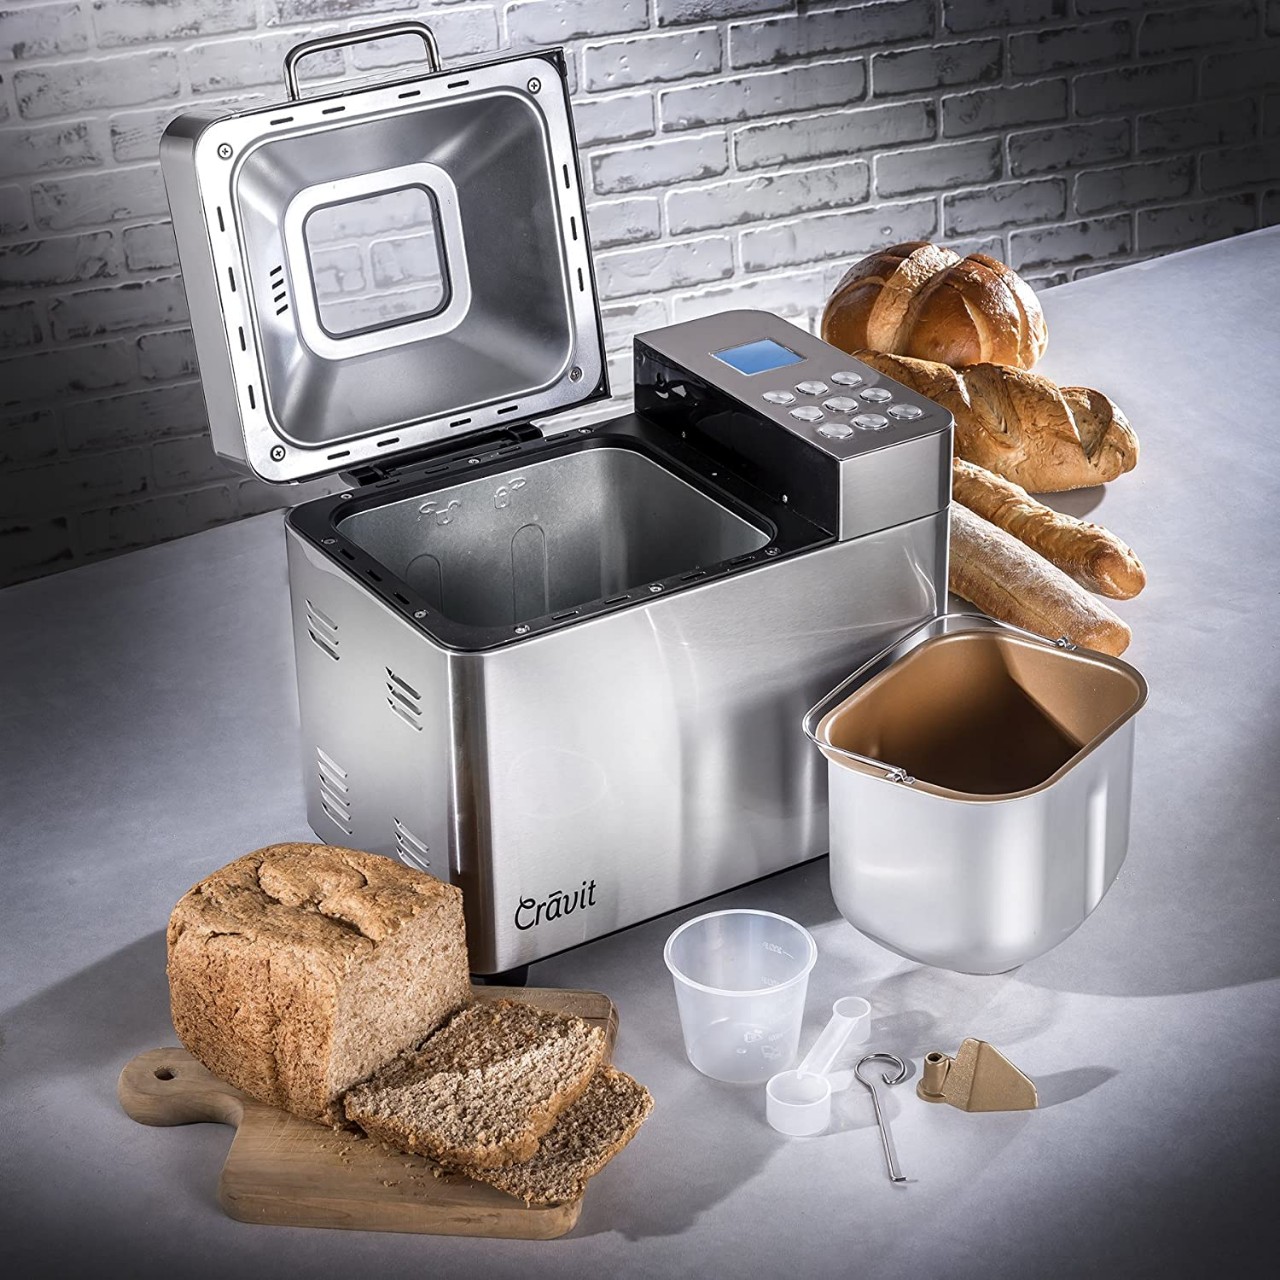
Preparing the Bread Pan
Preparing the bread pan is an important step in ensuring that your bread bakes properly and doesn’t stick to the pan. Here’s how to prepare the bread pan for optimal results:
- Check the Condition: Start by inspecting the bread pan. Look for any scratches, dents, or signs of wear. If the pan is damaged, it’s best to replace it to avoid any potential issues during the baking process.
- Grease the Pan: Even if your bread machine has a non-stick coating, it’s recommended to lightly grease the bread pan before adding the ingredients. This will further prevent sticking and make it easier to remove the bread once it’s done baking. You can use cooking spray, vegetable oil, or melted butter to grease the pan.
- Dust with Flour: After greasing the pan, lightly dust it with flour. This will create a barrier between the bread dough and the pan, helping to release the bread easily. Simply sprinkle a small amount of flour into the greased pan and gently shake it, ensuring that the flour coats the bottom and sides.
- Tap and Remove Excess: Once the pan is coated with flour, tap it on the counter or gently shake it to remove any excess flour. You want a thin layer of flour to remain in the pan for a smooth release.
- Insert the Paddle: Most bread machines come with a removable paddle that helps to knead and mix the dough. Insert the paddle into the designated slot at the bottom of the bread pan, ensuring that it fits securely.
By following these steps, you will prepare the bread pan to create a non-stick surface for baking your bread. Next, we’ll move on to adding the ingredients to the pan and starting the bread machine.
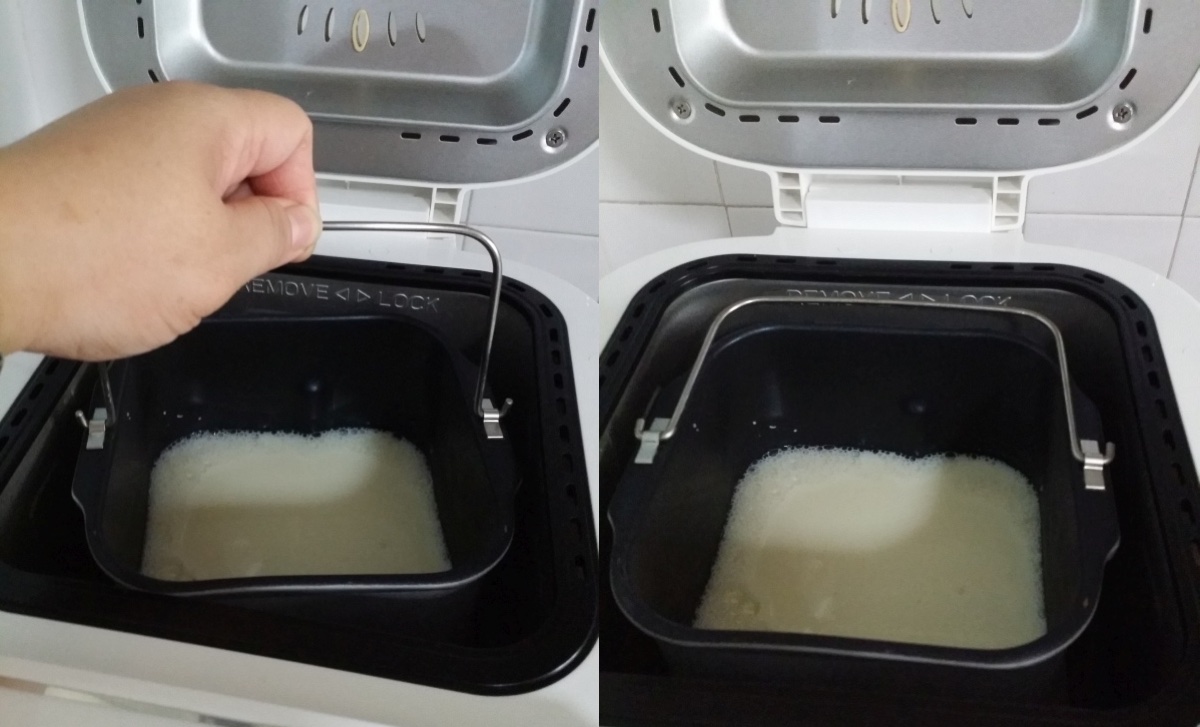
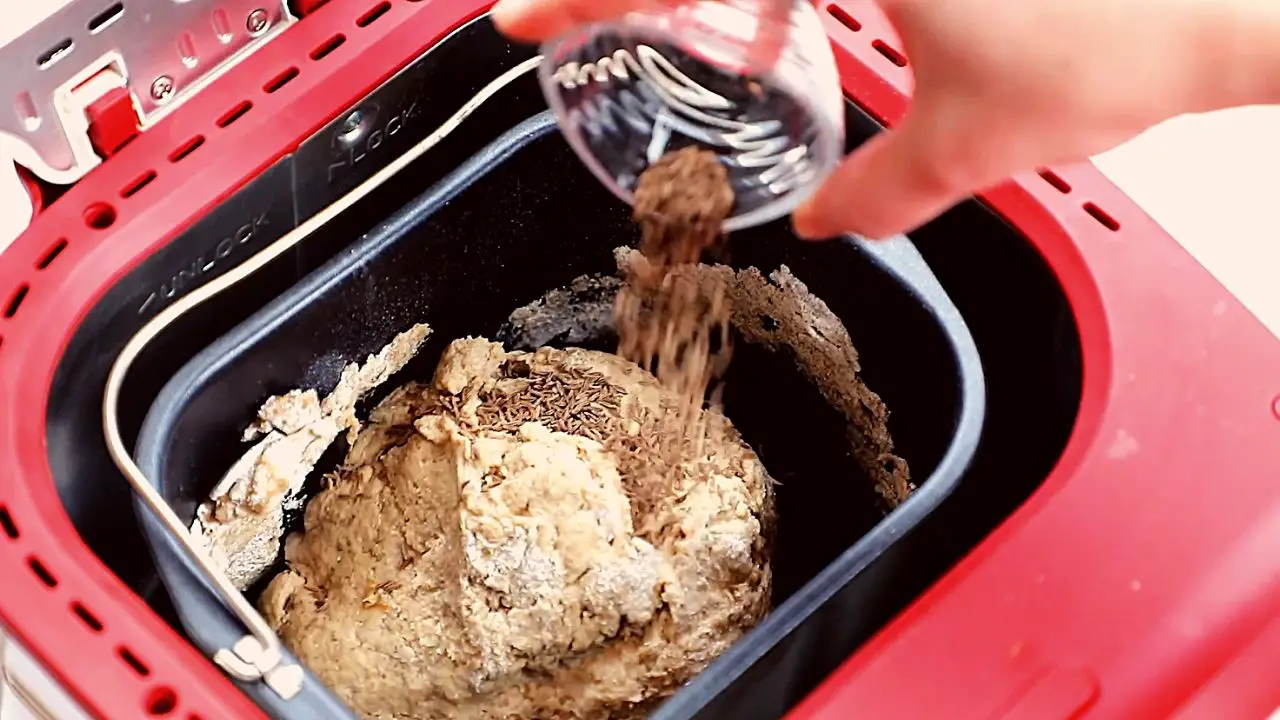
Adding the Ingredients
Once your bread pan is prepared, it’s time to add the ingredients for your bread recipe. Follow these steps to ensure that your ingredients are added in the correct order:
- Liquid: Start by pouring the liquid into the bread pan. This can be water, milk, or a combination of both, as specified in your recipe.
- Fat: Next, add the fat component, such as melted butter or oil, to the bread pan. This helps to keep the bread moist and adds flavor. If your recipe calls for any additional liquids (e.g., eggs, honey, or yogurt), you can add them along with the fat.
- Dry Ingredients: In a separate bowl, combine the dry ingredients—flour, sugar, salt, and yeast. Mix them well to distribute the ingredients evenly. Then, add this mixture to the bread pan on top of the liquids and fat. Ensure that the dry ingredients cover the liquids completely.
- Optional Additions: If you’re adding any extras to your bread, such as nuts, dried fruits, seeds, or spices, you can sprinkle them on top of the dry ingredient layer. Be mindful of any instructions in your recipe regarding the timing of adding these extras, as some machines have specific stages in the process for incorporating them.
Remember to follow the specific measurements and instructions provided by your recipe. Adding ingredients in the correct order is crucial to ensure that the bread machine mixes and kneads the dough effectively.
Once all the ingredients are added, you’re ready to select the appropriate setting on your bread machine and make any necessary adjustments to the recipe, which we’ll discuss in the next sections.
Read more: How To Make Sourdough In Bread Machine
Selecting the Correct Setting
Choosing the right setting on your bread machine is essential for achieving the desired texture and crust of your bread. While the available settings may vary between different bread machines, here are some common ones you’ll likely encounter:
- Basic/White Bread: This setting is ideal for baking standard white bread. It typically has a medium crust setting and a regular cycle length.
- Whole Wheat: Use this setting when baking bread with whole wheat flour or other whole grain flours. The whole wheat setting usually has a longer cycle to accommodate the heavier dough.
- Dough: If you want to prepare dough for shaped bread like baguettes or dinner rolls, select the dough setting. The machine will mix and knead the dough, but it won’t go through the baking process.
- Gluten-Free: For those following a gluten-free diet, many bread machines have a specific gluten-free setting. This setting has a different temperature and mixing pattern to accommodate gluten-free flours.
- Sweet Bread: Use this setting for bread recipes that contain additional sugar, honey, or other sweeteners. The sweet bread setting often has a longer rise time to allow the yeast and flavors to develop fully.
- Artisan: This setting is perfect for those who want to bake rustic artisan loaves with a chewy crust and airy texture. The artisan setting often includes a longer rise time and a hotter oven temperature.
Refer to your bread machine’s instruction manual to understand the specific settings available and their corresponding cycle lengths. Select the setting that aligns with your recipe and desired bread type. If you’re unsure, start with the basic/white bread setting as it works well for most bread recipes.
Once you’ve chosen the appropriate setting, you may need to make adjustments to the recipe to ensure optimal results. We’ll explore this topic in the next section.
Making Adjustments to the Recipe
While many bread machine recipes are reliable and produce excellent results, it’s not uncommon to make small adjustments to better suit your taste preferences or to accommodate specific dietary needs. Here are some adjustments you can consider:
- Flour: If you prefer a lighter texture, you can replace a portion of the all-purpose flour with bread flour. On the other hand, if you prefer a denser bread, you can use whole wheat flour or a combination of whole wheat and all-purpose flours.
- Sugar: Adjust the amount of sugar based on your preference. You can reduce the sugar or use alternative sweeteners like honey, maple syrup, or stevia.
- Fats: Feel free to experiment with different types of fats, such as olive oil, coconut oil, or even mashed avocado. Be mindful that different fats may affect the texture and flavor of the bread.
- Extras: Get creative with your mix-ins or add-ins. You can include nuts, dried fruits, seeds, herbs, or spices to add more flavor and texture to your bread. Just ensure that you follow any instructions regarding the timing of adding these extras.
- Yeast: If you want to achieve a faster rising time, you can increase the amount of yeast slightly. Conversely, if you prefer a longer rise for enhanced flavor development, you can decrease the amount of yeast. Make sure not to make drastic changes as it can affect the overall structure of the bread.
- Liquid: Adjust the amount of liquid based on the consistency of the dough. If the dough appears too dry and crumbly, add a small amount of liquid. On the other hand, if the dough looks too sticky, add a little bit more flour gradually until you achieve the desired consistency.
It’s important to note that making adjustments to a recipe is a matter of personal preference and experimentation. Start with small modifications and keep track of the changes you make, so you can replicate successful adjustments in the future.
Once you have made any necessary adjustments, it’s time to start your bread machine and let it work its magic. We’ll cover the next steps in the process in the following sections.
Add the wet ingredients first, followed by the dry ingredients, and then make a small well in the dry ingredients to add the yeast. This will help the bread machine to mix the ingredients more effectively.
Starting the Bread Machine
With your bread pan prepared, ingredients added, and the correct setting selected, it’s time to start your bread machine and let it do the work. Follow these steps to begin the baking process:
- Close the Lid: Ensure that the lid of your bread machine is securely closed. This is important to maintain the proper baking environment and temperature throughout the process.
- Plug in the Machine: Connect the bread machine to a power source and make sure it’s properly plugged in.
- Set the Timer: If your bread machine has a timer feature, you can program it to start at a specific time. This allows you to have freshly baked bread ready for a specific mealtime or when you wake up in the morning.
- Press Start: Simply press the “Start” or “On” button to initiate the bread-making process. The machine will begin mixing and kneading the dough, allowing it to rise and bake according to the selected setting.
- Avoid Opening the Lid: It’s tempting to peek inside the machine to check the progress, but try to resist the urge. Opening the lid can disrupt the baking process, cause temperature fluctuations, and affect the overall quality of the bread.
As the bread machine progresses through the different stages, you may hear various audible signals or see indications on the display panel. These signals can signify stages like adding mix-ins, additional rising times, or the completion of the baking process. Follow any prompts or instructions provided by your bread machine.
Now that your bread machine is running, it’s time to sit back, relax, and enjoy the anticipation of freshly baked bread. In the next section, we’ll discuss how to check the progress of your bread to ensure it’s baking perfectly.
Checking the Progress
While it’s crucial to avoid opening the lid frequently during the bread-making process, it’s important to check the progress at certain stages to ensure that everything is going smoothly. Here are a few checkpoints to keep in mind:
- Initial Mixing and Kneading: In the early stages of the cycle, listen for the sound of the machine as it mixes and kneads the dough. You should hear a consistent and rhythmic sound. If the noise seems irregular or too loud, it could indicate an issue with the machine. Refer to the instruction manual or contact the manufacturer for guidance.
- Rising: As the dough rises, you may want to periodically check through the viewing window (if your bread machine has one) to observe the progress. The dough’s size should visibly increase as it undergoes fermentation. If the dough appears to be rising too slowly or not rising at all, it could be due to inadequately activated yeast or cold ambient temperatures. Troubleshoot accordingly, following the next section on troubleshooting for more guidance.
- Baking: During the baking phase, you’ll start to notice the delicious aroma of bread filling your kitchen. Your machine may have a progress indicator or a countdown timer. Pay attention to these indicators, as they will let you know how much time is left in the baking process.
- Crust Color: Towards the end of the baking cycle, it’s essential to monitor the color of the crust. If it’s getting too dark for your liking, you may want to intervene and prevent it from burning. You can do this by covering the top of the bread with aluminum foil for the remaining baking time.
Remember, moderation is key when checking the progress of your bread. Avoid opening the lid excessively, as it can disrupt the baking process and affect the final outcome. Observing the key stages mentioned above should provide you with sufficient information to ensure that your bread is baking to perfection.
Once your bread has finished baking, the next step is to remove it from the machine. We’ll cover this topic in detail in the following section.
Read more: How To Make Jam In A Bread Machine
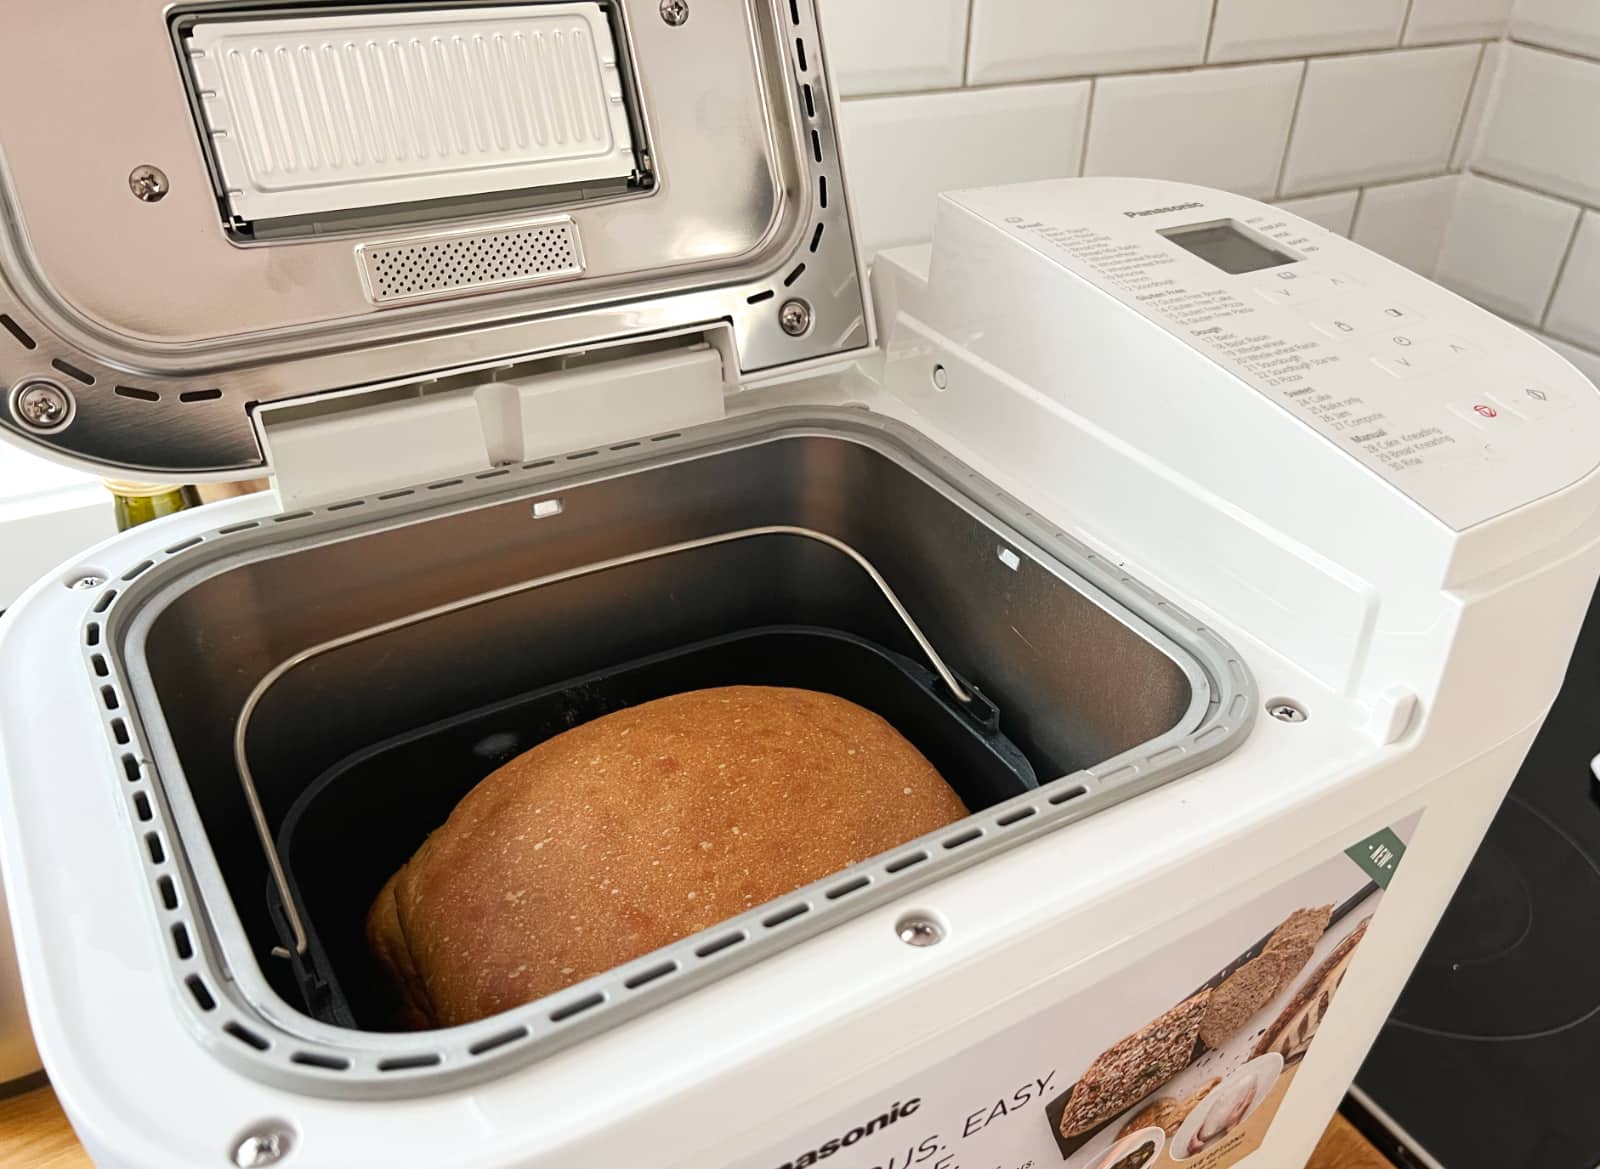
Removing the Bread from the Machine
As the baking cycle comes to an end, it’s time to remove the freshly baked bread from the machine. Follow these steps to safely extract your bread:
- Use Oven Mitts: The bread pan and the bread itself will be hot. Protect your hands by using oven mitts or heat-resistant gloves before handling the bread pan.
- Take Precautions: Tilt the bread pan slightly to one side to loosen the bread. Be careful as the paddle may still be attached to the bottom of the loaf. Gently shake the pan to help release the bread.
- Remove the Paddle: If the paddle is still embedded in the bread, remove it carefully. You can use a fork or tongs to grasp the paddle and gently twist and lift it out of the loaf. Be cautious to avoid squeezing or damaging the bread.
- Invert the Pan and Release the Bread: Turn the bread pan over onto a clean surface or wire cooling rack to release the bread. Tap the bottom of the pan or gently shake it until the loaf slides out. If needed, use a spatula or your hands to carefully lift the bread out of the pan.
- Cooling: Allow the bread to cool completely on a wire rack before slicing or serving. This will ensure that the interior of the bread sets properly and the flavors develop fully. While it may be tempting to dive right into the warm loaf, patience is key to achieving the best texture and taste.
Congratulations! You have successfully removed your freshly baked bread from the machine. It’s now ready to be enjoyed and savored.
Next, we’ll provide you with some tips to ensure perfect bread every time, as well as troubleshooting advice in case you encounter any issues during the baking process.
Tips for Perfect Bread
With these tips and tricks, you can elevate your bread-making skills and achieve perfect loaves every time:
- Follow the Recipe: While it’s tempting to improvise, especially for experienced bakers, it’s essential to follow the recipe closely, particularly when it comes to measurements and ingredient proportions.
- Use Fresh Ingredients: Fresh ingredients, especially yeast, can significantly impact the final result. Check the expiration date of your yeast and ensure your flour and other ingredients are not stale.
- Measure Accurately: Use measuring cups and spoons for dry ingredients and a kitchen scale for precise measurements. Accuracy is crucial to achieve the right texture and consistency.
- Room Temperature Ingredients: Ensure that any liquid ingredients, such as water or milk, are at room temperature. This helps the yeast activate and promotes proper fermentation.
- Experiment with Flours: Don’t be afraid to experiment with different types of flours, such as whole wheat, rye, or spelt flour. Combining different flours can add depth of flavor and nutritional value to your bread.
- Pay Attention to Dough Consistency: During the mixing and kneading phase, keep an eye on the dough’s consistency. It should be slightly tacky but not overly sticky. Adjust the liquid or flour as necessary to achieve this texture.
- Allow Proper Rising: Provide ample time and the right conditions for the dough to rise. Follow the recipe’s instructions for proofing, which may involve placing the dough in a warm spot or using the bread machine’s pre-set rise function.
- Avoid Disturbing the Machine: Let the bread machine do its work undisturbed. Avoid opening the lid frequently or moving the machine during the baking process, as this can affect the loaf’s rise and texture.
By following these tips, you’ll enhance your bread-making skills and increase the chances of achieving perfect loaves with each bake. Remember, practice makes perfect, so keep experimenting, learning, and enjoying the process.
However, if you encounter any issues along the way, don’t worry. We’ll cover some common troubleshooting tips in the next section.
Troubleshooting Common Issues
Even the most seasoned bread makers can run into problems from time to time. Here are some common issues you might encounter while using a bread machine and how to troubleshoot them:
- Dense or Heavy Loaf: A dense or heavy loaf is often a result of using too much flour or not enough liquid. Ensure that you measure your ingredients accurately and follow the recipe’s instructions closely. If the issue persists, try using bread flour or adjusting the liquid-to-flour ratio slightly.
- Sunken Top: A sunken top can occur if the yeast is not active enough or if the dough has risen for too long. Check the expiration date of your yeast and make sure to proof it properly before using it in the recipe. Additionally, try not to overproof the dough during the rising process.
- Uneven Rising or Baking: Uneven rising or baking can be caused by an uneven distribution of ingredients in the bread pan or an issue with the machine’s heating elements. Make sure to evenly distribute the dough in the pan and avoid overloading the machine. If the problem persists, consider contacting the manufacturer for assistance.
- Bread Collapsing: Bread collapsing in the middle is often a result of too much liquid or yeast, or insufficient gluten development during the mixing and kneading process. Adjust the ingredient quantities and ensure thorough mixing and kneading of the dough.
- Burnt or Dark Crust: If the crust of your bread consistently turns out burnt or too dark, it could be due to your machine’s temperature setting. Try selecting a lighter crust setting or reducing the baking time slightly. You can also cover the loaf with aluminum foil during the baking process to prevent excessive browning.
- Stuck Bread: If your bread is sticking to the pan, ensure that you properly greased and floured the pan before adding the ingredients. Additionally, avoid leaving the bread in the machine for an extended period after it’s done baking, as this can cause the loaf to stick.
If you encounter other issues not mentioned here, consult your bread machine’s instruction manual for troubleshooting guidance. Additionally, don’t hesitate to reach out to the manufacturer’s customer support for further assistance.
Remember that troubleshooting is a part of the learning process, and with a bit of patience and persistence, you’ll be able to overcome any challenges and create delicious homemade bread.
Now that you’re armed with troubleshooting knowledge, let’s move on to discuss the cleaning and maintenance of your bread machine.
Cleaning and Maintenance
Proper cleaning and maintenance of your bread machine are key to ensure its longevity and optimal performance. Here are some tips to keep your machine in top condition:
- Unplug and Cool Down: Before cleaning your bread machine, always unplug it from the power source and allow it to cool down completely. This is important for your safety and to prevent any damage to the machine.
- Remove the Bread Pan and Paddle: Carefully remove the bread pan and paddle from the machine. Some machines have removable paddles, while others may require the paddle to stay in the pan during the baking process. Refer to your instruction manual for guidance.
- Hand Wash the Bread Pan and Paddle: Wash the bread pan and paddle with warm soapy water. Use a non-abrasive sponge or cloth to clean the surfaces thoroughly. Avoid using harsh chemicals or abrasive cleaners, as they can damage the non-stick coating.
- Wipe the Machine Exterior: Use a damp cloth to wipe the exterior of the bread machine, including the control panel. Be careful not to get any moisture into the electrical components.
- Remove Crumbs and Debris: Regularly remove any bread crumbs or debris that may have accumulated in the machine. This can be done by gently shaking out the crumbs or using a soft brush or cloth to wipe them away.
- Allow to Dry: After cleaning, ensure that all parts are thoroughly dry before reassembling and storing the bread machine. Excess moisture can lead to mold growth or damage to the machine.
- Store in a Cool, Dry Place: When not in use, store your bread machine in a cool, dry place. Avoid storing it near heat sources or in direct sunlight, as this can affect its performance and lifespan.
- Regular Maintenance: Refer to your bread machine’s instruction manual for any specific maintenance requirements. Some machines may recommend periodic lubrication of moving parts or cleaning of internal components.
Following these cleaning and maintenance tips will help ensure that your bread machine stays in excellent condition and continues to produce delicious loaves of bread for years to come.
Now that you’re equipped with a deeper understanding of the cleaning and maintenance process, let’s conclude our journey to becoming bread-making experts.
Read more: How To Make Brioche In A Bread Machine
Conclusion
Congratulations! You’ve reached the end of our comprehensive guide on how to make bread in a bread machine. By now, you should have a good understanding of the steps and techniques involved in creating delicious homemade bread.
We started by discussing the importance of choosing the right bread machine for your needs and provided tips on selecting the correct setting based on your desired bread type. We then delved into the crucial aspects of ingredient measurement and preparation, ensuring that you have a solid foundation for successful baking.
We also covered troubleshooting common issues that may arise during the bread-making process. Remember, even if you encounter setbacks, such as an uneven rise or a dense loaf, don’t be discouraged. With practice and experimentation, you’ll overcome these challenges and continue to improve your bread-making skills.
Cleaning and maintaining your bread machine are vital for its longevity and performance. By following the recommended cleaning steps and regular maintenance, you’ll keep your machine in top shape and ensure many more batches of delicious bread in the future.
Now, armed with the tips and knowledge you’ve gained, it’s time to unleash your creativity and take your bread-making to new heights. Don’t hesitate to try different flours, experiment with flavors, and add your own personal touch to each loaf you create.
So, go forth, gather your ingredients, and let the aroma of freshly baked bread fill your home. Enjoy the satisfaction of slicing into a warm loaf and savoring the fruits of your labor. Whether it’s a simple sandwich bread, a crusty artisan loaf, or a delightful cinnamon swirl, there’s nothing quite like the taste and joy of homemade bread.
Frequently Asked Questions about How To Make Bread In A Bread Machine
Was this page helpful?
At Storables.com, we guarantee accurate and reliable information. Our content, validated by Expert Board Contributors, is crafted following stringent Editorial Policies. We're committed to providing you with well-researched, expert-backed insights for all your informational needs.


0 thoughts on “How To Make Bread In A Bread Machine”