Home>Articles>How To Make Gluten-Free Bread In A Bread Machine
Articles
How To Make Gluten-Free Bread In A Bread Machine
Modified: August 16, 2024
Discover helpful articles on how to make gluten-free bread using a bread machine. Explore step-by-step recipes and expert tips for delicious homemade gluten-free bread.
(Many of the links in this article redirect to a specific reviewed product. Your purchase of these products through affiliate links helps to generate commission for Storables.com, at no extra cost. Learn more)
Introduction
Gluten-free diets have gained popularity in recent years, as more and more individuals are diagnosed with gluten intolerance or celiac disease. For those who cannot tolerate gluten, finding suitable alternatives for everyday staples like bread can be a challenge. However, thanks to advancements in food technology, creating delicious gluten-free bread is now easier than ever.
In this article, we will explore how to make gluten-free bread using a bread machine. A bread machine takes the guesswork out of the process, ensuring that your gluten-free bread turns out perfectly every time. Whether you have a gluten intolerance, celiac disease, or simply want to adopt a gluten-free lifestyle, this guide will equip you with the knowledge and skills to create delicious gluten-free bread at home.
Before we dive into the specifics of making gluten-free bread in a bread machine, let’s take a moment to understand what gluten is and why it can be problematic for some individuals.
Gluten is a protein found in wheat, barley, and rye. It is what gives bread its elasticity and helps it rise. However, for individuals with celiac disease or gluten intolerance, consuming gluten can lead to a wide range of symptoms, including digestive issues, fatigue, and even damage to the small intestine. This is why it is crucial for those with gluten-related conditions to avoid gluten in their diets.
Fortunately, there are a variety of gluten-free flours and ingredients available that can be used as substitutes in baking. By understanding how to choose the right ingredients and adapt recipes, you can create gluten-free bread that is just as delicious and satisfying as its gluten-containing counterparts.
Now, let’s dive into the world of gluten-free bread making and discover the secrets to creating scrumptious loaves in your bread machine.
Key Takeaways:
- Making gluten-free bread in a bread machine is a convenient and enjoyable process that requires understanding the unique characteristics of gluten-free ingredients, utilizing the right settings, and experimenting with flavors and add-ins for personalized loaves.
- Successful gluten-free bread making involves precise ingredient measurements, proper resting and rising times, and the use of high-quality flour blends and binding agents. With patience and persistence, you can achieve delicious gluten-free bread that satisfies your cravings.
Read also: 12 Best Gluten Free Bread Machine For 2025
Understanding Gluten-Free Bread
Gluten-free bread is bread that is made without the use of wheat, barley, or rye, which are the primary sources of gluten. Instead, it relies on alternative flours and ingredients to achieve a similar texture and flavor. Understanding the unique characteristics of gluten-free bread is essential for successful baking.
One of the primary challenges of making gluten-free bread is replicating the elasticity and structure that gluten provides. Gluten is responsible for creating a network of proteins that trap air bubbles during the fermentation process, giving bread its light and fluffy texture. Without gluten, achieving this same level of rise and texture can be difficult.
Gluten-free flours, such as rice flour, almond flour, sorghum flour, and tapioca flour, have different properties compared to wheat flour. They lack the gluten proteins that provide structure, resulting in a denser texture. However, with the right combination of flours and ingredients, it is possible to achieve a light and airy gluten-free bread.
In addition to the absence of gluten, other factors contribute to the unique characteristics of gluten-free bread. One such factor is the use of binding agents and gums, such as xanthan gum or guar gum. These ingredients help mimic the elasticity and structure that gluten provides, giving the bread a better rise and texture.
Another consideration is the use of additional leavening agents, such as yeast or baking powder. These ingredients work in tandem with the gluten-free flours and binding agents to help the bread rise and achieve a desirable texture.
It is important to note that gluten-free bread may have a shorter shelf life and may dry out more quickly compared to bread made with wheat flour. This is due to the absence of gluten, which helps retain moisture. To keep your gluten-free bread fresh for longer, it is best to store it in an airtight container or freeze it for later use.
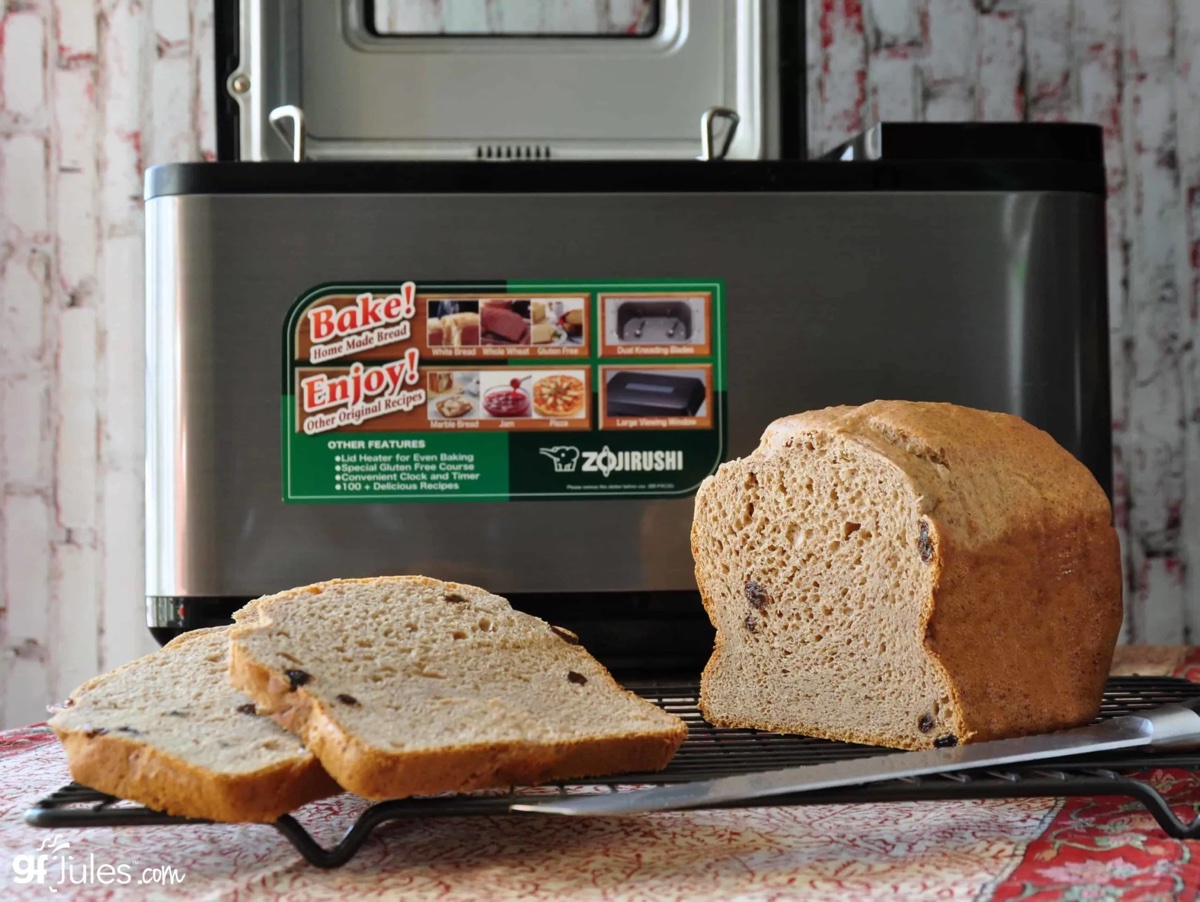
When it comes to the flavors and variations of gluten-free bread, the options are vast. You can experiment with different flour combinations, add-ins such as herbs or seeds, or even try sweet variations like gluten-free cinnamon raisin bread. The key is to understand the basic principles of gluten-free bread making and then unleash your creativity to create unique and delicious loaves.
Now that you have a better understanding of the challenges and characteristics of gluten-free bread, let’s explore how to choose the right ingredients for your homemade gluten-free bread.
Choosing the Right Ingredients
When it comes to making gluten-free bread, choosing the right ingredients is crucial for achieving a delicious and satisfying result. Here are some essential considerations when selecting ingredients for your gluten-free bread:
Gluten-Free Flours: Replace traditional wheat flour with gluten-free flours like rice flour, almond flour, sorghum flour, or a gluten-free flour blend. Experiment with different combinations to achieve the desired texture and flavor in your bread.
Binding Agents: Since gluten is responsible for creating structure in bread, it’s important to add binding agents that mimic its effects. Common options include xanthan gum, guar gum, or psyllium husk powder. These help improve the texture and rise of your gluten-free bread.
Leavening Agents: Utilize leavening agents such as yeast or baking powder to help your bread rise. This is especially important due to the absence of gluten, which normally aids in the fermentation process. Follow the instructions in your recipe regarding the use of these agents.
Liquid Ingredients: In gluten-free bread making, it’s often necessary to increase the liquid content to compensate for the absorbency of gluten-free flours. This helps create a softer, less dense loaf. Consider using ingredients like water, milk, or non-dairy alternatives to achieve the desired hydration level.
Eggs or Egg Replacers: Eggs provide structure and moisture in traditional bread recipes. If you’re following a vegan or egg-free diet, you’ll need to find suitable alternatives. Options like flaxseed meal, chickpea flour, or commercial egg replacers can help maintain the structure and moisture in your gluten-free bread.
Flavor Enhancers: Adding extra flavor to your gluten-free bread is a great way to experiment and personalize your recipe. Consider incorporating ingredients like herbs, spices, seeds, or even dried fruits or nuts to enhance the taste of your bread.
Salt and Sugar: Don’t forget to include the necessary amounts of salt and sugar in your recipe. Salt enhances the flavor of the bread, while sugar helps with browning and adds a touch of sweetness. Adjust these ingredients according to your taste preferences.
When selecting ingredients for your gluten-free bread, make sure to check the labels and opt for certified gluten-free products to ensure they are free from contamination. Cross-contamination can occur during the manufacturing process, so it’s essential to choose ingredients that are specifically labeled gluten-free.
Now that you are familiar with the key considerations when selecting ingredients, it’s time to adapt a regular bread recipe for gluten-free bread-making in your bread machine. We will explore this process in the next section.
Adapting a Regular Bread Recipe for Gluten-Free
If you have a favorite bread recipe that you’ve been using for years, adapting it to make gluten-free bread is possible with a few adjustments. While gluten-free bread requires different ingredients and techniques, you can still achieve a delicious loaf by following these steps:
1. Choose the Right Flours: Start by replacing the regular wheat flour in your recipe with a gluten-free flour or flour blend. Experiment with different combinations to find the one that works best for you. Keep in mind that gluten-free flours have different properties, so a blend of different flours usually yields the best results.
2. Add Binding Agents: Since gluten-free flours lack the structure provided by gluten, it’s important to add binding agents to your recipe. Xanthan gum or guar gum can help replicate the elasticity and structure of gluten, improving the texture of your bread.
3. Adjust the Liquid Content: Gluten-free flours tend to absorb more liquid than regular wheat flour. As a result, you may need to increase the liquid content in your recipe. The exact amount can vary, so start by adding a little more liquid than the original recipe calls for, and adjust as needed until you achieve the desired consistency.
4. Incorporate Additional Leavening: Gluten-free bread often benefits from extra leavening agents to help it rise properly. Consult your recipe to determine if additional yeast or baking powder is needed and adjust accordingly.
5. Consider Using Eggs or Egg Replacers: Eggs provide structure and moisture in traditional bread recipes. If you’re following a vegan or egg-free diet, you’ll need to find suitable alternatives. Options like flaxseed meal, chickpea flour, or commercial egg replacers can help maintain the structure and moisture in your gluten-free bread.
6. Let the Dough Rest: Gluten-free dough often benefits from a longer resting time to allow the flours to hydrate fully and the flavors to develop. Follow the recipe instructions for the recommended resting time and temperature.
7. Bake at the Right Temperature: Gluten-free bread may require a slightly lower baking temperature and longer baking time compared to regular bread. This is because gluten-free flours tend to brown more quickly. Monitor your bread closely during the baking process and adjust the temperature and time as needed.
By adapting a regular bread recipe with these tips in mind, you can create gluten-free bread that is just as delicious and satisfying as its gluten-containing counterpart. However, if you own a bread machine, utilizing its specific settings and functions can help simplify the process even further. Let’s explore how to use a bread machine to make gluten-free bread in the next section.
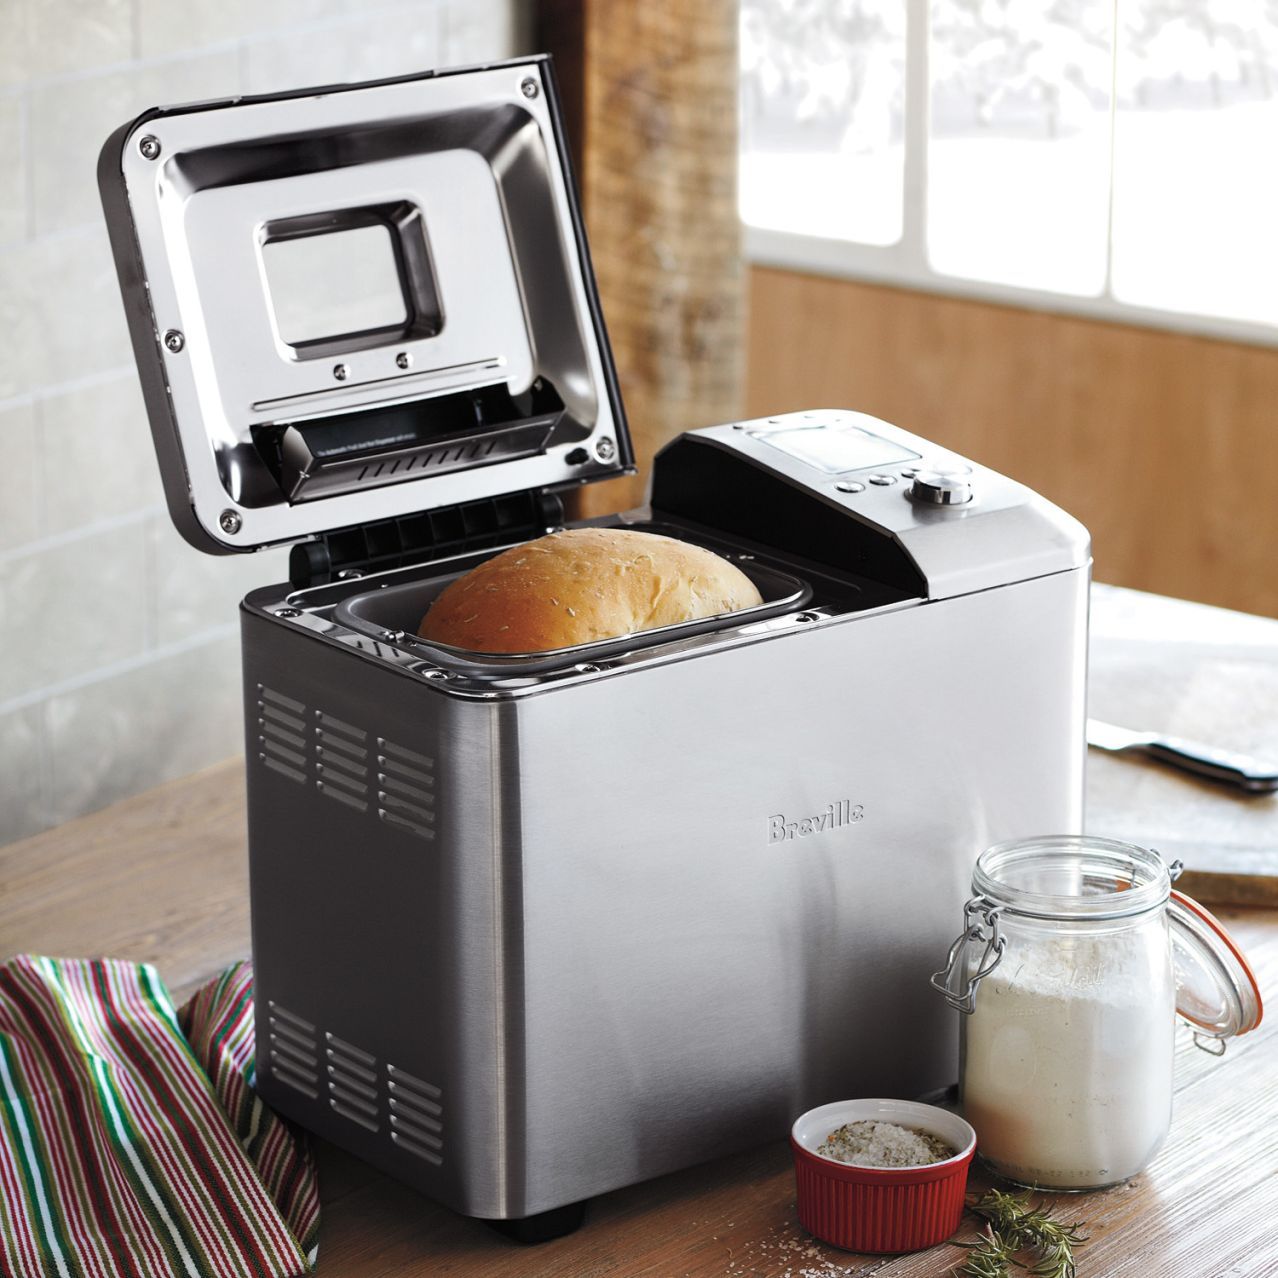
Using a Bread Machine for Gluten-Free Bread
A bread machine can be a valuable tool when it comes to making gluten-free bread. It takes the guesswork out of the process, allowing you to easily mix, knead, and bake your bread all in one device. Here are some tips for using a bread machine to make gluten-free bread:
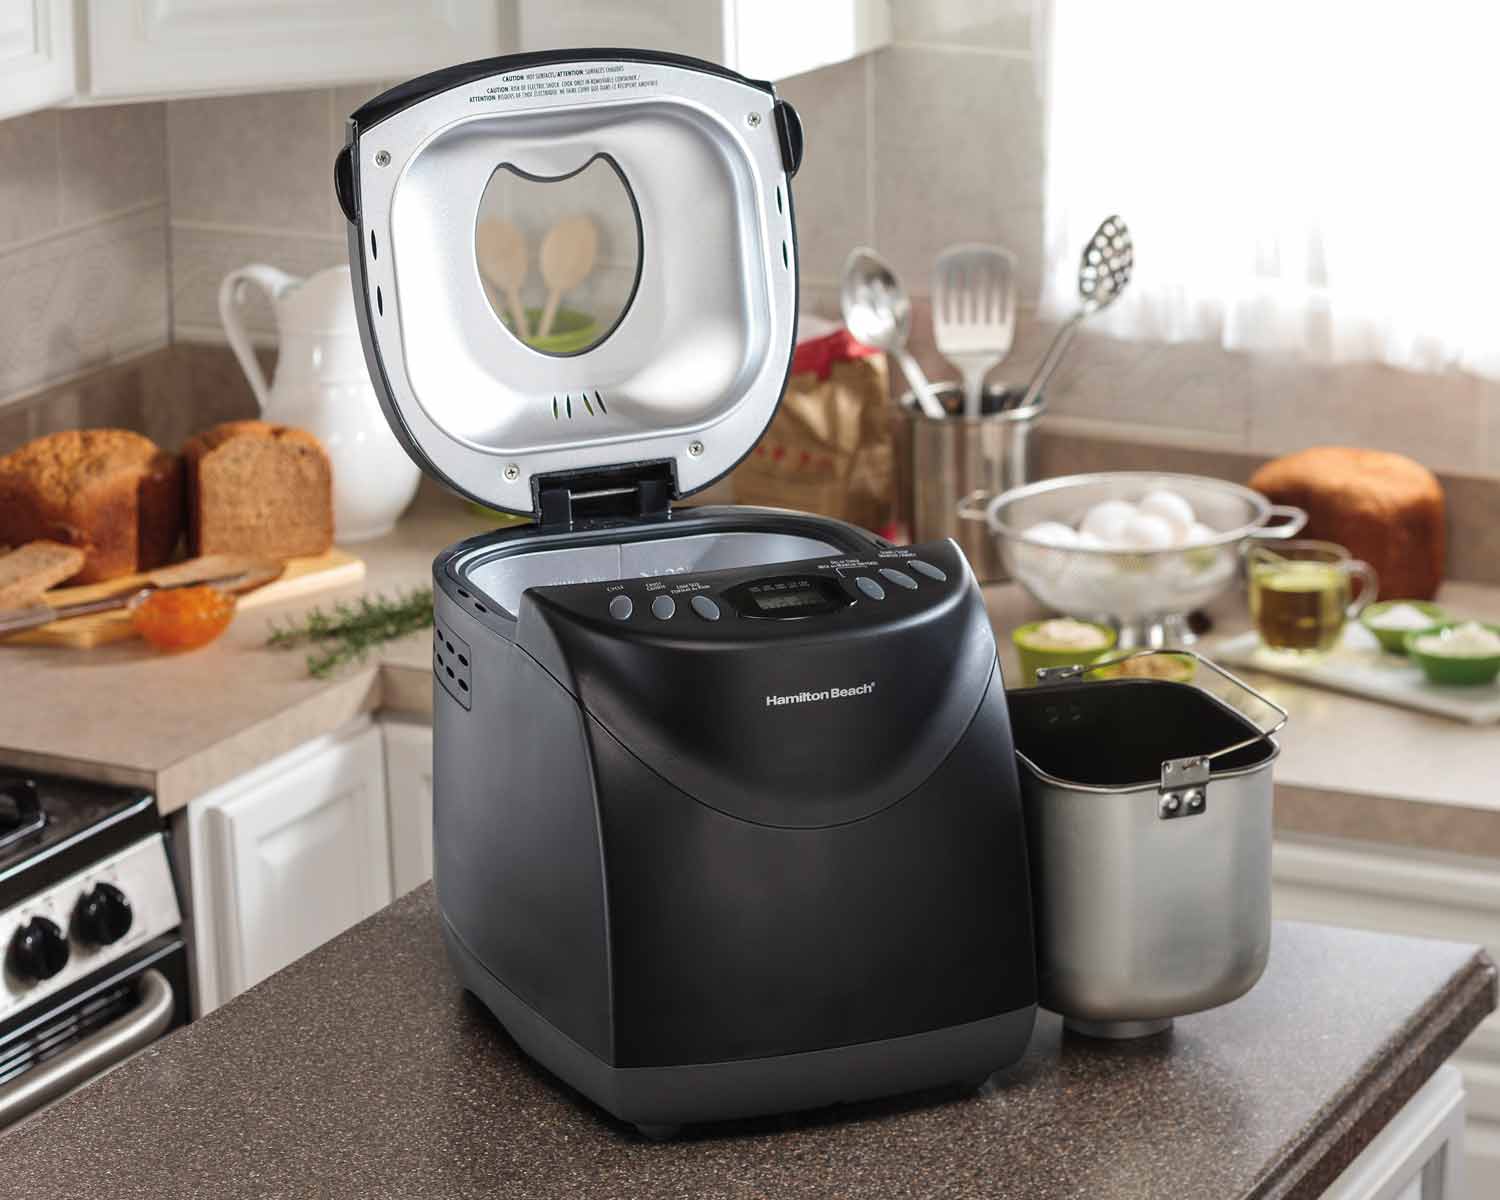
1. Select the Right Bread Machine: Not all bread machines are created equal when it comes to gluten-free bread making. Look for a machine that has specific gluten-free settings or customizable programs. These settings are designed to accommodate the unique needs of gluten-free dough, providing optimal results.
2. Use the Gluten-Free Setting: If your bread machine has a dedicated gluten-free setting, use it. This setting has specific programming that adjusts the kneading, rising, and baking times to cater to gluten-free bread recipes. It helps achieve a better rise and texture in your bread.
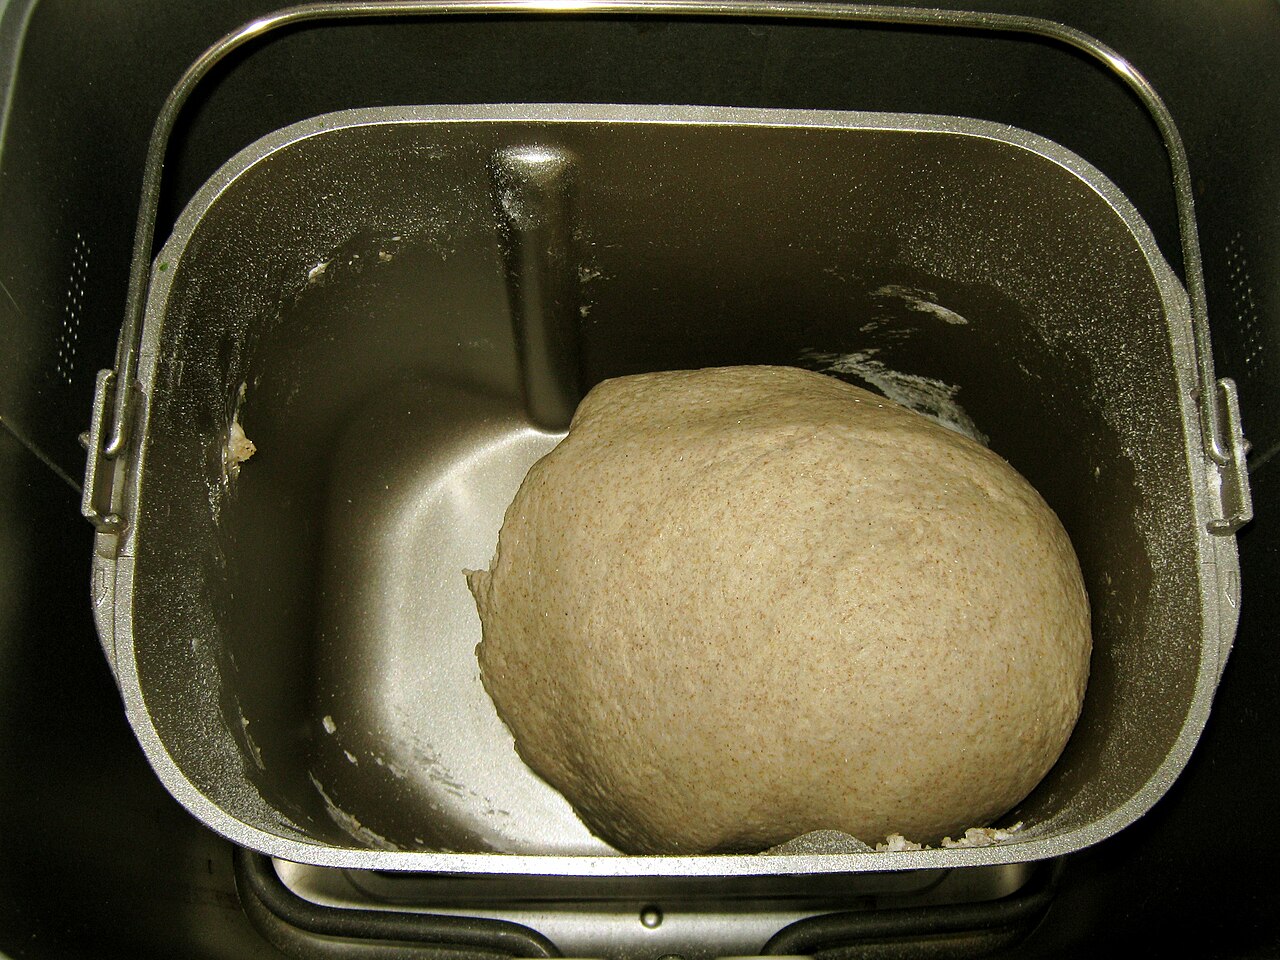
3. Adjust the Kneading and Mixing: Gluten-free dough requires different mixing and kneading techniques compared to regular wheat dough. Gluten-free flours don’t require as much kneading, so be mindful not to overmix the dough. Many bread machines with a gluten-free setting have shorter kneading cycles to accommodate this.
4. Allow for Extra Rising Time: Gluten-free bread dough might need more time to rise compared to traditional bread dough. This is due to the absence of gluten, which normally aids in the fermentation process. Follow the recommended rising time in your recipe, and if needed, consider extending it slightly.
5. Monitor the Baking Time: Gluten-free bread may require a longer baking time compared to regular bread. This is to ensure that the center of the loaf is fully cooked and the crust is golden brown. Check the bread for doneness by inserting a toothpick into the center – it should come out clean. If needed, add a few extra minutes to the baking time and check again.
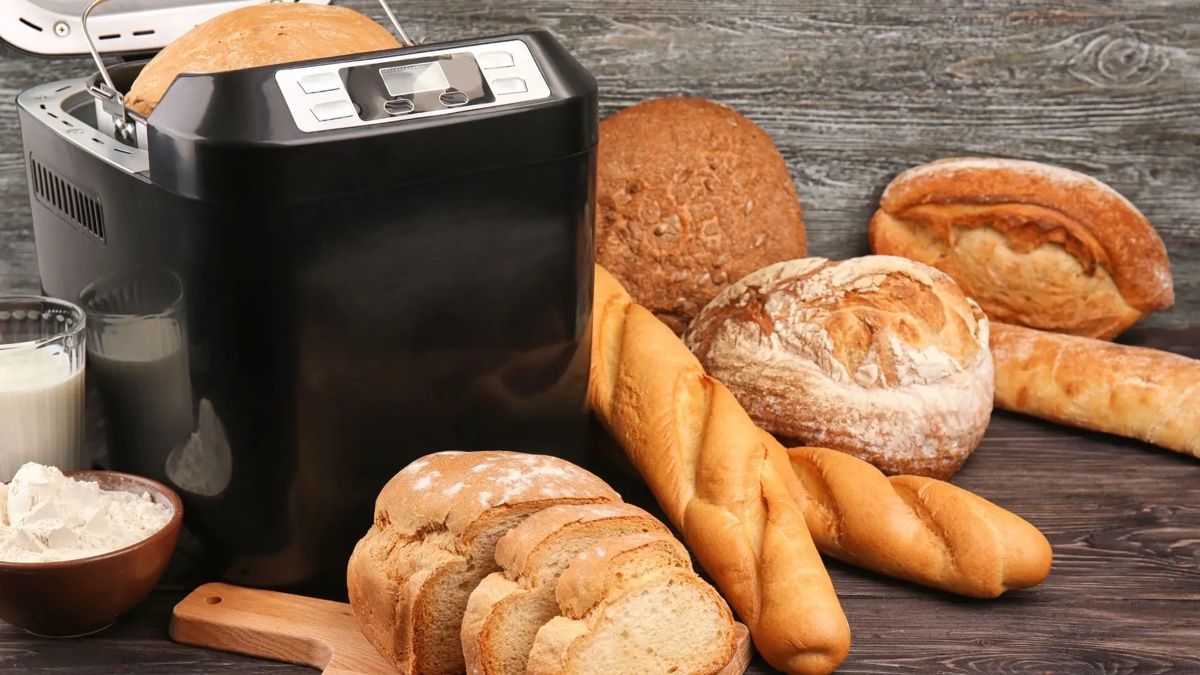
6. Experiment and Personalize: Don’t be afraid to experiment with different gluten-free flours, flavors, and add-ins to create unique and delicious bread. Bread machines offer versatility, allowing you to incorporate ingredients like herbs, spices, seeds, or dried fruits into the dough. Follow the instructions in your specific bread machine’s manual for adding these ingredients.
Using a bread machine to make gluten-free bread takes much of the complexity out of the process. The machine handles the mixing, kneading, and even the baking, leaving you with less room for error and a consistently delicious loaf of bread.
Now that you understand how to use a bread machine for gluten-free bread making, let’s move onto the step-by-step instructions for making gluten-free bread in a bread machine.
When making gluten-free bread in a bread machine, use a mix of gluten-free flours for better texture and flavor. Add xanthan gum to improve the bread’s structure.
Read more: How To Store Homemade Gluten Free Bread
Step-by-Step Instructions for Making Gluten-Free Bread in a Bread Machine
Making gluten-free bread in a bread machine is a convenient and straightforward process. Follow these step-by-step instructions to achieve delicious gluten-free bread:
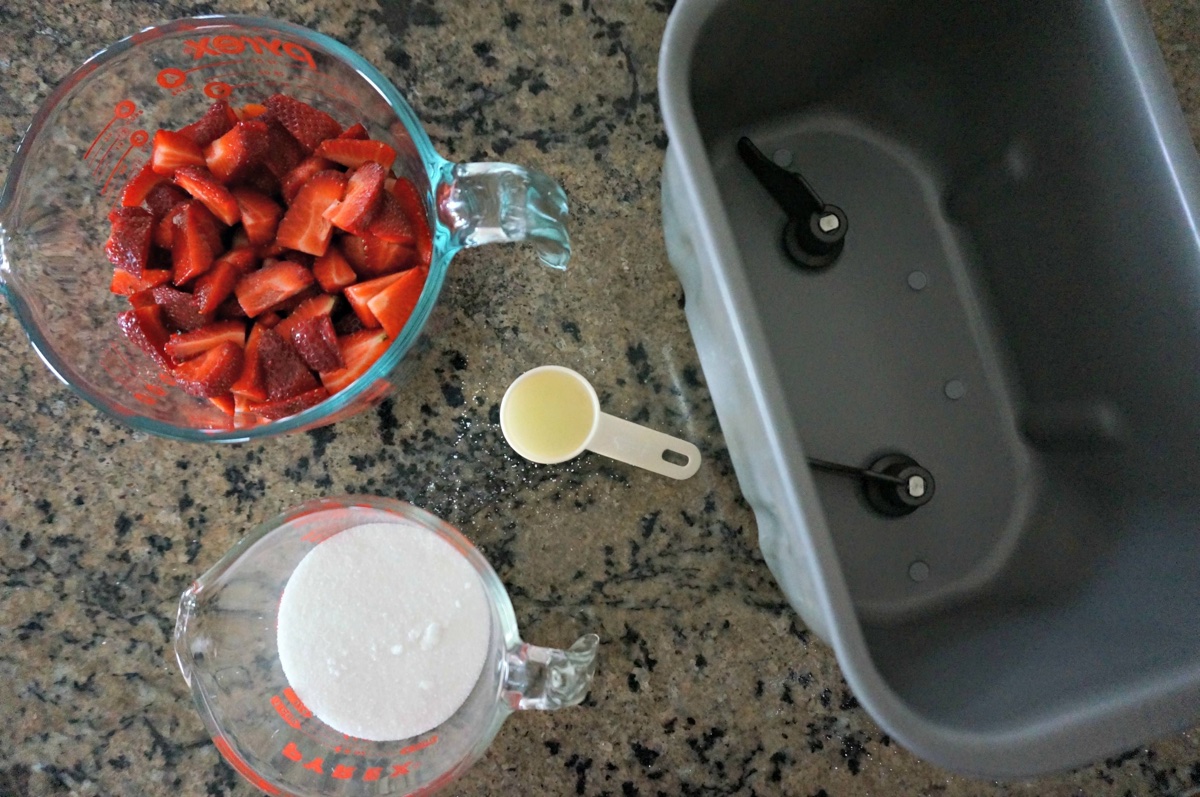
Step 1: Gather Your Ingredients
Collect all the necessary ingredients for your gluten-free bread recipe. This typically includes gluten-free flours, binding agents (such as xanthan gum or guar gum), leavening agents (like yeast or baking powder), liquid ingredients (water, milk, or non-dairy alternatives), salt, sugar, and any additional flavor enhancers or add-ins.
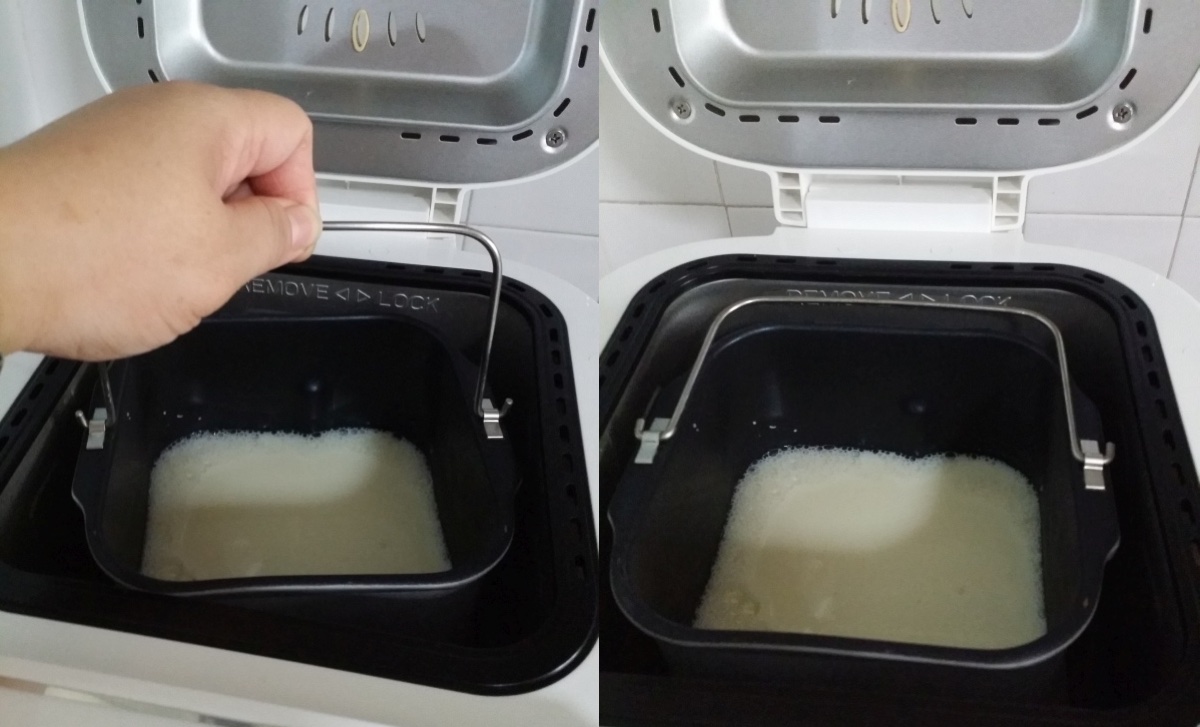
Step 2: Prepare the Bread Machine
Before adding any ingredients, make sure your bread machine is clean and ready for use. Follow the manufacturer’s instructions and ensure that the pan and kneading paddle are securely in place.
Step 3: Measure and Add the Ingredients
Measure the ingredients for your gluten-free bread recipe according to the recipe’s instructions. It’s crucial to follow the measurements accurately for the best results. Add the ingredients to the bread machine pan in the order specified by your machine’s manual. Typically, the liquid ingredients go in first, followed by the dry ingredients, with the yeast added last.
Step 4: Set the Gluten-Free Program
If your bread machine has a specific gluten-free program, select it. This program is designed to accommodate the unique needs of gluten-free bread dough, including adjustments to kneading, rising, and baking times. If your machine doesn’t have a gluten-free program, select the closest program available or consult the instruction manual for specific recommendations.
Step 5: Start the Bread Machine
Once you have selected the appropriate program, start the bread machine. The machine will begin mixing and kneading the dough. It will then allow the dough to rise and will automatically proceed to the baking cycle. During the baking process, keep an eye on the bread for doneness, making any necessary adjustments to the baking time as needed.
Step 6: Remove and Cool the Bread
When the baking cycle is complete, carefully remove the bread pan from the machine using oven mitts or potholders, as it will be hot. Remove the bread from the pan and transfer it to a cooling rack to cool completely. It’s important to let the bread cool before slicing to allow it to set and achieve the best texture.
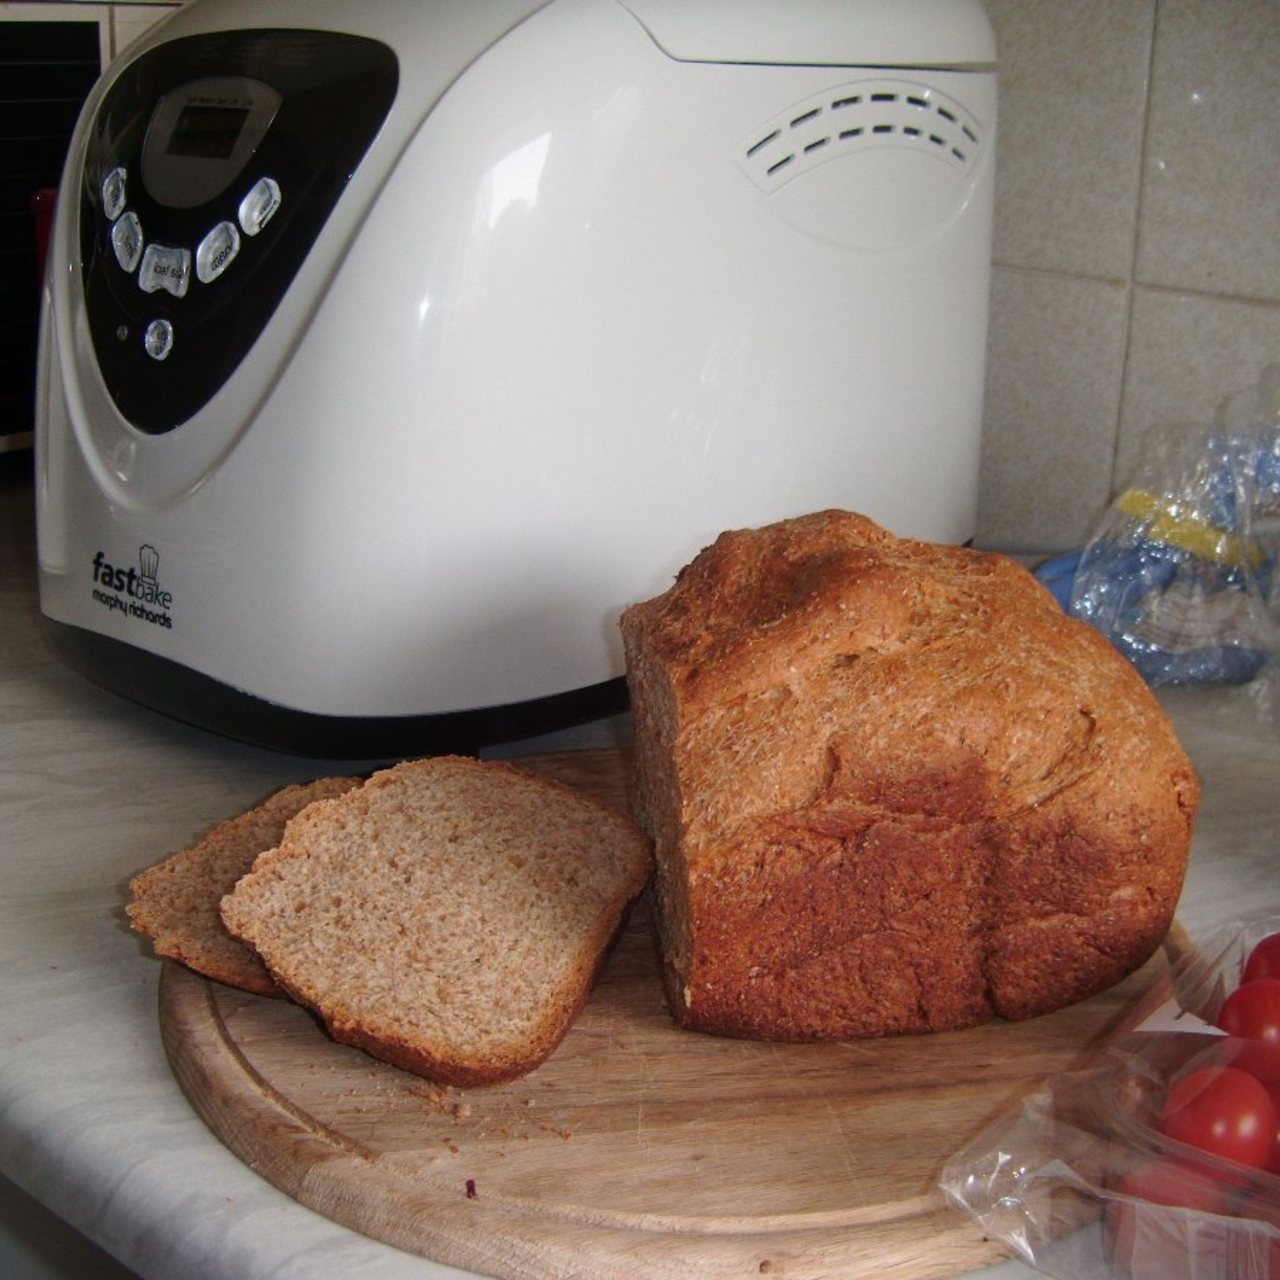
Step 7: Enjoy Your Homemade Gluten-Free Bread
Once the bread has cooled, it’s ready to be enjoyed! Slice the bread and savor its delicious gluten-free goodness. Store any leftover bread in an airtight container or freeze it for later use to maintain its freshness.
By following these step-by-step instructions, you can confidently use your bread machine to produce delectable gluten-free bread with ease. Now, let’s move on to some additional tips and tricks to ensure successful gluten-free bread making.
Tips and Tricks for Successful Gluten-Free Bread Making
While making gluten-free bread can be a rewarding endeavor, it does require some special considerations. Here are some valuable tips and tricks to help you achieve successful gluten-free bread every time:
1. Choose a High-Quality Gluten-Free Flour Blend: Using a pre-made gluten-free flour blend can often yield better results than using a single type of gluten-free flour. Look for a blend that contains a mix of flours and starches to provide a balanced texture and flavor to your bread.
2. Measure Ingredients Accurately: Gluten-free bread recipes rely on precise measurements to ensure the correct ratio of ingredients. Use measuring cups and spoons specifically designed for dry and wet ingredients to achieve accuracy.
3. Allow the Dough to Rest: After mixing and kneading, allow the gluten-free bread dough to rest for 15-30 minutes. This resting time helps hydrate the flours and improves the overall texture of the bread.
4. Don’t Overmix the Dough: Unlike traditional bread dough, gluten-free dough should not be kneaded excessively. Be cautious not to overmix, as this can result in a denser and gum-like texture. Mix the dough just until the ingredients are combined.
5. Use Warm Liquid Ingredients: Using warm liquid ingredients, such as warm water or warm milk, helps activate the yeast and promotes better fermentation. However, avoid using hot liquids, as they can negatively affect the yeast’s effectiveness.
6. Experiment with Different Flavors and Add-Ins: Don’t be afraid to add additional flavors and mix-ins to your gluten-free bread. Consider incorporating herbs, spices, seeds, nuts, or dried fruits to create unique and delicious combinations.
7. Store Bread Properly: Gluten-free bread has a shorter shelf life compared to bread made with wheat flour. To preserve freshness, store the bread in an airtight container or bag. Alternatively, slice and freeze the bread, and then defrost individual slices as needed.
8. Don’t Give Up: Gluten-free bread making can be a bit challenging at first, but don’t get discouraged. It may take a few tries to find the perfect combination of ingredients and techniques that work for you. Be patient and persistent, and you’ll eventually achieve excellent gluten-free bread.
9. Follow Recipes and Testimonials: Utilize trusted gluten-free bread recipes, as well as online resources, cookbooks, and forums, to access valuable tips and insights. Reading reviews and testimonials from other gluten-free bakers can provide helpful guidance and inspire you to try new approaches.
10. Keep Learning and Experimenting: Gluten-free bread making is a continuous learning process. Stay open to new techniques, ingredients, and recipes. Learn from your experiences and keep experimenting to find what works best for your taste preferences and dietary needs.
By implementing these tips and tricks, you can enhance your gluten-free bread making skills and create delicious loaves that are sure to impress. With practice and a little creativity, you’ll soon become a master at gluten-free bread making.
Now that we’ve covered these helpful tips, let’s address some frequently asked questions (FAQs) related to gluten-free bread making.
Frequently Asked Questions (FAQs)
Q: Are gluten-free bread machines different from regular bread machines?
A: Gluten-free bread machines often have specific programs or settings designed to accommodate the unique needs of gluten-free bread dough. These settings adjust the mixing, kneading, rising, and baking times to achieve better results with gluten-free recipes. However, with some adjustments and the right techniques, regular bread machines can also be used to make gluten-free bread.
Q: Can I use regular bread recipes and make them gluten-free in a bread machine?
A: While it is possible to adapt regular bread recipes for gluten-free bread making, it requires adjustments to the ingredients and techniques. Gluten-free flours, binding agents, and additional liquid may be needed to achieve the desired results. It’s often best to start with a trusted gluten-free bread recipe specifically designed for a bread machine and experiment from there.
Q: Can I use gluten-free bread mixes in a bread machine?
A: Yes, you can use gluten-free bread mixes in a bread machine by following the manufacturer’s instructions provided with the mix. Simply add the mix to the bread machine pan along with any additional ingredients mentioned, such as yeast or liquids. Set the machine to the appropriate cycle for gluten-free bread and let it do the rest of the work.
Q: How can I prevent my gluten-free bread from turning out dry or crumbly?
A: Dry or crumbly gluten-free bread can be the result of using too much gluten-free flour, overbaking, or not having enough binding agents. Ensure that you measure the ingredients accurately and follow the recommended ratios. Adjust the baking time if necessary to prevent overbaking, and consider adding or adjusting the amount of binding agents, such as xanthan gum or guar gum, in the recipe.
Q: Can I make gluten-free bread without a bread machine?
A: Absolutely! While a bread machine simplifies the process, you can still make gluten-free bread without one. Simply mix the ingredients together by hand or with a stand mixer, knead the dough, allow it to rise, and bake it in the oven following the recommended temperature and time in the recipe.
Q: Can I substitute gluten-free flour 1:1 for regular flour in other baking recipes?
A: Gluten-free flours have different properties compared to regular flour, so a 1:1 substitution may not always yield the desired results. It’s best to use a blend of gluten-free flours or rely on trusted gluten-free recipes specifically developed for the type of baked goods you are making.
Q: Can I freeze gluten-free bread?
A: Yes, you can freeze gluten-free bread to extend its shelf life. Slice the bread and place it in airtight freezer bags or containers. When ready to enjoy, thaw individual slices as needed. Gluten-free bread may benefit from a few seconds in the toaster or microwave after thawing to bring back its freshness.
Q: How can I achieve a better rise in my gluten-free bread?
A: Achieving a better rise in your gluten-free bread often comes down to the right combination of ingredients and techniques. Choose a good gluten-free flour blend, incorporate binding agents like xanthan gum or guar gum, allow the dough to rest, and follow the recommended rising and baking times. Experimenting with different combinations can also help you achieve the desired rise.
These FAQs should provide you with answers to some common questions related to gluten-free bread making. If you have any additional concerns or inquiries, feel free to consult trusted resources or seek advice from experienced gluten-free bakers.
Now, it’s time to wrap up our guide to gluten-free bread making!
Conclusion
Making gluten-free bread in a bread machine is an accessible and enjoyable process that allows you to create delicious and satisfying loaves at home. By understanding the unique characteristics of gluten-free bread, choosing the right ingredients, and adapting regular bread recipes, you can achieve excellent results. Utilizing a bread machine further simplifies the process, ensuring consistent and reliable outcomes.
Remember to choose high-quality gluten-free flours, incorporate binding agents and leavening agents, and adjust the liquid content as necessary. Use your bread machine’s gluten-free setting, or modify other programs to accommodate gluten-free bread making. Let the dough rest, monitor the baking time, and employ additional flavor enhancers for a personalized touch.
Don’t forget to store your gluten-free bread properly to maintain its freshness. And, most importantly, be patient and persistent. Gluten-free bread making may require some experimentation and adjustments to find the perfect recipe and technique that suits your preferences.
With the helpful tips, step-by-step instructions, and FAQs provided in this article, you now have the knowledge and confidence to embark on your gluten-free bread making journey. So, go ahead and unleash your creativity, try different flour blends, and explore new flavors to create delectable gluten-free bread that satisfies your cravings.
Enjoy the process, enjoy the results, and savor the joy of sharing your homemade gluten-free bread with friends and family. Happy baking!
Frequently Asked Questions about How To Make Gluten-Free Bread In A Bread Machine
Was this page helpful?
At Storables.com, we guarantee accurate and reliable information. Our content, validated by Expert Board Contributors, is crafted following stringent Editorial Policies. We're committed to providing you with well-researched, expert-backed insights for all your informational needs.


0 thoughts on “How To Make Gluten-Free Bread In A Bread Machine”