Articles
How To Make Pie Crust In Kitchenaid Mixer
Modified: August 16, 2024
Learn how to make the perfect pie crust in your Kitchenaid mixer with this comprehensive article. Get step-by-step instructions and expert tips!
(Many of the links in this article redirect to a specific reviewed product. Your purchase of these products through affiliate links helps to generate commission for Storables.com, at no extra cost. Learn more)
Introduction
Welcome to the world of homemade pies! There’s something truly special about biting into a perfectly flaky and buttery pie crust. It adds a wonderful texture and enhances the flavors of any pie filling. But making pie crust from scratch can seem like a daunting task. Fortunately, with the help of a Kitchenaid mixer, creating a delicious pie crust becomes a breeze.
In this article, we will guide you through the step-by-step process of making pie crust in a Kitchenaid mixer. We will cover everything from gathering the necessary ingredients and equipment to the final steps of shaping and baking the crust. So, whether you’re a seasoned baker or a newbie in the kitchen, get ready to impress your family and friends with a homemade pie crust that will take your desserts to a whole new level.
Before we dive into the details, it’s worth mentioning that using a Kitchenaid mixer simplifies the process of making pie crust. It eliminates the need for manual kneading and ensures that the ingredients are evenly incorporated, resulting in a consistent and flaky crust every time.
So, without further ado, let’s gather our ingredients and equipment, and get started on our delicious pie crust journey!
Key Takeaways:
- Master the art of creating flaky, buttery pie crusts with ease using a Kitchenaid mixer. From preparing the ingredients to fluting the edges, this guide will elevate your homemade pies to new heights.
- Whether pre-baking or filling the crust, your Kitchenaid mixer will help you achieve the perfect foundation for a wide range of delicious pie creations. Embrace the joy of baking and impress your loved ones with mouthwatering pies.
Read more: How To Make Pie Crust In A Stand Mixer
Gathering Ingredients and Equipment
Before you begin making the pie crust in your Kitchenaid mixer, it’s important to gather all the necessary ingredients and equipment. This will ensure a smooth and uninterrupted baking experience. Here’s what you’ll need:
- 2 ½ cups all-purpose flour
- 1 teaspoon salt
- 1 tablespoon sugar (optional, for a slightly sweeter crust)
- 1 cup unsalted butter, chilled and cut into small cubes
- ½ cup vegetable shortening, chilled
- Ice water
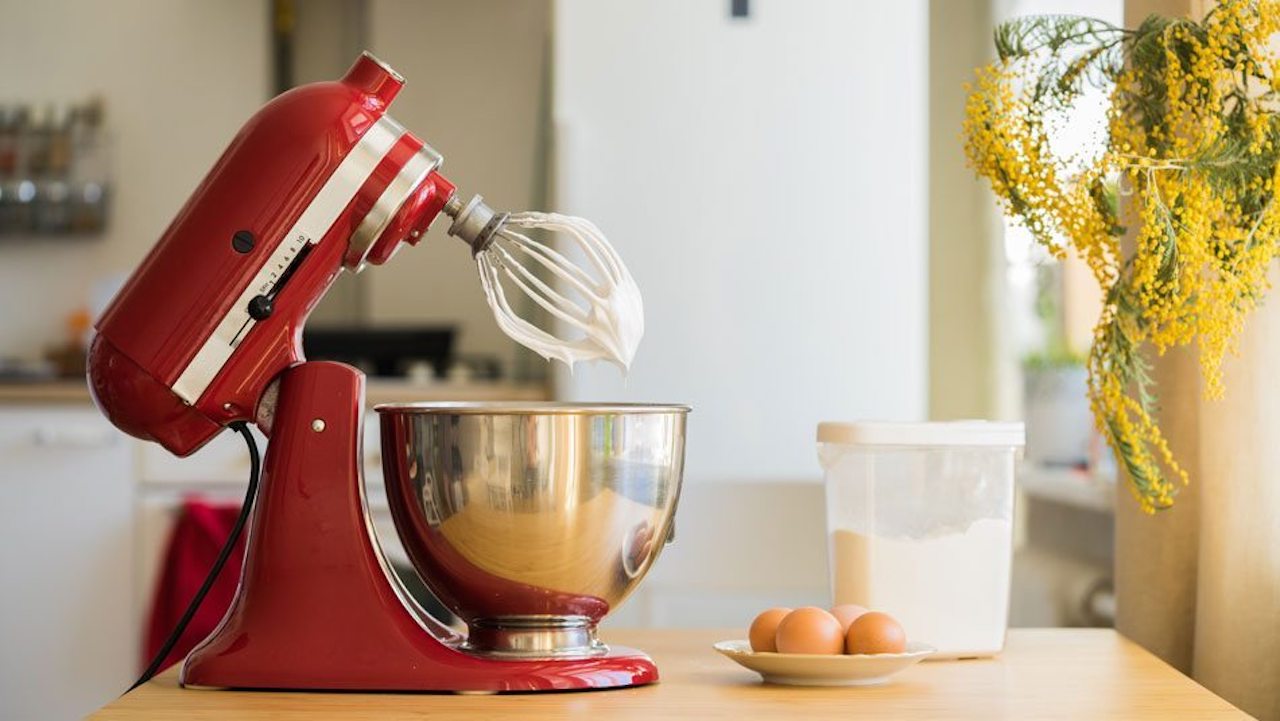
- Kitchenaid mixer with the paddle attachment
- Plastic wrap
- Rolling pin
- Pie dish
- Fork or pastry blender
Make sure your ingredients are fresh and of high quality for the best results. Chilling the butter, shortening, and water beforehand will help maintain the desired temperature and consistency of the dough.
It’s also important to note that while a Kitchenaid mixer is not absolutely essential for making pie crust, it does make the job significantly easier. If you don’t have a Kitchenaid mixer, you can still follow along with this guide using a different type of stand mixer or even mixing by hand. The instructions will remain the same.
Once you have gathered all your ingredients and equipment, it’s time to move on to the next step: preparing the butter and shortening.
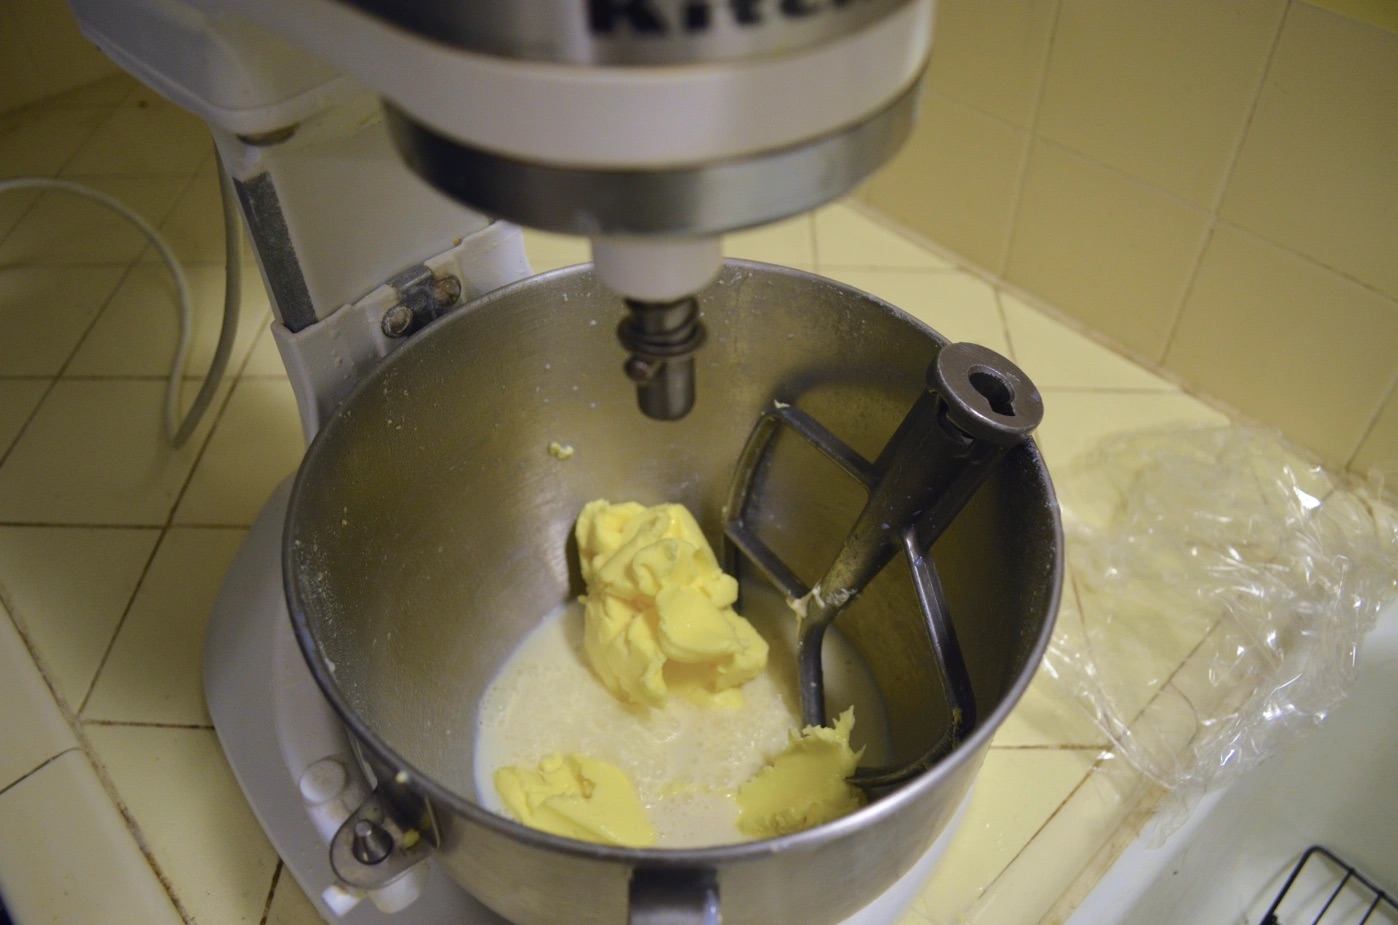
Preparing the Butter and Shortening
To achieve a flaky and tender pie crust, it’s crucial to have the right consistency of butter and shortening. The key is to keep them cold throughout the process. Here’s how you can prepare them:
- Take the chilled butter and shortening out of the refrigerator.
- Cut the butter into small cubes and place it in a bowl.
- Measure out the shortening and add it to the same bowl.
- Using a fork or a pastry blender, cut the butter and shortening into the flour until the mixture resembles coarse crumbs.
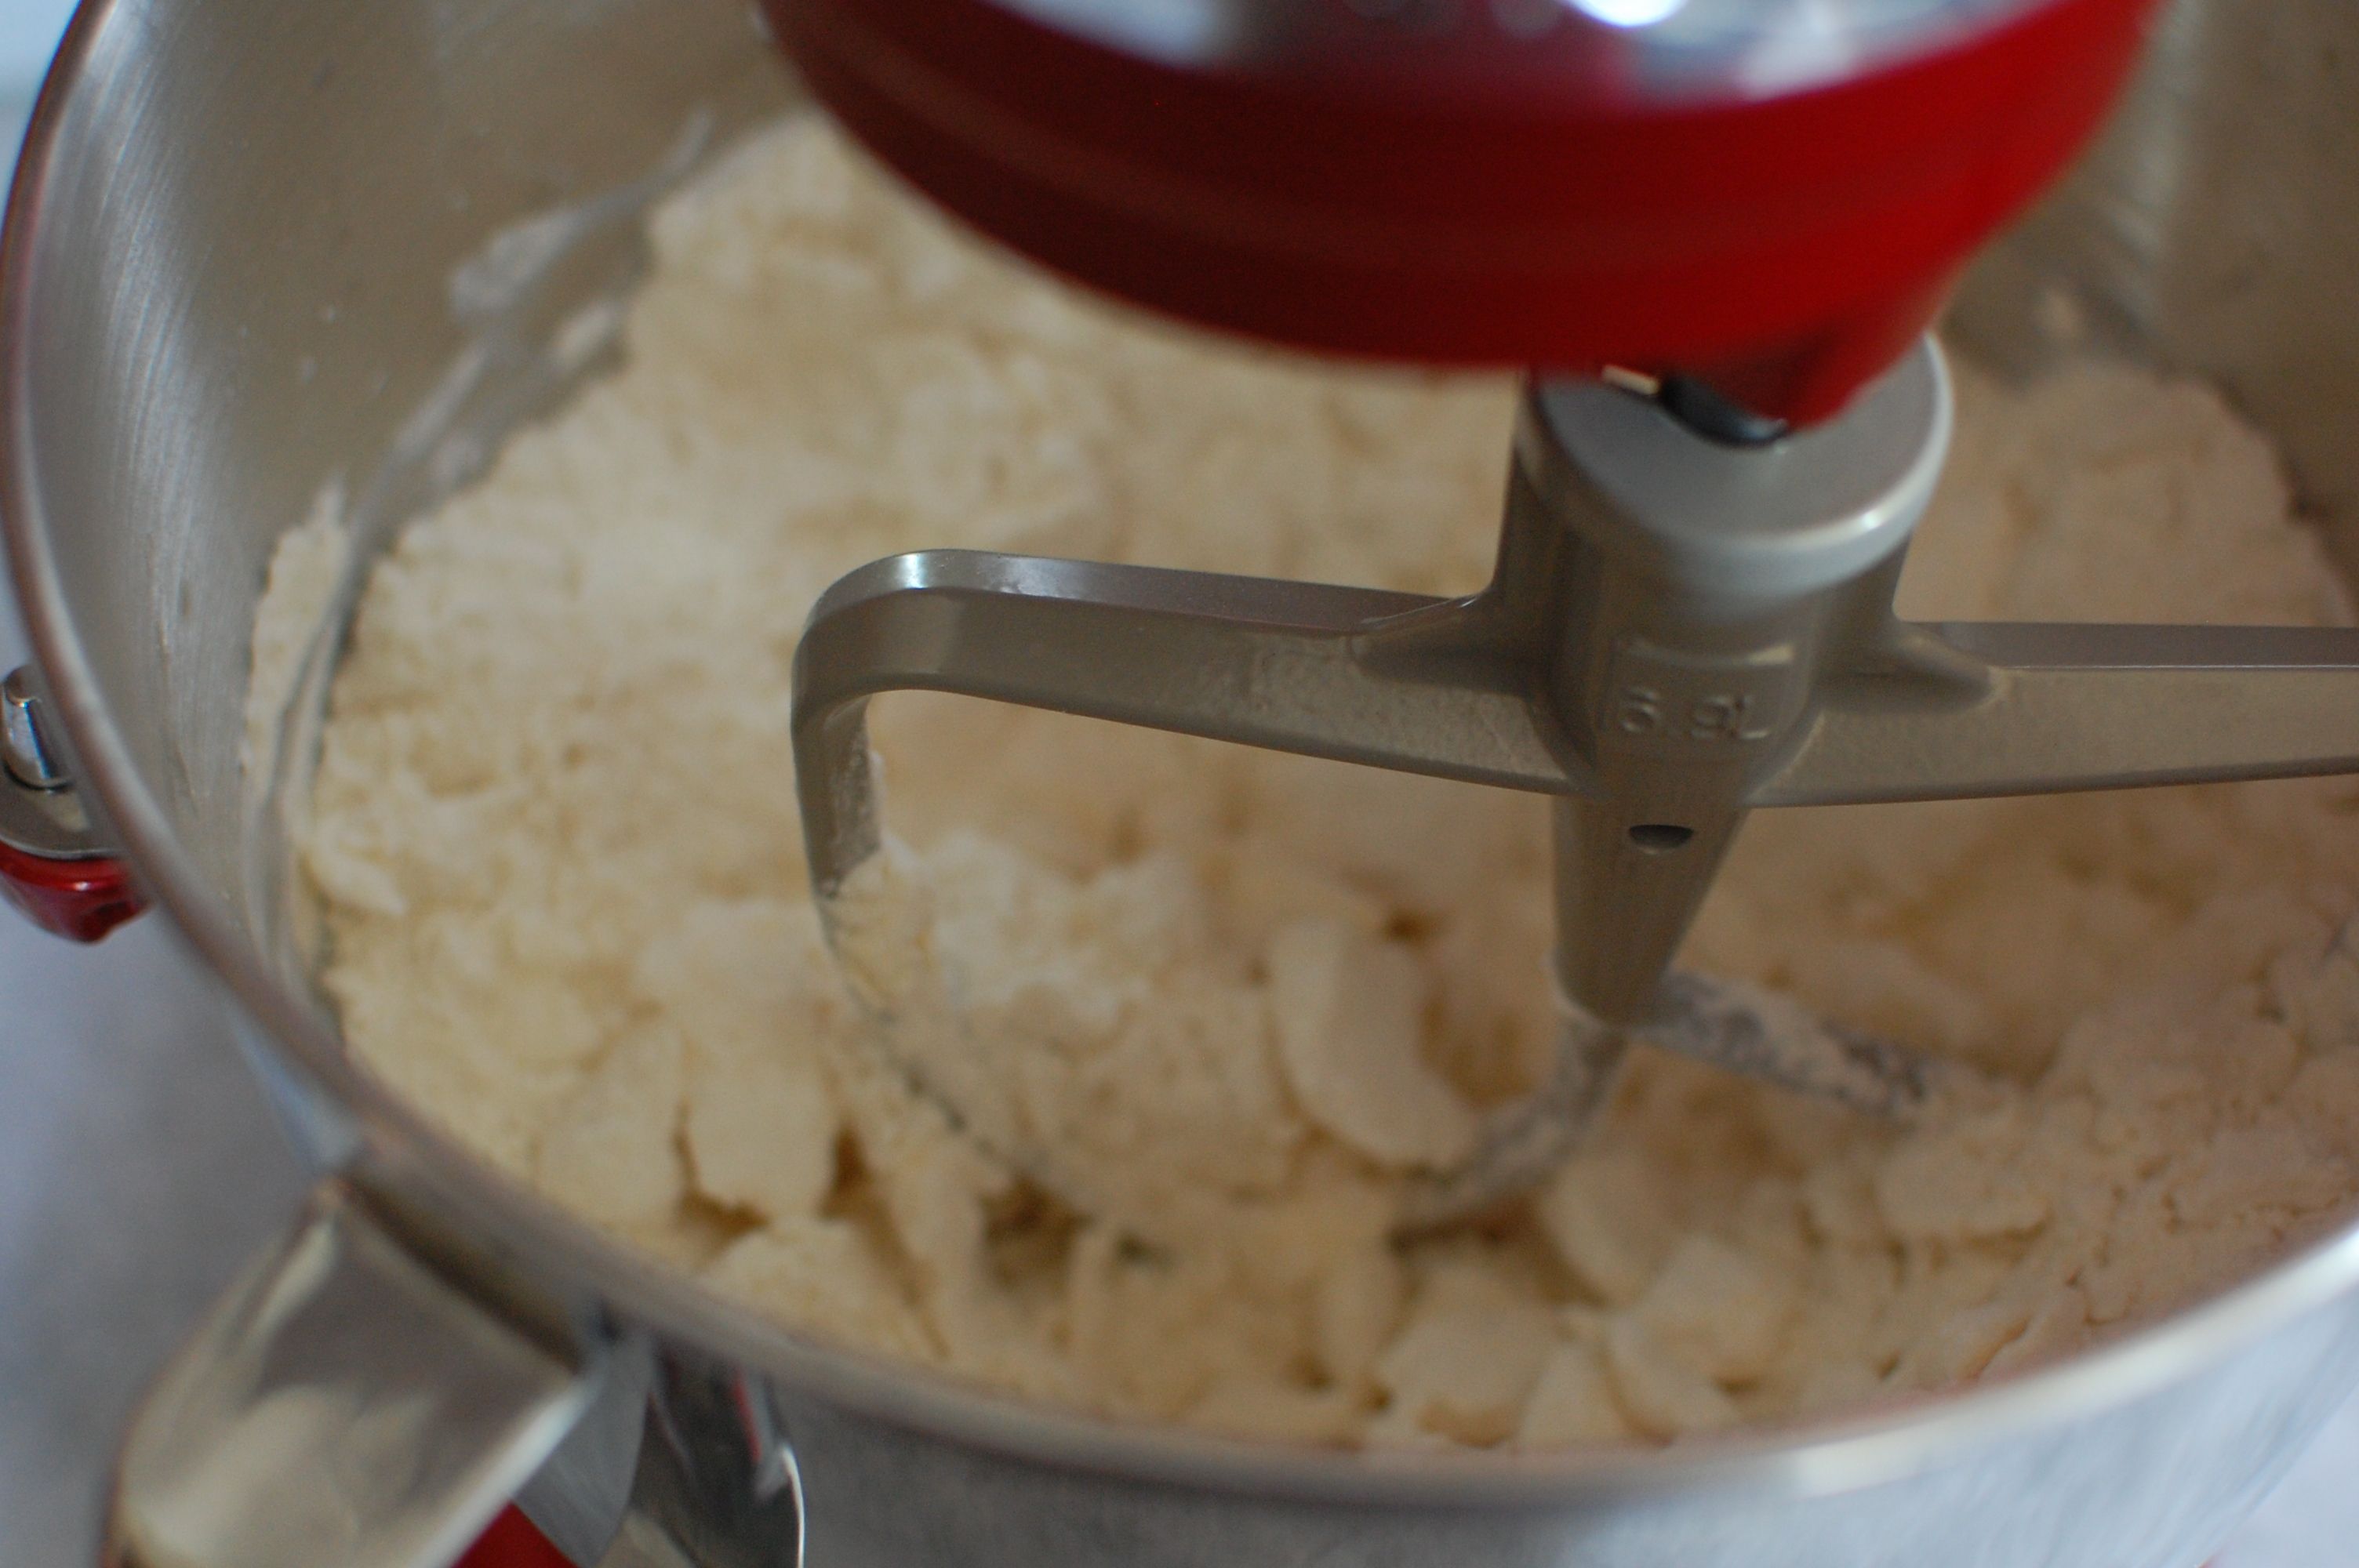
- Alternatively, you can use the paddle attachment on your Kitchenaid mixer to mix the butter, shortening, flour, salt, and sugar (if using) until they form pea-sized crumbs.
By incorporating cold butter and shortening into the dough, you create pockets of fat that will melt during baking, leaving behind small air pockets that result in a flaky texture. It’s important to handle the butter and shortening as little as possible to prevent them from melting.
Once your butter and shortening are prepared, it’s time to move on to adding the dry ingredients to the mixture. Let’s dive in!
Adding the Dry Ingredients
With the butter and shortening properly prepared, it’s time to incorporate the dry ingredients into the mixture. This step is crucial for achieving the desired texture and flavor of your pie crust. Here’s how you can do it:
- In a separate bowl, whisk together the all-purpose flour, salt, and sugar (if using).
- If you’re using a Kitchenaid mixer, switch from the paddle attachment to the dough hook attachment.
- Add the dry ingredient mixture to the bowl containing the butter and shortening.
- If you’re using a Kitchenaid mixer, set it to the lowest speed and mix until the dough starts to come together.
- Alternatively, you can use a fork or your hands to gently mix the dry ingredients into the butter and shortening until a crumbly texture is achieved.
Be careful not to overmix the dough. The goal is to combine the ingredients just enough to form a cohesive dough. Overmixing can develop gluten and result in a tough crust.
Once the dry ingredients are incorporated, it’s time to mix the dough using your Kitchenaid mixer. In the next section, we will guide you through the process of using your Kitchenaid mixer to achieve the perfect pie crust consistency. Let’s mix it up!
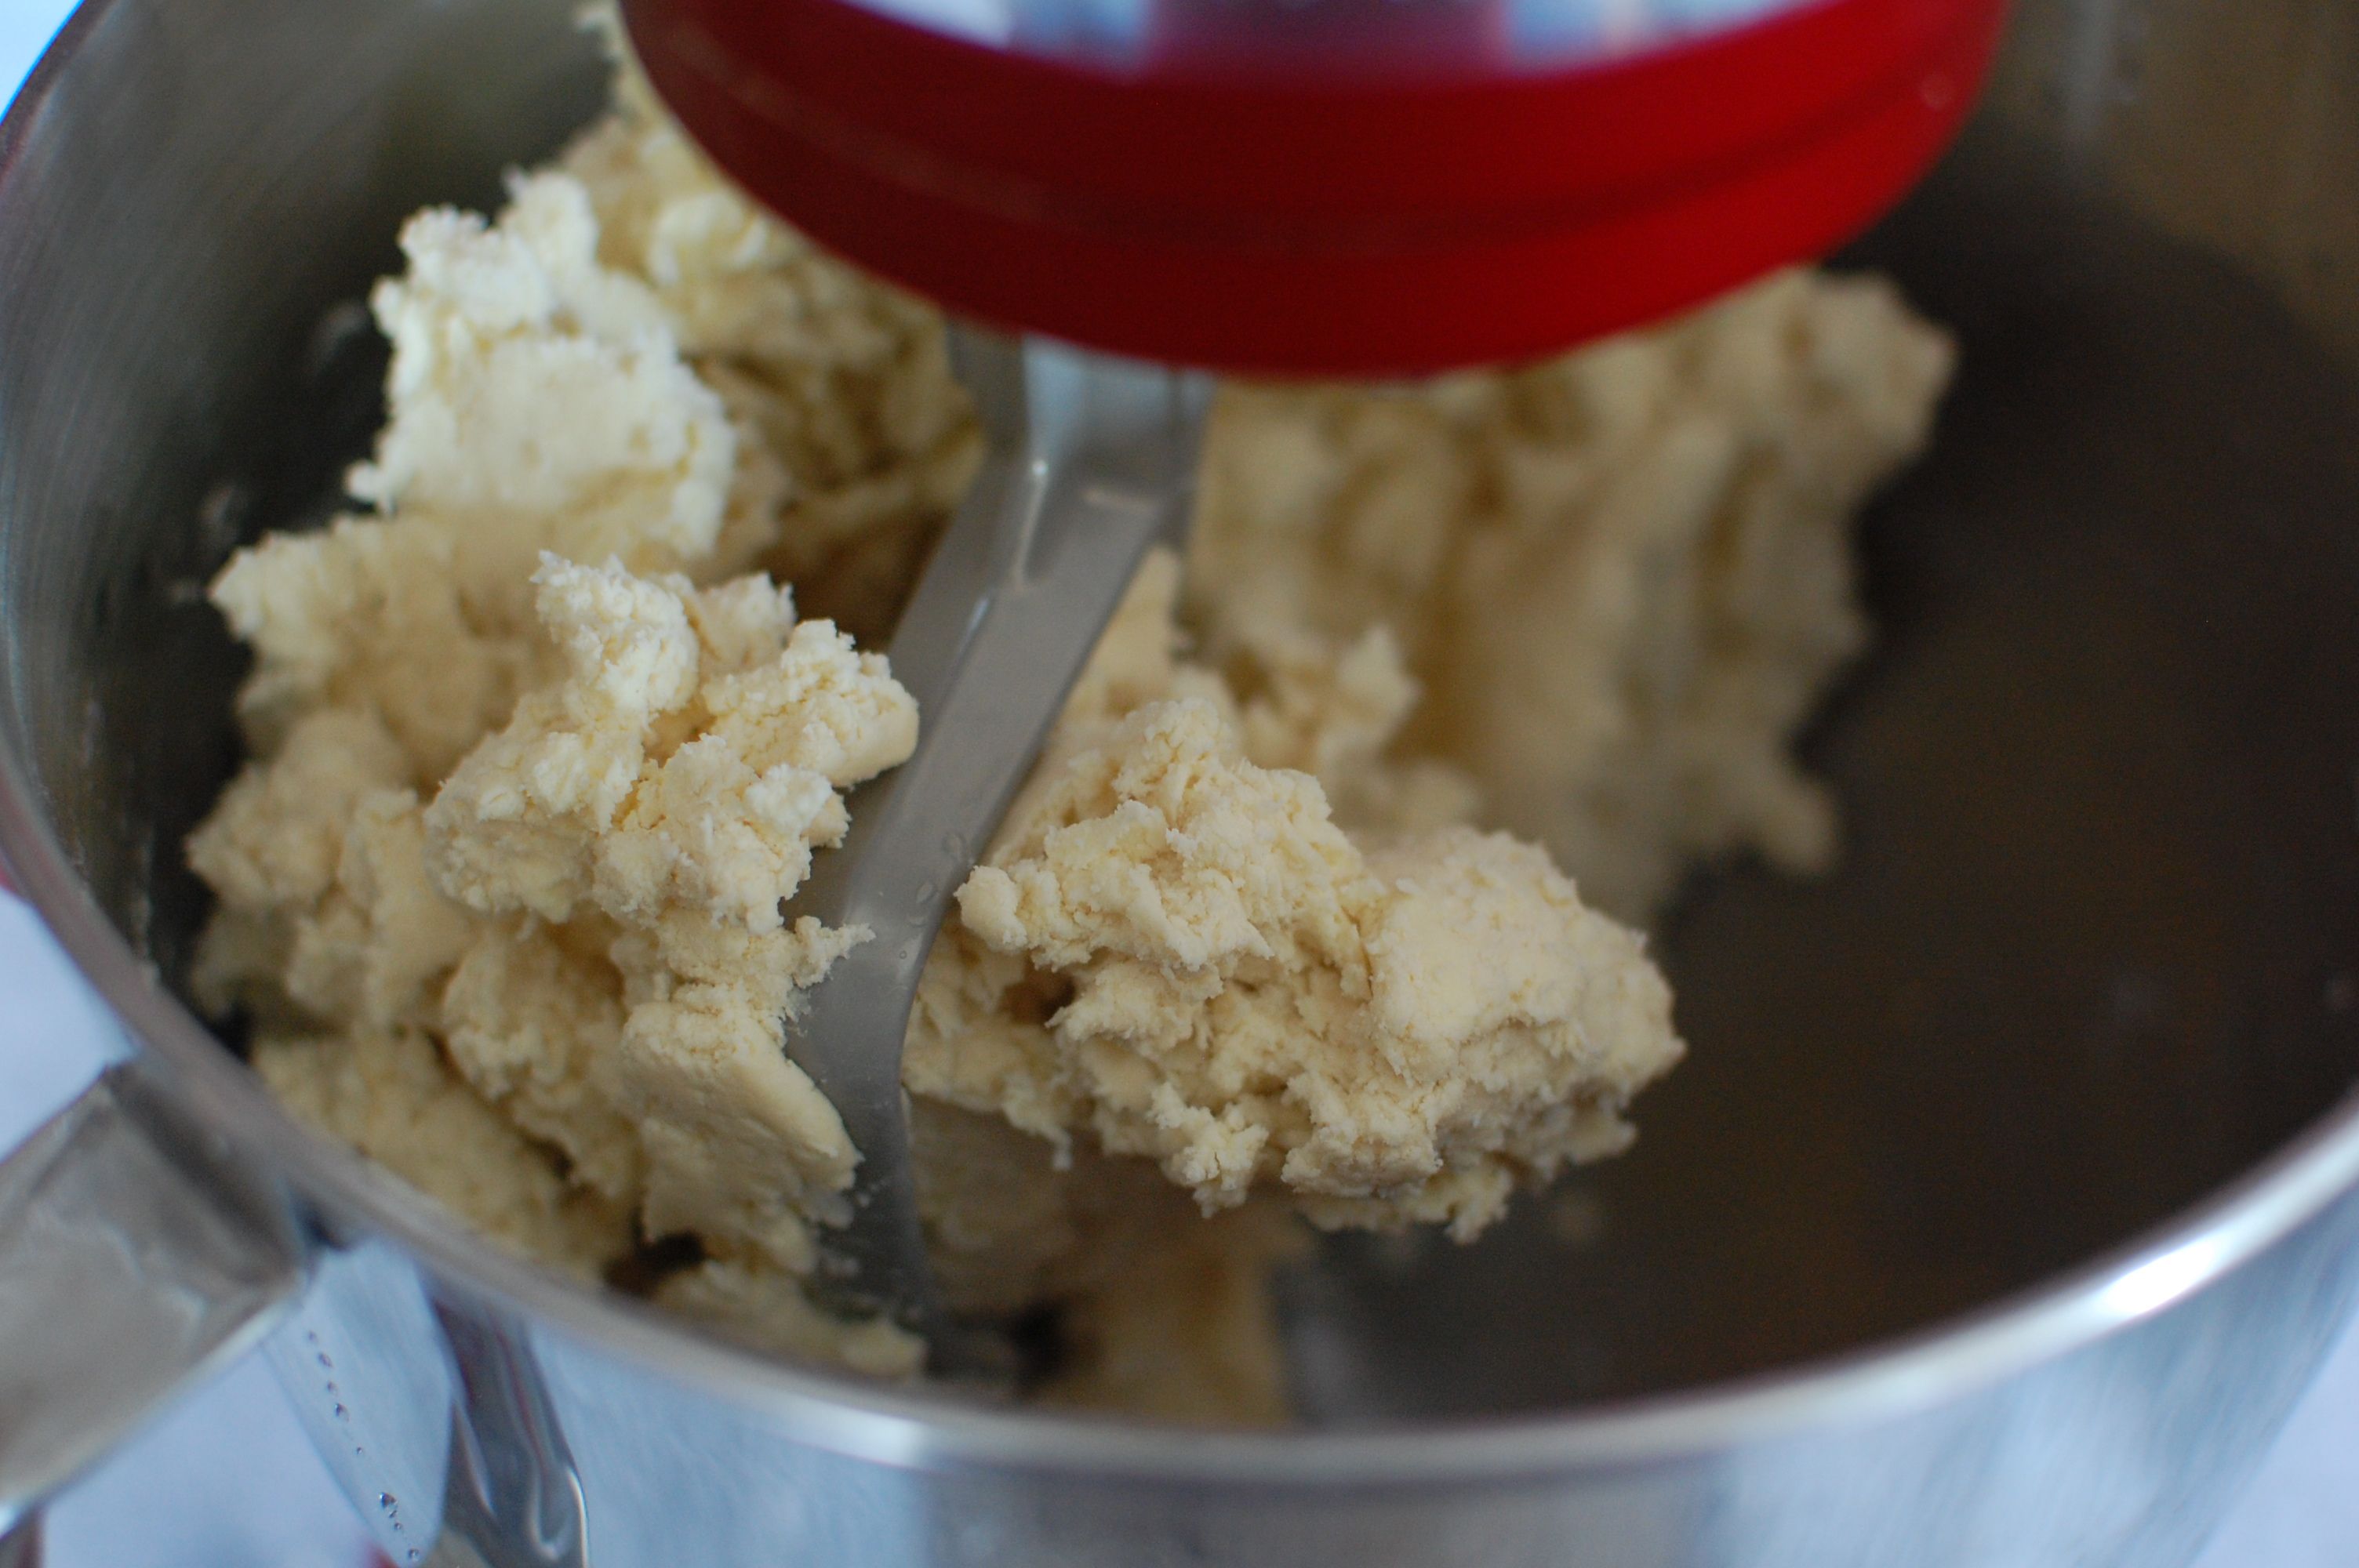
Mixing the Dough in the Kitchenaid Mixer
Now that the dry ingredients have been added to the butter and shortening mixture, it’s time to mix the dough in your trusty Kitchenaid mixer. This step will ensure that all the ingredients are evenly combined, resulting in a consistent and flaky pie crust. Here’s how to do it:
- Attach the dough hook attachment to your Kitchenaid mixer.
- Start the mixer on the lowest speed and gradually increase to medium-low.
- Mix the dough for about 1-2 minutes, or until it starts to come together and forms a ball.
- If the dough looks too dry or crumbly, you can add ice water, one tablespoon at a time, while the mixer is running, until the dough reaches the right consistency.
- Continue mixing for a few more seconds after the dough has come together to ensure it is well combined and smooth.
While the Kitchenaid mixer makes the process easier, it’s important to keep an eye on the dough and not overmix it. Overmixing can lead to a tough crust. Be careful not to let the dough become too warm during the mixing process, as this can also result in a less flaky crust.
Once the dough is properly mixed, it’s time to shape it into a disk for chilling. In the next section, we will guide you through this step. Let’s keep the dough rolling!
Read more: How To Store Pie Crust
Shaping the Dough into a Disk
After mixing the dough in your Kitchenaid mixer, it’s time to shape it into a disk. This step will make it easier to roll out the dough later on. Here’s how you can shape the dough:
- Remove the dough from the mixer bowl and place it on a lightly floured surface.
- Gently knead the dough a few times to ensure it is evenly formed.
- Shape the dough into a flattened disk, about 1 inch thick.
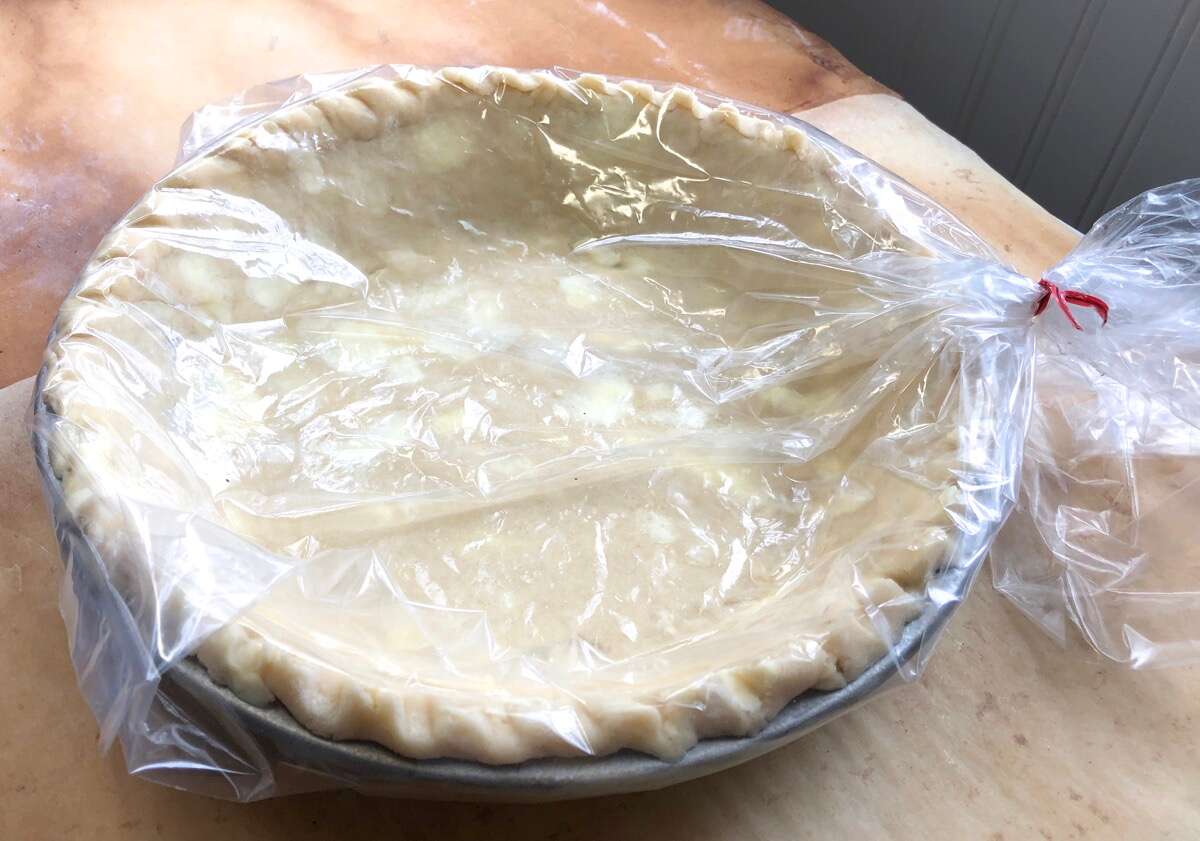
- Wrap the disk tightly in plastic wrap to prevent it from drying out.
Shaping the dough into a disk allows it to chill and rest evenly. This resting period allows the gluten to relax, making the dough easier to roll out and preventing shrinkage during baking. The plastic wrap helps maintain the moisture in the dough and prevents it from absorbing any odors from the refrigerator.
Once the dough is shaped and wrapped, it’s time to chill it. In the next section, we will guide you through the process of properly chilling the dough. Let’s keep it cool!
Chill all ingredients and equipment before making pie crust in a KitchenAid mixer to ensure a flaky and tender crust. Keep everything as cold as possible for the best results.
Chilling the Dough
After shaping the dough into a disk, it’s important to give it some time to chill in the refrigerator. Chilling the dough not only allows the flavors to meld together but also helps to prevent it from becoming too soft and difficult to work with. Here’s how you can chill the dough:
- Place the wrapped dough disk in the refrigerator.
- Let the dough chill for at least 1 hour, or up to 24 hours for the best results.
Chilling the dough allows the fats (butter and shortening) to firm up, which in turn helps create a flaky texture when baked. Additionally, it gives the gluten in the dough a chance to relax, making the crust more tender.
While it can be tempting to skip this step and move on to rolling out the dough immediately, it’s best to resist that urge. Chilling the dough is an essential part of the pie crust-making process, and it significantly contributes to the success of your final result.
Once the dough has chilled, it’s ready to be rolled out. In the next section, we will guide you through the process of rolling out the dough to the perfect thickness. Let’s get rolling!
Rolling out the Dough
Now that the dough has had a chance to chill and rest, it’s time to roll it out into a thin, even sheet. Rolling out the dough is a crucial step in creating a perfectly shaped pie crust. Here’s how you can do it:
- Remove the chilled dough from the refrigerator.
- Unwrap the dough and place it on a lightly floured surface.
- Sprinkle a little flour on top of the dough to prevent sticking.
- Using a rolling pin, start rolling out the dough from the center outward.
- Roll in one direction, then turn the dough 90 degrees and roll again.
- Repeat this process, rotating the dough as needed, until it reaches the desired thickness.
When rolling out the dough, be careful not to apply too much pressure, as this can result in a tough crust. Use a light touch and allow the rolling pin to do most of the work.
Keep in mind that the thickness of the rolled-out dough will depend on personal preference and the type of pie you’re making. Generally, a thickness of about 1/8 inch (3 mm) is suitable for most pie crusts.
Once the dough is rolled out to the desired thickness, you’re ready to transfer it to a pie dish. In the next section, we will guide you through this process. Let’s move on to the next step!
Transferring the Dough to a Pie Dish
After rolling out the pie dough, it’s time to transfer it to a pie dish. This step requires delicacy and precision to ensure that the dough fits properly and doesn’t tear or break. Here’s how you can transfer the dough to a pie dish:
- Carefully fold the rolled-out dough in half.
- Transfer the folded dough to one half of the pie dish.
- Unfold the dough and gently press it into the bottom and sides of the dish.
- Trim any excess dough hanging over the edges using a sharp knife or kitchen shears, leaving about 1 inch of overhang.
- Tuck the excess dough under to create a neat edge and crimp or flute it as desired.
Transferring the dough to a pie dish can be a little tricky, but folding the dough in half makes it easier to handle and reduces the risk of tearing or stretching it too much. Take your time and be patient during this process.
Remember, the way you flute or crimp the edges of the pie crust is a matter of personal preference and can add a decorative touch to your pie. If you’re unsure how to flute or crimp, there are numerous tutorials available online to help guide you.
Now that the dough is securely transferred to the pie dish and fluted or crimped, it’s time to move on to the next step based on your recipe. In the following section, we will cover the two possibilities: pre-baking or filling the pie crust. Let’s continue our journey towards a delicious pie!
Read more: How To Cook Pie Crust On Stove Top
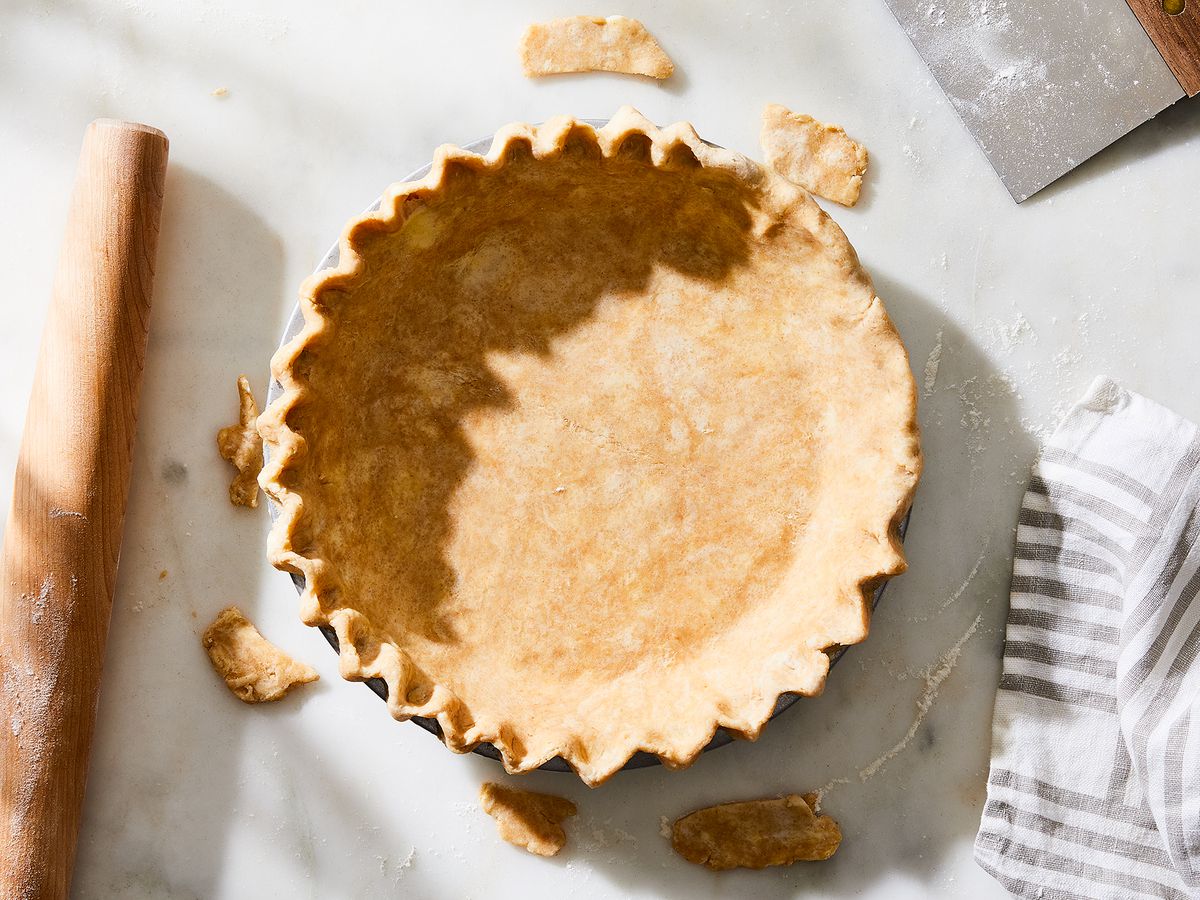
Fluting or Crimping the Pie Crust
Once you’ve transferred the dough to the pie dish, it’s time to add the finishing touch by fluting or crimping the edges of the pie crust. This step not only ensures a secure and attractive seal but also adds a decorative element to your pie. Here are a couple of common techniques for fluting or crimping the pie crust:
- Fluting:
- Using your thumb and index finger of one hand, press the dough between your thumb and the knuckle of your index finger on the other hand. Repeat this motion around the edge of the crust to create a fluted pattern.
- You can also use a fork to press down on the edge of the crust at regular intervals, creating a scalloped edge.
- Experiment with different fluting techniques to find one that suits your style and the occasion.
- Crimping:
- Using your thumb and index finger of one hand, pinch the dough edge to create a V-shape. Use your other index finger to press the V-shape from the opposite side, creating a crimped pattern.
- Continue this pinching and pressing motion around the edge of the crust until it is completely crimped.
- Alternatively, you can use a special crimping tool or the tines of a fork to create a decorative pattern.
Remember, the goal of fluting or crimping is to create a seal that not only looks visually appealing but also helps to prevent the filling from leaking out during baking. Take your time with this step to ensure a neat and professional-looking pie crust.
With the pie crust fluted or crimped to perfection, it’s time to move on to the next step based on your recipe. In the following section, we will cover two possibilities: pre-baking the pie crust or filling it. Let’s proceed to the final steps of this pie-making journey!
Pre-baking or Filling the Pie Crust
Now that you have fluted or crimped the pie crust, it’s time to decide whether you want to pre-bake the crust or fill it directly depending on your specific pie recipe. Here are the two options:
1. Pre-baking the Pie Crust:
Pre-baking the crust is necessary for certain pie recipes, such as custard or cream pies, where the filling does not require additional baking. Pre-baking ensures that the crust is fully cooked and maintains its shape when the filling is added. Here’s how to pre-bake the pie crust:
- Preheat your oven to the specified temperature in your recipe.
- Prick the bottom of the crust gently with a fork to prevent it from puffing up during baking.
- Line the crust with parchment paper or aluminum foil and fill it with pie weights or dried beans.
- Bake the crust in the preheated oven for the specified time in your recipe, usually around 10-15 minutes.
- Remove the parchment paper and weights and continue baking the crust for an additional 5-10 minutes, or until it turns a golden brown color.
- Allow the pre-baked crust to cool completely before adding the filling.
2. Filling the Pie Crust:
If your pie recipe requires the crust to be filled and then baked together, you can skip the pre-baking step. Simply follow the instructions in your specific recipe for filling the crust with your desired pie filling.
It’s important to note that every pie recipe is unique, and the instructions for pre-baking or filling the crust may vary. Always refer to the specific recipe you are using for the most accurate instructions.
Once your pie crust is either pre-baked or filled, it’s time to move forward with the remaining steps of your pie recipe. Whether you’re making a classic apple pie or a decadent chocolate cream pie, the crust you’ve prepared with your Kitchenaid mixer will provide the perfect foundation for your delicious creation.
Congratulations! You’ve now mastered the art of making pie crust in a Kitchenaid mixer. With your newfound skills, you can embark on a journey of creating beautifully flaky and delectable pies that will impress your family and friends. Happy baking!
Conclusion
Congratulations! You have reached the end of our guide on how to make pie crust in a Kitchenaid mixer. By following these step-by-step instructions, you can create a flaky, buttery pie crust that will elevate your homemade pies to new heights.
We started by gathering all the necessary ingredients and equipment. Remember to use fresh and high-quality ingredients for the best results. Then, we moved on to preparing the butter and shortening, ensuring they are cold to achieve the desired texture. Adding the dry ingredients and mixing the dough in the Kitchenaid mixer helped create a consistent and well-incorporated mixture.
Shaping the dough into a disk and chilling it allowed the dough to rest and develop its flavor. Rolling out the dough to the desired thickness and transferring it to a pie dish required patience and a gentle touch. Fluting or crimping the edges of the pie crust added a decorative touch that not only looked stunning but also provided a secure seal.
Finally, depending on your recipe, you had the option to pre-bake the crust or fill it directly. Pre-baking ensured a fully cooked crust for certain pie fillings, while filling it without pre-baking allowed the crust to bake together with the filling.
Now that you have mastered the art of making pie crust in a Kitchenaid mixer, the possibilities are endless. Fruit pies, custard pies, quiches, or tarts – you can explore a wide range of delicious creations with your homemade pie crust.
Remember, practice makes perfect. Don’t be discouraged if your first attempt isn’t flawless. With each pie crust you make, you’ll gain more skill and confidence. So, keep experimenting, trying different recipes, and enjoying the process of creating mouthwatering pies for your loved ones.
Thank you for joining us on this pie-making journey. We hope you found this guide helpful and inspiring. Now, go ahead and unleash your creativity in the kitchen, and may your homemade pies bring joy and delight to all! Happy baking!
Frequently Asked Questions about How To Make Pie Crust In Kitchenaid Mixer
Was this page helpful?
At Storables.com, we guarantee accurate and reliable information. Our content, validated by Expert Board Contributors, is crafted following stringent Editorial Policies. We're committed to providing you with well-researched, expert-backed insights for all your informational needs.


0 thoughts on “How To Make Pie Crust In Kitchenaid Mixer”