Articles
How To Make Stands For Picture Frames
Modified: May 6, 2024
Learn how to make sturdy stands for your picture frames with our informative articles. Find step-by-step instructions and helpful tips to display your frames perfectly.
(Many of the links in this article redirect to a specific reviewed product. Your purchase of these products through affiliate links helps to generate commission for Storables.com, at no extra cost. Learn more)
Introduction
Picture frames are a wonderful way to display cherished memories or add a personal touch to your decor. However, it can be challenging to find the perfect stand to showcase your frames. That’s where DIY comes in! Creating your own stands for picture frames not only allows you to customize the design but also gives you the satisfaction of crafting something unique. In this article, we will guide you through the process of making stands for picture frames, providing step-by-step instructions and helpful tips along the way.
Whether you’re a seasoned DIY enthusiast or just starting out, making stands for picture frames can be a fun and rewarding project. Not only will you end up with a practical and visually appealing solution for displaying your frames, but you’ll also have the opportunity to unleash your creativity and add your personal touch.
In the following sections, we will outline the materials needed and guide you through each step of the process. Don’t worry if you’re not familiar with DIY projects – we’ll provide clear instructions and useful tips to ensure your success.
So, let’s gather our materials, roll up our sleeves, and start creating beautiful stands for picture frames!
Key Takeaways:
- Crafting your own picture frame stand allows for personalization, creativity, and a sense of accomplishment. Embrace the DIY process and enjoy showcasing your cherished memories with a unique and customized display.
- Prioritize safety, attention to detail, and creativity when creating stands for picture frames. Unleash your crafting abilities, experiment with designs, and let your personal style shine through in your DIY projects.
Read more: How To Make Picture Frames
Materials Needed
- Wooden board or plywood
- Saw (hand saw, circular saw, or miter saw)
- Sandpaper (medium and fine grit)
- Measuring tape
- Pencil
- Drill
- Screws
- Screwdriver
- Paint or wood stain (optional)
- Paintbrush or sponge brush (optional)
- Decorative elements (optional, such as paint, wood stain, stencils, or stickers)
Before starting the project, it’s important to gather all the necessary materials. Here’s a list of the items you will need:
Firstly, you’ll need a wooden board or plywood to serve as the base and back support for the stand. The size of the board will depend on the dimensions of your picture frame and your desired stand height.
Next, you’ll need a saw to cut the wooden board into the required sizes. A hand saw, circular saw, or miter saw will work well for this task. Choose the appropriate saw based on your comfort level and the availability of tools.
Sandpaper is essential to smooth out any rough edges or surfaces on the wooden board. It’s recommended to use medium and fine grit sandpaper to achieve a polished finish.
Measuring tape and a pencil will come in handy to accurately measure and mark the dimensions for cutting the wooden board and creating the back support. Having precise measurements will ensure the stability and functionality of the stand.
A drill and screws will be needed to attach the back support to the base. Make sure to choose screws that are appropriate for the thickness of the wooden board and will securely hold the pieces together.
If you prefer to add a touch of color or protect the wood, you may choose to use paint or wood stain. A paintbrush or sponge brush will be useful for applying the paint or stain evenly.
Lastly, consider any decorative elements you’d like to incorporate into your stand. This could include paint, wood stain, stencils, or stickers that will add a personalized touch to your creation.
Now that you have all the necessary materials, you’re ready to move on to the next step – gathering the materials and getting your workspace ready.
Step 1: Gathering the Materials
Before you dive into making the stand for your picture frame, it’s crucial to gather all the materials required for the project. Having everything ready and within reach will ensure a smooth and efficient workflow. Here’s a step-by-step guide to gathering the materials:
- Refer to the “Materials Needed” section provided earlier in this article. Go through the list and ensure you have all the required items on hand.
- Check the availability and condition of the wooden board or plywood. Inspect it for any cracks, splinters, or defects that may affect the quality of the stand. If needed, purchase a new board or repair any issues with the existing one.
- If you need to cut the wooden board to size, ensure you have the appropriate saw and safety equipment in place. Measure the dimensions needed for the base and back support of the stand, and mark them on the board with a pencil.
- Check your supply of sandpaper and make sure you have both medium and fine grit. This will allow you to properly smooth out any rough edges or surfaces on the wooden board for a polished finish.
- Ensure your measuring tape and pencil are in good working condition. These tools will be crucial for accurate measurements and markings during the construction of the stand.
- Check the drill and make sure it is charged and functioning properly. Ensure you have the appropriate drill bits and screws available for attaching the back support to the base.
- If you plan to paint or stain the stand, inspect your paint or wood stain and make sure you have enough for the project. Ensure you have the necessary brushes or sponge brushes for applying the paint or stain.
- Finally, if you want to add decorative elements to your stand, gather any additional materials such as paint, stencils, or stickers that you may need to create the desired design.
By taking the time to gather all the required materials and ensuring they are in good condition, you’ll be well-prepared to embark on constructing your picture frame stand. With everything at your fingertips, you can focus on the task at hand and enjoy the process of bringing your creative vision to life.
Step 2: Measuring and Cutting the Base
Now that you have gathered all the materials needed, it’s time to move on to the first step in constructing your picture frame stand – measuring and cutting the base.
Follow these step-by-step instructions to accurately measure and cut the base of your stand:
- Decide on the size of the base. Consider the dimensions of your picture frame and choose a size that will provide stability and balance to the stand.
- Using a measuring tape, carefully measure and mark the dimensions for the base on the wooden board or plywood. Ensure the markings are accurate and clearly visible.
- Double-check the measurements to ensure they are correct. Remember to account for any overhang or additional space you would like around the picture frame.
- Put on safety goggles and gloves to protect yourself while using the saw. Choose the appropriate saw based on your comfort level and the availability of tools.
- Align the saw with the marked lines on the wooden board and carefully begin cutting. Use steady and controlled movements to achieve clean and straight cuts.
- Continue cutting until you have completely separated the base from the rest of the wooden board. Take your time and ensure the edges are smooth.
- Once the base has been cut, use sandpaper to smooth out any rough edges or surfaces. Start with a medium grit sandpaper and gradually move to a finer grit for a polished finish.
- Carefully inspect the base for any imperfections or unevenness. If needed, make any necessary adjustments or refinements with the saw and sandpaper.
By taking the time to accurately measure and cut the base of the stand, you’ll ensure a sturdy foundation for your picture frame. Remember to prioritize safety by wearing protective gear and using caution while cutting. Take your time during the sanding process to achieve a smooth and professional-looking finish.
With the base ready, you’re one step closer to completing your picture frame stand. Stay tuned for the next step where we will guide you through creating the back support for added stability and functionality.
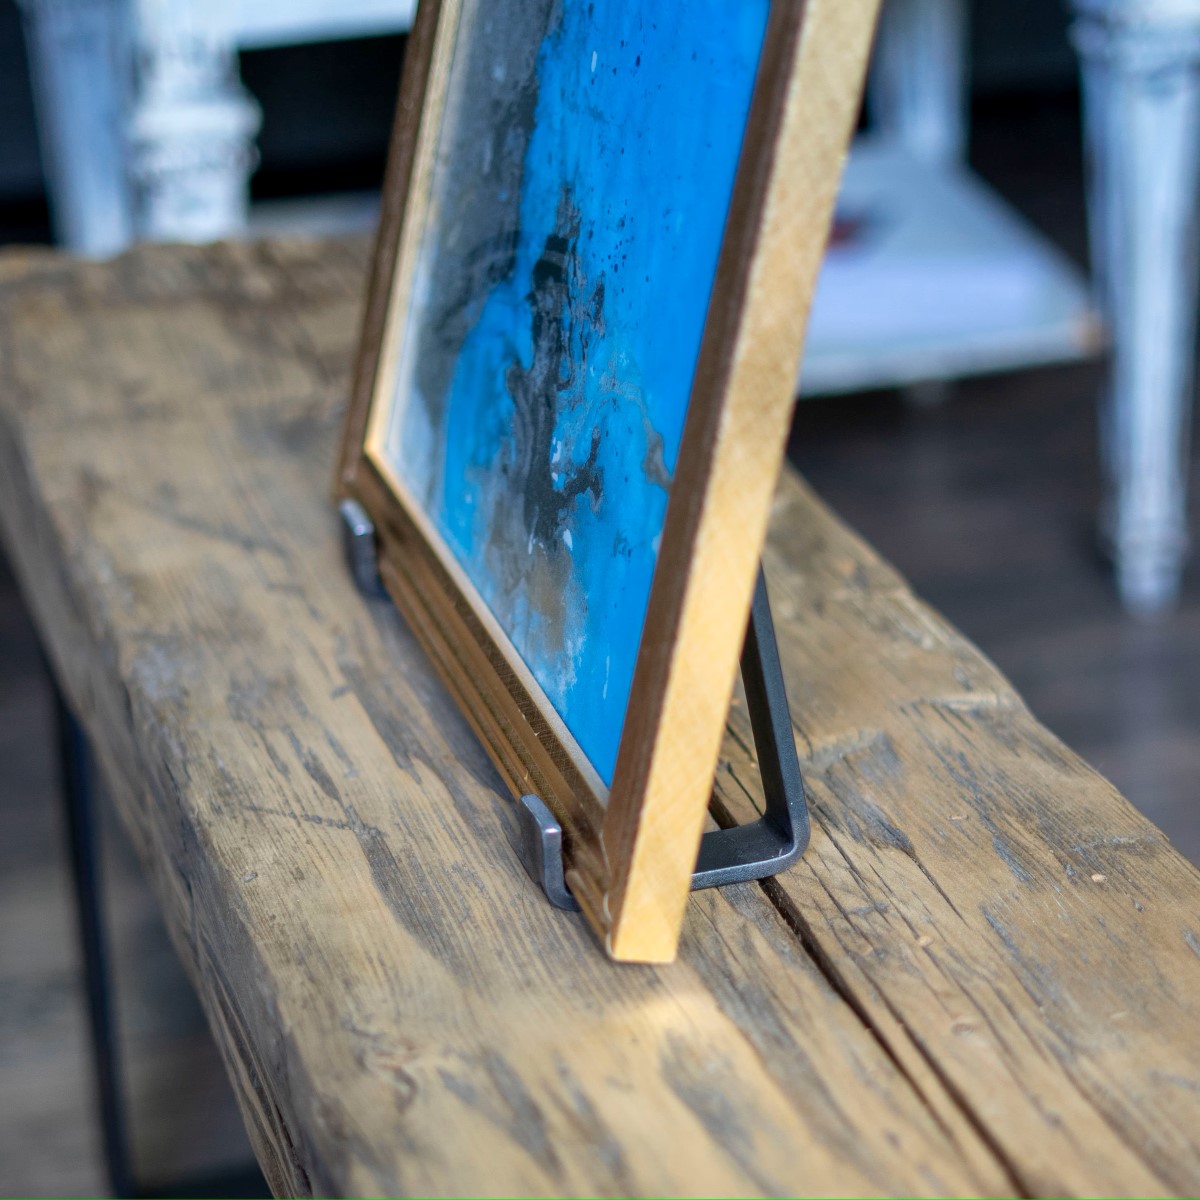
Step 3: Creating the Back Support
Now that you have successfully measured and cut the base of your picture frame stand, it’s time to move on to the next step: creating the back support. The back support will provide stability and ensure that your picture frame stands securely in an upright position.
- Start by determining the height of the back support. Consider the size of your picture frame and the desired angle at which it will be displayed.
- Measure and mark the height of the back support on the remaining wooden board or plywood. Ensure that the markings are accurate and clearly visible.
- Decide on the width of the back support. This will determine how securely the picture frame will sit on the stand.
- Measure and mark the width of the back support on the wooden board, ensuring that it aligns properly with the base.
- Use a saw to cut along the marked lines, creating the back support. Take your time and use steady, controlled movements to achieve clean and precise cuts.
- Once the back support has been cut, use sandpaper to smooth out any rough edges or surfaces. Start with a medium grit sandpaper and gradually move to a finer grit for a polished finish.
- Test the fit of the back support against the base. It should align properly and create a secure angle for the picture frame to rest against.
- If needed, make any adjustments to the back support by trimming or sanding until it fits snugly against the base.
Creating the back support is a crucial step in ensuring the stability of your picture frame stand. By taking the time to measure accurately and make clean cuts, you’ll create a sturdy support for your frame. Remember to use sandpaper to achieve a smooth finish, and don’t hesitate to make any necessary adjustments to ensure a proper fit.
With the back support in place, you’re now ready to move on to the next step – attaching the back support to the base. Stay tuned for detailed instructions on how to securely connect these two components and complete your picture frame stand.
When making stands for picture frames, ensure that the base is wide and stable to prevent tipping. Use materials like wood or metal for durability.
Read more: How To Make Acrylic Picture Frames
Step 4: Attaching the Back Support to the Base
Now that you have created the back support for your picture frame stand, it’s time to securely attach it to the base. This step is essential to ensure the stability and functionality of your stand. Follow these step-by-step instructions to properly connect the back support to the base:
- Place the base and back support side by side, ensuring they are properly aligned.
- Using a pencil, mark the spots where the back support will be attached to the base. The marks should be on the inside of the back support, facing towards the base.
- Pre-drill pilot holes at each marked spot. The size of the drill bit should be slightly smaller than the diameter of the screws you will be using.
- Align the back support with the base, making sure the pilot holes on the back support are positioned directly over the pilot holes on the base.
- Securely attach the back support to the base by driving screws into the pilot holes. Use a screwdriver or a drill fitted with a screwdriver bit to ensure a tight connection.
- Repeat the process for all the pilot holes, ensuring that the back support is firmly and evenly attached to the base.
It’s important to choose screws that are appropriate for the thickness of the wooden board or plywood you are using. This will ensure a secure attachment without splitting or damaging the wood.
After attaching the back support to the base, double-check the stability of the stand. Make any necessary adjustments to ensure that the picture frame stands upright and securely on the stand.
Congratulations! You have successfully attached the back support to the base of your picture frame stand. The structure is now stable and ready to hold your cherished picture frame. In the next step, we will guide you through securing the picture frame to the stand to complete the assembly. Stay tuned!
Step 5: Securing the Picture Frame to the Stand
Now that the base and back support of your picture frame stand are securely connected, it’s time to move on to the next step: securing the picture frame in place. Ensuring that the frame is stable and properly displayed on the stand is essential for showcasing your memories or artwork. Follow these step-by-step instructions to securely attach the picture frame to the stand:
- Position the picture frame on the stand in the desired orientation.
- Use a pencil or a marker to mark the spots where the frame will be attached to the back support.
- Pre-drill pilot holes at each marked spot on the back support.
- Hold the picture frame against the back support, aligning the pilot holes on the frame with the drilled holes on the back support.
- Attach the picture frame to the back support using screws. Make sure to use screws that are appropriate for the thickness of the frame and will securely hold it in place.
- Tighten the screws with a screwdriver or a drill fitted with a screwdriver bit, ensuring that the frame is firmly attached to the back support.
- Double-check the stability of the frame on the stand. Gently wiggle the frame to ensure it is securely anchored.
It’s important to choose screws that are long enough to securely hold the frame in place but not too long that they extend through the back of the back support. This will ensure the frame stays securely attached and prevent any damage to the artwork.
Once the picture frame is securely attached to the stand, step back and admire your handiwork. You have successfully completed the assembly of your picture frame stand! In the next step, we will discuss some optional finishing touches and decorations that you can add to personalize your stand. Stay tuned!
Step 6: Finishing Touches and Optional Decorations
With your picture frame securely attached to the stand, it’s time to add some finishing touches and optional decorations to enhance its visual appeal. This step allows you to personalize your stand and make it truly unique. Follow these suggestions to add those final touches:
- If desired, apply a coat of paint or wood stain to the wooden components of the stand. This can help protect the wood and give it a polished appearance. Use a paintbrush or sponge brush to evenly distribute the paint or stain.
- Consider adding decorative elements to the stand. You can use paint, wood stain, stencils, or stickers to create patterns, designs, or even personalized messages. Get creative and make your stand stand out!
- You may also want to add a protective finish to the stand. This can be done with a clear coat of varnish or polyurethane. Apply the finish according to the manufacturer’s instructions, ensuring you cover all exposed wooden surfaces.
- Finally, take a moment to clean and polish the picture frame itself. Remove any dust or fingerprints, and use a glass cleaner to make the glass shine. This will ensure that your framed pictures or artwork look their best.
The finishing touches and optional decorations allow you to add your personal style and creativity to the picture frame stand. Whether you choose to keep it simple and elegant or go for a bold and vibrant look, the choice is yours. Remember, the goal is to create a stand that complements your picture frame and adds visual interest to the overall display.
Once you have added the finishing touches and decorations, step back and admire your completed picture frame stand. It’s now ready to showcase your cherished memories, artwork, or any other items you want to display.
Congratulations! You have successfully created a personalized and functional picture frame stand. Enjoy the satisfaction of your DIY project and the joy it brings when displaying your favorite pictures or artwork. We hope this step-by-step guide has been helpful, and we encourage you to let your creativity shine!
Remember, practice makes perfect, so don’t be afraid to experiment and refine your technique. Enjoy the process, and happy showcasing!
Conclusion
Congratulations on completing the journey of creating your very own picture frame stand! By following the step-by-step instructions and adding your personal touch, you have crafted a unique and customized stand that perfectly showcases your cherished memories or artwork. Taking the time to create something with your own hands not only adds a personal touch to your home decor but also brings a sense of accomplishment and pride.
Throughout this article, we have guided you through the process of gathering the materials, measuring and cutting the base, creating the back support, attaching the back support to the base, securing the picture frame to the stand, and adding finishing touches and optional decorations. The result is a sturdy and visually appealing stand that highlights the beauty of your picture frame.
As you embarked on this creative DIY project, you may have discovered new skills or gained confidence in your crafting abilities. DIY projects like this provide a wonderful opportunity to unleash your creativity and make something truly unique. Don’t be afraid to experiment with different materials, designs, and techniques to create stands that reflect your personal style and taste.
Remember to prioritize safety throughout the process by using the appropriate tools and protective gear. Take your time, follow the instructions, and pay attention to details to ensure a flawless outcome. And if you encounter any challenges along the way, don’t hesitate to seek guidance or assistance.
Now that your picture frame stand is complete, take a moment to admire your handiwork. Showcase your favorite photos, artwork, or any other treasures that hold special meaning to you. Your newly crafted stand will not only enhance the beauty of the displayed items but also serve as a testament to your creativity and resourcefulness.
We hope this article has been informative and inspiring, encouraging you to explore more DIY projects in the future. Remember to enjoy the process and embrace the satisfaction that comes with creating something with your own two hands. Happy showcasing, and may your picture frame stand bring joy and beauty to your living space!
Now that you've mastered crafting stands for picture frames, why not broaden your DIY skills with some exciting woodworking projects? Our latest guide, "14 Best Woodworking for 2024", outlines creative ideas guaranteed to inspire and challenge both novices and seasoned crafters. After you've created the perfect stand, consider the art of presentation. Our comprehensive guide on how to display artwork, photos, and ornaments offers innovative and stylish ways to showcase your favorite pieces. Both articles promise to enhance your home’s aesthetic and give your handcrafted projects the attention they deserve.
Frequently Asked Questions about How To Make Stands For Picture Frames
Was this page helpful?
At Storables.com, we guarantee accurate and reliable information. Our content, validated by Expert Board Contributors, is crafted following stringent Editorial Policies. We're committed to providing you with well-researched, expert-backed insights for all your informational needs.


0 thoughts on “How To Make Stands For Picture Frames”