Articles
How To Open An Acculine Laser Level
Modified: August 21, 2024
Learn all about opening and operating an Acculine laser level with our comprehensive articles. Master the art of leveling with step-by-step guides and expert tips.
(Many of the links in this article redirect to a specific reviewed product. Your purchase of these products through affiliate links helps to generate commission for Storables.com, at no extra cost. Learn more)
Introduction
Opening an Acculine laser level is a relatively simple and straightforward process that requires a few basic steps and the right tools. Whether you are a professional contractor or a DIY enthusiast, using a laser level can greatly enhance the accuracy and efficiency of your leveling and alignment tasks.
In this article, we will guide you through the process of opening an Acculine laser level and getting it ready for use. From gathering the necessary tools and materials to understanding the different parts and buttons of the laser level, we will cover everything you need to know to ensure a successful setup.
But before we delve into the step-by-step process, let’s briefly discuss what a laser level is and its primary benefits. A laser level is a precision instrument that emits a laser beam to create a perfectly straight line or reference point. It is commonly used in construction, woodworking, and other applications that require accurate leveling, such as installing shelves, hanging pictures, or aligning tiles.
The primary advantages of using an Acculine laser level include improved precision, time-saving, and ease of use. Unlike traditional bubble levels, which can be prone to human error and may require frequent readjustments, a laser level ensures precise results with minimal effort. It allows you to easily and quickly establish level lines, plumb lines, or any other desired reference point, saving you time and reducing frustration.
Now that we have a basic understanding of what a laser level is and its benefits, let’s move on to the step-by-step process of opening an Acculine laser level.
Key Takeaways:
- Proper preparation is essential for opening an Acculine laser level, including gathering tools, familiarizing yourself with the device, and ensuring correct battery insertion and settings adjustment. This sets the stage for a smooth and efficient setup process.
- Safety, precision, and care are paramount when using and storing an Acculine laser level. Prioritizing safety goggles, handling the device with care, and following proper powering off and storage procedures ensure longevity and reliable performance.
Read more: How To Level A Laser Level Tripod
Step 1: Gather the Required Tools and Materials
Before you begin opening your Acculine laser level, it is essential to gather all the necessary tools and materials. This ensures that you have everything you need within reach, making the setup process smoother and more efficient. Here are the items you will need:
– Laser level: Of course, the most important item on your checklist is the Acculine laser level itself. Make sure you have it readily available and in good working condition.
– Batteries: Check the user manual or the laser level itself to determine the type and number of batteries required. Ensure that you have the appropriate batteries on hand to power up your laser level.
– User manual: The user manual is an essential accompanying document that provides detailed instructions on how to operate the laser level. It contains valuable information about the different functions, settings, and safety precautions. Keep it nearby for easy reference throughout the setup process.
– Safety goggles: Safety should be your top priority when working with any laser device. Acculine laser levels emit a bright laser beam, which can be harmful if it enters your eyes. Protect your eyes by wearing safety goggles specifically designed to shield against laser radiation.
– Tripod (optional): While not necessary for all laser level models, a tripod can significantly enhance stability and accuracy, especially when working on larger projects. If your Acculine laser level is compatible with a tripod, consider using one to ensure a steady and reliable setup.
By gathering these tools and materials before you begin opening your Acculine laser level, you can eliminate any unnecessary delays or interruptions during the setup process. This preparation sets the foundation for a smooth and efficient setup, allowing you to focus on the task at hand: getting your laser level ready for use.
Step 2: Familiarize Yourself with the Laser Level
Before diving into the setup process, it’s crucial to familiarize yourself with the different parts, buttons, and functions of your Acculine laser level. This will ensure that you have a clear understanding of how the device operates and how to make the most out of its features. Here are two important aspects to consider:
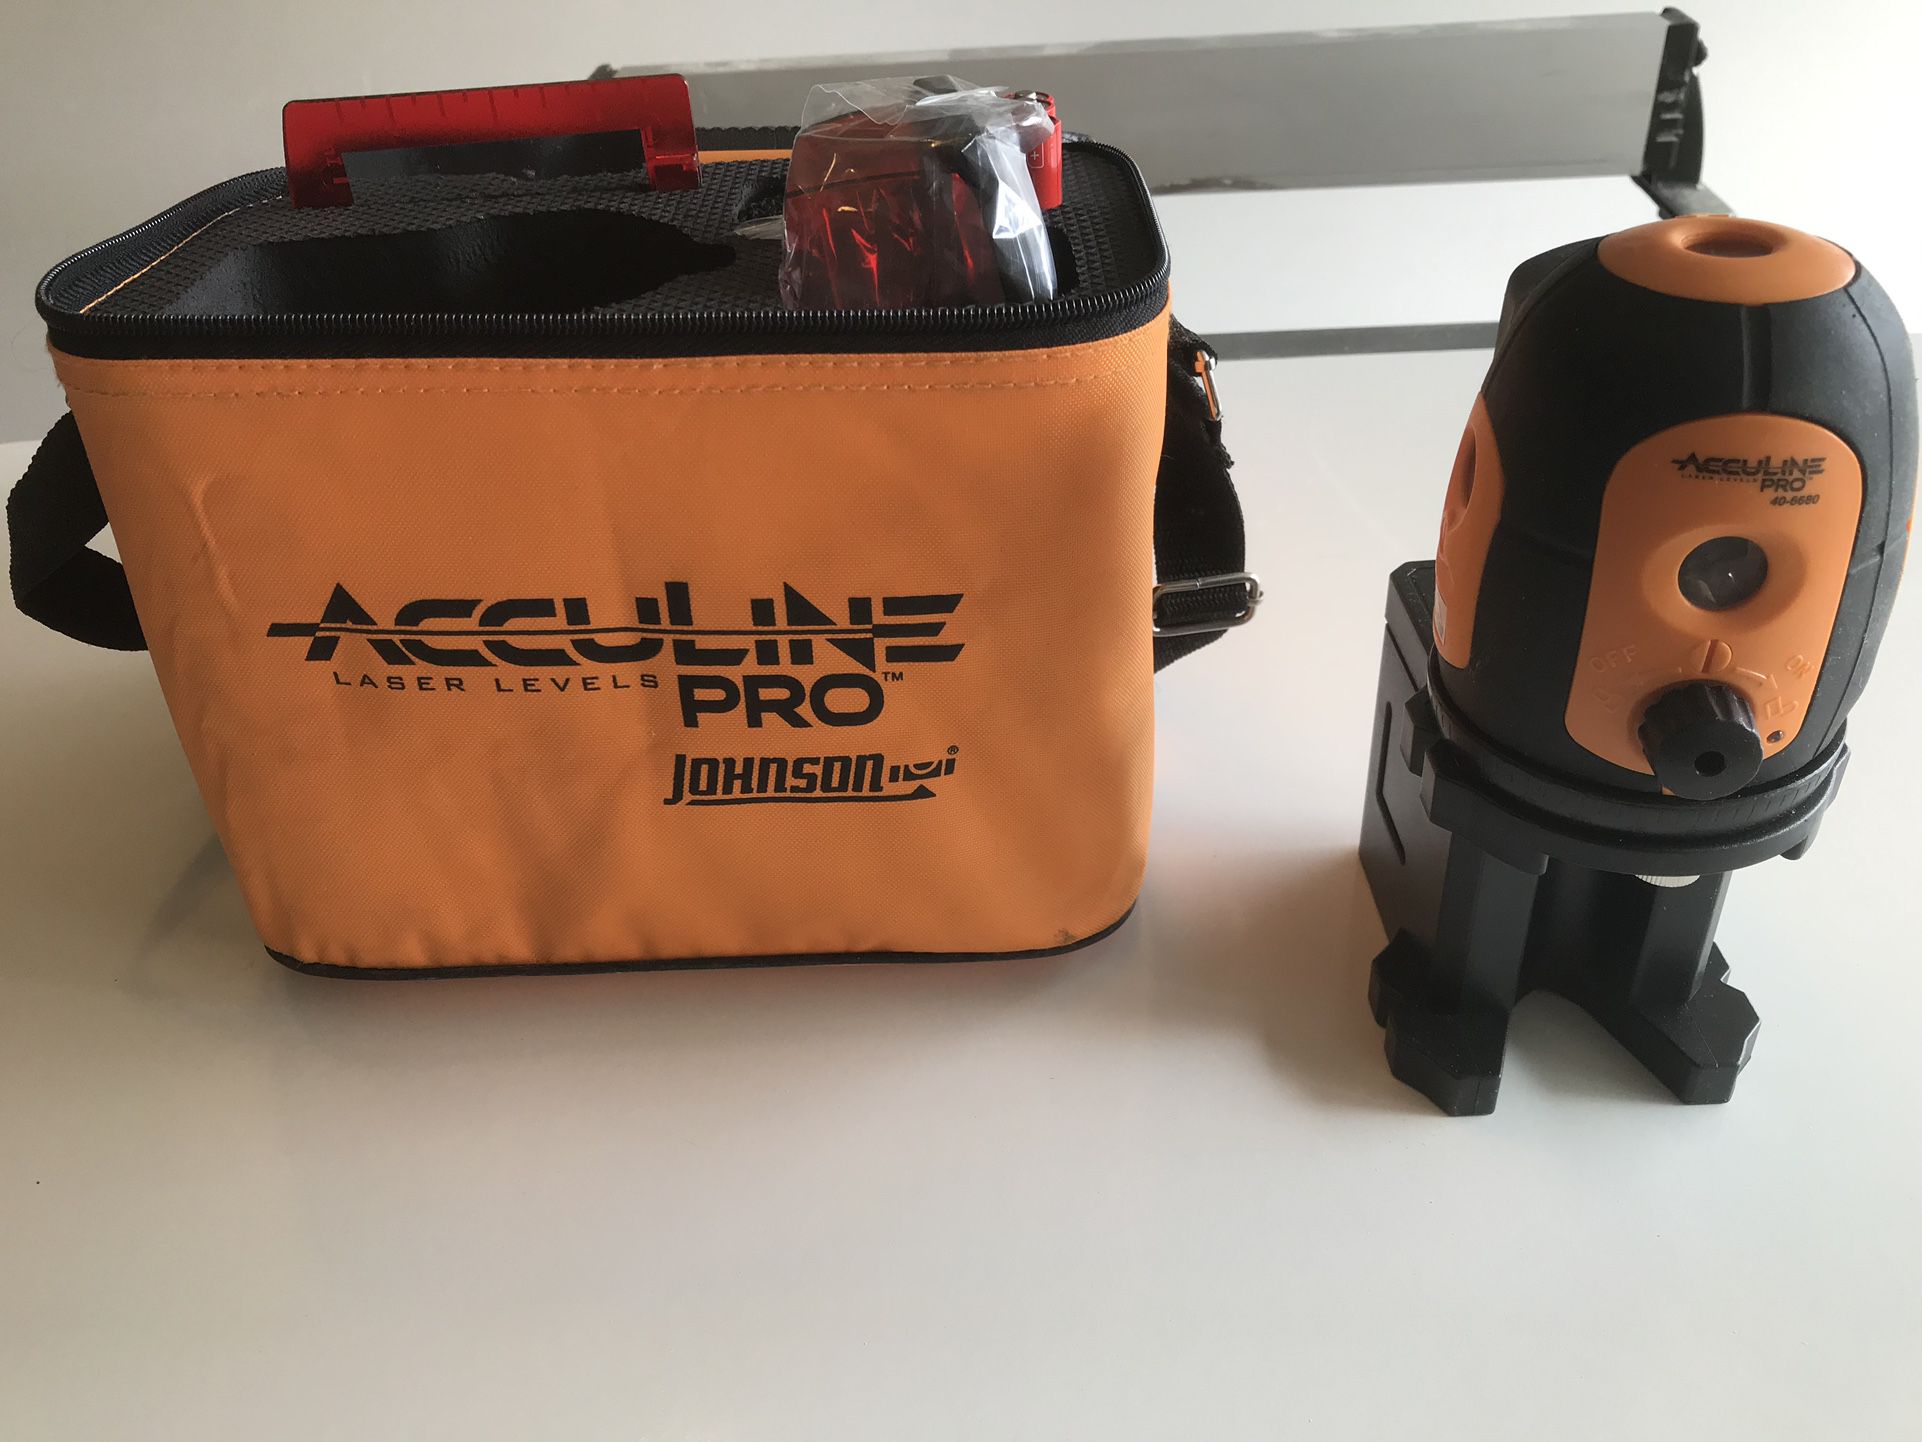
– Understanding the different parts and buttons: Take a moment to inspect your Acculine laser level and identify its various components. Common parts may include the laser emitter, leveling bubble, power switch, calibration knobs, and mode selector. Familiarize yourself with these components to have a better grasp of how they contribute to the laser level’s functionality.
– Reading the user manual for instructions: The user manual is an invaluable resource that provides detailed instructions specific to your Acculine laser level model. It contains information on how to operate the laser level, adjust its settings, troubleshoot common issues, and ensure proper maintenance. Set aside some time to thoroughly read the user manual and gain a comprehensive understanding of how to maximize the potential of your laser level.
By familiarizing yourself with the different parts and buttons of the Acculine laser level and reading the user manual, you set yourself up for success during the setup and usage processes. This knowledge enables you to confidently navigate the various features and settings, ensuring accurate and efficient results in your leveling and alignment tasks.
Step 3: Prepare the Laser Level
Now that you are familiar with your Acculine laser level, it’s time to prepare it for use. This step involves two key processes: inserting the batteries and adjusting the laser level settings as needed. Let’s explore each of these processes in detail:
– Inserting the batteries: Check the user manual or the battery compartment of your Acculine laser level to determine the type and number of batteries required. Make sure you have the correct batteries on hand. Open the battery compartment and insert the batteries according to the specified orientation. Double-check that the batteries are securely in place before proceeding. Ensure that you are using fresh batteries or fully charged rechargeable batteries to maximize the laser level’s performance.
– Adjusting the laser level settings as needed: Depending on your specific project requirements, you may need to make some adjustments to the laser level’s settings. This could include selecting different laser beam modes (such as horizontal, vertical, or cross-line), adjusting the beam brightness, or modifying the self-leveling sensitivity. Refer to the user manual for detailed instructions on how to access and adjust these settings. Take your time to configure the laser level to meet the exact needs of your task.
By properly inserting the batteries and adjusting the laser level settings as needed, you ensure that your Acculine laser level is ready to provide accurate results in your leveling and alignment tasks. These preparations lay the foundation for a successful setup that will save you time and effort in the long run.
Step 4: Set up the Laser Level
Now that your Acculine laser level is prepared, it’s time to set it up in the desired location. This step involves two important considerations: choosing a suitable location and mounting the laser level securely. Let’s explore each of these considerations in detail:
– Choosing a suitable location: Start by assessing your project requirements and determining the best location for your Acculine laser level. Consider factors such as the size of the area you need to level or align, the distance to your reference points, and any obstacles that may affect the laser beam visibility. Additionally, ensure that the location provides a stable and flat surface for mounting the laser level.
– Mounting the laser level on a tripod or other stable surface: If your Acculine laser level comes with a tripod mount, using a tripod can provide enhanced stability and accuracy during operation. Attach the laser level to the tripod by aligning the mounting threads and securely tightening the connection. Alternatively, if your laser level doesn’t have a tripod mount or you prefer not to use a tripod, you can place it on a stable surface, such as a table or ledge. Ensure that the laser level remains steady and doesn’t wobble during use.
By carefully selecting a suitable location and securely mounting your Acculine laser level, you set the stage for precise and reliable leveling and alignment. The stability of the laser level during operation plays a crucial role in obtaining accurate results, so take the time to choose the right spot and ensure a secure setup.
Read more: How To Work A Water Level Or Laser Level
Step 5: Power On and Calibrate the Laser Level
With your Acculine laser level set up and in position, it’s time to power it on and calibrate it for accurate leveling. This step involves two key processes: switching on the laser level and adjusting the calibration knobs. Let’s explore each of these processes in detail:
– Switching on the laser level: Locate the power switch on your Acculine laser level and turn it on. Depending on the model, the switch may be a physical button or a digital control. Refer to the user manual if you are unsure about the location or operation of the power switch. Once the laser level is powered on, allow it a few moments to self-level and stabilize. Some models may have an indicator light that informs you when the laser is ready for use.
– Adjusting the calibration knobs for accurate leveling: To ensure that the laser beam is aligned correctly and provides accurate leveling or alignment, you may need to make adjustments using the calibration knobs. These knobs allow you to fine-tune the position of the laser level and ensure that it is perfectly level. Refer to the user manual for instructions on how to access and adjust these knobs. Make small adjustments, observing the laser beam’s movement, until it aligns with your desired reference point or leveling line.
By switching on the laser level and adjusting the calibration knobs, you ensure that your Acculine laser level is calibrated for accurate leveling and alignment. Proper calibration is crucial to achieving precise and reliable results in your projects. Take the time to make small adjustments and ensure that the laser beam is aligned according to your requirements.
Before opening an Acculine laser level, ensure that the device is turned off and remove any batteries. Use a screwdriver to carefully remove the screws from the casing, then gently pry the casing open to access the internal components.
Step 6: Using the Laser Level
Now that your Acculine laser level is powered on and calibrated, it’s time to put it to use. This step involves two important actions: aligning the laser beam with the desired reference point and adjusting the laser level position or tripod height for proper alignment. Let’s explore each of these actions in detail:
– Aligning the laser beam with the desired reference point: Determine the reference point or leveling line you want to establish. Activate the laser beam and adjust its position until it aligns precisely with your desired reference point. Use the leveling bubble or digital indicators on the laser level to ensure that it remains level during the alignment process. Take your time to align the laser beam accurately as this will dictate the accuracy of your measurements or alignment.
– Adjusting the laser level position or tripod height for proper alignment: Depending on the nature of your project and the desired reference points, you may need to adjust the laser level’s position or the height of the tripod. If the laser beam is too high or too low, adjust the tripod legs accordingly to achieve the desired height. If the laser level needs to be repositioned, carefully move it while maintaining its level position to avoid losing alignment. Make small, precise adjustments until the laser beam aligns perfectly with the desired reference point.
By aligning the laser beam with the desired reference point and adjusting the laser level position or tripod height for proper alignment, you ensure that your Acculine laser level provides accurate and reliable results. Remember to take your time and make small adjustments for precise alignment. This will ensure that your leveling or alignment tasks are carried out with the utmost accuracy and efficiency.
Step 7: Making Adjustments and Fine-tuning
Once your Acculine laser level is in use and the initial alignment has been achieved, there may be further adjustments and fine-tuning required to ensure optimal accuracy. This step involves utilizing the leveling features of the laser level and making any necessary refinements to the alignment. Let’s explore these actions in detail:
– Utilizing the leveling features of the laser level: Many Acculine laser levels come equipped with additional leveling features to enhance accuracy. These features may include self-leveling mechanisms, manual slope adjustments, or locking mechanisms to maintain a specific angle. Refer to the user manual to understand the capabilities of your laser level and how to utilize these features effectively. Depending on your project requirements, you can take advantage of these features to achieve precise leveling or alignment.
– Fine-tuning the alignment as needed: As you begin your project or as you move along, it’s important to periodically check the alignment of the laser beam and make any necessary adjustments. This could involve verifying the levelness of the laser level using the leveling bubble or digital indicators. If you notice any deviations from the desired reference point or leveling line, make small, incremental adjustments using the calibration knobs or repositioning the laser level if needed. Regularly monitoring and fine-tuning the alignment will help ensure accurate results throughout your project.
By utilizing the leveling features of your Acculine laser level and making necessary adjustments and fine-tuning, you can maintain optimal accuracy as you progress through your project. Regular checks and minor refinements will enable you to achieve consistent and precise leveling or alignment, enhancing the overall quality of your work. Remember to refer to the user manual for specific guidelines on how to utilize the leveling features and make adjustments effectively.
Step 8: Safety Precautions
When using your Acculine laser level, it is essential to prioritize safety to ensure a secure and hazard-free work environment. This step involves two important safety precautions: wearing safety goggles during operation and handling the laser level with care. Let’s explore each of these precautions in detail:
– Wearing safety goggles during operation: Acculine laser levels emit a bright laser beam that can potentially be harmful to the eyes. To protect your vision, it is crucial to wear safety goggles specifically designed to shield against laser radiation. Safety goggles with appropriate laser protection ratings will prevent accidental exposure to the laser beam and minimize the risk of eye injuries. Remember to always wear these goggles when operating the laser level, regardless of the duration of use.
– Handling the laser level with care: Acculine laser levels are precision instruments that require careful handling to maintain their accuracy and functionality. Treat the laser level with care to avoid accidental damage. Avoid dropping or subjecting the laser level to extreme temperatures or humidity. If transporting the device, use a protective case or packaging to prevent any potential impacts. Additionally, keep the laser level away from dust, dirt, and moisture, as these can affect its performance. By handling the laser level with care, you can extend its lifespan and ensure reliable results in your projects.
By adhering to these safety precautions, you can create a safe working environment while using your Acculine laser level. The importance of wearing safety goggles cannot be overstated, as it provides crucial eye protection from the laser beam. Additionally, handling the laser level with care will help to avoid any accidental damage and maintain its integrity over time. Prioritizing safety is vital for a successful and incident-free working experience.
Read more: How Dangerous Is Laser Level
Step 9: Powering Off and Storage
As you come to the end of your project or when you need to temporarily stop using your Acculine laser level, it’s important to follow proper procedures for powering off and storing the device. This step involves two actions: turning off the laser level and safely storing it and its accessories. Let’s explore each of these actions in detail:
– Turning off the laser level: When you have completed your leveling or alignment task or when you need to take a break, it’s important to power off the laser level. Locate the power switch on your Acculine laser level and switch it off. This will deactivate the laser beam and conserve battery power. It is essential to power off the laser level properly to prevent accidental activation or unintentional laser emissions. Always ensure that the laser level is turned off when not in use.
– Safely storing the laser level and accessories: Proper storage of your Acculine laser level and its accessories helps maintain their performance and prolong their lifespan. Safely store the laser level in a protective case or a designated storage area to shield it against dust, dirt, and potential damage. If the laser level came with additional accessories such as batteries or a user manual, store them together in the same location for easy access. Avoid storing the laser level in extreme temperatures, high humidity, or direct sunlight, as these conditions can impact its functionality. By storing the laser level and accessories properly, you ensure that they will be in good condition and ready for future use.
By following the procedures for powering off and storing your Acculine laser level, you can maintain its longevity and ensure its readiness for future projects. Turning off the laser level when not in use helps preserve battery life and prevents accidental activation. Properly storing the laser level and its accessories provides protection against potential damage and enables convenient access when needed. Take the time to establish a safe and organized storage system to keep your Acculine laser level in optimal condition.
Conclusion
Opening and setting up an Acculine laser level is a straightforward process that can greatly enhance the accuracy and efficiency of your leveling and alignment tasks. By following the step-by-step guide outlined in this article, you can confidently prepare, power on, calibrate, and use your Acculine laser level with ease.
Starting with gathering the necessary tools and materials, such as the laser level, batteries, user manual, safety goggles, and tripod (optional), you ensure that you have everything you need for a smooth setup. Familiarizing yourself with the different parts and buttons of the laser level, as well as reading the user manual, helps you get acquainted with its functionality and features.
Preparation involves inserting the batteries and adjusting the laser level settings as needed. This ensures that your laser level is powered and configured correctly for accurate leveling and alignment. Set up the laser level by choosing a suitable location and securely mounting it on a tripod or stable surface. This establishes a solid foundation for precise measurements.
Powering on the laser level and calibrating it are crucial steps in achieving accurate results. Switching on the laser level and adjusting the calibration knobs help ensure that the laser beam is aligned correctly and provides accurate leveling or alignment.
Using the laser level involves aligning the laser beam with the desired reference point and making small adjustments as needed. Regularly checking and fine-tuning the alignment, as well as utilizing the leveling features of the laser level, enhances accuracy throughout your project.
Safety should always be a top priority when using a laser level. Wearing safety goggles during operation protects your eyes from laser radiation. Handling the laser level with care, avoiding drops and extreme conditions, helps maintain its functionality and lifespan.
Finally, powering off the laser level and safely storing it and its accessories ensure proper maintenance and readiness for future use.
With this comprehensive guide, you can confidently open and set up an Acculine laser level, leveraging its precision to achieve accurate and efficient leveling and alignment in various projects. Remember to consult the specific user manual for your model to ensure you follow any manufacturer-specific instructions.
So, equip yourself with an Acculine laser level, follow the steps outlined in this article, and enjoy the benefits of enhanced accuracy and efficiency in your leveling and alignment tasks.
Frequently Asked Questions about How To Open An Acculine Laser Level
Was this page helpful?
At Storables.com, we guarantee accurate and reliable information. Our content, validated by Expert Board Contributors, is crafted following stringent Editorial Policies. We're committed to providing you with well-researched, expert-backed insights for all your informational needs.


0 thoughts on “How To Open An Acculine Laser Level”