Articles
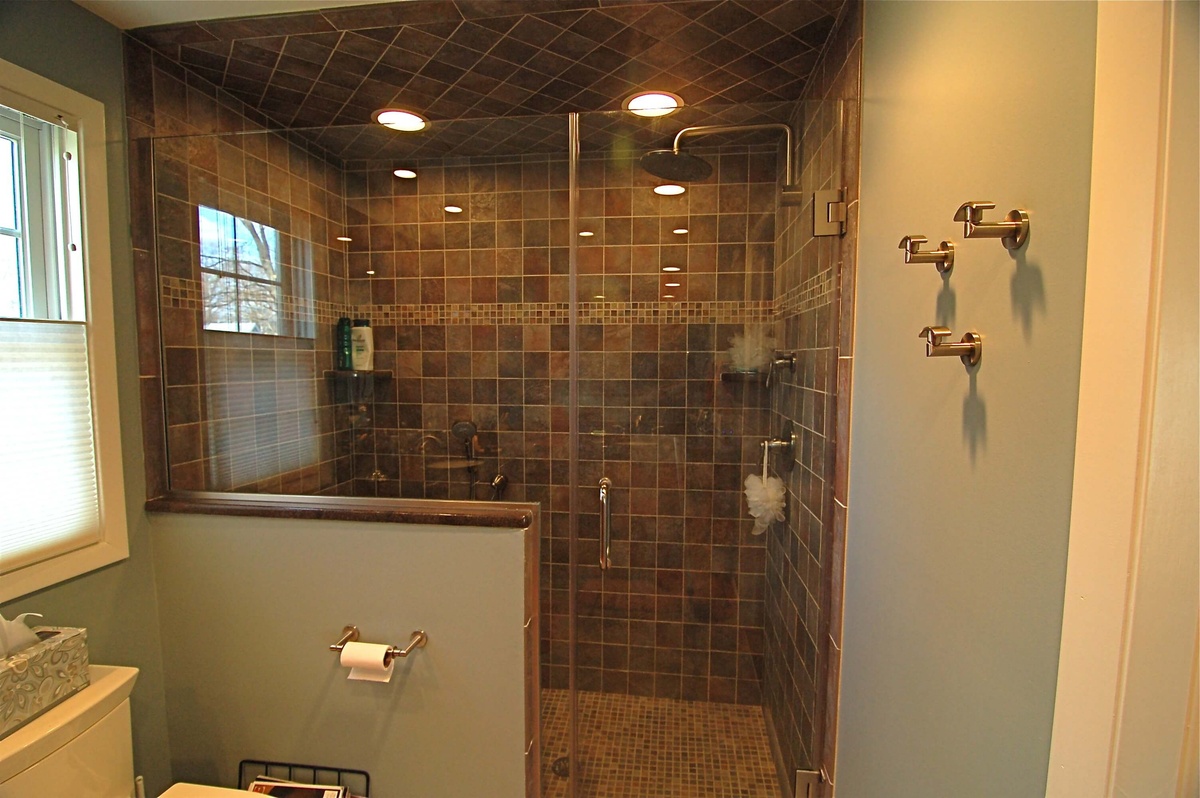
How To Paint Bathroom Floor Tile
Modified: October 28, 2024
Learn how to paint your bathroom floor tile with our informative articles. Transform your space with our expert tips and techniques.
(Many of the links in this article redirect to a specific reviewed product. Your purchase of these products through affiliate links helps to generate commission for Storables.com, at no extra cost. Learn more)
Introduction
Are you tired of the outdated look of your bathroom floor tiles? Perhaps they have seen better days and are in need of a refresh. Luckily, you don’t have to go through the hassle and expense of replacing them. With a little bit of time and effort, you can give your bathroom floor tiles a brand new look by painting them.
Painting bathroom floor tiles is a cost-effective and creative way to transform the appearance of your bathroom. Whether you want to update the color, add a pattern, or simply freshen up the existing tiles, this DIY project is both fun and rewarding. Plus, it allows you to personalize your space and make it more aesthetically pleasing.
In this article, we will guide you through the process of painting bathroom floor tiles step by step. We will cover everything from preparing the tiles to selecting the right paint and ensuring proper maintenance. So, roll up your sleeves, gather your supplies, and let’s get started on this exciting home improvement project!
Before diving into the painting process, it’s important to note that success in painting bathroom floor tiles depends on several factors. The condition of the tiles, the type of paint used, and proper surface preparation all play a crucial role in achieving a long-lasting and professional finish. With that said, let’s explore each step in detail to help you achieve beautiful and durable results.
Key Takeaways:
- Transform your bathroom floor tiles with a cost-effective and creative DIY project by painting them. Follow the step-by-step guide to achieve a personalized and aesthetically pleasing result.
- Proper preparation, choosing the right paint, and applying multiple coats are crucial for achieving a durable and professional-looking finish when painting bathroom floor tiles. Remember to seal and maintain the painted surface for long-lasting beauty.
Read more: How To Get Paint Off Tile Floor
Preparing the Bathroom Floor Tile
Before you begin painting your bathroom floor tiles, it’s essential to prepare the surface properly. This step is crucial for the paint to adhere well and ensure a smooth and long-lasting finish. Here are the steps involved in preparing the tiles:
- Clean the tile: Start by thoroughly cleaning the bathroom floor tiles. Remove any dirt, grime, or soap scum using a tile cleaner and a scrub brush. Pay special attention to the grout lines, as they can accumulate a lot of dirt. Rinse the tiles with clean water and allow them to dry completely.
- Remove any sealant: If there is any existing sealer or wax on the tiles, it’s important to remove it before painting. Use a commercial sealer remover or a mixture of warm water and vinegar to strip off the old sealant. Follow the manufacturer’s instructions and make sure to rinse the tiles thoroughly afterwards.
- Sand the tiles: To create a rough surface for the paint to adhere to, lightly sand the bathroom floor tiles. Use a fine-grit sandpaper or sanding block and gently roughen the surface of the tiles. This will help the paint bond better and prevent chipping or peeling later on. Wipe away any dust with a damp cloth.
- Mask off areas: If there are any areas you want to protect from paint, such as baseboards or fixtures, use painter’s tape to mask them off. This will ensure clean and straight lines and prevent accidental paint splatters.
By properly preparing the bathroom floor tiles, you create an ideal surface for paint adhesion. This step sets the foundation for a successful and durable painting project. Once the tiles are clean, free of sealant, sanded, and masked off, you are now ready to move on to the next stage: choosing the right paint.
Choosing the Right Paint
When it comes to painting bathroom floor tiles, selecting the right type of paint is crucial for achieving a professional and long-lasting finish. Not all paints are suitable for this high-moisture and high-traffic area. Here are some factors to consider when choosing the right paint for your bathroom floor tiles:
- Tile material: Different types of tiles require different paint options. Ceramic and porcelain tiles are typically the easiest to paint and can be coated with most types of paint. However, if you have natural stone or marble tiles, it’s important to choose a paint specifically designed for these surfaces to ensure proper adhesion and prevent damage.
- Paint type: For painting bathroom floor tiles, it’s best to use a high-quality, durable paint that is formulated for high-moisture areas. Look for paints labeled as “epoxy” or “epoxy enamel,” as they provide excellent adhesion and are resistant to water, stains, and chemicals. These paints are specifically designed for painting tile surfaces and offer better durability and longevity than regular latex or oil-based paints.
- Color and finish: The color and finish of the paint are purely a matter of personal preference. Consider the overall aesthetic of your bathroom and choose a color and finish that complement the existing décor. Lighter colors can make the space look larger and brighter, while darker colors can add drama and sophistication.
- Sample testing: It’s always a good idea to test the paint on a small, inconspicuous area of the tile before proceeding with the entire floor. This will allow you to see how the paint adheres and dries on your specific tile surface, ensuring that you get the desired results.
When purchasing the paint, make sure to consult with a knowledgeable salesperson or read the paint can instructions to ensure that it is suitable for painting bathroom floor tiles. Additionally, consider getting extra paint for touch-ups or future maintenance.
Choosing the right paint is essential to achieve a beautiful and long-lasting finish on your bathroom floor tiles. It’s worth investing in high-quality paint specifically designed for tile surfaces to ensure durability and resistance to moisture and wear.
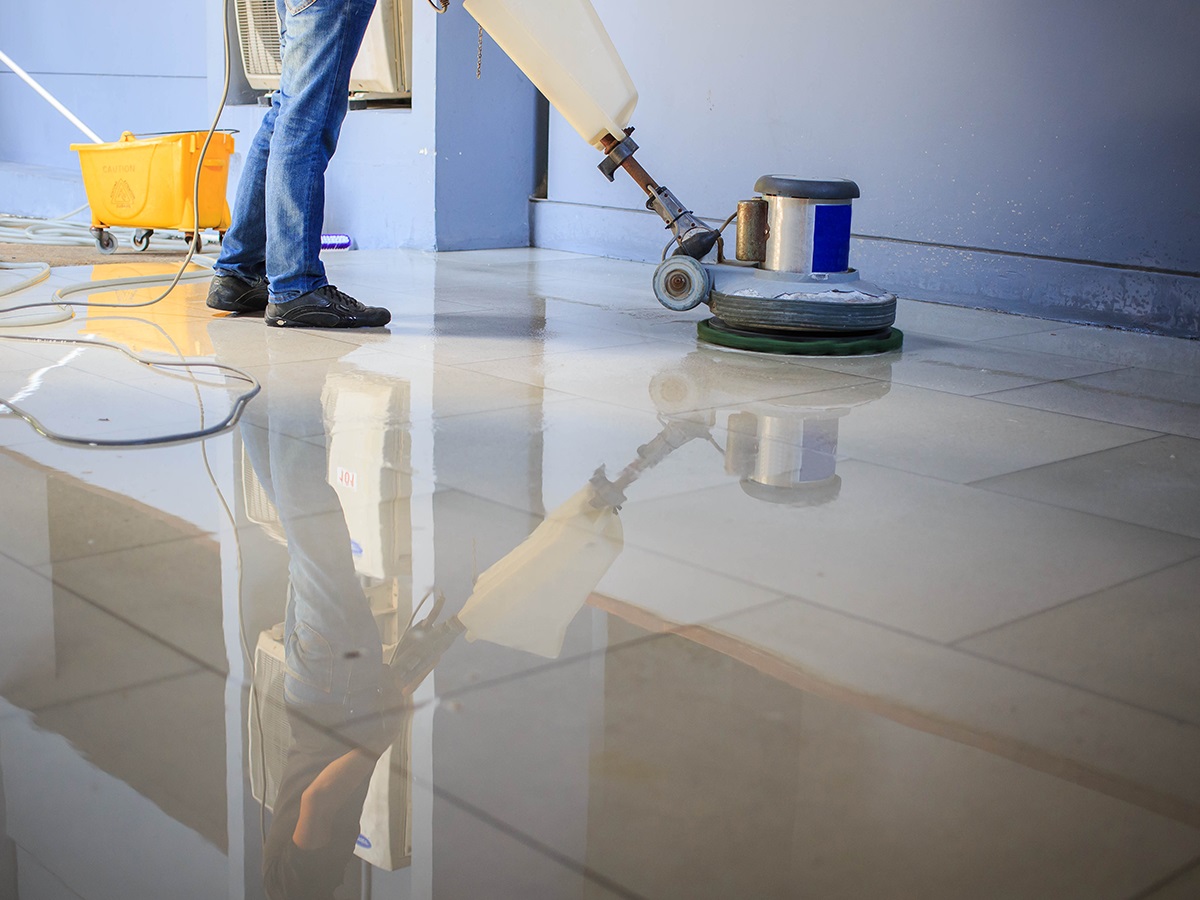
Cleaning the Tile Surface
Before you begin the painting process, it is crucial to clean the tile surface thoroughly. Cleaning ensures that the paint will adhere properly and provides a smooth canvas for your new finish. Here’s how to clean the tile surface effectively:
- Remove loose debris: Start by removing any loose dirt, dust, or debris from the tile surface. Use a broom or vacuum cleaner to sweep away the larger particles. Pay special attention to the grout lines, as they can accumulate a significant amount of dirt and grime.
- Mix a cleaning solution: Create a cleaning solution by mixing warm water with a mild detergent or tile cleaner. Follow the manufacturer’s instructions for the proper dilution ratio. Avoid using harsh or abrasive cleaners, as they can damage the tile surface or grout.
- Scrub the tiles: Dip a soft scrub brush or sponge into the cleaning solution and scrub the tiles gently. Work in small sections, applying light pressure to remove dirt, stains, and any remaining residue. Pay attention to corners, edges, and grout lines to ensure a thorough clean.
- Rinse with clean water: After scrubbing, rinse the tiles with clean water to remove any soapy residue. Use a sponge or mop to wipe away the cleaning solution. Make sure to rinse the mop or sponge frequently to avoid spreading dirty water back onto the tiles.
- Dry the surface: Allow the tile surface to dry completely before moving on to the next step. Use a clean towel or let it air dry naturally. It’s essential to ensure that there is no moisture left on the tiles, as it can affect the adhesion of the paint.
By thoroughly cleaning the tile surface, you remove any dirt, grime, or contaminants that can hinder the paint’s adherence. This step ensures optimal conditions for a successful painting project and helps the paint adhere evenly and smoothly. Once the tiles are clean and dry, you are ready to proceed to the next steps of the painting process.
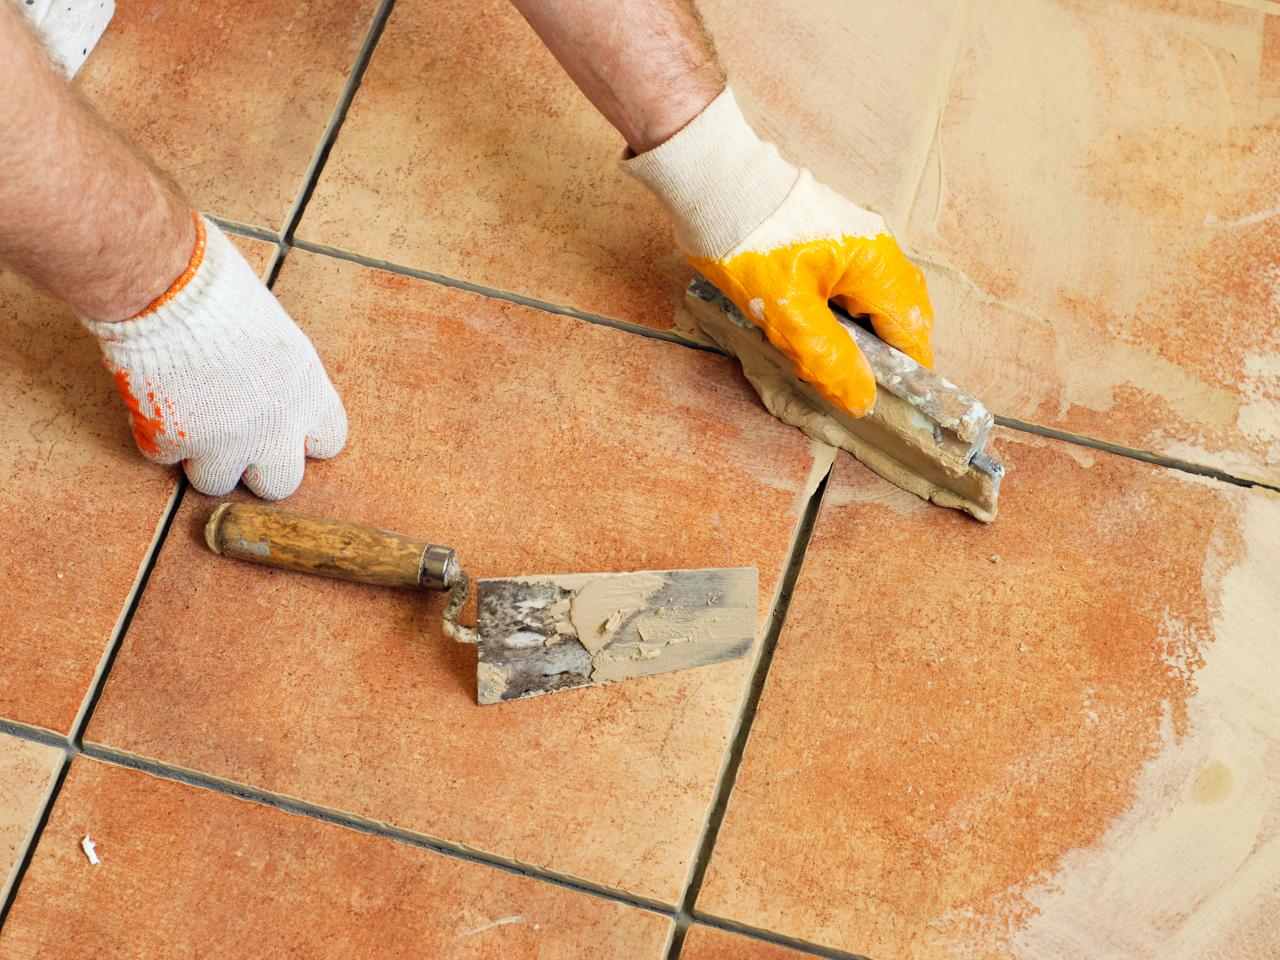
Repairing Damaged Tile
Before painting your bathroom floor tiles, it’s important to inspect them for any signs of damage. Cracked or chipped tiles can affect the overall appearance and longevity of the painted finish. Here’s how to repair damaged tiles:
- Assess the extent of damage: Carefully inspect each tile for cracks, chips, or loose pieces. Determine whether the damage is superficial or structural. Superficial damage, such as small chips or surface cracks, can often be repaired. However, if the tile is severely cracked or broken, it may need to be replaced.
- Fill in chips: For small chips in ceramic or porcelain tiles, you can use a two-part epoxy filler or a pre-mixed tile filler. Follow the manufacturer’s instructions to mix the filler or use it directly from the container. Apply the filler to the chip using a putty knife or a similar tool. Smooth out the filler to be level with the tile surface. Allow it to dry completely before proceeding.
- Repair cracks: Cracks in tiles can be repaired using an epoxy resin or a tile repair kit. Clean the crack thoroughly and apply the epoxy or repair compound according to the manufacturer’s instructions. Use a putty knife or a similar tool to ensure proper application and to smooth out the repair. Allow the repair to dry completely.
- Reattach loose tiles: If you have any tiles that are coming loose from the floor, use a tile adhesive or a thinset mortar to reattach them. Apply a thin layer of adhesive or mortar to the back of the tile and press it firmly onto the floor. Wipe away any excessive adhesive or mortar that squeezes out from the edges.
- Allow for curing time: After making any repairs, it’s important to allow the filled chips, repaired cracks, or reattached tiles to cure and dry according to the product instructions. This will help ensure that the repaired areas are stable and ready for the painting process.
Repairing any damaged tiles before painting is crucial to achieving a smooth and polished finish. It not only enhances the overall appearance of the floor but also ensures that the painted surface lasts longer without further damage. By taking the time to repair any cracks, chips, or loose tiles, you can create a solid foundation for a successful painting project.
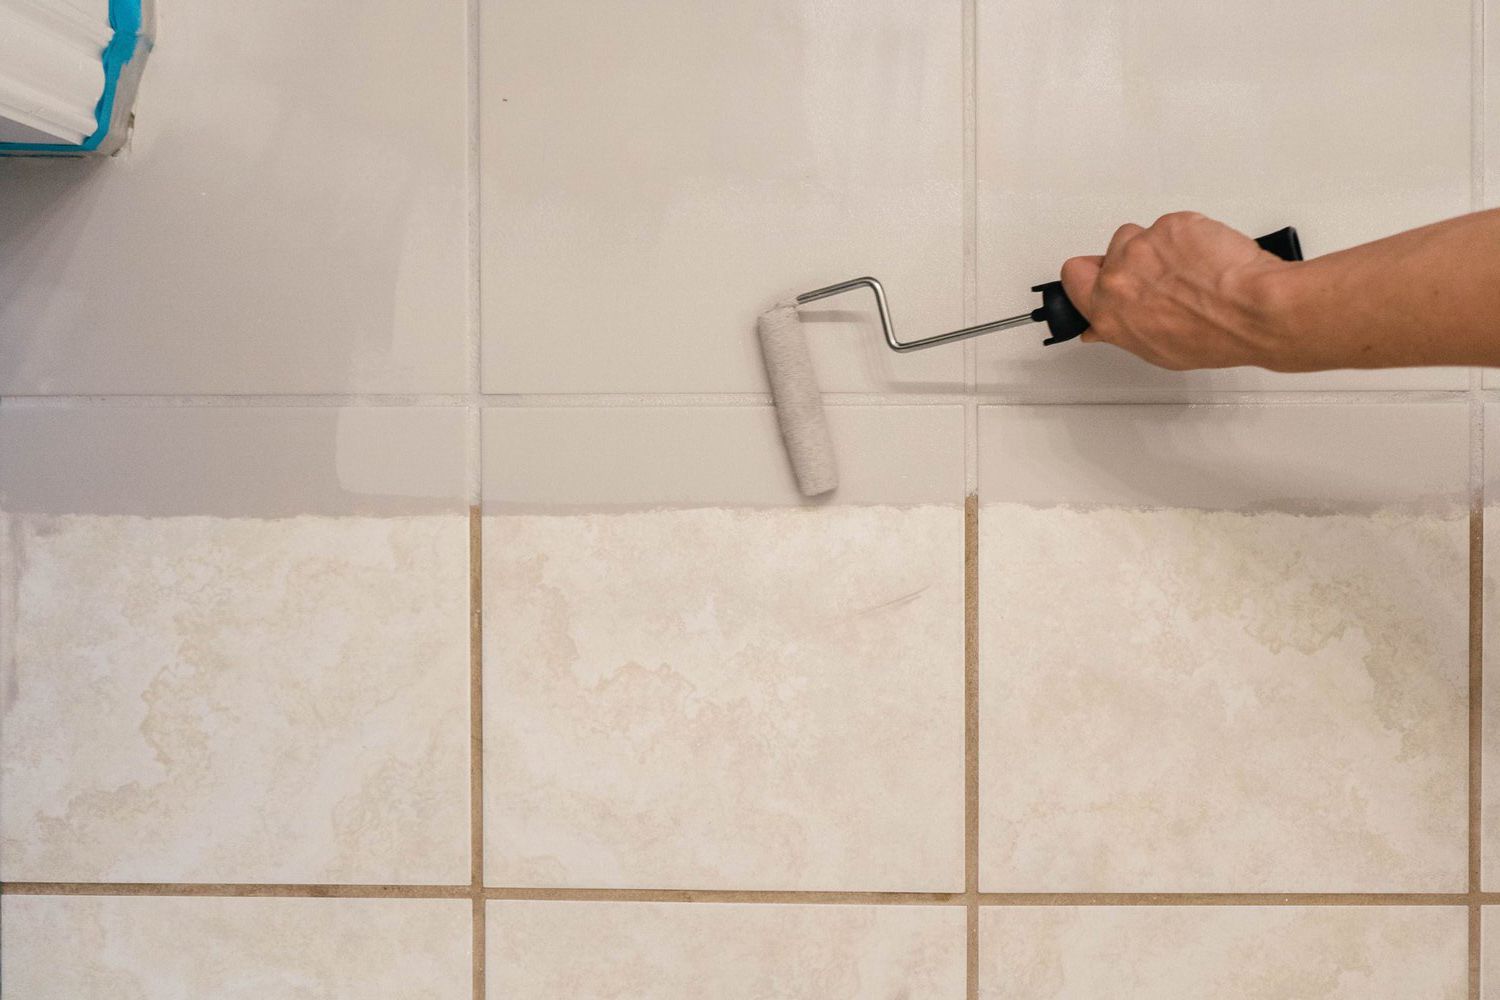
Priming the Tiles
Once the bathroom floor tiles are clean, dry, and any damaged areas have been repaired, it’s time to prime the surface. Priming the tiles is an important step as it helps the paint adhere better, enhances the color, and provides a smooth base for the final coat. Here’s how to prime the tiles:
- Select the right primer: Look for a high-quality primer specifically designed for use on tiles or for surfaces that require excellent adhesion. Choose a primer that is compatible with the type of paint you will be using.
- Prepare the primer: Follow the manufacturer’s instructions to prepare the primer. Usually, it requires stirring or shaking before application. If necessary, dilute the primer as indicated on the label.
- Apply the primer: Using a roller or a brush, apply a thin, even layer of primer over the entire tile surface. Work in small sections, starting from one corner of the room and working your way across. Ensure that the primer is applied evenly, without any drips or pooling.
- Allow the primer to dry: Check the drying time specified on the primer’s packaging. Typically, it takes a few hours for the primer to dry. Make sure the room is well-ventilated during the drying process to aid in quick and thorough drying.
- Inspect the primed tiles: After the primer has dried, inspect the tiles for any uneven areas or missed spots. If necessary, apply an additional coat of primer to these areas. It’s crucial to have a smooth and uniform primed surface before proceeding to the painting stage.
- Allow for curing time: Once all the tiles are evenly primed, allow them to cure according to the primer’s instructions. Curing ensures that the primer fully bonds to the tile surface, providing a strong base for the paint.
Priming the bathroom floor tiles is an essential step in the painting process. It creates a solid foundation for the paint to adhere to, improves the overall finish, and enhances the durability of the painted surface. By taking the time to prime the tiles properly, you increase the chances of achieving a professional and long-lasting result.
Use a high-quality primer designed for use on tile to ensure proper adhesion of the paint. Clean and sand the tile before applying the primer for best results.
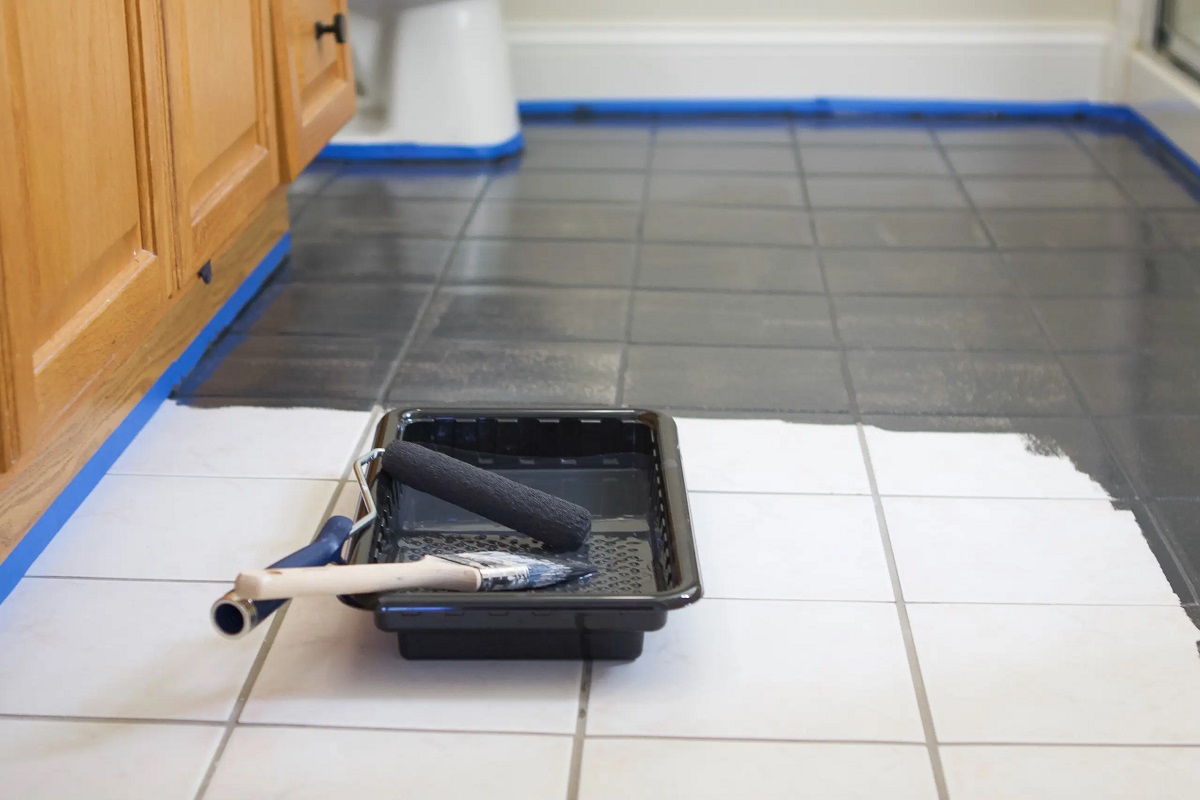
Painting the Bathroom Floor Tile
Now that the tiles are cleaned, repaired, and properly primed, it’s time to begin painting. Painting bathroom floor tiles requires a methodical approach to ensure an even application and a smooth, professional finish. Follow these steps to paint your bathroom floor tiles:
- Prepare the paint: Stir the paint thoroughly to ensure it is well-mixed. If necessary, strain the paint to remove any clumps or debris. Pour the paint into a paint tray or a clean bucket for easy access.
- Start from the back: To avoid stepping on wet paint, start from the back corner of the room, farthest from the exit. This way, you can gradually work your way out of the room without having to walk on the freshly painted tiles.
- Use a roller or brush: Depending on your preference and the size of the tiles, choose either a roller or a brush. A roller can be faster and more efficient for larger areas, while a brush can provide better control and coverage for smaller or intricate tile patterns.
- Apply the paint: Dip the roller or brush into the paint, removing any excess by rolling it on the tray’s ridges or tapping it against the side of the container. Apply a thin, even coat of paint onto the tiles, working in small sections at a time. Be careful not to overload the brush or roller to avoid drips or pooling.
- Work in a systematic pattern: Start at one corner of the room and work your way across, applying the paint in parallel strokes. Ensure that the strokes overlap slightly to achieve a seamless finish. Work methodically and avoid going back over areas that have already been painted until the first coat has dried.
- Paint the grout lines: If desired, you can also paint the grout lines for a uniform look. Use a small brush or a toothbrush to carefully apply paint to the grout, ensuring that it doesn’t come into contact with the painted tiles. This step can help refresh the grout’s appearance and give the floor a polished look.
- Allow the paint to dry: After applying the first coat of paint, allow it to dry according to the paint manufacturer’s instructions. Depending on the type of paint and the humidity levels, this can typically range from a few hours to overnight.
Once the first coat is dry, assess the coverage and decide if any additional coats are necessary. Apply subsequent coats, following the same steps of thin and even application, allowing each coat to dry fully before proceeding. Most bathroom floor tile painting projects will require at least two coats of paint to achieve a solid and seamless finish.
Remember, patience is key during the painting process. Take your time and ensure that each coat is applied smoothly and evenly. This will contribute to a more professional-looking result. Once you have achieved the desired number of coats and the paint has dried completely, it’s time to move on to the final steps of sealing and finishing.
Applying Multiple Coats
Applying multiple coats of paint to your bathroom floor tiles is essential for achieving a durable and professional-looking finish. Multiple coats ensure better coverage, improved color saturation, and increased resistance to wear and tear. Follow these steps to apply multiple coats of paint:
- Assess the coverage: After the first coat of paint has dried completely, assess the coverage. Check for any areas that may still show through or appear uneven. This is the time to determine if additional coats are needed to achieve the desired look.
- Sand between coats: Before applying additional coats of paint, it’s recommended to lightly sand the surface. Use a fine-grit sandpaper or sanding sponge to gently roughen the painted surface. This helps the subsequent coats adhere better and promotes a smoother finish.
- Clean the surface: After sanding, thoroughly clean the surface to remove any dust or debris. Wipe down the tiles with a damp cloth or sponge and allow them to dry completely before proceeding.
- Apply additional coats: Using the same techniques as before, apply additional thin and even coats of paint. Work in parallel strokes, overlapping each stroke slightly. This will ensure a seamless and consistent finish. Allow each coat to dry fully before applying the next one.
- Assess the final result: After each coat has dried, assess the final result. Determine if the desired color and coverage have been achieved. If necessary, continue applying additional coats until you are satisfied with the appearance.
- Allow for ample drying time: Once all the desired coats have been applied, allow the paint to dry completely. Follow the paint manufacturer’s instructions for the recommended drying time. It’s important to resist the temptation to use the bathroom before the paint is fully cured to prevent any damage or smudging.
Remember, the number of coats required may vary depending on the type of paint, the color, and the condition of the tiles. Applying multiple coats ensures better durability and a more visually pleasing outcome. Take your time during this process to achieve a beautifully painted bathroom floor that can withstand daily use.
Once the paint has dried and cured, it’s time to move on to the final steps of sealing the painted tiles to protect the finish and prolong its lifespan.
Sealing the Painted Tile
After painting your bathroom floor tiles, it’s important to seal the painted surface to protect it from moisture, stains, and wear. Sealing helps to create a barrier that enhances the durability and longevity of the painted finish. Follow these steps to seal the painted tile:
- Select the right sealer: Choose a high-quality sealer specifically designed for painted tiles or surfaces. Look for a sealer that is formulated to withstand high-moisture areas such as bathrooms. Take into consideration factors such as the type of paint used and the sheen finish, as some sealers may affect the appearance.
- Prepare the area: Ensure that the painted tiles are clean and free of any dust or debris. Wipe them down with a damp cloth or sponge and allow them to dry completely before applying the sealer.
- Apply the sealer: Follow the manufacturer’s instructions for the sealer application. Use a clean brush or roller to apply a thin and even coat of sealer over the entire painted surface. Work in small sections, starting from one corner and working your way across.
- Avoid excess sealer: Be careful not to apply too much sealer, as it may result in a sticky or uneven finish. Remove any excess sealer with a clean cloth or sponge while it is still wet to maintain a smooth and consistent appearance.
- Allow the sealer to dry: Allow the sealer to dry completely according to the manufacturer’s instructions. This drying time may vary depending on the sealer and environmental conditions. Make sure the room is well-ventilated during the drying process.
- Apply additional coats if needed: Assess the sealed surface and determine if it requires additional coats of sealer. Some sealers may recommend applying multiple coats for optimal protection. Follow the manufacturer’s instructions and allow sufficient drying time between coats.
- Allow for curing time: After the final coat of sealer has been applied, allow the painted tiles to cure as per the sealer manufacturer’s instructions. This curing period allows the sealer to fully harden and provide maximum protection to the painted surface.
Sealing the painted tile adds an extra layer of protection and helps maintain the paint’s appearance over time. It prevents moisture from penetrating the surface and guards against stains and damage. With proper sealing, your painted bathroom floor tiles will be better equipped to withstand the daily use and maintain their beauty for years to come.
Once the sealer has fully cured, you can enjoy your revamped bathroom floor. However, keep in mind that proper maintenance and care are crucial to ensure the longevity of the painted surface.
Curing and Drying Time
After completing the painting and sealing process for your bathroom floor tiles, it’s important to allow sufficient time for the paint and sealer to dry and cure. This ensures that the finish is fully hardened and ready to withstand daily use. Here’s what you need to know about the curing and drying time:
- Drying time: Drying time refers to the period it takes for the paint or sealer to dry on the surface. The drying time can vary depending on factors such as the type of paint, the number of coats applied, the room’s temperature and humidity, and the ventilation. Typically, paint may take a few hours to dry to the touch, while sealers may require longer drying periods, ranging from a few hours to overnight.
- Curing time: Curing time is the duration it takes for the paint or sealer to fully harden and reach its optimum level of durability. Curing times can vary depending on the specific product used and can range from a few days to a couple of weeks. It’s important to follow the manufacturer’s instructions regarding the recommended curing time for the specific paint and sealer utilized.
- Avoid premature use: During the drying and curing process, it’s crucial to avoid premature use of the painted surface. Even though the paint may feel dry to the touch, it may not have fully cured, and applying pressure or exposing it to moisture too soon can result in damage or smudging. It’s best to wait until the recommended curing time has elapsed before resuming normal use of the bathroom floor.
- Optimal conditions: To facilitate proper drying and curing, it’s important to provide optimal conditions in the room. This includes ensuring adequate ventilation by opening windows or using fans to promote air circulation. Maintaining a consistent room temperature and controlling humidity levels can also contribute to faster and more effective drying and curing.
- Perform a touch test: Before resuming use of the bathroom floor, perform a touch test on a small inconspicuous area. Gently press your fingernail against the painted surface to check for any soft or tacky areas. If the paint or sealer feels firm and does not show any signs of damage or smudging, it is likely ready for normal use.
Patience is key when it comes to drying and curing the painted bathroom floor tiles. While it may be tempting to rush the process, proper drying and curing times ensure that the paint and sealer reach their maximum durability and longevity. By allowing sufficient time for drying and curing, you can enjoy a beautifully transformed bathroom floor that will stand the test of time.
After the paint and sealer have fully cured, it’s important to implement regular maintenance and care to preserve the beauty and integrity of the painted surface.
Maintenance and Care Tips
After painting your bathroom floor tiles, it’s important to implement regular maintenance and care to ensure the longevity and beauty of the painted surface. By following these tips, you can keep your newly painted tiles looking fresh and vibrant for years to come:
- Avoid harsh cleaners: Use mild, non-abrasive cleaners specifically designed for painted surfaces. Harsh chemicals or abrasive cleaners can damage the paint and cause it to peel or fade.
- Clean spills promptly: Wipe up any spills or splatters as soon as they occur to prevent staining or damage to the paint. Use a soft cloth or sponge and a mild cleaner to gently clean the affected area.
- Regularly clean the tiles: Clean the painted tiles regularly to remove dirt, dust, and build-up. Use a gentle cleaner and a soft cloth or mop. Avoid using abrasive sponges or brushes that can scratch the paint.
- Avoid excessive moisture: While the painted tiles are more resistant to moisture than before, it’s still important to minimize excessive moisture exposure. Wipe up any water spills promptly and ensure proper ventilation in the bathroom to prevent excessive humidity.
- Avoid abrasive materials: When cleaning the painted tiles, avoid using abrasive materials such as steel wool or scouring pads. These can scratch or damage the paint surface. Opt for soft cloths, non-abrasive sponges, or microfiber cleaning tools.
- Be cautious with heavy objects: Avoid dragging heavy objects across the painted tiles, as this can cause scratches or gouges. Use furniture pads or lift heavy objects instead of sliding them to prevent damage to the paint.
- Treat the floor gently: Be mindful when cleaning or moving items on the painted floor. Avoid using sharp or pointed tools that can chip or scratch the paint. Take caution when wearing high heels or hard-soled shoes to prevent any impact damage.
- Periodically inspect and touch up: Regularly inspect the painted tiles for any signs of wear, chipping, or fading. If you notice any areas that require touch-ups, carefully clean and prepare the surface before applying a small amount of paint to the affected area.
- Place mats or rugs: Placing mats or rugs in high-traffic areas can help protect the painted floor. Choose rugs with non-slip backing to prevent accidents. Avoid using rubber-backed mats, as rubber can discolor the paint over time.
- Follow manufacturer’s instructions: Lastly, always refer to the specific paint and sealer manufacturer’s instructions for any additional maintenance and care guidelines. They may provide specific recommendations tailored to the type of paint and sealer used.
By following these maintenance and care tips, you can extend the life of your painted bathroom floor tiles and keep them looking fresh and beautiful for years to come. Regular cleaning, prompt spill clean-up, and gentle treatment will help preserve the integrity of the paint and ensure that your bathroom floor remains a stunning focal point in your home.
Remember to periodically inspect the painted tiles and perform any necessary touch-ups to maintain a flawless appearance. With proper care, your newly painted bathroom floor will continue to impress and enhance your space for a long time.
Frequently Asked Questions about How To Paint Bathroom Floor Tile
Was this page helpful?
At Storables.com, we guarantee accurate and reliable information. Our content, validated by Expert Board Contributors, is crafted following stringent Editorial Policies. We're committed to providing you with well-researched, expert-backed insights for all your informational needs.


0 thoughts on “How To Paint Bathroom Floor Tile”