Articles
How To Cover Tile Floor
Modified: May 6, 2024
Learn how to cover a tile floor with our informative articles. Find step-by-step guides and expert tips to transform your space easily and efficiently.
(Many of the links in this article redirect to a specific reviewed product. Your purchase of these products through affiliate links helps to generate commission for Storables.com, at no extra cost. Learn more)
Introduction
When it comes to revamping the look of a room, one of the most effective ways is to cover the tile floor. Whether you’re tired of the outdated tiles or simply want a new style, covering the flooring can completely transform the space. Luckily, with the right knowledge and preparation, you can easily tackle this DIY project.
In this article, we will guide you through the process of covering a tile floor, from preparing the floor to selecting the right covering material and applying it properly. By following these steps, you’ll be able to achieve a beautiful and durable new floor that suits your personal style.
Before you embark on this project, it’s important to assess the condition of the existing tile floor. If the tiles are cracked, uneven, or damaged, it may be necessary to repair or replace them before proceeding with the covering process. Additionally, be sure to gather all the necessary tools and materials for the job, including the covering material, adhesive, grout, and sealant.
Now, let’s dive into the step-by-step instructions for covering a tile floor and create a stunning new look for your space.
Key Takeaways:
- Transform your space by covering a tile floor with the right material, adhesive, and meticulous attention to detail. Enjoy a fresh and updated look that reflects your personal style and lasts for years to come.
- Achieve a professional and polished result by following the step-by-step process, from preparing the floor to sealing the surface. Take pride in your DIY project and enjoy the transformed space.
Read more: How To Put Tile On Floor
Preparing the Floor
Before you can begin covering the tile floor, it’s crucial to properly prepare the surface. This ensures that the new covering material adheres well and creates a smooth and even finish. Follow these steps to get your floor ready:
- Clear the area: Start by removing any furniture, rugs, or objects from the room. This will give you a clear space to work with and prevent any potential damage to your belongings.
- Remove baseboards: If your room has baseboards or trim along the floor, carefully remove them using a pry bar or a putty knife. Set them aside to be reinstalled after the covering process.
- Inspect the tiles: Examine the existing tile floor to identify any loose or damaged tiles. Use a putty knife or a similar tool to carefully lift and remove these tiles. This will ensure that the new covering material lays flat and smooth.
- Clean the floor: Thoroughly clean the tile floor using a broom or vacuum to remove any dust, dirt, or debris. Follow up with a damp mop or sponge to eliminate any remaining residue. Allow the floor to fully dry before proceeding.
- Level the floor: Check the floor for any uneven or raised areas. If you notice any, use a floor leveling compound to create a smooth and level surface. Follow the manufacturer’s instructions for mixing and applying the leveling compound.
- Fill in gaps: If there are any large gaps or cracks between the tiles, use a tile filler or caulk to fill them in. Smooth out the filler with a putty knife and allow it to dry completely.
By taking these steps to prepare the floor, you’re ensuring that the new covering material will have a solid foundation and create a seamless and professional-looking finish. Now that the floor is prepped, it’s time to move on to selecting the right covering material.
Choosing the Right Covering Material
When it comes to covering a tile floor, you have a wide range of options to choose from. The right covering material will depend on your personal preferences, the style of the room, and your budget. Here are some popular choices to consider:
- Laminate flooring: Laminate flooring is a versatile and affordable option that mimics the look of hardwood or natural stone. It’s available in a variety of colors and finishes, making it easy to find a style that suits your aesthetic.
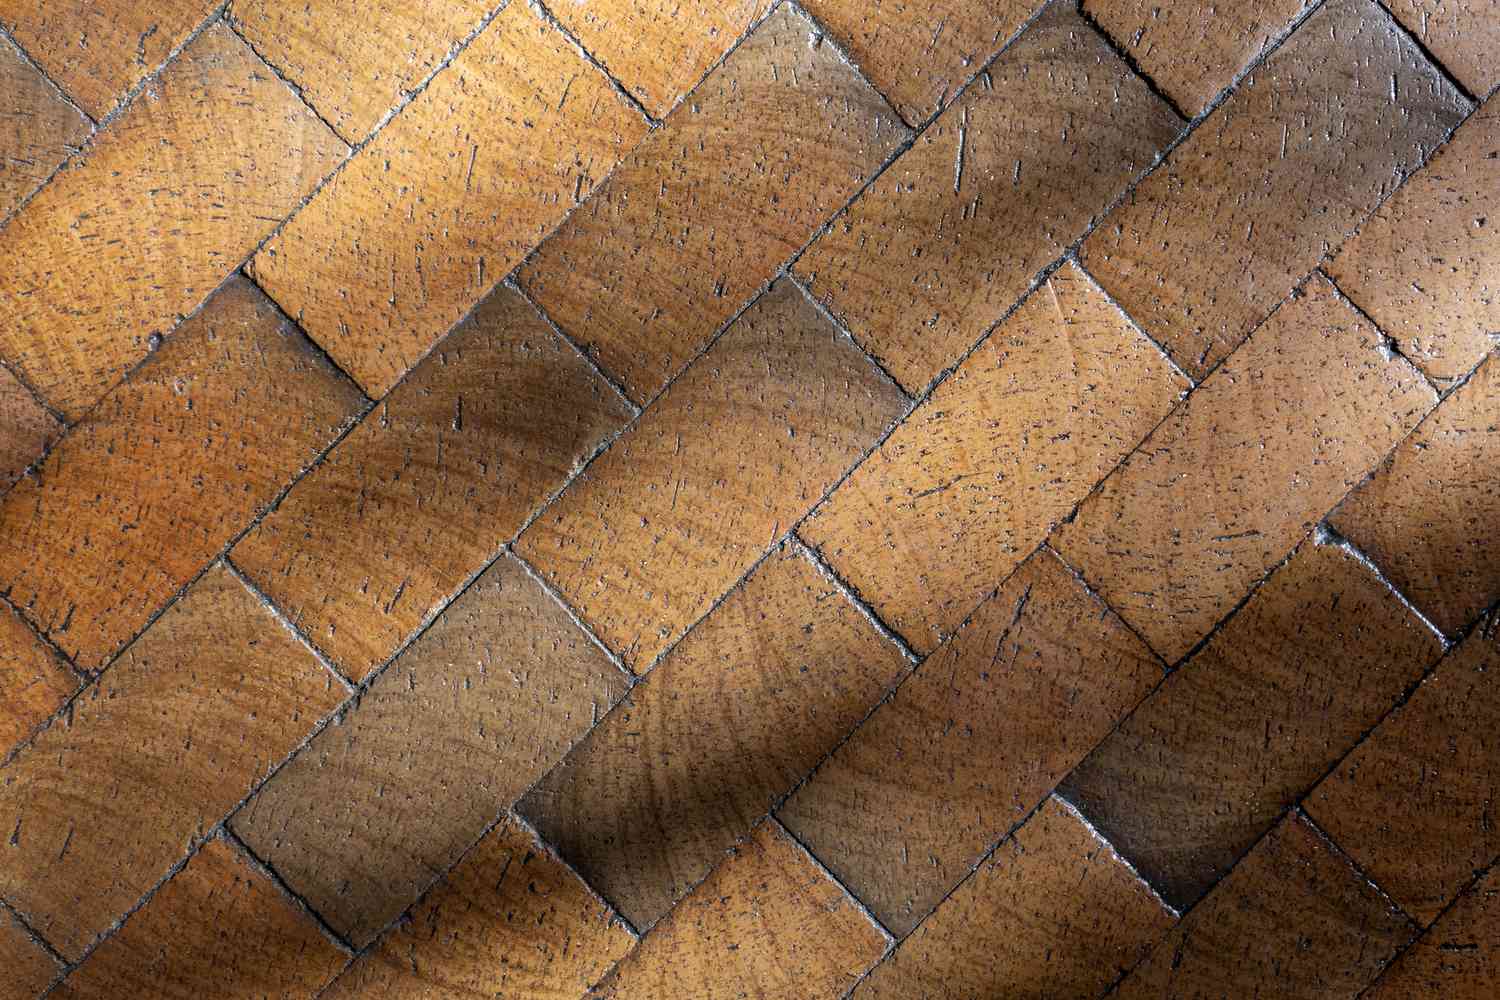
- Engineered wood: If you prefer the warmth and character of real wood, but want a more durable option, engineered wood is a great choice. It consists of a thin layer of real wood on top of composite materials, providing the look of hardwood with enhanced stability.
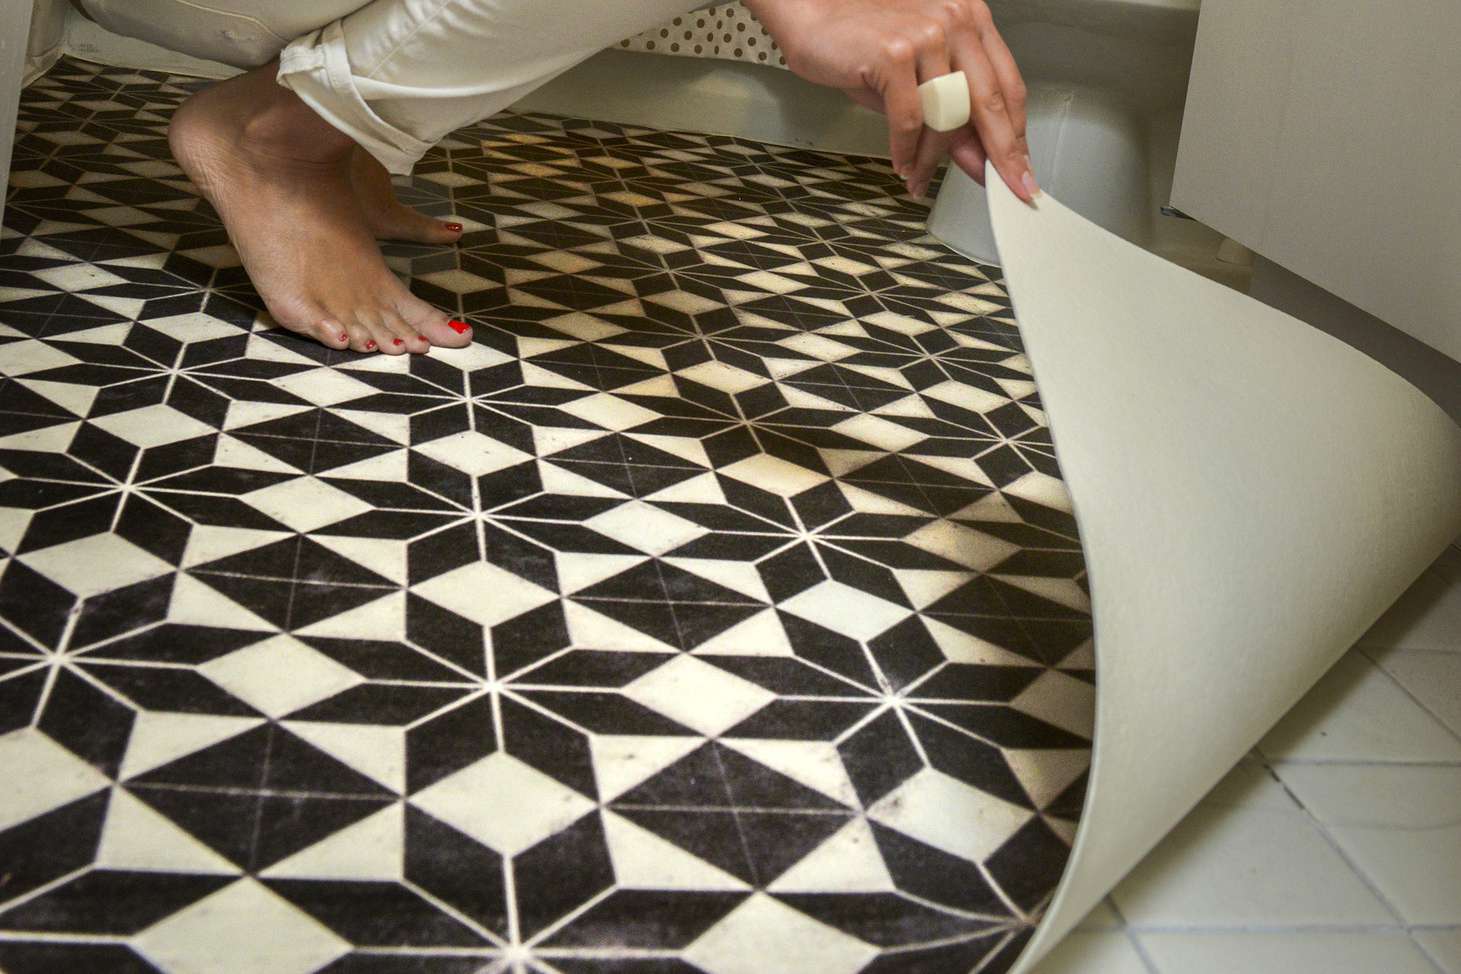
- Vinyl flooring: Vinyl flooring has come a long way in terms of style and durability. It’s available in an array of designs, including realistic wood and stone patterns. Vinyl is water-resistant, making it suitable for areas prone to moisture.
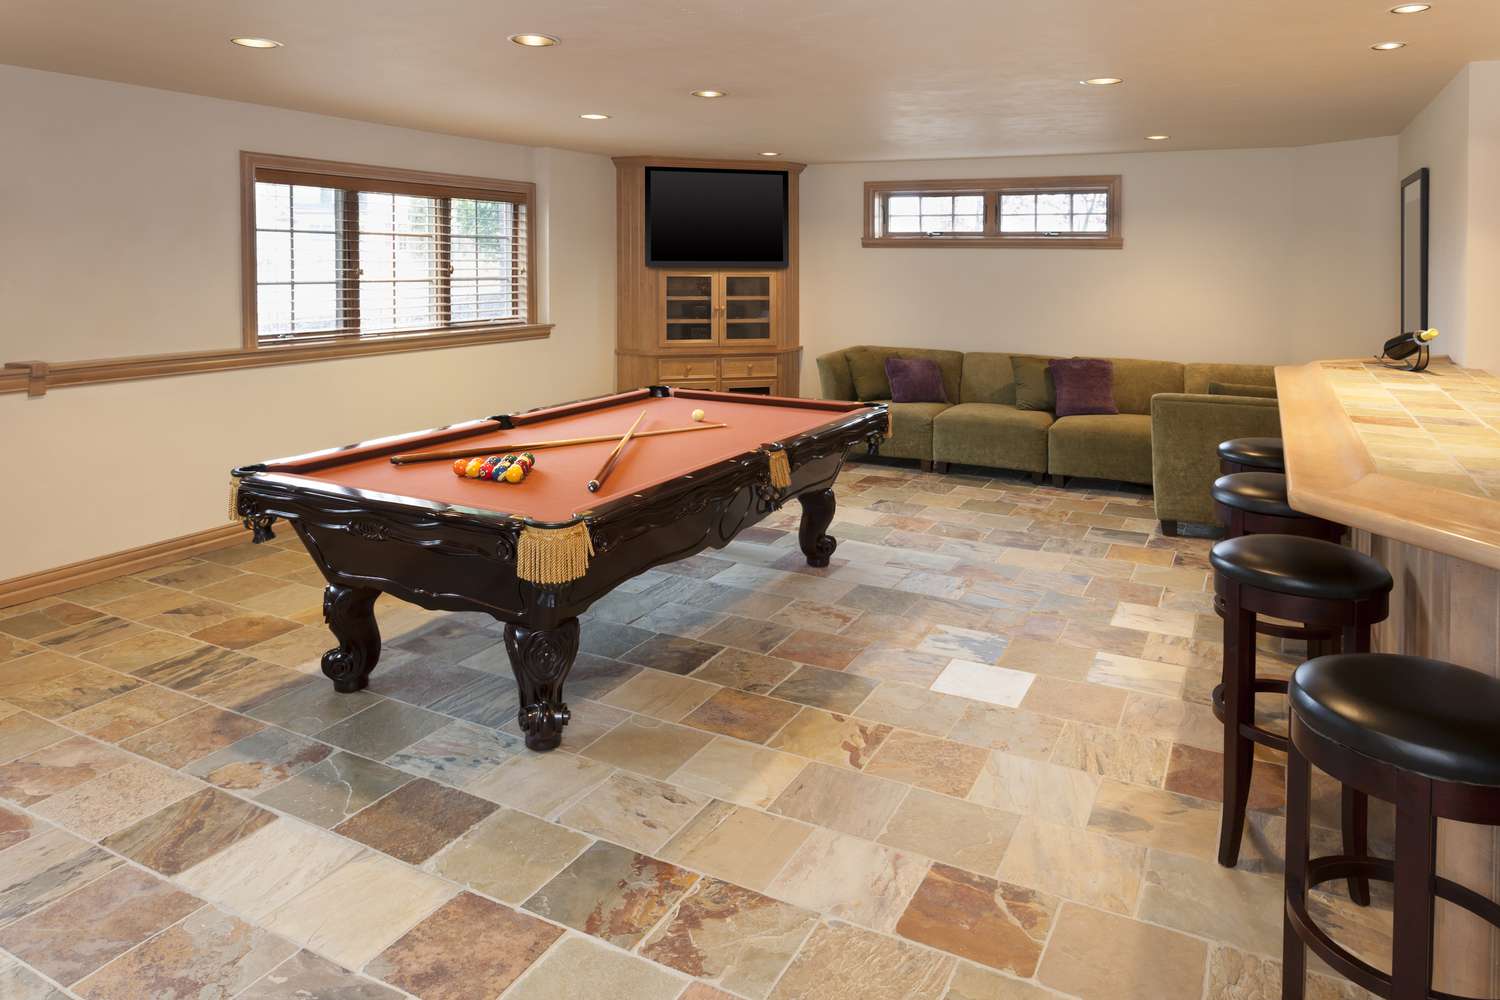
- Porcelain or ceramic tiles: If you still want the look and feel of tiles but want to replace the existing ones, porcelain or ceramic tiles can be a great option. They come in a variety of sizes, colors, and patterns, allowing you to create a custom look.
- Carpet tiles: If you’re looking for a cozy and comfortable option, carpet tiles can be a fantastic choice. They are easy to install and can add warmth and insulation to the room. Plus, if one tile gets damaged, you can simply replace it without having to redo the entire floor.
Consider factors such as durability, maintenance requirements, and the overall aesthetic of the room when making your decision. It’s also a good idea to consult with a flooring professional or do some research to understand the pros and cons of each material.
Once you’ve chosen the right covering material, it’s time to move on to the next step: removing the old tiles.
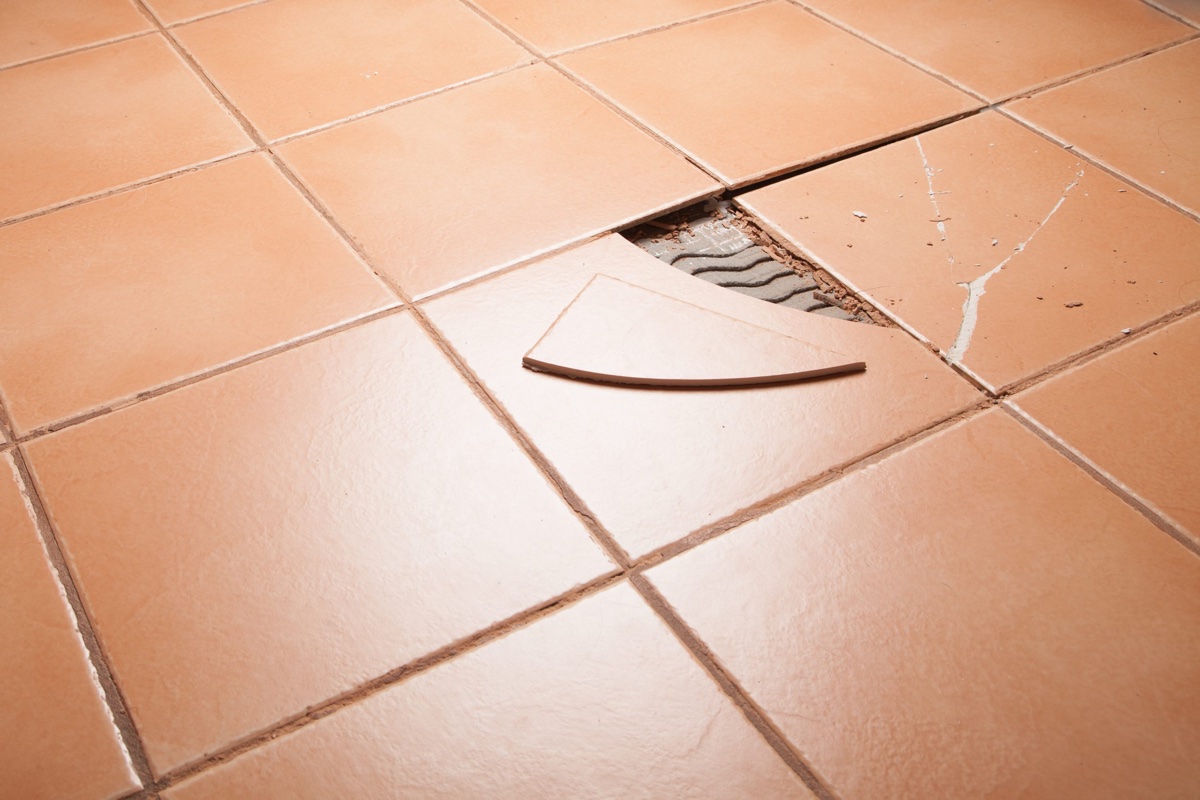
Removing Old Tiles
Before you can proceed with covering the tile floor, you’ll need to remove the old tiles. This step is necessary to create a clean and smooth surface for the new covering material. Here’s how you can remove the old tiles:
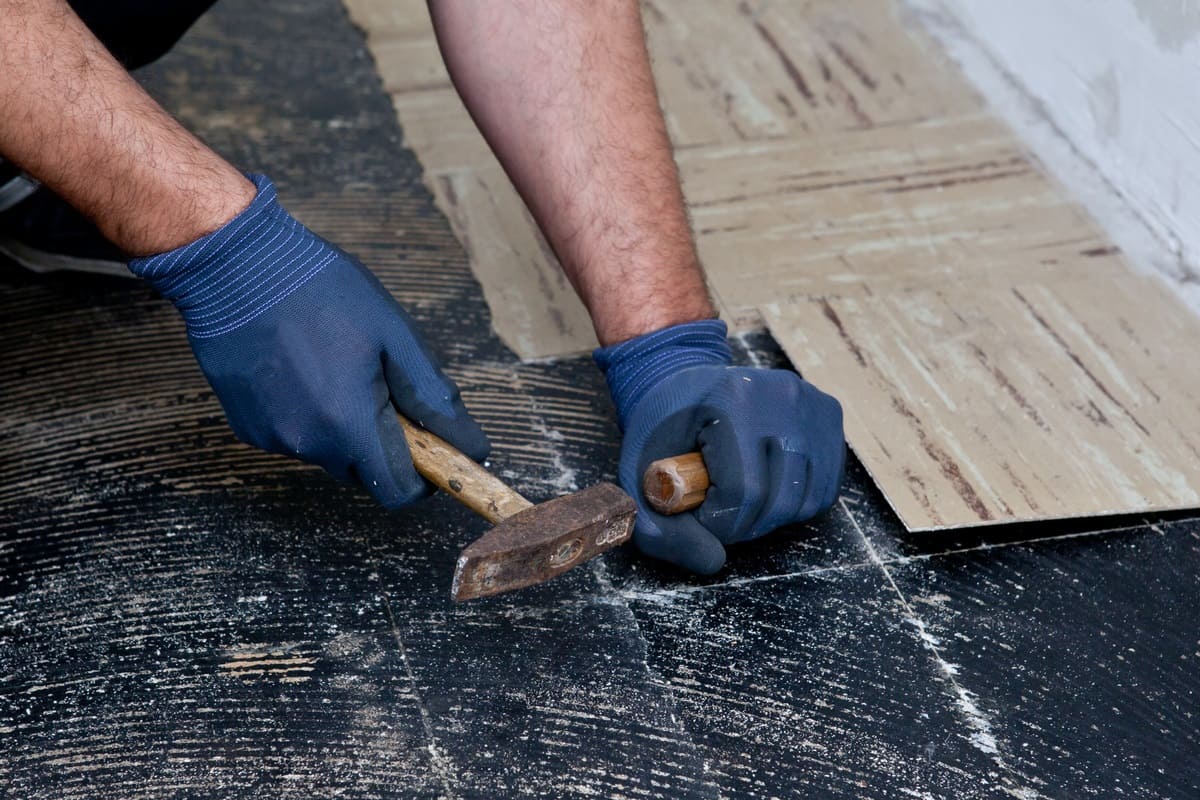
- Protect yourself: Start by wearing protective gear such as safety goggles, gloves, and a face mask. This will protect you from any flying debris or dust.
- Start at the edges: Using a chisel or a scraper, start at the edge of a tile and gently tap it with a hammer to loosen it. Work your way around the tile, gradually prying it up. Be careful not to apply too much force, as it can damage the underlying floor.
- Remove adhesive: Once the tiles are removed, you’ll likely have adhesive or mortar residue on the floor. Use a scraper or a putty knife to scrape off as much of the adhesive as possible. If the adhesive is stubborn, you may need to use a heat gun or a chemical adhesive remover.
- Dispose of the tiles and debris: Place the old tiles and any debris into a heavy-duty bag or container for disposal. Be mindful of proper waste disposal regulations in your area.
Removing old tiles can be a time-consuming and labor-intensive task, especially if the tiles are firmly adhered to the floor. If you’re unsure about taking on this step yourself, it may be best to hire a professional to ensure a smooth and efficient removal process.
Once the old tiles and adhesive are removed, you can proceed to the next step: repairing any damage that may have occurred during the removal process.
Repairing Any Damage
During the process of removing the old tiles, it’s possible that some damage may occur to the underlying floor. It’s important to address any areas of damage before proceeding with the covering process to ensure a sturdy and long-lasting result. Here are the steps to repair any damage:
- Fill in cracks or holes: If you notice any cracks, holes, or gouges in the floor, it’s essential to fill them in. Use a floor patching compound or a similar product to fill the damaged areas. Smooth out the compound with a putty knife and allow it to dry according to the manufacturer’s instructions.
- Level uneven spots: If you encounter any uneven spots or low areas in the floor, they need to be leveled. Apply a self-leveling compound according to the product instructions to create a smooth and even surface. Be sure to follow the recommended drying time before proceeding.
- Repair subfloor: In some cases, the damage may extend to the subfloor, especially if the tiles were installed on a wooden subfloor. Inspect the subfloor for any signs of rot, damage, or instability. If necessary, replace or reinforce the subfloor to ensure a solid foundation for the new covering material.
- Sand and smooth rough spots: If there are any rough or uneven areas on the floor, use sandpaper to gently smooth them out. This will help create a more even surface for the covering material to be applied.
Repairing any damage is crucial to ensure that the new covering material adheres properly and creates a seamless result. Take your time to carefully assess and address any issues before moving on to the next step.
Now that the floor is repaired, it’s time to focus on cleaning and leveling the floor to prepare it for the new covering material.
Read more: How Thick Are Floor Tiles
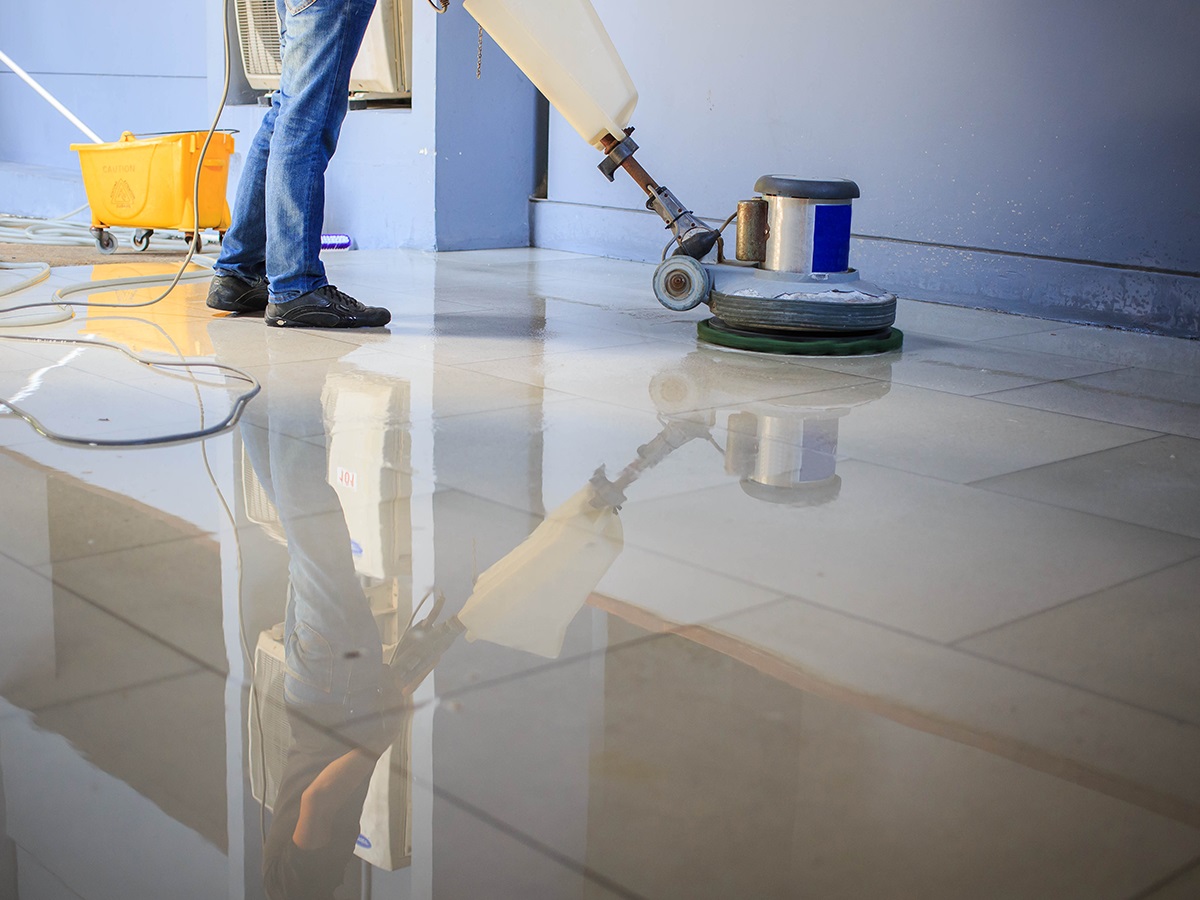
Cleaning and Leveling the Floor
Before applying the new covering material, it’s important to thoroughly clean and level the floor. This will ensure a smooth and even surface, allowing the covering material to adhere properly. Follow these steps to clean and level the floor:
- Vacuum or sweep: Start by removing any dust, dirt, or debris from the floor using a vacuum cleaner or a broom. Pay close attention to the corners and edges of the room.
- Wash the floor: Next, use a mild detergent mixed with warm water to clean the floor. Dip a mop or sponge into the soapy water and wring it out well. Wipe down the entire floor, making sure to remove any stains or spills. Rinse the mop or sponge frequently to avoid spreading dirt.
- Dry the floor: After washing, thoroughly dry the floor using clean towels or allow it to air dry completely. Moisture can interfere with the adhesion of the new covering material, so it’s crucial to ensure a dry surface.
- Level the floor: Use a floor leveling compound to address any low or uneven spots on the floor. Follow the manufacturer’s instructions for mixing and applying the compound. Use a trowel or a leveling tool to spread the compound evenly across the floor, smoothing it out as you go. Remove any excess compound and allow it to cure according to the manufacturer’s recommendations.
- Sand and smooth the surface: Once the leveling compound is dry, lightly sand the floor to remove any rough or uneven areas. This will create a smooth and even surface for the new covering material.
Cleaning and leveling the floor are essential steps in the preparation process. By thoroughly cleaning the floor and addressing any leveling issues, you’re ensuring a solid foundation for the new covering material and increasing the longevity of your new floor.
With the floor clean and leveled, it’s time to move on to the application of the adhesive for the new covering material.
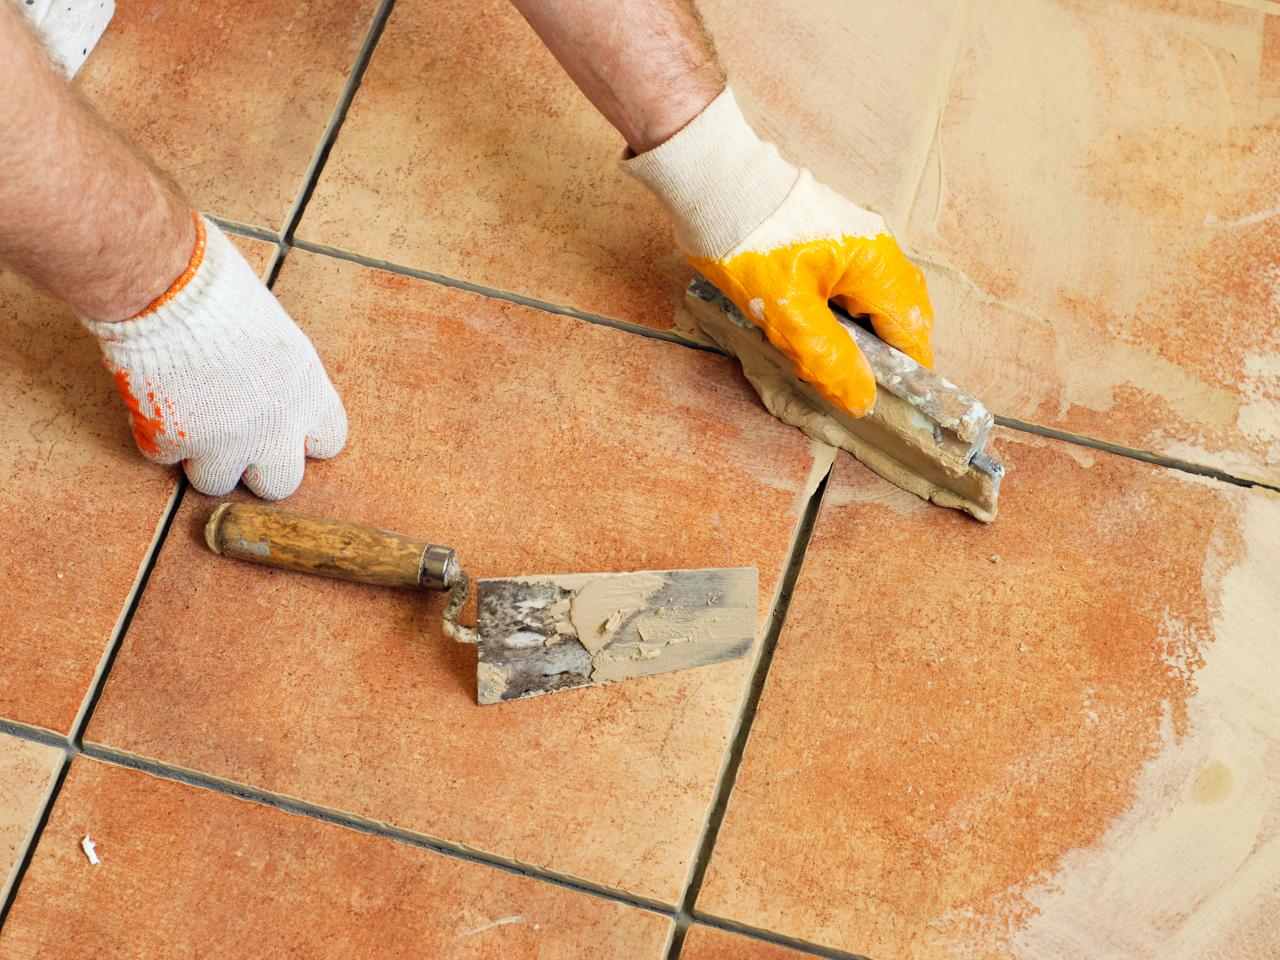
Applying Adhesive
Applying adhesive is a crucial step in the process of covering a tile floor. The adhesive ensures that the new covering material adheres securely to the floor, creating a strong and durable bond. Here’s how to apply adhesive:
- Choose the right adhesive: Before proceeding, make sure you have the correct type of adhesive for the selected covering material. Consult the manufacturer’s instructions or seek guidance from a flooring professional to ensure you have the appropriate adhesive for your specific flooring choice.
- Prepare the adhesive: Follow the manufacturer’s instructions to properly prepare the adhesive. This may involve mixing it with water or a specific ratio of mixing agent. Be sure to follow the instructions carefully to achieve the correct consistency.
- Start spreading the adhesive: Begin applying the adhesive in one corner of the room, using a trowel or a notched trowel. Spread a thin and even layer of adhesive onto the floor, working in small sections. Be mindful of the working time specified by the adhesive product; work within the recommended timeframe to ensure optimal adhesion.
- Apply the covering material: Once the adhesive is spread, carefully place the covering material onto the adhesive. Follow any specific instructions provided by the manufacturer regarding the orientation or installation technique for the specific covering material.
- Press down firmly: After placing the covering material, apply firm but even pressure across the entire surface, using a hand roller or a weight. This helps ensure a strong bond between the covering material and the adhesive. Pay extra attention to any seams or edges to ensure they are securely adhered.
- Trim excess covering material: If necessary, use a utility knife or a cutting tool to trim any excess covering material along the edges or corners of the room. Take care to make clean and precise cuts to achieve a polished and professional look.
Properly applying the adhesive is essential for the success and longevity of your new floor covering. Take your time during this step to ensure the adhesive is applied evenly and the covering material is firmly and securely placed.
With the adhesive in place, it’s time to move on to laying the new covering material on the floor.
When covering a tile floor, make sure to clean and level the surface before applying any new flooring material. Use a primer to ensure proper adhesion of the new flooring.
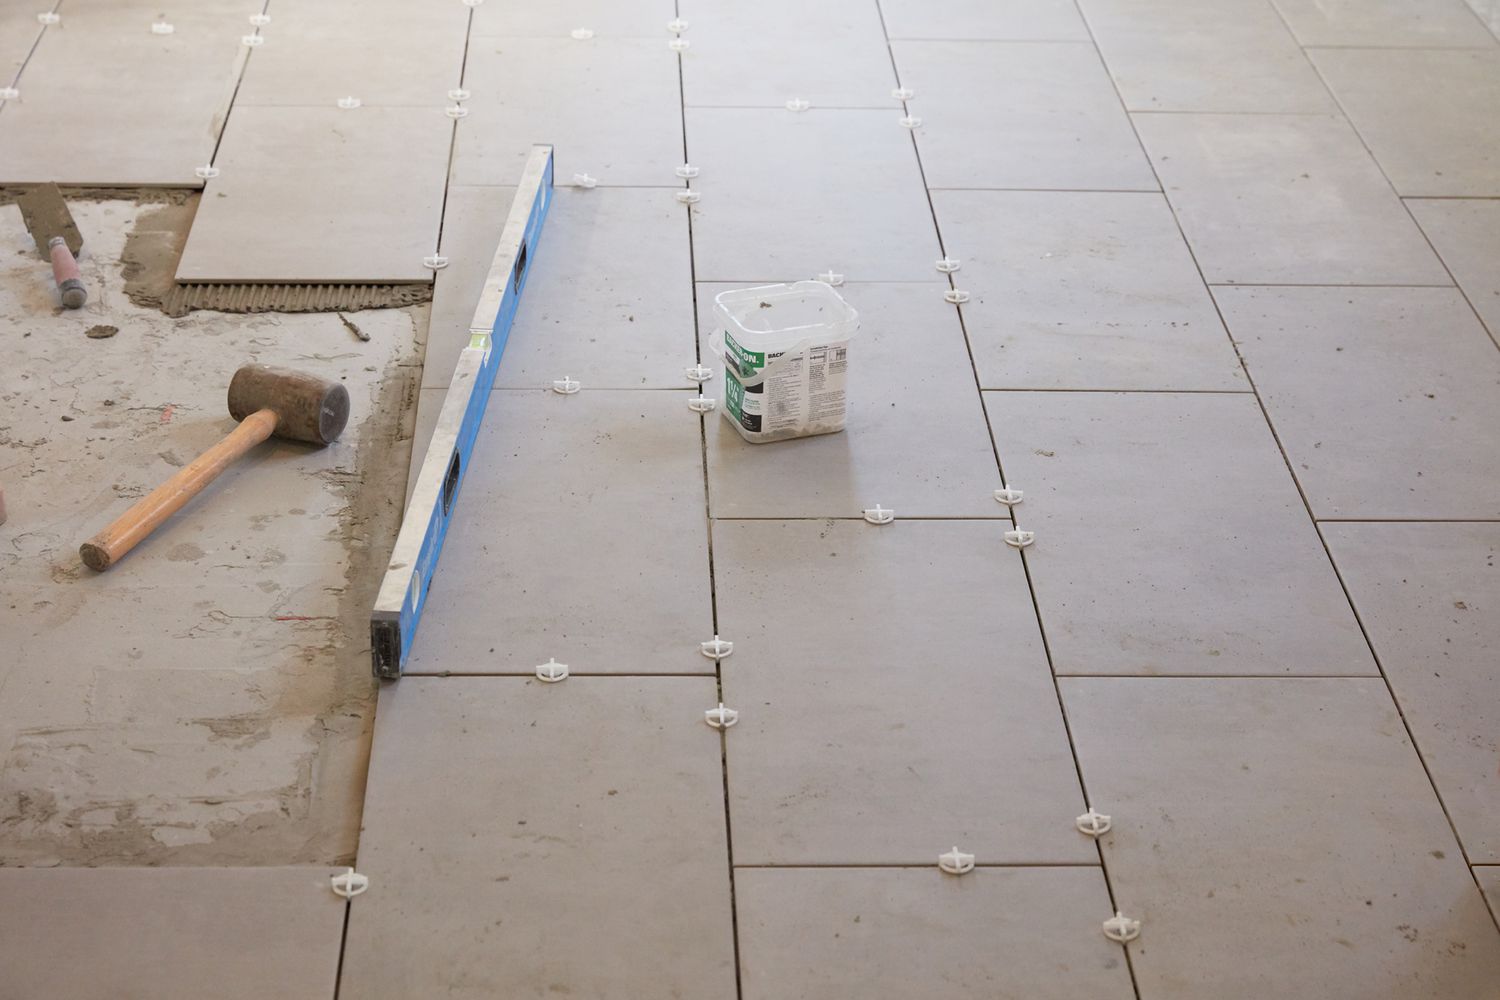
Laying the New Covering Material
Now that the adhesive has been applied, it’s time to lay the new covering material onto the floor. This step is crucial to achieve a polished and professional-looking result. Follow these steps to properly lay the new covering material:
- Start in a corner: Begin in one corner of the room and lay the first piece of the covering material, aligning it carefully with the walls. Be mindful of any patterns or designs, ensuring they are properly aligned for a cohesive look.
- Continue laying the material: Progressively lay the covering material, working your way across the room. Use a straightedge or a level to ensure the material is aligned and level as you go. Butt the edges of each piece tightly against each other for a seamless appearance.
- Make necessary cuts: As you approach obstacles such as doorways or fixtures, you may need to make cuts in the covering material to fit. Use a utility knife or a cutting tool to make precise cuts, taking care to leave a small gap between the covering material and any fixed objects for expansion or contraction.
- Stagger the joints: To create a more visually appealing and stable floor, stagger the joints of the covering material. This means that the end of each piece should not align with the end of the adjacent piece, but rather be offset by a certain distance (as recommended by the manufacturer).
- Follow manufacturer’s instructions: Throughout the process, refer to the manufacturer’s instructions for any specific guidelines or recommendations regarding the installation of the selected covering material. This ensures that you are following the proper techniques and utilizing any required tools or adhesives.
- Step back and assess: Take breaks periodically to step back and assess the overall layout and appearance of the covering material. This will allow you to make any necessary adjustments or corrections before moving forward.
By following these steps, you’ll be able to lay the new covering material in a careful and precise manner, ensuring a high-quality and visually appealing result. With the covering material in place, it’s time to proceed to the next step: cutting and fitting the tiles.
Cutting and Fitting Tiles
When covering a tile floor, you may encounter areas where the covering material needs to be cut and fitted for a precise fit. This step is essential to ensure a professional and seamless finish. Follow these steps to cut and fit the tiles:
- Measure the space: Before cutting any tiles, carefully measure the area where the tile needs to be fitted. Take accurate measurements and allow for any necessary gaps or expansion joints.
- Use the right tools: Depending on the type of covering material you’re using, you’ll need specific tools for cutting tiles. Common tools include a tile cutter, wet saw, or a scoring tool and pliers. Refer to the manufacturer’s instructions or seek advice from a professional for the proper tools and techniques.
- Make the cuts: Mark the cutting line on the tile using a pencil or a marker. Use the appropriate cutting tool to score along the marked line. Apply gentle pressure to break the tile along the scored line. For more complex cuts or curves, use a wet saw or other specialized tools.
- Fit the tile: Once the tile is cut, carefully place it into position, ensuring a snug fit. Check that the edges align with the surrounding tiles and make any necessary adjustments. Use a rubber mallet or a gentle tapping motion to ensure it is properly seated.
- Seal the edges: If the cut tiles are exposed along the edges or in high-moisture areas, it’s important to seal them properly. Apply a thin bead of silicone caulk along the exposed edges to prevent water damage or dirt accumulation.
- Check the appearance: Step back and assess the appearance of the cut and fitted tiles. Ensure that they blend seamlessly with the surrounding tiles and that the layout looks visually pleasing.
Cutting and fitting tiles requires precision and careful attention to detail. Take your time during this step to ensure accurate measurements and clean cuts. By following these steps, you’ll be able to achieve a professional and seamless result.
With the tiles cut and fitted, the next step is to proceed with grouting them together for a finished look.
Read more: How Much To Tile A Floor
Grouting the Tiles
Grouting the tiles is an important step in the tile floor covering process. Grout not only fills the gaps between the tiles, but it also adds strength and stability to the floor. Follow these steps to effectively grout the tiles:
- Prepare the grout: Choose the appropriate type of grout for your specific covering material. Read and follow the manufacturer’s instructions for mixing the grout to achieve the proper consistency. Generally, you’ll mix the grout with water until it reaches a thick, paste-like texture.
- Apply the grout: Using a grout float or a rubber float, spread the grout diagonally across the tiles, pressing it into the gaps. Hold the float at a 45-degree angle and work in small sections at a time.
- Remove excess grout: After spreading the grout, use the edge of the float to scrape off excess grout from the surface of the tiles. Hold the float at a shallow angle and move it diagonally across the tiles to avoid removing too much grout from the gaps.
- Clean the tiles: Once the excess grout has been removed, wipe the tiles down with a damp sponge or cloth to remove any grout haze. Rinse the sponge frequently and wring it out well to prevent smearing the grout.
- Allow the grout to cure: Follow the manufacturer’s instructions for the recommended curing time for the grout. Keep foot traffic and any excess moisture away from the newly grouted area to allow it to fully set and harden.
- Seal the grout: After the grout has cured, consider applying a grout sealer to protect it from stains and moisture. Follow the sealer manufacturer’s instructions for application, ensuring the grout is clean and dry before sealing.
Grouting the tiles is a meticulous process that requires attention to detail. Take your time to ensure the grout is applied evenly and thoroughly. By following these steps, you’ll achieve a professionally finished look and enhance the durability of your tile floor covering.
With the tiles properly grouted, the next step is to seal the surface for added protection and longevity.
Sealing the Surface
Sealing the surface of your tile floor covering is an essential step to protect it from stains, moisture, and wear. It also helps to enhance the longevity and appearance of the tiles. Follow these steps to effectively seal the surface:
- Clean the tiles: Ensure that the tiles are clean and free from any dust, dirt, or grout residue before applying the sealer. Use a mild cleaning solution and a sponge or cloth to wipe down the surface. Allow the tiles to dry completely.
- Choose the right sealer: Select a sealer that is compatible with the type of covering material you have chosen. There are various types of sealers available, including topical sealers or penetrating sealers. Read and follow the manufacturer’s instructions for the specific sealer you have selected.
- Test the sealer: Before applying the sealer to the entire floor, it’s recommended to test it on a small, inconspicuous area. This will help you ensure that the sealer provides the desired effect without causing any discoloration or damage to the tiles.
- Apply the sealer: Using a clean applicator such as a brush or roller, apply the sealer to the tiles following the manufacturer’s instructions. Start from one corner and work your way across the floor, ensuring even coverage. Pay extra attention to grout lines and any porous areas.
- Allow for drying time: After applying the sealer, allow it to dry according to the manufacturer’s instructions. This typically takes several hours or overnight. Keep foot traffic and any moisture away from the sealed surface during this time to ensure optimal curing.
- Apply additional coats if necessary: Depending on the type of sealer and your specific needs, you may need to apply multiple coats. Follow the manufacturer’s guidelines regarding the number of coats and the drying time in between each application.
Sealing the surface of your tile floor covering provides an added layer of protection against stains and moisture, making it easier to clean and maintain in the long run. It’s an important final step to ensure the durability and beauty of your newly covered floor.
With the surface properly sealed, it’s time for the final touches and clean-up.
Final Touches and Clean-Up
After completing the major steps of covering a tile floor, it’s time to put the finishing touches and complete the clean-up process. These final touches will ensure that your newly covered floor looks polished and ready to be enjoyed. Follow these steps for the final touches and clean-up:
- Reinstall baseboards: If you removed baseboards or trim during the preparation phase, now is the time to reinstall them. Use a hammer and nails or a brad nailer to secure them back in place, ensuring they are level and aligned with the floor.
- Inspect for any loose tiles: Take a close look at the newly covered floor and check for any loose tiles or areas that need extra attention. If you find any, use adhesive or grout to secure them properly and ensure a sturdy and cohesive floor surface.
- Clean the floor: Give the entire floor a final cleaning to remove any dust, debris, or residue that may have accumulated during the covering process. Use a damp mop or sponge with a mild cleaning solution to gently clean the surface. Allow the floor to dry completely.
- Remove any excess grout or adhesive: Inspect the floor carefully for any remaining traces of grout or adhesive. Use a scraper or a cloth dampened with water to remove any excess material, being careful not to damage the tiles or the newly covered surface.
- Inspect for any touch-ups: Take a final walk through the room and look for any areas that may require touch-ups. This includes any visible gaps, uneven edges, or imperfections that can be fixed with additional adhesive, grout, or touch-up paint.
- Enjoy your refreshed space: Once you have completed the final touches and clean-up, it’s time to step back and enjoy your newly covered floor. Take pride in the accomplishment and appreciate the transformation it has brought to your space.
By focusing on these final touches and completing the clean-up process, you ensure that your newly covered tile floor is in optimal condition and ready to be admired and used for years to come.
Congratulations on successfully covering your tile floor and creating a fresh and updated look for your room!
Please note that the specific steps and requirements may vary depending on the type of covering material and the condition of your existing tile floor. Always refer to the manufacturer’s instructions and seek professional advice if needed.
Conclusion
Covering a tile floor can completely transform the look and feel of a room, providing a fresh and updated space that reflects your personal style. By following the step-by-step process outlined in this article, you can successfully tackle this DIY project and achieve a beautiful and durable floor covering.
From preparing the floor by clearing the area and removing old tiles, to repairing any damage and cleaning and leveling the surface, each step is crucial for a successful outcome. Choosing the right covering material and properly applying adhesive are important decisions that contribute to the overall quality and longevity of the floor. Cutting and fitting tiles, grouting, and sealing the surface add the finishing touches and protection needed for a polished and professional-looking result.
Throughout the entire process, it’s important to consider safety precautions, follow manufacturer’s instructions, and take your time to ensure accuracy and quality. Be sure to select the appropriate tools, wear protective gear, and consult with professionals if needed.
By completing the final touches and clean-up, such as reinstalling baseboards, thorough cleaning, and inspecting for any touch-ups, you can ensure that your new floor covering is in optimal condition and ready to be enjoyed.
Congratulations on completing the journey of covering your tile floor! Take a moment to appreciate the transformation you have achieved and enjoy your refreshed space. Remember that proper maintenance and regular cleaning will help preserve the beauty and durability of your new floor covering for years to come.
Thank you for joining us on this guide, and we hope that it has provided you with the knowledge and confidence to successfully cover your tile floor. Happy renovating!
Ready to spruce up your home even further? If you're pondering which surfaces to choose for your renovation, our guide on the best hardwood floors will provide all the insights you need to make an informed decision. And for those eyeing a kitchen makeover, our rundown on optimal kitchen flooring options offers durable and stylish choices that stand the test of time. Dive into these resources to elevate every corner of your dwelling!
Frequently Asked Questions about How To Cover Tile Floor
Was this page helpful?
At Storables.com, we guarantee accurate and reliable information. Our content, validated by Expert Board Contributors, is crafted following stringent Editorial Policies. We're committed to providing you with well-researched, expert-backed insights for all your informational needs.


0 thoughts on “How To Cover Tile Floor”