Articles
How To Redo Cheap Countertops
Modified: January 7, 2024
Looking for budget-friendly ways to redo your countertops? Read our articles for tips and inspiration to transform your kitchen or bathroom without breaking the bank.
(Many of the links in this article redirect to a specific reviewed product. Your purchase of these products through affiliate links helps to generate commission for Storables.com, at no extra cost. Learn more)
Introduction
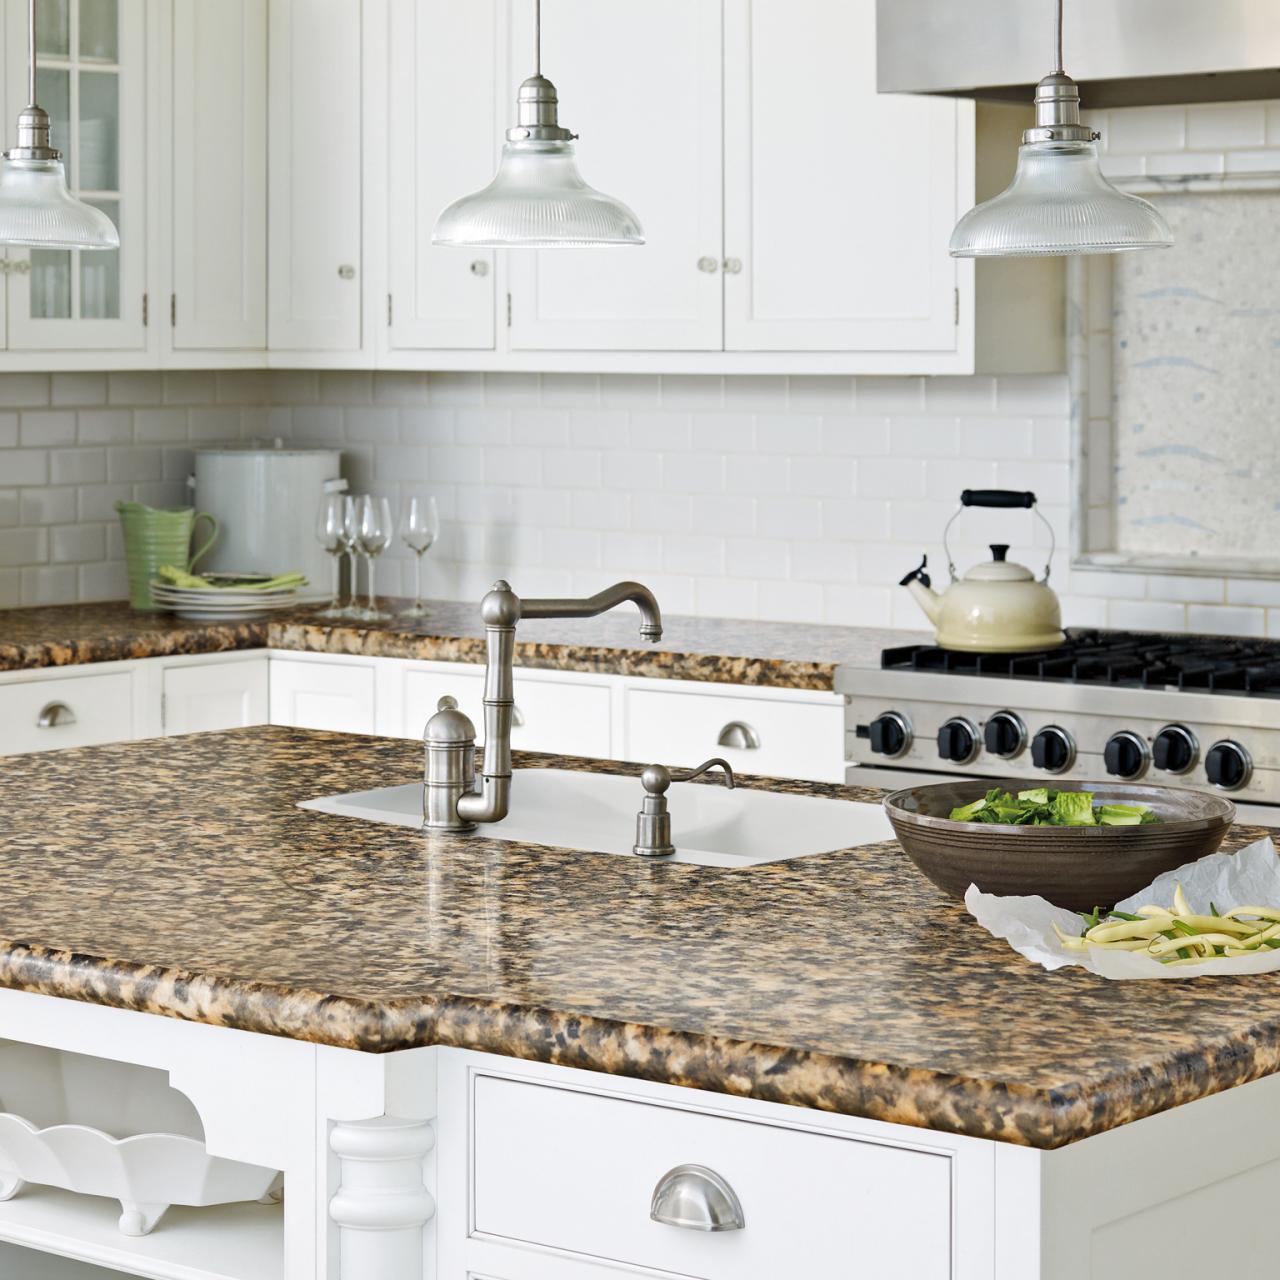
When it comes to home renovations, upgrading your kitchen countertops can make a significant impact on the overall aesthetic and value of your space. However, the cost of replacing countertops can quickly add up, leaving many homeowners looking for more affordable alternatives. Luckily, there are several creative ways to redo cheap countertops without breaking the bank.
In this article, we will walk you through a step-by-step process to transform your existing countertops into beautiful and stylish surfaces. Whether you have laminate, tile, or even outdated countertops, we will provide you with the necessary guidance to give them a fresh, new look. Let’s dive in!
Key Takeaways:
- Redoing cheap countertops is achievable with thorough assessment, proper cleaning, and the right materials. Choose between painting or using contact paper for a budget-friendly transformation.
- Adding a protective finish and implementing a maintenance routine are essential for preserving the beauty and functionality of your newly transformed countertops. Take proactive measures to care for your countertops and enjoy a budget-friendly upgrade.
Step 1: Assessing the Countertop
Before you begin the process of redoing your cheap countertops, it’s important to assess their current condition and identify any necessary repairs. This step will help you determine if a simple cosmetic upgrade will suffice or if you need to take additional measures to prepare the surface for a new finish.
Start by thoroughly examining your countertops for any signs of damage, such as cracks, chips, or loose edges. If you come across any of these issues, it’s crucial to address them before proceeding with the makeover. Repairing any damage will ensure a smooth and long-lasting result.
If your countertops are in good condition without any major repairs needed, you can move on to evaluating their material. Different materials may require specific techniques and products for the best outcome. Laminate, tile, and wood are common types of countertops, each with its own set of considerations.
For laminate countertops, check for any peeling or lifting edges. If you notice any, use a strong adhesive to reattach them. Tiles countertops may have missing or broken tiles. In this case, you can replace the damaged tiles or consider covering them with a new material. Wooden countertops may have scratches, stains, or water damage. Sanding the surface to remove imperfections and applying a new finish can restore their beauty.
By thoroughly assessing your countertops and addressing any necessary repairs, you can ensure a solid foundation for the upcoming steps and maximize the overall outcome of your countertop redo.
Step 2: Cleaning and Preparation
Once you have assessed and repaired your countertops, the next step in redoing cheap countertops is to thoroughly clean and prepare the surface. Proper cleaning and preparation are crucial for ensuring that the new finish adheres well and provides a durable and long-lasting result.
Start by removing any items and debris from the countertop surface. Clear the area to have a clean working space. Next, use a mild detergent and warm water to clean the countertops. Scrub the surface gently with a soft sponge or cloth to remove any dirt, grime, or grease. Rinse the countertops thoroughly with clean water and allow them to dry completely before proceeding to the next step.
Once the countertops are dry, it’s time to prepare them for the new finish. If you have laminate countertops and plan to paint them, lightly sand the surface with fine-grit sandpaper. This will create a rough texture that helps the primer and paint adhere better. Be sure to clean off any dust or residue from sanding before proceeding.
If you are using contact paper to redo your countertops, measure and cut the contact paper to fit the dimensions of your countertops. Carefully peel off the backing of the contact paper and slowly apply it to the surface, smoothing out any bubbles or wrinkles as you go along. Trim any excess contact paper using a utility knife.
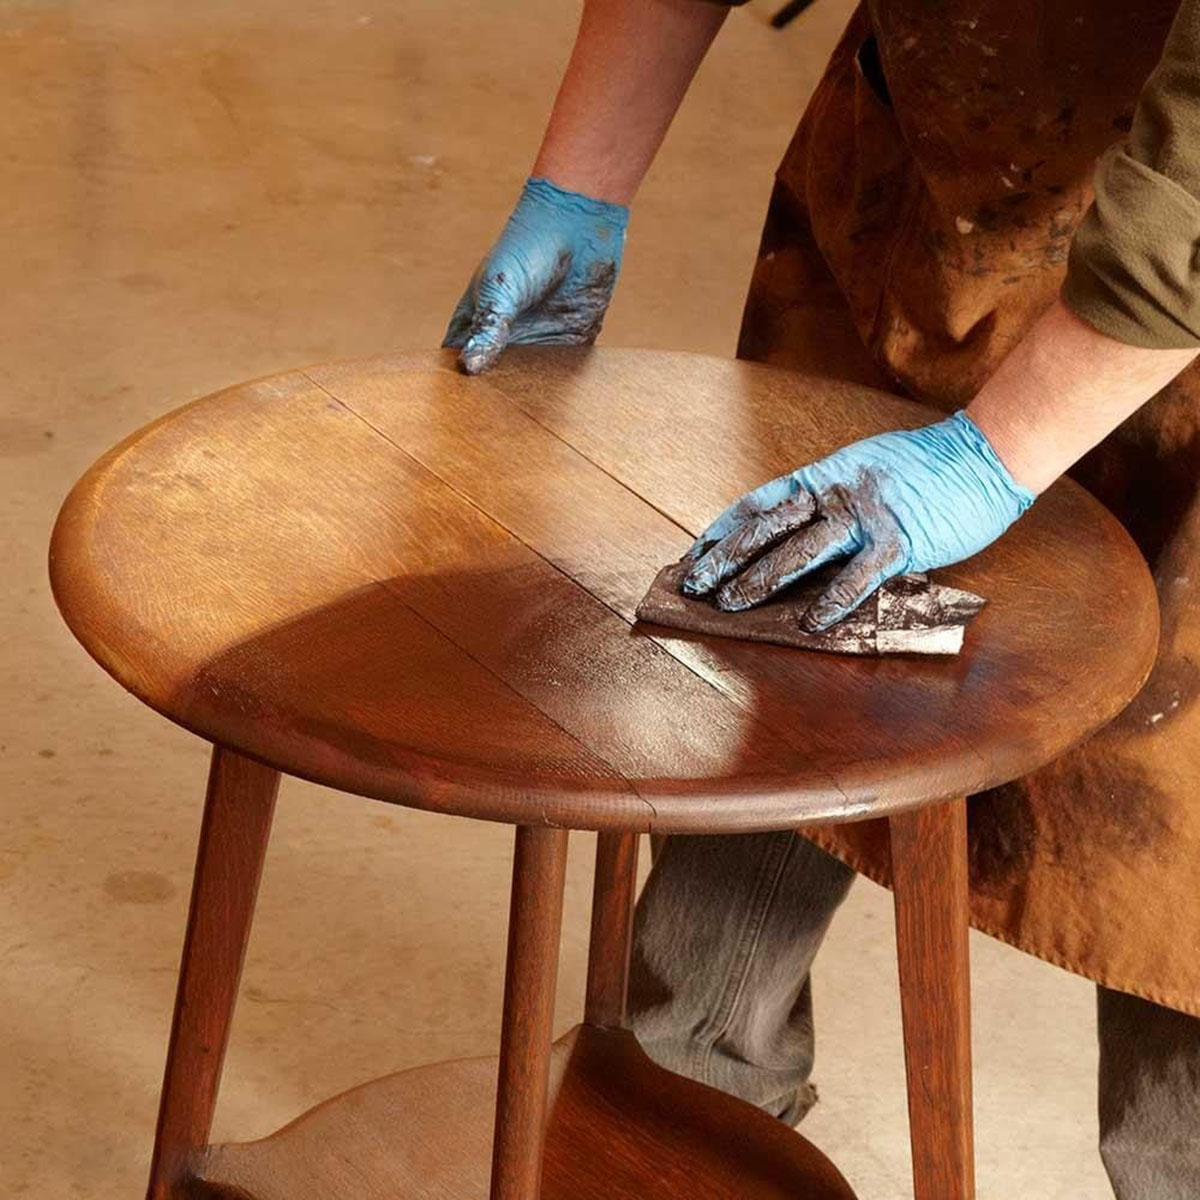
For wood countertops, sand the surface to remove any existing finish or imperfections. Begin with a coarse-grit sandpaper to remove the top layer, and then switch to a finer-grit sandpaper for a smoother finish. Clean off any dust from sanding before continuing.
By properly cleaning and preparing your countertops, you are setting the stage for a successful and professional-looking redo. Taking the time to complete this step will contribute to a flawless and long-lasting outcome.
Step 3: Applying Primer
After cleaning and preparing your countertops, the next step in the process of redoing cheap countertops is to apply a primer. Primer helps create a smooth and even surface, improves adhesion, and enhances the durability of the new finish.
Begin by choosing a primer that is suitable for the material of your countertops. For laminate countertops, look for a high-quality bonding primer specifically designed for use on smooth surfaces. If you are working with wooden countertops, choose a wood primer that provides excellent adhesion and seals the surface effectively.
Before applying the primer, it is essential to protect the surrounding areas and ensure proper ventilation. Cover the nearby surfaces with drop cloths or masking tape to prevent any accidental spills or splatters. Open windows or use fans to ensure good airflow in the room.
When you’re ready to begin applying the primer, follow the manufacturer’s instructions carefully. Use a brush or a foam roller to apply the primer in smooth, even strokes. Start from one corner of the countertop and work your way across to avoid any visible lines or streaks.
Depending on the product you are using, you may need to apply multiple coats of primer for optimal coverage. Allow each coat to dry completely before applying the next one. It is important to be patient and allow sufficient drying time to ensure the best results.
Once the primer is completely dry, lightly sand the surface with fine-grit sandpaper to smooth out any imperfections or raised grains. Clean off any dust from sanding before proceeding to the next step.
Applying a primer to your countertops is an essential step that prepares the surface for the new finish. It promotes better adhesion and provides a solid foundation for the next phase of the countertop redo.
Consider using a countertop refinishing kit to update cheap countertops. These kits are affordable and can give your countertops a fresh, new look without the cost of replacement.
Step 4: Applying Paint or Contact Paper
After applying the primer, you have the option to either paint your countertops or use contact paper to give them a new look. The choice depends on your personal preference, the desired style, and the material of your countertops.
If you decide to paint your countertops, choose a high-quality paint that is specifically formulated for countertop surfaces. Look for a paint that is durable, heat-resistant, and suitable for the material of your countertops. You can opt for a solid color or even experiment with faux finishes to mimic the appearance of natural stone or granite.
Before applying the paint, make sure the countertops are clean and free of any dust or debris. Prepare the area by covering the surrounding surfaces and ensuring proper ventilation. Use a brush or a foam roller to apply the paint in thin, even coats. Start from one corner and work your way across, allowing each coat to dry before applying the next. Depending on the paint and desired coverage, you may need to apply multiple coats.
Alternatively, if you prefer a quick and temporary solution, you can use contact paper to transform the look of your countertops. Contact paper comes in a variety of colors, patterns, and textures, allowing you to achieve the desired aesthetic easily. To apply contact paper, measure and cut it to fit the dimensions of your countertops. Slowly peel off the backing and carefully press the contact paper onto the surface, smoothing out any bubbles or wrinkles as you go along.
Whether you choose to paint your countertops or use contact paper, take your time and work carefully to achieve a professional-looking finish. Allow the paint or contact paper to dry completely before moving on to the final step.
Applying paint or contact paper is a pivotal step in the countertop redo process, as it brings your vision to life and transforms the appearance of your countertops. Choose a method that suits your style and material, and enjoy the transformative results.
Step 5: Adding a Protective Finish
Once you have painted your countertops or applied contact paper to give them a new look, it’s essential to add a protective finish. The protective finish will not only enhance the durability of the new surface but also provide resistance to scratches, stains, and heat.
When choosing a protective finish, consider the material of your countertops and the level of durability required. For painted countertops, opt for a clear, water-based polyurethane or acrylic sealer. These types of sealers provide a protective barrier and are easy to apply. Make sure to choose a sealer that is specifically designed for use on painted surfaces.
If you have used contact paper to redo your countertops, a protective finish is still recommended to prolong its lifespan and prevent peeling or lifting. Clear self-adhesive laminate or a clear topcoat specifically designed for contact paper can provide the necessary protection.
Before applying the protective finish, ensure that the surface is clean and free of any dust or debris. Use a soft cloth or sponge to gently wipe down the countertops. Apply the protective finish using a brush or a foam roller, following the manufacturer’s instructions for drying time and application techniques. It is usually recommended to apply multiple thin coats, allowing each coat to dry completely before applying the next.
Once the protective finish has dried, inspect the countertops for any areas that may need touch-ups or additional coats of sealer. If necessary, repeat the process until you achieve the desired level of protection and durability.
Adding a protective finish is a crucial step in the countertop redo process, ensuring that your newly transformed countertops remain beautiful and resistant to daily wear and tear. Take the time to apply this final layer of protection, and enjoy your refreshed countertops for years to come.
Step 6: Maintaining and Caring for the Countertop
Once you have completed the process of redoing your cheap countertops, it’s important to implement a maintenance routine to ensure their longevity and keep them looking their best. By following these simple care tips, you can preserve the beauty and functionality of your newly transformed countertops.
First and foremost, always use cutting boards or chopping mats when preparing food on your countertops. This will prevent scratches or cuts on the surface and maintain its overall appearance. Avoid using sharp knives directly on the countertop to prevent any damage.
When cleaning your countertops, use gentle, non-abrasive cleaners that are specifically formulated for your countertop material. Harsh chemicals or abrasive cleaners can strip away the protective finish or damage the surface. Always read and follow the manufacturer’s instructions for cleaning and maintenance.
Wipe up spills promptly to prevent stains or discoloration. This is especially important for porous materials like wood or certain types of stone, as they can absorb liquids and leave unsightly marks. Use a soft, damp cloth or sponge to clean up spills, and follow up with a dry cloth to ensure the surface is left dry.
Avoid placing hot pans or pots directly on the countertop surface, as extreme heat can cause damage. Always use trivets or heat-resistant mats to protect the countertop from heat exposure. This is particularly important for laminate countertops, as excessive heat can cause the laminate to warp or melt.
Regularly inspect your countertops for any signs of wear or damage. If you notice any scratches, chips, or other imperfections, address them promptly to prevent further deterioration. Depending on the material of your countertops, you may be able to use touch-up paint or fillers to repair minor blemishes.
Lastly, be mindful of heavy objects or sharp items that could potentially damage the surface. Avoid dropping heavy items on the countertops and refrain from using abrasive cleaning tools or scouring pads that can scratch the finish.
By implementing a proper maintenance routine and taking proactive measures to care for your countertops, you can ensure their longevity and keep them looking beautiful for years to come.
ConclusionRedoing cheap countertops doesn’t have to be a daunting or expensive task. With the right approach and some creativity, you can transform your existing surfaces into stunning focal points in your kitchen or bathroom. By following the step-by-step process outlined in this article, you can achieve a professional-looking result and save money in the process.
Assessing the condition of your countertops and addressing any repairs is crucial to ensure a solid foundation for the redo. Cleaning and preparing the surface properly sets the stage for a successful makeover. Applying primer improves adhesion and creates a smooth base for the new finish.
Whether you choose to paint your countertops or use contact paper, these affordable options can completely change the look and feel of your space. Selecting the right paint or contact paper is key to achieving the desired outcome.
Adding a protective finish provides durability and resistance to scratches, stains, and heat. It ensures that your newly transformed countertops stay beautiful and functional for years to come.
Maintaining and caring for your countertops is essential to preserve their appearance and extend their lifespan. Following a regular cleaning routine, using cutting boards, and protecting the surface from heat and heavy objects will help keep your countertops in top shape.
By following these steps and implementing the recommended maintenance practices, you can redo your cheap countertops without compromising on style or quality. It’s time to unleash your creativity, revamp your space, and enjoy the satisfaction of a beautiful and budget-friendly transformation.
Frequently Asked Questions about How To Redo Cheap Countertops
Was this page helpful?
At Storables.com, we guarantee accurate and reliable information. Our content, validated by Expert Board Contributors, is crafted following stringent Editorial Policies. We're committed to providing you with well-researched, expert-backed insights for all your informational needs.


0 thoughts on “How To Redo Cheap Countertops”