Furniture
How To Redo A Lampshade
Modified: September 2, 2024
Looking to give your lamp shade a new look? Follow our step-by-step guide on how to redo a lamp shade and transform your furniture in no time.
(Many of the links in this article redirect to a specific reviewed product. Your purchase of these products through affiliate links helps to generate commission for Storables.com, at no extra cost. Learn more)
Introduction
Welcome to the exciting world of lamp shade redo! Are you tired of the same old lamp shade sitting in your living room? Do you want to add a personal touch to your space? Well, you’ve come to the right place.
Redoing a lamp shade is a fantastic way to breathe new life into a tired piece of furniture. Whether you have an old lamp shade that needs a makeover, or you simply want to change the look of your current one, this guide will take you through the step-by-step process of how to redo a lamp shade.
Not only is a lamp shade redo a cost-effective option compared to buying a brand new lamp, but it also allows you to unleash your creativity and customize your lamp shade to match your style and decor. From choosing the perfect fabric to adding decorative embellishments, the possibilities are endless.
Before we dive into the process, let’s gather all the materials you’ll need for this exciting project.
Key Takeaways:
- Redoing a lamp shade is a cost-effective and creative way to breathe new life into your living space. From choosing the perfect fabric to adding decorative embellishments, the possibilities are endless for customizing your lamp shade.
- By following the step-by-step process of preparing, choosing, measuring, and attaching, you can transform a tired lamp shade into a stunning centerpiece. Unleash your creativity and enjoy the satisfaction of a DIY project well done!
Read more: How To Recover A Lampshade
Materials Needed
Before you begin, gather the following materials:
- Old lamp shade
- Fabric or covering of your choice
- Scissors
- Measuring tape
- Fabric glue or adhesive spray
- Hot glue gun
- Decorative trim or embellishments (optional)
- Iron (if using fabric)
- Ironing board or pressing cloth (if using fabric)
Make sure to choose a fabric or covering that is suitable for lamp shades. Cotton, linen, silk, or even decorative paper are common choices. Consider the color, pattern, and texture that will complement your space and existing decor.
Once you have gathered all the materials, it’s time to get started on transforming your lamp shade!
Step 1: Prepare the Lamp Shade
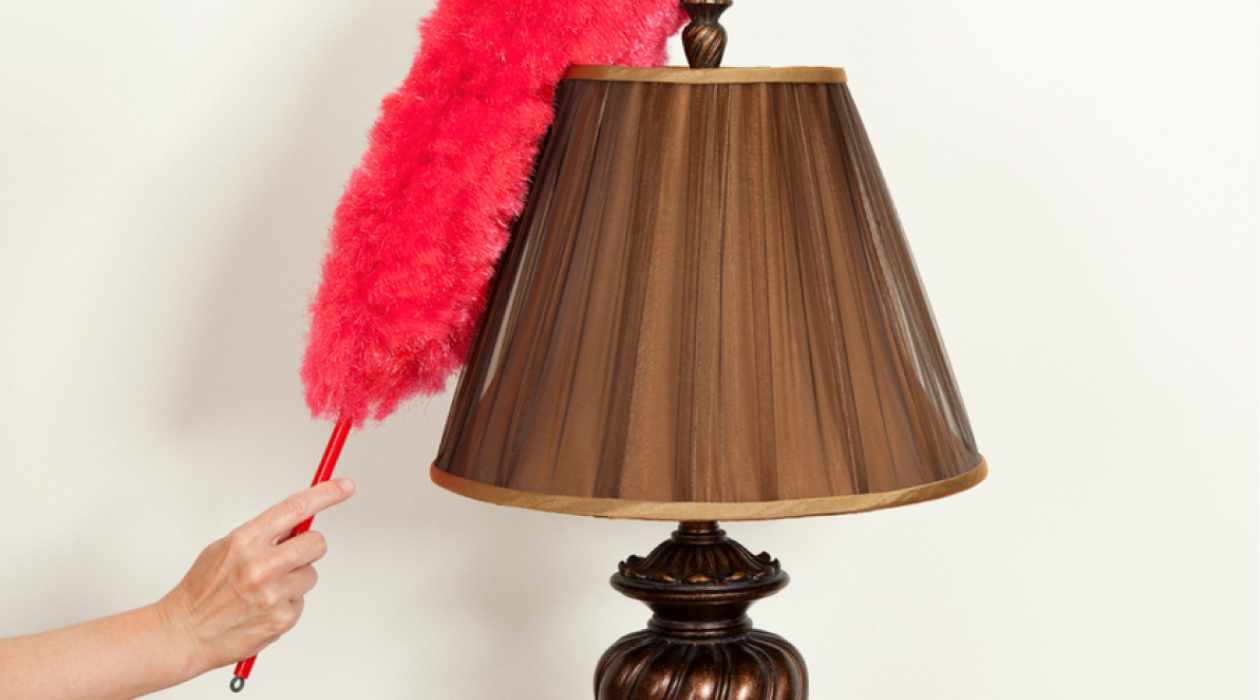
Before you can begin redoing your lamp shade, you need to prepare it for the makeover. Start by removing the lamp shade from the lamp base and placing it on a clean, flat surface. This will make it easier to work on and prevent any accidental damage to the lamp or surrounding objects.
Next, inspect the lamp shade to see if it needs any repairs. Look for any loose or broken parts, such as trim, frame wires, or fabric. If you find any damage, take the necessary steps to fix or replace the affected areas.
If your lamp shade is dirty or dusty, gently clean it using a soft cloth or a brush. Be careful not to apply too much pressure, as this can cause damage to the shade. If necessary, you can also use a mild soap and water solution to remove any stubborn stains.
Once your lamp shade is clean and in good condition, it’s time to move on to the next step: removing the existing covering.
Step 2: Remove the Existing Covering
Now that your lamp shade is prepared, it’s time to remove the existing covering. Most lamp shades are covered with fabric or paper that has been adhered to the frame. The method of removal will depend on the type of covering and how it is attached.
If the existing covering is fabric, carefully peel it away from the frame. You may need to use a utility knife or scissors to cut through any adhesive that is holding the fabric in place. Take your time and be gentle to avoid damaging the shade or frame.
If the existing covering is paper, it may be more delicate. Start by gently peeling away any tape or adhesive used to secure it. Then, use a damp cloth to moisten the paper, which will help loosen the adhesive. Slowly peel away the paper, using a scraping tool if necessary to remove stubborn bits.
Once you have successfully removed the existing covering, take a moment to clean any remaining adhesive residue from the frame. You can use a mild adhesive remover or rubbing alcohol on a cloth to gently wipe away the residue.
With the old covering removed and the frame clean, you’re ready to move on to the next step: choosing a new fabric or covering for your lamp shade.
Step 3: Choose a New Fabric or Covering
Now that you have a clean lamp shade frame, it’s time to choose a new fabric or covering to give it a fresh and updated look. This is where your creativity can shine! Consider the style and color scheme of your space, as well as your personal taste and preferences.
When selecting a fabric, look for one that is suitable for lamp shades. Fabrics like cotton, linen, or silk work well, as they are sturdy and can withstand the heat generated by the lamp. You can choose a solid color, a patterned fabric, or even a textured material, depending on the desired look.
If you prefer a different type of covering, such as decorative paper or even wallpaper, make sure it is appropriate for lamp shade use. Look for materials that are durable and heat-resistant.
Consider the size and shape of your lamp shade when choosing the fabric or covering. Measure the dimensions of the shade and take note of any unique features or contours that may affect the cutting and application process.
Once you have chosen your new fabric or covering, it’s time to move on to the next step: measuring and cutting the material to fit your lamp shade.
Consider using fabric spray paint to give your lamp shade a new look. Make sure to clean the shade thoroughly before applying the paint, and use light, even coats for best results.
Read more: How To Redo Fireplace
Step 4: Measure and Cut the New Fabric
With your chosen fabric or covering in hand, it’s time to measure and cut it to fit your lamp shade. This step is crucial for achieving a smooth and professional-looking finish.
Start by laying out your fabric on a clean, flat surface. Make sure it is free from any wrinkles or creases. Place your lamp shade frame on top of the fabric and carefully roll it along the length of the fabric, ensuring that it covers the entire surface.
Once the lamp shade frame is in position, use a fabric marker or pencil to trace along the top and bottom edges of the frame. This will serve as a guideline for cutting the fabric.
Using sharp fabric scissors, carefully cut along the traced lines. Take your time and ensure clean, straight cuts. If your lamp shade has unique contours or shapes, you may need to make small incisions or adjustments to accommodate them.
As you cut the fabric, it’s important to leave a bit of excess fabric on each side. This will allow for easier attachment and adjustment during the next step.
Once you have finished cutting the fabric, double-check that it fits the lamp shade frame properly. Make any necessary adjustments, such as trimming any excess fabric if needed.
Now that your fabric is cut to size, it’s time to move on to the next step: attaching the new fabric to the lamp shade.
Step 5: Attach the New Fabric to the Lamp Shade
Now comes the fun part – attaching the new fabric to your lamp shade frame. This step will give your lamp shade a whole new look and transform it into a stunning focal point in your room.
Start by applying a thin layer of fabric glue or using an adhesive spray to the inside surface of the lamp shade frame. Be sure to cover the entire surface evenly, while avoiding getting any glue on the outside of the frame.
Next, carefully position your cut fabric over the lamp shade frame, aligning it with the top and bottom edges. Begin by attaching one side of the fabric to the frame, gently pressing it down and smoothing out any wrinkles or folds.
Continue to work your way around the lamp shade, gradually attaching the fabric to the frame. Use your fingers to smooth out any wrinkles or creases as you go. Take your time to ensure a tight and even fit.
If you encounter any curves or bends in the lamp shade frame, you may need to make small incisions or folds in the fabric to accommodate them. This will help ensure a seamless and professional finish.
If you’re using a fabric that is prone to fraying, you can use a small amount of clear nail polish or fray check along the cut edges to prevent any unraveling.
Once the fabric is securely attached to the lamp shade frame, allow it to dry and set according to the instructions provided by the fabric glue or adhesive spray.
Now that the fabric is in place, it’s time to add those finishing touches to complete your revamped lamp shade.
Step 6: Finishing Touches
Congratulations! You’re in the final step of redoing your lamp shade. This step involves adding those special finishing touches to make your lamp shade truly unique and reflective of your personal style.
If you want to add some extra flair to your lamp shade, consider incorporating decorative trim or embellishments. This can be in the form of ribbon, lace, beaded fringe, or any other decorative elements that catch your eye. Use a hot glue gun to carefully attach the trim along the top and/or bottom edges of the lamp shade.
Another option is to stencil or paint a design onto the fabric of your lamp shade. Choose a stencil or create your own design, then use fabric paint or markers to apply the pattern or design onto the fabric. Allow the paint to dry completely before moving or using the lamp shade.
If your lamp shade has any additional features, such as a diffuser or finial, make sure to reattach them securely after the fabric has dried. This will ensure that your lamp shade is fully functional and ready to be put back into use.
Lastly, take a moment to clean and polish the lamp base, if needed. Wipe away any dust or dirt and ensure that it complements the newly refreshed lamp shade.
With the finishing touches complete, step back and admire your beautifully redone lamp shade. It’s now ready to be placed back on the lamp base and showcased in your space.
Congratulations on successfully redoing your lamp shade! You’ve not only given it a new lease on life but also added a personal touch to your decor. Enjoy the enhanced ambiance and the satisfaction of a DIY project well done!
Conclusion
Redoing a lamp shade is a rewarding way to breathe new life into old furniture and personalize your home decor. By following the step-by-step process outlined in this guide, you’ve learned how to transform a tired lamp shade into a stunning centerpiece for any room.
Throughout this journey, you’ve prepared the lamp shade, removed the existing covering, chosen a new fabric or covering, measured and cut the material, attached the new fabric to the lamp shade frame, and added those finishing touches that make it truly unique.
Remember to let your creativity flow during each step of the process. From selecting the perfect fabric or covering to experimenting with decorative trims or stencils, you have the freedom to customize your lamp shade to match your style and decor.
This DIY project not only allows you to save money by giving a new look to an old lamp shade, but it also provides a sense of accomplishment and satisfaction. You’ll enjoy the feeling of pride every time you switch on your revamped lamp and see the beautiful glow it adds to your space.
So, go ahead and take on the challenge of redoing a lamp shade. Unleash your creativity, explore different fabric options, and let your personal style shine through. With a little time and effort, you can transform a simple lamp shade into a stunning piece of functional art.
Frequently Asked Questions about How To Redo A Lampshade
Was this page helpful?
At Storables.com, we guarantee accurate and reliable information. Our content, validated by Expert Board Contributors, is crafted following stringent Editorial Policies. We're committed to providing you with well-researched, expert-backed insights for all your informational needs.