
Articles
How To Redo A Bathroom Floor
Modified: January 19, 2024
Looking to redo your bathroom floor? Check out our informative articles on how to tackle this project and achieve stunning results.
(Many of the links in this article redirect to a specific reviewed product. Your purchase of these products through affiliate links helps to generate commission for Storables.com, at no extra cost. Learn more)
Introduction
Redoing a bathroom floor can significantly transform the look and feel of your bathroom. Whether you’re tired of the old, worn-out flooring or simply want to upgrade to something more stylish and durable, replacing the bathroom floor is a great way to make a big impact with a relatively small investment of time and money.
In this article, we will guide you through the process of redoing a bathroom floor step by step. From assessing the current flooring and choosing the right material to installing the new flooring and adding the finishing touches, we’ve got you covered.
Before we begin, it’s important to note that redoing a bathroom floor is not a task to be taken lightly. It requires careful planning, attention to detail, and some basic handyman skills. If you’re not confident in your abilities, it’s always a good idea to hire a professional who can ensure a quality installation.
Now, let’s dive into the steps involved in redoing a bathroom floor and create a fresh, inviting space that you’ll love.
Key Takeaways:
- Redoing a bathroom floor involves assessing the current flooring, choosing the right material, and carefully preparing the space. Whether it’s ceramic tile, vinyl, or natural stone, proper planning is key to achieving a stunning and functional result.
- From removing the existing flooring to installing the new one and adding the finishing touches, redoing a bathroom floor is a rewarding project that can transform the look and feel of your bathroom. It’s a worthwhile investment that enhances the aesthetics and value of your home.
Read more: How To Redo A Bathroom Vanity
Assessing the Current Bathroom Floor
Before you can start redoing your bathroom floor, it’s essential to assess the current condition of the flooring. This step will help you determine whether you need to repair the subflooring, completely remove the existing flooring, or if you can install the new flooring on top of the current one.
Start by examining the current flooring for any signs of damage, such as cracks, water damage, or loose tiles. If you notice any of these issues, it’s advisable to remove the existing flooring and assess the subflooring for any potential damage.
In addition to evaluating the physical condition of the floor, consider your personal preferences and the overall aesthetic you want to achieve. Think about the style, color, and material you would like for your new bathroom floor.
Also, take into account the functionality and durability of the flooring material. Bathrooms are high-moisture spaces, so it’s crucial to choose a flooring material that is waterproof or water-resistant.
Keep in mind that different flooring options have varying maintenance requirements. Some materials are easy to clean and maintain, while others may be more high-maintenance.
Finally, take measurements of the bathroom floor to determine the square footage. By knowing the size of the space, you’ll be able to calculate the amount of flooring material you’ll need and ensure an accurate cost estimate.
Once you have thoroughly assessed the current bathroom floor, determined necessary repairs, and considered your preferences, you can move on to the next step: choosing the right flooring material.
Choosing the Right Flooring Material
When it comes to choosing the right flooring material for your bathroom, there are several factors to consider. You want a material that not only looks aesthetically pleasing but also withstands the moisture and humidity commonly found in bathrooms. Here are some popular flooring options to consider:
- Ceramic or Porcelain Tile: Tile is a classic choice for bathroom flooring. It is durable, water-resistant, and comes in a wide variety of styles and colors. Tiles can be laid in different patterns, allowing for a customized look. Keep in mind that grout lines may require extra maintenance to keep them clean.
- Vinyl: Vinyl is a versatile and affordable flooring option for bathrooms. It is water-resistant, easy to clean, and available in various designs, including realistic wood and tile patterns. Vinyl comes in sheets or tiles, and both options are relatively easy to install.
- Laminate: Laminate flooring is a cost-effective alternative to hardwood flooring. It can mimic the look of wood, tile, or stone but is more affordable and resistant to moisture. Laminate is relatively easy to install and maintain, making it a popular choice for DIY bathroom renovations.
- Natural Stone: If you want to add a touch of luxury to your bathroom, natural stone such as marble, granite, or travertine can be an excellent choice. These materials are beautiful and durable, but they require regular maintenance to prevent staining and water damage.
- Engineered Wood: Engineered wood flooring consists of a real wood veneer on top of a plywood base. It offers the warmth and beauty of hardwood floors while being more resistant to moisture. However, it’s essential to choose an engineered wood specifically designed for bathrooms to ensure its durability.
Consider your budget, the overall style of your bathroom, and the level of maintenance you’re willing to commit to when selecting a flooring material. It’s also a good idea to read customer reviews, consult with professionals, and visit showrooms to see the materials in person before making a final decision.
With the flooring material chosen, it’s time to gather the necessary tools and materials for the project.
Gathering the Necessary Tools and Materials
Before you can begin redoing your bathroom floor, it’s important to gather all the necessary tools and materials. Having everything prepared in advance will streamline the process and ensure that you have everything you need on hand. Here is a list of the essential tools and materials you may need:
Tools:
- Tape measure
- Pry bar or crowbar
- Utility knife
- Chisel
- Hammer
- Power drill
- Notched trowel
- Tile saw (if using ceramic or porcelain tile)
- Sanding block or sander
- Caulking gun
- Paint roller or brush (if painting the floor)
Read more: How To Redo Fireplace
Materials:
- Flooring material of your choice (e.g., tiles, vinyl sheets, laminate planks)
- Underlayment (if required by the flooring manufacturer)
- Thin-set mortar or adhesive
- Grout and grout sealer (if using tiles)
- Spacers (if using tiles)
- Transition strips or edging
- Caulk
- Primer (if painting the floor)
- Paint (if painting the floor)
It’s important to ensure that you have the proper tools for the specific flooring material you’ve chosen. Some materials may require specialized tools or additional supplies, so it’s always a good idea to consult the manufacturer’s instructions or seek advice from a professional.
Additionally, make sure to purchase extra materials to account for any cutting errors or future repairs. It’s better to have a little extra than to run out in the middle of the project.
Once you have all the necessary tools and materials ready, you can move on to preparing the bathroom for the flooring project.
Preparing the Bathroom for the Flooring Project
Before you begin installing the new flooring in your bathroom, it’s essential to properly prepare the space. Preparing the bathroom will help ensure a smooth and successful flooring project. Here are the steps to follow:
1. Clear the Area:
Remove all furniture, fixtures, and personal belongings from the bathroom. This includes items such as towels, rugs, toiletries, and any freestanding cabinets or storage units. Clearing the space will give you a clean and unobstructed work area.
2. Turn Off the Water Supply:
If you have any water fixtures in the bathroom, such as a toilet or sink, turn off the water supply and disconnect them. This step is crucial to prevent any accidental leaks or water damage during the flooring installation process.
Read more: How To Redo A Front Porch
3. Protect Surfaces:
Use drop cloths or plastic sheets to cover bathroom fixtures, cabinets, and any other surfaces that need protection. This will help prevent accidental damage from tools, materials, or spills while working on the floor.
4. Ventilate the Area:
Make sure the bathroom is well-ventilated by opening windows and using fans. Good ventilation will help with drying times for adhesives and reduce the buildup of fumes or odors from the flooring materials.
5. Clean the Subfloor:
Thoroughly clean the subfloor to remove any dirt, dust, or debris. A clean surface will ensure proper adhesion of the new flooring material. Use a broom, vacuum, or damp cloth to clean the subfloor, depending on the type of flooring material you’re installing.
6. Address Subflooring Issues:
If you notice any damage or unevenness in the subfloor, now is the time to address it. Repair any cracks, replace damaged sections, or level out any uneven areas to create a smooth and stable base for the new flooring.
Read more: How To Redo A Driveway
7. Allow for Acclimation:
If you’re using materials like hardwood or laminate, it’s important to let them acclimate to the room’s temperature and humidity prior to installation. Follow the manufacturer’s guidelines for acclimation time, which typically ranges from 24 to 48 hours.
By properly preparing your bathroom for the flooring project, you’ll set the stage for a successful installation process. With the preparation complete, you can move on to removing the existing flooring from the bathroom floor.
Removing the Existing Flooring
Removing the existing flooring is an important step in redoing a bathroom floor. This step allows you to start with a clean slate and ensures a proper installation of the new flooring. Here’s how to remove the existing flooring:
1. Prepare for Removal:
Put on safety goggles, gloves, and a dust mask to protect yourself from dust, debris, and potential sharp edges. Open windows or use fans to improve ventilation and minimize the spread of dust throughout your home.
2. Start at One Corner:
Begin removing the flooring from one corner of the bathroom. If you’re dealing with tiles, use a pry bar or crowbar to lift and remove the first tile. Be careful not to damage the subfloor or adjacent tiles during this process.
Read more: How To Redo Basement
3. Continue Removing the Flooring:
Once you’ve removed the first tile or section of flooring, continue to remove the rest. Use the pry bar or crowbar to lift and pry away the remaining tiles, planks, or sheets. If necessary, use a chisel and hammer to break larger tiles or remove stubborn adhesive.
4. Remove Adhesive or Residue:
After removing the flooring, you may have adhesive or residue left on the subfloor. Use a scraper or putty knife to remove any remaining adhesive. If you’re dealing with resilient flooring like vinyl, you can use a heat gun or adhesive remover to soften and scrape away the adhesive.
5. Clean the Subfloor:
Once all the old flooring and adhesive have been removed, thoroughly clean the subfloor. Sweep or vacuum to remove any loose debris, and use a damp cloth or sponge to wipe away any remaining dirt or dust.
6. Inspect the Subfloor:
Take this opportunity to inspect the subfloor for any damage or issues that may need to be addressed before installing the new flooring. Look for any rot, water damage, or uneven areas. If necessary, make the necessary repairs or level the subfloor to ensure a smooth surface.
By following these steps, you can remove the existing flooring and prepare the subfloor for the installation of the new bathroom floor. Next, let’s move on to repairing the subflooring (if necessary) before installing the new flooring.
Read more: How To Redo A Stone Fireplace
Repairing Subflooring (If Necessary)
Before installing the new flooring in your bathroom, it’s important to address any subflooring issues that may be present. Repairing the subfloor ensures a stable and secure foundation for the new flooring. Here’s how to repair the subflooring if necessary:
1. Inspect for Damage:
Thoroughly examine the subfloor for any signs of damage, such as rot, water damage, or weak areas. Pay close attention to areas near fixtures like the toilet or sink, as these are common areas for water damage.
2. Replace Damaged Sections:
If you encounter any damaged sections of the subfloor, it’s crucial to replace them. Use a circular saw or reciprocating saw to carefully cut out the damaged portion, ensuring that your cuts are straight and align with the existing subfloor joists.
With the damaged section removed, cut a new piece of plywood or subfloor material to fit the opening. Apply construction adhesive to the joists, place the new piece in position, and secure it with screws or nails. Make sure to leave a small gap between the new piece and existing subfloor to allow for expansion.
3. Level Uneven Areas:
If you have any uneven areas on the subfloor, use a leveling compound to fill in the gaps and create a smooth surface. Follow the manufacturer’s instructions to mix and apply the leveling compound, ensuring that it is spread evenly across the subfloor.
Read more: How To Redo Cheap Countertops
4. Address Subfloor Moisture:
If you discover excessive moisture or signs of water damage on the subfloor, it’s crucial to address the underlying issue. Determine the source of the moisture and fix any leaks or plumbing issues before proceeding with the flooring installation.
5. Allow for Drying Time:
If you’ve made any repairs or applied leveling compound, allow sufficient drying time before proceeding with the installation of the new flooring. Follow the manufacturer’s guidelines for drying times, as this will ensure the stability and longevity of your new bathroom floor.
By repairing the subflooring as needed, you create a solid foundation for the new flooring, ensuring its durability and longevity. Once the subfloor is in good condition, you’re ready to move on to the next step: installing the new flooring in your bathroom.
Installing the New Flooring
The time has finally come to install the new flooring in your bathroom. This step will bring your vision to life and transform the look and feel of the space. Follow these steps to ensure a successful installation:
1. Read the Manufacturer’s Instructions:
Before you begin installing the new flooring, carefully read and follow the manufacturer’s instructions. Each flooring material may have specific guidelines and recommendations for installation, so it’s essential to familiarize yourself with them.
Read more: How To Redo My Wardrobe
2. Prepare the Underlayment:
If your flooring material requires an underlayment, such as laminate or vinyl, ensure that it is properly installed following the manufacturer’s instructions. The underlayment helps provide a cushioning layer and can help with noise reduction and moisture resistance.
3. Lay Out the Flooring:
Start by laying out the flooring material according to your chosen pattern or design. Use spacers to ensure consistent spacing between tiles or planks. Make any necessary cuts to fit the flooring around edges, corners, or obstacles such as toilets or cabinets.
4. Apply Adhesive:
Depending on the type of flooring material, you may need to apply adhesive or mortar. Follow the manufacturer’s instructions for applying the adhesive and spreading it evenly on the subfloor or underlayment.
5. Install the Flooring:
Begin installing the flooring, starting from one corner of the bathroom. Place the tiles, planks, or sheets in the adhesive, pressing them firmly and ensuring they are properly aligned. Use a rubber mallet or a tapping block to gently tap the flooring into place if needed.
Read more: How To Redo A Garden Bed
6. Check for Proper Alignment:
Regularly check for proper alignment as you progress with the installation. Use a level or straightedge to ensure the flooring is even and aligned correctly. Adjust as needed to maintain a uniform and professional-looking installation.
7. Follow Grout or Sealing Instructions (If Applicable):
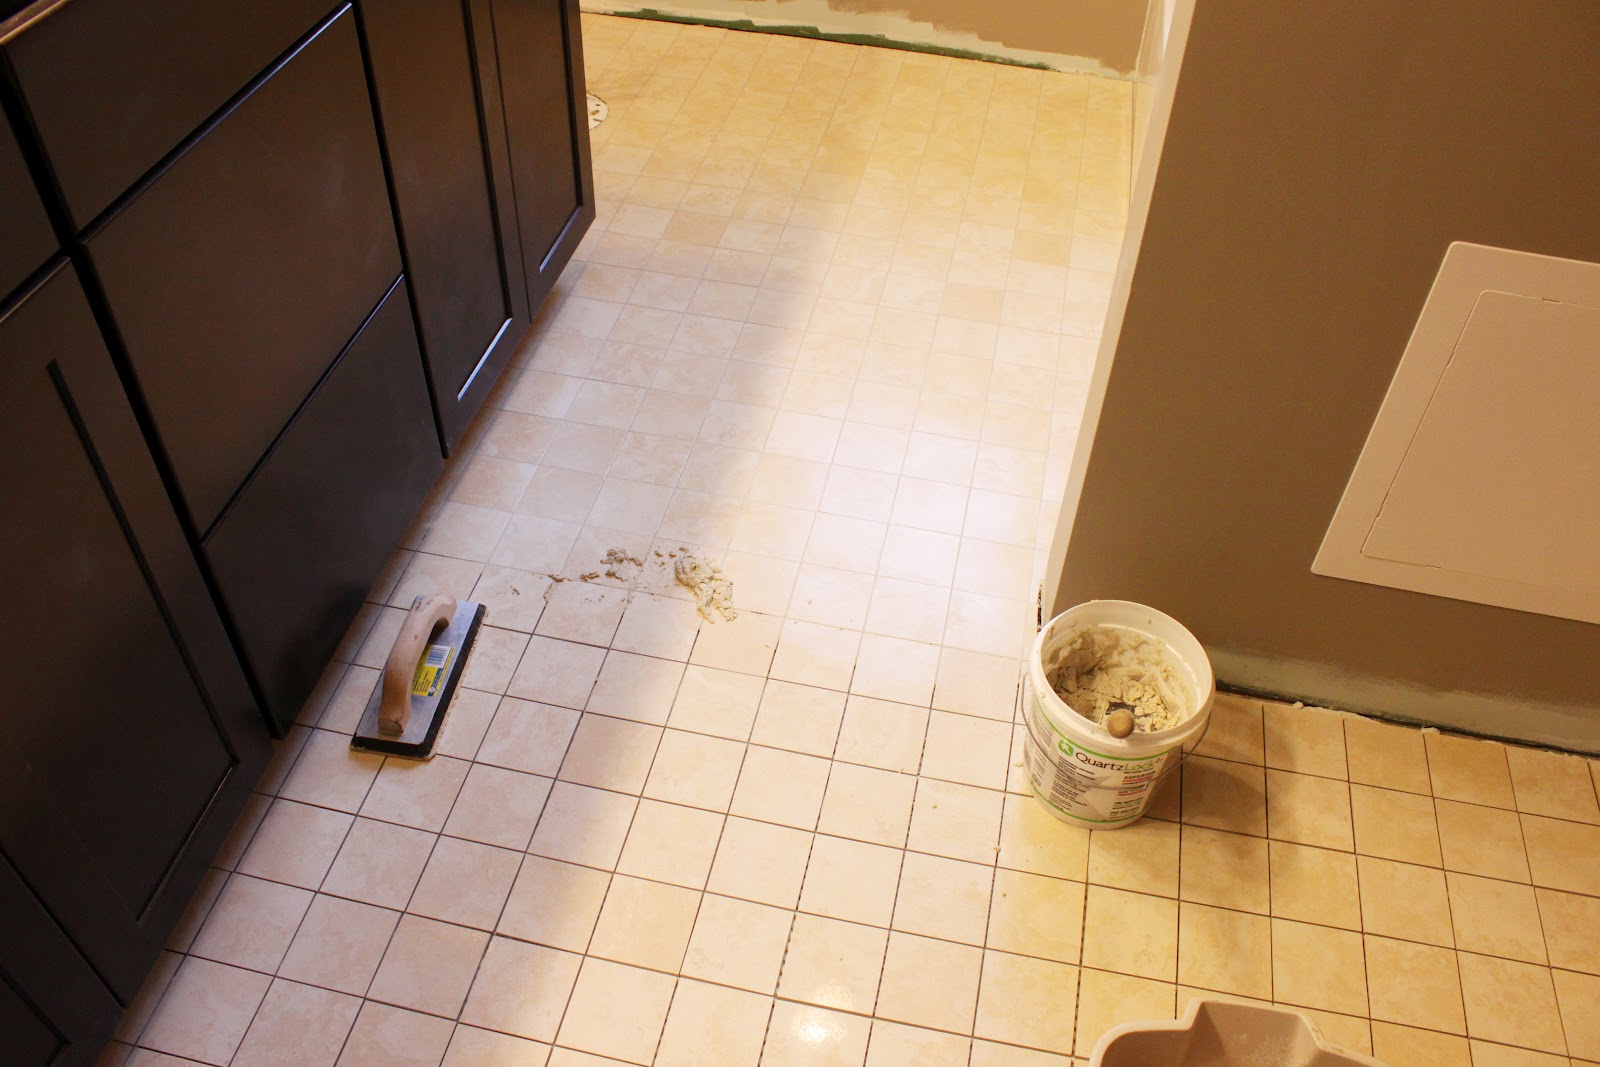
If you’re installing tile flooring, follow the manufacturer’s instructions for grouting and sealing. Apply the grout between tiles, wiping off any excess with a grout float or damp sponge. Once dry, apply a grout sealer to protect the grout from stains and moisture.
8. Install Transition Strips or Edging:
To achieve a finished look, install transition strips or edging where the new flooring meets other flooring surfaces or thresholds. This will create a seamless and professional transition between different areas.
9. Allow for Proper Drying Time:
After completing the installation, allow sufficient time for the adhesive, grout, or sealing materials to dry and cure. Follow the manufacturer’s guidelines for drying times before walking on or using the newly installed flooring.
By following these steps and the manufacturer’s instructions, you can successfully install the new flooring in your bathroom. With the flooring in place, it’s time to add the finishing touches and complete the project.
Read more: How To Redo A Coffee Table
Finishing Touches and Cleanup
Now that you’ve installed the new flooring in your bathroom, it’s time to add the finishing touches and complete the project. Follow these steps to ensure a polished and professional result:
1. Trim and Seal:
Trim any excess material or overhanging edges from the new flooring, ensuring clean and precise lines. Use a utility knife, scissors, or appropriate cutting tool for your specific flooring material. Be careful not to damage the flooring in the process.
If needed, apply a sealant or caulk along the edges of the flooring, where it meets the walls or baseboards. This will help provide a watertight seal and prevent any moisture from seeping underneath the flooring.
2. Install Baseboards or Shoe Molding:
If you removed the baseboards or shoe molding during the flooring installation, now is the time to reinstall them. Cut the molding to fit, ensuring tight and clean corners. Secure the molding in place with finishing nails or adhesive.
3. Paint or Touch-Up Walls:
If necessary, paint or touch-up the walls surrounding the new flooring. This will give the entire bathroom a refreshed and cohesive look. Use painter’s tape to protect the flooring and ensure clean lines while painting.
Read more: How To Redo Carpet
4. Clean Up:
Thoroughly clean the newly installed flooring to remove any debris, dust, or residue. Use a broom, vacuum, or damp mop, depending on the type of flooring material. Be sure to follow the manufacturer’s guidelines for proper cleaning and maintenance.
5. Reinstall Fixtures:
Once the flooring and surrounding area are clean, reinstall any fixtures, such as toilets, sinks, or cabinets, that were removed during the project. Ensure that they are properly connected and functioning before using the bathroom again.
6. Decorate and Enjoy:
With the finishing touches complete, it’s time to decorate your bathroom and enjoy your newly redone floor. Add personal touches, such as rugs, towels, and decor, to make the space your own. Step back and appreciate the hard work you put into transforming your bathroom.
By following these steps and taking care of the finishing touches, you can achieve a well-rounded and complete bathroom flooring project. Congratulations on successfully redoing your bathroom floor!
Conclusion
Redoing a bathroom floor is a rewarding project that can completely transform the look and feel of your bathroom. By assessing the current flooring, choosing the right material, gathering the necessary tools and materials, preparing the bathroom, removing the existing flooring, repairing the subflooring (if necessary), installing the new flooring, and adding the finishing touches, you can achieve a stunning and functional bathroom floor.
Remember to carefully evaluate the condition of the current floor and consider your personal preferences when choosing the new flooring material. Whether you opt for ceramic tile, vinyl, laminate, natural stone, or engineered wood, ensure that it is suitable for high-moisture environments and fits into your budget and maintenance requirements.
Properly preparing the bathroom, including clearing the area, turning off the water supply, protecting surfaces, and cleaning the subfloor, sets the stage for a successful flooring project. If necessary, address any subflooring issues, such as damage or unevenness, to ensure a stable foundation.
When it comes time to install the new flooring, follow the manufacturer’s instructions closely and take the necessary steps to achieve proper alignment, apply adhesive or mortar, and install transition strips or edging as needed. Allow for drying time to ensure that the materials set and bond correctly.
Finally, don’t forget about the finishing touches and cleanup. Trim and seal the edges, reinstall baseboards or shoe molding, touch up the walls, clean the floor thoroughly, and reinstall any fixtures that were removed.
Redoing a bathroom floor can be a DIY project or completed with the help of professionals, but either way, the end result will be a beautiful and functional bathroom that brings joy and satisfaction every time you step inside.
So go ahead, take on the challenge, and enjoy the process of redoing your bathroom floor. It’s a worthwhile investment that will enhance the aesthetics and value of your home for years to come.
Frequently Asked Questions about How To Redo A Bathroom Floor
Was this page helpful?
At Storables.com, we guarantee accurate and reliable information. Our content, validated by Expert Board Contributors, is crafted following stringent Editorial Policies. We're committed to providing you with well-researched, expert-backed insights for all your informational needs.



0 thoughts on “How To Redo A Bathroom Floor”