Articles
How To Remove A Harbor Breeze Ceiling Fan
Modified: September 2, 2024
Learn the step-by-step process of removing a Harbor Breeze ceiling fan with helpful articles, tips, and tricks.
(Many of the links in this article redirect to a specific reviewed product. Your purchase of these products through affiliate links helps to generate commission for Storables.com, at no extra cost. Learn more)
Introduction
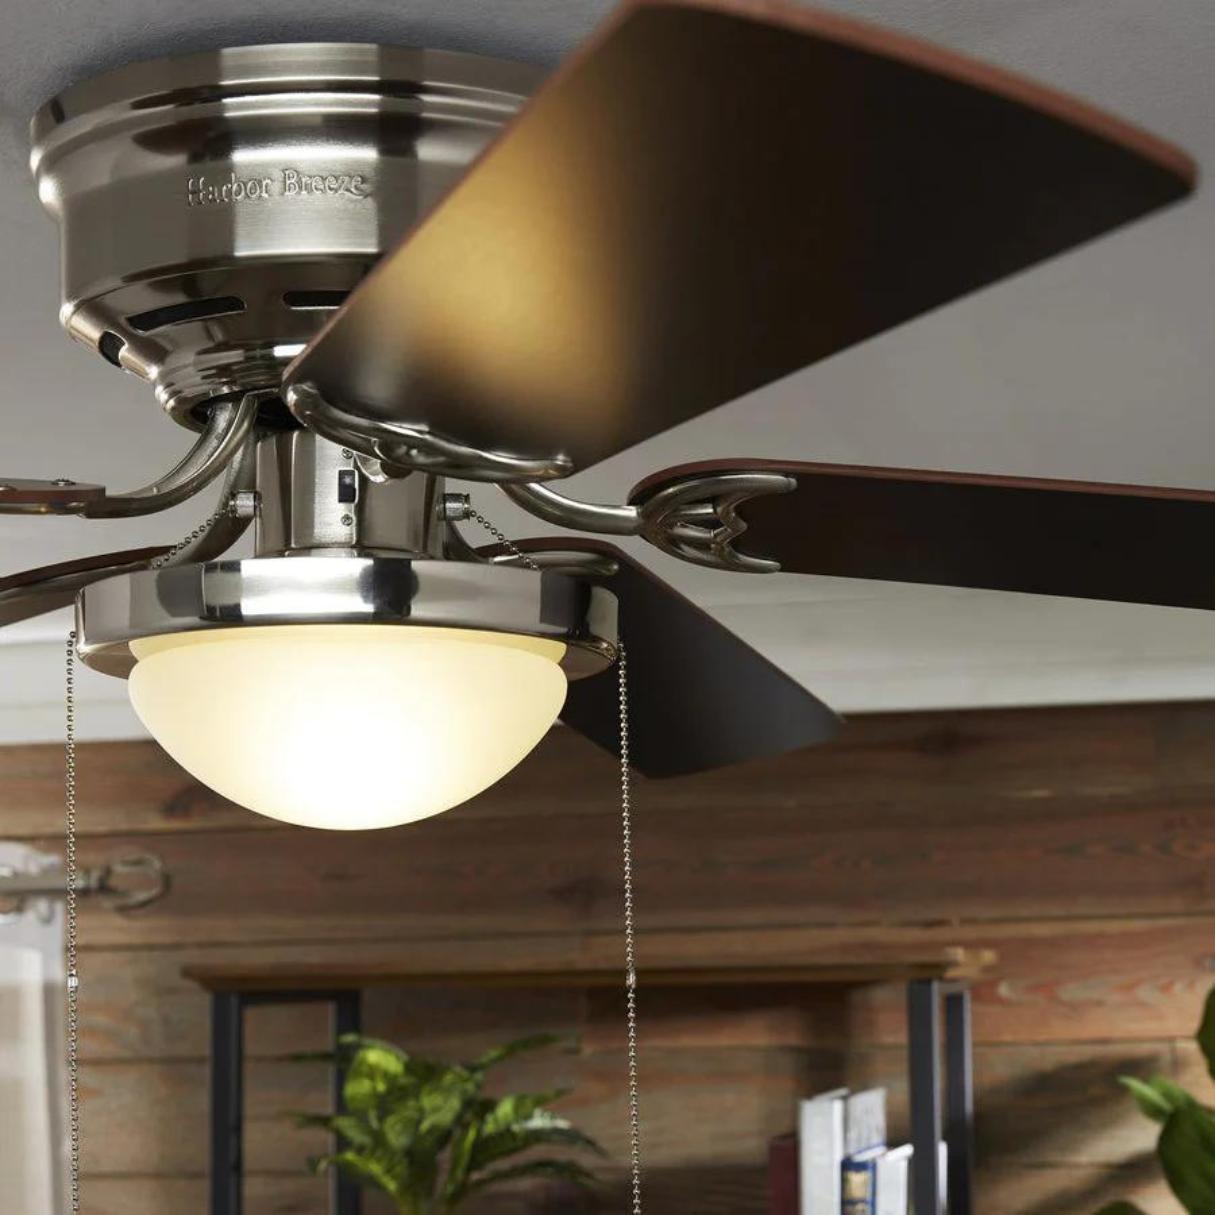
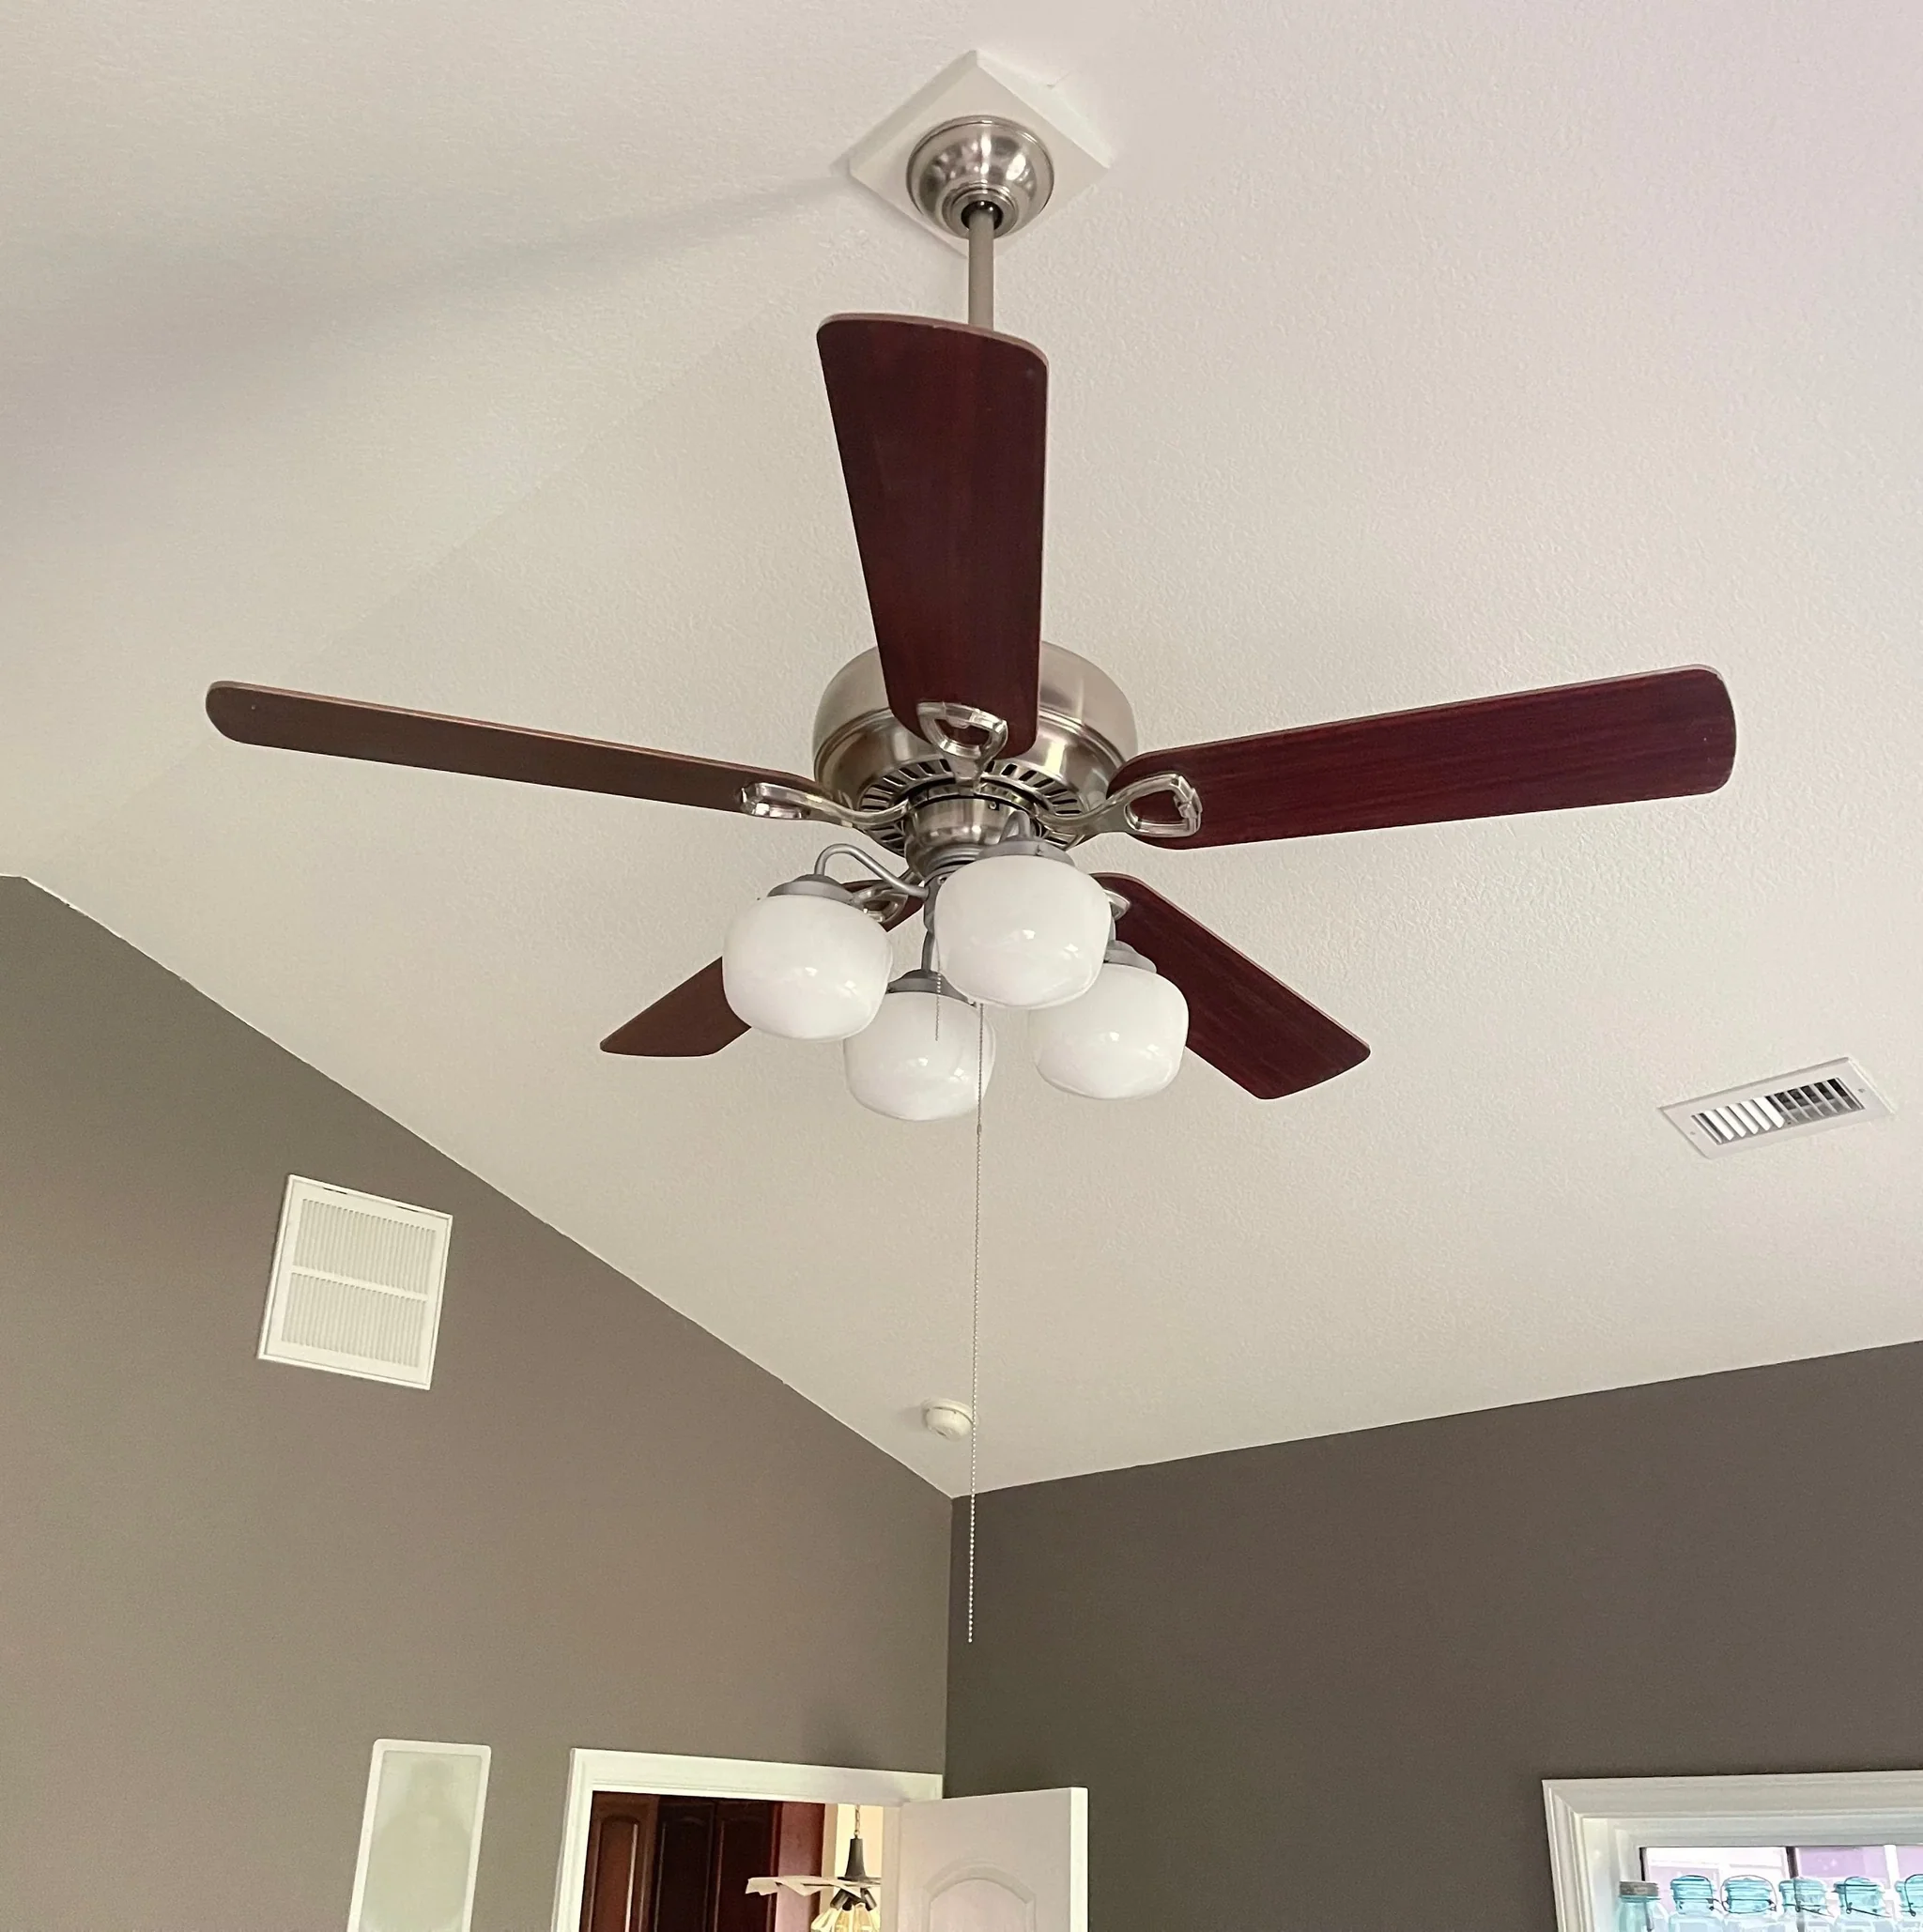
Having a ceiling fan in your home can provide comfort and added ventilation, but there may come a time when you need to remove it. Whether you want to replace the fan with a new one or make way for a different lighting fixture, knowing how to remove a Harbor Breeze ceiling fan is essential.
Harbor Breeze is a popular brand known for manufacturing high-quality and stylish ceiling fans. While these fans are designed for easy installation and removal, it’s important to follow the proper steps to ensure a smooth and safe process. In this article, we will guide you through the step-by-step process of removing a Harbor Breeze ceiling fan.
Before we dive into the removal process, let’s start by gathering the necessary tools and materials. Having everything you need on hand will make the job more efficient and will prevent any unnecessary delays. Here are the tools and materials you’ll need:
- Screwdriver (both Phillips-head and flat-head)
- Ladder or step stool
- Wire nuts
- Electrician’s tape
- Circuit tester
Make sure to have these items ready before you start the removal process. Now that you’re prepared let’s move on to step one: turning off the power to the ceiling fan.
Key Takeaways:
- Safely and efficiently remove a Harbor Breeze ceiling fan by following step-by-step instructions and prioritizing safety throughout the process. Gather the necessary tools, turn off the power, and disconnect electrical connections to complete the removal successfully.
- Whether updating the room’s décor or making way for a new lighting fixture, this guide empowers you to confidently tackle the DIY project of removing a Harbor Breeze ceiling fan. Prioritize safety, follow the step-by-step process, and consider professional assistance if needed.
Read more: How To Install Harbor Breeze Ceiling Fan
Step 1: Gather the necessary tools and materials
Before you begin the process of removing your Harbor Breeze ceiling fan, it’s important to have all the necessary tools and materials at your disposal. Here is a list of what you’ll need:
- Screwdriver (both Phillips-head and flat-head): These will be used to loosen and remove the screws that hold the fan blades, mounting bracket, and electrical connections in place.
- Ladder or step stool: Depending on the height of your ceiling, you may need a ladder or step stool to safely reach the fan.
- Wire nuts: These small plastic caps are used to secure and insulate the electrical connections when disconnecting the fan.
- Electrician’s tape: This tape is used to wrap and secure the wire nuts, providing extra protection and preventing any accidental disconnection of the wires.
- Circuit tester: It’s essential to have a circuit tester to ensure that the power to the ceiling fan is turned off before you start the removal process. This will help prevent any electrical accidents.
Having all these tools and materials ready before you begin will save you time and frustration. Additionally, it’s crucial to prioritize your safety while working with electrical components. Make sure the power is turned off and take necessary precautions such as wearing gloves and using a stable ladder or step stool.
Once you have gathered all the necessary tools and materials, you’re ready to move on to the next step: turning off the power to the ceiling fan.
Step 2: Turn off the power to the ceiling fan
Before you start removing your Harbor Breeze ceiling fan, it is crucial to ensure that the power to the fan is turned off. This step is essential for your safety and for preventing any electrical accidents. Here’s how you can turn off the power:
- Locate the circuit breaker panel in your home. It is usually found in the basement, garage, or utility room.
- Open the circuit breaker panel and locate the breaker that controls the fan. The breakers are typically labeled, but if you’re unsure which one controls the fan, you can turn off the main breaker to cut the power to the entire house.
- Using a circuit tester, double-check to ensure that there is no electricity flowing to the fan. The tester will indicate whether the power is off or on. If it is on, repeat step 2 to find the correct breaker and turn it off.
Once you have confirmed that the power is off, you can proceed with confidence knowing that you are working in a safe environment. Remember to exercise caution when handling any electrical components and always prioritize your safety.
Now that you have successfully turned off the power to the Harbor Breeze ceiling fan, you can move on to the next step: removing the fan blades.
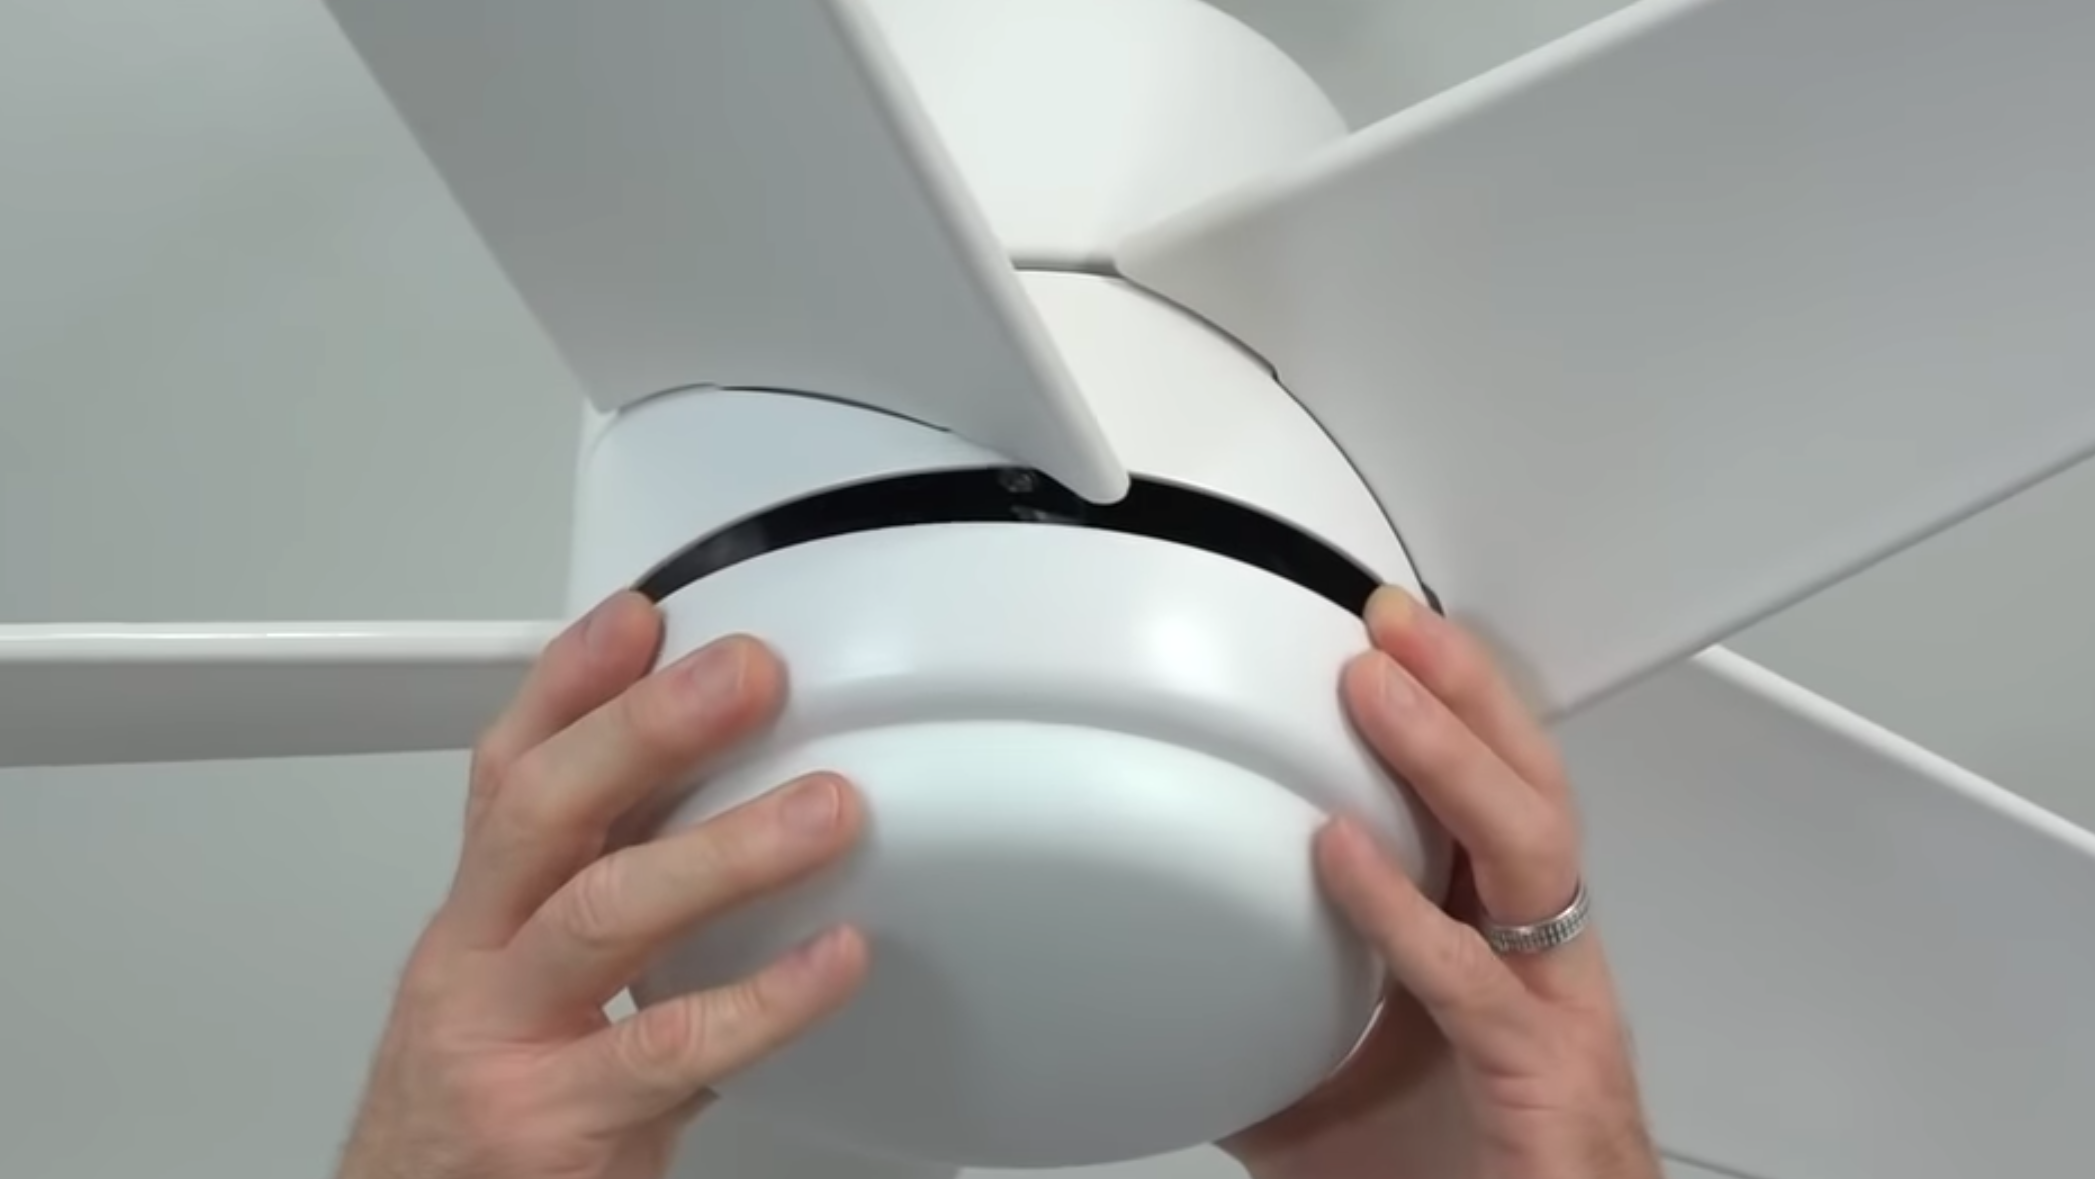
Step 3: Remove the fan blades
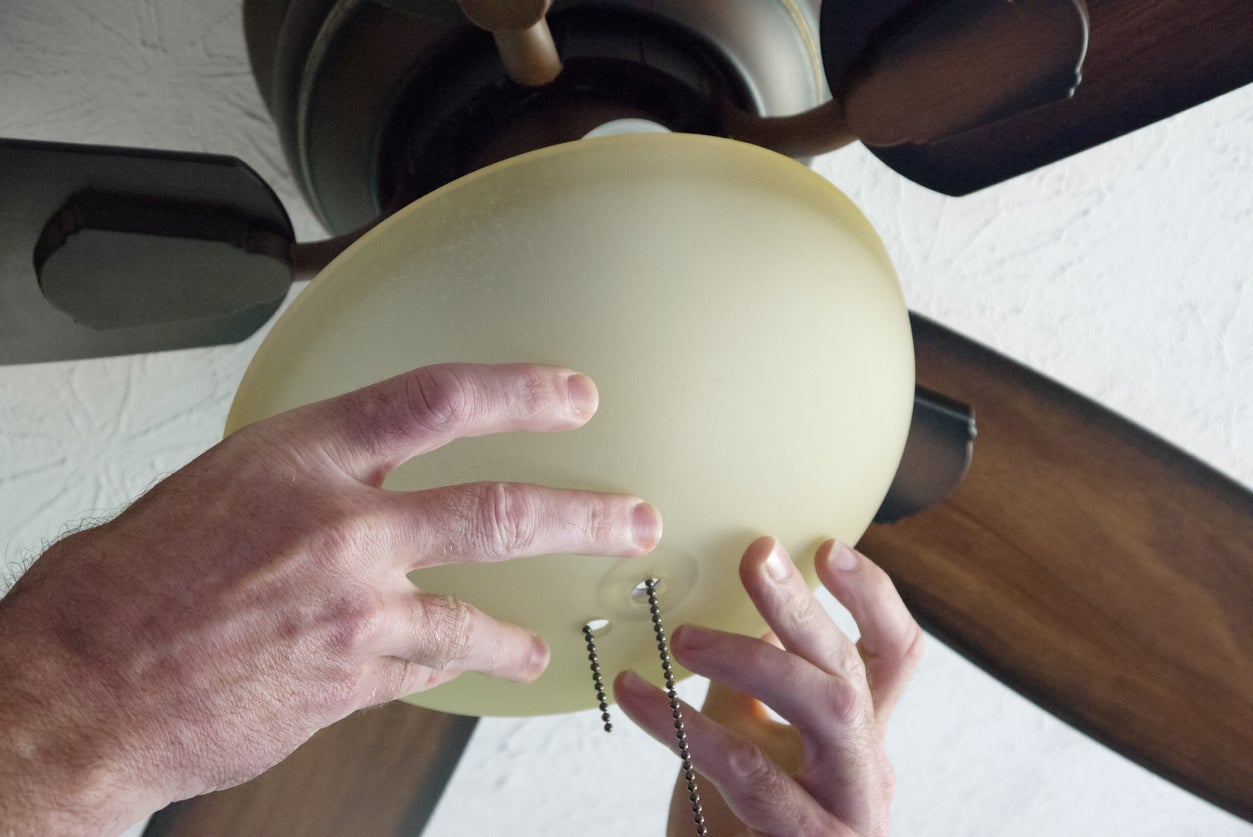
With the power turned off, you can now safely remove the fan blades from your Harbor Breeze ceiling fan. Removing the fan blades will make the overall removal process easier and more manageable. Here’s how you can remove the fan blades:
- Locate the screws that secure the fan blades to the motor housing. These screws are usually located at the base of each blade.
- Using a screwdriver, carefully unscrew and remove each screw. Make sure to keep track of the screws as you remove them so you can easily reassemble the fan later.
- Once all the screws have been removed, gently lift the fan blade away from the motor housing. Be cautious of any wires or connections that may be attached to the blades.
- If there are any additional screws or clips holding the fan blades in place, remove them accordingly. Each fan model may vary, so refer to the user manual or manufacturer’s instructions if needed.
- Repeat this process for each fan blade until all the blades have been removed from the motor housing.
By removing the fan blades, you are effectively reducing the weight and bulk of the ceiling fan, making it easier to handle and maneuver during the subsequent steps of the removal process. Remember to handle the fan blades with care to avoid any damage or injuries.
Now that you have successfully removed the fan blades, you can proceed to the next step: disconnecting the electrical connections.
Step 4: Disconnect the electrical connections
Now that the fan blades have been removed, it’s time to disconnect the electrical connections of your Harbor Breeze ceiling fan. This step is crucial for safely removing the fan from the ceiling. Follow these steps to disconnect the electrical connections:
- Locate the electrical box or junction box that houses the fan’s wiring. It is typically located at the top of the fan’s motor housing.
- Using a screwdriver, loosen and remove the screws or nuts that secure the wire connections. There will typically be three connections: black (hot) wire, white (neutral) wire, and green or bare copper wire (ground).
- To disconnect the wires, unscrew the wire nuts that secure the connections. Carefully separate the wires, ensuring that they do not touch each other or any other metal surfaces.
- Once the electrical connections are disconnected, use electrical tape to wrap each wire end individually. This provides insulation and prevents accidental contact while you continue the removal process.
- Secure the taped ends of the wires by twisting on new wire nuts. Make sure they are tightened securely.
It’s important to note that the specific wiring colors and configurations may vary depending on your ceiling fan and electrical setup. Always consult the manufacturer’s instructions or a professional electrician if you are unsure about the connections.
With the electrical connections safely disconnected and secured, you can now move on to the next step: removing the mounting bracket.
Before removing a Harbor Breeze ceiling fan, make sure to turn off the power at the circuit breaker. Use a voltage tester to ensure the power is off before starting the removal process.
Read more: Who Makes Harbor Breeze Ceiling Fans
Step 5: Remove the mounting bracket
After disconnecting the electrical connections, it’s time to remove the mounting bracket of your Harbor Breeze ceiling fan. The mounting bracket is what holds the fan securely to the ceiling. Follow these steps to remove the mounting bracket:
- Locate the screws or bolts that secure the mounting bracket to the ceiling. These are usually found on the sides or top of the bracket.
- Using a screwdriver or wrench, carefully loosen and remove the screws or bolts. Keep track of these fasteners as you will need them to install a new fan or lighting fixture later, if desired.
- Once the screws or bolts are removed, gently lower the mounting bracket. Be cautious of any wires or cables that may be attached to the ceiling.
- If there are any additional screws or clips holding the mounting bracket in place, remove them accordingly. Refer to the manufacturer’s instructions or user manual if needed.
- Once the mounting bracket is detached, set it aside for future use or discard it if you are not planning to reinstall a ceiling fan in the same location.
By removing the mounting bracket, you are freeing up the ceiling space and preparing it for a new fan or lighting fixture. Ensure that the area is clean and free from any debris, dust, or loose screws before proceeding to the next step.
Now that the mounting bracket has been removed, you can move on to the next step: taking down the ceiling fan motor.
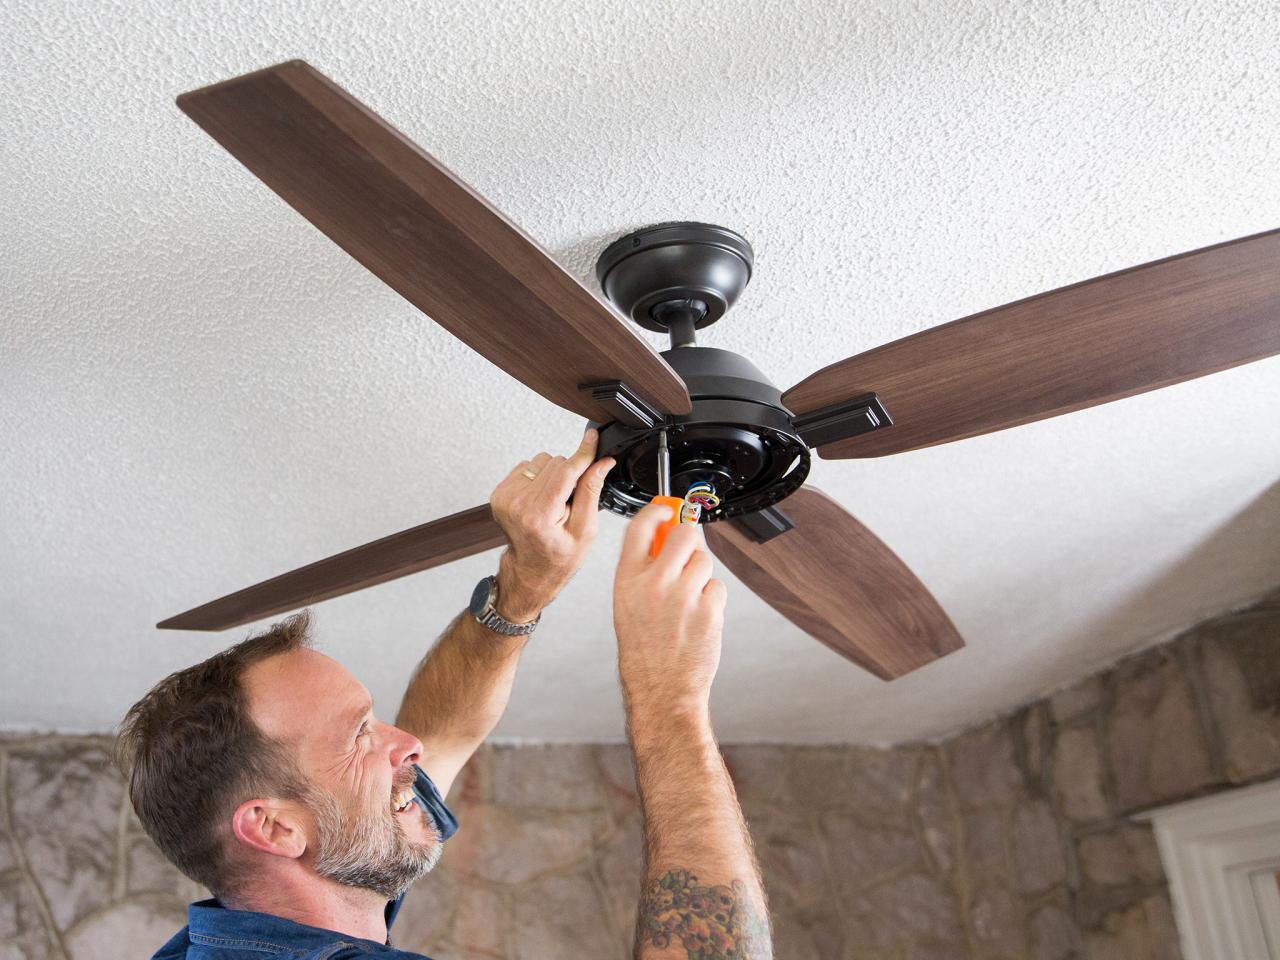
Step 6: Take down the ceiling fan motor
With the mounting bracket removed, it’s time to take down the ceiling fan motor of your Harbor Breeze fan. The motor is the main component of the fan that houses the motor housing and controls. Follow these steps to take down the ceiling fan motor:
- Ensure that you have secure footing on a ladder or step stool when working above your head.
- Gently lower the fan motor by carefully disconnecting any remaining screws or brackets that secure it to the ceiling.
- After loosening the screws or brackets, hold the motor with one hand while supporting the weight to prevent it from falling.
- Safely lower the motor to the ground, ensuring it does not collide with any obstacles or floor surfaces.
- Set the motor aside in a safe location, taking care not to damage any of its components.
By removing the ceiling fan motor, you are completing the removal of the entire fan assembly. Make sure to handle the motor with caution as it may still be heavy and contain delicate parts.
If you plan on installing a new ceiling fan or a different lighting fixture, make sure to prepare the ceiling for the installation. This may involve patching up any holes, wiring new electrical connections, or installing a new mounting bracket.
Now that the ceiling fan motor has been safely removed, you can proceed with patching up the ceiling if needed, which is an optional step.
Step 7: Patch up the ceiling (optional)
If you have removed your Harbor Breeze ceiling fan and do not plan to install a new fan or lighting fixture in the same location, you may want to consider patching up the ceiling. This step is optional and depends on your personal preference and future plans for the space. Here’s how you can patch up the ceiling:
- Inspect the ceiling for any holes or gaps left behind from the removal process. These may be where the mounting bracket or electrical connections were located.
- If there are small holes or cracks, you can use spackling compound or putty to fill them. Apply the compound with a putty knife, smoothing it out to create an even surface.
- For larger holes or gaps, you may need to use a patching kit. These kits typically include a self-adhesive mesh patch and joint compound. Follow the instructions on the kit to apply the patch and cover it with the joint compound.
- Once the patching compound has dried, use a fine-grit sandpaper to smooth out the patched area, blending it with the surrounding ceiling texture.
- Wipe away any dust or debris from the sanding process, and ensure that the patched area is clean and ready for further finishing or painting.
If you plan to repaint the ceiling, make sure to match the paint color and finish to the rest of the ceiling. This will help create a seamless and uniform appearance.
Remember, patching up the ceiling is optional, and you can choose to leave it as is or explore other decorative options for the space. It all depends on your preferences and the overall aesthetic you want to achieve.
Now that the ceiling has been patched up or left as is, you can move on to the final step: installing a new ceiling fan or concluding the removal process.
Step 8: Install a new ceiling fan (optional)
If you have removed your Harbor Breeze ceiling fan and wish to install a new one or a different lighting fixture in the same location, you can follow these steps to complete the installation. Keep in mind that this step is optional and depends on your preference and plans for the space.
- Choose a new ceiling fan or lighting fixture that fits your style and meets your needs. Consider factors such as size, design, functionality, and energy efficiency.
- Read and familiarize yourself with the installation instructions provided by the manufacturer. Each fan or fixture may have specific requirements and steps.
- Ensure that the electrical connections and mounting bracket are compatible with the new fan or fixture. Make any necessary adjustments or replacements if needed.
- Follow the manufacturer’s instructions to install the new mounting bracket onto the ceiling. Use a level to ensure that it is perfectly aligned.
- Connect the electrical wires of the new fan or fixture according to the manufacturer’s instructions. Use wire nuts and electrical tape to secure the connections.
- Attach the fan blades or lighting fixture securely to the motor or housing using the provided hardware.
- Double-check that all connections are secure and properly tightened. Ensure that the fan or fixture is balanced and level.
- Turn on the power and test the new ceiling fan or lighting fixture to ensure it functions correctly.
If you are uncertain about any aspect of the installation process or if you feel uncomfortable working with electrical components, it is recommended to consult a professional electrician. They can ensure that the installation is done safely and in compliance with electrical codes.
Remember, the installation of a new ceiling fan or lighting fixture is optional and dependent on your personal preference and plans for the space. If you choose not to install a new fan, you can conclude the removal process knowing that you have successfully removed the Harbor Breeze ceiling fan.
With this final step completed, your removal process is finished. You can now enjoy the updated space or prepare for further enhancements to your home.
Conclusion
Removing a Harbor Breeze ceiling fan requires careful planning, the right tools, and a systematic approach. By following the step-by-step instructions outlined in this guide, you can safely and efficiently remove your ceiling fan and prepare the space for a new fixture or simply leave it as is.
Remember to always prioritize safety throughout the removal process. Turn off the power to the fan, use appropriate tools, and exercise caution when handling electrical connections and fan components. If you encounter any difficulties or uncertainties, it’s best to seek professional assistance or consult the manufacturer’s instructions.
Whether you’re removing the Harbor Breeze ceiling fan to update the room’s décor, address maintenance issues, or make way for a different lighting fixture, this guide has provided you with the necessary knowledge and instructions to successfully complete the removal process. With each step carefully executed, you can enjoy a refreshed space and create new possibilities for your home.
Should you choose to install a new ceiling fan or explore other enhancements, always ensure that you follow the manufacturer’s instructions and adhere to electrical safety guidelines. When in doubt, consult a professional electrician to ensure that the installation is done correctly and meets all necessary requirements.
Thank you for using this guide to learn how to remove a Harbor Breeze ceiling fan. We hope that you have found this information useful and that it has empowered you to confidently tackle this DIY project. Remember to adapt the steps to your specific fan model and take professional advice if needed. Best of luck with your home improvement endeavors!
Ready to tackle more around your house? After mastering ceiling fan removal, why not dive into our guide on DIY home improvement? It's packed with practical advice to transform spaces with your own hands. Or, if upkeep is on your mind, check out our insights on home maintenance. Both articles offer useful tips to keep your home in top shape, ensuring your DIY projects and maintenance tasks are a breeze.
Frequently Asked Questions about How To Remove A Harbor Breeze Ceiling Fan
Was this page helpful?
At Storables.com, we guarantee accurate and reliable information. Our content, validated by Expert Board Contributors, is crafted following stringent Editorial Policies. We're committed to providing you with well-researched, expert-backed insights for all your informational needs.


0 thoughts on “How To Remove A Harbor Breeze Ceiling Fan”