Articles
How To Repair A Garage Door Panel
Modified: August 17, 2024
Looking for articles on how to repair a garage door panel? Discover expert tips and step-by-step guides to fix your garage door easily.
(Many of the links in this article redirect to a specific reviewed product. Your purchase of these products through affiliate links helps to generate commission for Storables.com, at no extra cost. Learn more)
Introduction
A garage door is an essential component of any home, providing security, convenience, and protection for your vehicles and belongings. However, like any other mechanical system, garage doors are prone to wear and tear, and over time, the panels may become damaged or worn out. When a garage door panel gets damaged, it not only affects the aesthetics of your home but can also impact the functionality and security of the door. Therefore, it is crucial to address any garage door panel damage promptly.
In this article, we will guide you through the process of repairing a garage door panel. We will cover everything from assessing the damage to removing the damaged panel and installing a new one. By following these steps, you will be able to restore your garage door to its optimal condition and ensure its proper functioning.
Before we dive into the repair process, it is important to understand the types of damage that can occur to garage door panels. This knowledge will help you identify the issue accurately and choose the appropriate repair method. Let’s explore some common types of garage door panel damage.
Key Takeaways:
- Proper maintenance and timely repair of damaged garage door panels are crucial for enhancing security, preserving curb appeal, and preventing further damage, ensuring the longevity of your garage door.
- Disconnecting the garage door opener before removing or installing panels, gathering the right tools, and testing the repair are essential steps in ensuring a successful and safe garage door panel repair process.
Read more: How Much Is A Garage Door Panel
Understanding the Importance of Garage Door Panel Repair
Garage door panel repair is essential for maintaining the overall integrity and functionality of your garage door. A damaged or broken panel not only affects the appearance of your home but can also compromise the security and insulation of your garage. Here are a few key reasons why garage door panel repair is important:
- Enhanced Security: A damaged panel can make it easier for intruders to gain access to your garage and potentially your home. Repairing or replacing the damaged panel ensures that your garage remains secure.
- Improved Energy Efficiency: Garage doors play a crucial role in insulating your garage and preventing heat loss or gain. Damaged panels can create gaps or cracks, allowing air to escape or enter, which can impact your energy bills. Repairing the panel restores the insulation properties of your garage door.
- Preserving Curb Appeal: The garage door is often a prominent feature of the front of a house. A damaged or unsightly panel can detract from the overall curb appeal of your property. Repairing or replacing the panel restores the aesthetic appeal of your garage door.
- Preventing Further Damage: Ignoring a damaged panel can lead to more extensive issues in the future. A small crack or dent can worsen over time and potentially affect other panels or components of the garage door. Addressing the damage early on prevents more costly repairs down the line.
Now that you understand the importance of garage door panel repair, let’s move on to the first step in the repair process: assessing the damage.
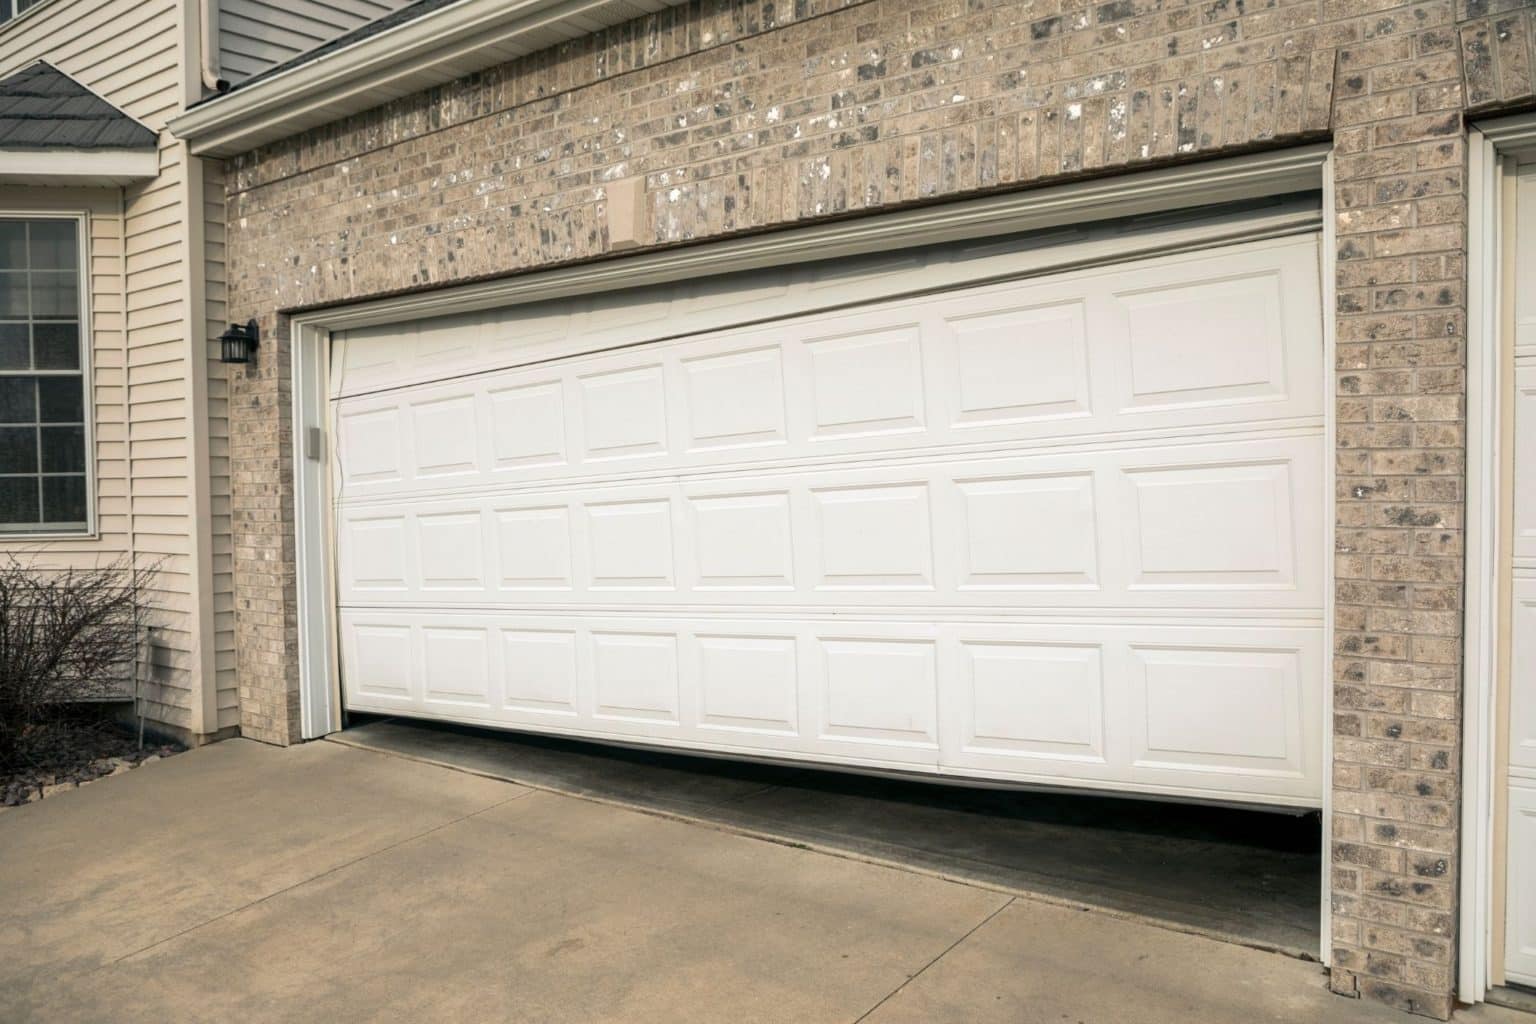
Step 1: Assessing the Damage
Before you start the garage door panel repair process, it is crucial to identify the type of damage your panel has sustained. Different types of damage require specific repair approaches. Here are some common types of garage door panel damage:
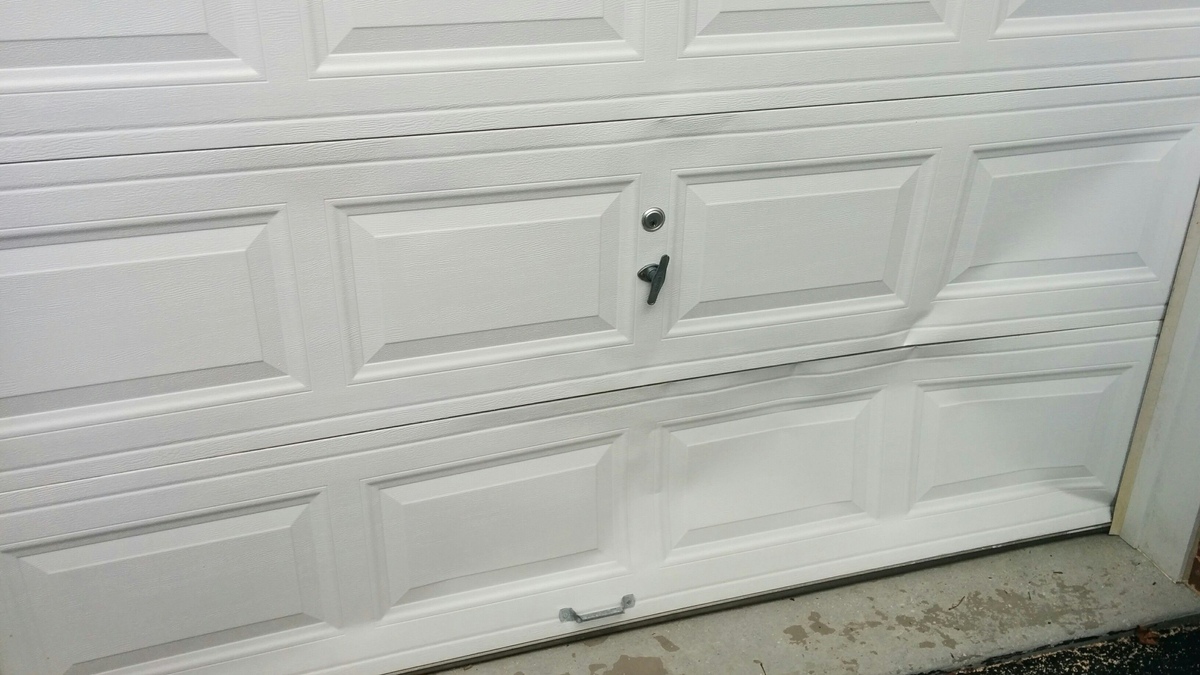
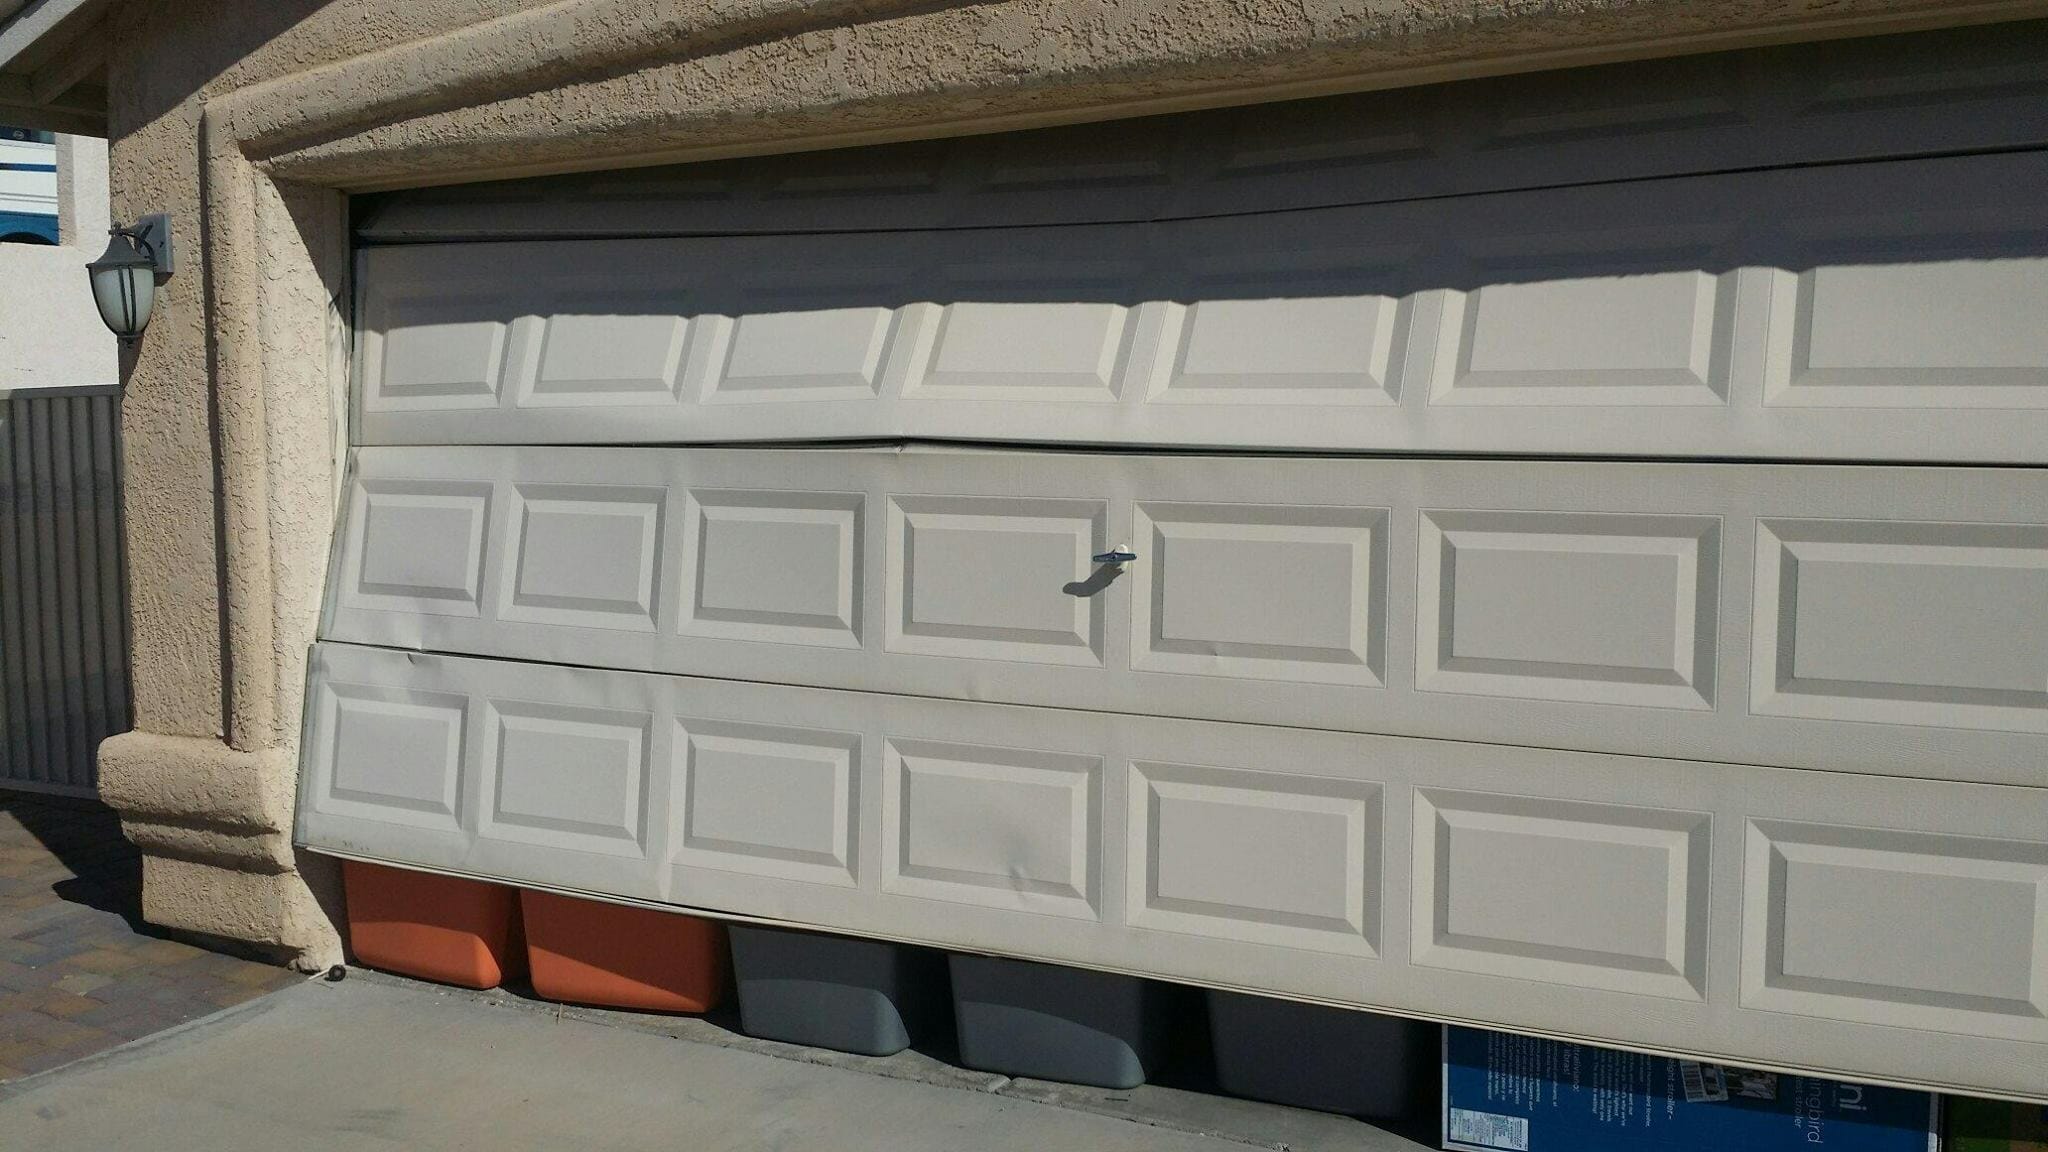
- Dents and dings: Dents and dings are the most common types of damage to garage door panels. They can occur due to accidental impact, hailstorms, or even minor accidents with vehicles. Dents may vary in size and depth, and their severity will determine whether the panel can be repaired or needs to be replaced.
- Cracks and splits: Cracks and splits can occur due to extreme temperature changes or structural weaknesses in the panel. These damages can compromise the integrity of the panel and require immediate attention. Small cracks can sometimes be repaired, while large splits usually necessitate panel replacement.
- Warped or bent panels: Warping or bending of garage door panels can happen over time due to age, moisture exposure, or improper installation. Warped panels can affect the smooth operation of the door and may require either panel repair or replacement.
- Rust and corrosion: Metal garage door panels are susceptible to rust and corrosion, especially in areas with high humidity or exposure to moisture. Rust can weaken the panel and compromise its structural integrity. Removing the rust, treating the affected area, and repainting the panel may be sufficient for repair in some cases.
- Faded or peeling paint: While not directly affecting the functionality of the door, faded or peeling paint can make the panels appear worn and detract from the overall appearance of your garage door. Repainting the panel can help restore its aesthetic appeal.
Once you have identified the specific type of damage your garage door panel has sustained, you can proceed with the appropriate repair method. In the next section, we will discuss how to inspect the extent of the damage and determine if the panel can be repaired or needs to be replaced.
Step 2: Gathering the Required Tools and Materials
After assessing the damage to your garage door panel, it’s time to gather the necessary tools and materials for the repair. Having the right equipment on hand will ensure a smooth and efficient repair process. Here are the essential tools and materials you’ll need:
Essential Tools for Garage Door Panel Repair:
- Screwdriver set: To remove screws and bolts holding the damaged panel in place.
- Adjustable wrench: For loosening nuts and bolts.
- Pliers: To grip and manipulate small components.
- Hammer: For minor adjustments and tapping out dents.
- Tape measure: To accurately measure and align the replacement panel.
- Level: To ensure the new panel is installed straight and level.
- Hacksaw or reciprocating saw: For cutting and trimming the replacement panel (if needed).
- Painting supplies: If the panel requires repainting, gather brushes, rollers, and the appropriate paint.
Additionally, you’ll need to acquire the correct replacement panel for your garage door. It’s essential to match the material, color, style, and dimensions of the existing panels to maintain a uniform appearance. Contact a reputable garage door supplier to ensure you get the right panel for your specific door model.
Before proceeding with the repair, ensure that you have a safe and well-lit workspace. Clear out any obstructions around the garage door and have a sturdy ladder or step stool available if needed. Safety goggles and work gloves are also recommended to protect yourself during the repair process.
With the necessary tools and materials gathered, you’re ready to move on to the next steps. In the following sections, we will cover how to remove the damaged panel and install the replacement panel.
Step 2: Gathering the Required Tools and Materials
Essential Tools for Garage Door Panel Repair
Repairing a garage door panel requires a few essential tools to ensure a successful and efficient repair process. By having these tools on hand, you’ll be well-equipped to tackle any damage or issues with your garage door panel. Here are the must-have tools for garage door panel repair:
- Screwdriver Set: A set of screwdrivers, including both flathead and Phillips head, is essential for removing screws and bolts holding the damaged panel in place.
- Adjustable Wrench: An adjustable wrench is necessary for loosening nuts and bolts during the repair process.
- Pliers: Pliers are handy for gripping and manipulating small components, such as connectors or fasteners.
- Hammer: A hammer is useful for tapping out small dents or making minor adjustments during the repair process.
- Tape Measure: A tape measure is crucial for accurately measuring the dimensions of the damaged panel and the replacement panel.
- Level: A level ensures that the replacement panel is installed straight and level, avoiding any misalignments.
- Hacksaw or Reciprocating Saw: Depending on the type of damage and the need for panel trimming, a hacksaw or reciprocating saw may be necessary to cut and trim the replacement panel.
- Painting Supplies: If the damaged panel requires repainting, you’ll need brushes, rollers, and appropriate paint to match the original color and finish.
Aside from these tools, it’s also important to have a safe and well-lit workspace. Clear any obstructions around the garage door area and ensure you have a sturdy ladder or step stool if needed. Wearing safety goggles and work gloves is recommended to protect yourself during the repair process.
Remember, having the right tools will make the repair process easier and more efficient. Now that you have gathered the necessary tools, you’re ready to move on to the next steps: removing the damaged panel and installing the replacement panel.
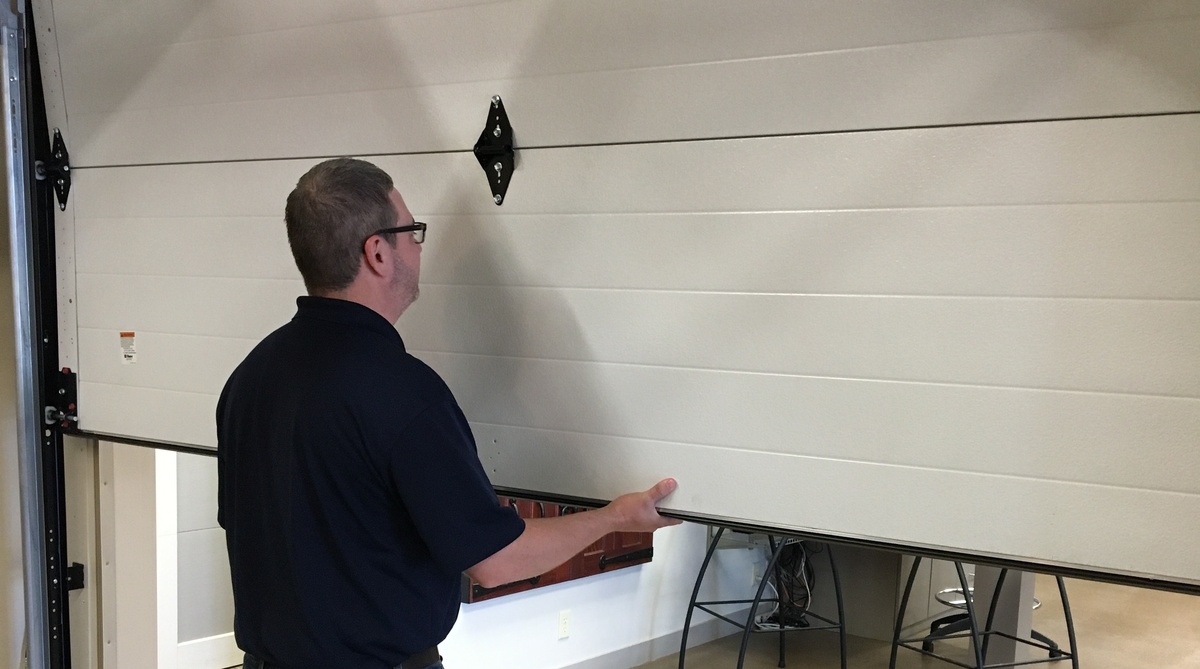
Step 3: Removing the Damaged Panel
Now that you have assessed the damage and gathered the necessary tools, it’s time to proceed with removing the damaged garage door panel. Removing the damaged panel is a crucial step in the repair process to make way for the installation of the replacement panel. Here’s how you can remove the damaged panel:
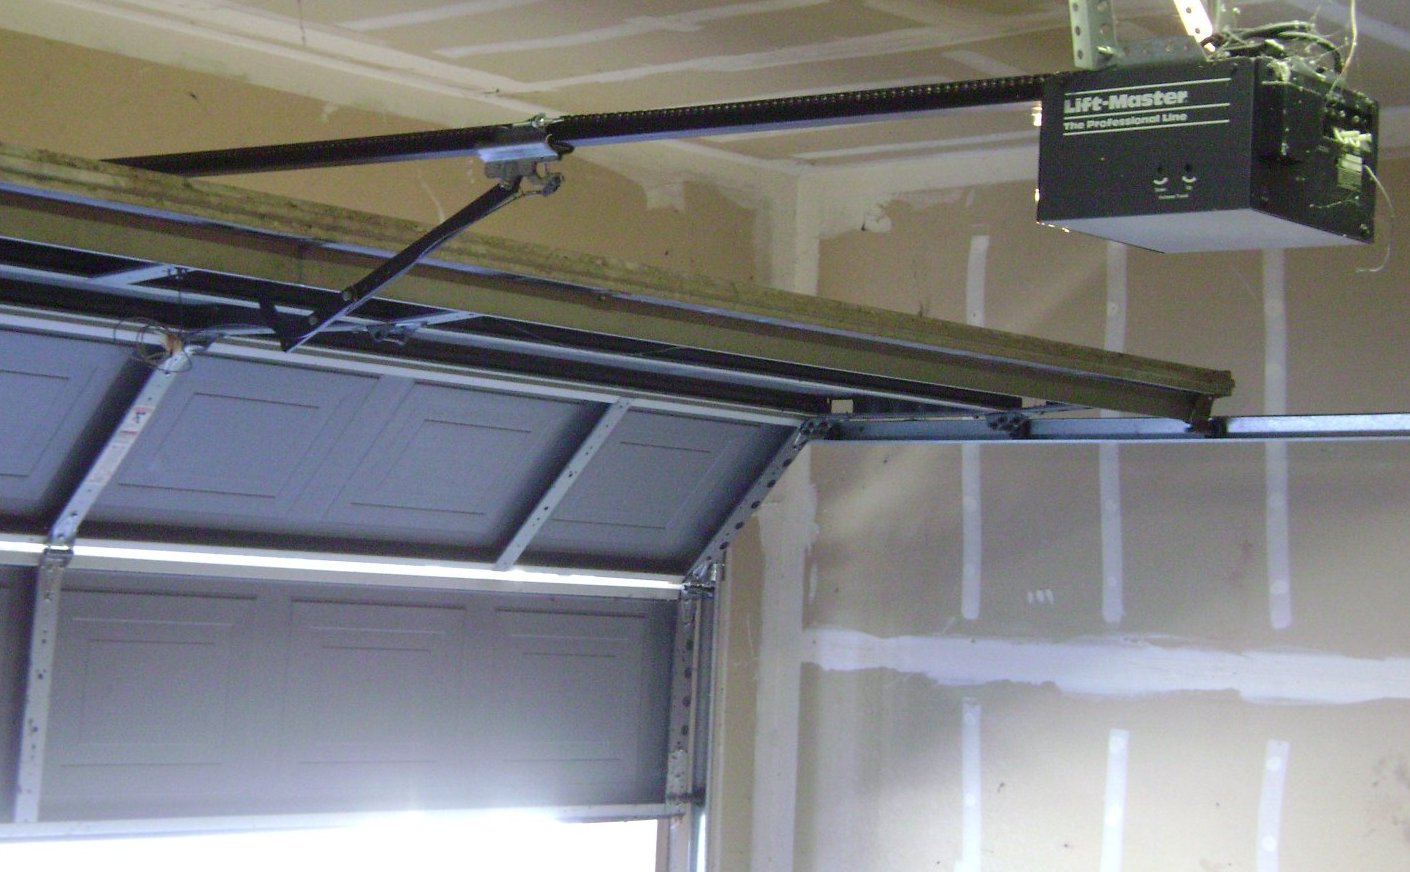
- Disconnecting the Garage Door Opener: Before starting any work on your garage door, it’s essential to disconnect the power to the garage door opener. This ensures that the door cannot be operated while you are working on it. Locate the garage door opener’s power source, usually a plug or switch, and disconnect it from the power outlet.
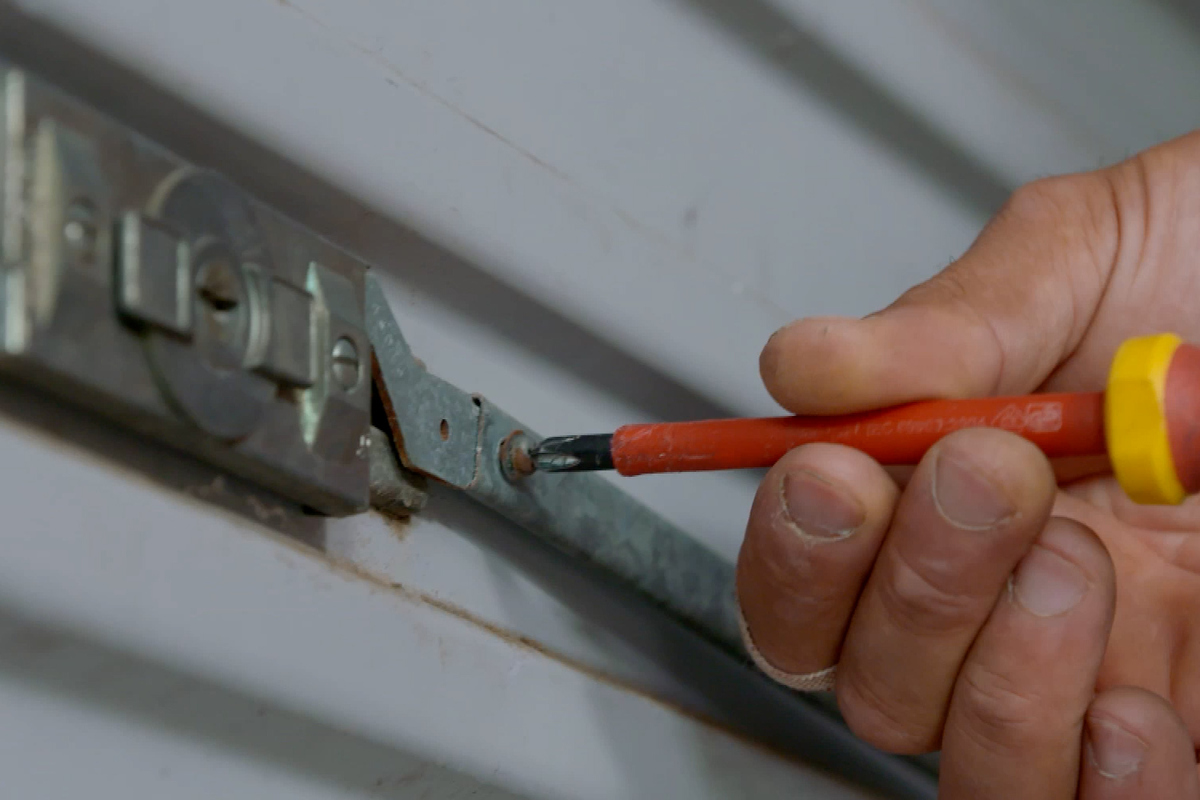
- Removing the Nuts and Bolts Holding the Panel in Place: Using a screwdriver or wrench, carefully remove the nuts and bolts securing the damaged panel to the garage door frame. Pay attention to any brackets or connectors that may be holding the panel in place and remove them as well. Keep the hardware in a safe place, as you may need it for the installation of the replacement panel.
- Gently Detaching the Damaged Panel: Once the nuts, bolts, and connectors are removed, gently detach the damaged panel from the garage door frame. Be cautious when handling the panel to avoid causing additional damage.
It’s important to note that the removal process may vary depending on the specific model and design of your garage door. Some doors may require additional steps or have different hardware configurations. Refer to the manufacturer’s instructions or consult a professional if you encounter any difficulties during the removal process.
With the damaged panel successfully removed, you’re now ready to move on to the next step: selecting the correct replacement panel. Choosing the right replacement panel is crucial to ensure a seamless repair and maintain the aesthetics of your garage door.
Step 3: Removing the Damaged Panel
Read more: How To Adjust Liftmaster Garage Door
Disconnecting the Garage Door Opener
When it comes to removing a damaged garage door panel, it’s crucial to prioritize safety. One of the first steps in this process is disconnecting the garage door opener. This ensures that the door remains stationary and cannot be accidentally activated while you work on removing the damaged panel. Here’s how you can disconnect the garage door opener:
- Locate the Power Source: Start by identifying the power source of your garage door opener. This can usually be found by inspecting the ceiling-mounted motor unit or near the wall-mounted control panel. Look for a power cord or a switch that controls the power supply to the opener.
- Disconnect the Power Cord: If your garage door opener is connected to a power outlet, simply unplug the power cord from the socket. This will prevent the opener from receiving power and operating the door while you work on it.
- Turn Off the Power: In some cases, the garage door opener may be hardwired and not connected to a power outlet. In this situation, you will need to locate the circuit breaker or fuse that controls the power supply to the opener. Switch off the corresponding breaker or remove the appropriate fuse to cut off the power.
Once you have disconnected the power source or turned off the circuit breaker, it’s important to test that the garage door opener no longer responds to commands. Press the wall-mounted control panel or remote control buttons to ensure that the door remains stationary and does not move.
Remember, safety should always be your top priority. By disconnecting the garage door opener, you can safely proceed with removing the damaged panel without the risk of unexpected movement or accidents.
Now that you have disconnected the garage door opener, you can move on to the next step: removing the nuts and bolts that hold the damaged panel in place.
Step 4: Installing the New Panel
Removing the Nuts and Bolts Holding the Panel in Place
With the garage door opener disconnected, you can now proceed with removing the nuts and bolts that secure the damaged panel to the garage door frame. Removing these fasteners will allow you to detach the damaged panel and prepare for the installation of the new panel. Follow these steps to remove the nuts and bolts:
- Inspect the Fasteners: Take a close look at the fasteners that hold the damaged panel in place. Typically, there will be a series of nuts and bolts located along the edges and corners of the panel. Additionally, there may be brackets or connectors that need to be loosened or removed as well.
- Use the Appropriate Tools: Depending on the type of fasteners used, you’ll need the appropriate tools to remove them. Grab your screwdriver or wrench and ensure it fits securely onto the nuts and bolts.
- Loosen the Nuts and Bolts: Starting from one corner, begin loosening the nuts and bolts. Turn them counterclockwise to loosen them and remove them completely. Take care not to drop them, as you’ll need them for the installation of the new panel.
- Remove Brackets or Connectors: If there are any brackets or connectors holding the damaged panel in place, loosen or remove them as well. This may require using pliers or a screwdriver, depending on their design.
- Repeat for the Remaining Fasteners: Proceed to the remaining nuts, bolts, and connectors, and remove them one by one. Work your way around the damaged panel until all fasteners are removed.
- Gently Detach the Damaged Panel: With all the nuts, bolts, and connectors removed, carefully detach the damaged panel from the garage door frame. Take your time and avoid applying excessive force, as you don’t want to cause any additional damage.
Once you have successfully removed the damaged panel, you’re now ready to move on to the exciting part: installing the new panel!
Step 4: Installing the New Panel
Read more: How To Maintain Garage Door
Attaching the Replacement Panel to the Garage Door Frame
With the damaged panel removed, it’s time to install the new replacement panel. Properly attaching the replacement panel to the garage door frame ensures a secure and seamless repair. Follow these steps to install the new panel:
- Position the Replacement Panel: Carefully position the new panel in place, aligning it with the remaining panels and ensuring it sits flush against the garage door frame. Use a level to verify that the panel is straight and level.
- Insert Nuts and Bolts: Start by inserting the nuts and bolts into the corresponding holes in the new panel and the garage door frame. Hand-tighten them initially to hold the panel in place. Make sure the bolts are inserted through the designated slots or brackets inside the panel.
- Secure with Tools: Using a screwdriver or wrench, tighten the nuts and bolts firmly. Ensure that the new panel is securely attached to the garage door frame. Be careful not to overtighten, as it can cause damage to the panel or other components of the door.
- Check for Alignment: Double-check the alignment of the new panel with the remaining panels. Make any necessary adjustments to ensure a uniform and seamless appearance. Use the level again to ensure the panel is straight.
- Reinsert Brackets or Connectors: If there were any brackets or connectors that were removed during the removal process, reinsert them in their original positions. Secure them tightly to ensure stability and proper panel alignment.
- Inspect the Panel: Once the replacement panel is securely attached, inspect it to ensure there are no visible gaps or misalignment. Check that it moves smoothly when operating the garage door manually.
It’s crucial to follow the manufacturer’s instructions and guidelines for your specific garage door model during the installation process. If you encounter any difficulties or the replacement panel does not fit properly, consider consulting a professional garage door technician for assistance.
Once the new panel is securely installed, you’re almost done! In the next step, we will discuss how to ensure the repair was successful by testing the functionality of the garage door.
Step 4: Installing the New Panel
Read more: How To Maintain Garage Door
Attaching the Replacement Panel to the Garage Door Frame
After positioning the replacement panel, the next step is to secure it to the garage door frame using nuts and bolts. Securing the panel properly will ensure its stability and functionality. Follow these steps to securely attach the replacement panel:
- Insert Nuts and Bolts: Place the nuts and bolts into the corresponding holes on the replacement panel and within the garage door frame. Ensure they are properly aligned.
- Tighten the Nuts and Bolts: Using a screwdriver or wrench, tighten the nuts and bolts snugly. Be careful not to overtighten, as it can cause damage to the panel or other components.
- Verify Alignment: Check the alignment of the replacement panel with the adjacent panels. Ensure that there are no noticeable gaps between the panels and that they form a seamless and uniform surface.
- Test Stability: Gently shake the newly installed panel to ensure it is securely attached and does not move or wobble. If there is any instability, recheck the nuts and bolts to ensure they are tightened correctly.
Once the replacement panel is securely attached, you can proceed to the next step: testing the repair.
Step 5: Testing the Repair
Now that the new panel is installed, it’s essential to test the repair to ensure the garage door operates smoothly and properly. Here’s how you can test the repair:
- Reconnect the Garage Door Opener: If you disconnected the garage door opener earlier, now is the time to reconnect it. Plug in the power cord or switch on the circuit breaker to restore power to the opener.
- Operate the Garage Door: Use the garage door opener remote or wall-mounted control panel to operate the garage door. Open and close the door several times to ensure it moves smoothly and without any issues. Pay attention to any strange noises or jerky movements that may indicate further adjustments or repairs are needed.
- Observe Panel Movement: Watch the newly installed panel as the garage door moves. Ensure that it moves in sync with the other panels and that there are no obstructions or binding that could affect its operation.
- Check Safety Features: Test the safety features of the garage door, such as auto-reverse. Place a block of wood or similar object on the ground under the path of the door. When closing, the door should automatically reverse upon contact with the object.
If you notice any issues during the testing phase, such as improper movement, unusual sounds, or safety feature malfunctions, it is advisable to consult a professional garage door technician for further inspection and adjustment.
With the repair complete and the garage door functioning smoothly, you’ve successfully replaced the damaged panel. However, to prolong the lifespan of your garage door, it is important to remember proper maintenance. In the next section, we will discuss how to maintain your garage door panels for long-lasting performance.
Read more: How To Make A Garage Door
Step 5: Testing the Repair
Reconnecting the Garage Door Opener
With the new panel installed and secured, it’s time to reconnect the garage door opener. The garage door opener is responsible for automating the opening and closing of the door, providing convenience and ease of use. Here’s how you can safely reconnect the garage door opener:
- Locate the Power Source: Identify the power source for your garage door opener. This could be a power outlet, a dedicated circuit breaker, or a power switch near the motor unit. Take note of its location.
- Restore Power: Reconnect the power to the garage door opener. If the opener is connected to a power outlet, ensure the power cord is securely plugged in. If the opener has a dedicated circuit breaker, switch it back on. For a power switch, turn it to the “on” position.
- Ensure Proper Operation: After restoring power, test the garage door opener by pressing the wall-mounted control panel or remote control button. The garage door should respond and begin opening or closing accordingly.
- Observe the Panel: As the garage door operates, carefully observe the newly installed panel. Ensure that it moves smoothly and aligns properly with the other panels. Watch out for any irregularities or issues that may require further adjustment.
If any issues arise during the reconnection process or operation of the garage door opener, it is advisable to consult the manufacturer’s instructions or contact a professional garage door technician for assistance. They can provide expert guidance and ensure the garage door opener is properly connected and functioning safely.
Now that the garage door opener is reconnected and the repair is complete, it’s time to move on to the final step: testing the repair and ensuring the garage door operates correctly.
Read more: How To Make A Garage Door
Step 5: Testing the Repair
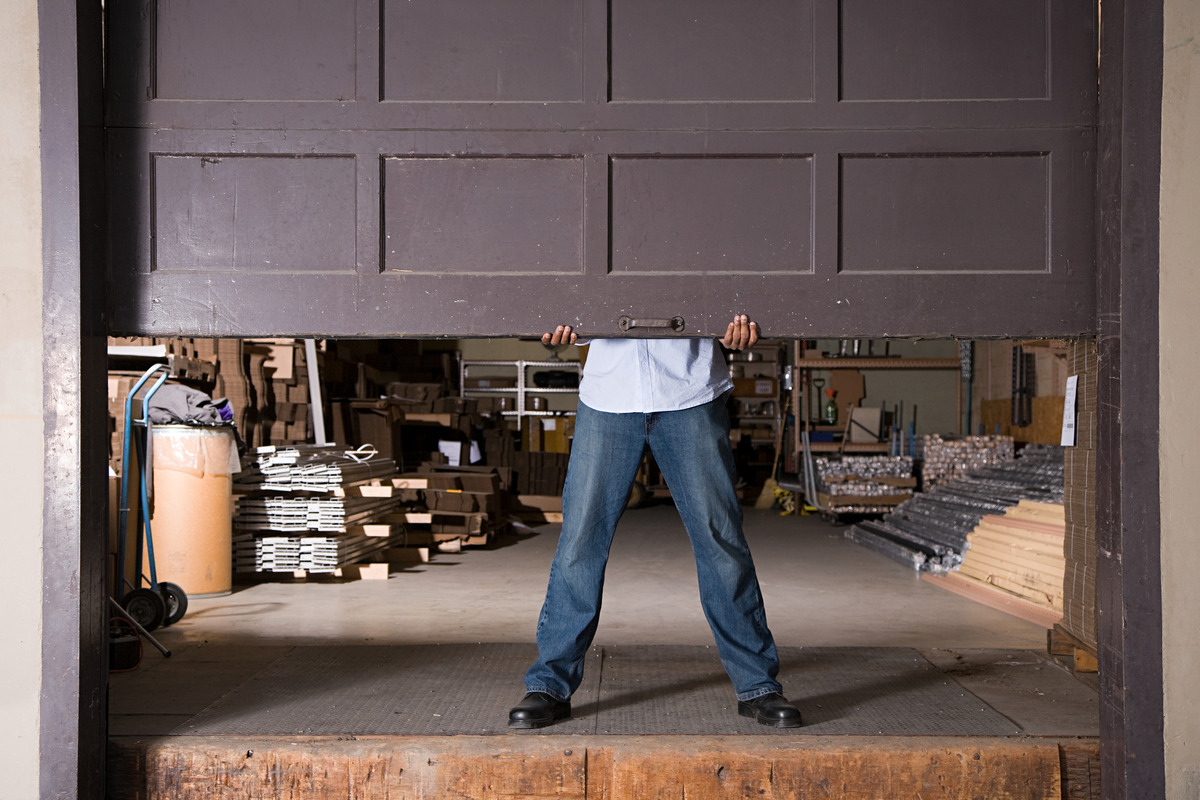
Operating the Garage Door to Ensure Proper Functioning
With the garage door opener reconnected, it’s time to test the repair and ensure that the garage door operates smoothly and correctly. By performing this final step, you can verify that the panel replacement was successful and that your garage door is back to optimal functionality. Here’s how you can test the repair:
- Check for Smooth Operation: Use the wall-mounted control panel or remote control to open and close the garage door several times. Observe the door as it moves and ensure that it operates smoothly without any jerking or sticking.
- Listen for Unusual Noises: Pay attention to any unusual noises, such as grinding, scraping, or squeaking, during the operation of the garage door. Unusual noises might indicate misalignment or other issues that require further attention.
- Verify Safety Features: Test the safety features of your garage door, such as the auto-reverse mechanism. Place an object, like a roll of paper towels, in the path of the closing door. The door should reverse automatically upon contact with the object. This feature is crucial for preventing accidents or injuries.
- Inspect Panel Alignment: While the garage door is in motion, visually inspect the replaced panel and ensure that it moves in sync with the adjacent panels. Check for any misalignment or gaps that may require adjustment.
- Test Remote Control Range: Test the range and responsiveness of the remote control by operating the garage door from different areas of your property. Ensure that the remote control reliably activates the garage door opener at a reasonable distance.
If you notice any issues or concerns during the testing process, it’s recommended to consult a professional garage door technician. They will have the expertise to diagnose and address any underlying problems, ensuring your garage door operates safely and efficiently.
Inspect the garage door panel for any dents or damage. Use a rubber mallet to gently tap out small dents, or contact a professional for larger repairs.
Read more: How To Change Garage Door Frequency
Conclusion
Repairing a damaged garage door panel is an important task that not only improves the appearance of your home but also ensures the functionality and security of your garage. By following the steps outlined in this article, you now have the knowledge to assess the damage, gather the necessary tools and materials, remove the damaged panel, install the replacement panel, and test the repair for proper functioning.
Remember to prioritize safety throughout the repair process, such as disconnecting the garage door opener before removing the damaged panel. Take the time to select the correct replacement panel that matches the material, color, style, and dimensions of the existing panels.
Regular maintenance and care can help prolong the lifespan of your garage door panels. Inspect them periodically for any signs of damage, such as dents, cracks, or rust, and address any issues promptly. Lubricate the moving parts, check the weatherstripping for wear, and keep the panels clean to maintain their integrity.
By maintaining your garage door panels and addressing any repairs or replacements as needed, you can ensure that your garage door not only functions properly but also enhances the overall security and appearance of your home.
Maintaining the Garage Door Panels for Longevity
To keep your garage door panels in optimal condition and extend their lifespan, regular maintenance is essential. By following a few simple steps, you can ensure that your garage door continues to function properly and looks its best. Here are some tips for maintaining your garage door panels:
- Regular Cleaning: Clean the garage door panels periodically to remove dirt, dust, and debris. Use a mild detergent and water to scrub the panels gently. Avoid using harsh chemicals or abrasive cleaners, as they can damage the panel’s finish. Rinse thoroughly with clean water and dry with a soft cloth.
- Inspect for Damage: Conduct regular inspections of the garage door panels to identify any signs of damage, such as dents, cracks, or peeling paint. Promptly address any issues by repairing or replacing the affected panels. This will prevent further damage and ensure the longevity of your garage door.
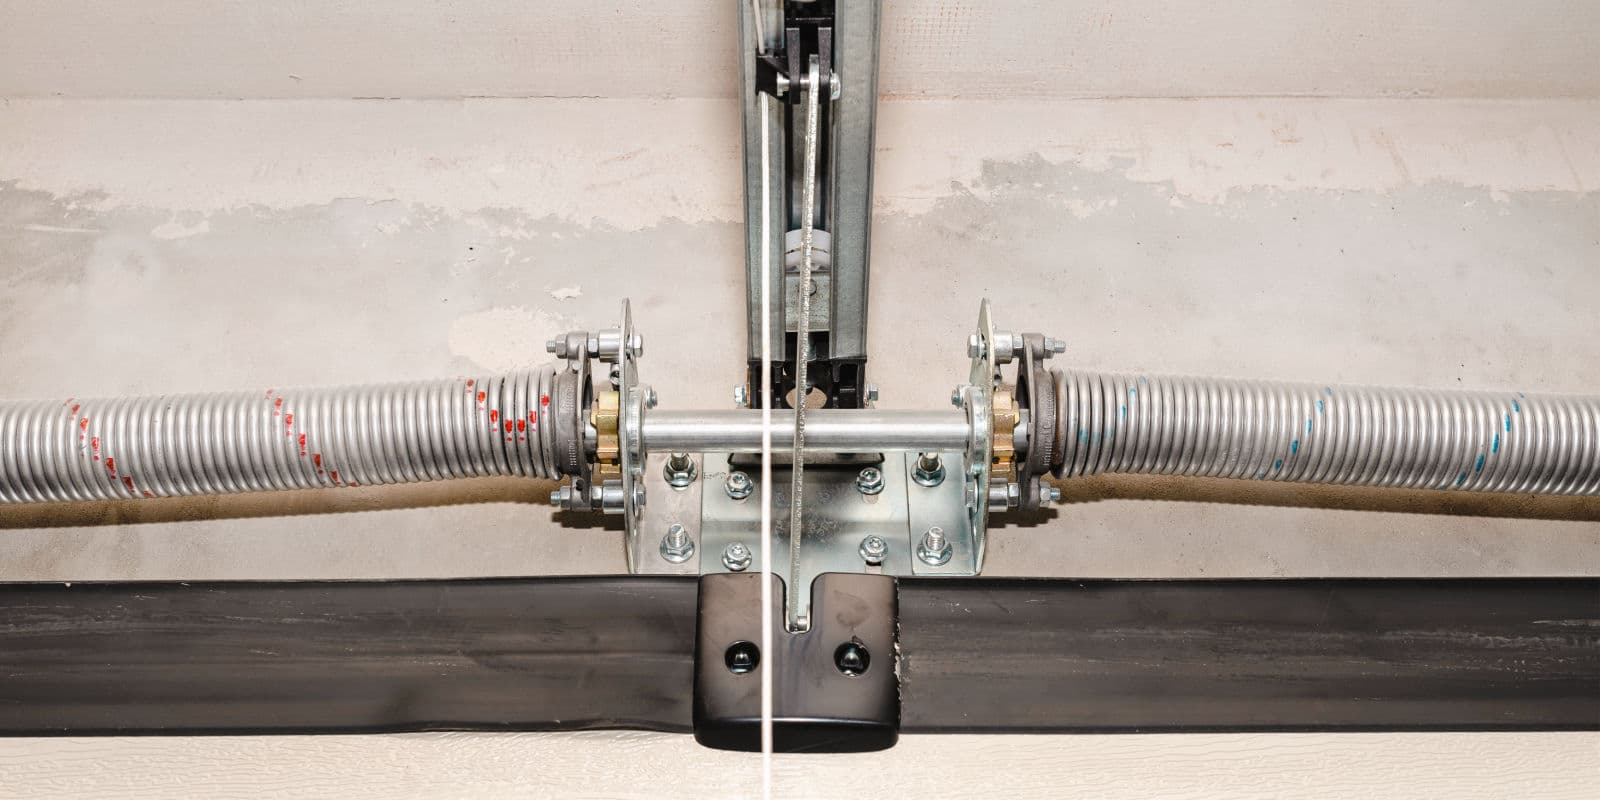
- Maintain Hardware: Check the nuts, bolts, hinges, and rollers that attach the panels to the garage door system. Tighten any loose hardware and replace any damaged or worn-out components. Lubricate the moving parts with a silicone-based lubricant to ensure smooth and quiet operation.
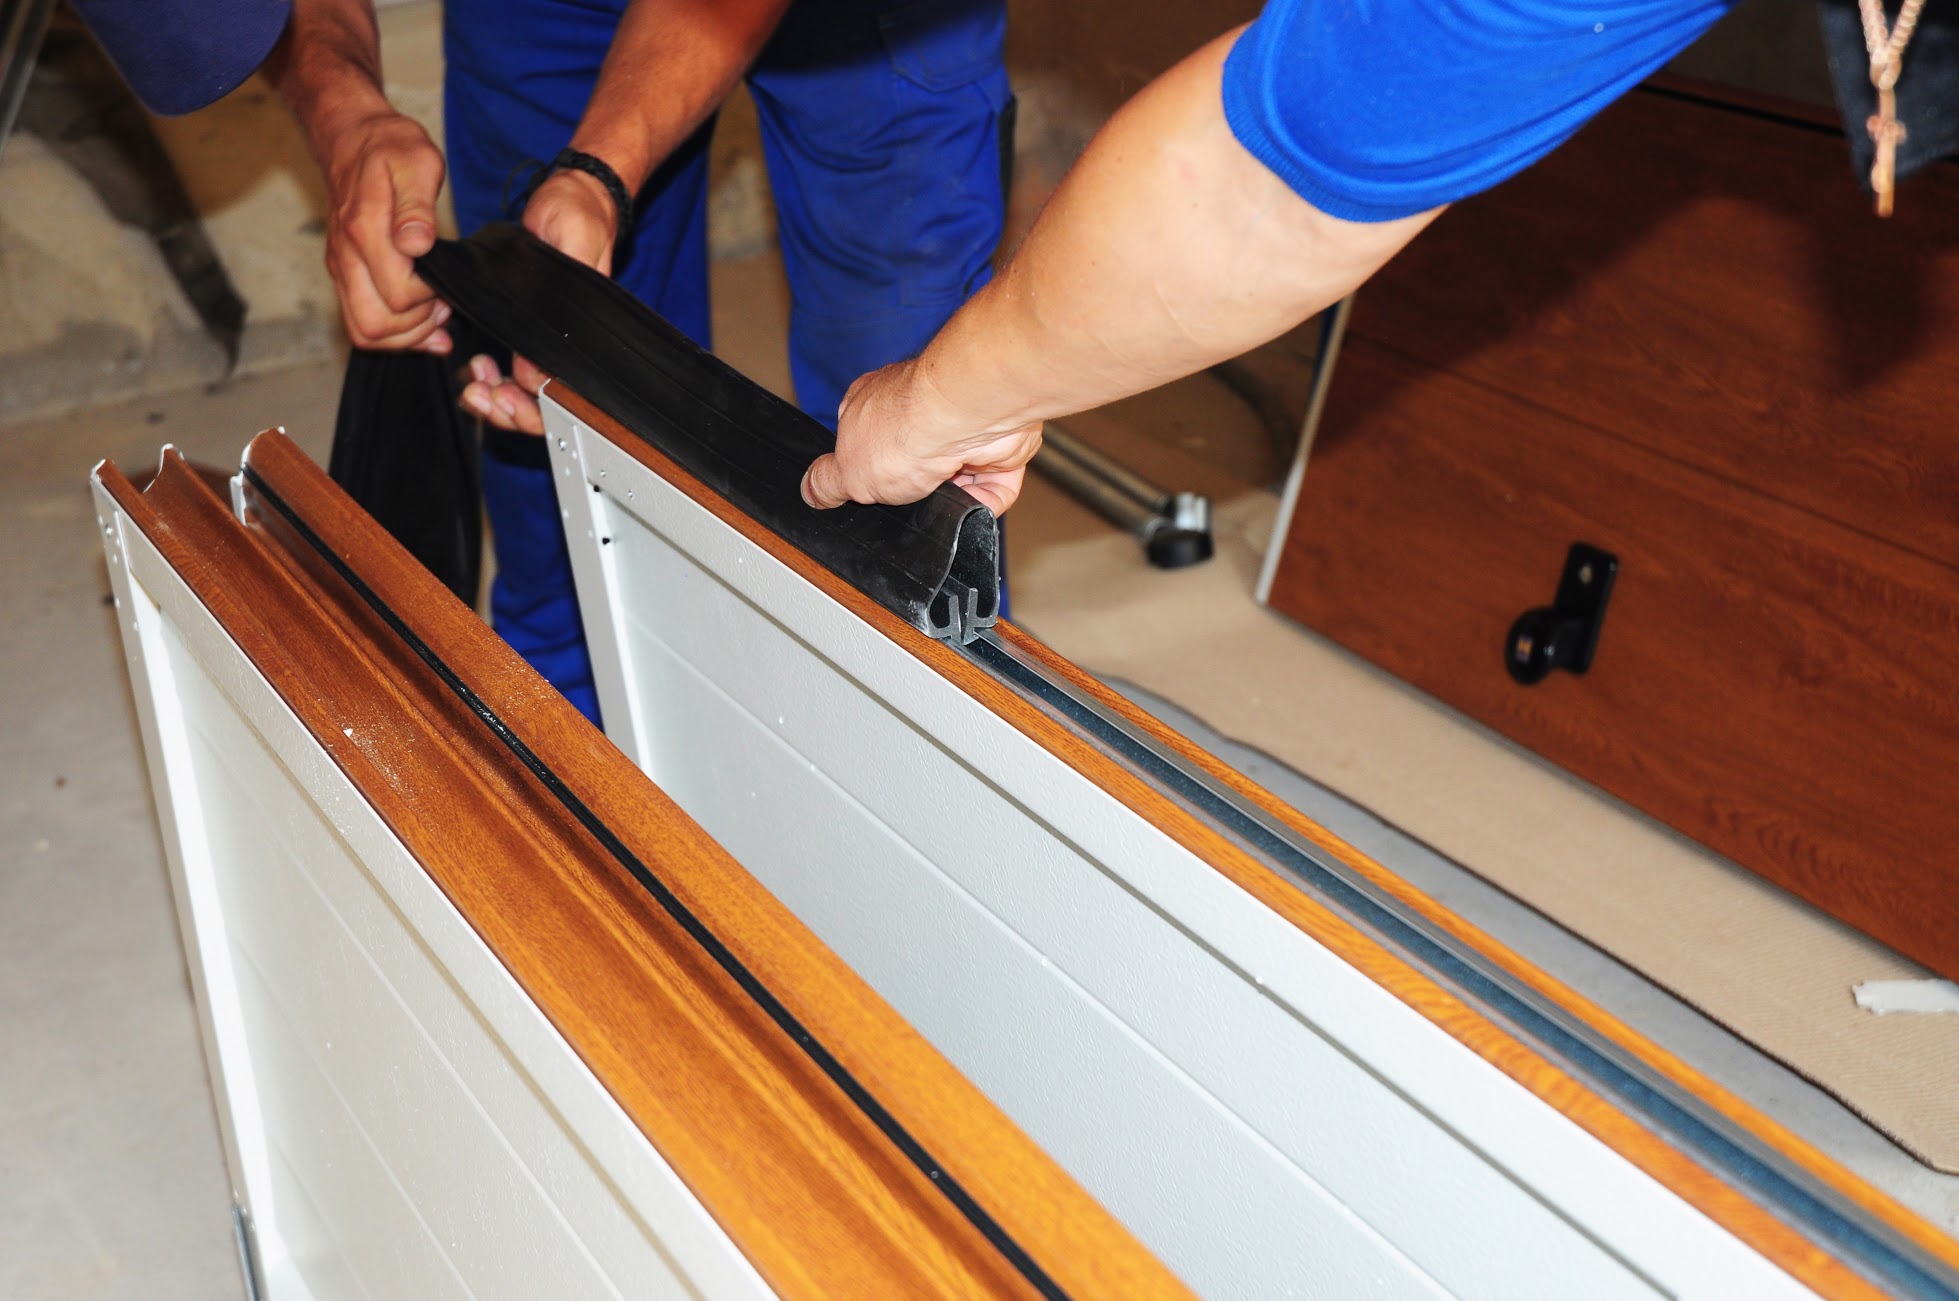
- Check Weatherstripping: Inspect the weatherstripping along the bottom and sides of the garage door panels. Ensure that it is intact and provides a tight seal when the door is closed. Replace any damaged or worn weatherstripping to prevent drafts, water infiltration, and energy loss.
- Paint or Stain Maintenance: If your garage door panels are painted or stained, inspect the finish regularly for signs of fading, chipping, or peeling. Touch up any damaged areas with matching paint or stain to protect the panels from the elements and maintain their appearance.
- Keep Clear of Obstructions: Regularly check the area around the garage door and ensure it is clear of any obstructions, such as debris, plants, or storage items. Obstructions can interfere with the smooth operation of the door and potentially cause damage to the panels or the garage door system.
By following these maintenance practices, you can preserve the integrity and appearance of your garage door panels. Regular upkeep not only prolongs the lifespan of the panels but also ensures the safe and reliable operation of your garage door.
If you are unsure about any maintenance tasks or encounter significant issues with your garage door panels, it is best to consult a professional garage door technician. They have the expertise to handle complex repairs and provide guidance on proper maintenance practices specific to your garage door model.
By investing a little time and effort into maintaining your garage door panels, you can enjoy a functional, secure, and visually appealing garage door for years to come.
Frequently Asked Questions about How To Repair A Garage Door Panel
Was this page helpful?
At Storables.com, we guarantee accurate and reliable information. Our content, validated by Expert Board Contributors, is crafted following stringent Editorial Policies. We're committed to providing you with well-researched, expert-backed insights for all your informational needs.

0 thoughts on “How To Repair A Garage Door Panel”