Home>Articles>How To Repair A Storm Door, From Top To Bottom
Articles
How To Repair A Storm Door, From Top To Bottom
Modified: October 19, 2024
Learn how to repair a storm door from top to bottom with our informative articles. Expert tips and step-by-step guides to make your repair process easier.
(Many of the links in this article redirect to a specific reviewed product. Your purchase of these products through affiliate links helps to generate commission for Storables.com, at no extra cost. Learn more)
Introduction
Storm doors are a valuable addition to any home, providing an extra layer of protection from the elements and added security. However, over time, these doors may experience wear and tear, requiring repairs to keep them functioning properly. From top to bottom, various components of the storm door may need attention, such as the hinges, frames, or glass panels.
In this comprehensive guide, we will walk you through the step-by-step process of repairing a storm door, ensuring that it returns to its optimal condition. Whether you have a damaged top portion, a sagging middle portion, or a worn bottom portion, we have you covered. So grab your tools and let’s get started on restoring your storm door!
Key Takeaways:
- Repairing a storm door from top to bottom is a manageable project that can be tackled by homeowners with the right guidance and tools. It not only improves functionality and security but also enhances the overall appearance and energy efficiency of the home.
- Regular maintenance is crucial to prolonging the lifespan of a storm door. By addressing issues promptly and properly maintaining the door, homeowners can enjoy its benefits for years to come.
Preparing to Repair the Storm Door
Before diving into the repair process, it’s important to take a few preparatory steps to ensure a smooth and successful repair. Here’s what you need to do:
- Gather the necessary tools: To effectively repair the storm door, you’ll need a set of basic tools such as a screwdriver, pliers, hammer, putty knife, and a replacement part, if needed.
- Clear the work area: Remove any obstacles or debris around the storm door to provide a safe and clutter-free work environment. This will allow you to move freely without causing any accidents.
- Inspect the damage: Carefully examine the storm door to assess the extent of the damage. Look for cracked frames, loose screws, damaged hinges, or any other issues that need attention.
- Obtain replacement parts: If certain components of the storm door are beyond repair, it may be necessary to purchase replacement parts. Take note of the specific measurements and materials needed for the replacement to ensure a proper fit.
- Protect the surrounding surfaces: Cover adjacent areas, such as walls and floors, with protective materials like drop cloths or cardboard to prevent any accidental damage during the repair process.
By following these preparatory steps, you’ll set yourself up for a successful repair job and ensure that you have all the necessary tools and materials at hand. Once you’re ready, it’s time to move on to the next step – removing the storm door.
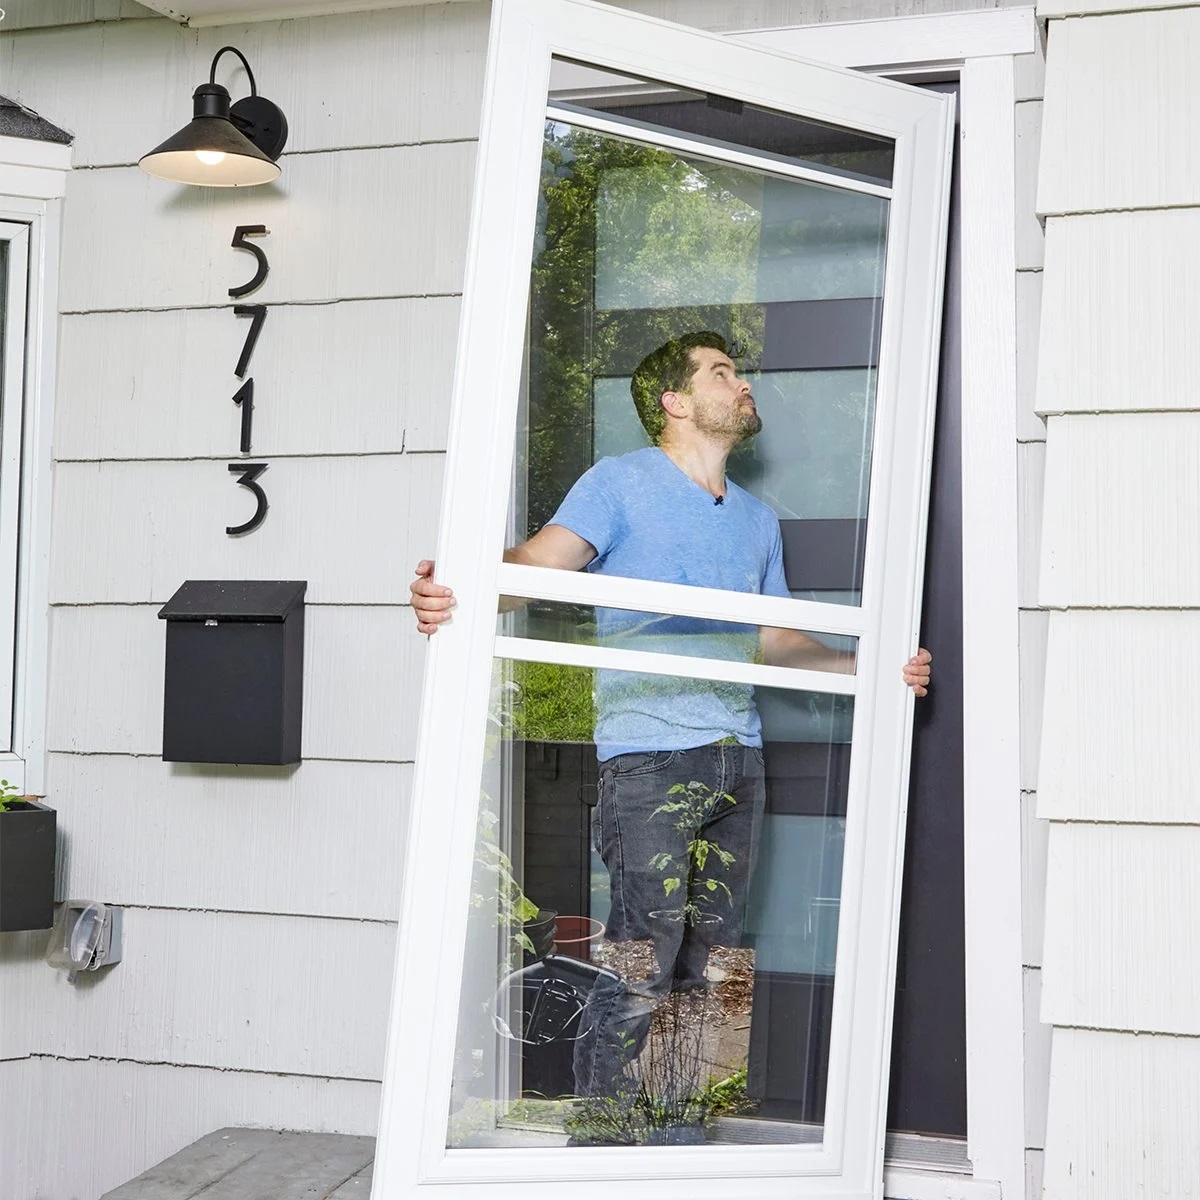
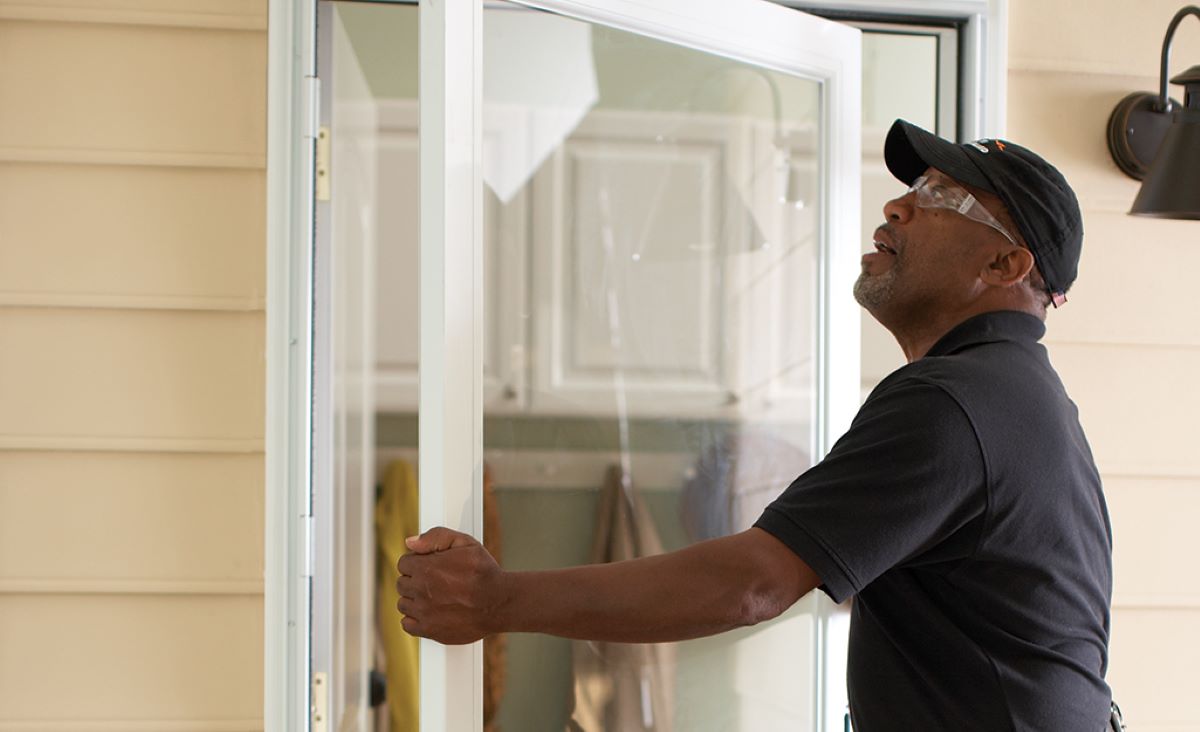
Removing the Storm Door
Removing the storm door is the crucial first step in the repair process. Be sure to follow these steps carefully to avoid any damage to the door or surrounding areas:
- Open the storm door: Fully open the storm door and secure it in place with a doorstop or by propping it open with an object.
- Inspect the hinges: Examine the hinges to determine how the storm door is attached to the frame. Most storm doors have removable hinge pins or screws that hold the door in place.
- Remove the hinge pins or screws: Depending on the type of hinges, either unscrew the screws or tap the hinge pins out with a hammer and a nail or small punch.
- Separate the door from the frame: Carefully lift the storm door away from the frame, disengaging it from the hinges. Have someone assist you if the door is heavy or awkward to handle.
- Set the door aside: Find a safe and stable place to set the storm door aside, ensuring that it doesn’t get damaged or cause any hazards.
- Remove any remaining hardware: If there are any additional hardware components attached to the storm door, such as a closer or lock mechanism, remove them according to the manufacturer’s instructions.
By following these steps, you’ll successfully remove the storm door, allowing you to easily access and repair the specific areas that need attention. Remember to handle the door with care to prevent any accidental damage. Now that the storm door is removed, let’s move on to repairing the top portion.
Repairing the Top Portion of the Storm Door
The top portion of the storm door often requires repair due to issues such as a damaged frame, loose hinges, or a broken glass panel. Here’s how you can effectively repair the top portion:
- Assess the damage: Thoroughly inspect the top portion of the storm door to identify the specific areas that need repair. Look for cracks, dents, or any other signs of damage.
- Repair a damaged frame: If the frame of the top portion is cracked or damaged, use a putty knife to apply wood filler or epoxy to the affected area. Smooth it out and allow it to dry according to the product instructions.
- Tighten loose hinges: If the hinges are loose, use a screwdriver to tighten the screws. If the screw holes are stripped, remove the screws, add wood glue to toothpicks, insert them into the holes, and trim off the excess. Then, reinsert the screws to securely fasten the hinges.
- Replace a broken glass panel: If the glass panel in the top portion is broken, carefully remove any remaining shards. Measure the dimensions of the panel and purchase a replacement from a local or online retailer. Install the new glass panel according to the manufacturer’s instructions.
- Repaint or refinish the frame: Depending on the condition of the frame, you may need to repaint or refinish it to restore its original appearance. Sand the surface, remove any flaking paint or finish, apply a primer if necessary, and then paint or refinish the frame with a suitable product.
By following these steps, you’ll be able to repair the top portion of the storm door effectively. Remember to take your time and ensure that the repairs are done meticulously. Once the top portion is repaired, we can move on to the middle portion of the storm door.
When repairing a storm door, start from the top by checking and adjusting the door closer mechanism. This can often resolve issues with the door not closing properly.
Repairing the Middle Portion of the Storm Door
The middle portion of the storm door may require repair due to issues such as sagging, sticking, or damaged weatherstripping. Follow these steps to repair the middle portion:
- Address sagging: If the middle portion of the storm door is sagging, use a screwdriver to adjust the tension screws on the door’s closer. Tighten the screws to increase the tension and alleviate the sagging. Test the door to ensure it opens and closes smoothly.
- Fix sticking: If the storm door is sticking when opening or closing, examine the frame and hinges for any misalignment or debris. Clean the hinges and remove any obstructions to allow the door to operate smoothly. If necessary, use sandpaper to lightly sand any rough edges on the door or frame.
- Replace weatherstripping: Damaged or worn weatherstripping can compromise the energy efficiency of the storm door. Carefully remove the old weatherstripping and clean any adhesive residue. Measure the dimensions of the door and purchase replacement weatherstripping. Install the new weatherstripping according to the manufacturer’s instructions.
- Inspect the latch and lock mechanism: Check the latch and lock mechanism in the middle portion of the door. Clean and lubricate the mechanism to ensure smooth operation. If the latch or lock is damaged beyond repair, consider replacing it with a new one.
- Reinforce weakened areas: If there are any weakened or loose areas in the middle portion of the storm door frame, apply wood glue along the joints and use clamps or screws to secure them. Allow the glue to dry completely before moving on.
By following these steps, you’ll be able to address common issues in the middle portion of the storm door and restore its functionality. Take the time to perform repairs carefully, ensuring that the door operates smoothly once repaired. Now, let’s proceed to the repair of the bottom portion.
Read more: How To Fix Gap At Top Of Storm Door
Repairing the Bottom Portion of the Storm Door
The bottom portion of the storm door is susceptible to damage from foot traffic, exposure to the elements, or general wear and tear. Here’s how you can effectively repair the bottom portion:
- Inspect the threshold: Check the threshold of the storm door for any signs of damage or wear. If it is cracked or worn, consider replacing it with a new threshold to ensure a proper seal and prevent drafts.
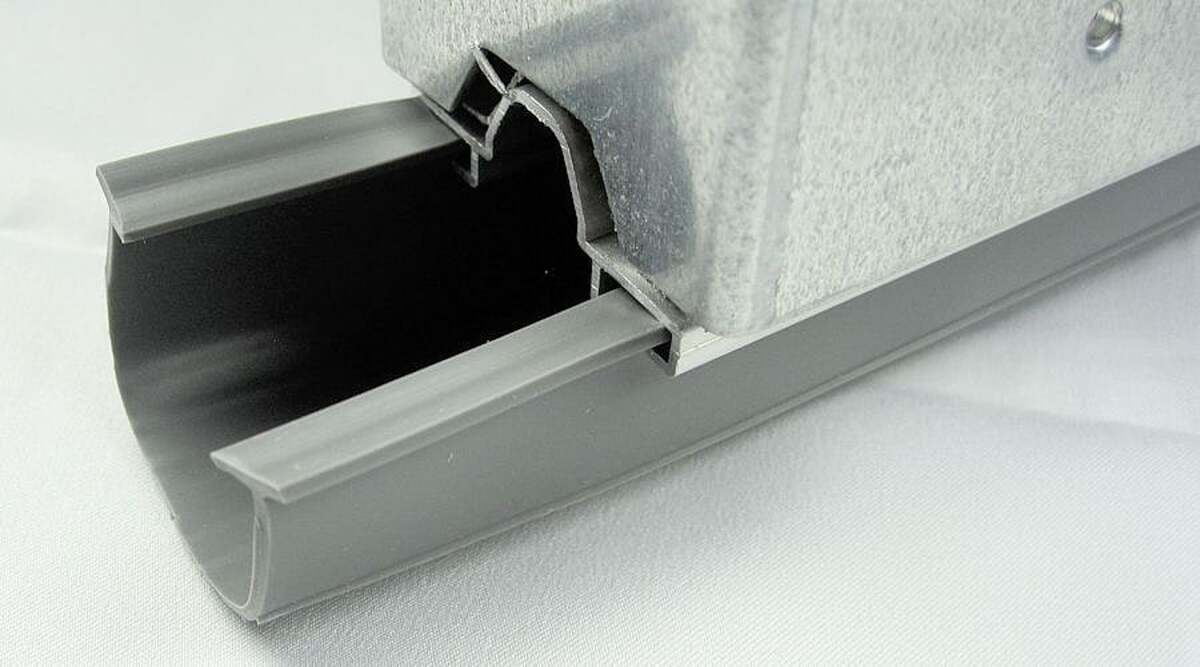
- Repair or replace the sweep: The door sweep at the bottom of the storm door is responsible for sealing out drafts and debris. Inspect the sweep and replace it if it is damaged or worn. Install a new sweep according to the manufacturer’s instructions.
- Address rust or corrosion: If the bottom portion of the storm door has rust or corrosion, use a wire brush or sandpaper to remove the rust. Apply a rust-resistant primer and finish with a paint or spray enamel to protect the metal surface from further corrosion.
- Fix loose or damaged paneling: If the paneling on the bottom portion of the storm door is loose or damaged, use a screwdriver to tighten any loose screws. If the paneling is severely damaged, consider replacing it with a new panel for a seamless and secure fit.
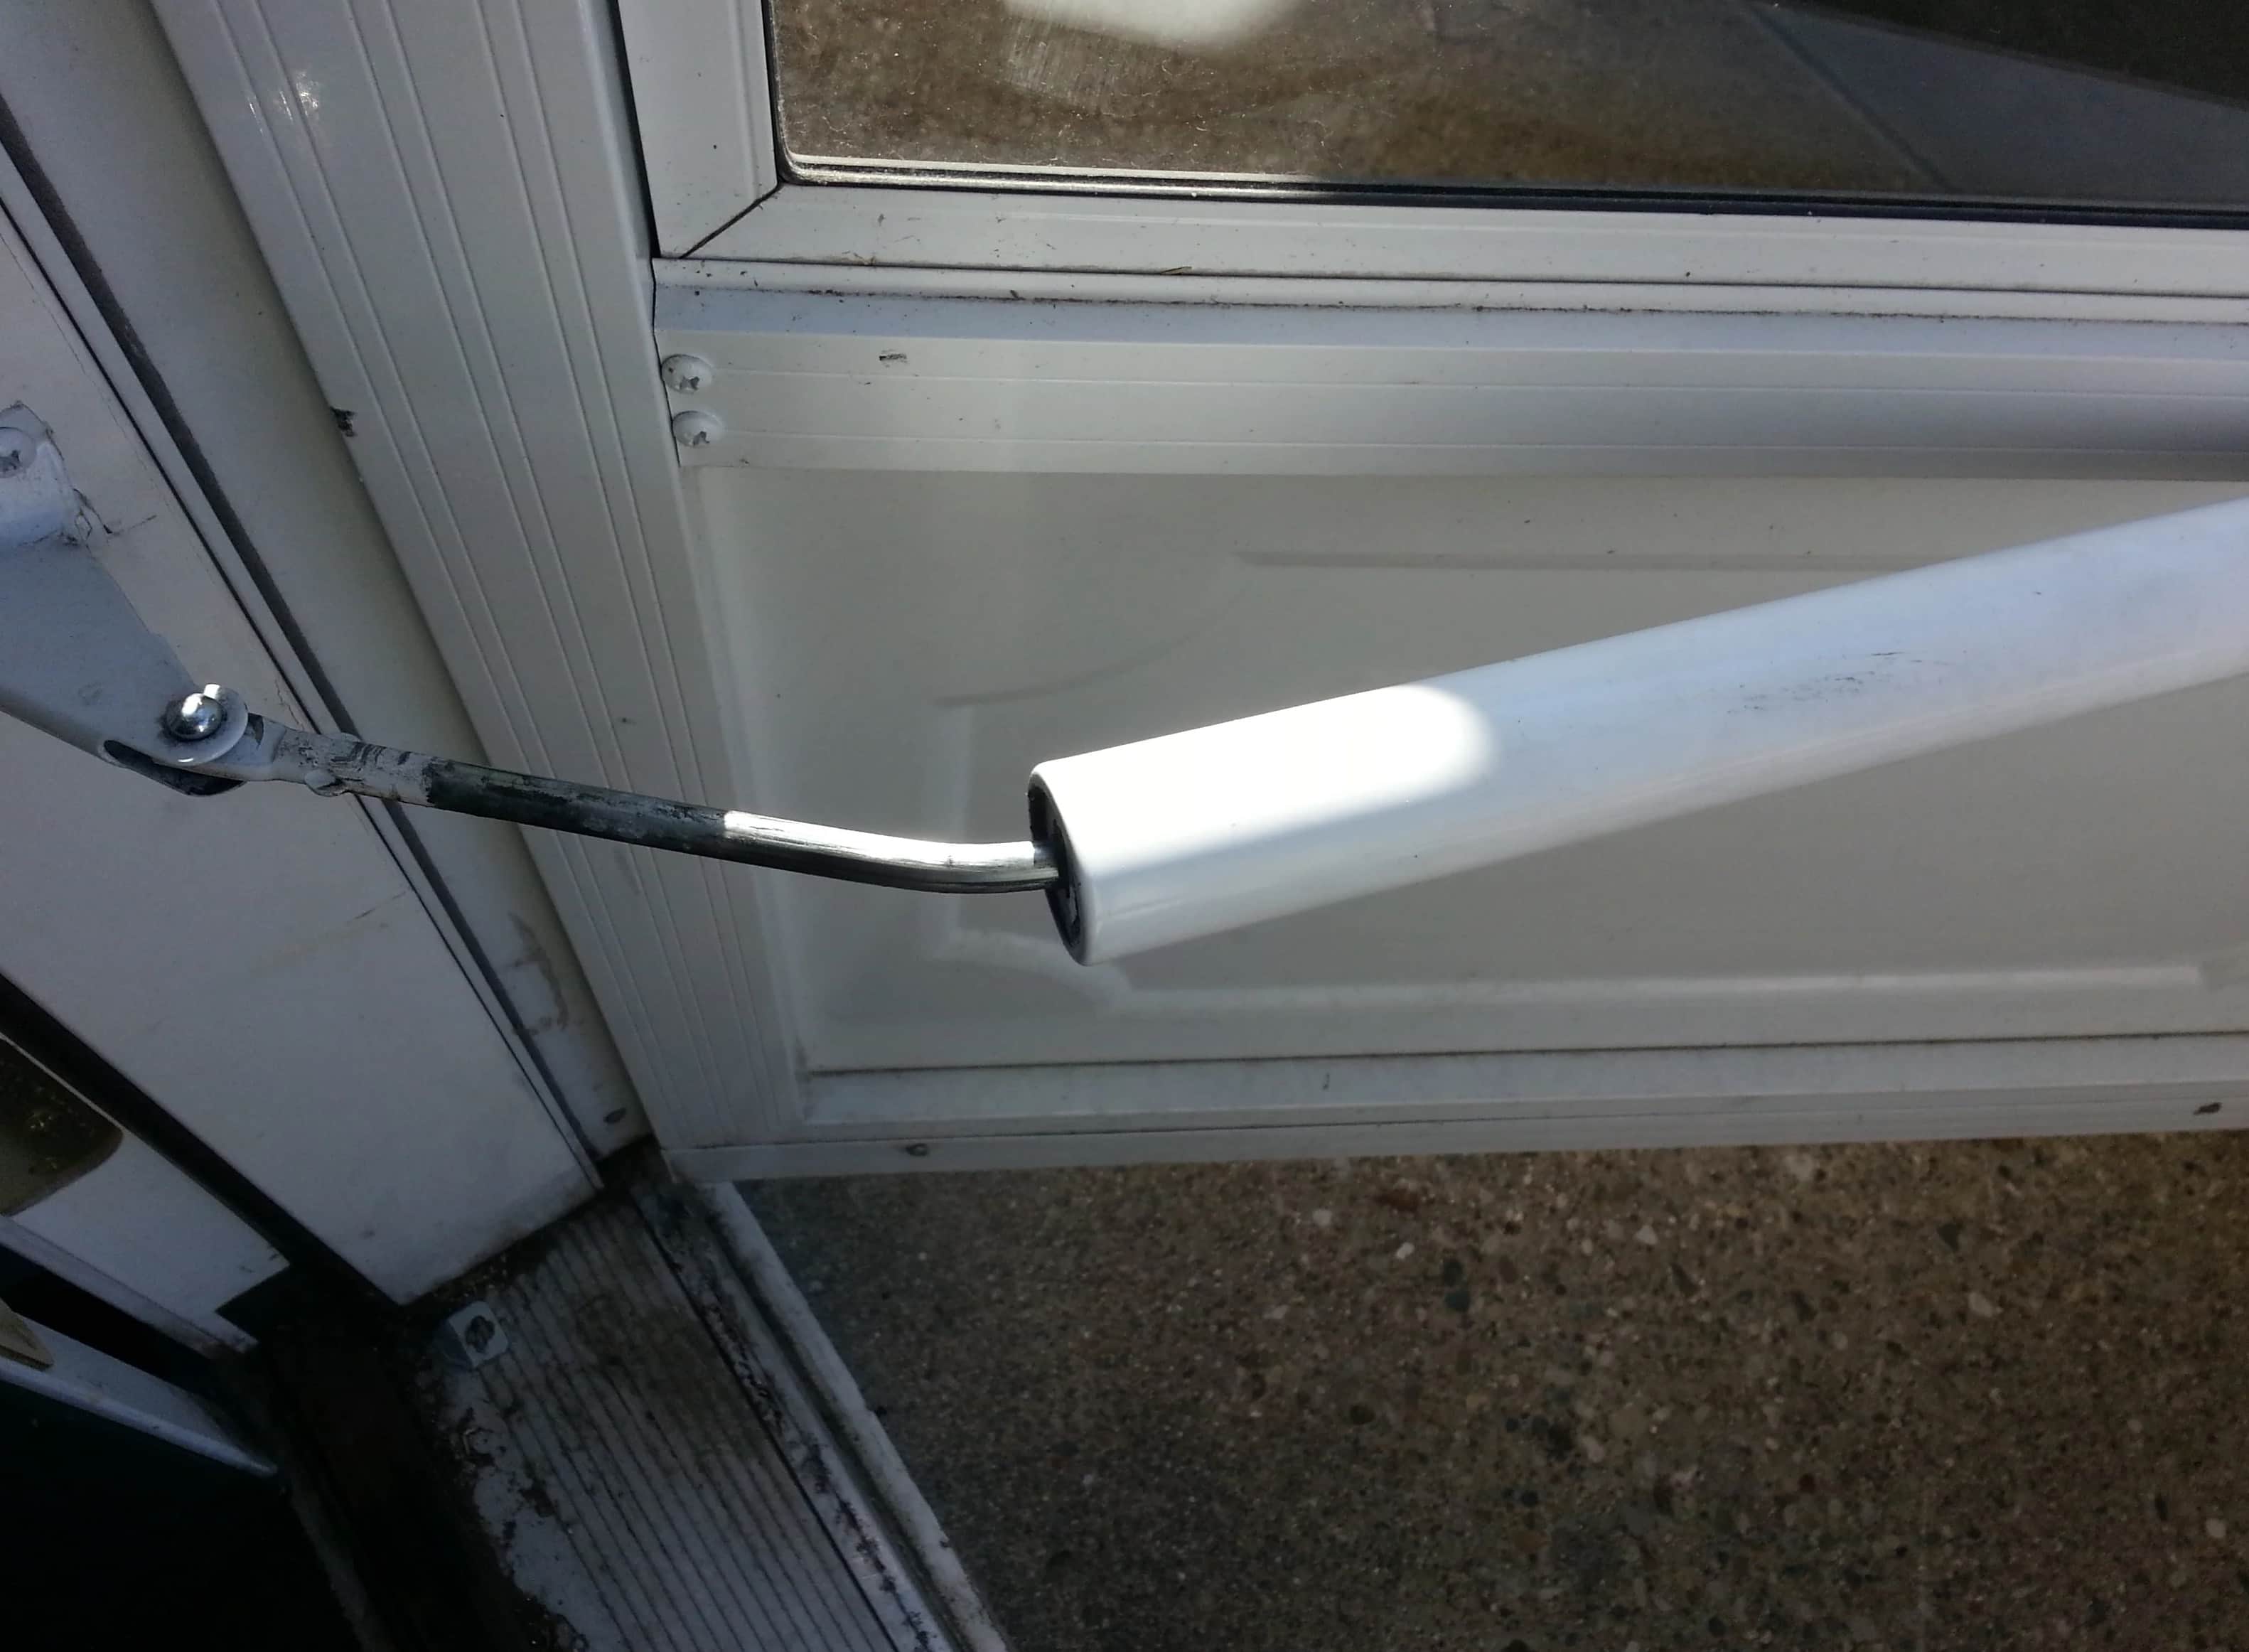
- Check the door closer: Inspect the door closer mechanism at the bottom of the storm door. Lubricate the moving parts with a silicone-based spray to ensure smooth operation. If the closer is damaged or not functioning correctly, replace it with a new one.
By following these steps, you’ll be able to repair the bottom portion of the storm door effectively. Each repair will contribute to enhancing the door’s functionality, appearance, and energy efficiency. Take the time to perform the repairs carefully, ensuring that the bottom portion is restored to its optimal condition. With the bottom portion repaired, we’re now ready to reinstall the storm door.
Reinstalling the Storm Door
Now that you have successfully repaired the storm door, it’s time to reinstall it. Follow these steps to ensure a proper reinstallation:
- Align the hinges: Hold the storm door up to the frame and align the hinges with their respective locations on the frame. Ensure that the door is level and centered within the frame.
- Insert the hinge pins or screws: Depending on the type of hinges, insert the hinge pins or screws that hold the door in place. If using screws, tighten them securely with a screwdriver.
- Test the door: Open and close the storm door a few times to check its smooth operation. Make any necessary adjustments to the hinges or closer tension to ensure proper functionality.
- Install any additional hardware: If you had removed any additional hardware components such as a closer or lock mechanism, reinstall them according to the manufacturer’s instructions.
- Check the door’s seal: Close the storm door and check the seal along the edges and the bottom. Adjust the door sweep if necessary to ensure a tight seal that prevents drafts and keeps out debris.
With the storm door successfully reinstalled, take a moment to admire your work. You have not only repaired a valuable component of your home, but you have also improved its functionality, appearance, and security.
Remember, regular maintenance is key to keeping your storm door in optimal condition. Clean the door regularly, lubricate the hinges and closer mechanism, and inspect for any signs of damage to address them promptly. By doing so, you will prolong the lifespan of your storm door and enjoy its benefits for years to come.
Now that you’ve completed the repair and reinstallation process, you can sit back, relax, and enjoy the comfort and protection that your storm door provides. Well done!
Conclusion
Repairing a storm door from top to bottom can seem like a daunting task, but with the right guidance and tools, it is a manageable project that can be tackled by homeowners. By following the step-by-step process in this comprehensive guide, you can successfully restore your storm door to its optimal condition.
We started by preparing for the repair, gathering the necessary tools and clearing the work area. Then, we moved on to removing the storm door, taking care not to damage it or the surrounding areas. Next, we tackled the repair of each portion of the door, addressing issues such as damaged frames, sagging, sticking, broken glass panels, and worn weatherstripping.
Once we completed the repairs, we learned how to correctly reinstall the storm door, ensuring proper alignment and functionality. Finally, we emphasized the importance of regular maintenance to keep the storm door in excellent condition and extend its lifespan.
Repairing a storm door not only improves its functionality and security, but it also enhances the overall appearance and energy efficiency of your home. By taking the time to address any issues promptly and properly maintain the storm door, you can enjoy the benefits it provides for years to come.
Remember, if you are unsure about any part of the repair process or if you encounter major structural damage, it’s always wise to consult a professional for assistance. Safety should always be a top priority when working on any home improvement project.
So, don’t let a damaged storm door dampen your spirits. Roll up your sleeves, gather your tools, and follow this guide to repair your storm door from top to bottom. With a little bit of effort and know-how, you can easily restore your storm door and enhance the beauty and functionality of your home.
Frequently Asked Questions about How To Repair A Storm Door, From Top To Bottom
Was this page helpful?
At Storables.com, we guarantee accurate and reliable information. Our content, validated by Expert Board Contributors, is crafted following stringent Editorial Policies. We're committed to providing you with well-researched, expert-backed insights for all your informational needs.


0 thoughts on “How To Repair A Storm Door, From Top To Bottom”