Articles
How To Repair An LED Bulb
Modified: September 1, 2024
Learn how to repair an LED bulb with step-by-step articles. Discover tips and tricks to fix your lighting efficiently and save money.
(Many of the links in this article redirect to a specific reviewed product. Your purchase of these products through affiliate links helps to generate commission for Storables.com, at no extra cost. Learn more)
Introduction
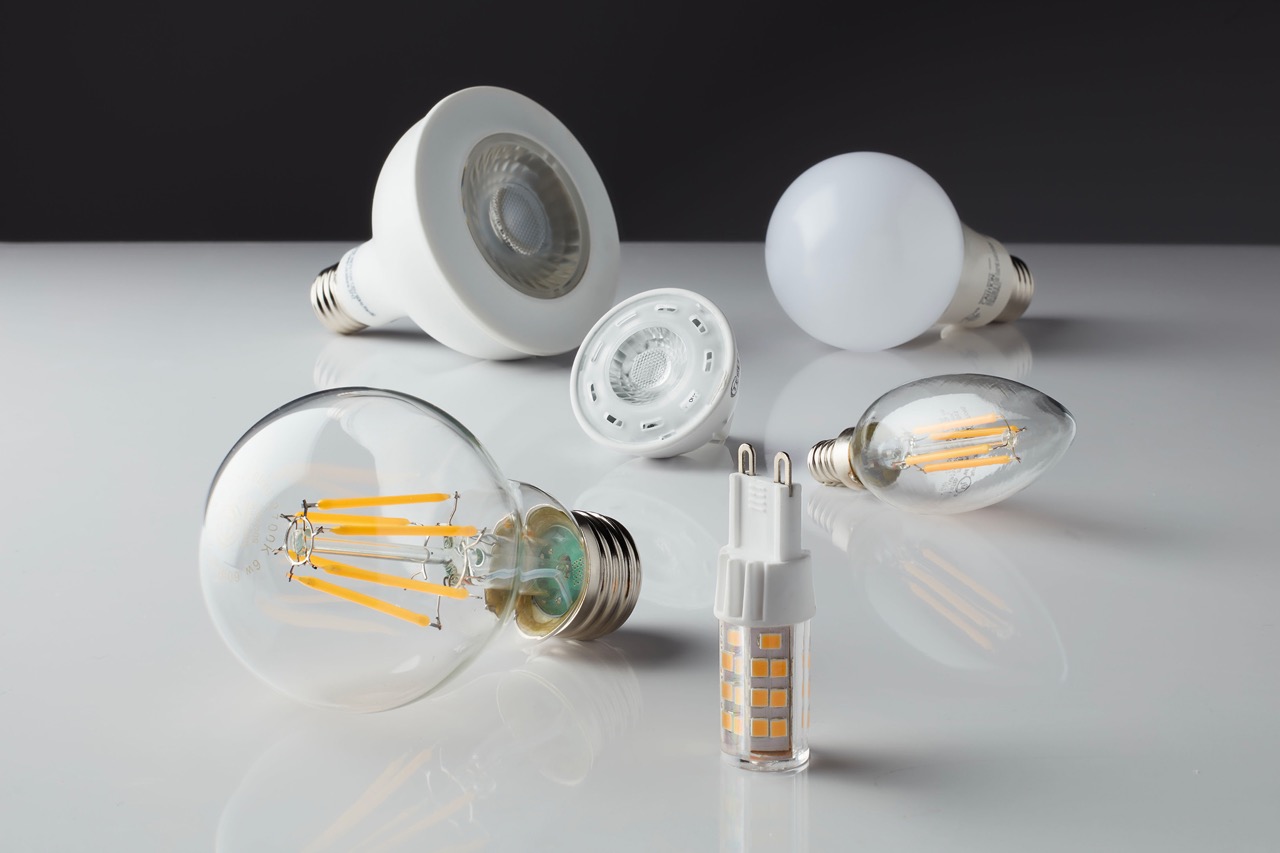
Welcome to the world of LED bulbs, where energy efficiency and long lifespan go hand in hand. LED bulbs have become a popular choice for lighting solutions due to their numerous advantages over traditional incandescent bulbs. However, like any other electronic device, LED bulbs are not immune to malfunctioning. Fortunately, with a little know-how and some basic tools, you can easily repair a faulty LED bulb and bring it back to life.
In this article, we will guide you through the step-by-step process of repairing an LED bulb. Whether it’s a flickering light or a completely non-functional bulb, we’ll show you how to diagnose the problem and fix it with ease. So, let’s dive in and get those LED bulbs shining bright once again!
Key Takeaways:
- Repairing LED bulbs is a cost-effective and sustainable way to extend their lifespan. With the right tools and know-how, you can diagnose and fix common issues, contributing to a more eco-friendly approach to lighting solutions.
- Safety is paramount when repairing LED bulbs, and each step in the process, from disassembly to testing, plays a crucial role in restoring functionality. By taking your time and being cautious, you can successfully repair and enjoy the benefits of efficient LED lighting.
Read more: How Does An LED Bulb Works
Step 1: Gather necessary tools and materials
Before diving into the repair process, it’s essential to gather all the necessary tools and materials. Here’s a list of items you’ll need:
- Screwdriver set: A set of screwdrivers with different sizes and heads will help you disassemble the LED bulb.
- Soldering iron: This tool is crucial for soldering and desoldering components.
- Solder wire: Make sure you have a quality solder wire for effective soldering.
- Multimeter: A multimeter is vital for testing the continuity and voltage of components.
- Replacement components: Depending on the nature of the problem, you may need to replace faulty components such as resistors, capacitors, or diodes.
- Heat sink: A heat sink will help dissipate heat during soldering and prevent damage to sensitive components.
- Desoldering pump/braid: These tools are necessary for removing excess solder and desoldering components if needed.
- Safety glasses and gloves: It’s crucial to protect your eyes and hands during the repair process.
Once you have gathered all these tools and materials, you’re ready to move on to the next step.
Step 2: Disassemble the LED bulb
Now that you have all the necessary tools and materials, it’s time to disassemble the LED bulb. Follow these steps:
- Ensure that the LED bulb is disconnected from any power source. Safety should always be the top priority.
- Inspect the LED bulb for any visible screws or clips. Most LED bulbs have a plastic or metal cover that can be easily removed.
- Use the appropriate screwdriver or pry tool to remove the screws or clips and carefully separate the bulb’s cover from the base.
- Once the cover is removed, you’ll have access to the internal components of the LED bulb. Take note of their arrangement and orientation for reassembly later.
During the disassembly process, be gentle and avoid bending or damaging any of the internal components. If you encounter any difficulties, refer to the manufacturer’s instructions or online resources specific to your LED bulb model.
With the LED bulb disassembled, you’re ready to move on to the next step: identifying the faulty component.
Step 3: Identify the faulty component
Identifying the faulty component is a crucial step in repairing an LED bulb. Follow these steps to identify the problem:
- Inspect the internal components of the LED bulb for any visible signs of damage, such as burnt or discolored components.
- Use a multimeter to check the continuity and voltage of different components. Start by checking the LED diode to ensure it is functioning properly.
- If the LED diode is working fine, proceed to test other components such as resistors, capacitors, and diodes.
- If necessary, compare the readings of the components with their specified values to determine if any of them are faulty.
- It’s also helpful to search for common issues related to your LED bulb model online, as others may have encountered similar problems and shared their troubleshooting experiences.
By carefully examining the components and conducting tests, you will be able to pinpoint the faulty component that needs repair or replacement.
Once you have identified the problem, you can proceed to the next step: repairing or replacing the faulty component.
When repairing an LED bulb, always make sure to disconnect the power source before attempting any repairs. This will help prevent any electrical accidents or injuries.
Step 4: Repair or replace the faulty component
After identifying the faulty component in your LED bulb, it’s time to repair or replace it. Here are the steps to follow:
- If the component can be repaired, carefully desolder it from the circuit board using a soldering iron and desoldering pump or braid.
- Inspect the component closely for any visible damage or loose connections. If there are any, repair them using a soldering iron and solder wire.
- If the component cannot be repaired, it will need to be replaced. Use the appropriate replacement component and solder it onto the circuit board, ensuring proper alignment and connections.
- Make sure to apply the right amount of solder and avoid creating solder bridges that could cause short circuits.
- If you are unsure about the soldering process, consider seeking assistance from a professional or practicing on a scrap circuit board before working on the LED bulb.
Remember to handle the components and soldering iron with caution to avoid burns or injuries. It is important to take your time and work carefully to ensure a successful repair or replacement.
Once the faulty component has been repaired or replaced, you can proceed to the next step: reassembling the LED bulb.
Read more: How To Dispose An LED Bulb
Step 5: Reassemble the LED bulb
Now that you have repaired or replaced the faulty component in your LED bulb, it’s time to reassemble it. Follow these steps:
- Ensure that the repaired or replaced component is securely soldered onto the circuit board.
- Carefully align and place the cover of the LED bulb back onto the base.
- Use the appropriate screws or clips to secure the cover in place. Make sure not to overtighten the screws to avoid damaging the LED bulb.
- Double-check that all the internal components are properly positioned and secured within the bulb.
During the reassembly process, pay attention to the alignment and orientation of the components to ensure everything fits together correctly. Take your time and be gentle to avoid any accidental damage.
Once you have reassembled the LED bulb, you’re ready to move on to the final step: testing the repaired LED bulb.
Step 6: Test the repaired LED bulb
After reassembling the LED bulb, it’s important to test it to ensure that the repair was successful. Here’s how you can test the repaired LED bulb:
- Connect the LED bulb to a power source and turn it on.
- Observe the brightness and functionality of the bulb. If the repair was successful, the LED bulb should light up evenly without flickering or any other issues.
- If the bulb still exhibits any problems, it may indicate that there is another component or underlying issue that needs to be addressed.
- Double-check the connections and soldering of the repaired or replaced component. Make sure everything is secure and properly connected.
- If necessary, repeat the repair process or seek professional assistance if you are unable to diagnose or fix the issue yourself.
Remember to exercise caution when connecting the LED bulb to a power source. Avoid touching any exposed wires or components while the bulb is powered on.
If the repaired LED bulb functions properly, congratulations! You have successfully repaired your LED bulb. If not, don’t worry – troubleshooting electronics can sometimes present challenges. Consider reaching out to an experienced technician or exploring other resources for further assistance.
With the repair process complete, you can now enjoy the benefits of a fully functional LED bulb once again.
Conclusion
Repairing an LED bulb can be a rewarding and cost-effective solution to extend its lifespan and reduce waste. By following the step-by-step process outlined in this article, you can diagnose and repair common issues with your LED bulbs. Remember, safety should always be your top priority, so ensure you take necessary precautions when working with electronics.
From gathering the necessary tools and materials to identifying and repairing the faulty component, each step in the repair process plays a crucial role in restoring your LED bulb to its optimal functionality. With a little patience and practice, you can become skilled at troubleshooting and repairing LED bulbs.
However, it’s important to note that some LED bulbs may have sealed designs or specific warranties that discourage user repairs. In such cases, it is advisable to refer to the manufacturer’s guidelines or seek professional help to avoid voiding the warranty.
By repairing LED bulbs instead of immediately replacing them, you contribute to a more sustainable environment and save money in the long run. So, the next time you encounter a malfunctioning LED bulb, don’t be quick to discard it – give repair a try!
Remember, if you are unsure or uncomfortable with the repair process, it’s always best to consult a professional technician. They have the expertise and specialized tools to handle complex repairs safely.
Now that you have the knowledge to repair LED bulbs, you can take control of your lighting solutions and enjoy the benefits of a longer-lasting and more efficient lighting system.
Frequently Asked Questions about How To Repair An LED Bulb
Was this page helpful?
At Storables.com, we guarantee accurate and reliable information. Our content, validated by Expert Board Contributors, is crafted following stringent Editorial Policies. We're committed to providing you with well-researched, expert-backed insights for all your informational needs.


0 thoughts on “How To Repair An LED Bulb”