
Articles
How To Change A Can Light Bulb
Modified: September 2, 2024
Learn how to change a can light bulb with our step-by-step guide. Read our informative articles for easy and helpful instructions.
(Many of the links in this article redirect to a specific reviewed product. Your purchase of these products through affiliate links helps to generate commission for Storables.com, at no extra cost. Learn more)
Introduction
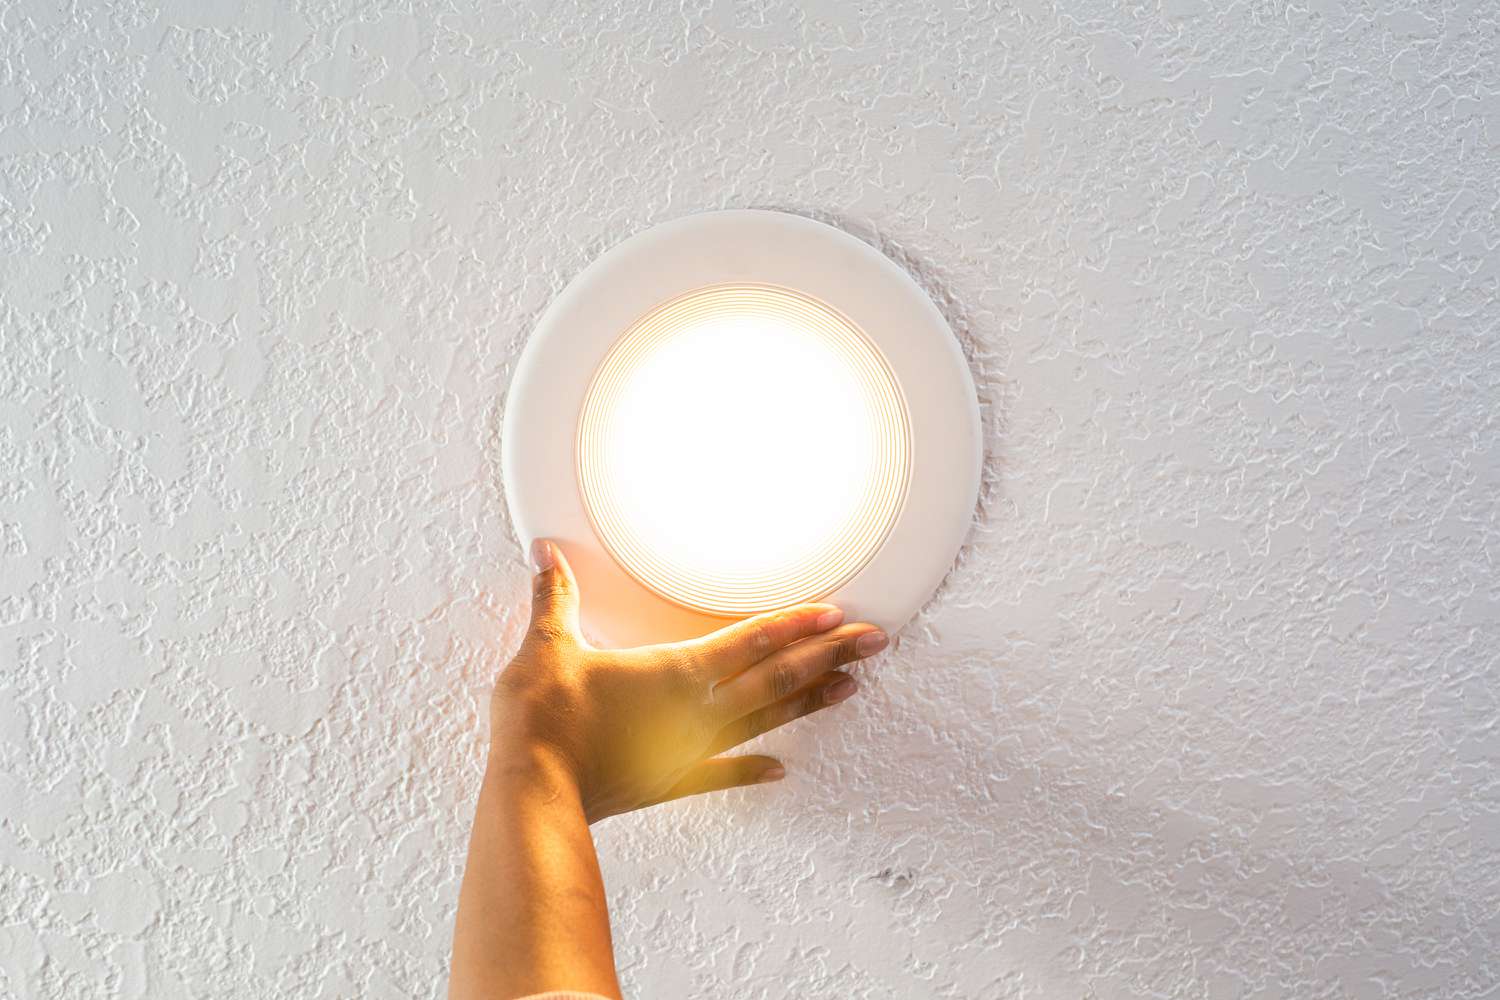
Changing a can light bulb may seem like a simple task, but it is important to approach it with caution and follow the necessary steps to ensure safety. Can lights, also known as recessed lights, are popular fixtures in many homes and provide a sleek and modern lighting solution.
In this article, we will guide you through the process of changing a can light bulb, step by step. Whether you are replacing a burnt-out bulb or wanting to upgrade to a more energy-efficient option, this article will help you do it safely and efficiently.
Before we dive into the steps, it is crucial to emphasize the importance of safety. Working with electricity requires extra care and attention to prevent accidents. Always remember to turn off the power supply to the light fixture before attempting any bulb replacement. Additionally, if you are unsure about any step, it is wise to consult a professional electrician.
Now, let’s gather the necessary tools and get started!
Key Takeaways:
- Prioritize safety by turning off the power supply, using protective gear, and handling the light bulb and fixture with care when changing a can light bulb. Always consult a professional electrician if unsure.
- Ensure a smooth and successful bulb replacement by following safety precautions, choosing the right replacement bulb, and completing each step carefully. Enjoy improved lighting and a visually appealing environment.
Read more: How To Change A Light Bulb
Safety Precautions
Before proceeding with any electrical work, it is important to take certain safety precautions. Here are some guidelines to follow when changing a can light bulb:
- Turn off the power supply: Before starting any work on the can light fixture, ensure that the power supply is turned off. Locate the circuit breaker connected to the light and switch it off to cut off the electricity.
- Use protective gear: Wear protective gear, such as safety glasses and gloves, to protect yourself from any potential hazards. This will help prevent injuries from broken glass or accidental electrical shocks.
- Allow the bulb to cool: If the can light was recently turned on, give the bulb enough time to cool down before attempting to touch or remove it. Hot bulbs can cause burns if handled immediately.
- Use a stable ladder: If the can light is located in a high-ceiling area, use a stable ladder to reach it. Make sure the ladder is properly positioned, and do not overreach to avoid falling or losing balance.
- Read the manufacturer’s instructions: Familiarize yourself with the manufacturer’s instructions for both the can light fixture and the specific type of bulb you are using. This will ensure that you follow their recommended guidelines for safe installation and removal.
- Avoid water contact: Keep the work area dry and avoid contact with water while working on the can light fixture. Moisture can create a potential electrical hazard, so it’s important to exercise caution.
By following these safety precautions, you can minimize the risk of accidents and ensure a safe environment while changing the can light bulb. Now that we have covered the safety measures, let’s move on to gathering the necessary tools.
Step 1: Gather the Necessary Tools
Before starting the process of changing a can light bulb, it is important to gather all the necessary tools. Having the proper tools on hand will make the task easier and more efficient. Here are the tools you will need:
- Ladder: Depending on the height of the can light fixture, you may need a ladder to reach it safely. Ensure that the ladder is stable and secure before climbing.
- Safety Glasses: Protect your eyes from any potential debris or broken glass by wearing safety glasses.
- Gloves: It is advisable to wear gloves to protect your hands while handling the light bulb and fixture. This will help prevent any accidental cuts or injuries.
- New Light Bulb: Make sure to have a replacement light bulb on hand that is compatible with your can light fixture. Check the wattage and type of bulb required by referring to the manufacturer’s instructions.
- Screwdriver: In some cases, you may need a screwdriver to remove the trim or cover of the can light. Check the type of screws used and have the appropriate screwdriver ready.
- Electrical Tape: Electrical tape can be useful for temporarily securing wires or providing insulation if needed.
- Flashlight: If the area around the can light is dimly lit, a flashlight will come in handy to provide additional light while working.
- Voltage Tester: It is a good practice to have a voltage tester to ensure that the power supply to the can light fixture is indeed switched off before starting any work.
By having all these tools prepared and within reach, you will be ready to tackle the task of changing the can light bulb smoothly. With the necessary tools on hand, let’s move on to the next step: turning off the power supply to the fixture.
Step 2: Turn off the Power Supply
Before performing any work on the can light fixture, it is crucial to turn off the power supply to ensure your safety. Here is how you can do it:
- Locate the circuit breaker: The circuit breaker is usually found in the electrical panel or breaker box. It is labeled with different switches that control the power supply to various parts of your home.
- Identify the circuit for the can light: Look for the switch or circuit breaker that corresponds to the can light fixture you are working on. It is often labeled with the specific room or area of the house.
- Switch off the circuit breaker: Flip the switch or push the circuit breaker to the “Off” position that controls the power supply to the can light fixture. This will cut off the electricity flowing to the fixture.
- Double-check the power supply: To ensure that the power is indeed turned off, use a voltage tester to test the wires. Place the voltage tester on the wires and check for any signs of electricity. If the voltage tester does not react, then it is safe to proceed.
- Consider additional precautions: Even though the power supply is off, it is still recommended to handle the can light fixture and wires with caution. Treat them as if they are live to avoid any potential accidents.
By following these steps, you can be sure that the power supply to the can light fixture is safely switched off. This precautionary measure is vital to prevent electrical shocks or any unwanted incidents during the bulb replacement process. Now that you have turned off the power supply, we can move on to the next step: removing the trim or cover of the can light.
Step 3: Remove the Trim or Cover
With the power supply turned off, it is time to remove the trim or cover of the can light fixture. The trim is the decorative ring that surrounds the light bulb, while the cover is a larger piece that may need to be removed to access the bulb. Follow these steps to remove the trim or cover:
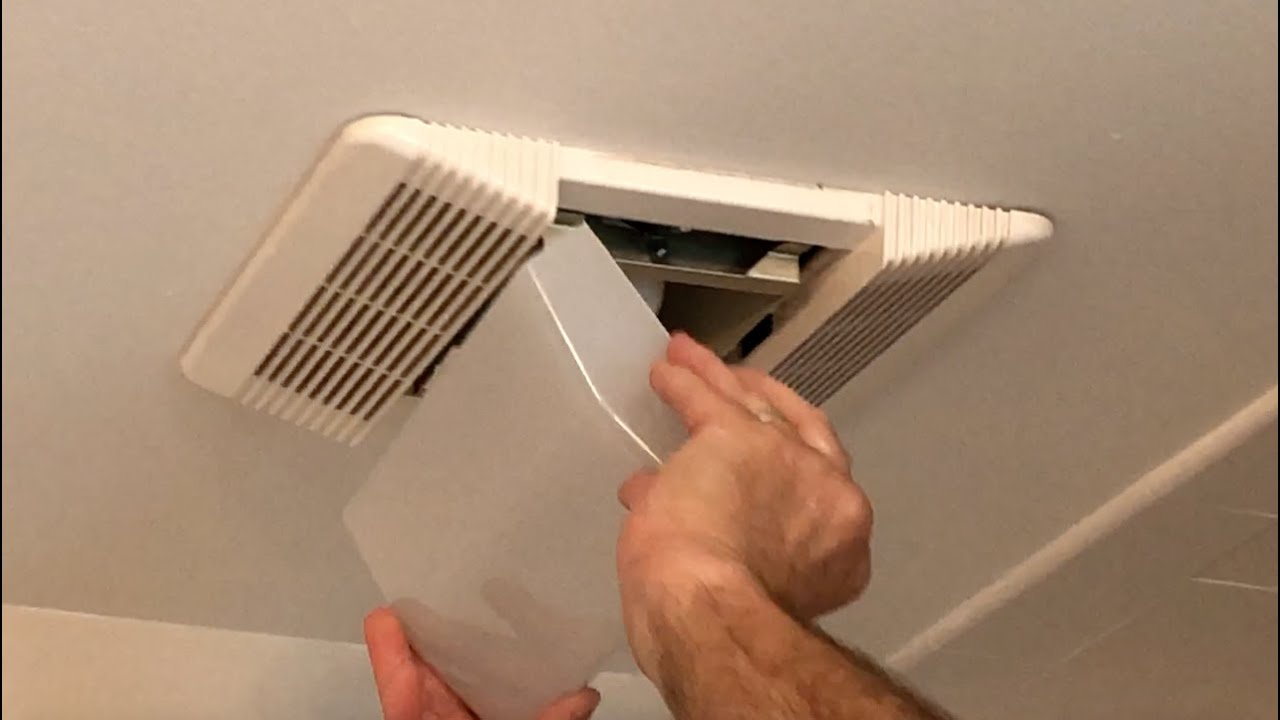
- Identify the type of trim or cover: Can light fixtures can have different types of trim or covers, such as baffle trim, shower trim, or open trim. Understanding the type of trim or cover your fixture has will help you remove it correctly.
- Check for clips or springs: Many can light trims are held in place by clips or springs. Look for these small metal pieces around the trim and gently press or pull them to release the trim. Alternatively, some trims may have screws that need to be removed using a screwdriver.
- Rotate or twist off the trim: For some can light fixtures, the trim needs to be rotated or twisted counterclockwise to release it from the housing. Rotate the trim gently until it comes loose from the housing. Be careful not to apply too much force to avoid damaging the fixture.
- Remove the cover if necessary: In certain cases, the can light fixture may have a larger cover that needs to be removed to access the light bulb. Check for any screws or clips securing the cover and remove them accordingly. Once released, carefully lift off the cover.
- Set the trim or cover aside: Once removed, place the trim or cover in a safe location to prevent damage while changing the light bulb.
By carefully following these steps, you will be able to remove the trim or cover of the can light fixture. Remember to handle the trim or cover gently to avoid any breakage or damage. With the trim or cover removed, we can now proceed to the next step: removing the old light bulb.
When changing a can light bulb, make sure to turn off the power to the fixture to avoid the risk of electric shock. Use a stable ladder and wear gloves to protect your hands from broken glass.
Read more: How To Change A Brake Light Bulb
Step 4: Remove the Old Light Bulb
Now that the trim or cover has been removed, it’s time to remove the old light bulb from the can light fixture. Follow these steps to safely remove the old light bulb:
- Allow the bulb to cool (if necessary): If the can light fixture was recently turned on, give the bulb enough time to cool down before attempting to touch or remove it. Hot bulbs can cause burns if handled immediately.
- Hold onto the base: Carefully grip the base of the light bulb with your fingers or, if necessary, use a cloth or glove to handle it. Avoid touching the glass part of the bulb as it may be hot or prone to breakage.
- Twist the bulb counterclockwise: Gently twist the bulb counterclockwise to loosen it from the socket. Be careful not to apply excessive force or use too much pressure to prevent breaking the bulb or damaging the socket.
- Remove the bulb from the socket: Once the bulb is loose, carefully take it out from the socket. Place the old bulb aside and ensure that it is disposed of properly according to your local regulations for light bulb disposal.
- Inspect the socket: Take a moment to inspect the socket for any dust, dirt, or debris. Use a soft cloth or small brush to clean the socket if necessary, ensuring that it is clean and free from any obstruction.
By following these steps, you will be able to safely remove the old light bulb from the can light fixture. Remember to handle the bulb with care and dispose of it properly. With the old bulb removed, we can now proceed to the next step: installing the new light bulb.
Step 5: Install the New Light Bulb
With the old light bulb removed, it is time to install the new light bulb into the can light fixture. Follow these steps to safely and correctly install the new light bulb:
- Choose the right type of bulb: Ensure that the replacement light bulb you have is the correct type and wattage for your can light fixture. Refer to the manufacturer’s instructions for the recommended bulb specifications.
- Hold onto the base of the new bulb: Grip the new light bulb by its base, making sure not to touch the glass part. This will help prevent any dirt or oils from your hands from affecting the bulb’s lifespan or performance.
- Align the bulb with the socket: Position the base of the bulb so that the pins or contacts align with the socket. Carefully insert the bulb into the socket, ensuring a secure and snug fit.
- Twist the bulb clockwise: Once the bulb is properly inserted, gently twist it clockwise to tighten it into the socket. Be cautious not to overtighten or use excessive force, as this can damage the bulb or the socket.
- Test the installation: After installing the new light bulb, restore the power supply to the can light fixture by switching on the circuit breaker. Test the bulb by turning on the light switch or control connected to the can light. If the bulb illuminates properly, the installation was successful.
By following these steps, you will be able to correctly install the new light bulb into the can light fixture. Remember to handle the bulb carefully and ensure that the bulb is compatible with the fixture. With the new bulb installed, we can now move on to the next step: replacing the trim or cover.
Step 6: Replace the Trim or Cover
Now that you have successfully installed the new light bulb, it’s time to replace the trim or cover of the can light fixture. Follow these steps to ensure the trim or cover is placed back properly:
- Align the trim: Position the trim back into the opening of the can light fixture. Align any clips or springs with their corresponding slots or holes.
- Press or secure the trim: Depending on the type of trim, press firmly or secure it in place using the clips or springs. Make sure the trim is snugly fitted and does not wobble or come loose.
- Twist or secure the cover (if applicable): If your can light fixture has a cover, align it with the opening and secure it back in place using screws or clips if any were removed during the removal process.
- Check for proper fit: Inspect the trim or cover to ensure it is properly aligned and installed. Verify that it sits flush against the ceiling or wall, without any noticeable gaps.
By following these steps, you will be able to replace the trim or cover of the can light fixture effectively. Double-check the fit and alignment to ensure the fixture looks neat and aesthetically pleasing. With the trim or cover replaced, we can now proceed to the final step: restoring the power supply.
Step 7: Restore the Power Supply
With the trim or cover back in place, it’s time to restore the power supply to the can light fixture. Follow these steps to safely restore the power:
- Check the position of the light switch: Ensure that the light switch or control connected to the can light fixture is in the “Off” position.
- Go back to the electrical panel: Return to the electrical panel or breaker box where you turned off the circuit breaker for the can light fixture.
- Switch on the circuit breaker: Locate the circuit breaker that controls the power supply to the can light fixture. Flip the switch or push it back into the “On” position to restore the power.
- Verify the light is functioning: Return to the can light fixture and test the light by turning on the light switch or control. The light should illuminate properly, indicating that the power supply has been successfully restored.
- Make final adjustments if necessary: If the light does not turn on, double-check the connections and ensure that the bulb is properly installed. If needed, repeat the previous steps to troubleshoot and resolve any issues.
By following these steps, you will be able to restore the power supply to the can light fixture safely and effectively. Take a moment to observe the light and ensure it is functioning correctly after restoring the power. With the power supply restored, you have successfully completed the process of changing a can light bulb!
Remember to always prioritize safety and exercise caution when working with electricity. If you encounter any difficulties or are unsure about any step, it is best to consult a professional electrician for assistance or guidance.
Thank you for following this guide and taking the time to learn how to change a can light bulb. Enjoy the improved lighting in your space!
Read more: How To Change Oven Light Bulb
Conclusion
Changing a can light bulb may seem like a small task, but it is essential to approach it with caution and follow the necessary steps to ensure safety. By following the step-by-step guide outlined in this article, you can confidently change a can light bulb without any complications.
From gathering the necessary tools to restoring the power supply, each step plays a significant role in ensuring a smooth and successful bulb replacement. Remember to always prioritize safety by turning off the power supply, using protective gear, and handling the light bulb and fixture with care.
Additionally, it is crucial to choose the right type and wattage of the replacement bulb according to the manufacturer’s guidelines. This will ensure optimal performance and prevent any potential issues with the can light fixture.
By adhering to the safety precautions and following each step carefully, you can enhance the lighting in your space, whether you’re replacing a burnt-out bulb or upgrading to a more energy-efficient option. Not only will you enjoy improved functionality, but you will also create a visually appealing and well-lit environment.
Remember, if you have any doubts or concerns about changing a can light bulb, it is always best to consult a professional electrician. Their expertise will help ensure a safe and successful bulb replacement.
Thank you for taking the time to learn how to change a can light bulb. We hope this article has provided you with the knowledge and confidence to tackle this task. Enjoy the well-lit ambiance in your home or workspace!
Frequently Asked Questions about How To Change A Can Light Bulb
Was this page helpful?
At Storables.com, we guarantee accurate and reliable information. Our content, validated by Expert Board Contributors, is crafted following stringent Editorial Policies. We're committed to providing you with well-researched, expert-backed insights for all your informational needs.


0 thoughts on “How To Change A Can Light Bulb”