Home>Articles>How To Repair Woodpecker Holes In Cedar Siding
Articles
How To Repair Woodpecker Holes In Cedar Siding
Modified: May 6, 2024
Learn effective techniques for repairing woodpecker holes in cedar siding with our informative articles. Restore the beauty and integrity of your home's exterior today.
(Many of the links in this article redirect to a specific reviewed product. Your purchase of these products through affiliate links helps to generate commission for Storables.com, at no extra cost. Learn more)
Introduction
Woodpeckers can be fascinating to watch with their distinct drumming sounds and unique behavior. However, when they start pecking away at your beautiful cedar siding, it can quickly turn into a frustrating and costly problem. Woodpecker holes can not only damage the aesthetics of your home but also compromise the integrity of the siding, allowing moisture to seep in and potentially leading to further issues such as rot and decay.
Fortunately, repairing woodpecker holes in cedar siding is a manageable task that can be done with some basic tools and materials. In this article, we will provide you with a step-by-step guide on how to repair woodpecker holes in cedar siding, ensuring that your home remains beautiful and protected.
Before we dive into the repair process, it’s crucial to first understand why woodpeckers are attracted to cedar siding. The primary motivation for woodpeckers pecking on cedar siding is to establish their territory or attract a mate. The resonating sound they create by drumming on the wood serves as a way to communicate with other woodpeckers. Additionally, they may be searching for insects or larvae that are present in the siding.
When assessing the extent of woodpecker damage on your cedar siding, it’s essential to distinguish between active and inactive holes. Active holes are characterized by fresh wood chips or markings, indicating recent woodpecker activity. Inactive holes, on the other hand, show signs of weathering and are no longer being used by woodpeckers. It’s important to address both active and inactive holes to prevent future woodpecker damage and maintain the overall appearance of your siding.
Repairing woodpecker holes in cedar siding can be a multi-step process, depending on the size and severity of the holes. In the following sections, we will guide you through each step, from filling small holes to patching larger ones. We will also cover the necessary materials and techniques to ensure a seamless repair job.
By following this comprehensive guide, you’ll be able to restore your cedar siding and protect it against future woodpecker damage. So, let’s get started and bring back the beauty of your home’s exterior!
Key Takeaways:
- Protect your cedar siding by repairing woodpecker holes with a step-by-step guide, ensuring a seamless finish and preventing future damage with effective deterrent strategies.
- Embrace harmony with woodpeckers while safeguarding your home’s exterior by combining repair techniques with humane and environmentally friendly prevention methods.
Read more: How To Fix A Hole In Aluminum Siding
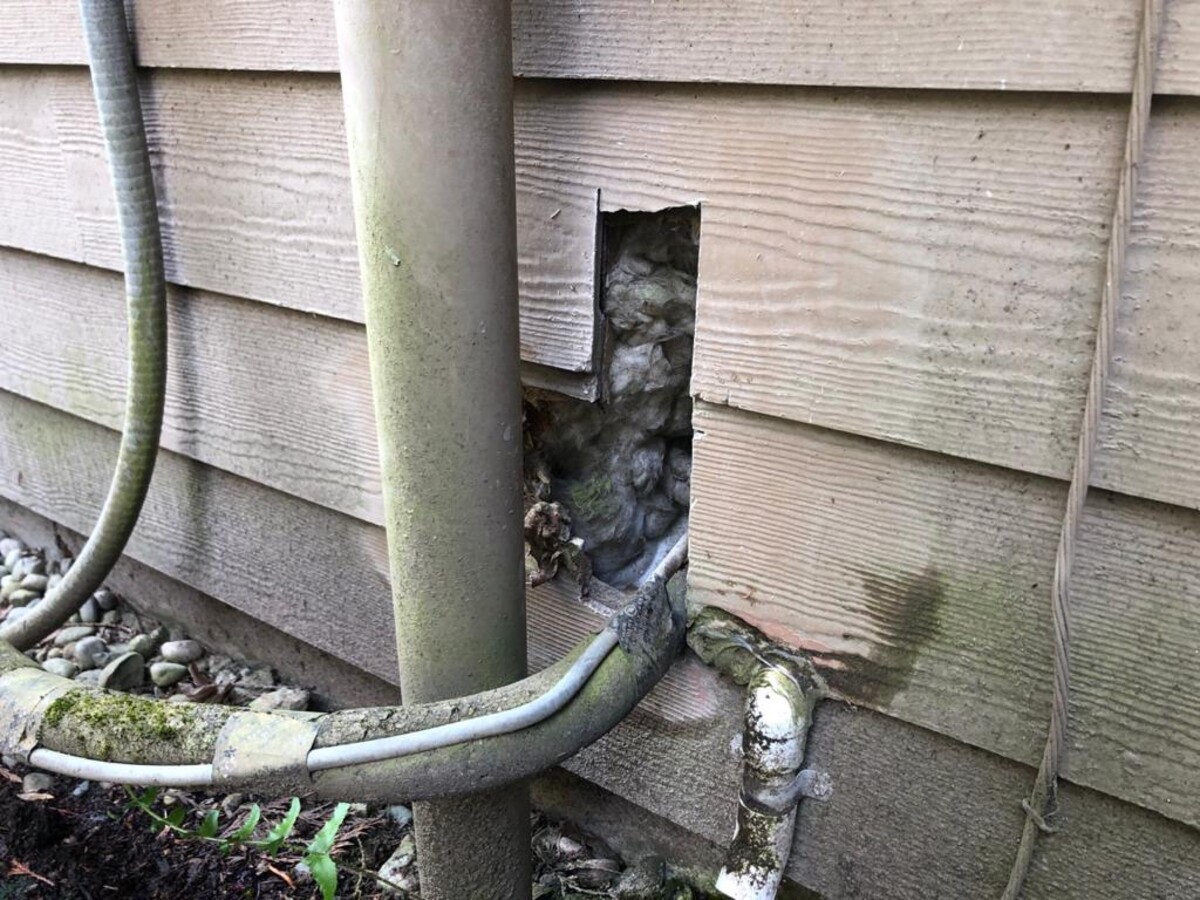
Understanding Woodpecker Damage
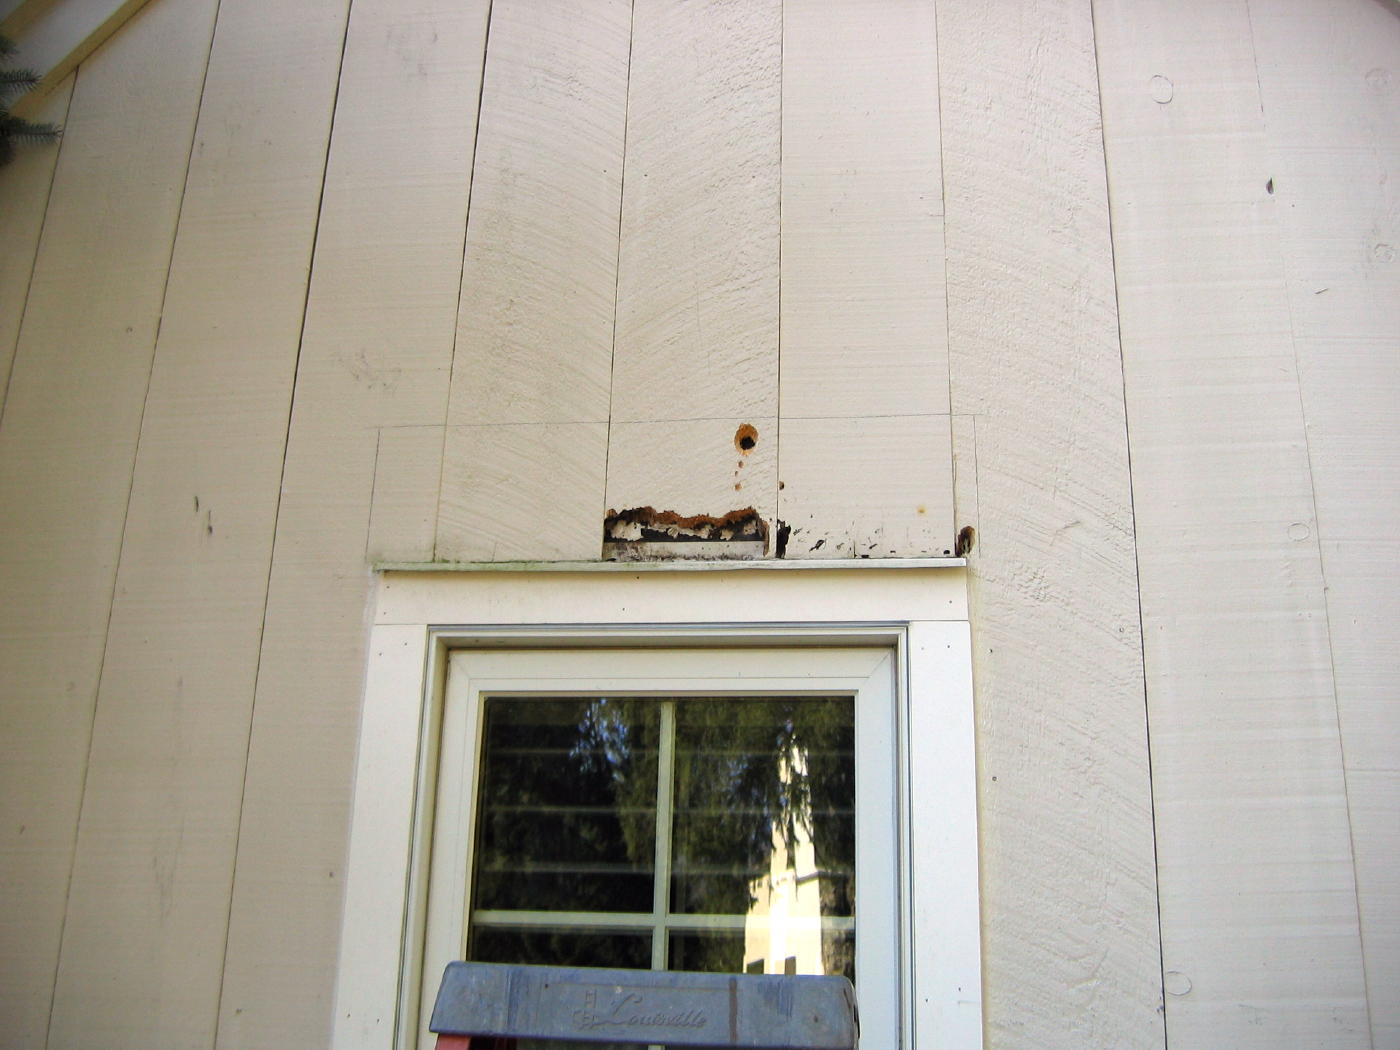
Woodpecker damage to cedar siding can vary in severity and appearance, depending on the species of woodpecker and the frequency and intensity of their pecking. Understanding the nature of woodpecker damage can help you determine the best course of action for repairing and preventing further damage.
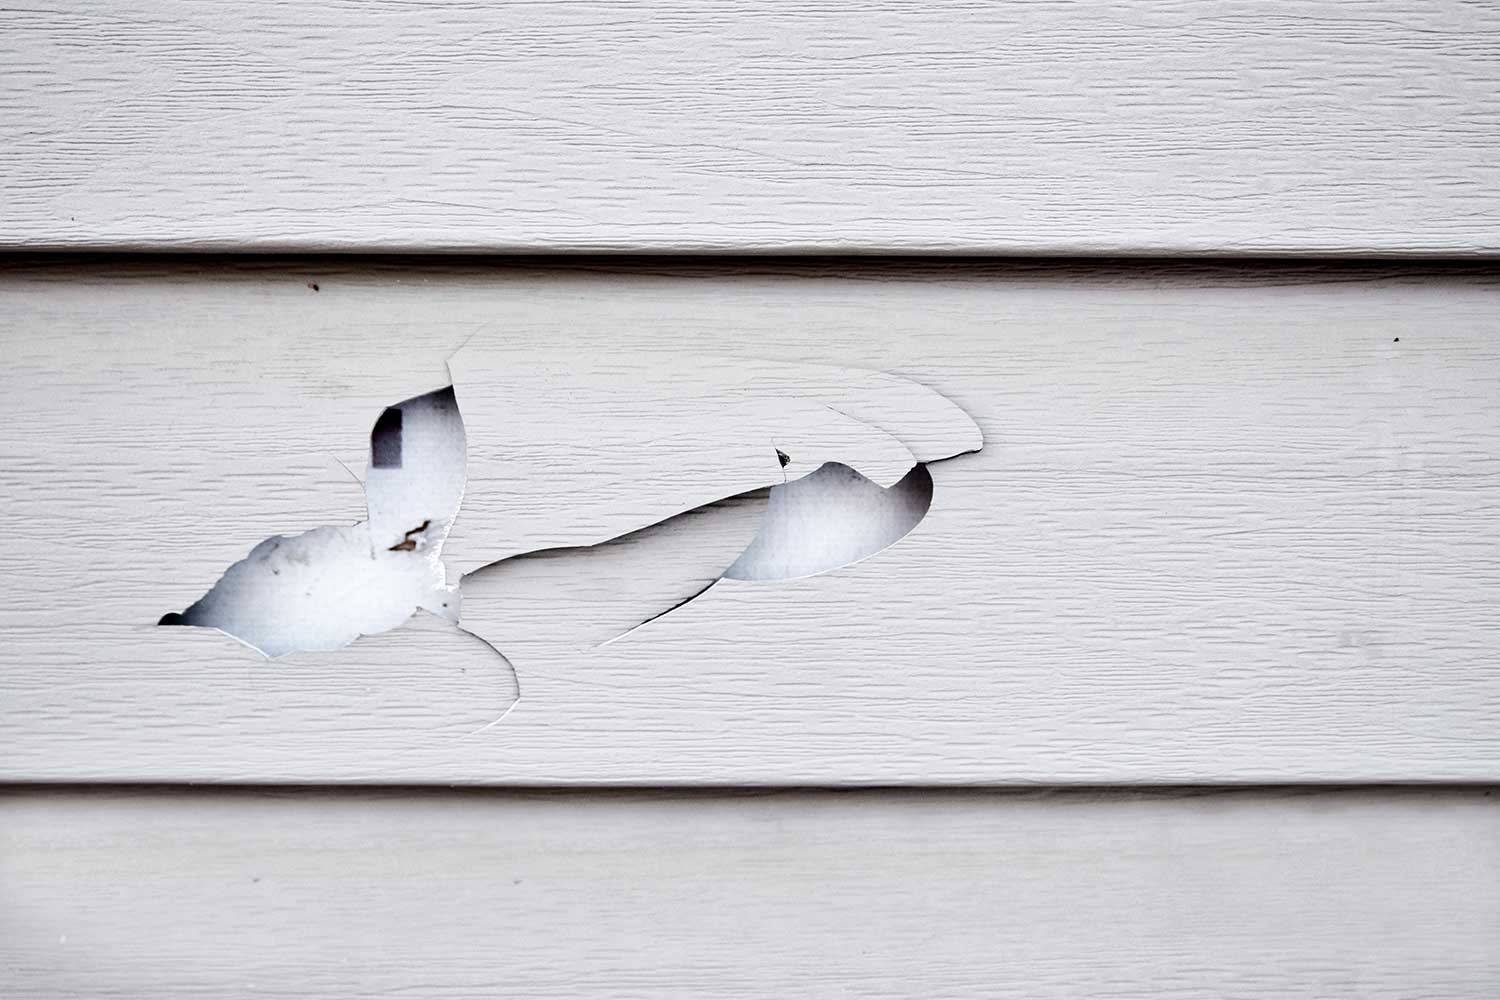
Woodpeckers create holes in cedar siding by using their strong beaks to “drum” or peck at the surface. The size and shape of the holes can vary, ranging from small, shallow indentations to larger, deeper cavities. Woodpeckers typically create a series of holes in a horizontal or vertical line, as they drum to establish their territory or attract a mate.
One common type of woodpecker damage is ‘skip pecking.’ This occurs when woodpeckers make a series of small, shallow holes, creating a pattern that resembles Morse code. Skip pecking can be a repetitive behavior that can cause significant aesthetic damage to the cedar siding.
In addition to the visible holes, woodpecker damage may also include peeling or flaking of the wood surface around the holes, as well as chipping or splintering along the edges. These secondary effects can further compromise the integrity of the siding and increase the likelihood of moisture penetration.
It’s important to note that woodpeckers are protected birds, and it is illegal to harm or kill them without the appropriate permits. Therefore, the focus should be on deterring their behavior and repairing the damage they have caused to your cedar siding.
Understanding the reasons behind woodpecker pecking can help in developing effective prevention strategies. As mentioned earlier, woodpeckers may be drumming to establish territories or attract mates. They are also known to peck at siding to search for insects or larvae that may be present in the wood. By addressing these underlying factors, you can discourage woodpeckers from targeting your cedar siding.
Now that we have a clear understanding of woodpecker damage and the motivations behind their pecking, let’s move on to assessing the severity of the holes and determining the best repair approach.
Assessing the Severity of the Holes
Before you begin the repair process, it’s important to assess the severity of the woodpecker holes in your cedar siding. This will help you determine the appropriate course of action and the extent of repairs needed. Here are steps to follow to assess the severity of the holes:
- Inspect the holes: Take a close look at the woodpecker holes in your cedar siding. Note the size, depth, and quantity of the holes. Are they small indentations or larger cavities? Are they concentrated in one area or spread out across the siding? This inspection will give you a better idea of the extent of the damage.
- Determine the activity level: Look for signs of fresh wood chips or markings around the holes. Active woodpecker holes will have recent activity, indicating ongoing pecking. Inactive holes, on the other hand, will show signs of weathering, with no new activity. Differentiating between active and inactive holes is essential for addressing both current and potential future damage.
- Check for structural damage: Assess whether the woodpecker holes have compromised the structural integrity of the cedar siding. If the holes are deep or extensive, they may weaken the siding, allowing moisture to seep in and potentially leading to rot or decay. Pay attention to any areas where the wood appears soft or deteriorated.
- Evaluate the overall appearance: Consider the visual impact of the woodpecker holes on the aesthetics of your cedar siding. Even small holes can be unsightly, while larger cavities can be quite noticeable. Assess the damage from different angles and distances to get a comprehensive understanding of how it affects the overall appearance of your home.
By thoroughly assessing the severity of the woodpecker holes, you can make informed decisions regarding the repair process. Smaller, less severe holes may require simpler filling techniques, while larger or more extensive damage may require more complex repairs. Additionally, identifying any structural issues will help you determine if any additional measures, such as reinforcing the siding, are necessary.
Once you have assessed the severity of the woodpecker holes, you can move on to gathering the required materials for the repair process. Proper preparation ensures that you have everything you need to effectively fix the damage and restore the integrity and aesthetics of your cedar siding.
Gathering the Required Materials
Before you can begin repairing woodpecker holes in your cedar siding, it’s essential to gather all the necessary materials. Having the right tools and supplies on hand will ensure a smooth and efficient repair process. Here are the materials and tools you’ll need:
- Exterior Wood Filler: Look for a high-quality exterior wood filler that is specifically designed for outdoor use. This filler should be durable, weather-resistant, and able to bond well with cedar wood. Choose a color that closely matches the natural shade of your cedar siding.
- Putty Knife: A putty knife will be used to apply the wood filler into the holes and smooth it out. Opt for a flexible putty knife with a comfortable grip for easy application.
- Sanding Block: A sanding block is essential for smoothing out the filled holes and blending them with the surrounding surface. Choose a sanding block with medium-grit sandpaper for effective results.
- Primer: If you plan to paint or stain your cedar siding after the repair, you’ll need a suitable primer. The type of primer you choose will depend on the type of topcoat you plan to apply.
- Paint or Stain: Once the repaired areas have been primed and dried, you’ll need paint or stain to match the color of your existing cedar siding. Select a high-quality paint or stain that is recommended for exterior use and can withstand the elements.
- Paintbrush or Stain Applicator: Depending on whether you choose to paint or stain, you’ll need a paintbrush or a stain applicator to apply the topcoat evenly to the repaired areas.
- Protective Gear: It’s essential to protect yourself during the repair process. Wear safety glasses to shield your eyes from debris and dust, and use a dust mask to prevent inhalation of fine particles.
- Ladder or Scaffolding: If the woodpecker holes are higher up on your cedar siding, you may need a ladder or scaffolding to reach them safely.
- Caulk (optional): If there are any gaps or cracks in your cedar siding, consider using caulk to seal them and prevent further damage or moisture penetration.
Ensure that you have all these materials readily available before starting the repair process. This will save you time and allow you to complete the repairs seamlessly. With the necessary tools and supplies in hand, you’re ready to move on to the next steps of filling small woodpecker holes in your cedar siding.
Filling Small Woodpecker Holes
If you have identified small woodpecker holes in your cedar siding, you can easily fill them using an exterior wood filler. Small holes are typically shallow and require a relatively simple repair process. Here’s a step-by-step guide on filling small woodpecker holes:
- Clean the area: Start by cleaning the area around the woodpecker holes. Use a brush or a cloth to remove any debris, dirt, or loose wood particles. This will ensure that the wood filler adheres properly to the surface.
- Prepare the wood filler: Follow the manufacturer’s instructions to prepare the exterior wood filler. Typically, you’ll need to mix the filler components together until they form a smooth and workable consistency. Use a disposable container and a stirring stick for this purpose.
- Apply the wood filler: Using a putty knife, scoop some wood filler onto the blade. Press the filler into the woodpecker holes, ensuring that they are completely filled. Smooth out the surface of the filler with the putty knife, creating a level finish with the surrounding cedar siding. Avoid overfilling the holes as excess filler may need to be sanded down later.
- Allow the filler to dry: The drying time for the wood filler will vary depending on the brand and thickness of the application. Check the manufacturer’s instructions for the recommended drying time. It’s crucial to allow the filler to dry completely before proceeding to the next step.
- Sand the filled areas: Once the wood filler is dry, use a sanding block with medium-grit sandpaper to gently sand down the filled areas. Sand in a circular motion to blend the filled holes with the surrounding wood. This will help create a smooth and seamless finish.
- Remove the sanding dust: Use a clean cloth or brush to remove the sanding dust from the repaired areas. It’s important to have a clean surface before moving on to any additional steps, such as priming or applying paint/stain.
By following these steps, you can effectively fill small woodpecker holes in your cedar siding. Remember to take your time and be precise during each step to achieve the best results. Once the small holes are filled and sanded, you can move on to repairing medium-sized woodpecker holes, which require a slightly different approach.
Read more: How To Deter Woodpeckers From Wood Siding
Repairing Medium-Sized Woodpecker Holes
Medium-sized woodpecker holes in cedar siding require a slightly different repair approach compared to small holes. These holes are typically deeper and may require additional reinforcement. Here’s a step-by-step guide on repairing medium-sized woodpecker holes:
- Clean and prepare the area: Begin by cleaning the area around the woodpecker holes, removing any loose debris or dirt. Use a brush or cloth to ensure the surface is clear and ready for repair.
- Apply wood filler:Using a putty knife, fill the medium-sized woodpecker holes with an exterior wood filler. Ensure that the filler is pressed firmly into the holes, completely filling them. Smooth out the filler with the putty knife, creating a level surface that is flush with the surrounding cedar siding.
- Add reinforcement: For medium-sized holes, it may be beneficial to use a backing material to reinforce the repair. Cut a small piece of wire mesh or hardware cloth slightly larger than the hole. Place it over the filled hole, ensuring that it is securely adhered to the surrounding wood with the wood filler.
- Apply additional wood filler: Once the reinforcement is in place, apply another layer of wood filler over the hole and the mesh. Smooth out the filler with the putty knife, blending it with the surrounding surface. Ensure that the filler is level with the rest of the cedar siding.
- Allow the filler to dry: Give the wood filler sufficient time to dry completely. Refer to the manufacturer’s instructions for the recommended drying time. It’s crucial to allow the filler to fully harden before proceeding to the next steps.
- Sand and smooth the repair: Once the filler is dry, use a sanding block with medium-grit sandpaper to gently sand down the repaired area. Sand in a circular motion, gradually blending the repair with the surrounding wood. The goal is to create a seamless and smooth finish.
- Remove the sanding dust: Use a clean cloth or brush to remove any lingering sanding dust from the repaired area. Ensure the surface is clean before moving on to any additional steps, such as priming or applying paint/stain.
Repairing medium-sized woodpecker holes may require a bit more effort and attention to detail. By following these steps, you can effectively restore the integrity and aesthetics of your cedar siding. Once the medium-sized holes are repaired and sanded, you can proceed to the next step of patching large woodpecker holes.
Use a wood filler or epoxy putty to fill the woodpecker holes in cedar siding. Sand the area smooth once the filler has dried, then paint or stain to match the surrounding siding.
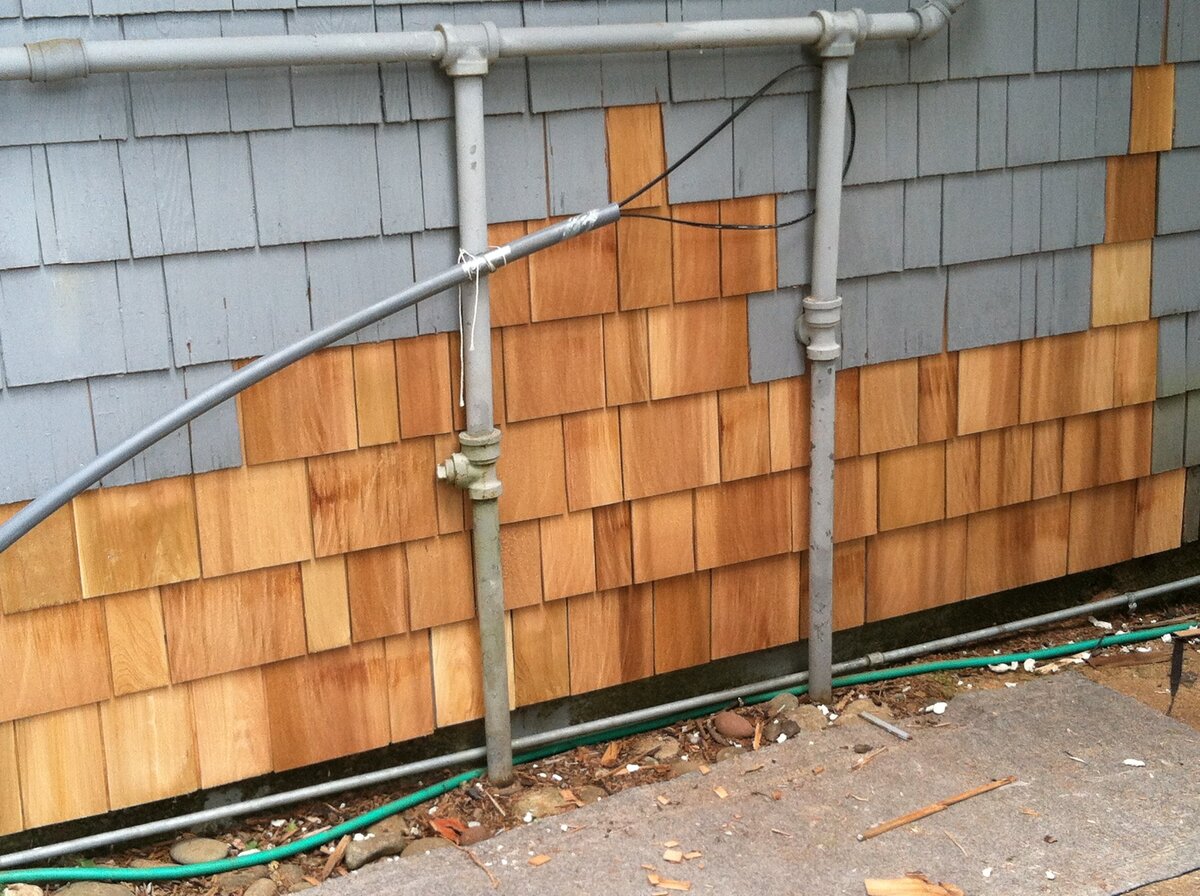
Patching Large Woodpecker Holes
Large woodpecker holes in cedar siding require a more extensive repair process to ensure proper structural integrity and a seamless finish. These holes may be deeper and wider, requiring additional support and filling techniques. Here’s a step-by-step guide on patching large woodpecker holes:
- Clean and prepare the area: Start by thoroughly cleaning the area around the large woodpecker holes. Remove any loose debris, dirt, or splintered wood. Use a brush or cloth to ensure the surface is clean and ready for repair.
- Create a wooden plug: For larger holes, it can be beneficial to create a wooden plug to provide additional support. Cut a piece of cedar wood that matches the size and shape of the hole. The length of the plug should be slightly longer than the depth of the hole.
- Apply adhesive: Apply an exterior wood adhesive or epoxy to the edges of the wooden plug. Insert the plug into the hole, ensuring it is a snug fit. Press it firmly into place, allowing the adhesive to bond the plug to the surrounding wood.
- Fill the hole with wood filler: After securing the wooden plug, fill the remaining space in the hole with an exterior wood filler. Use a putty knife to apply the filler, ensuring that it completely fills the hole and covers the wooden plug. Smooth out the filler with the putty knife, creating a level surface that is flush with the surrounding cedar siding.
- Allow the filler to dry: Give the wood filler sufficient time to dry and harden. Follow the manufacturer’s instructions for the recommended drying time. It’s important to allow the filler to fully set before moving on to the next steps.
- Sand and shape the repair: Once the filler is dry, use a sanding block with medium-grit sandpaper to sand down the repaired area. Blend the patch with the surrounding wood, gradually shaping it to match the natural contours of the cedar siding. Aim for a smooth and seamless transition between the patch and the surrounding surface.
- Remove the sanding dust: Use a clean cloth or brush to remove any sanding dust from the repaired area. Ensure the surface is clean before moving on to any additional steps, such as priming or applying paint/stain.
Patching large woodpecker holes requires careful attention to detail to ensure a sturdy and visually appealing repair. By following these steps, you can effectively restore the integrity of your cedar siding and create a seamless finish. With the large holes patched and sanded, you’re ready to proceed to the next step of sanding and smoothing the repairs.
Sanding and Smoothing the Repairs
After filling and patching woodpecker holes in your cedar siding, it’s important to sand and smooth the repairs to achieve a seamless finish. Sanding helps blend the filled areas with the surrounding wood, creating a uniform surface. Here’s a step-by-step guide on sanding and smoothing the repairs:
- Gather the necessary materials: Ensure you have a sanding block with medium-grit sandpaper readily available. You may also need a cloth or brush to remove sanding dust.
- Sand the repaired areas: Begin by using the sanding block with medium-grit sandpaper to gently sand the filled and patched areas. Use a circular or back-and-forth motion, applying light pressure to even out the surface. Sand until the repairs blend seamlessly with the surrounding cedar siding. The goal is to create a smooth, level finish.
- Check the smoothness: Periodically stop sanding and run your fingers over the repaired areas to check for smoothness. Pay attention to any unevenness or rough patches and continue sanding until you are satisfied with the results.
- Remove the sanding dust: Once you’ve completed the sanding process, use a clean cloth or brush to remove any sanding dust from the repaired areas. Ensure the surface is clean before moving on to any additional steps, such as priming or applying paint/stain.
By sanding and smoothing the repairs, you’ll achieve a seamless integration between the filled or patched areas and the rest of the cedar siding. This step is crucial for achieving a professional and visually appealing finish. With the repairs sanded and dust-free, you can proceed to the next step of staining or painting the cedar siding.
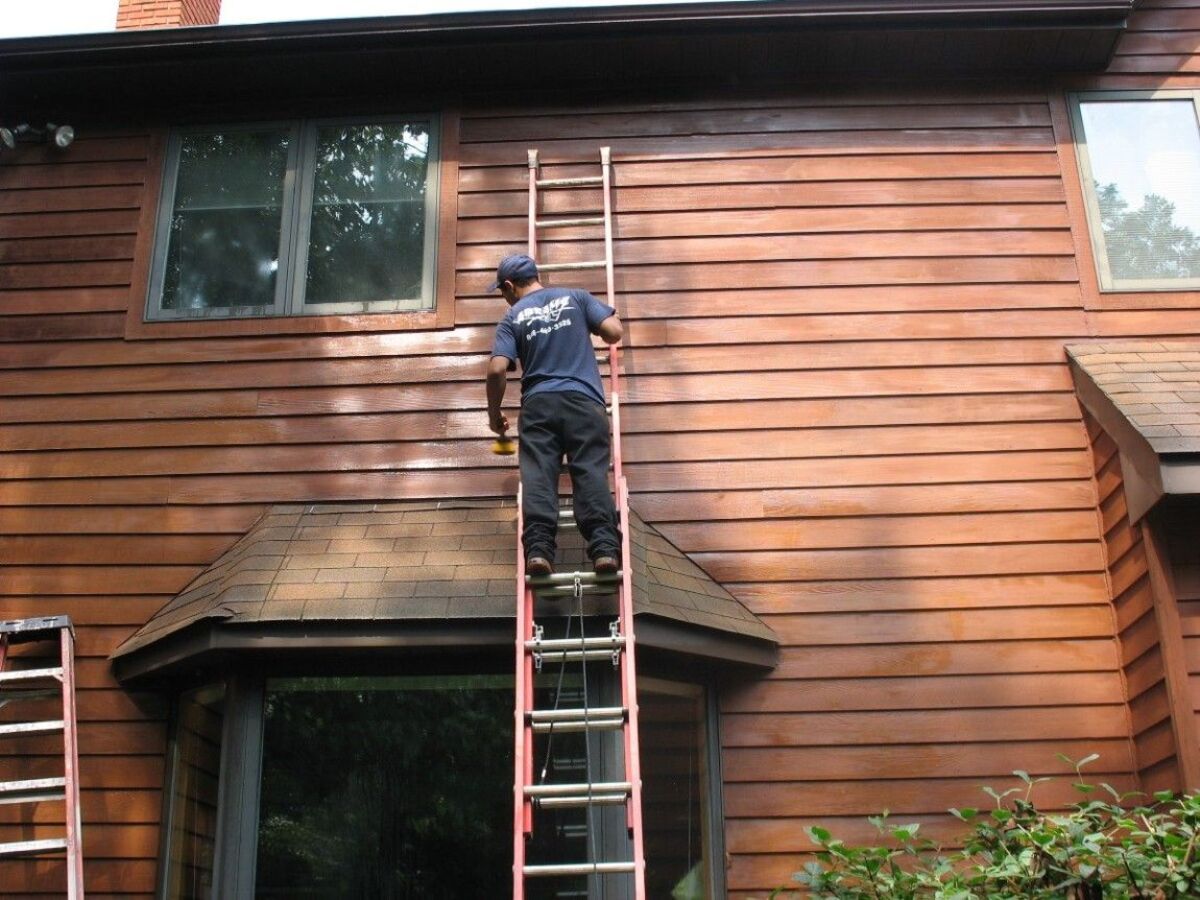
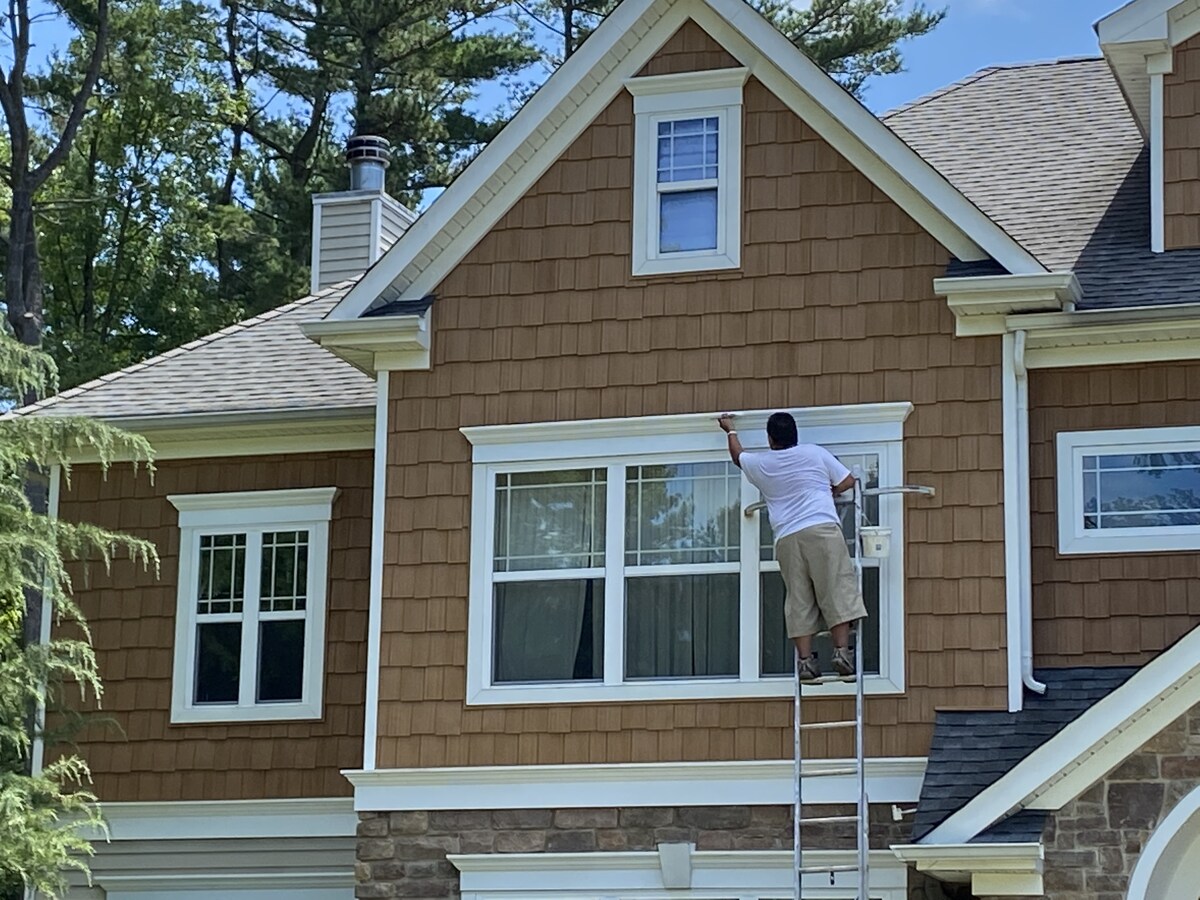
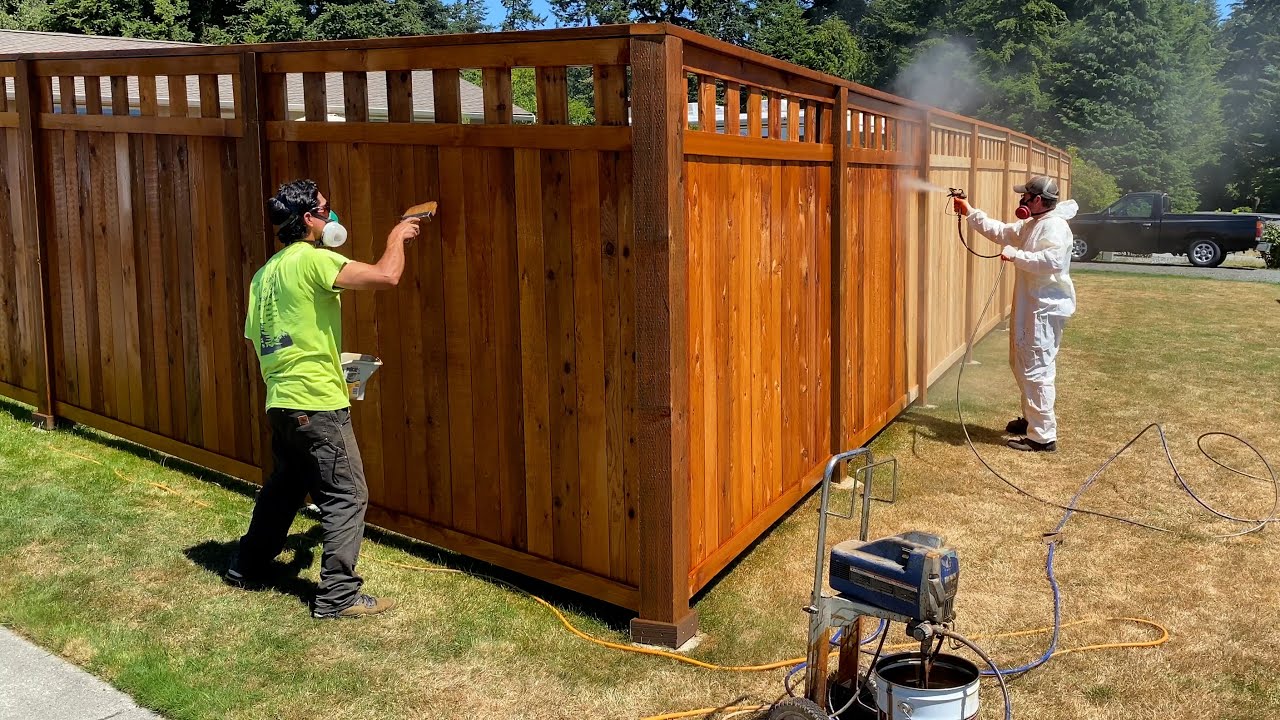
Staining or Painting the Cedar Siding
Once you have repaired and smoothed the woodpecker holes in your cedar siding, the next step is to apply a protective finish to enhance its appearance and durability. You have the option to either stain or paint the cedar siding based on your preferences and desired aesthetic. Here’s a step-by-step guide on staining or painting the cedar siding:
- Clean the cedar siding: Before applying any finish, ensure that the cedar siding is clean and free from dust, dirt, or debris. Use a brush or cloth to remove any loose particles and ensure a smooth surface for the stain or paint.
- Choose your finish: Decide whether you want to stain or paint the cedar siding. Stain allows the natural beauty and grain of the wood to show through, while paint provides color and added protection. Consider the overall look you want to achieve and select the appropriate product.
- Prepare the stain or paint: Follow the manufacturer’s instructions to prepare the stain or paint. This may involve stirring the product to ensure an even consistency or diluting it if necessary. Use a disposable container and a stirring stick specifically for this purpose.
- Apply the stain or paint: Use a paintbrush or a stain applicator to evenly apply the stain or paint onto the cedar siding. Start from the top and work your way down, ensuring complete coverage. Follow the grain of the wood for a smoother application. Apply multiple coats as needed, allowing each coat to dry before proceeding.
- Allow for drying time: After applying the stain or paint, allow sufficient time for drying as per the manufacturer’s instructions. This typically ranges from a few hours to a day. Ensure the surface is fully dry before subjecting it to any moisture or further handling.
- Inspect for touch-ups: Once the finish has dried, inspect the stained or painted cedar siding for any touch-ups. Look for areas that may need an extra coat or where the coverage is uneven. Address these areas as needed to achieve a uniform appearance.
- Protect and maintain the finish: To prolong the life of your stained or painted cedar siding, consider applying a clear topcoat or sealer as an added layer of protection. Additionally, follow proper maintenance practices such as regular cleaning and periodic reapplication of the finish to ensure its longevity.
By staining or painting your cedar siding, you not only enhance its visual appeal but also provide it with essential protection against the elements. Choose a finish that suits your style and take the necessary steps to properly apply and maintain it. With the staining or painting complete, you can now focus on preventing future woodpecker damage.
Read more: How Much Is Cedar Siding
Preventing Future Woodpecker Damage
To avoid future woodpecker damage to your cedar siding, it’s important to take proactive measures that deter these birds from targeting your home. Here are some effective strategies to prevent future woodpecker damage:
- Identify and remove attractants: Woodpeckers are often drawn to homes that provide attractive food sources or nesting sites. Identify and remove any potential attractants, such as bird feeders or dead trees near your property. By eliminating these attractants, you reduce the likelihood of woodpeckers being attracted to your home.
- Install deterrents: Implement physical deterrents to discourage woodpeckers from landing on your cedar siding. These can include reflective materials, such as mylar tape or shiny objects, that create a visually unappealing and disorienting environment for woodpeckers.
- Hang moving objects: Adding wind chimes, mobiles, or similar moving objects near your cedar siding can help deter woodpeckers. The movement and noise created by these objects can disrupt the birds’ behavior and make them think twice about pecking on your siding.
- Use scare tactics: Employ scare tactics, such as hanging scarecrow effigies or installing predator decoys (like fake owls or snakes), to create a sense of danger for woodpeckers. Move these scare devices periodically to prevent woodpeckers from becoming accustomed to them.
- Apply taste or scent deterrents: Some products on the market have repellent properties that can be applied to your cedar siding. These repellents typically have a strong taste or odor that woodpeckers find unpleasant. Apply them according to the manufacturer’s instructions to create a deterrent barrier.
- Inspect and repair: Regularly inspect your cedar siding for any signs of wood-boring insect activity or potential entry points where woodpeckers may be seeking food. Promptly address any issues by treating the affected area and repairing or replacing damaged sections of the siding.
- Consider professional help: If woodpecker activity persists despite your efforts, consult with a professional pest control or wildlife management service. They can provide expert advice and assistance in implementing effective woodpecker deterrent strategies.
Remember, it is important to implement multiple prevention strategies in combination for the best results. Woodpeckers are intelligent and adaptable birds, so a combination of physical deterrents, scare tactics, and repellents is often the most effective approach.
By taking proactive steps to prevent future woodpecker damage, you can maintain the beauty and integrity of your cedar siding while ensuring a peaceful coexistence with these fascinating birds. With these prevention strategies in place, your cedar siding will be well-protected for years to come.
Conclusion
Repairing woodpecker holes in cedar siding is a task that requires patience, attention to detail, and the right materials. By following the step-by-step guide provided in this article, you can successfully restore the integrity and aesthetic appeal of your home’s exterior. Whether you are dealing with small, medium, or large woodpecker holes, the repair process involves cleaning, filling, patching, sanding, and smoothing the damaged areas. Additionally, staining or painting the cedar siding provides an added layer of protection and enhances its overall appearance.
While repairing the existing damage is essential, taking preventive measures is equally important to avoid future woodpecker damage. Removing attractants, installing deterrents, using scare tactics, and applying taste or scent repellents can help deter woodpeckers from targeting your cedar siding. Regular inspection and proper maintenance of the siding will help identify and address any potential vulnerabilities to woodpecker activity.
It is important to remember that woodpeckers are protected birds, so it is crucial to approach woodpecker control with humane and environmentally friendly methods. Avoid causing harm to the birds and focus on deterring their behavior rather than harming them.
By repairing the woodpecker holes, taking preventive measures, and appreciating the natural beauty of these fascinating birds, you can maintain the integrity of your cedar siding and contribute to the harmony between humans and wildlife in your environment.
So, roll up your sleeves, gather the necessary materials, and embark on the journey of repairing and protecting your cedar siding from the pecking of woodpeckers. With the knowledge and techniques provided in this article, you’re well-equipped to tackle the task at hand and preserve the beauty of your home’s exterior for years to come.
Now that you've mastered fixing woodpecker holes in cedar siding, why not tackle more hands-on projects around your house? Our guide on DIY home improvement offers practical tips and creative project ideas that will transform your living space without breaking the bank. Whether you’re looking to refresh a room or undertake a more significant renovation, you'll find plenty of inspiration to get you started. So grab your tools, and let's turn those home improvement dreams into reality with these easy-to-follow steps!
Frequently Asked Questions about How To Repair Woodpecker Holes In Cedar Siding
Was this page helpful?
At Storables.com, we guarantee accurate and reliable information. Our content, validated by Expert Board Contributors, is crafted following stringent Editorial Policies. We're committed to providing you with well-researched, expert-backed insights for all your informational needs.


0 thoughts on “How To Repair Woodpecker Holes In Cedar Siding”